¶ A1 mini Heatbed Cable & Nozzle Wiper
This article only provides guidelines and precautions for removing the A1 mini Heatbed Cable and Heatbed Nozzle Wiper. For guidelines on removing the entire Heatbed from the A1 mini, please refer to A1 mini Installation Tutorial.
Removing the Heatbed from the printer is unnecessary when replacing either the Heatbed or the Heatbed Nozzle Wiper.
¶ Parts List
The following are the parts involved in this guide.
| No. | Name | Image | No. | Name | Image |
| 1 | Heatbed Cable |
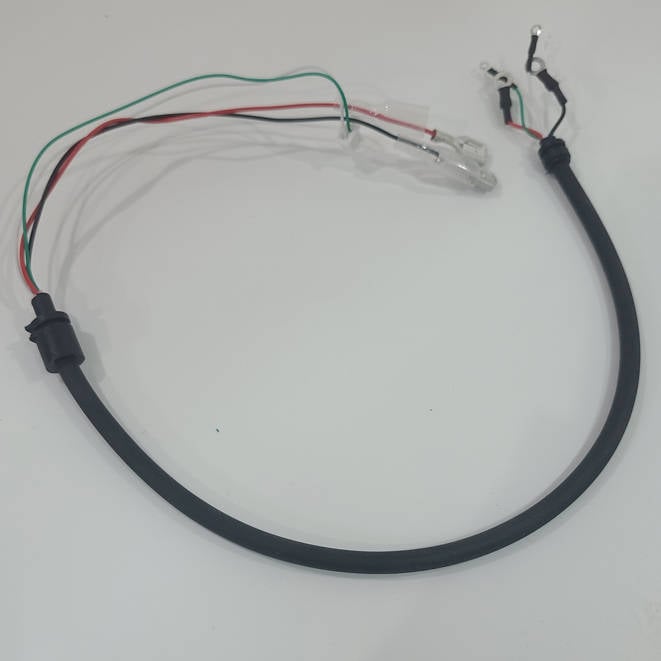 |
2 | Heatbed Nozzle Wiper |
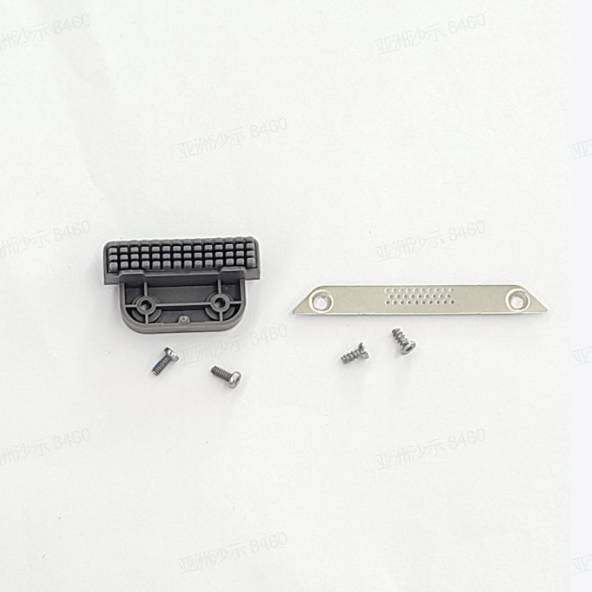 |
¶ Module List
None
¶ Screw List
| Screw | Type | Position | Dimensions/Drawing | Screw | Type | Position | Dimensions/Drawing |
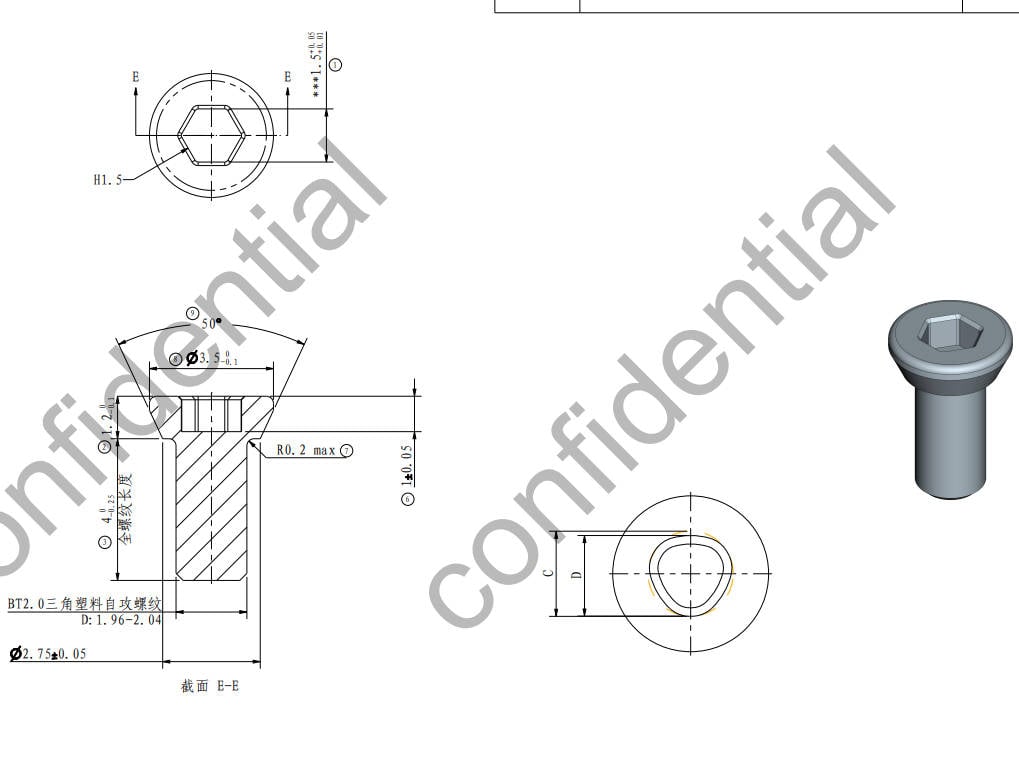
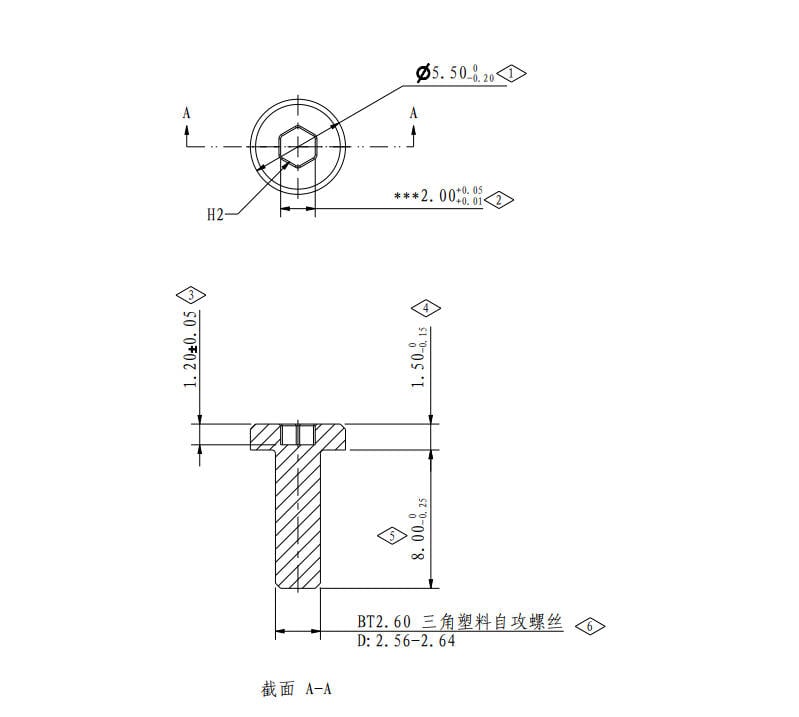
| A | BT2*4 |
To lock the nozzle wiper (2PCS) |
 |
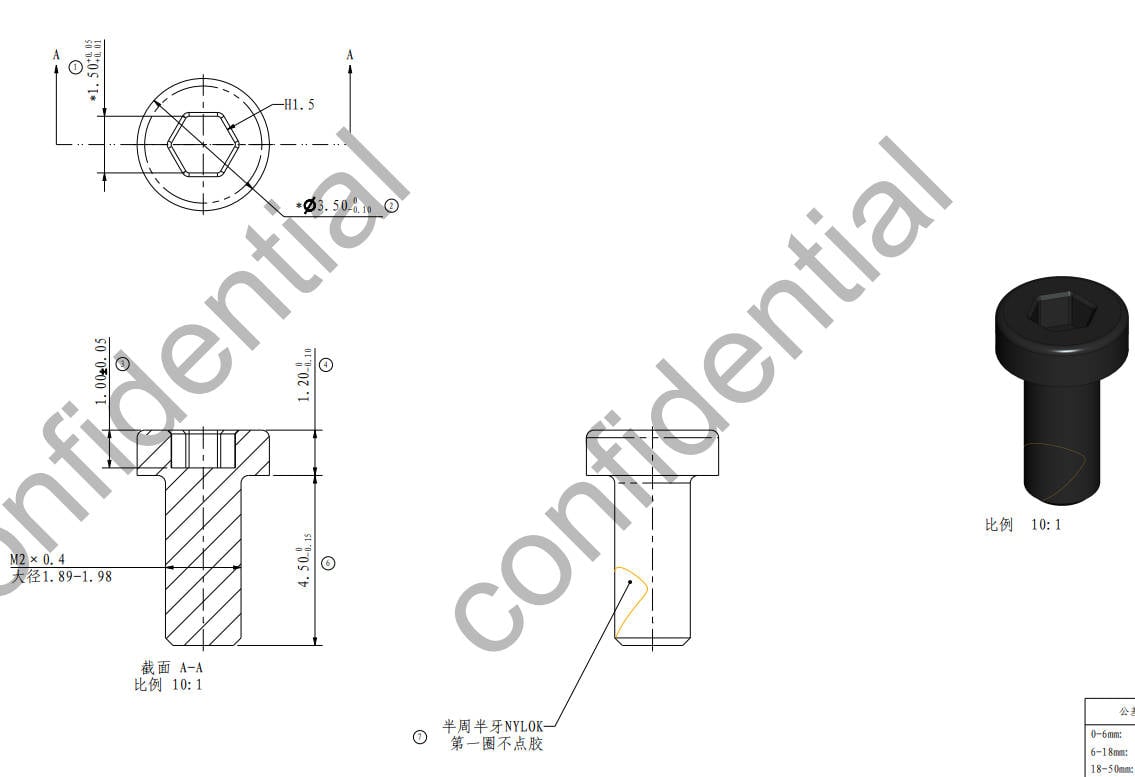
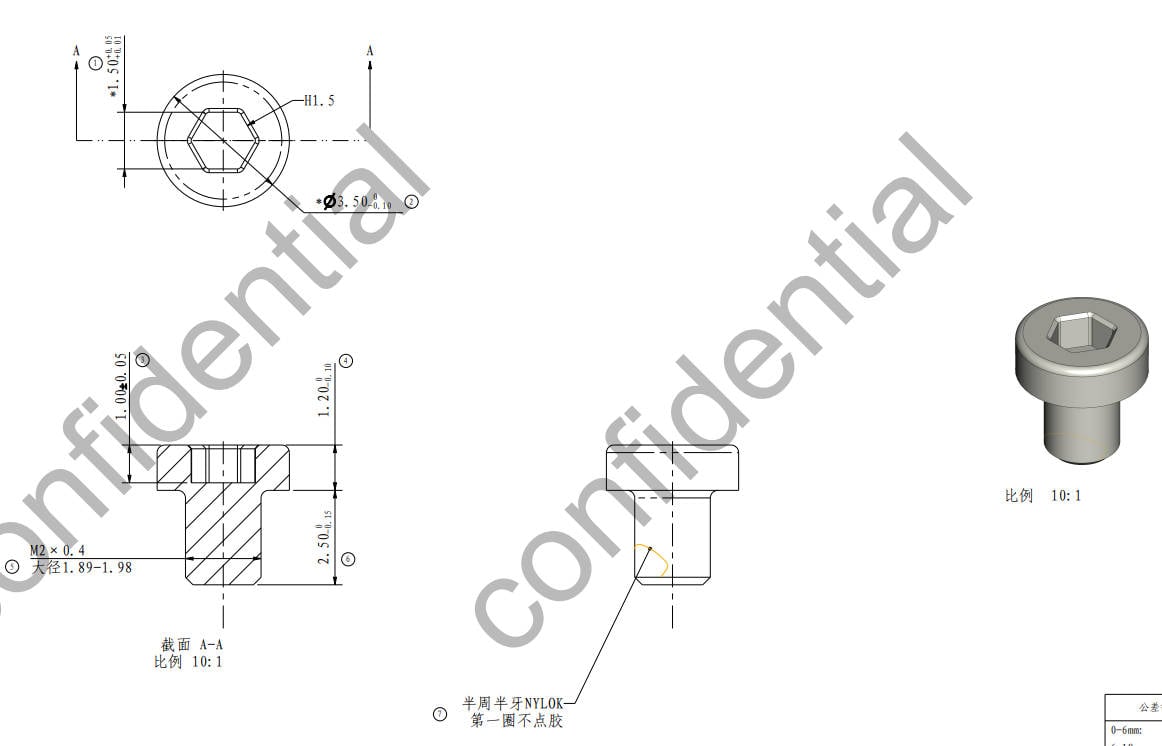
B | M2*4.5 |
To lock the Silicone Seat, and the Heatbed Cable Cover (3PCS) |
 |
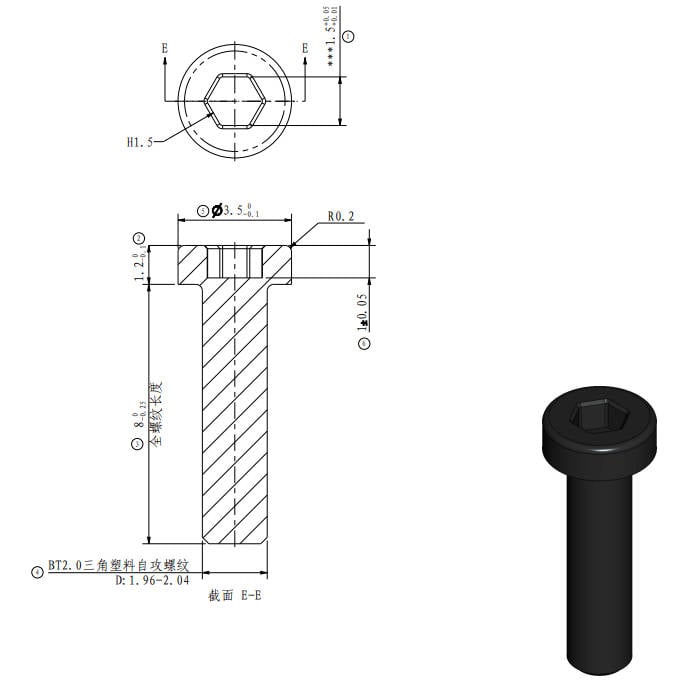
| C | BT2*6 |
To lock the Heatbed Cable Cover (2PCS) |
 |
D | BT2*8 |
To lock the Heatbed Cable Cover (2PCS) |
 |
| E | M2*2.5 |
To lock the Heatbed Signal Cable (2PCS) |
 |
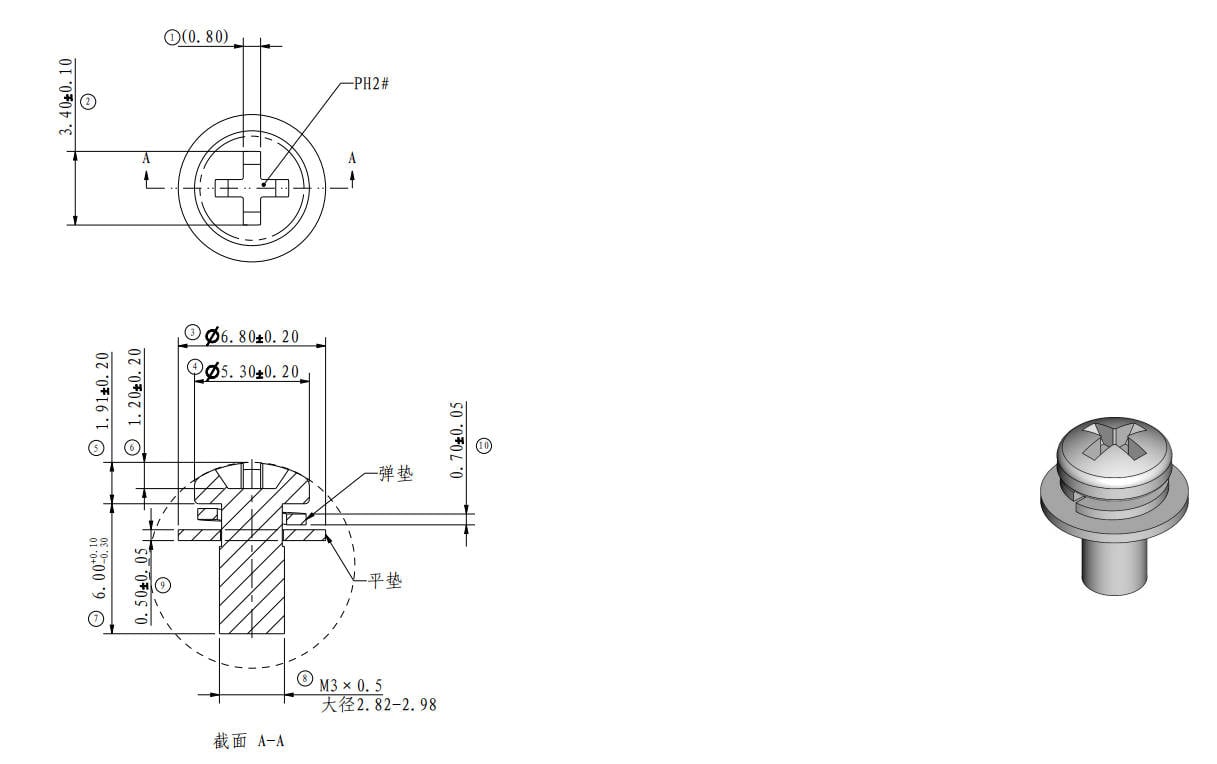
F | MW3*6 |
To lock the Heatbed Power Cable (2PCS) |
 |
¶ Tool List
H2.0/H1.5 Allen Key
¶ Safety Warning
IMPORTANT!
It's crucial to power off the printer before conducting any maintenance work, including work on the printer's electronics and tool head wires. Performing tasks with the printer on can result in a short circuit, leading to electronic damage and safety hazards.
During maintenance or troubleshooting, you may need to disassemble parts, including the hotend. This exposes wires and electrical components that could short circuit if they contact each other, other metal, or electronic components while the printer is still on. This can result in damage to the printer's electronics and additional issues.
Therefore, it's crucial to turn off the printer and disconnect it from the power source before conducting any maintenance. This prevents short circuits or damage to the printer's electronics, ensuring safe and effective maintenance. For any concerns or questions about following this guide, open a new ticket in our Support Page and we will do our best to respond promptly and provide the assistance you need.
¶ Video Guide
Due to differences in product versions, there may be some differences in details.
¶ Disassemble the Heatbed
¶ Step 1-Remove the Heatbed Nozzle Wiper
Remove the 2 screws A using a H1.5 Allen Key and remove the nozzle wiper tab; Then, flip the Heatbed over and remove the silicone wipers by loosening the 2 screws B with a H1.5 Allen key.
 |
 |
 |
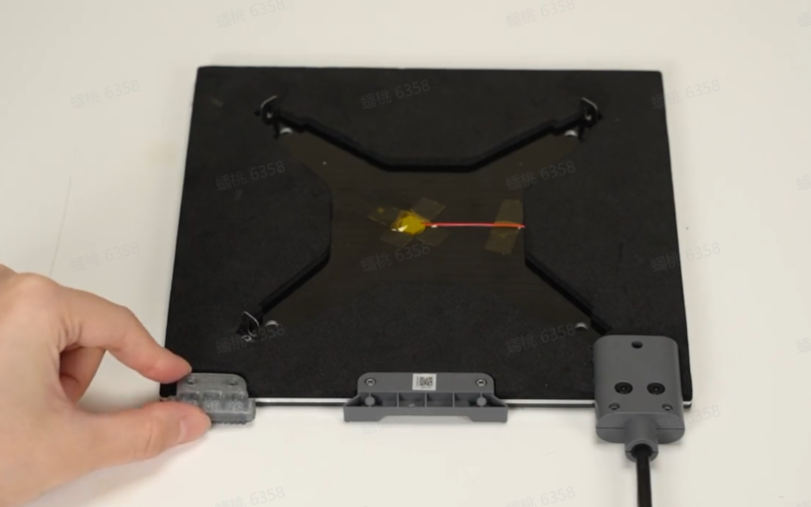
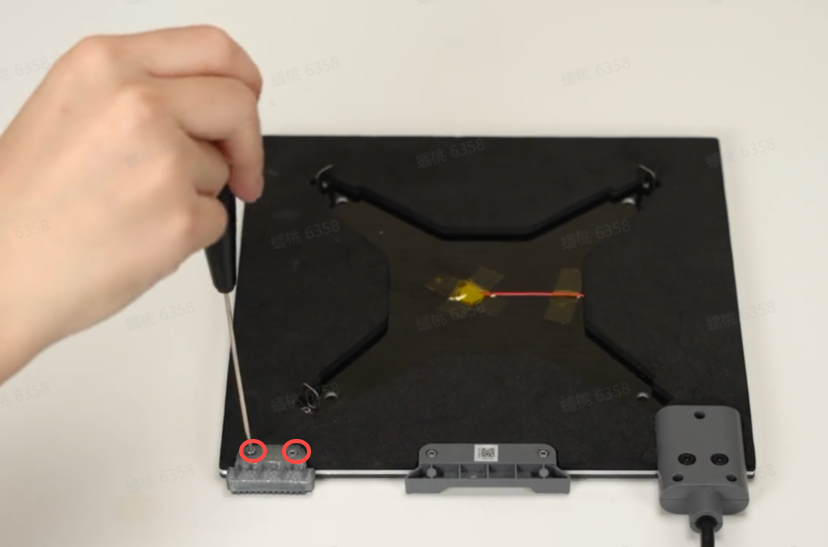
¶ Step 2-Remove the Heatbed Cable
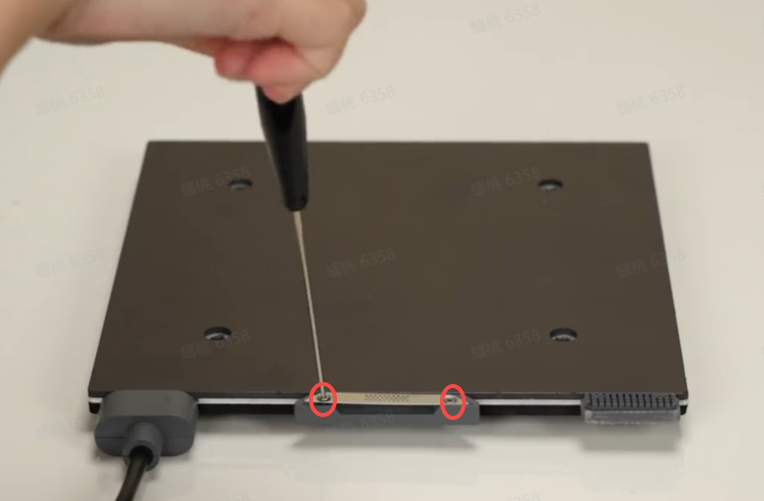
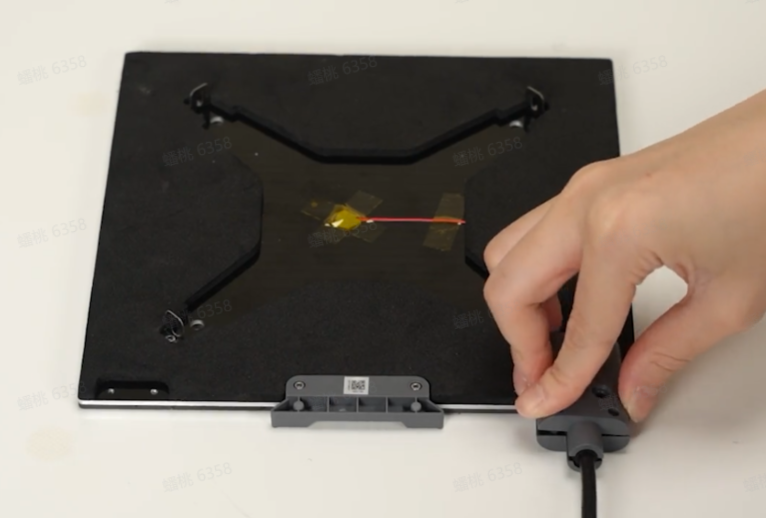
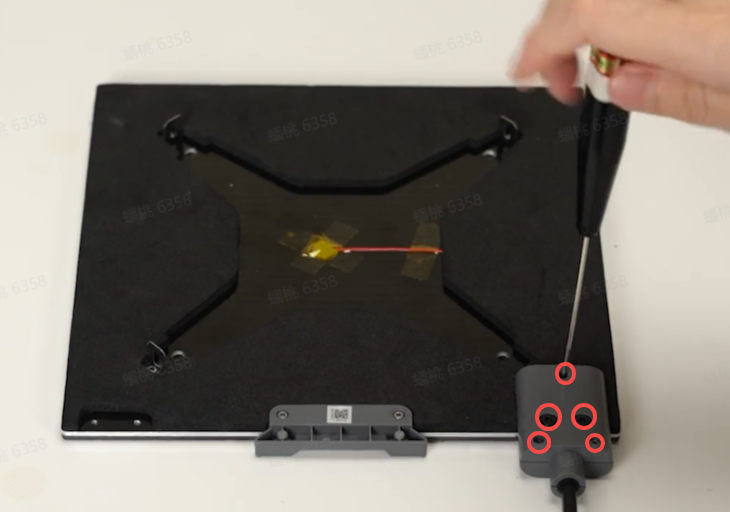
Remove 1 screw B, 2 screws C, and 2 screws D; Then, take off the heatbed cable cover.
 |
 |
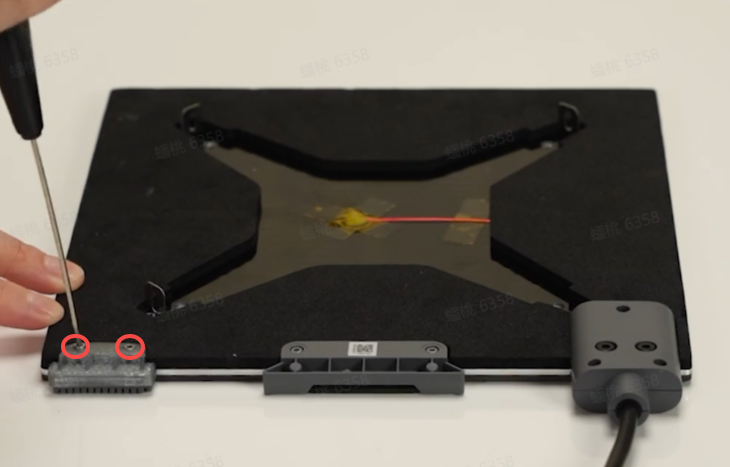
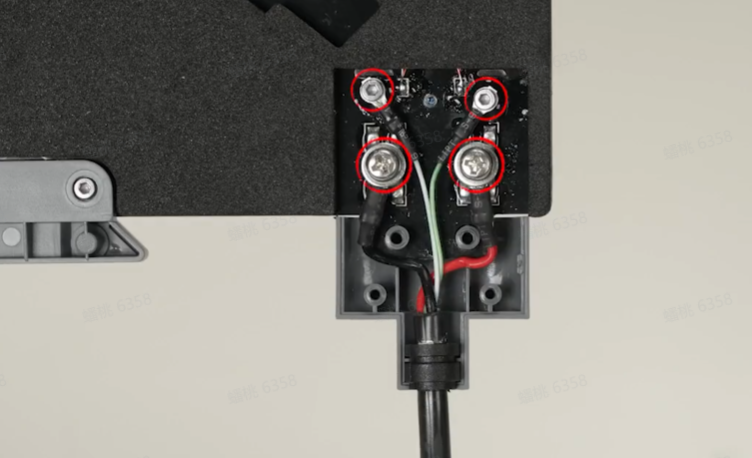
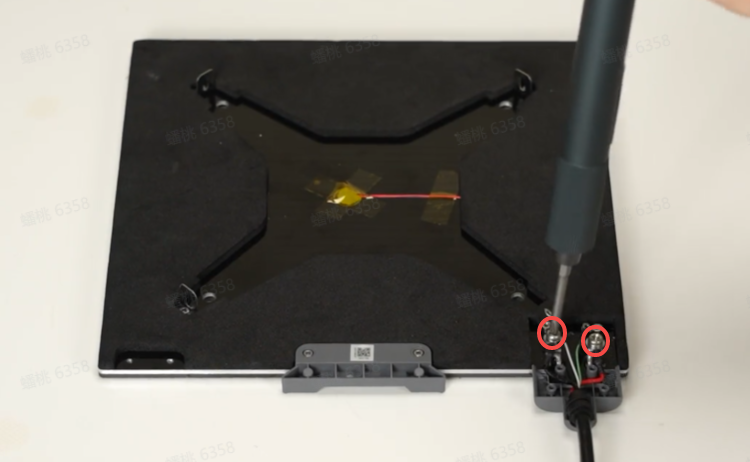
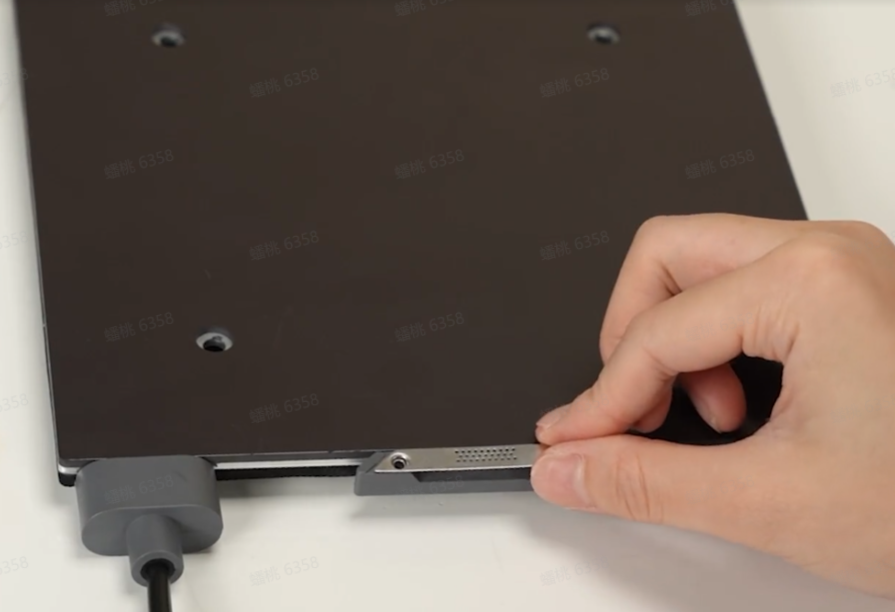
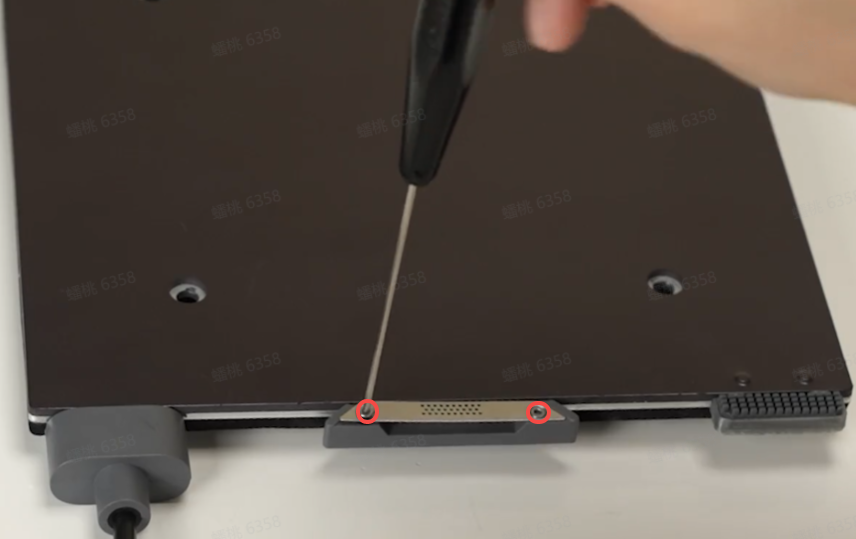
Remove the Heatbed Signal Cable by unlocking 2 screws E (distinguish the direction when installing it)
 |
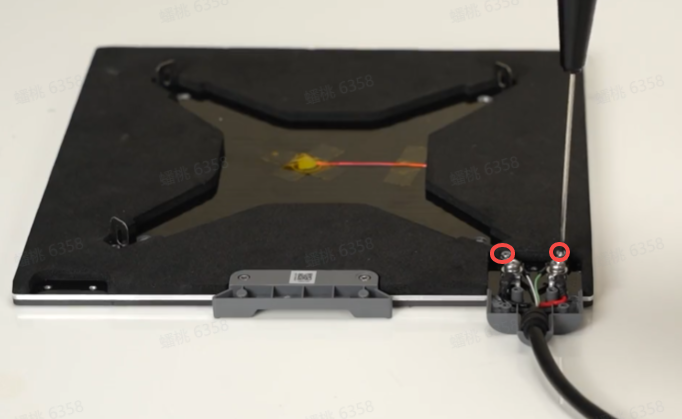 |
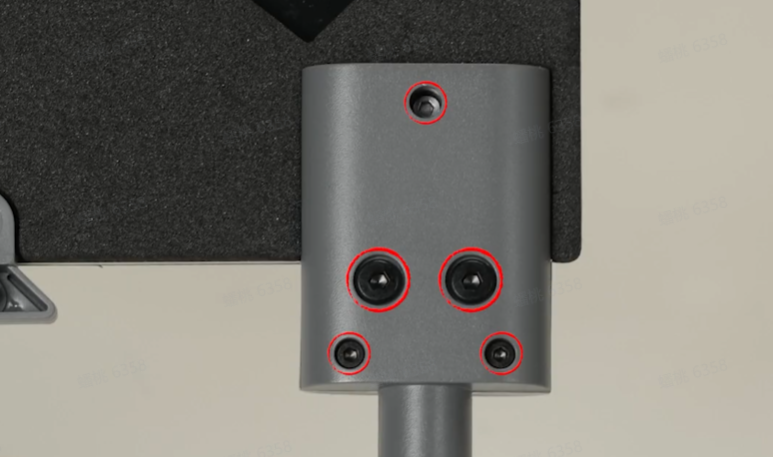
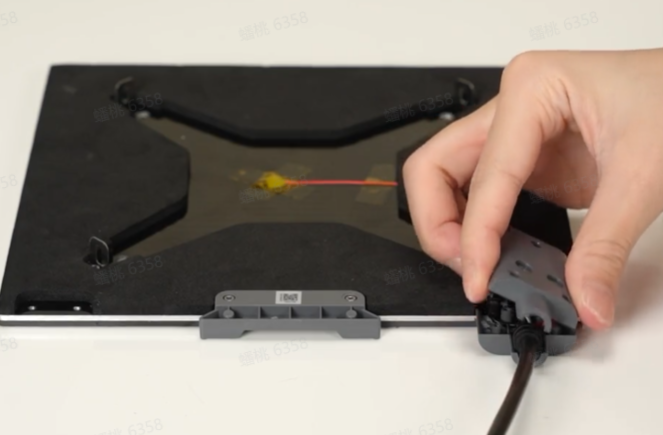
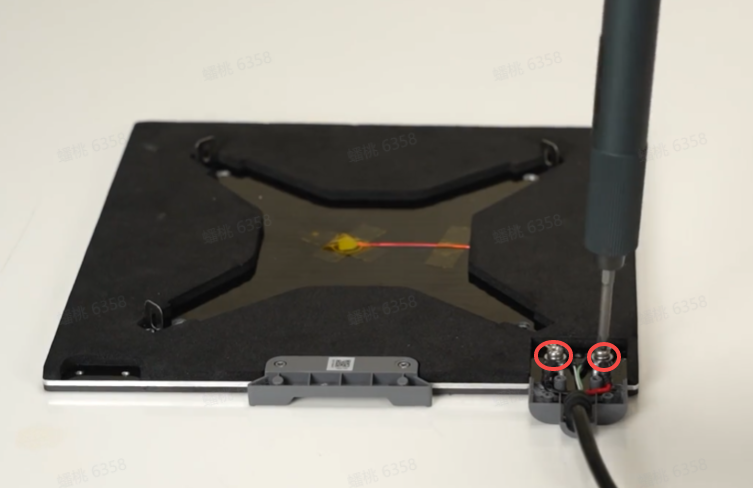
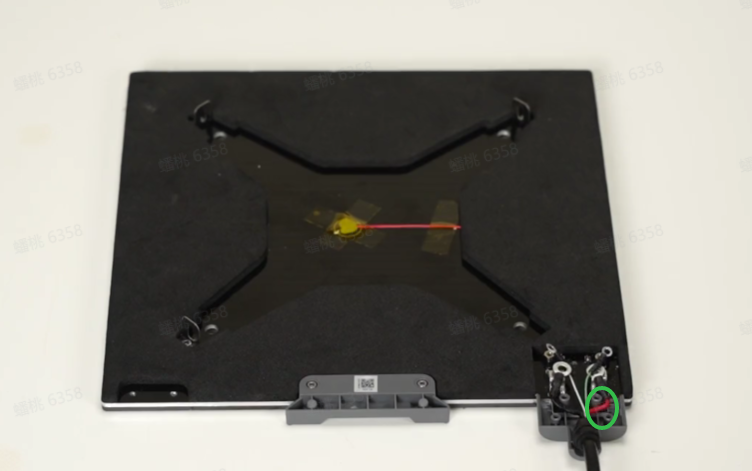
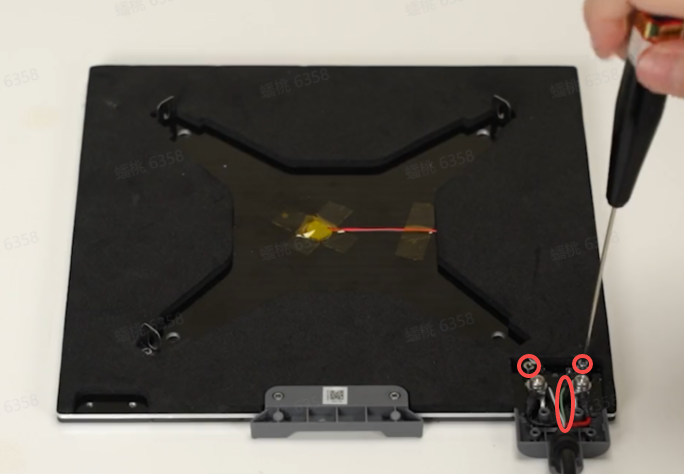
Unlock the 2 screws F to remove the hot bed power cord.
|
|
 |
¶ Assemble the Heatbed
¶ Step 1 - Install the Heatbed Cable
Connect the power cable to the terminal with the red wire on the right side, as shown in the middle picture below. Secure it in place by tightening the 2 screws F. Then, connect the Heatbed Signal Cable to the terminals with the green wire on the right side, as shown in the picture on the right, and secure it by tightening the 2 screws E.
 |
 |
 |
Close the Heatbed Cable Cover and secure it by tightening 2 screws C, 2 screws D, and 1 screw B.
 |
 |
¶ Step 2 - Install the Heatbed Nozzle Wiper
Install the silicone wiper and tighten 2 screws B
 |
 |
Flip the heatbed over, place the nozzle wiper tab into position, and secure it by tightening the 2 screws A.
 |
 |
¶ How to verify completion/success
Set the heatbed temperature to 60°C using the on-screen options and wait for the temperature to begin rising.
¶ Calibration
Not required
¶ End Notes
We hope the detailed guide provided has been helpful and informative.
To ensure a safe and effective execution, if you have any concerns or questions about the process described in this article, we recommend reaching out to technical support team before initiating the operation. We will do our best to respond promptly and provide the assistance you need. Click here to open a new ticket in our Support Page.