We recommend that you watch the video first before unboxing to ensure the operations are correct.
Slight differences may be found between your printer and the one shown in the unboxing video in terms of protective films, foams, and cardboard.
The screen is covered with one or two protective films to prevent contamination during production and transportation. For two protective films, there will be a tear on the first film for you to tear it off. If there is only one protective film, there will be no tear. Either of these two situations is normal for a new printer.
If your printer screen has two protective films, you can tear off the first one. If there is only one film, you can decide whether to keep it or not. However, we recommend that you keep the one film to avoid scratches during use.
Filament swatches are no longer included in the latest packaging of A1 series.
¶ Important Reminder:
The Y-axis of the A1 mini utilizes full-metal guide wheels, ensuring that users do not need to frequently adjust the motion components of the A1 mini. However, regular lubrication and cleaning are required to reduce wear and noise, maintain printer accuracy and lifespan, and effectively prevent rusting of the guide rails.
Each printer receives a certain level of lubrication before leaving the factory. However, only a small amount of lubricating oil is applied to the printer to avoid excessive oil that may drip onto the casing during transportation, causing noticeable stains and affecting the appearance.
Therefore, we strongly recommend applying an appropriate amount of lubricating oil to the Y-axis guide rails of your printer upon unboxing, ensuring that the entire rail is lubricated.
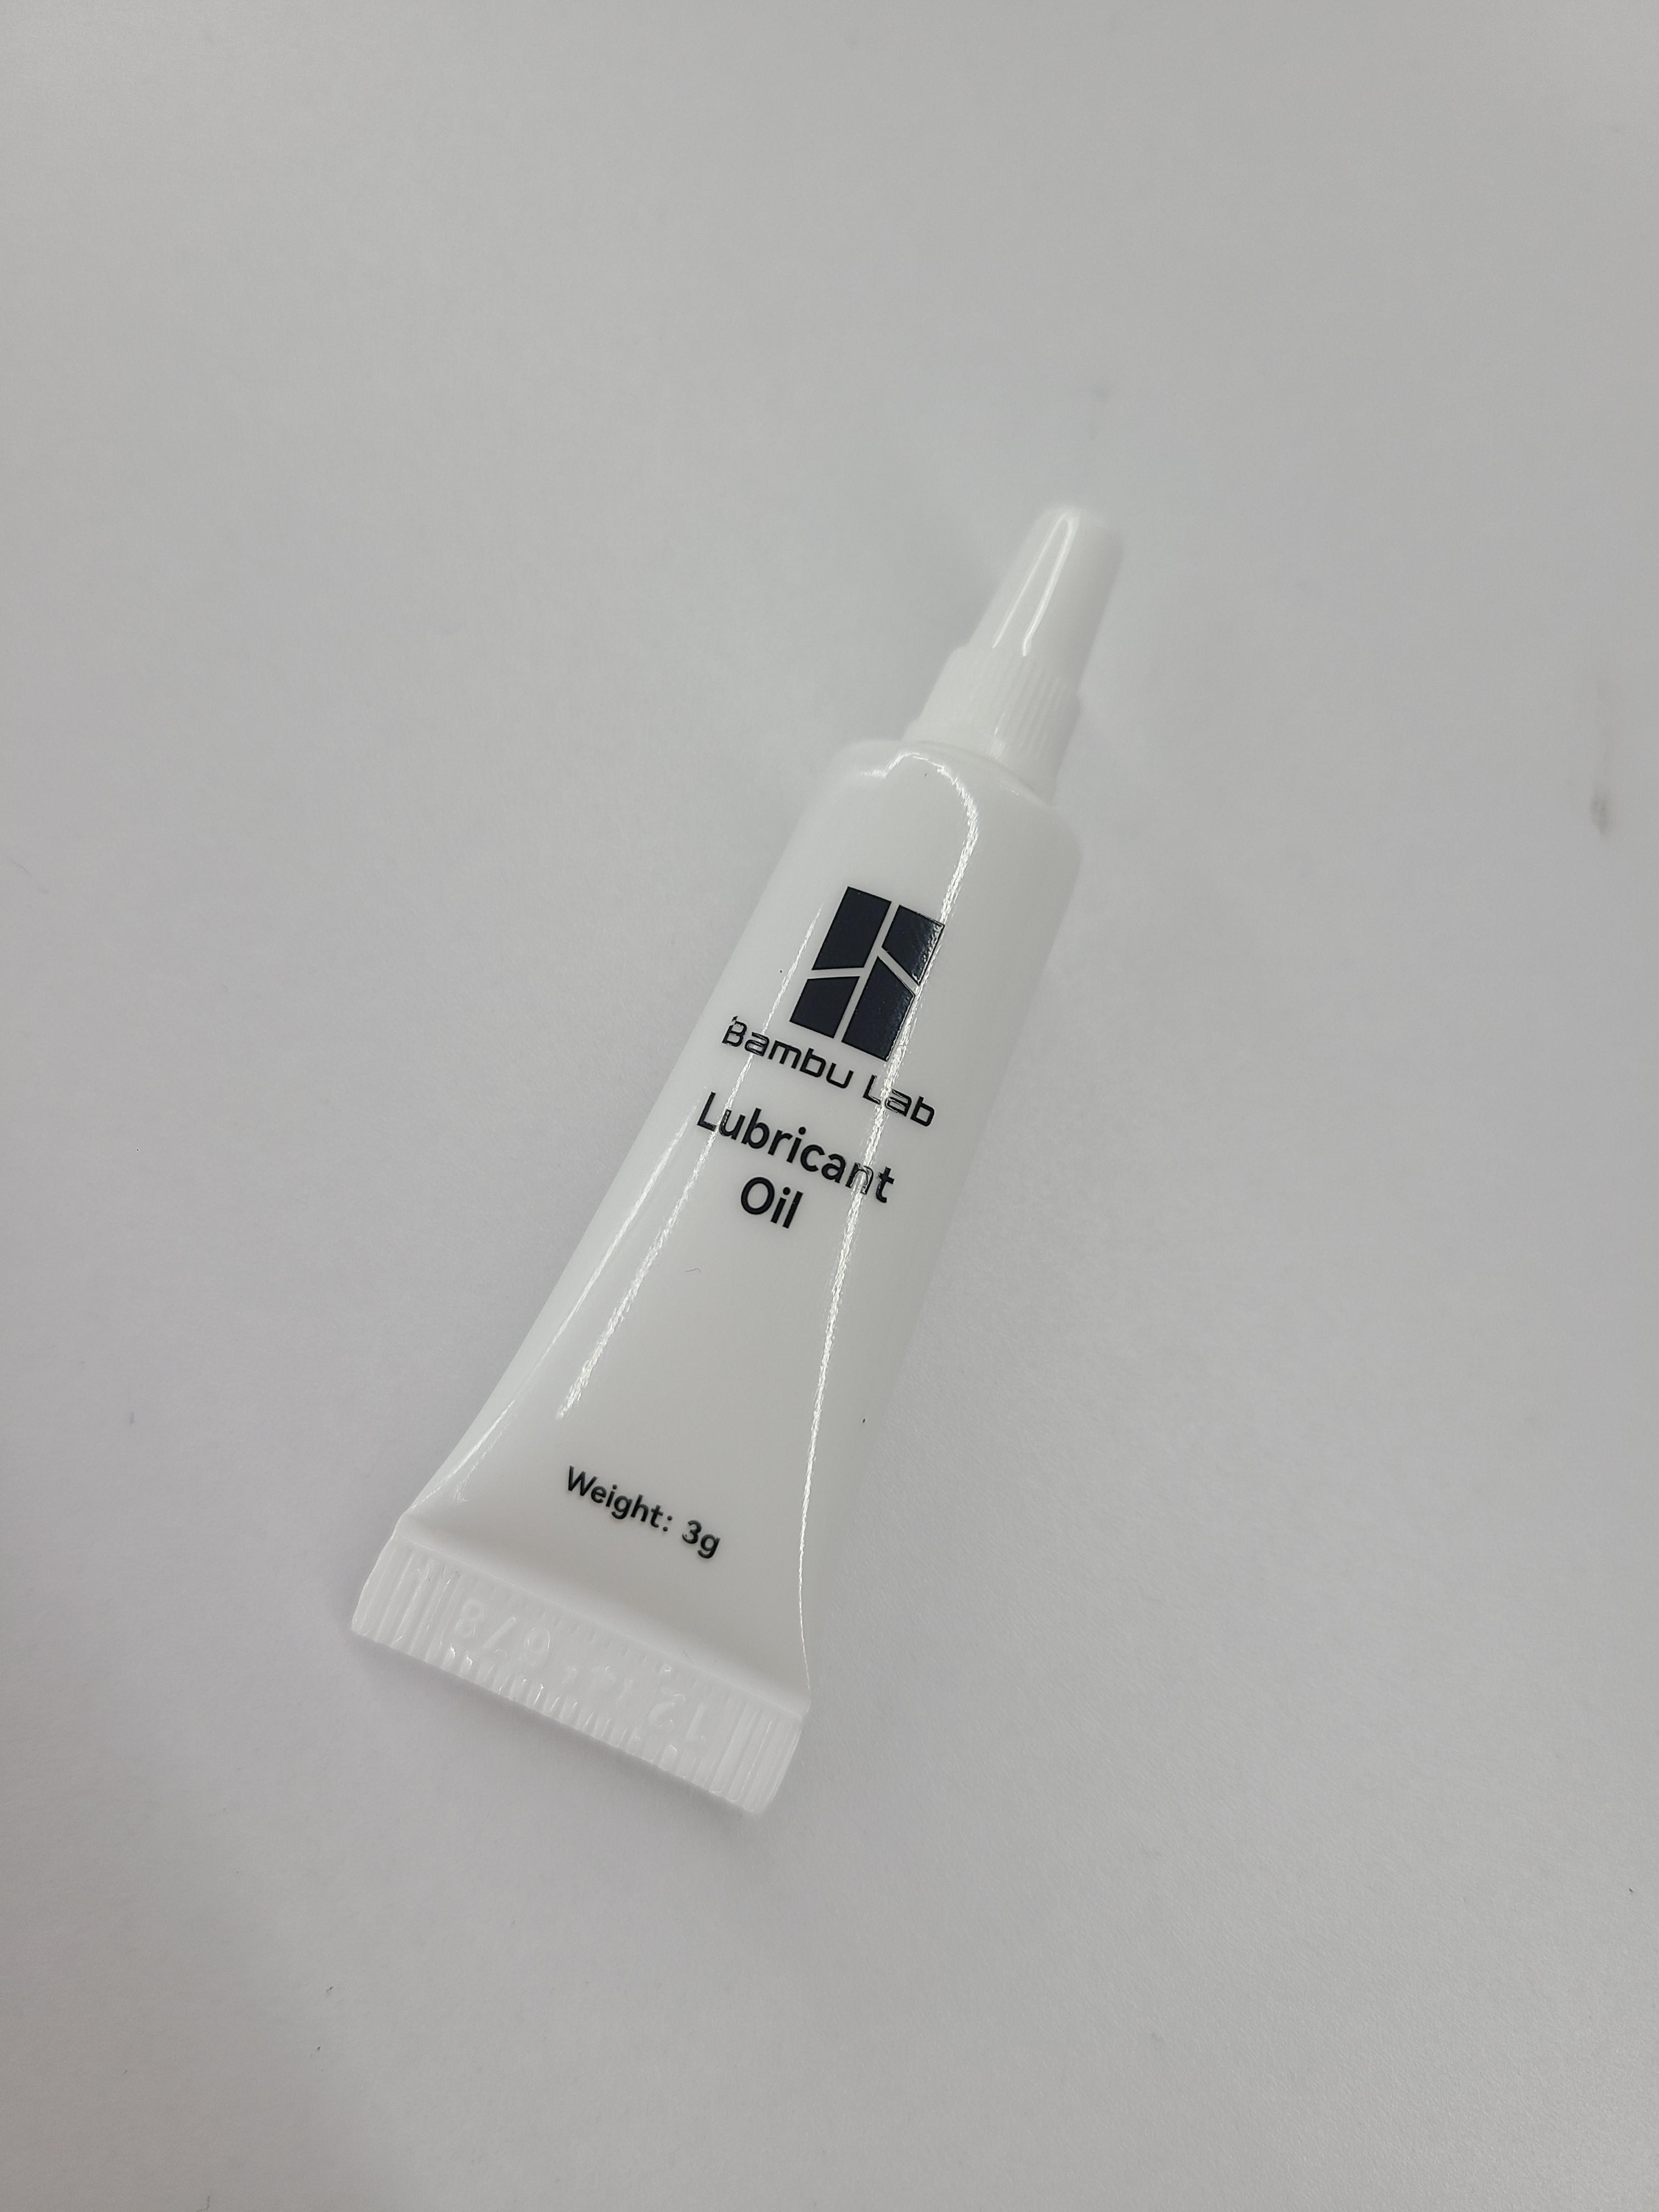
The lubricating oil is included in the accessory box. Please refer to the accompanying video for instructions on how to apply the lubricant:
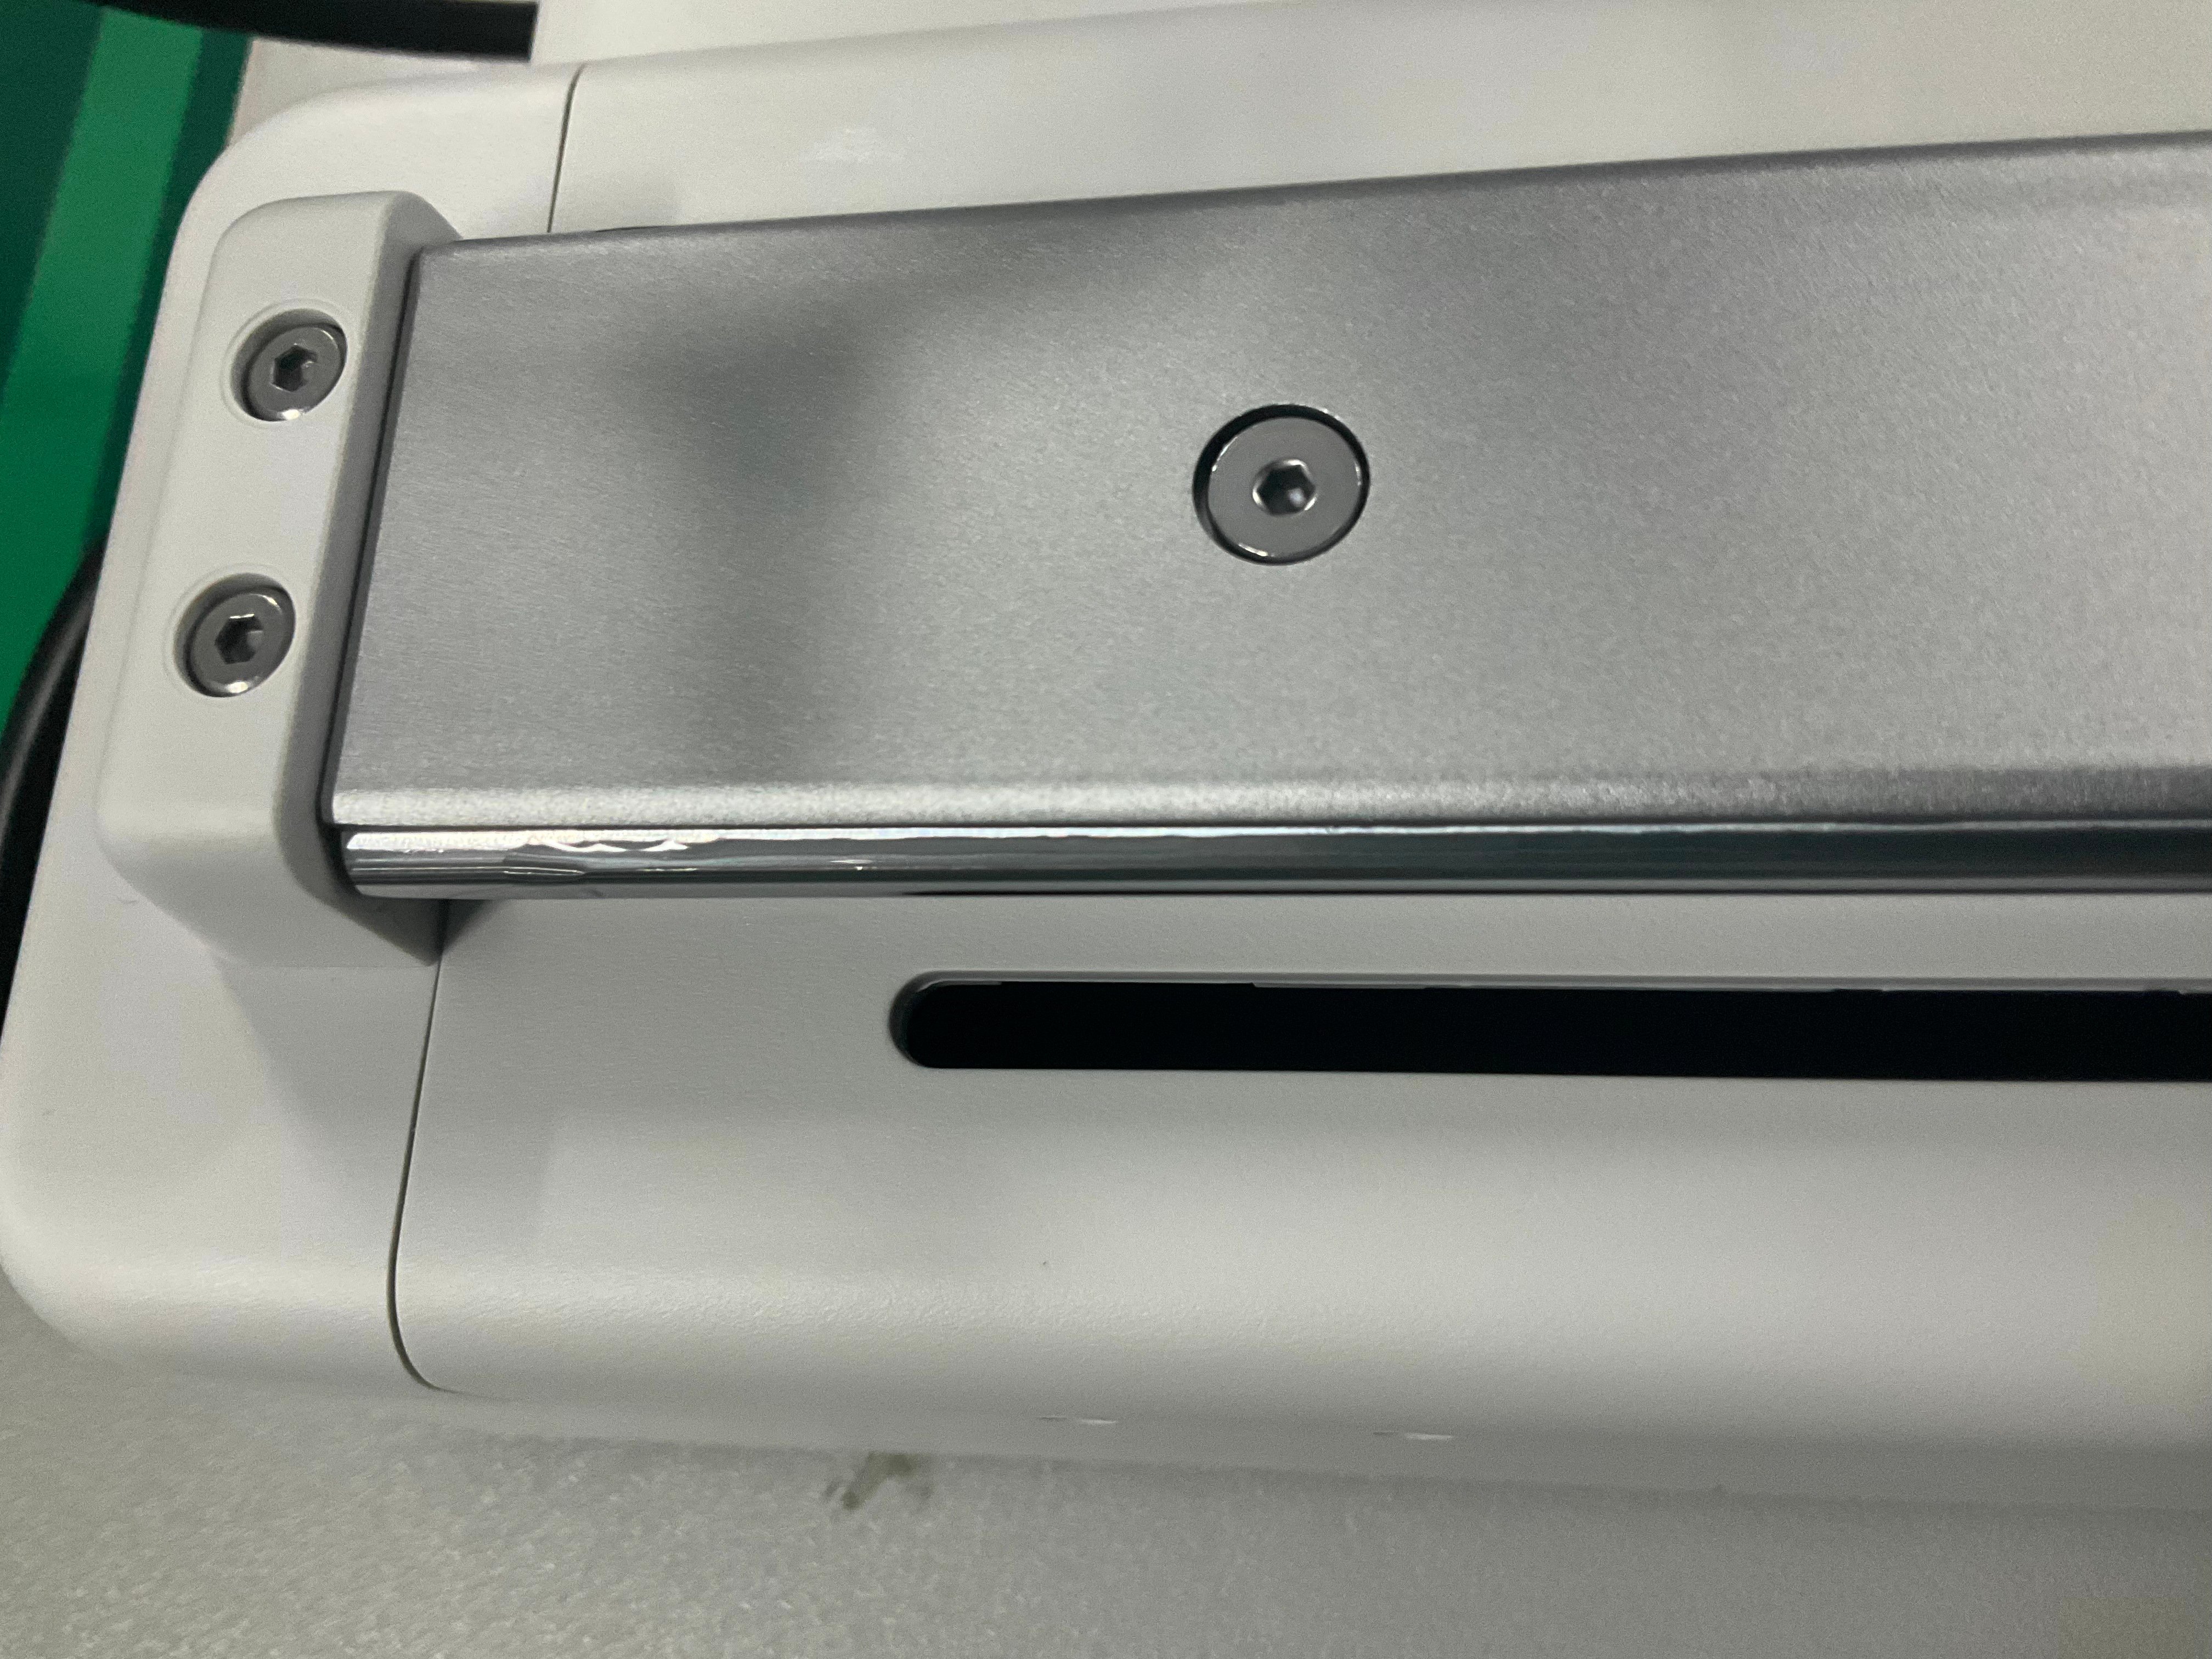 Picture of the Y-axis guide rails after proper lubrication. |
 |
¶ Steps to unbox and take out the A1 mini, AMS lite, and their accessories
The protective foam may vary from the machine shown in the unboxing video. Please refer to the machine you have received for accurate information. For example, some machines may have protective foam installed beneath the heatbed, which needs to be removed during the unboxing process. Early boxes include Bambu Filament Swatches when unboxing, while the latest packaging does not include Bambu Filament Swatches in the box.
The screen surface is covered with one or two layers of protective film, the purpose of which is to prevent contamination during production and transportation. Regardless of the state you receive, it is a normal new printer.
Some printers are manufactured with two layers of protective film (the first layer has a tear-off position), while others have only one layer (if you don't see a tear-off position, it means there is only one layer). Both situations will be shipped simultaneously, and you should refer to the actual machine you receive.
If your printer screen has two film layers, you can peel off the outer layer. If there is only one layer, you can decide whether to peel off this layer or not, you can peel it or not. However, we recommend that you keep the last one so that you can avoid scratches when using the screen.
¶ 1. Remove the protective cardboard from the top
Some accessories may be embedded in the foam, so please check them carefully. Please take out the components one by one and avoid removing the plastic packaging bags from the box all at once.
.png) |
.png) |
¶ 2. Carefully read the quick start guide and familiarize yourself with the precautions for unboxing in advance.
Take out the accessories, AMS lite, and the printer. When picking up the printer, support the rear cover of the Z-axis with your hand and avoid touching the metal rails of the Z-axis and X-axis with your hands.
.png) |
.png) |
.png) |
.png) |
.png) |
¶ Check the accessories in the box
With AMS lite: The packaging box includes the following items: A1 mini printer, AMS lite body, AMS lite stand and installation screws, AMS lite Rotary spool holder, purge wiper and its screws, spool holder with the bracket and its screws, PTFE tubes (580 mm *2, 700 mm *2), textured pei plate, sample filament, unclogging pin tool, allen keys (H2 and H1.5), 32 GB Micro SD card (pre-installed in the printer), heatbed nozzle wiper, cable organizer, bambu scraper blade and its screws, spare filament cutter, lubricating oil and grease (2 types of packages randomly shipped), quick start guide, and disclaimer and safety guidelines.
Without AMS lite: The packaging box includes the following items: A1 mini printer, purge wiper and its screws, spool holder with the bracket and its screws, PTFE tube (520 mm *1), Textured PEI plate, sample filament, unclogging pin tool, allen keys (H2 and H1.5), 32 GB Micro SD card (pre-installed in the printer), heatbed nozzle wiper, cable organizer, bambu scraper blade and its screws, spare filament cutter, lubricating oil and grease (2 types of packages randomly shipped), quick start guide, and disclaimer and safety guidelines.
| With AMS lite | Without AMS lite |
|---|---|
.png) |
.png) |
In the most recent packaging, the items in the tool box are placed inside transparent plastic bags.
¶ Steps to unlock the Z-axis limiter and tool head.
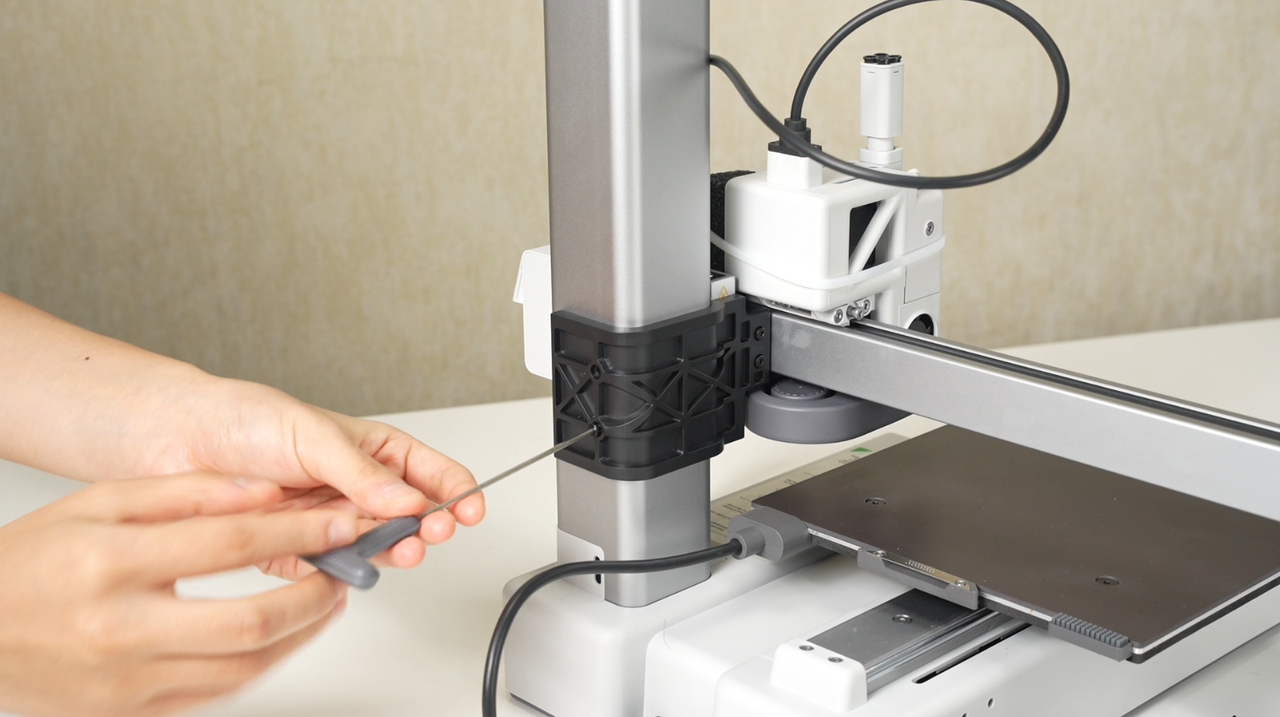
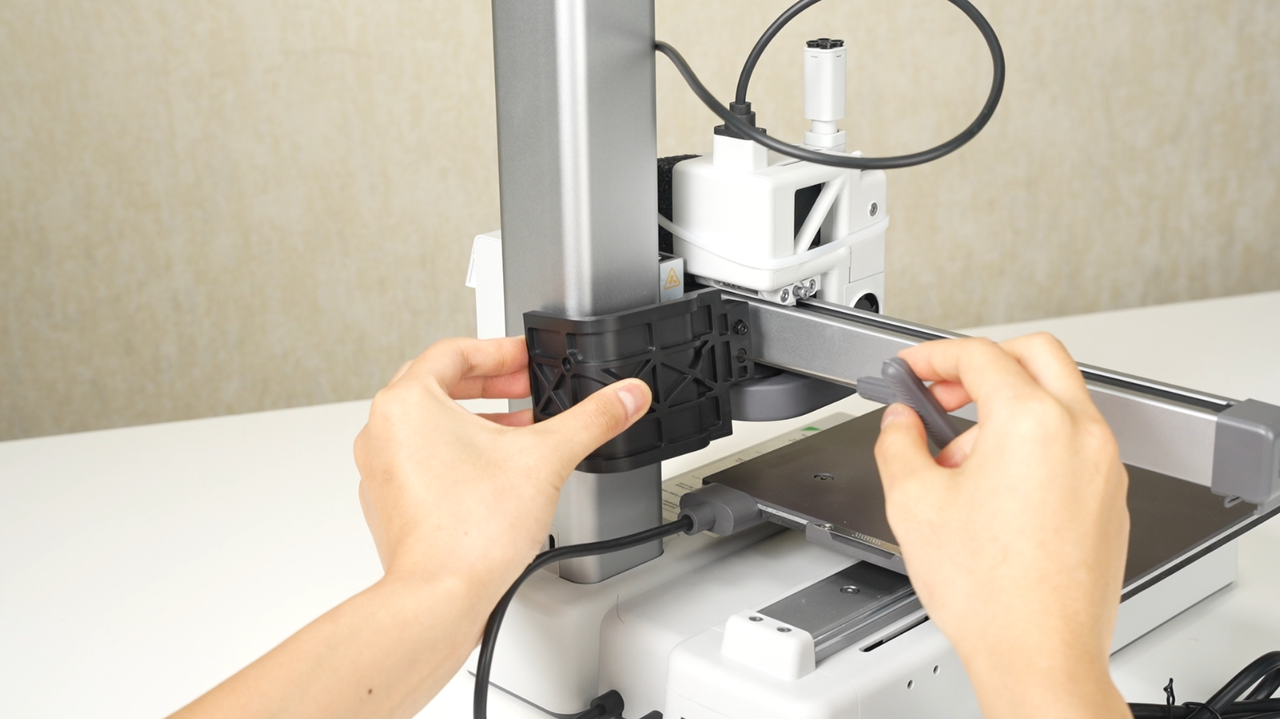
¶ 1. Remove the 4 screws to unlock the Z-axis limiter that is used to protect the printer during transportation.
 |
 |
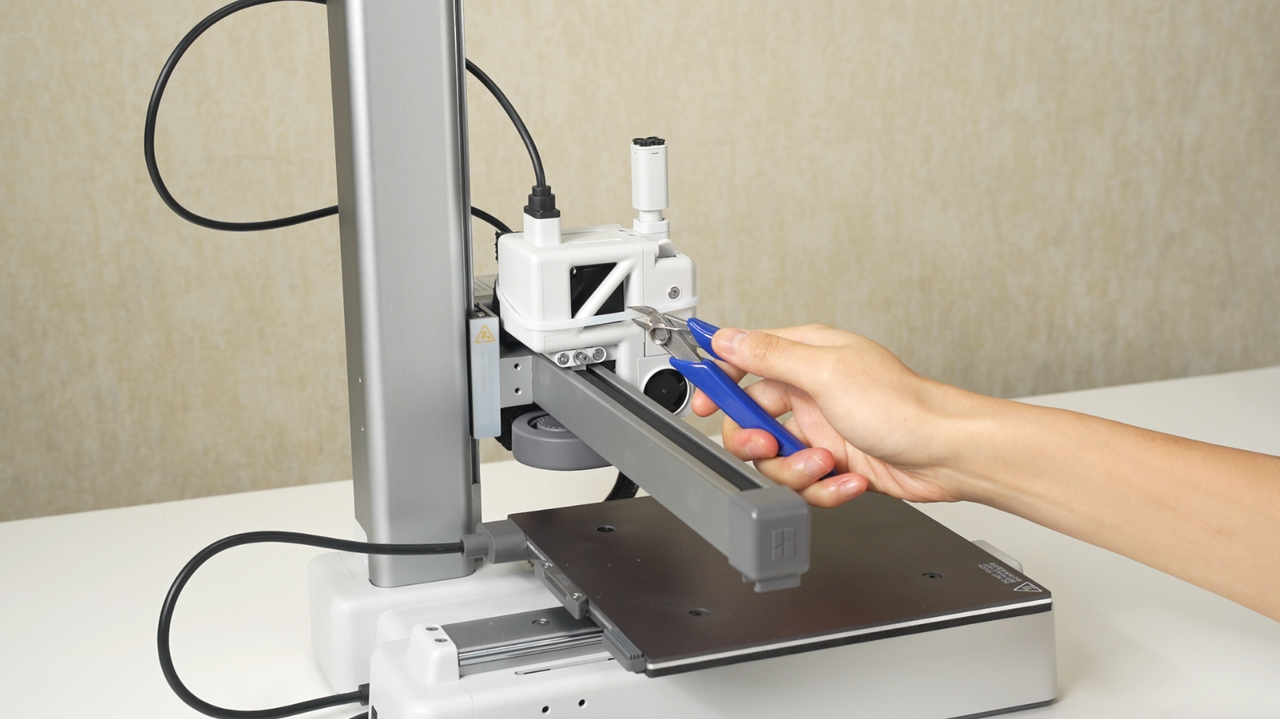
¶ 2. Cut the zip-tie wrapped around the tool head.
 |
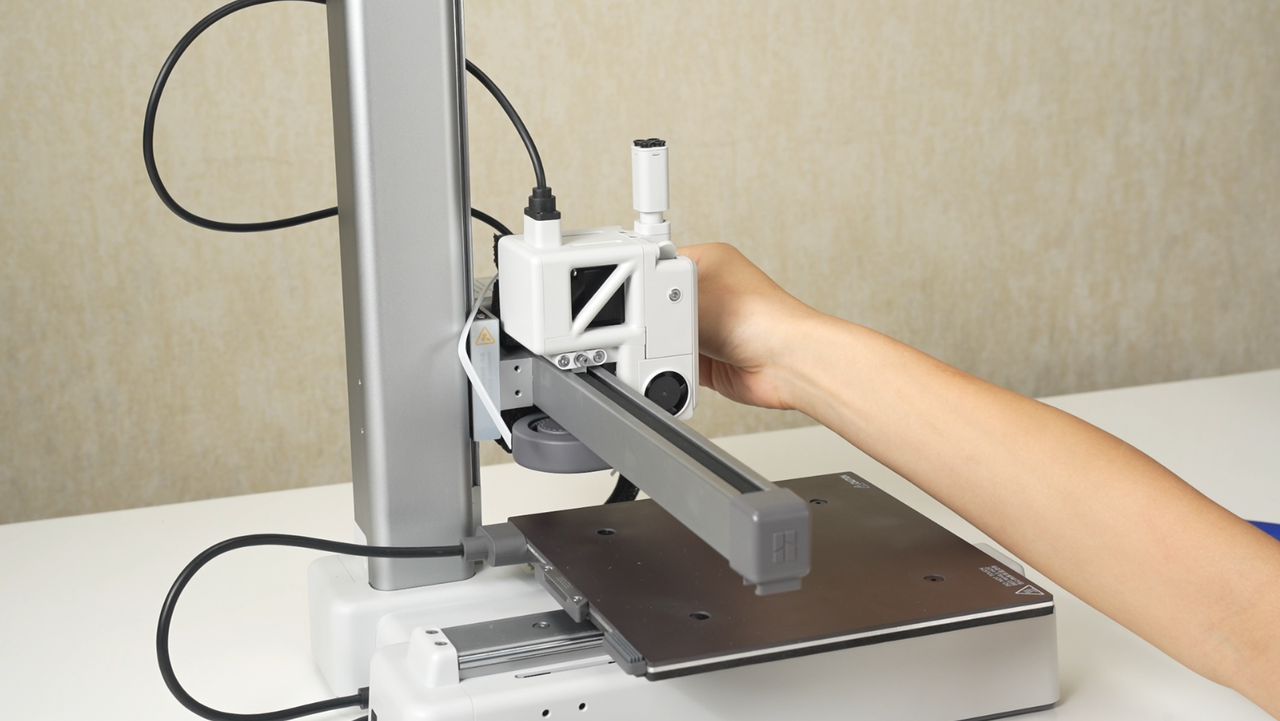 |
¶ 3. Move the tool head slightly to the left and then remove the foam padding.
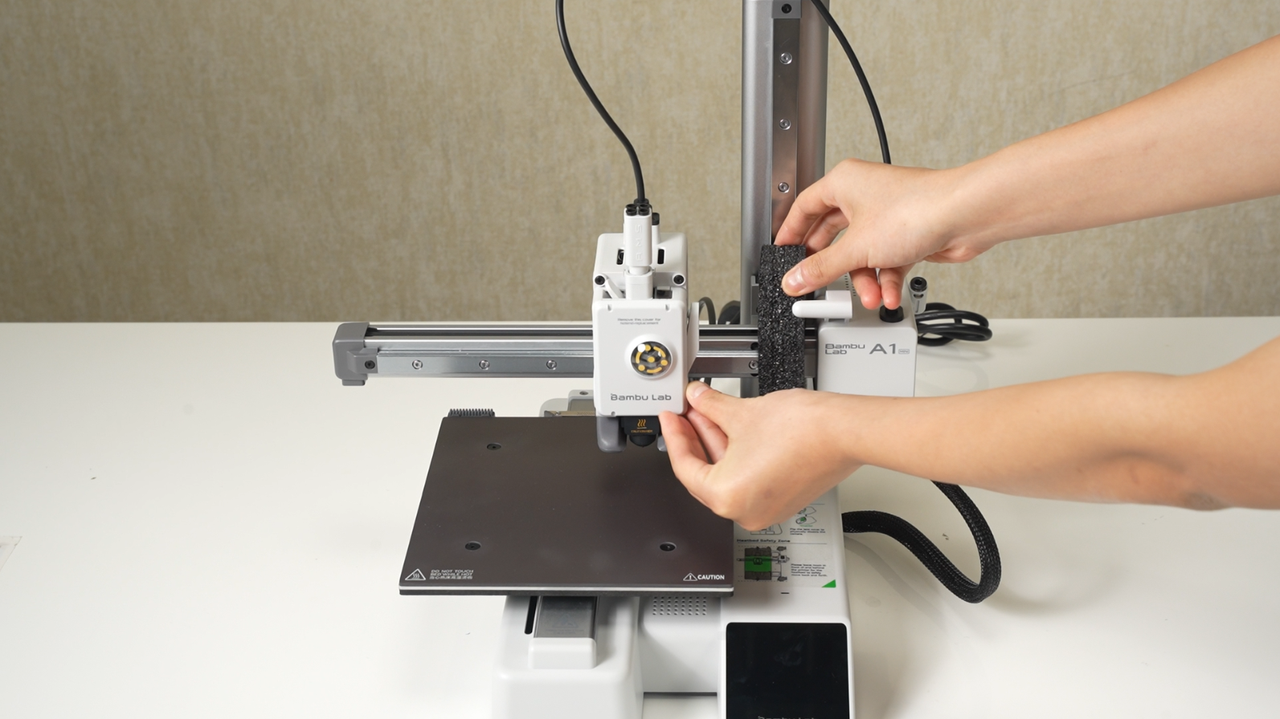
If there is protective foam around the heatbed and guide rails, it should be removed at this step.
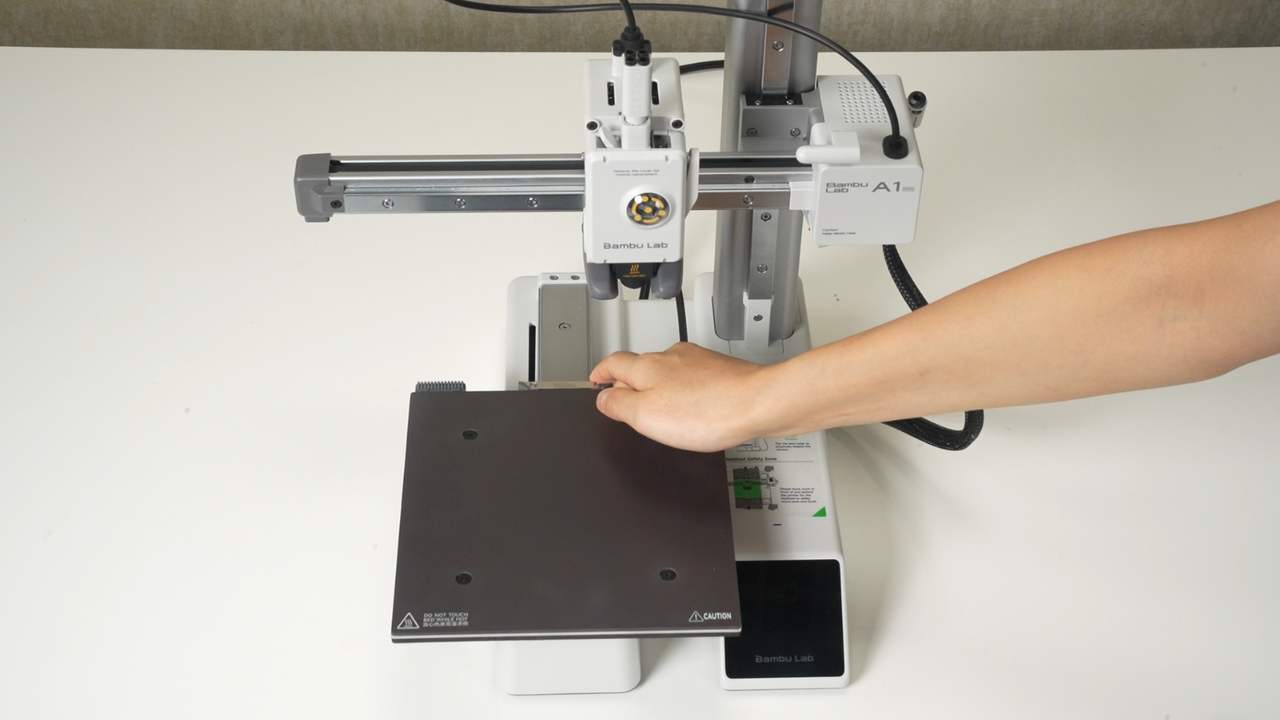
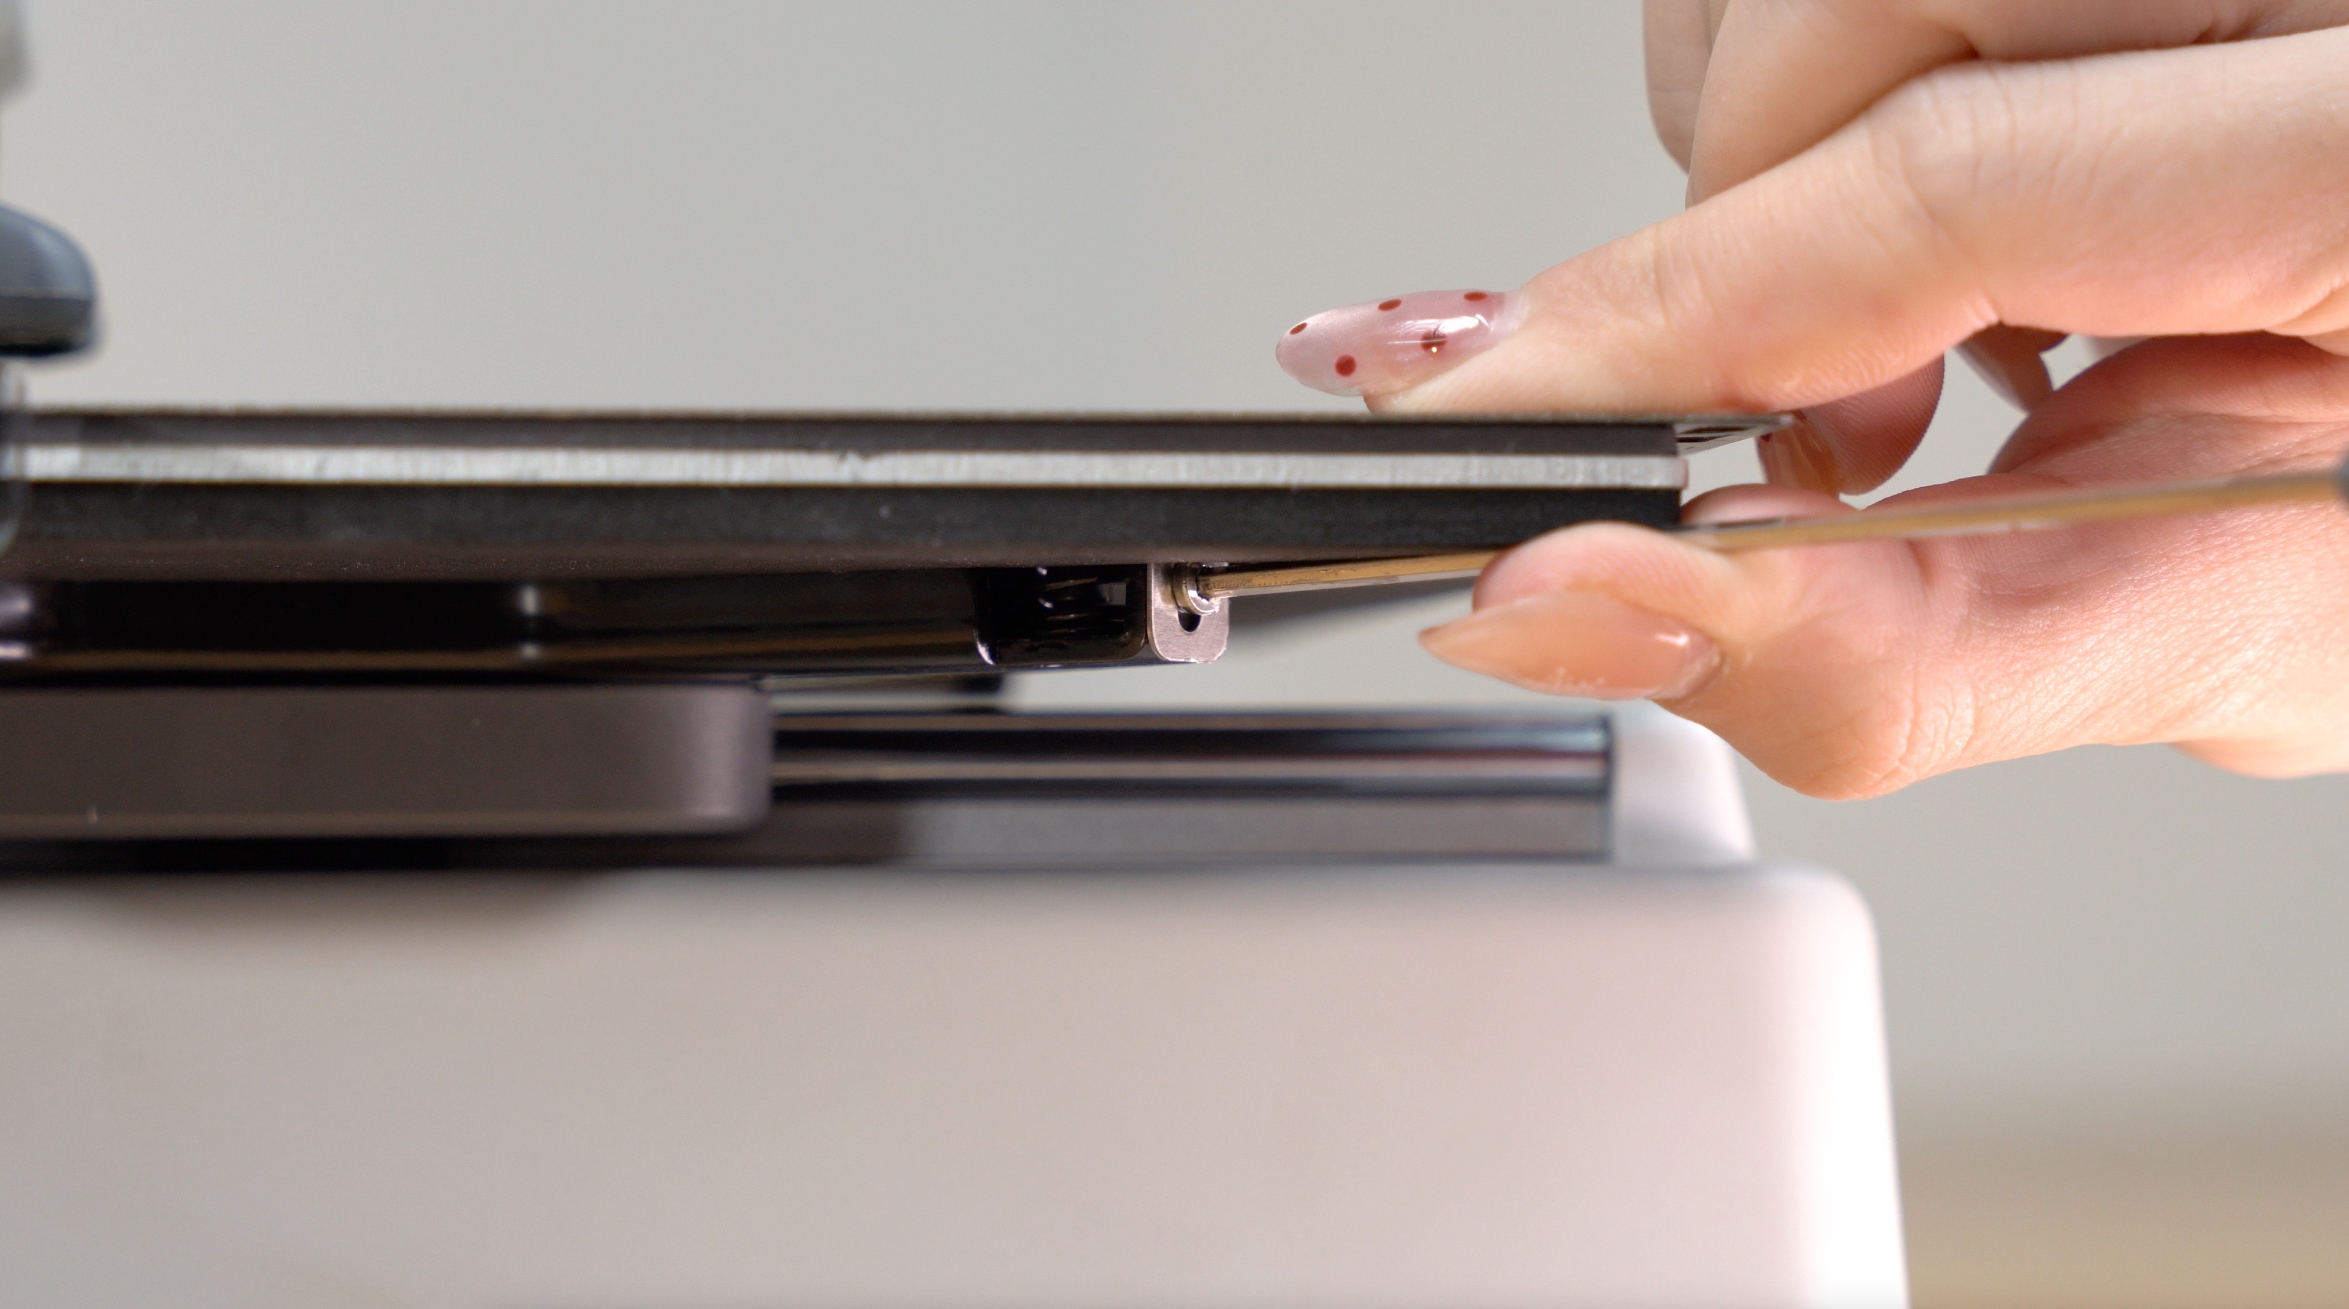
¶ Tighten the heatbed screws.
To prevent damage to parts due to impact during transportation, the 3 screws at the bottom of the heatbed (as shown in the green mark in the picture) will be loosened during the factory assembly process. So you need to tighten them.
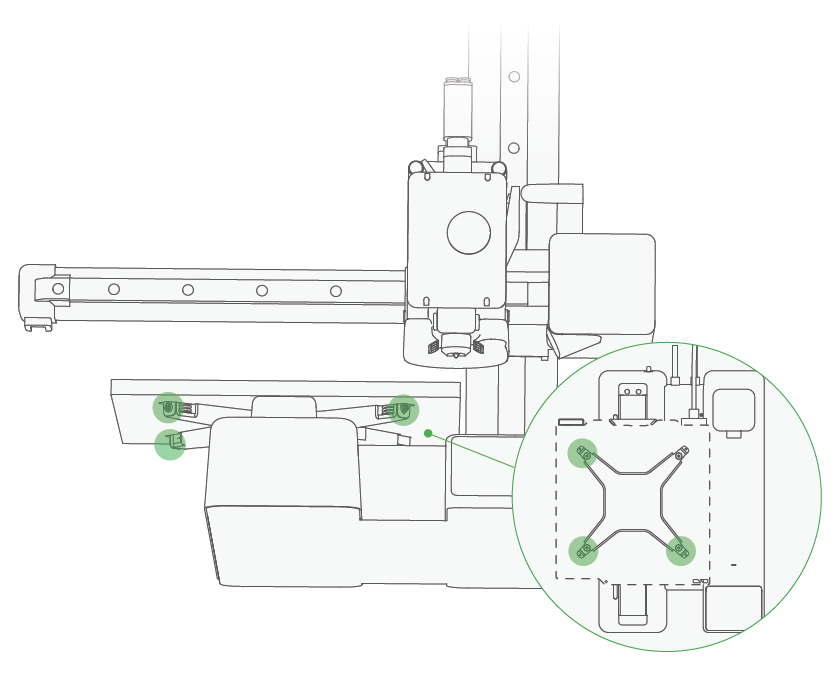
It is recommended to push the heatbed slightly to a position where you can use the Allen key, insert the key first, and then fix the key and the build plate with your hands to prevent the screws from falling off.
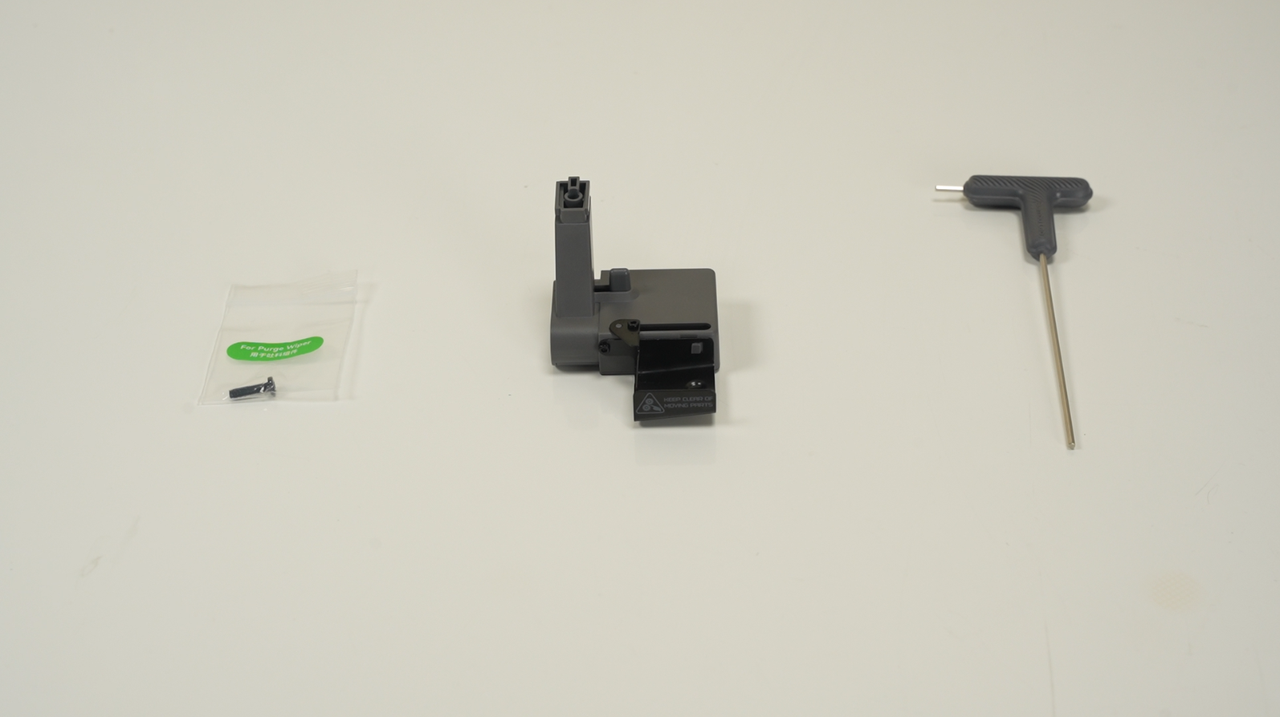
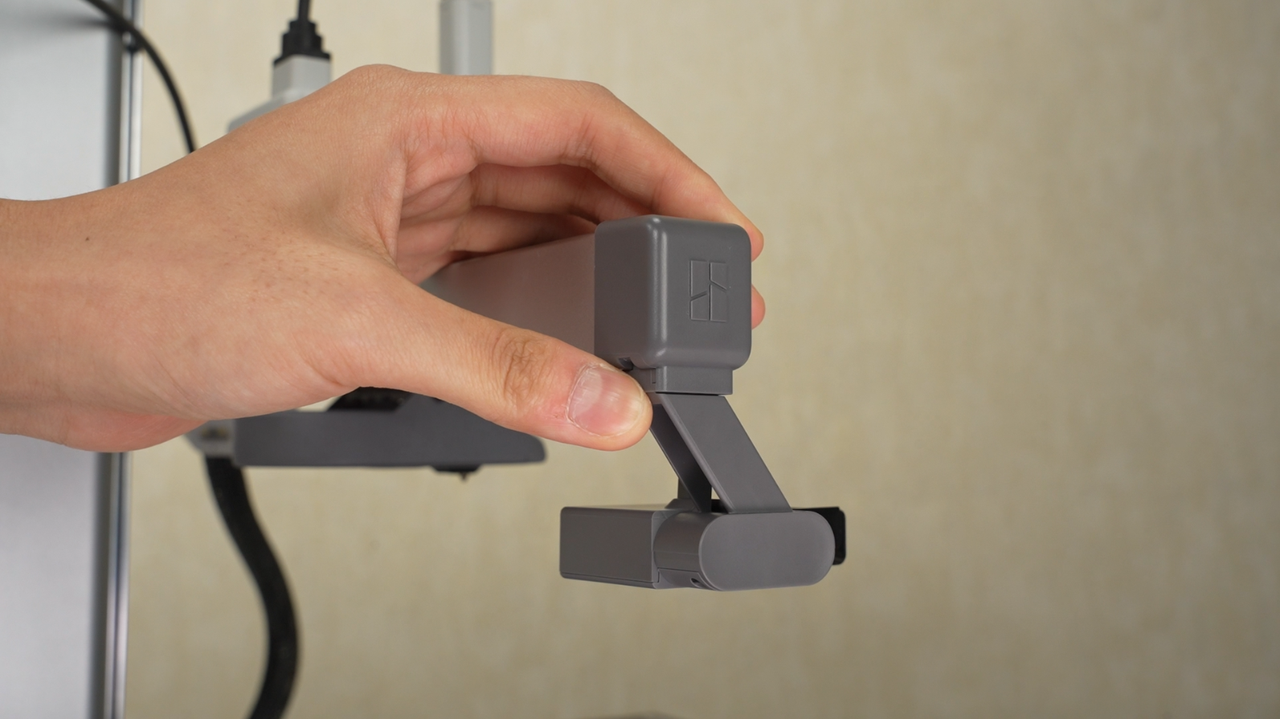
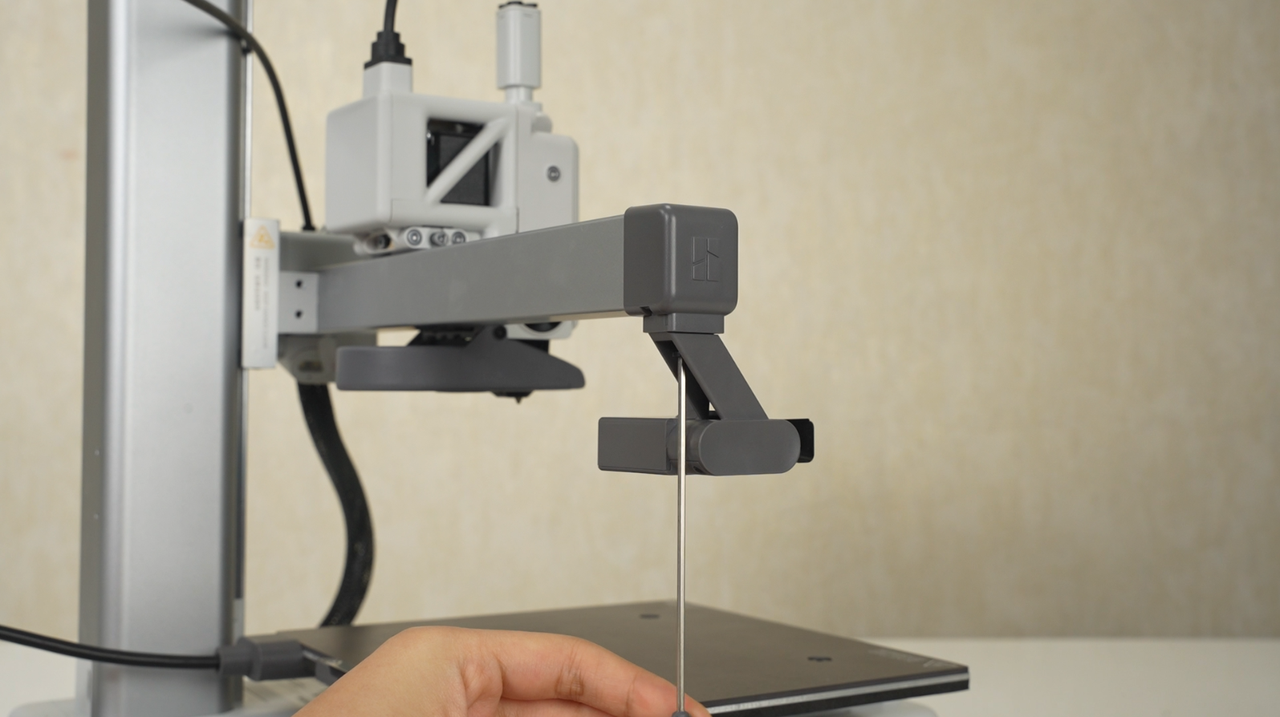
¶ Install the purge wiper
Slide in the Purge Wiper unit into the slot at the end of the X-Axis from the back to the front. Install the 1*M3-12 screw (for purge wiper) from the accessory box to fix the Purge Wiper in place.
 |
.png) |
 |
 |
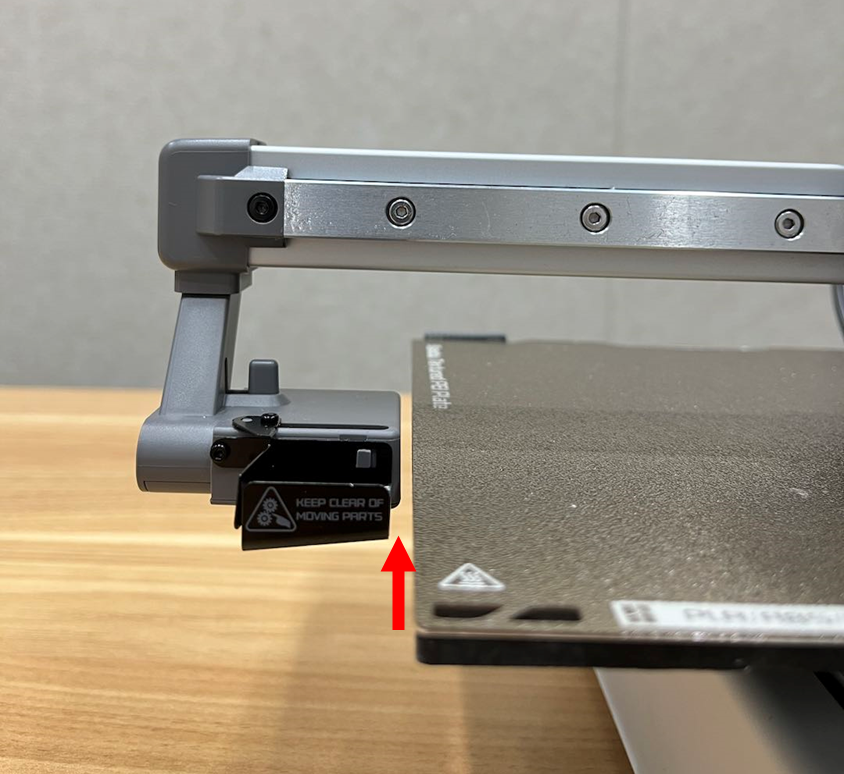
Note: After installing the purge wiper, it should be parallel to and not collide with the left edge of the heatbed, as shown in the picture below:
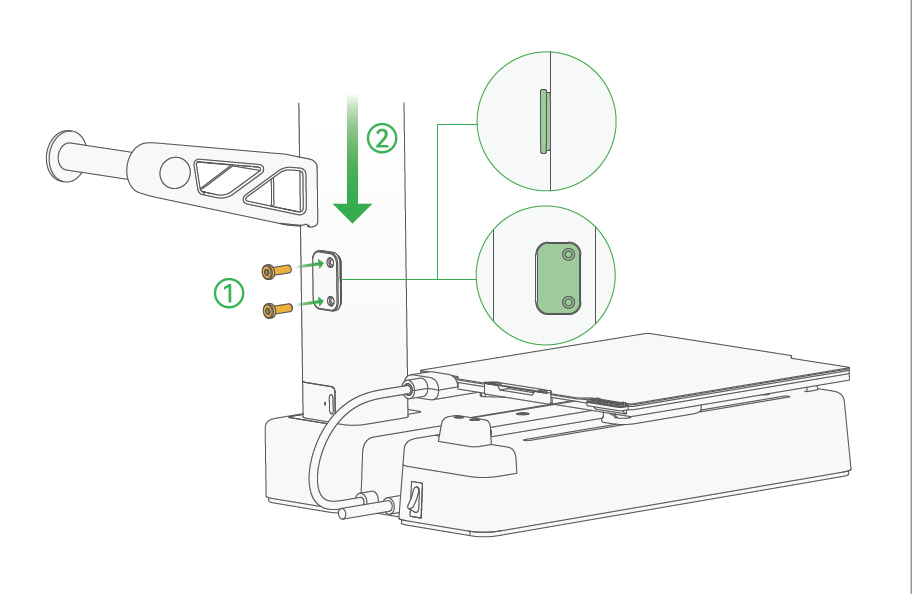
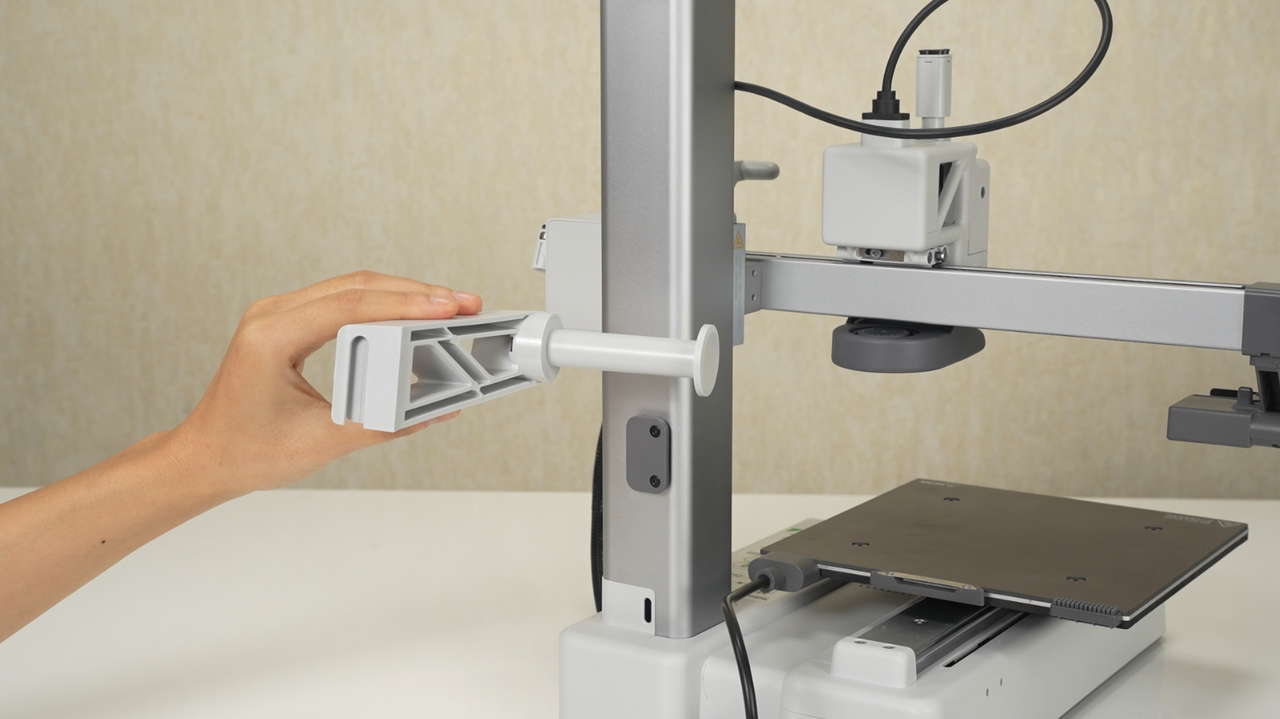
¶ Steps to install the spool holder
¶ 1. Install the spool holder base plate with the 2*M3-8 screws (for spool holder) from the accessory box. Please pay attention to the installation orientation.
If you want to print with AMS lite, this step would be optional.
.png) |
 |
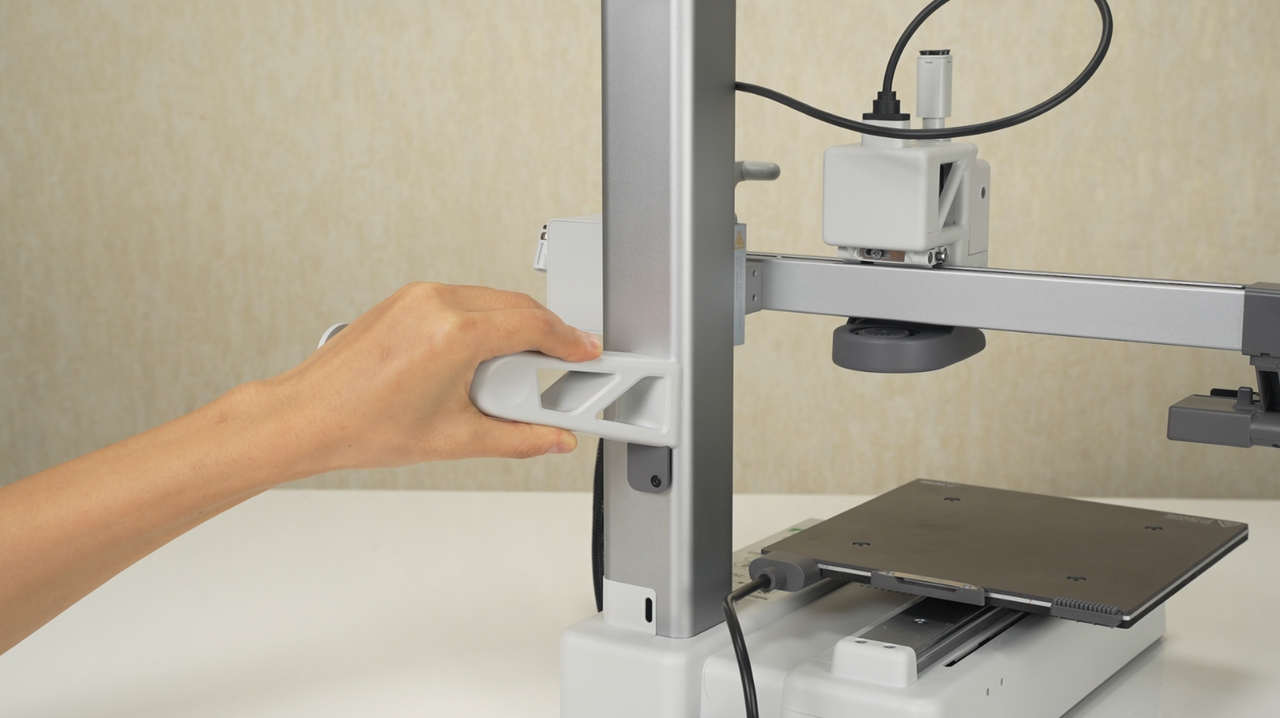
¶ 2. Slide the spool holder into place from the top to the bottom.
Ensure that the orientation of the spool holder matches the direction of the slot.
 |
 |
¶ Remove the protective films on the camera and screen
.png) |
|
.png) |
The screen is covered with one or two protective films to prevent contamination during production and transportation. For two protective films, there will be a tear on the first film for you to tear it off. If there is only one protective film, there will be no tear. Either of these two situations is normal for a new printer. |
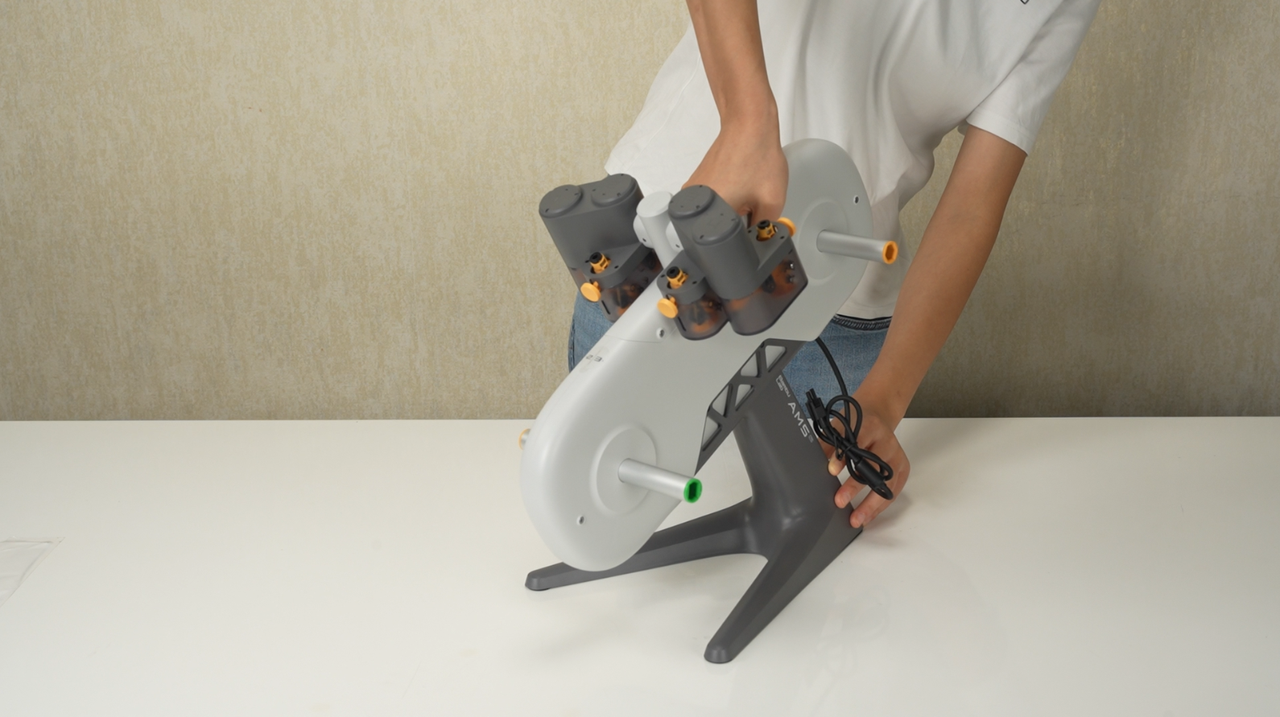
¶ Steps to assemble the AMS lite
¶ 1. Put the AMS lite body on the stand (cable towards the back side of the AMS).
 |
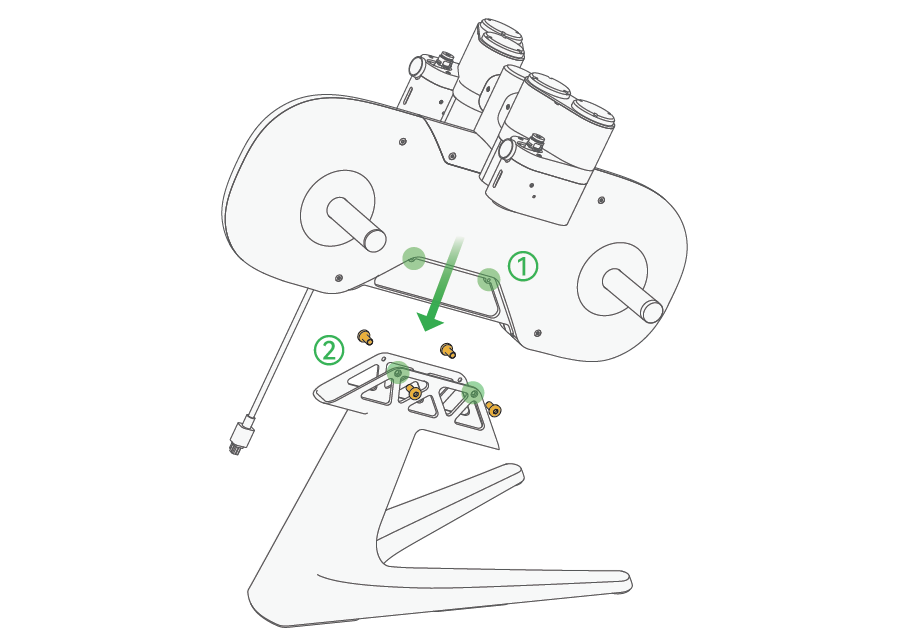 |
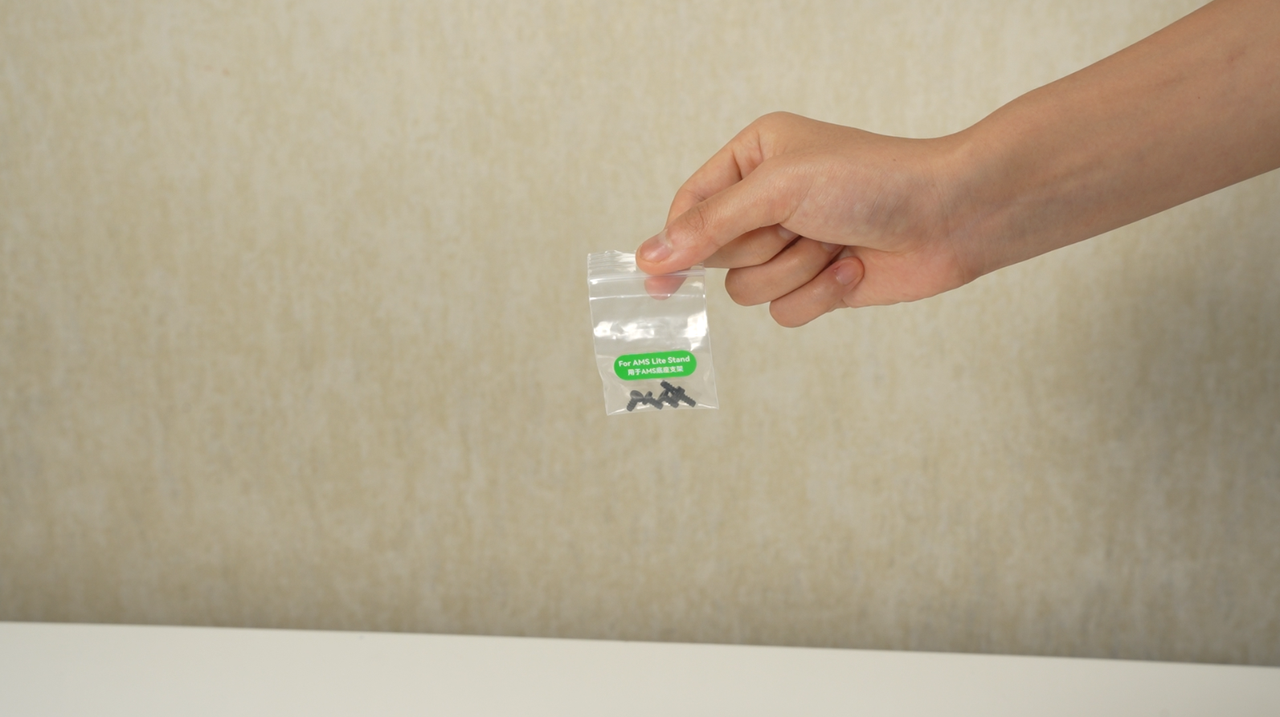
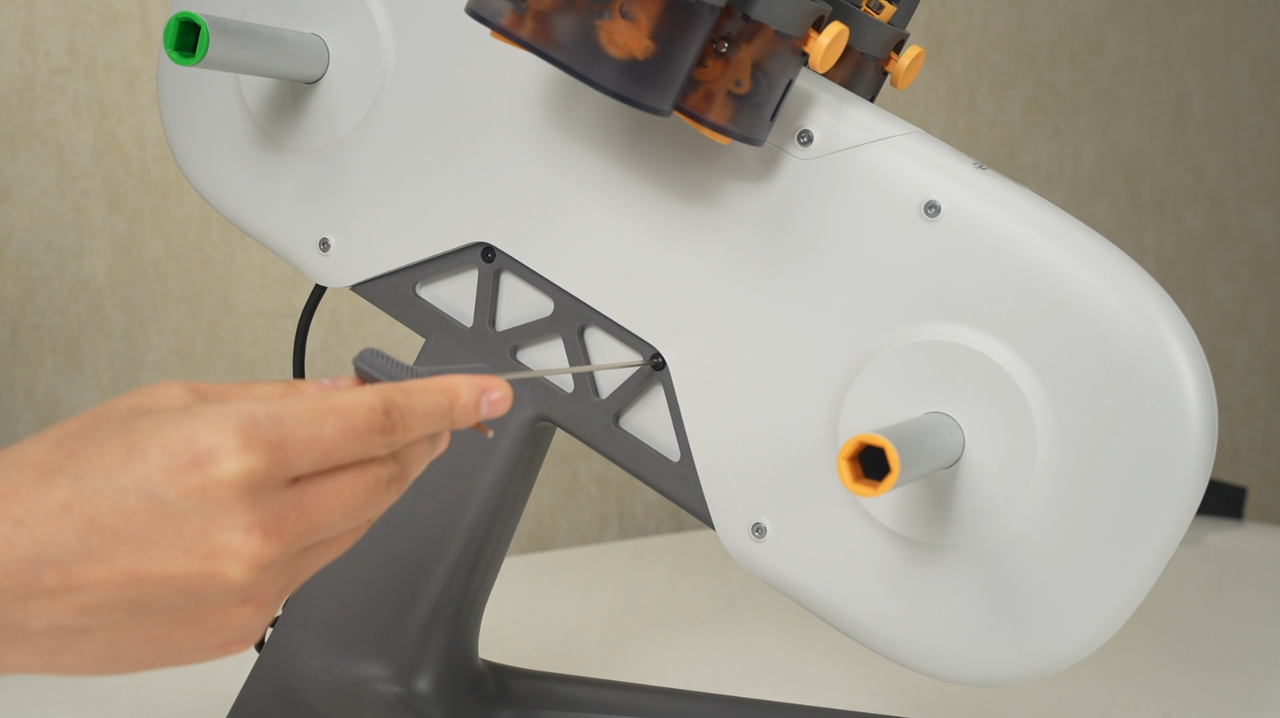
¶ 2. Secure the AMS lite with the 4*BT3-8 screws (for AMS stand) from the accessory box
 |
 |
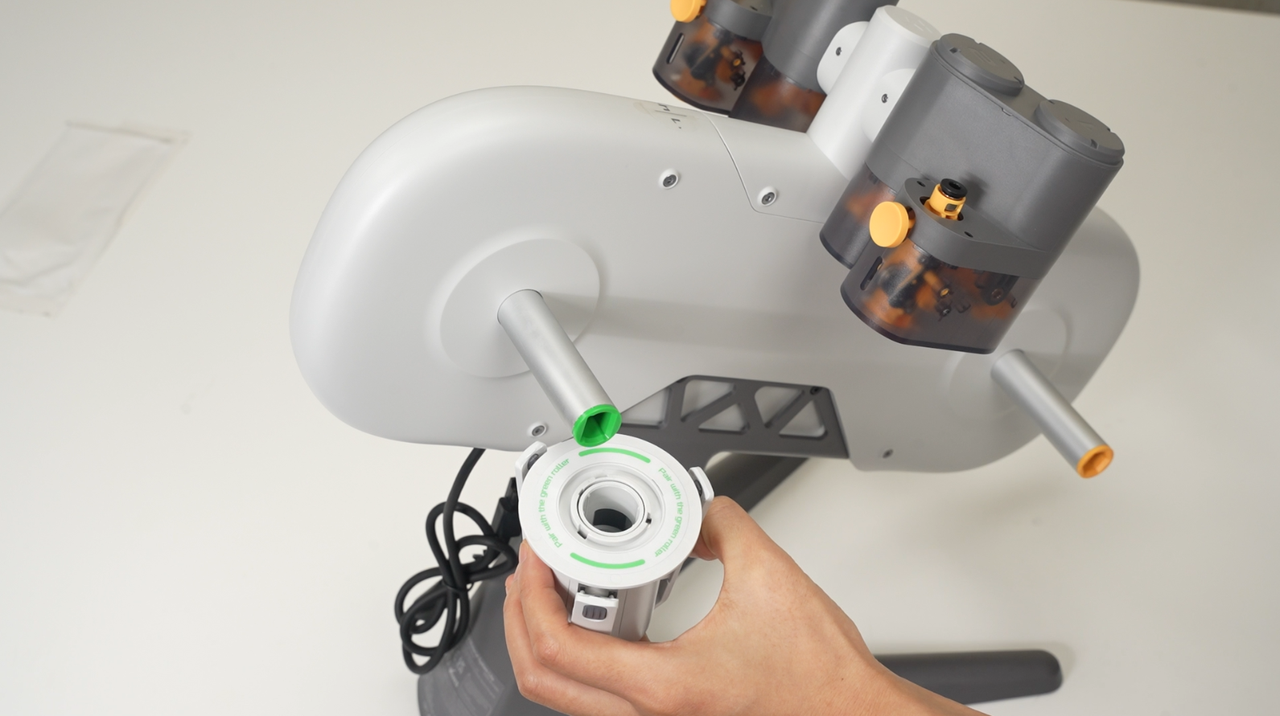
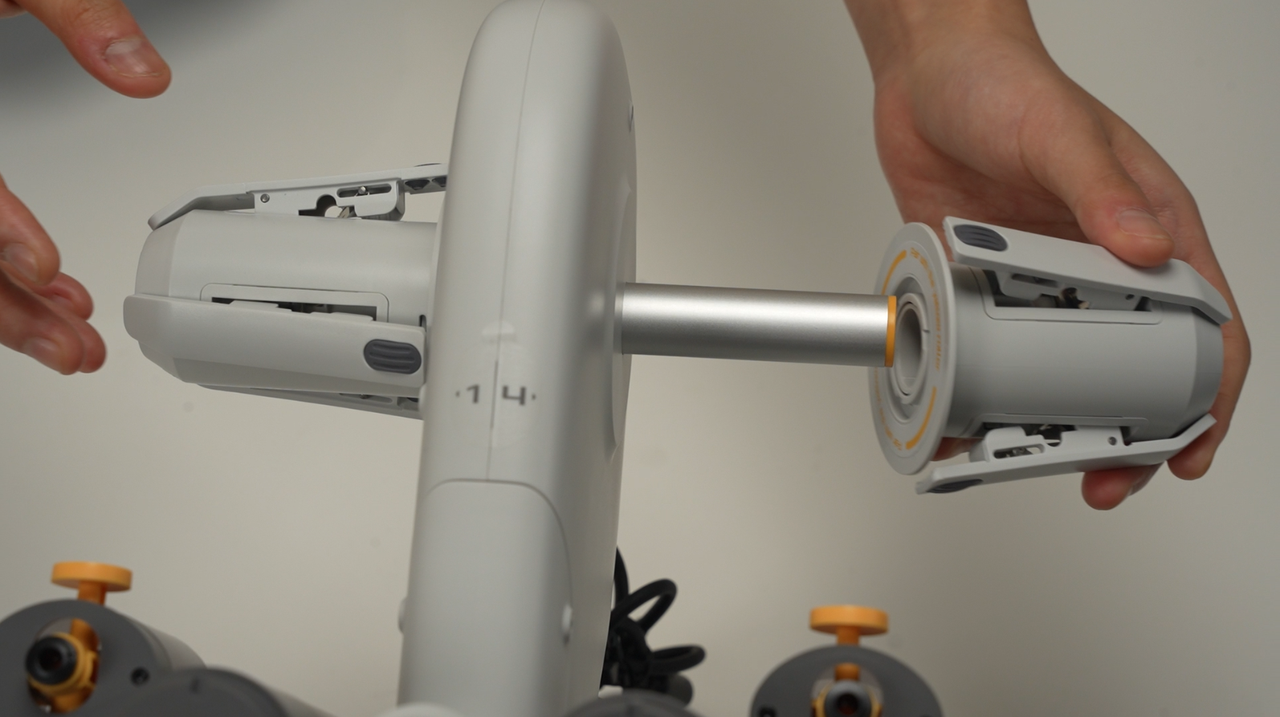
¶ 3. Slide the rotary spool holders all the way in. Be careful to match colors to avoid damaging any parts (as shown in the diagram, yellow matches with yellow, green matches with green).
 |
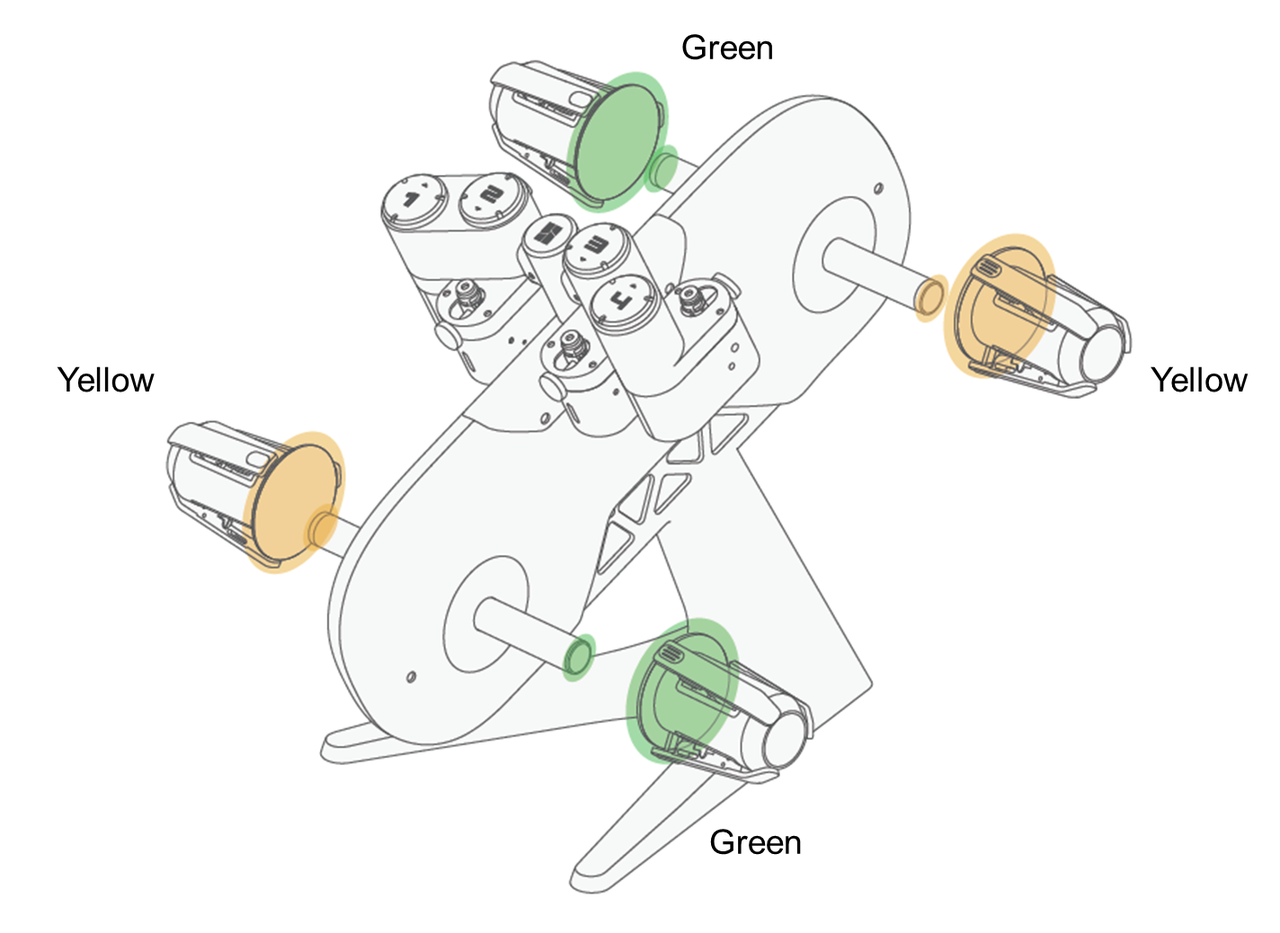 |
The yellow rotary spool holders have a hexagonal clip inside, making aligning with the locking position relatively easier. The green rotary spool holders have a rectangular shape, so it is recommended to align them with the hole before insertion roughly, then move them parallelly with slight adjustments to ensure alignment with the locking position.
 |
 |
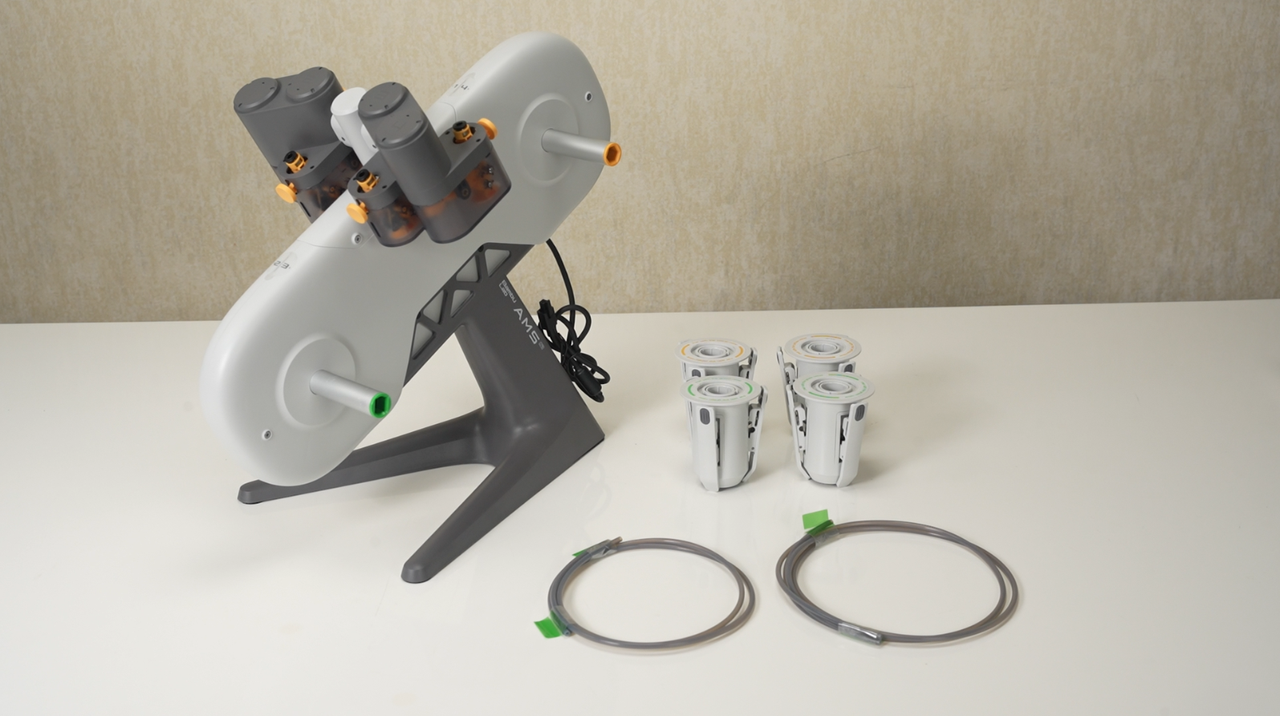
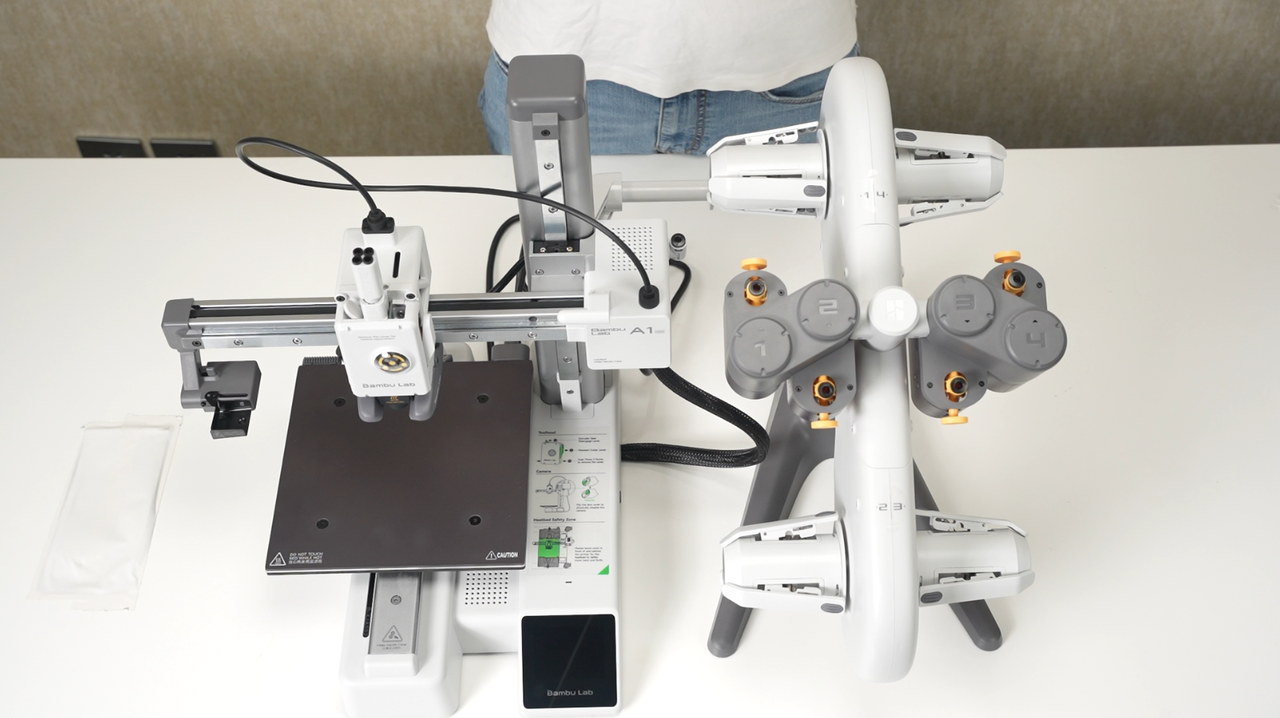
¶ 4. Place the AMS lite on the right side of the A1 mini printer after successfully installing the rotary spool holders.
¶ 5. Install PTFE tubes
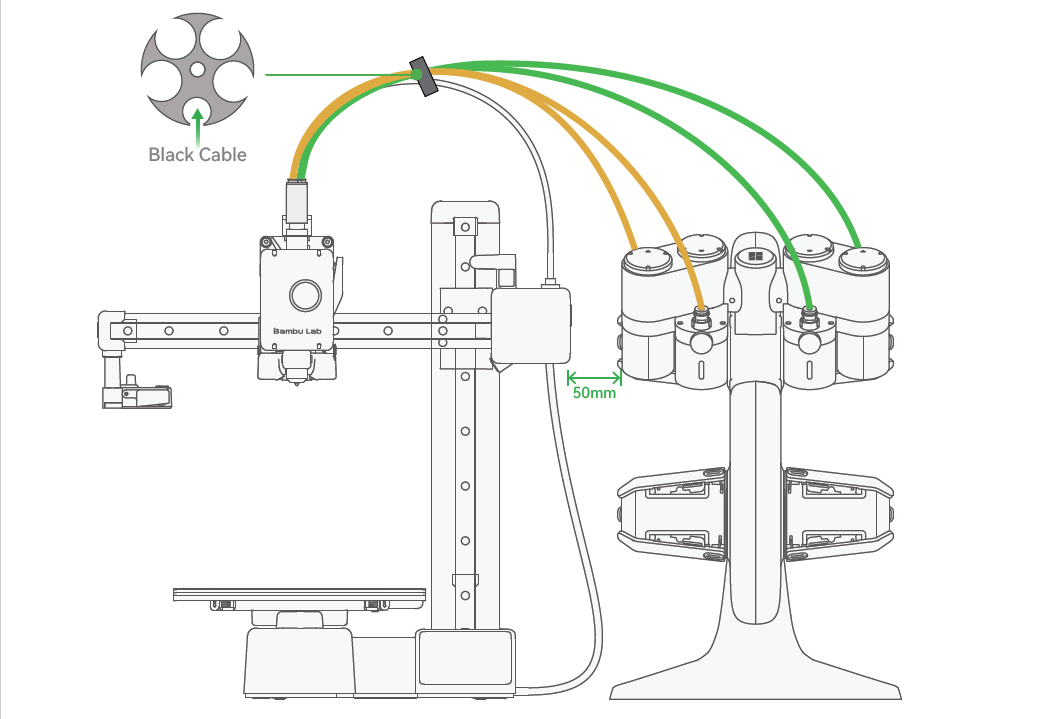
As the pictures show, insert the 580 mm PTFE tubes into feeder coupler connectors 1 and 2. Insert the other end of the PTFE tube from port 1 into the left-rear side of the filament hub, and insert the other end of the PTFE tube from port 2 into the left-front side of the filament hub. (Viewed from the front to the back)
.png) |
.png) |
As the pictures show, insert the 700 mm PTFE tubes into feeder coupler connectors 3 and 4. Insert the other end of the PTFE tube from port 3 into the right-front side of the filament hub, and insert the other end of the PTFE tube from port 4 into the right-rear side of the filament hub. (Viewed from the front to the back)
.png) |
.png) |
Note: If you have mistakenly inserted the PTFE tube during the installation process, please refer this Wiki to remove it: A1 series Printer PTFE Tube Removement
Here is the overall visual representation of the completed installation of the 4 PTFE tubes:
.png)
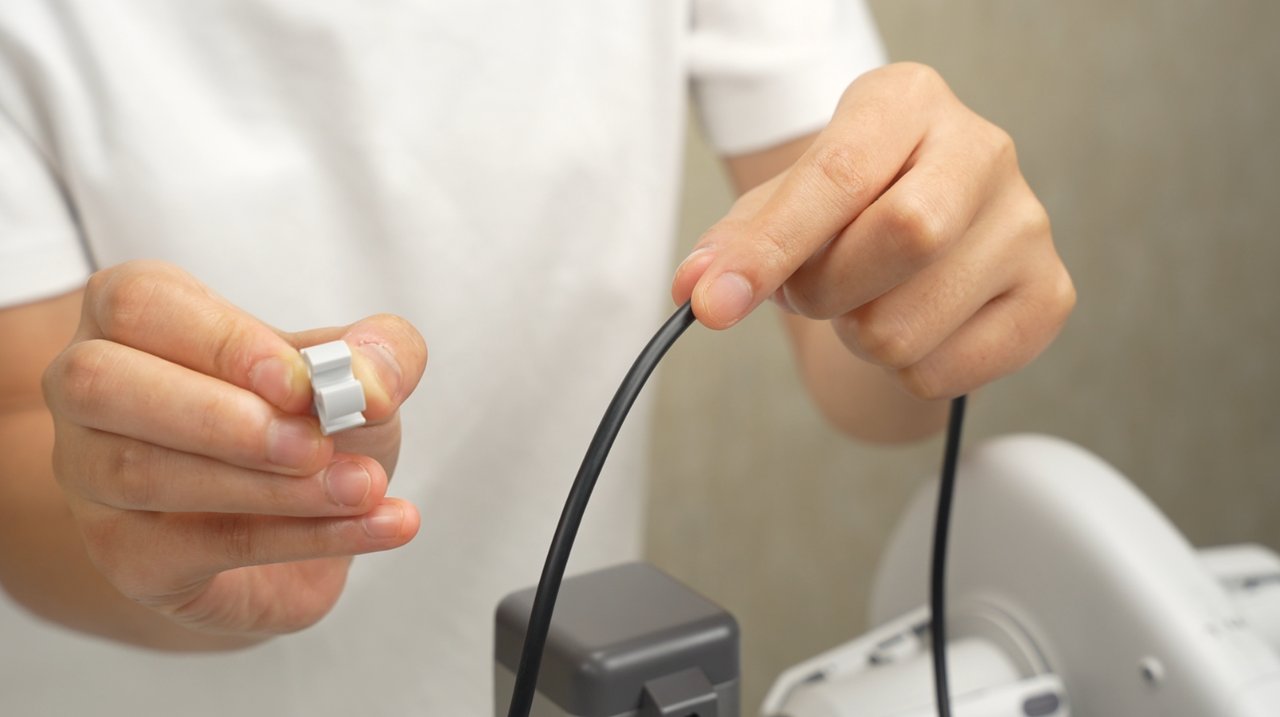
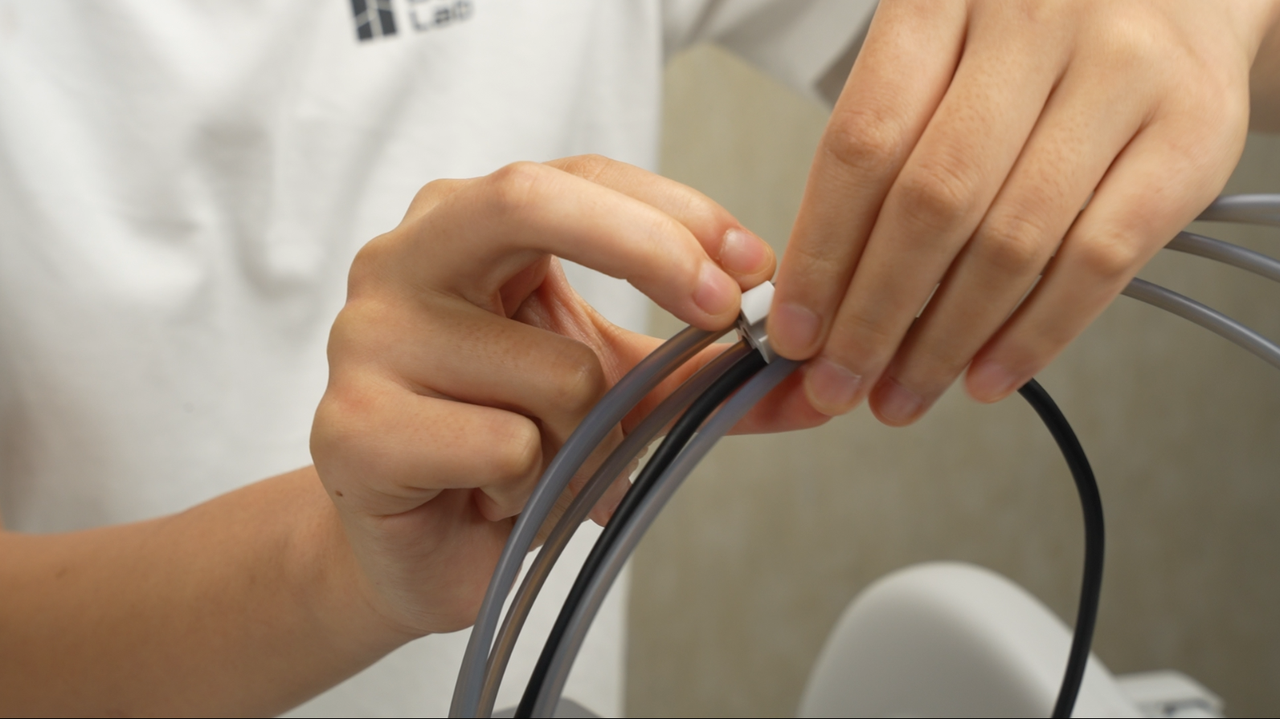
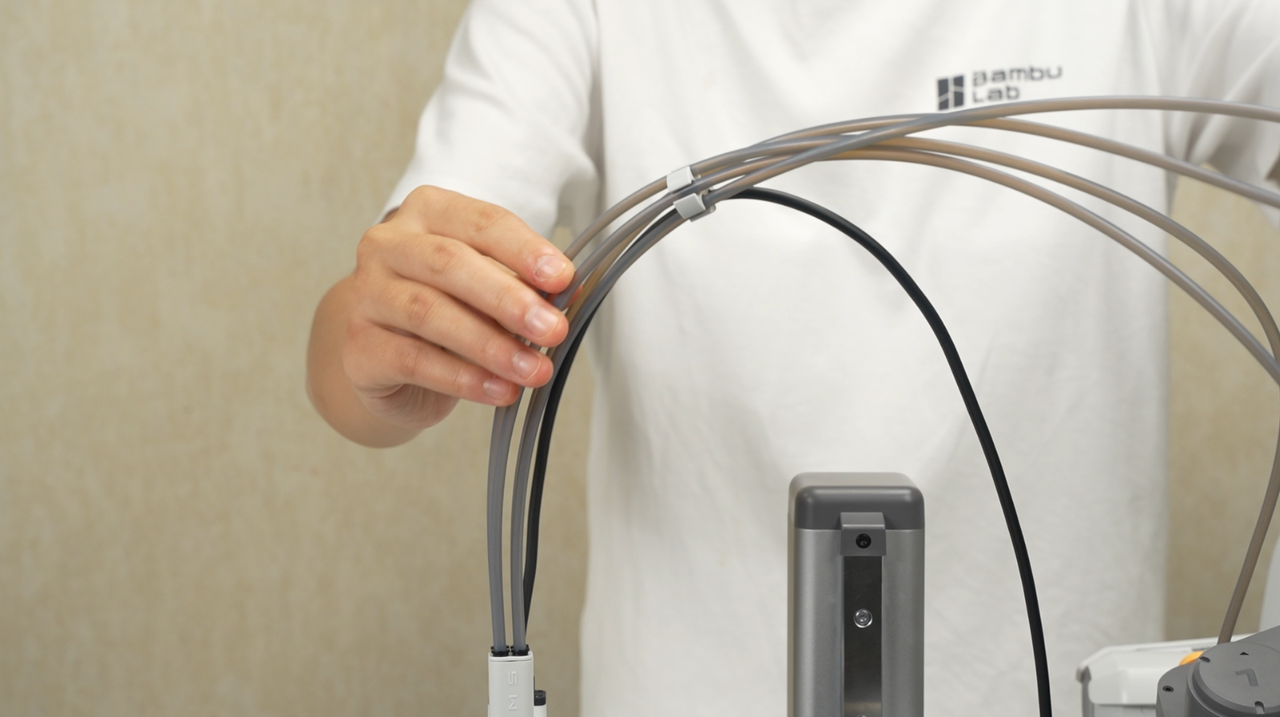
¶ Install the cable organizer
Install the organizer as shown in the diagram. Clip the black cable into the smaller hole and secure the PTFE tubes into the other four larger holes. Please note that the cable organizer should be positioned close to the end of the tool head instead of the AMS lite.
 |
 |
 |
 |
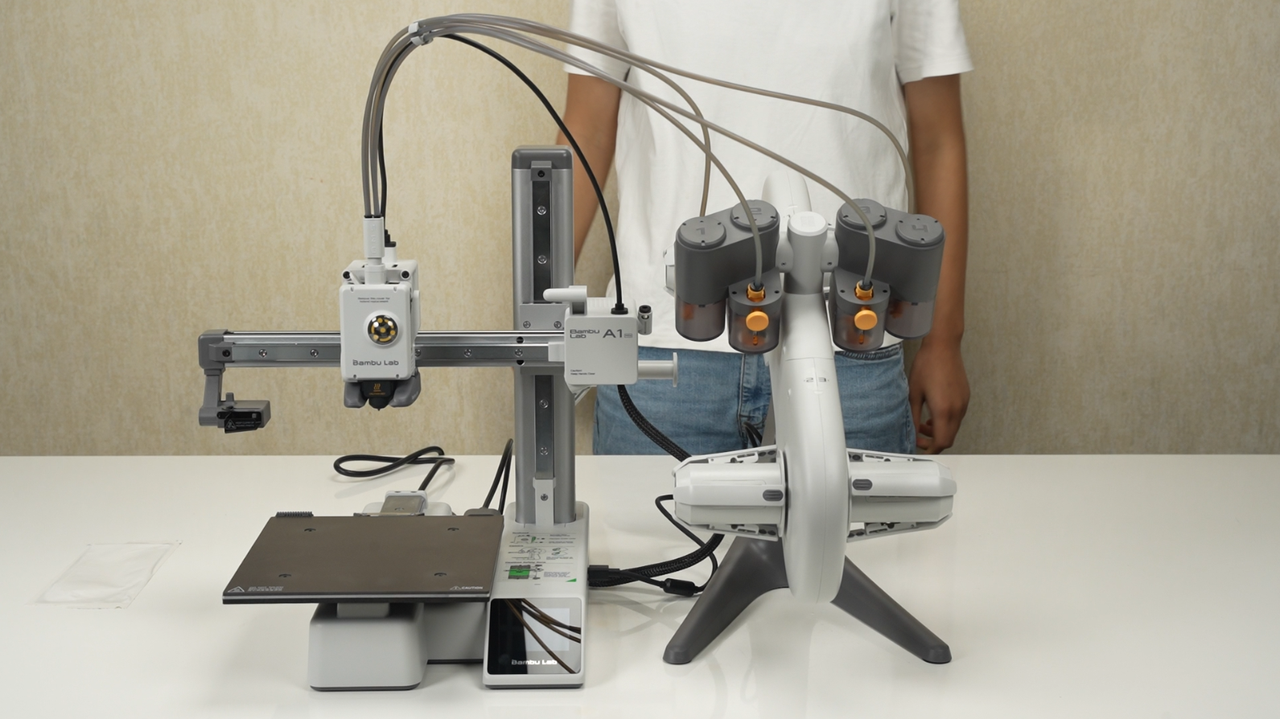
The recommended distance between A1 mini and AMS lite is 50 mm, as shown in the diagram.
 |
 |
¶ Power on the printer and the AMS lite
Plug the AMS lite 4-pin connector into the port on the A1 mini. (either one); Ensure that the 4-pin cable is inserted correctly and aligned with the direction of the protection clip.
.png)
Please make sure to neatly organize the 4-pin cable of AMS lite and the braided cable of A1 mini separately, ensuring they do not cross over each other. This will prevent the two cables from tangling or pulling on each other when printing large-sized parts.
.png)
Kind reminder: The protective foam on your printer may be different from the one shown in the video. Please make sure to remove all the foam (such as the one around the heatbed) before connecting the printer to power.
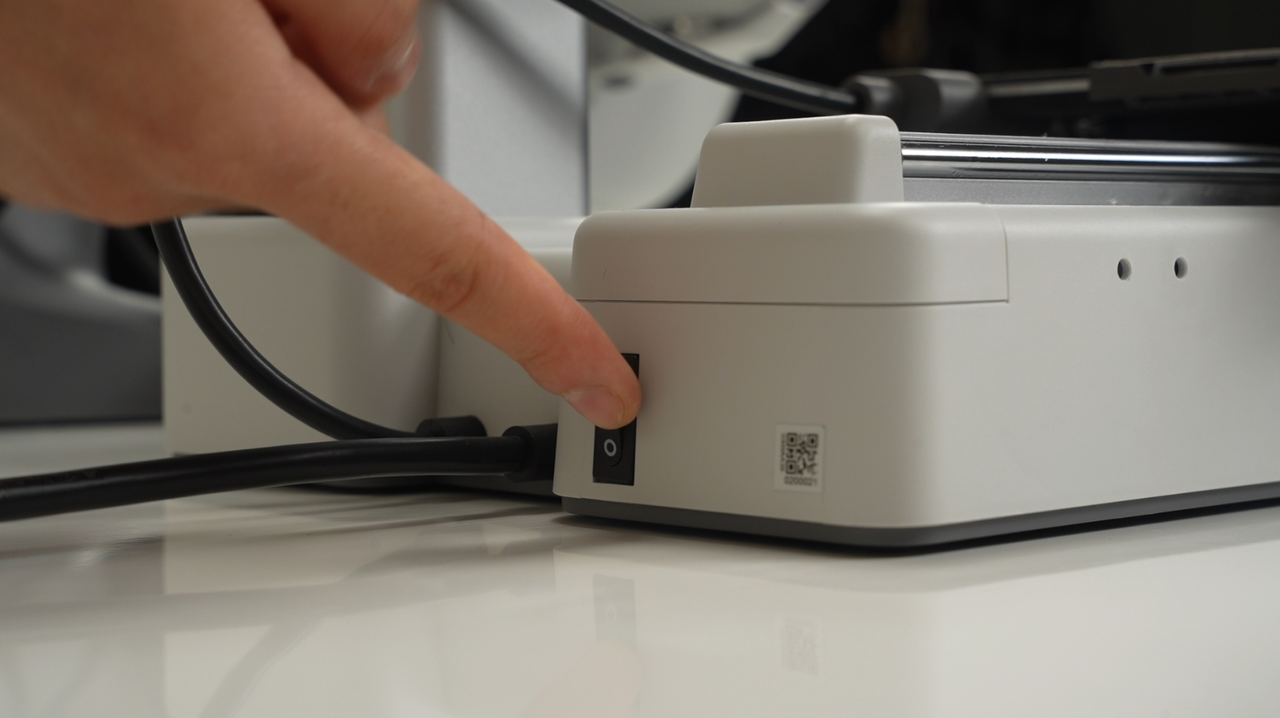
Connect the printer to the power source and switch on the A1 mini on the rear.
 |
 |
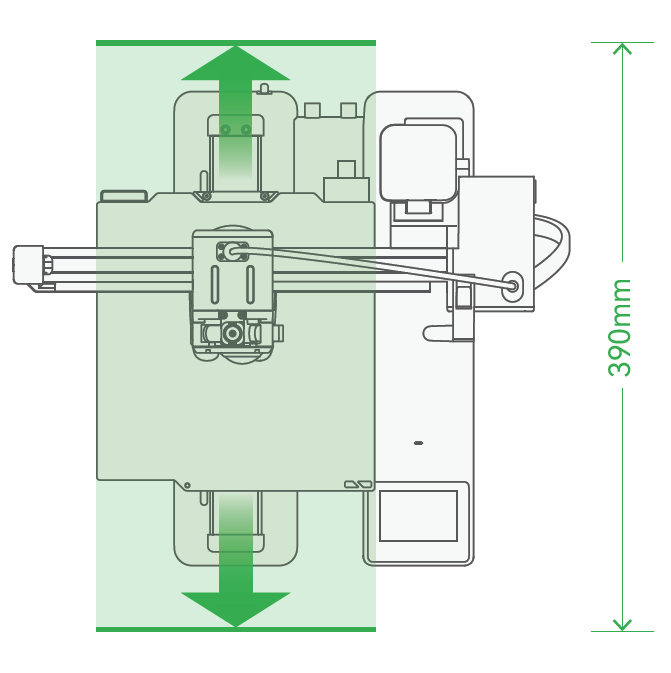
Please leave a safe space for heatbed movement. (as shown in the diagram)
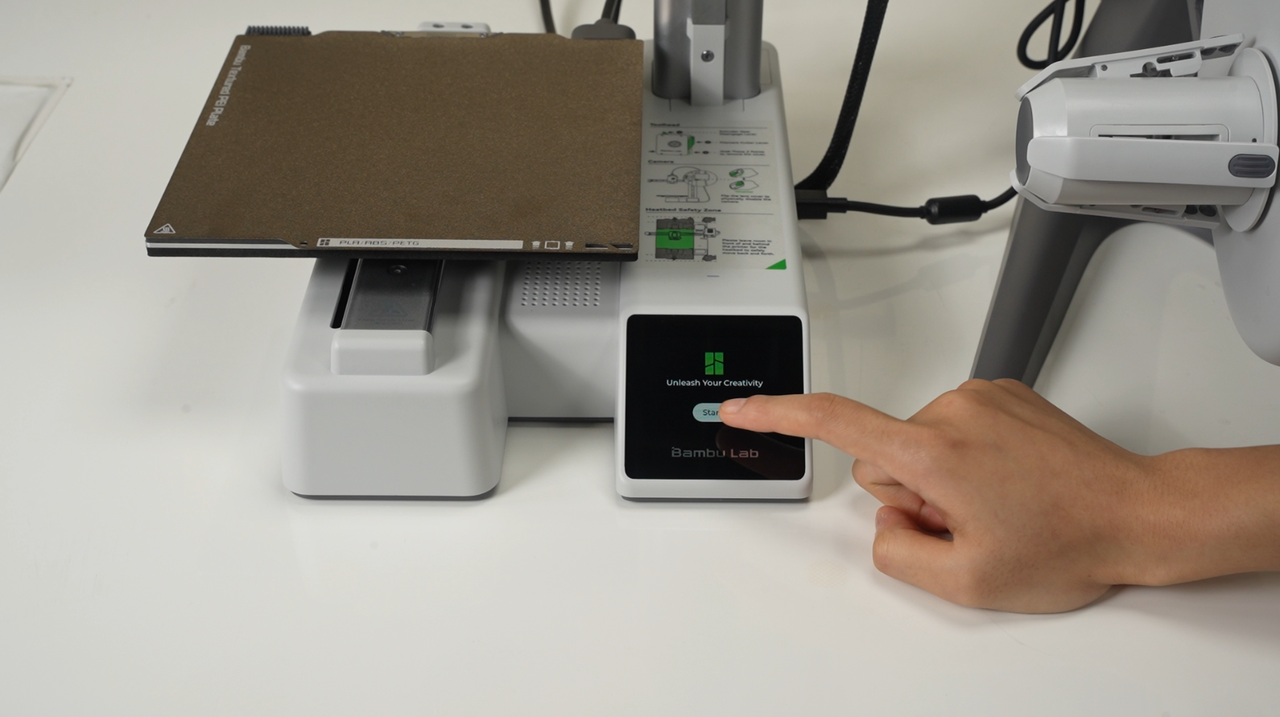
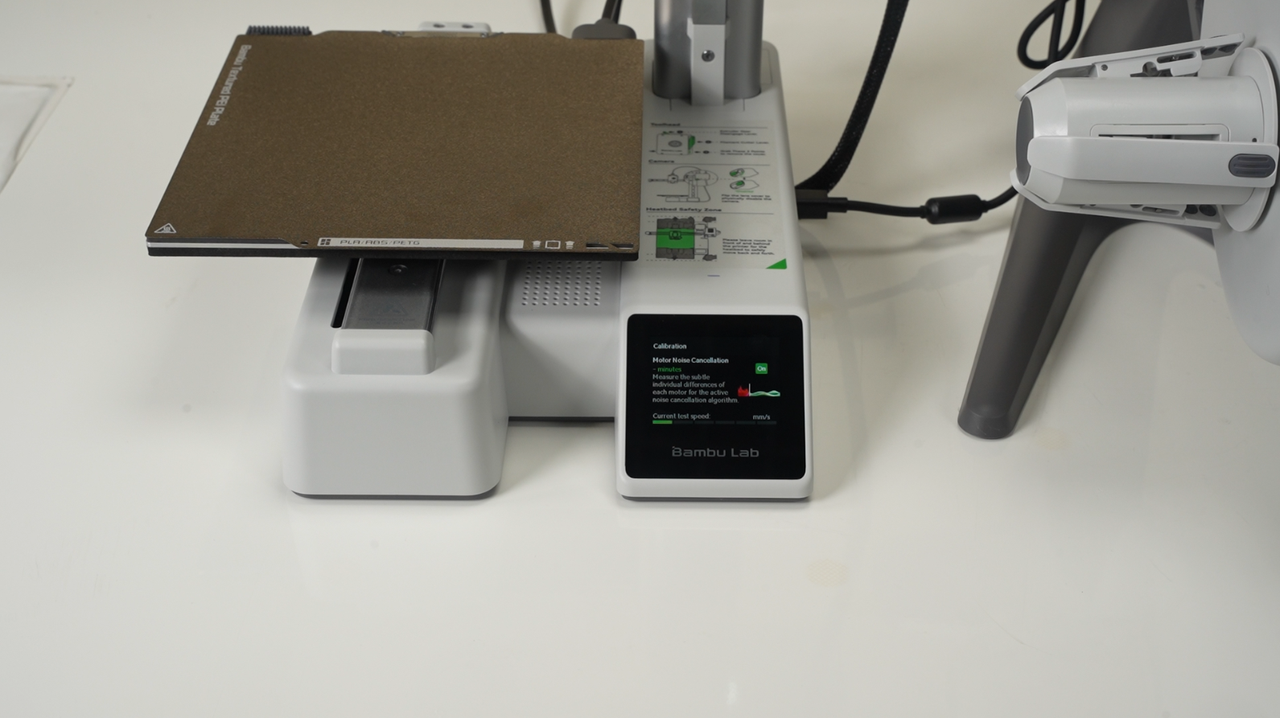
¶ Place the textured PEI plate on the heatbed, and follow the on-screen prompts to complete the initialization and calibration process.
After powering on the printer, please follow the prompts on the screen to complete the initialization and calibration of the printer.
.png) |
.png) |
.png) |
 |
 |
If you skipped the network process and Bambu Handy binding steps during the unboxing process, you can still connect and bind the printer to Bambu Handy in the settings page after the printer calibration is completed.
¶ Appendix: Installing the External Filament Spool Holder and Start the first print with A1 mini
If you want to use an external filament spool holder, you can follow the picture below to install the PTFE tube and the spool holder.
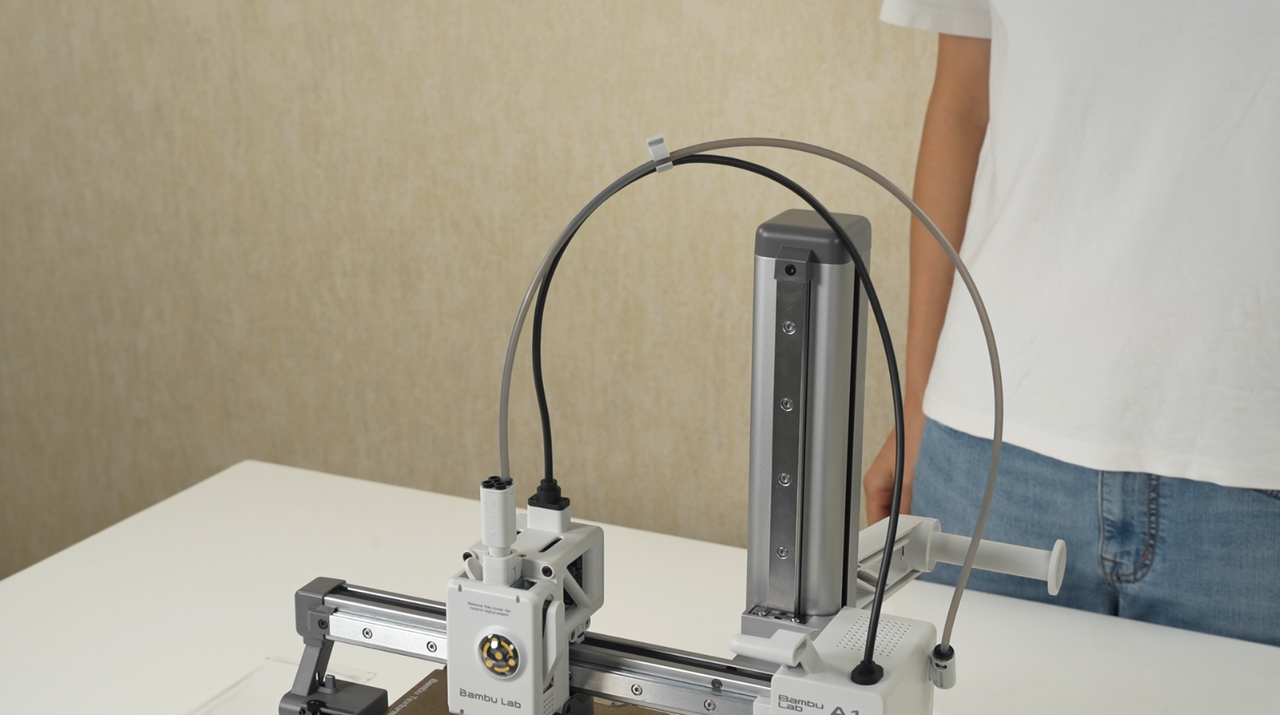 |
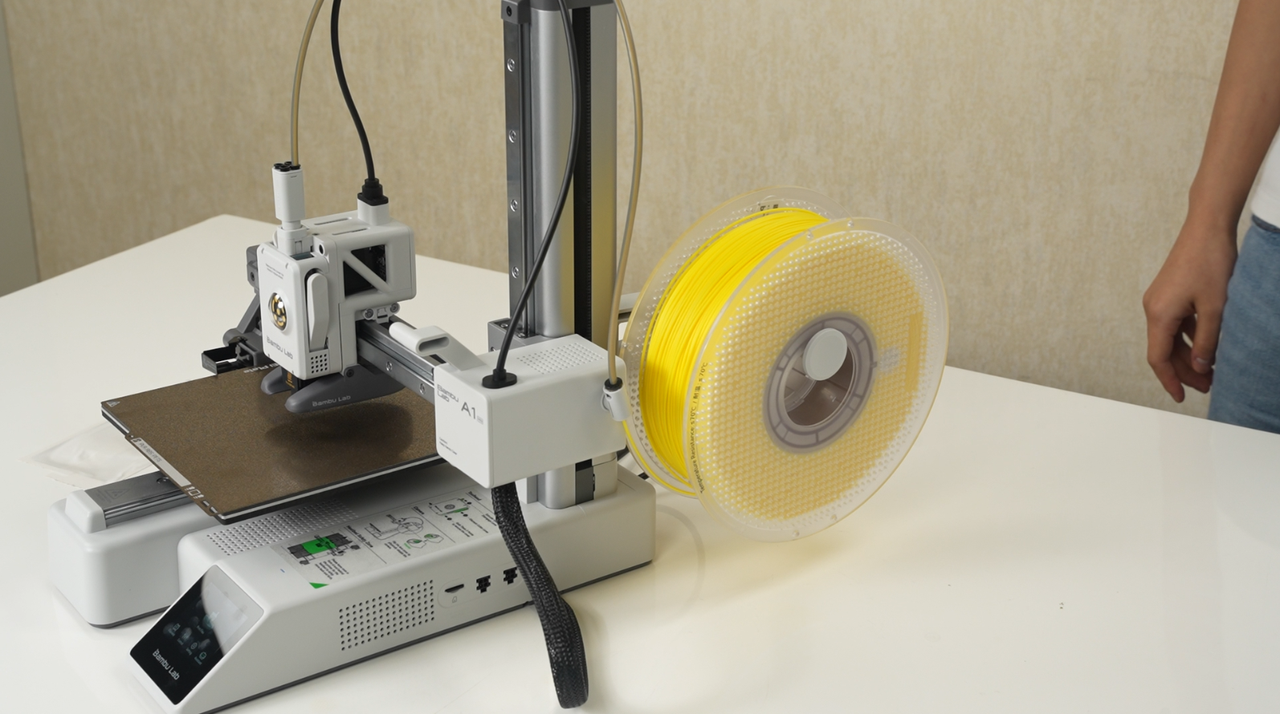 |
Due to limited space, please refer to the following articles for first print tutorial.
¶ End Notes
We hope that the detailed guide we shared with you was helpful and informative.
We want to ensure that you can perform it safely and effectively. If you have any concerns or questions regarding the process described in this article, we encourage you to reach out to our friendly customer service team before starting the operation. Our team is always ready to help you and answer any questions you may have.
Click here to open a new ticket in our Support Page.
We will do our best to respond promptly and provide you with the assistance you need.