The AMS 2 Pro is not only a multi-material system but also features an integrated drying unit to keep your filaments in optimal condition. This guide provides a step-by-step process for setting up and using the AMS 2 Pro for filament drying in the X1/P1 series.
¶ Why Should You Dry the Filament?
- Prevents print imperfections: Moisture in filament causes bubbles, stringing, or poor layer adhesion, leading to flawed prints.
- Improves mechanical strength: Dry filament ensures stronger, more durable prints by reducing voids from water vapor.
- Enhances surface finish: Drying eliminates moisture-related surface defects, producing smoother and more professional-looking prints.
- Reduces clogs and jams: Moisture-free filament prevents nozzle clogs and feeder issues, ensuring consistent extrusion.
¶ What You Need to Have
- X1/P1 series 3D Printer
- AMS 2 Pro
- Filament buffer (or AMS Hub for multiple units). You can buy filament buffer or AMS Hub from the Bambu Lab store if you don't have them.
- 6-pin and 4-pin bus cable (included with AMS 2 Pro
- PTFE tube for filament feeding.
- Bambu Lab Switching Adapter for powering the drying function. You can get it from the Bambu Lab store . If you’re using multiple AMS 2 Pro units and want to dry filament in more than one simultaneously, each unit requires its own switching adapter.
¶ How to Use AMS 2 Pro for Filament Drying
Follow the steps below to use AMS 2 Pro for drying filament in X1/P1 series.
¶ Step 1: Update the Firmware
The filament drying feature for X1/P1 series printers requires a firmware update (released by end of April 2025) to enable the AMS 2 Pro drying functionality. Without this update, the drying feature won't work. To update the firmware for X1 series, check out the X1 firmware update. Check out the P1 series firmware update wiki to learn how to update the P1 3D printer.
Note: Update the printer firmware before connecting the AMS 2 Pro to avoid initialization issues.
¶ Step 2: Connect the AMS 2 Pro to the X1/P1 3D Printer
Use 2 M3 × 21.5 screws to secure the filament buffer to the printer. Connect one end of the 550 mm PTFE tube to the filament outlet of the AMS 2 Pro, and the other end to the left port of the filament buffer. Then, connect one end of the 370 mm PTFE tube to the PTFE coupler on the printer, and the other end to the right port of the filament buffer.

Next, connect the L-shaped end of the 4-pin Bambu Bus cable to the printer, and the other end to the bottom port of the filament buffer. Then, connect one end of the 6-pin Bambu Bus cable to either 6-pin port on the AMS 2 Pro, and the other end to the left port of the filament buffer. If you are using multiple AMS 2 Pro units, replace the filament buffer with an AMS Hub.
¶ Step 3: Connect the Switching Power Adapter
Plug the Switching Adapter into the AMS 2 Pro’s power connector. Below is how you connect it.
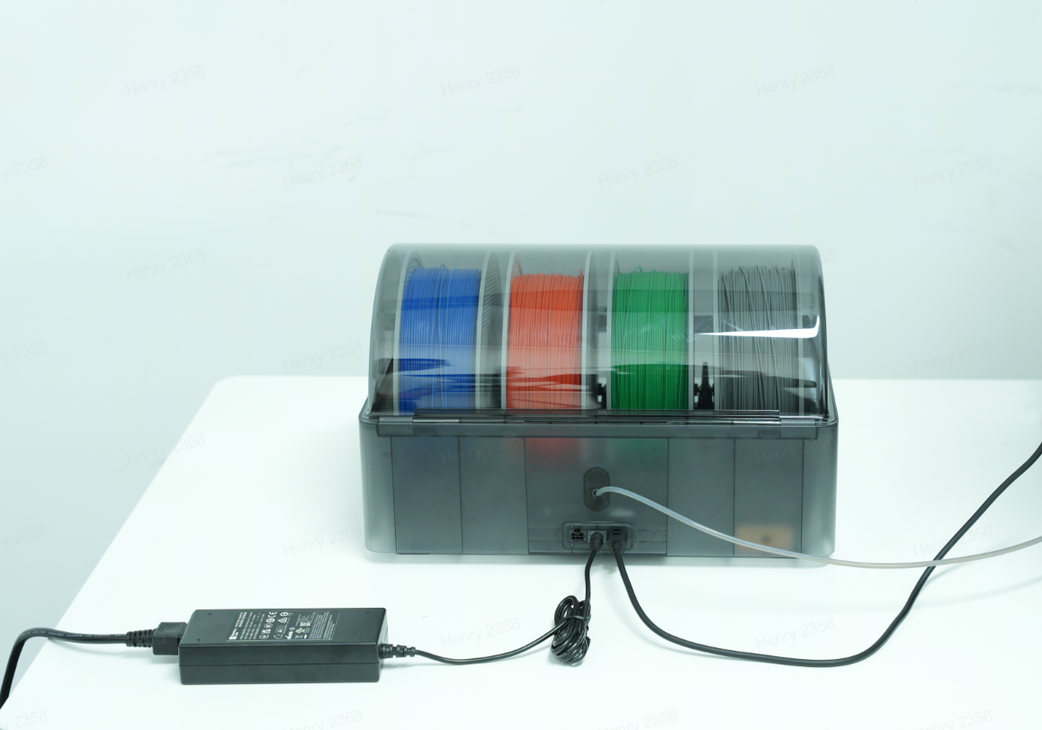
If you don't use the switching power cable and try drying, you will see a notification indicating insufficient power, and you will be prompted to plug it in. The power icon in the lower right corner of the page is grayed out too. But once you connect it properly, it turns green instead.
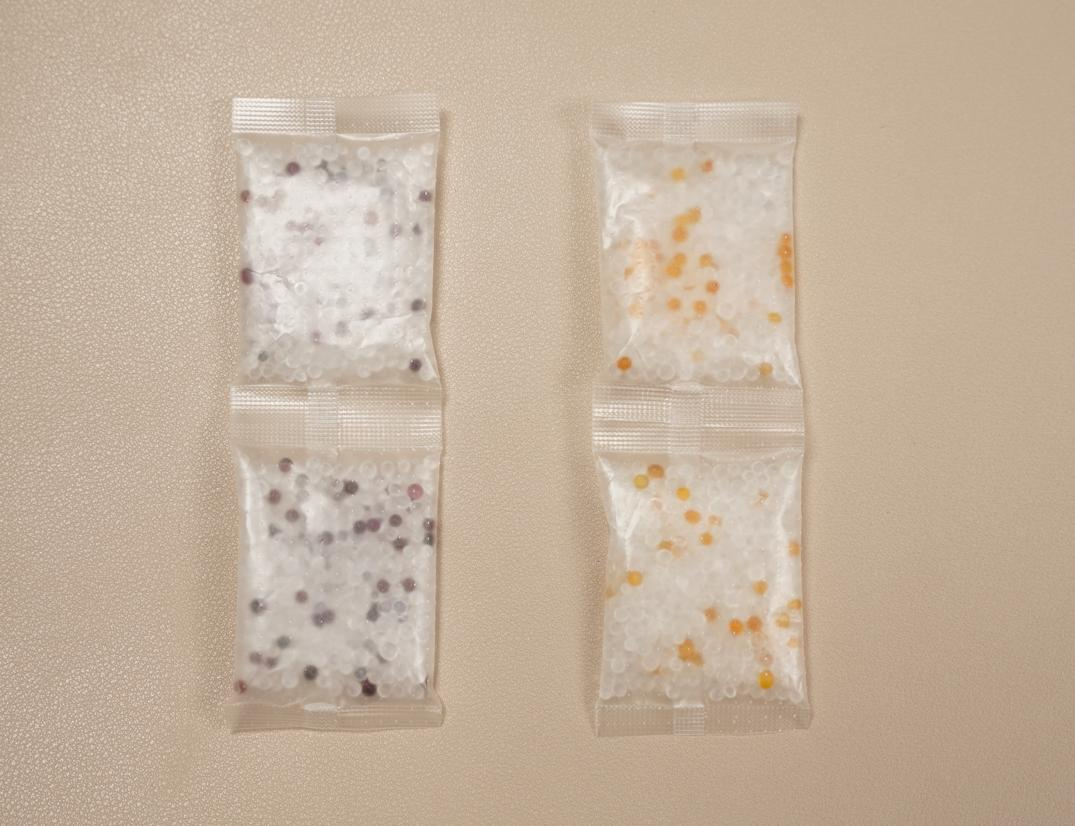
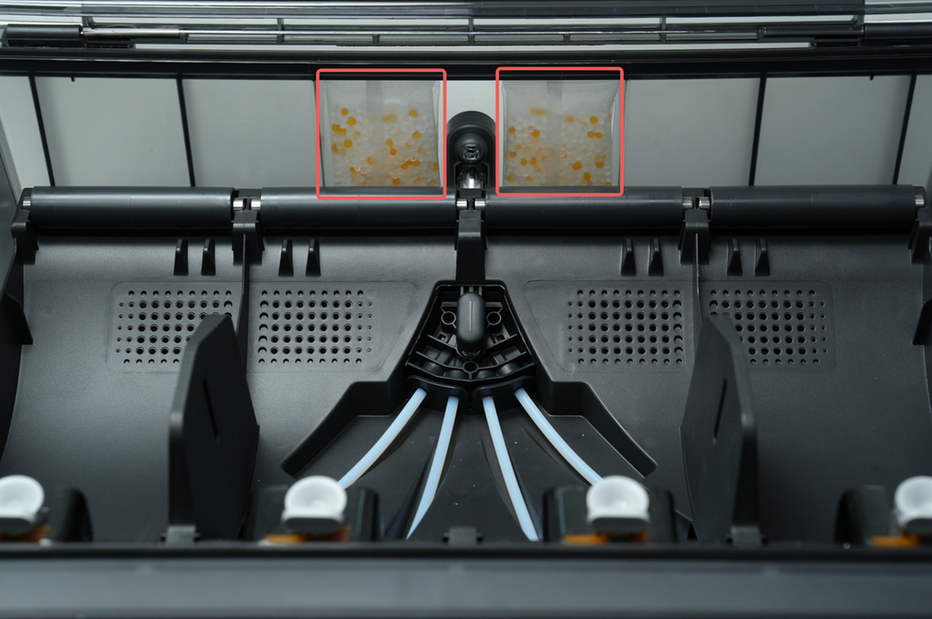
¶ Step 4: Place the Desiccant and Filament to the AMS 2 Pro
The AMS 2 Pro uses color-changing silica gel desiccant (yellow to purple when saturated). Place them at the middle-back section of the AMS 2 Pro, as shown below.
 |
 |
Next, place a filament spools on top of the AMS 2 Pro.
Note: Don't load the filament during drying. If you do, you will receive a notification prompting you to remove it when you attempt to dry.
If the filament is already loaded, you will see a notification that there is a filament in AMS outlet. So you have to make sure that you have unloaded.

Close the top cover to ensure an airtight seal for drying, then turn on the 3D printer.
¶ Step 5: Initiate Filament Drying
¶ Initiating Drying in X1C
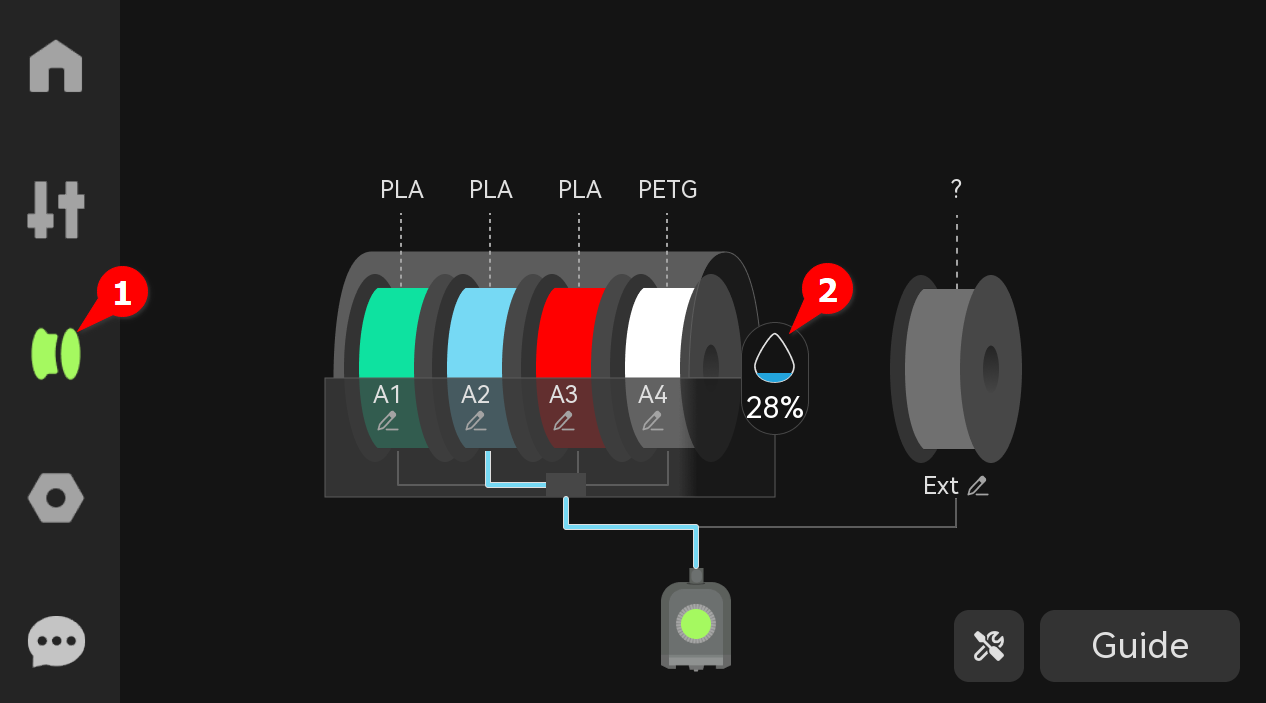
If you are using X1C, on the printer’s touchscreen, navigate to the Filament section, then click the AMS humidity icon.
This will open the Drying and Humidity page.
Alternatively, you can click on the settings icon on the bottom right section, then select AMS Drying.
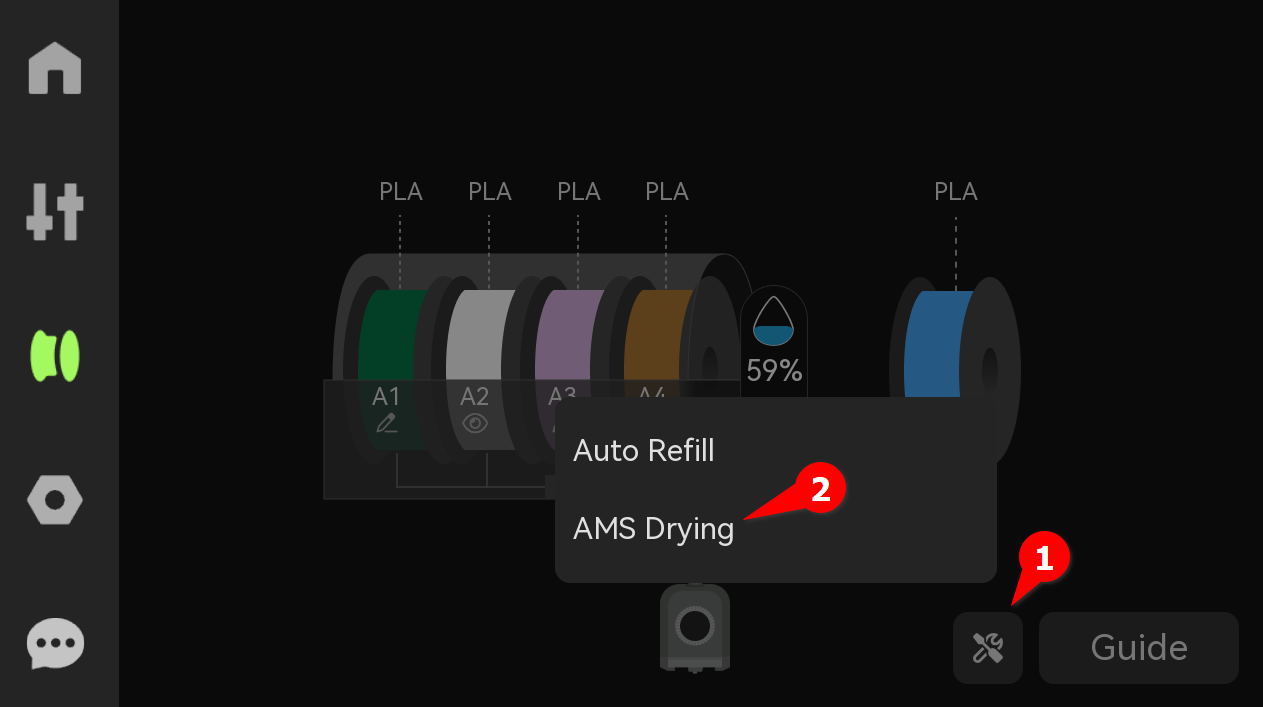
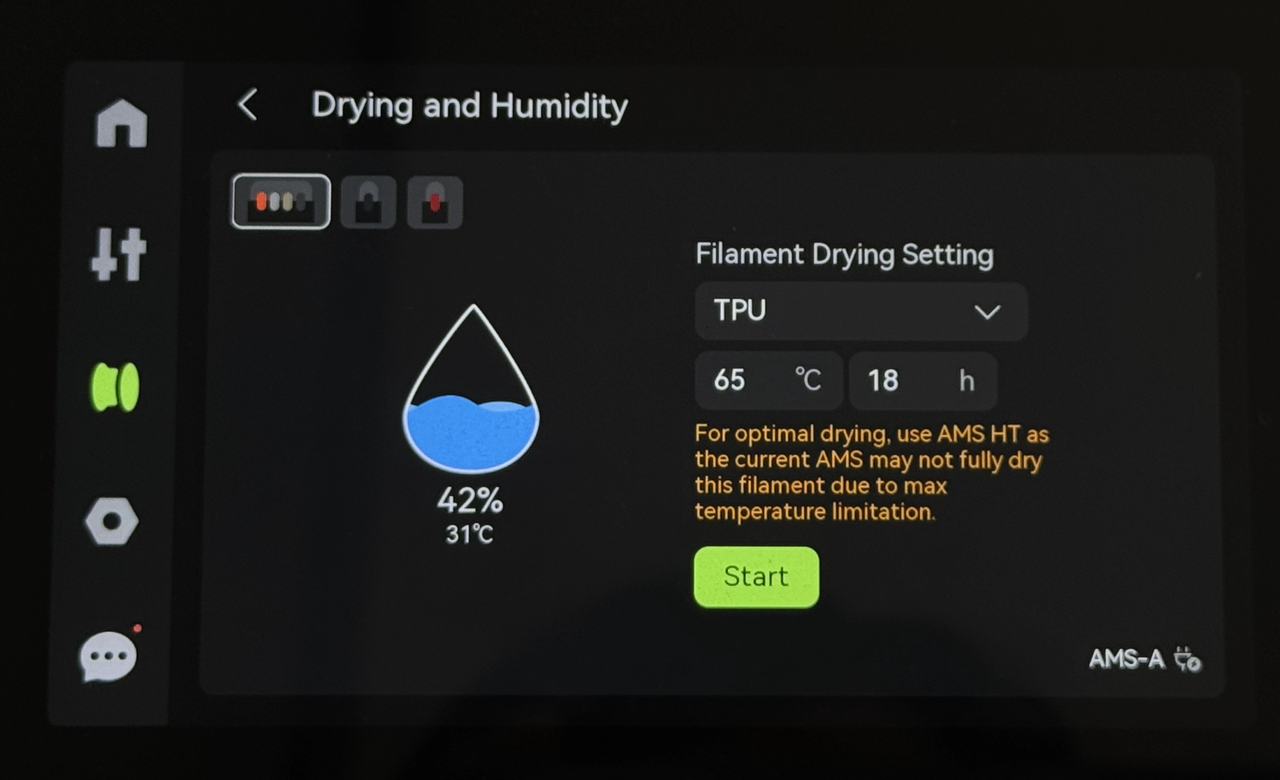
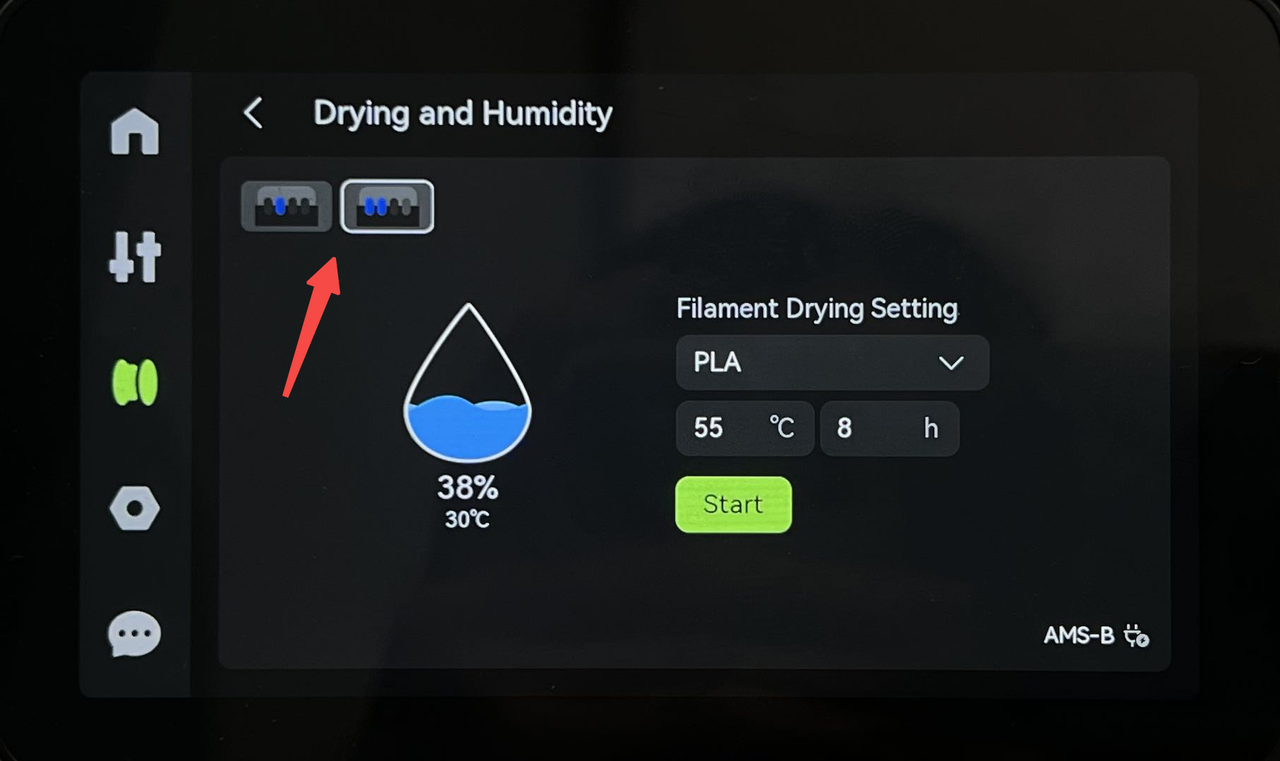
Select the filament slot to dry. For Bambu filaments, RFID auto-configures drying settings (temperature, time). You can also set the temperature (max 65°C) and duration manually, based on the filament type (e.g., PLA: 45–55°C, 6-8 hours).
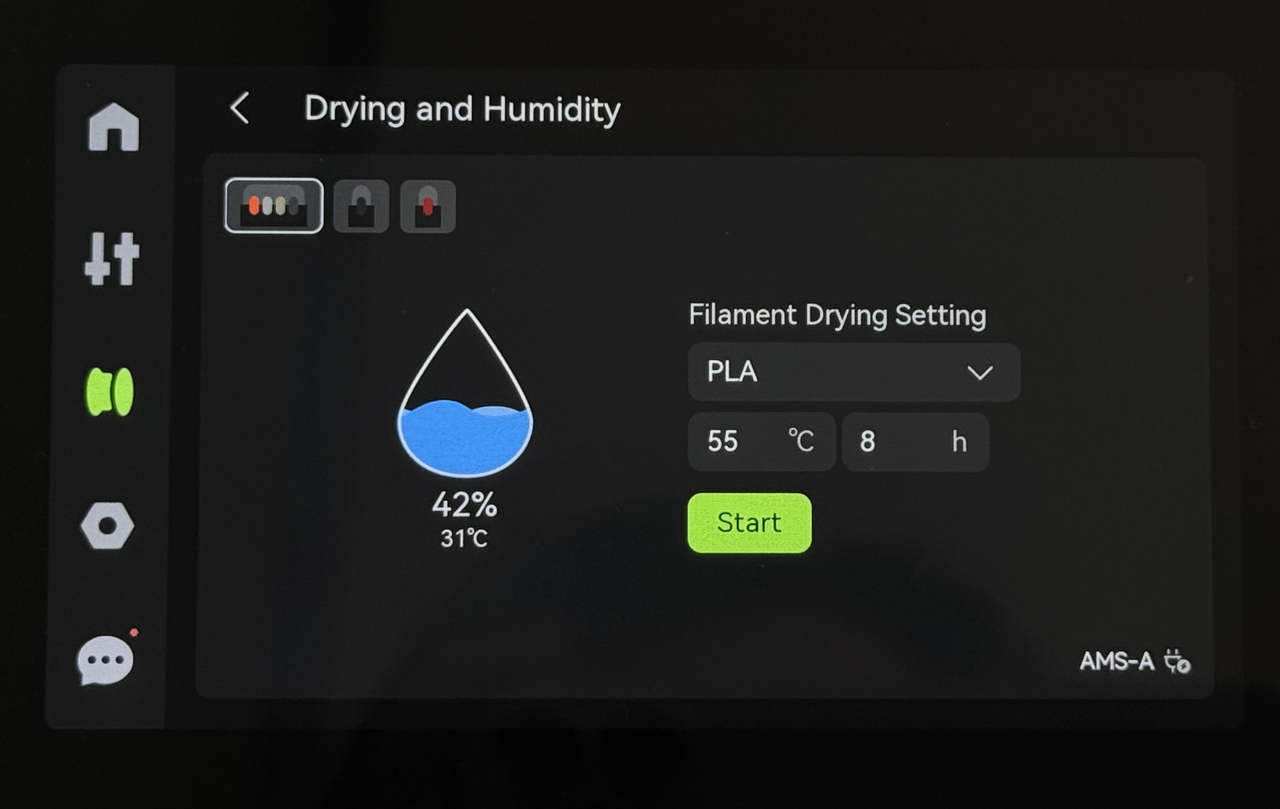
Click Start to start the drying process.
¶ Initiating Drying in P1 series
If you are using P1 series, once you connect the AMS, you will see a notification indicating that AMS is available.
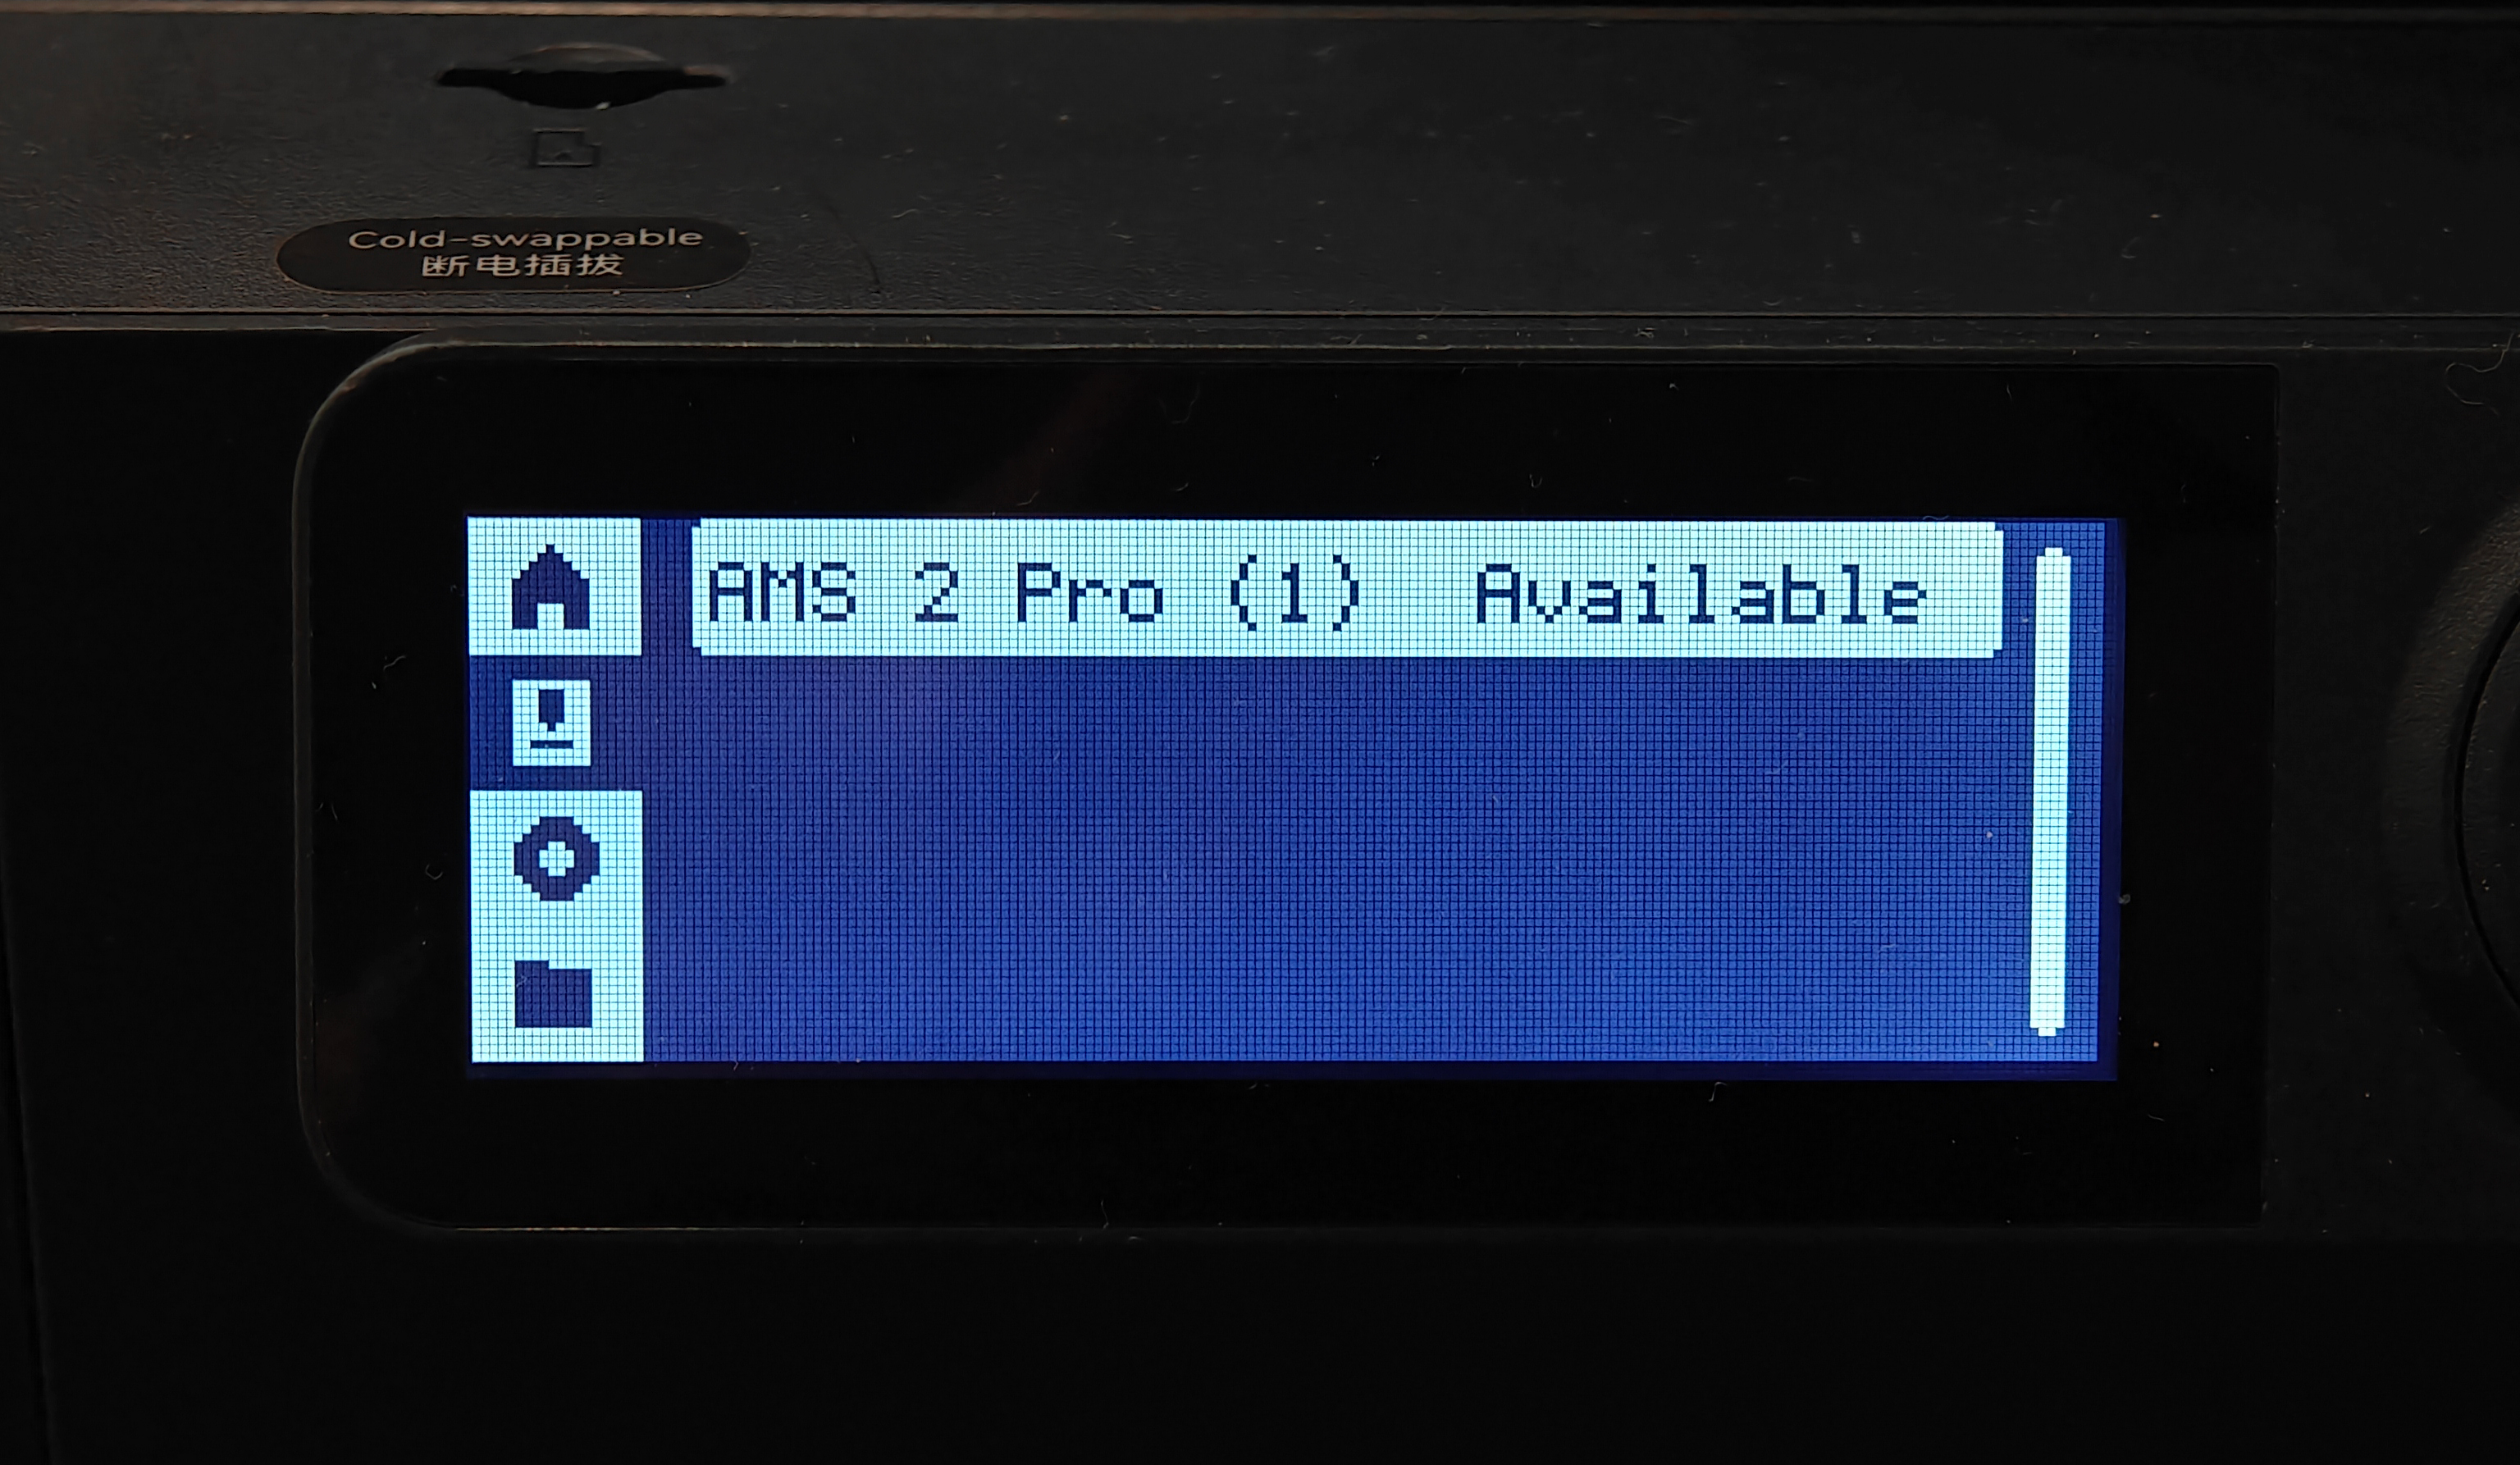
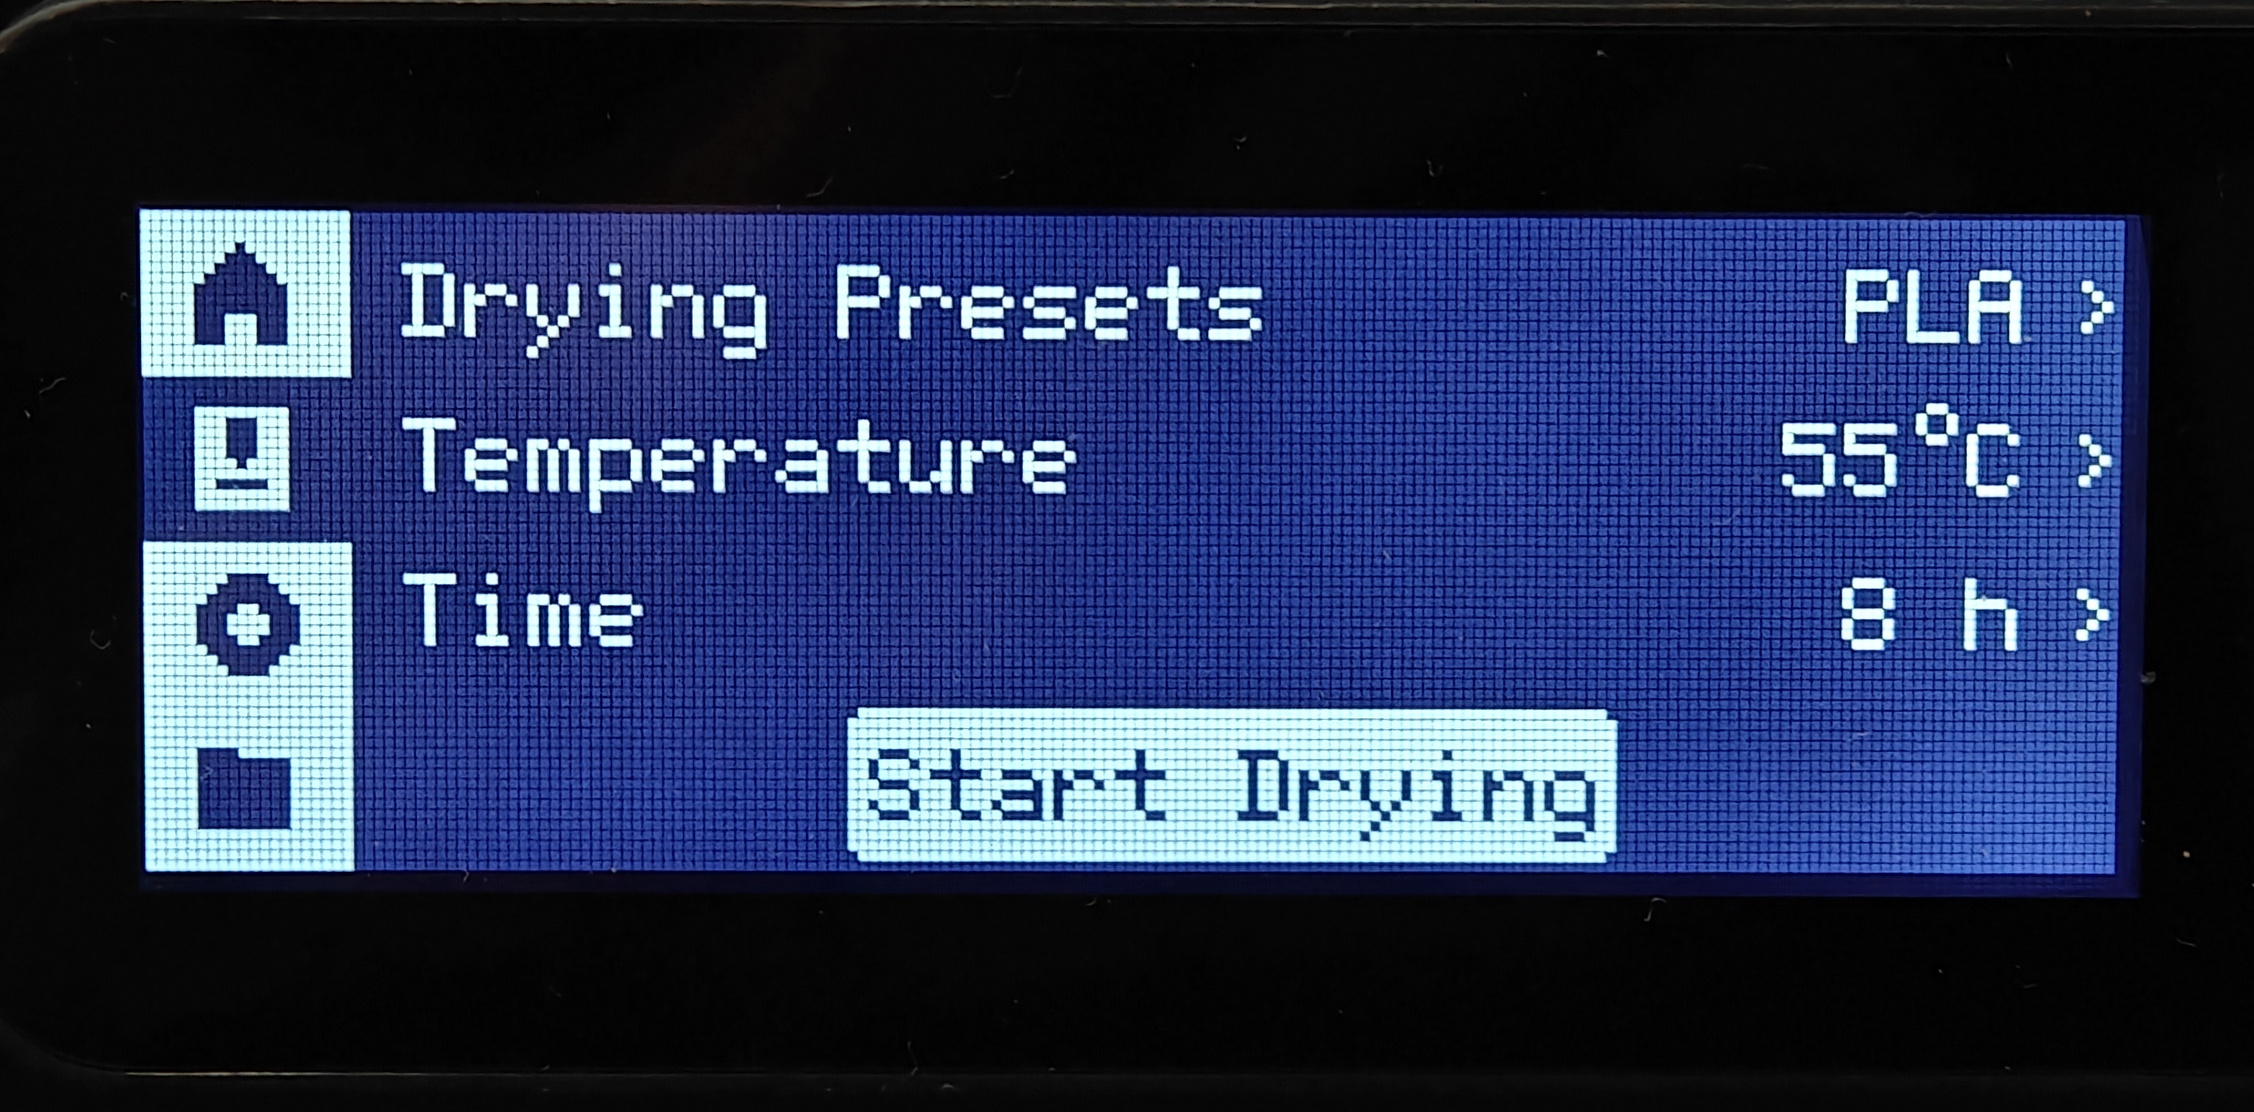
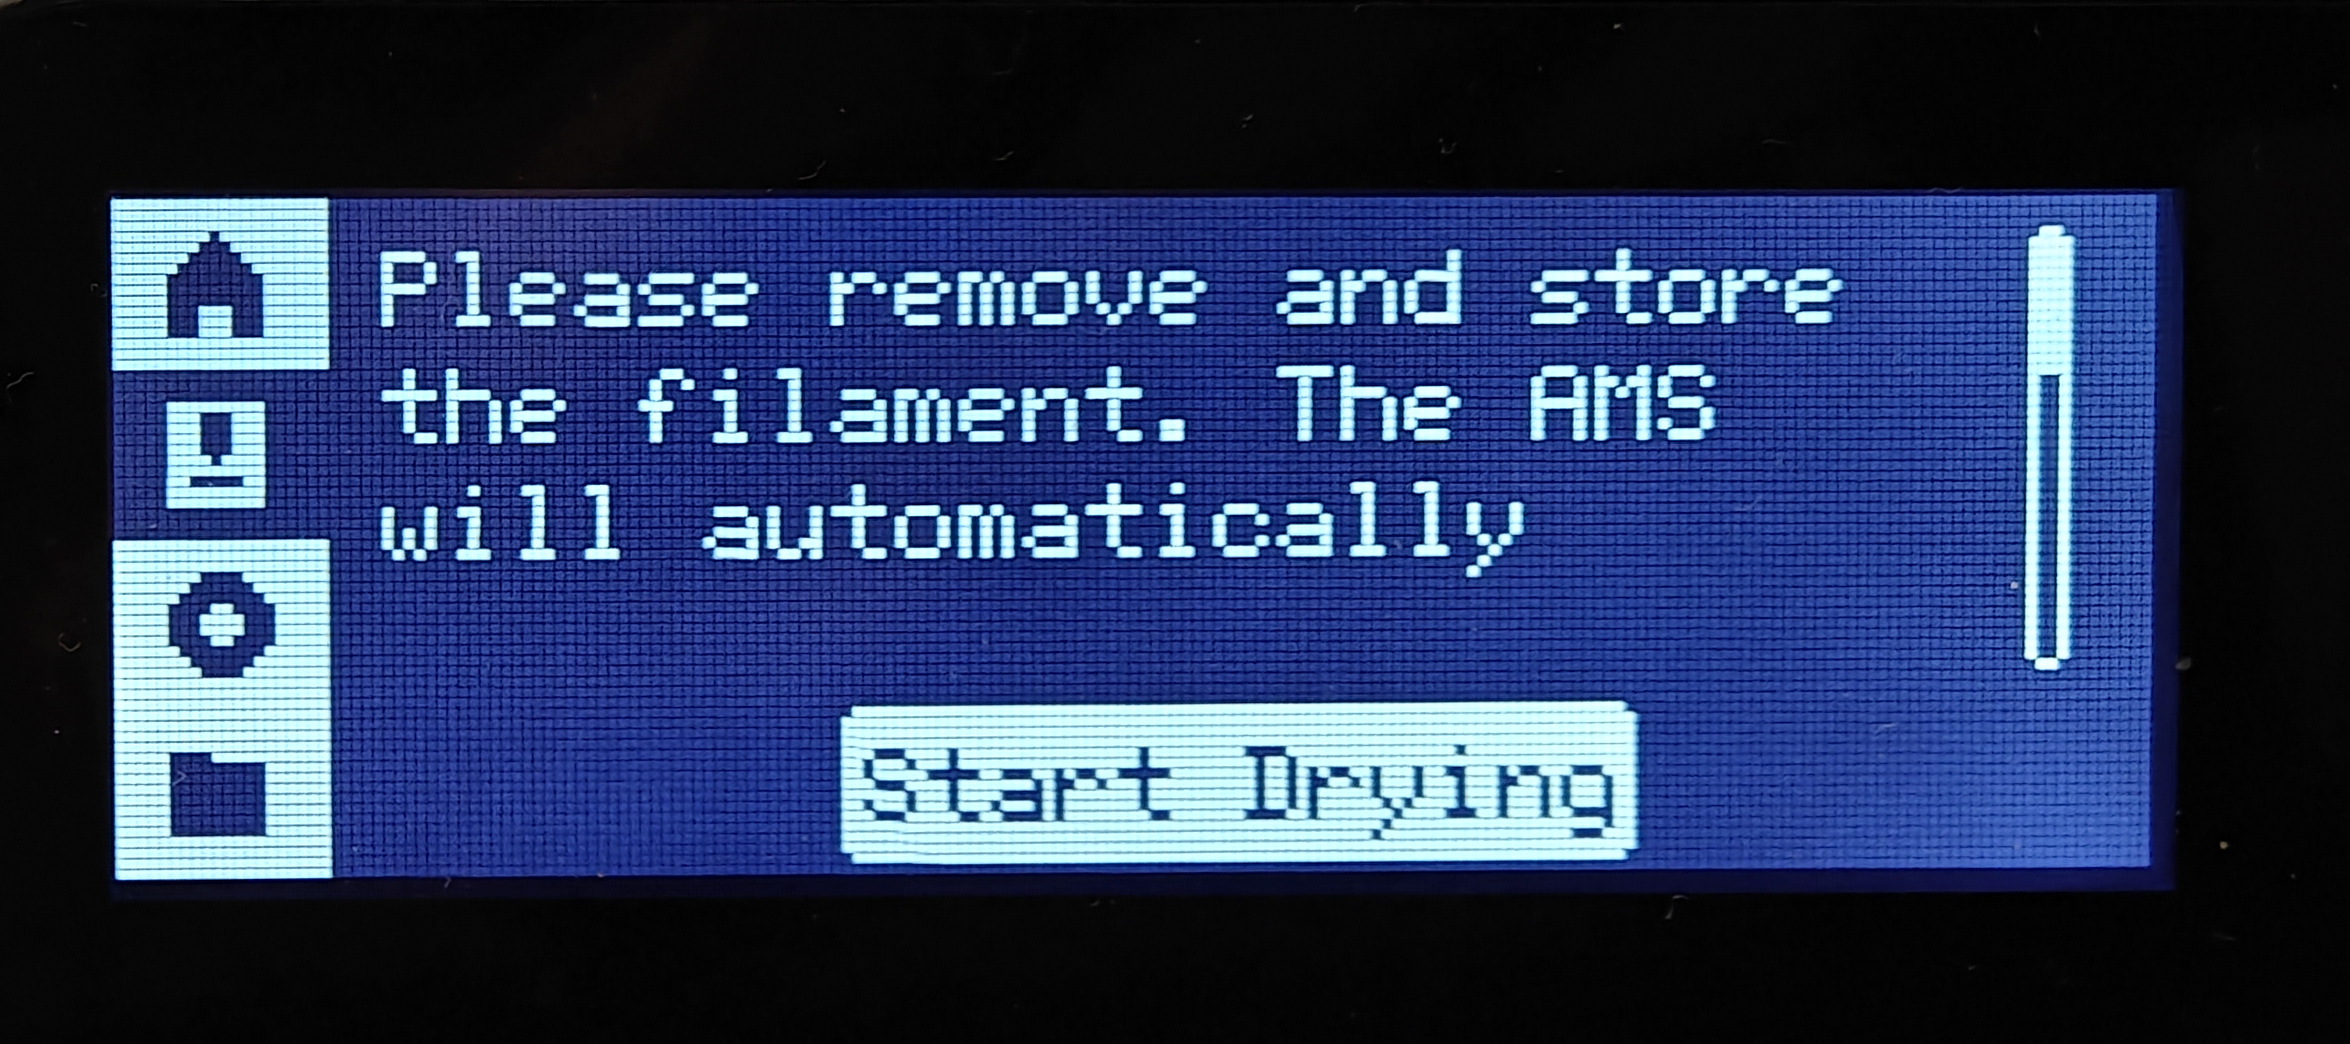
Click on it, then after accessing the drying and humidity page, you will see an option to choose the filament, set drying temperature, and time. Then click Start Drying.
If the filament was already loaded, you will see a notification that you need to remove the filament and the AMS will automatically start drying.
Note: Ensure the top cover of the AMS 2 Pro is closed before drying
The AMS 2 Pro features a built-in heating and drying module located beneath the central frame, capable of reaching a maximum drying temperature of 65 °C, which can effectively dry the majority of filaments. However, some filaments might require a temperature higher than 65 °C, and drying using the AMS it might not be completely dried. You will see a notification suggesting that you use the AMS HT instead.
¶ Step 6: Monitoring the Humidity
You can monitor real-time humidity and temperature by clicking in the upper left corner. If you have connected several AMSs, you can also use that option to switch between each AMS. You will be able to view the humidity, temperature, and remaining time.
 |
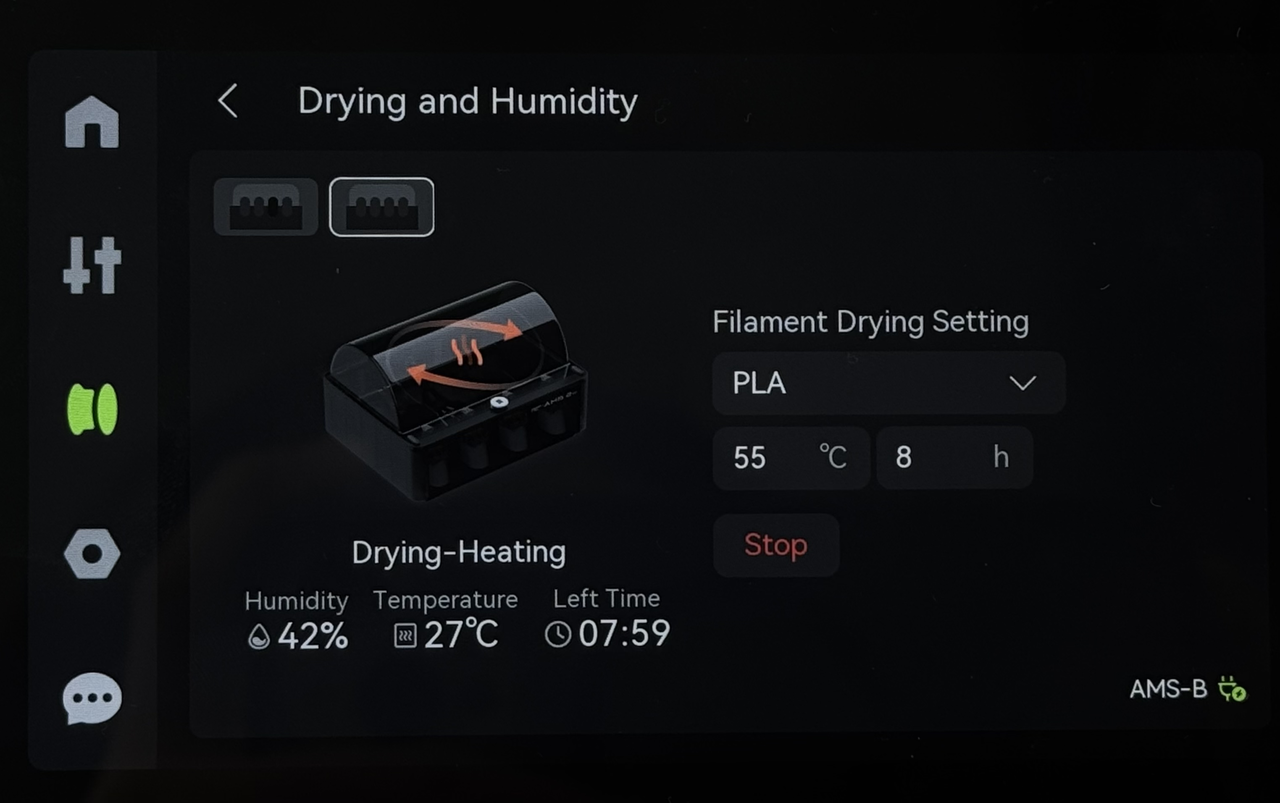 |
During drying, the AMS 2 Pro expels moisture through the vents at the bottom. Ensure that they are not blocked for optimal drying performance.

¶ Post-Drying Activities
¶ Step 1: Allow the AMS 2 Pro to Cool Down
Allow it to cool for around 5–10 minutes, especially if high temperatures were used.
¶ Step 2: Remove And Inspect the Filament
Remove the spool from the AMS and check the filament for dryness. Ensure the filament feels smooth and shows no signs of moisture. Also, look for deformities, flattening, or gear marks that may have been caused by the feeder.
If the filament appears dry and intact, it’s ready for printing or storage. Load it and start 3D printing. If you intend to store it instead, ensure that you use airtight containers with desiccants to prevent reabsorption of moisture.
¶ Troubleshooting
- Drying feature not activating: The AMS 2 Pro drying feature requires firmware updates to enable control on X1/P1 series printers. Verify that the printer firmware is updated to the latest version.
- Insufficient power for drying notification: The X1/P1 series printers cannot supply enough power for the AMS 2 Pro’s drying modules, and an external power adapter is required. Ensure that you connect the official Bambu Lab Switching Adapter. Using a third-party power adapter may not enable the drying function properly. Moreover, hardware damage caused by a third-party power adapter is not covered by the product warranty.
- Filament deformed or jammed in the nozzle: Printing and drying at the same time can cause the nozzle to jam or deformation in the filament. You should avoid drying filament while 3D printing.
- Filament not drying completely: Verify the filament type and drying settings to ensure optimal results. For high-temperature filaments, consider using an AMS HT, as the AMS 2 Pro’s 65°C limit may be insufficient. Alternatively, you can also use the heatbead to do so. Check out the wiki on how to dry filament on X1 and P1 series heatbead to learn more.
¶ End Notes
We hope our guide was helpful. If you have any questions or concerns about the process, please contact our customer service team. We're here to assist you.
Click here to open a new ticket in our Support Page.
We will do our best to respond promptly and provide you with the assistance you need.