¶ Fundamental Rules and Principles
(1) Lower speeds with lower temperatures, higher speeds with high temperatures.
When you increase the print speed, more filament needs to be melted simultaneously, requiring an increase in nozzle temperature to provide additional heat. For example, when turning on the Sport Mode or Ludicrous Mode, the print speed is increased, and the nozzle temperature needs to be raised to avoid insufficient filament melting causing a lack of materials; On the contrary, when decreasing the print speed to a very low level, the filament will stay in the nozzle for a longer duration, causing the filament to melt more fully, potentially leading to issues such as stringing and leakage. However, there are upper limits for both the printer's print speed and the working temperature suitable for each filament type. Therefore, the increase in nozzle temperature and print speed is only applicable within a specific range.
(2) The higher the print speed, the shorter it takes to print, but the lower the print quality - the surface is not smooth and detailed enough.
The higher the printing speed, the higher the pressure of the filament melt from the nozzle. As the speed increases, the surface becomes more prone to cracking and exhibits abnormal fluidity. Additionally, insufficient heating of the filament can result in poor melt fluidity and unsatisfactory surface smoothness. Therefore, printing at high speeds tends to lead to relatively rough and less delicate surfaces, exhibits low gloss, and may even lose some fine details. On the contrary, printing at low speeds, especially when printing at low speeds together with high nozzle temperatures, usually leads to smoother and more delicate print surfaces which show higher gloss and clearer details
(3) The lower the layer height, the less obvious the layer lines and the higher the print quality, but the longer the printing time.
(4) Within a certain range, the more walls and the higher the infill density, the stronger the prints, but the higher the risk of warping and the longer the printing time.
(5) The larger the size of the nozzle, the lower the risk of clogging when printing filaments containing particles such as CF, GF, etc, and the shorter time when printing large-size models. After increasing the nozzle temperature, you can set a higher volumetric speed for larger nozzles( 0.6 and 0.8 mm nozzles), which further reduces the printing time. Nevertheless, it is important to note that this may result in lower print quality.
(6) The larger the size and the higher the infill density of the prints, the higher the risk of warping. High-temperature filaments such as ABS, ASA, PC, PA, PA-CF, etc. are prones to warp more, especially when the chamber temperature is low. To reduce or avoid warping, you can consider the following methods:
- A. The model itself: Avoid printing large models with a large surface area in direct contact with the heatbed. If it is necessary to print a large model, consider dividing it into smaller parts or rotating the model at an angle. Tilting the larger part at an approximate 45° angle in the Z-direction can be beneficial. It is important to note that the interlayer strength of a model is usually significantly lower than the strength vertical to the interlayer, meaning that the strength in the Z direction is usually significantly lower than the strength in the X and Y directions. Therefore, if you require a high load-bearing capacity for a model, avoid having the layers bear the main load. When arranging models, ensure that the interlayer does not become the primary load-bearing area. For example, if you want to print a large structural part that needs to bear a great load with PA-CF, you can refer to the following picture for arranging. (The simple model used here is only used out of convenience of illustration. In the actual printing scenarios, the contact area between it and the build plate is very small and needs to be optimized, such as cutting out a small plane to increase the area of the first layer.)
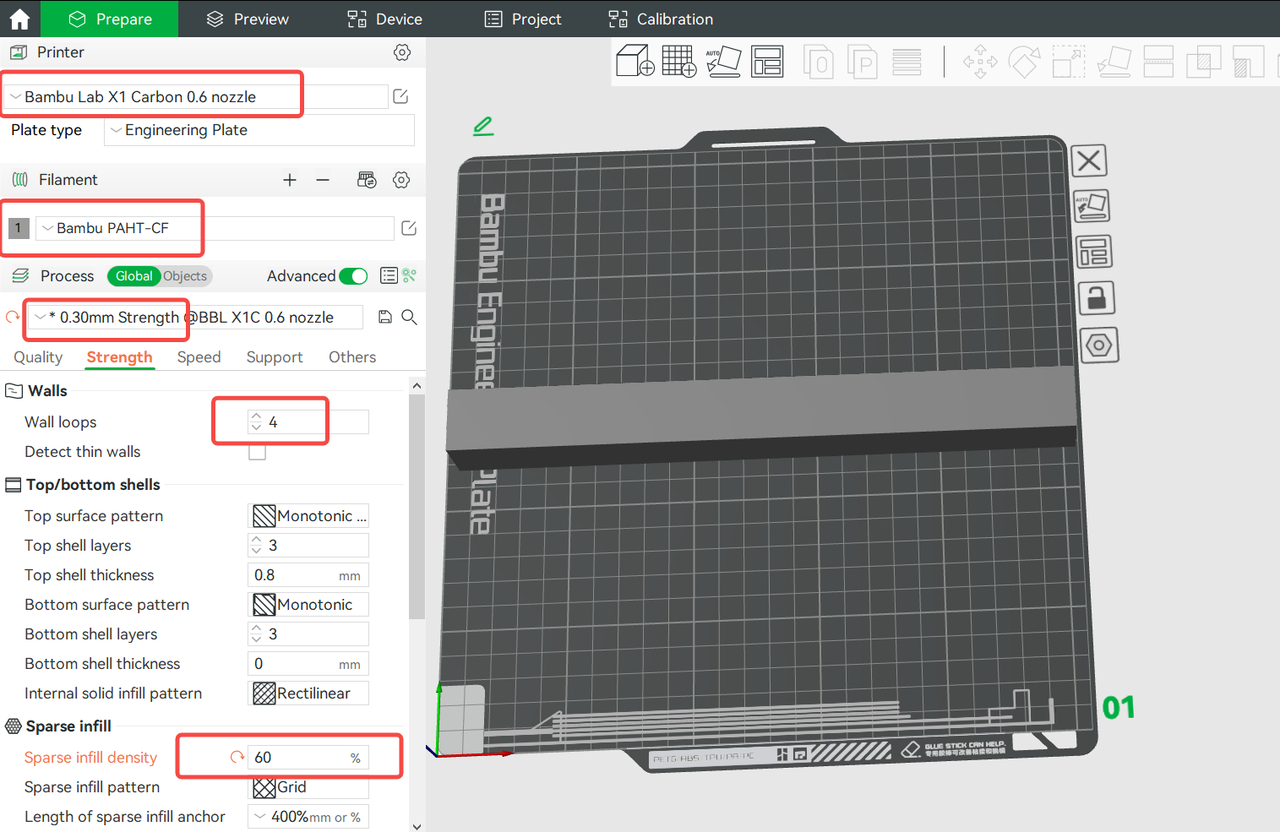
Arranging the models as shown in Picture 1 results in a large contact area between the model and the heatbed, which means that a significant portion of the model lies in the X and Y directions. This arrangement provides strength advantages, but it also increases the risk of warping — Not recommended.
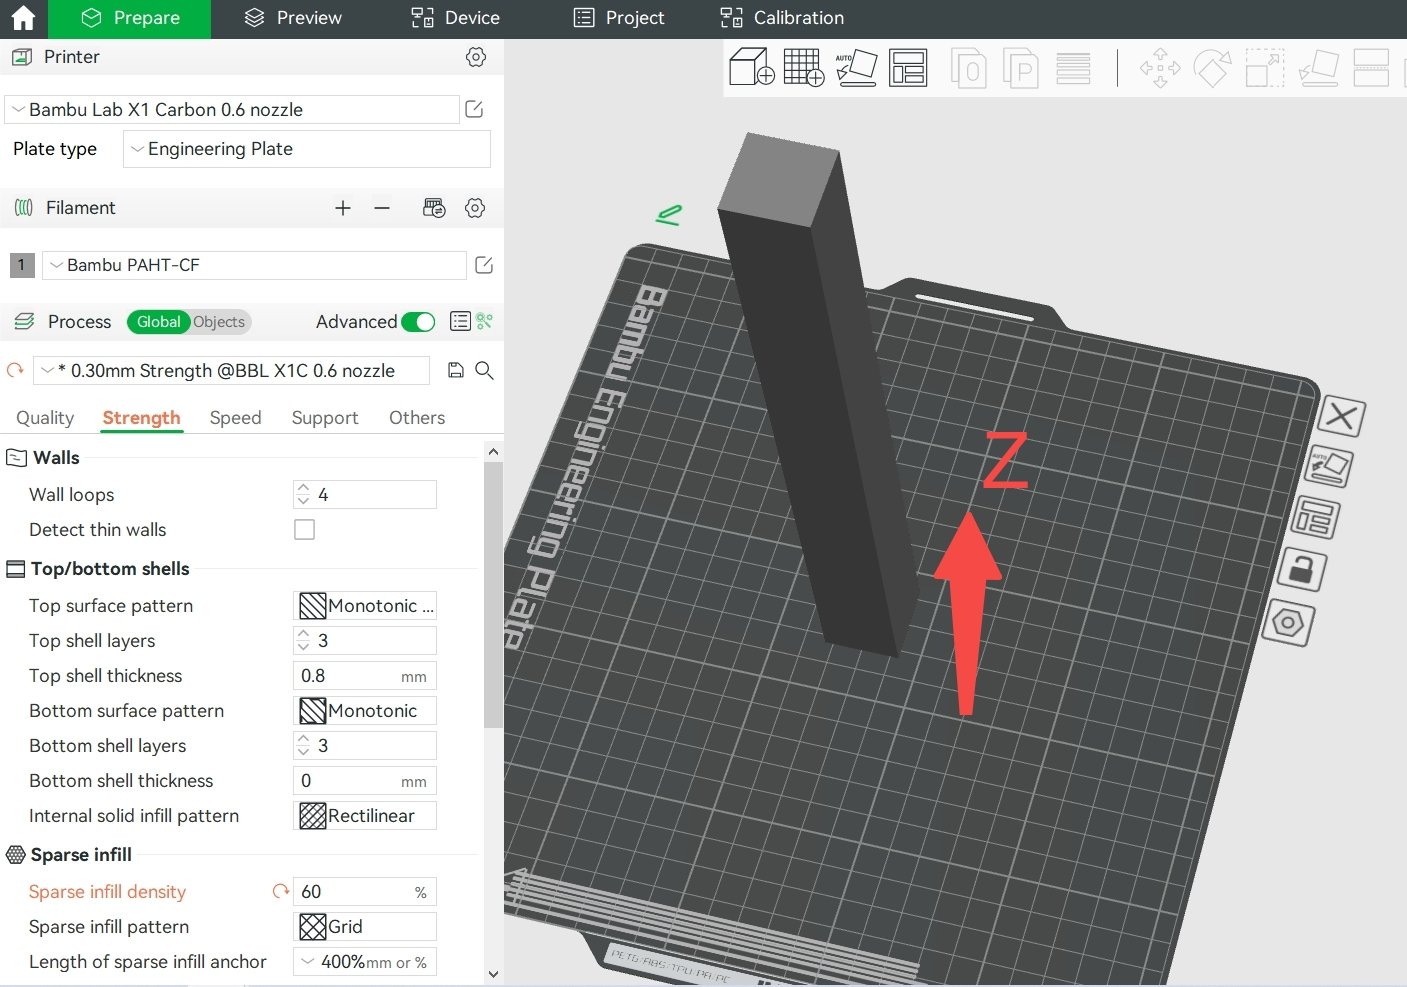
Arranging the model as shown in Picture 2 results in a very small contact area between the model and the heatbed, meaning that the percentage in the X and Y directions is minimal. This arrangement helps to avoid warping, but it also has the disadvantage of a significantly larger percentage in the interlayer (Z direction), resulting in lower strength for the model — Not recommended.
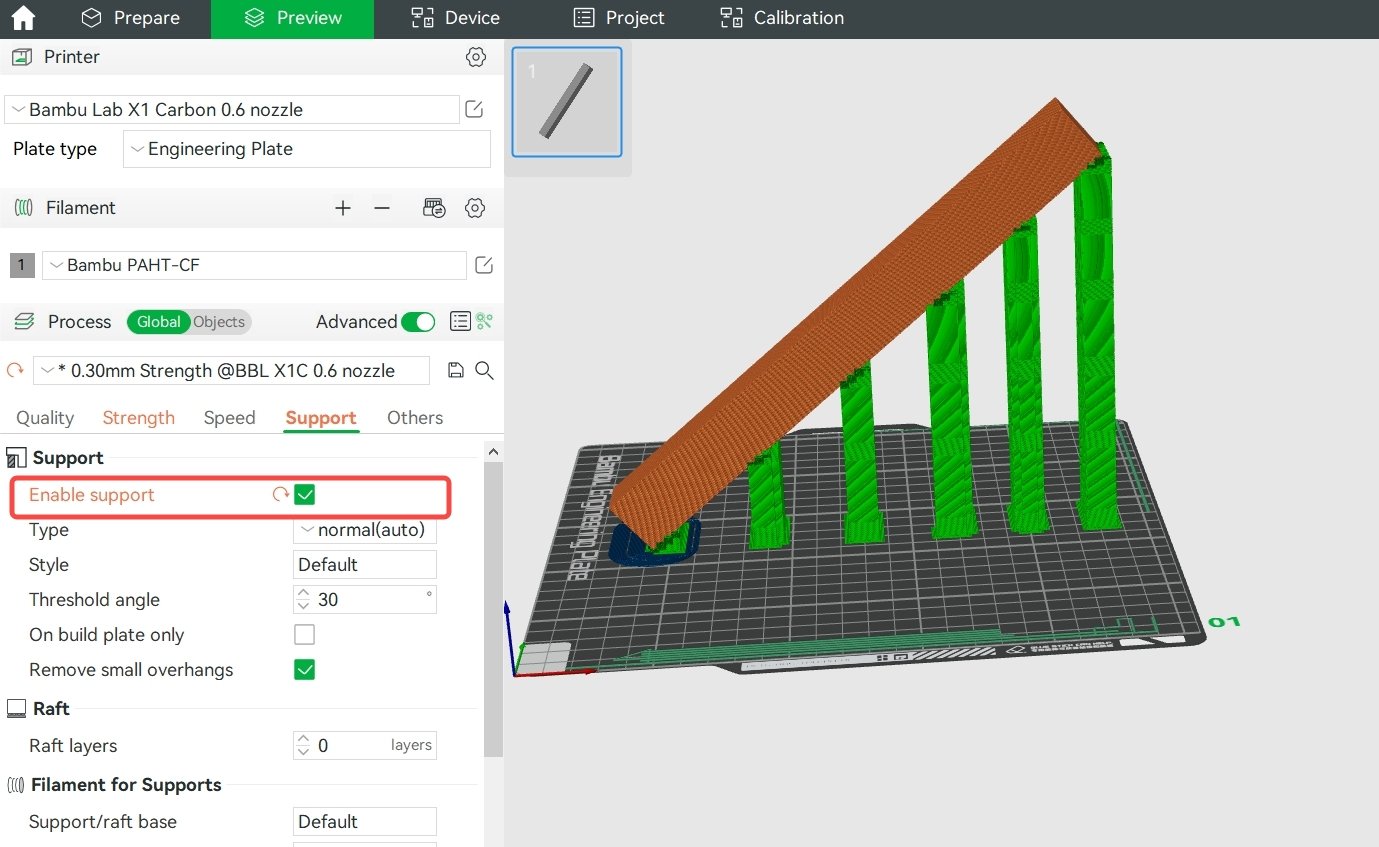
By arranging the model as shown in Picture 3, the model will have a similar percentage in the X&Y and Z directions, which helps to prevent warping while maintaining strength. It's important to note that this arrangement may result in more overhang areas. To solve this, appropriate support needs to be added to the model. You can turn on auto support or finish support painting manually, depending on the characteristics of the models.
- B. Filament selection: It is important to note that high-temperature filaments such as ABS, ASA, PC, PA, PA-CF and others are more easily warped. Therefore, it is advisable to avoid them whenever possible for large-size prints. Instead, it is recommended to select filaments like PLA, PLA-CF, PETG, PETG-CF, PET-CF and others that are less prone to warping.
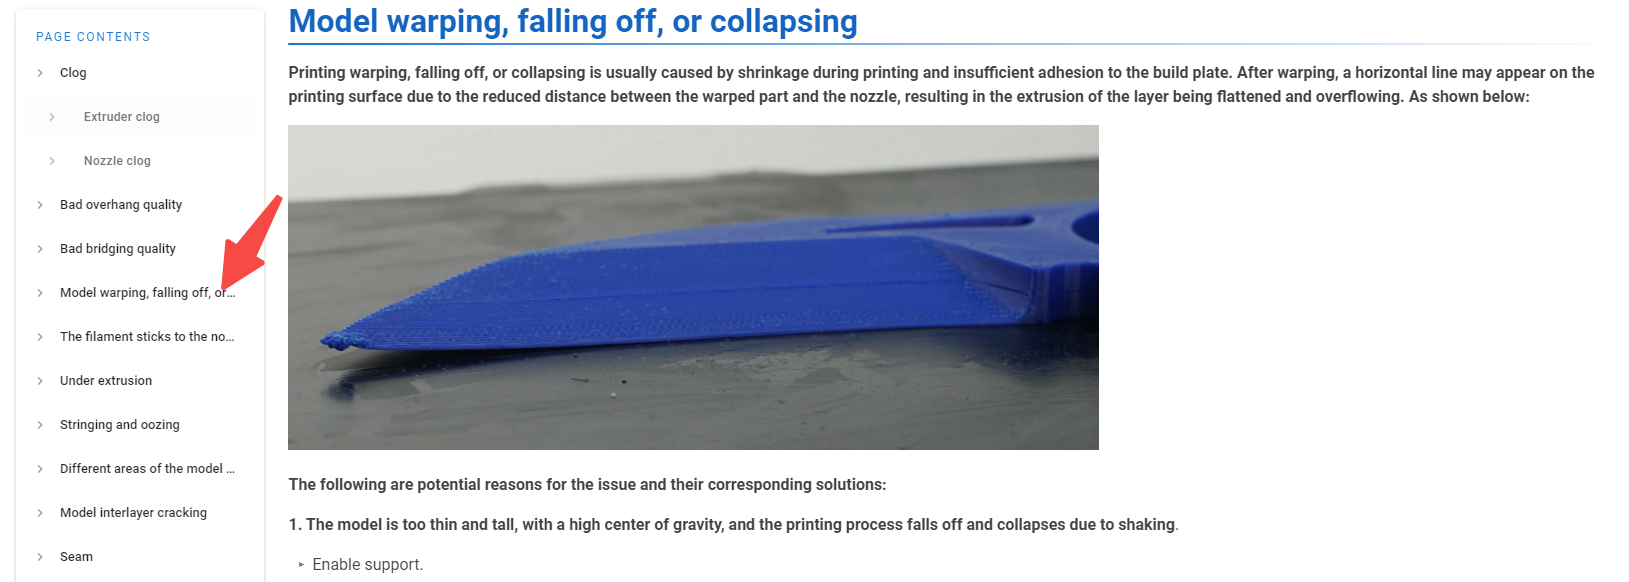
- C. To minimize shrinkage tendency, adjust print parameters as follows: Use a lower infill density, select a relatively high heatbed temperature, and ensure the front door and top cover are closed to increase the chamber temperature( while for low-temperature filaments like PLA, PETG and TPU, and chamber temperature shoe are not high, and when the heatbed temperature is high, the front door and top cover need opening and removing to lower the chamber temperature, or clogging may occur). For more detailed information, please refer to Common print quality problems and solutions
¶ Default Process Parameter (Standard Process Parameter)
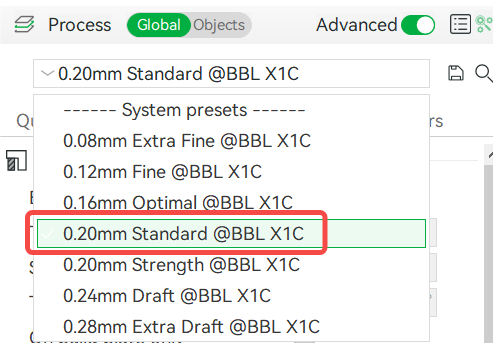
Advantages: High enough printing quality and short enough printing time, capable of satisfying most regular printing scenarios.
Application: Most of the models that do not require very high strength and quality.
¶ High Quality Process Parameter
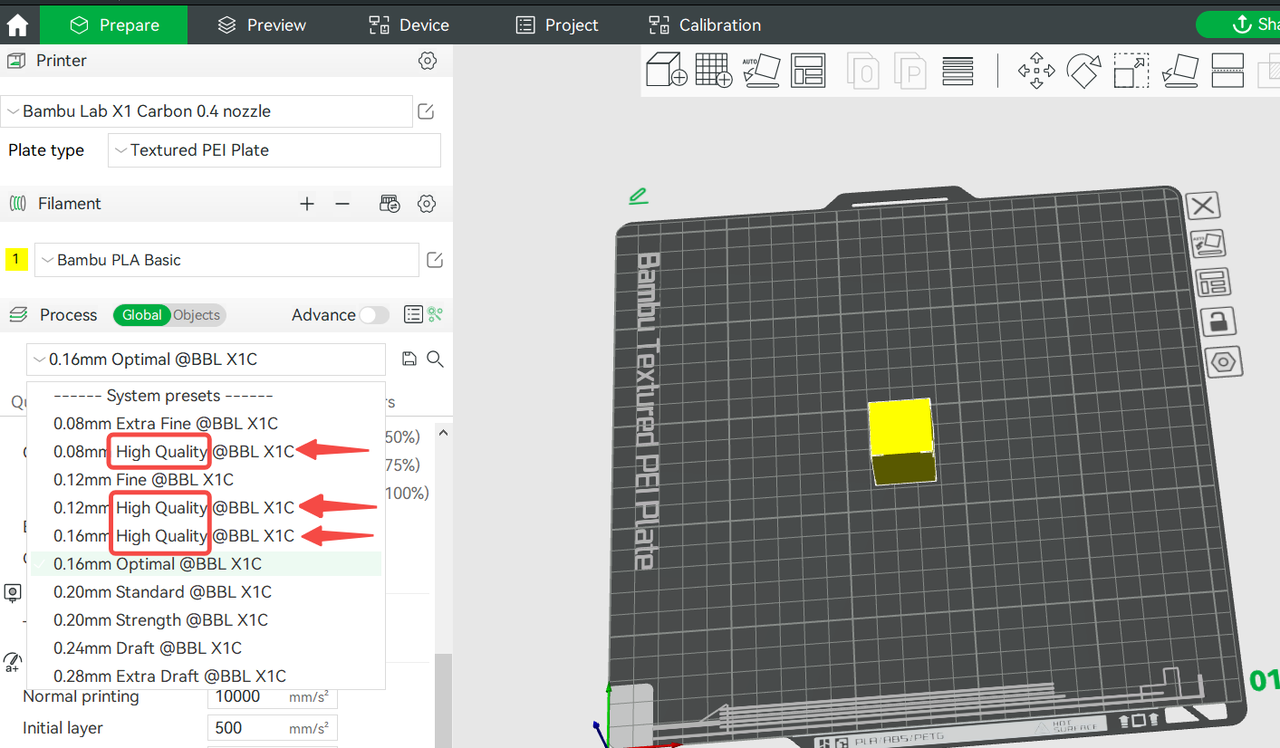
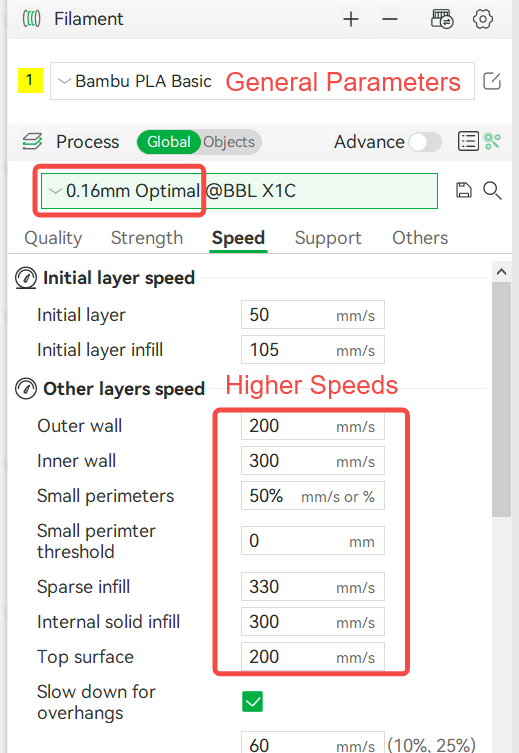
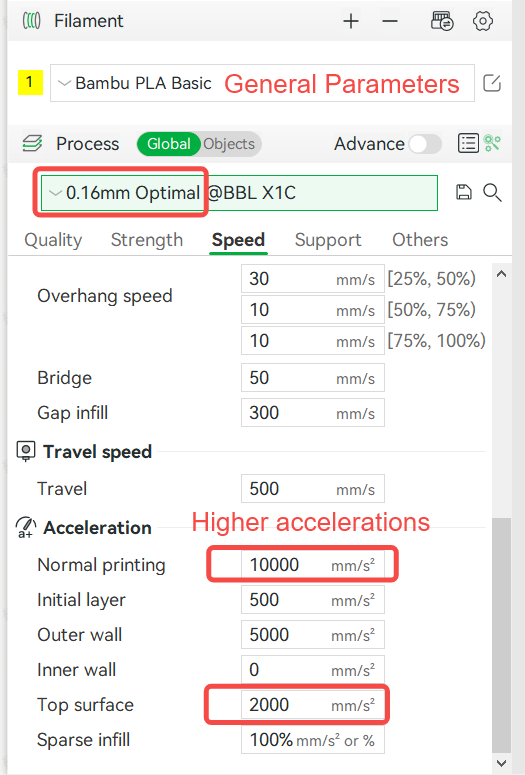
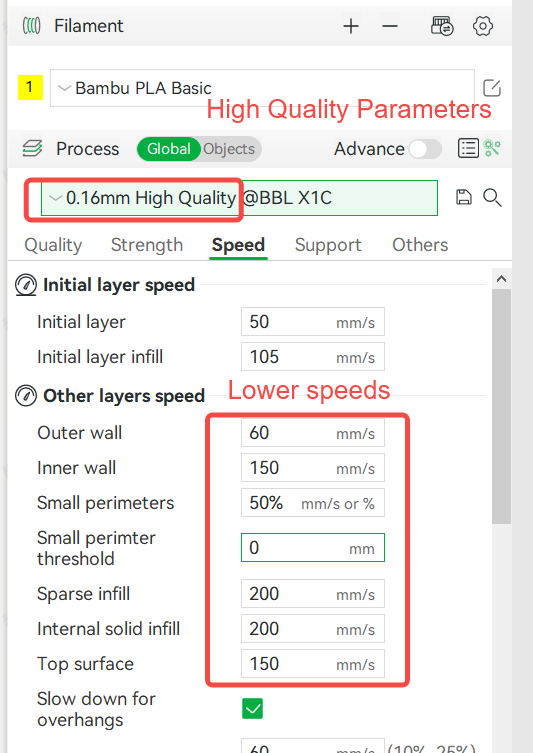
High quality process parameters refer to parameters in the manufacturing process that are named as "High Quality." Compared to General Process Parameters (Standard Process Parameters), these parameters have lower acceleration and speed (which can be adjusted as needed) to achieve higher printing quality for the printed objects.
|
The speeds and accelerations of General Process parameters |
|
 |
 |
|
The speeds and accelerations of High Quality Process parameters |
|
 |
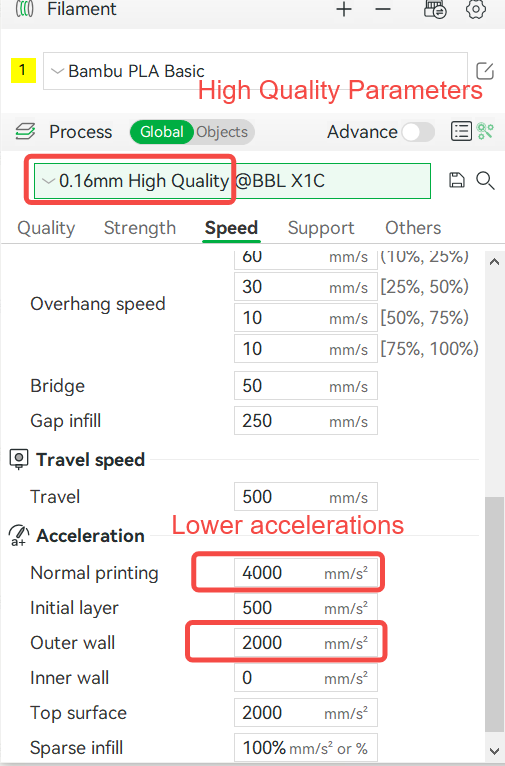 |
The main differences from the Default Process Parameters (Standard Process Parameters) are: lower layer height, acceleration, and speed (which can be adjusted as needed).
Advantages: Higher quality of printed objects - smoother and finer surface, clearer details.
Disadvantages: Longer printing time.
Applicable scope: Most printed objects that require high visual quality, such as most figurines, artworks, exhibition pieces, etc.
¶ Strength Process Parameter
 |
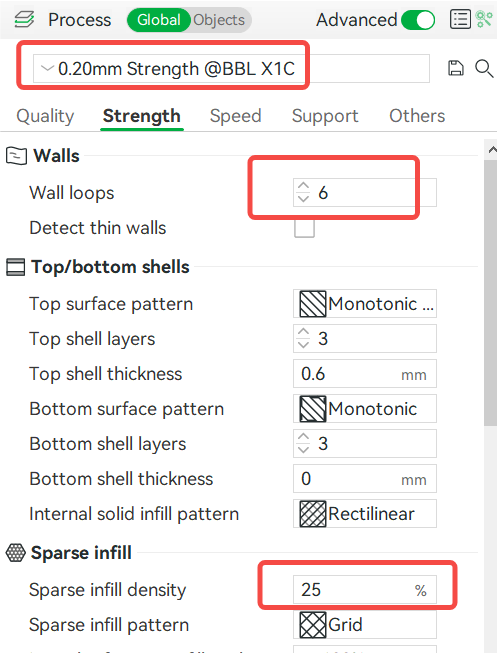 |
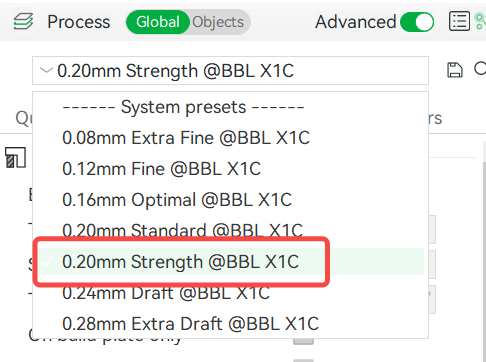
The main differences from the default process parameters (standard process parameters): It has more wall loops and higher infill density (these two parameters can also be adjusted appropriately according to actual requirements).
Advantage: The prints have higher strength.
Disadvantages: Higher material consumption, longer printing time, and some large-size models are prone to warping (warping can be reduced or avoided by proper methods, please refer to Common print quality problems and solutions).
Application: Most of the prints that require higher strength, such as most of the engineering parts and structural parts.
Learn more about slicing parameters at Setting Guide of Slicing Parameters