¶ What is SN
Serial number (SN) is a 15-digit serial character assigned to each device during manufacturing.
¶ Why do I need to find the SN
- Provide the SN for after-sales services.
- Update the SN after replacing the AP board/mainboard to ensure the printer functions properly.
¶ How to find the original SN
You can find the original SN in Bambu Handy, Bambu Studio, on the printer screen, or by scanning the QR code on the device.
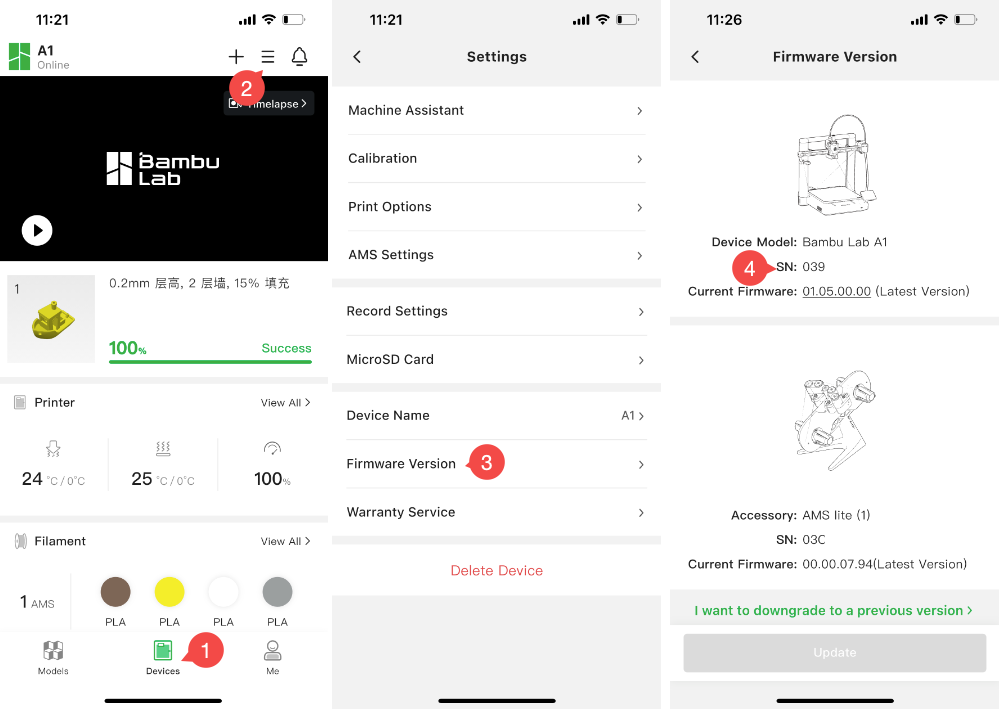
¶ Bambu Handy
In Bambu Handy, the SN can be found under Settings > Firmware Version as shown in the image below:
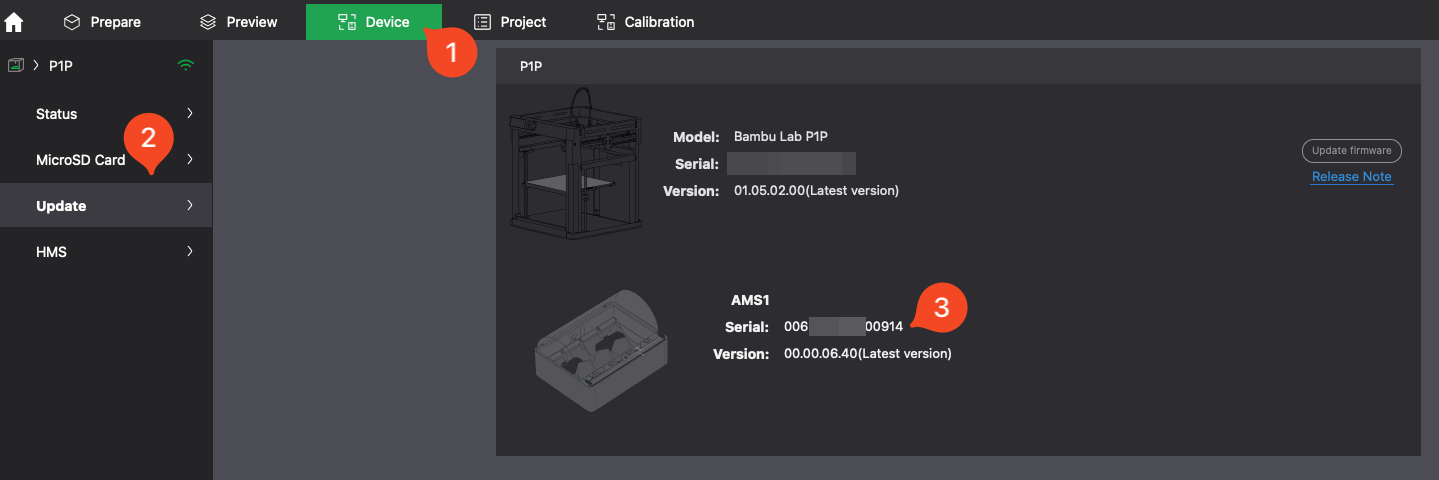
¶ Bambu Studio
In Bambu Studio, the SN can be found under Device→ Update as shown in the image below:
¶ Printer screen or QR code
The SN is also available on the printer’s screen or by scanning the QR code on the device.
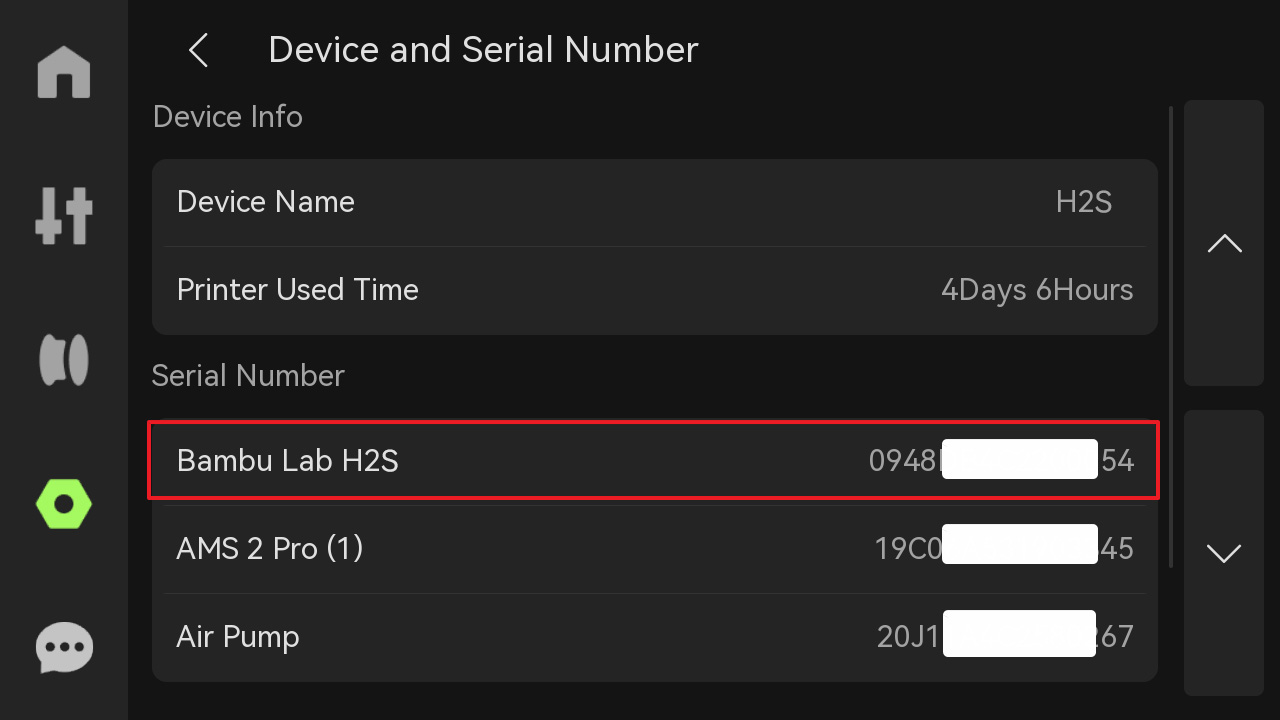
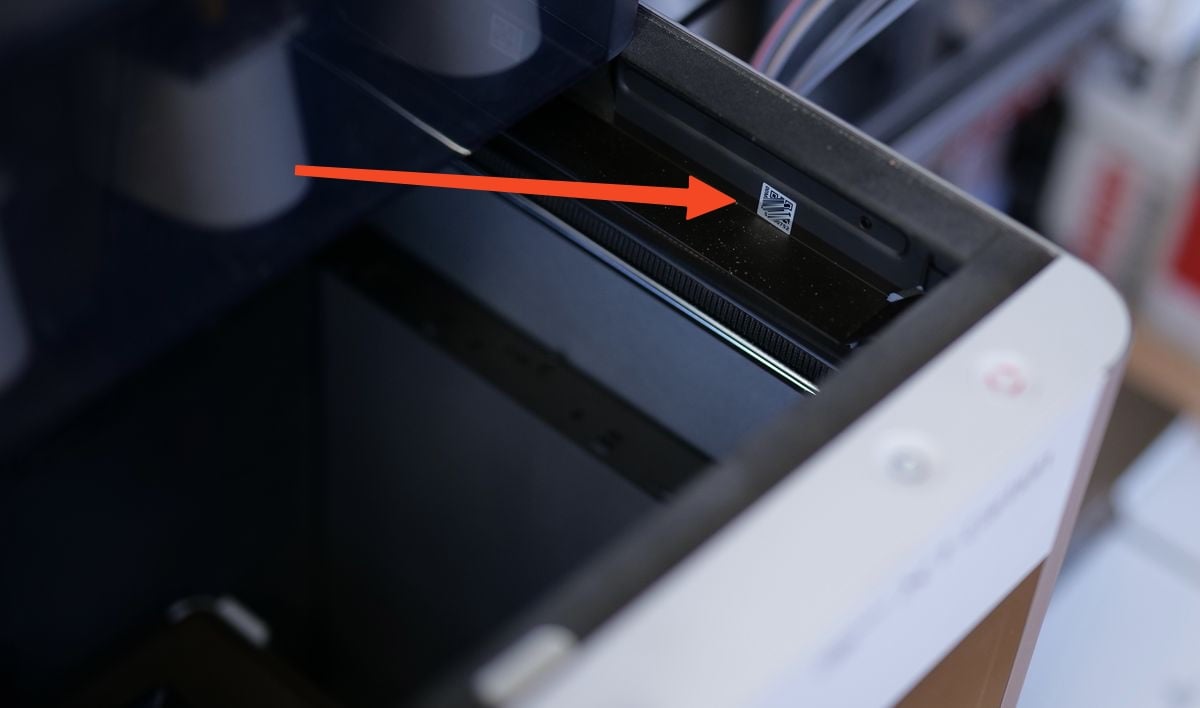
¶ H2S
Option 1: Locate the SN on the printer’s screen if it’s functioning properly
- Enter the Settings page.
- Select Device and Serial Number.
Option 2: Scan the QR code to find the SN
The H2S serial number is located on the right frame inside the chamber.
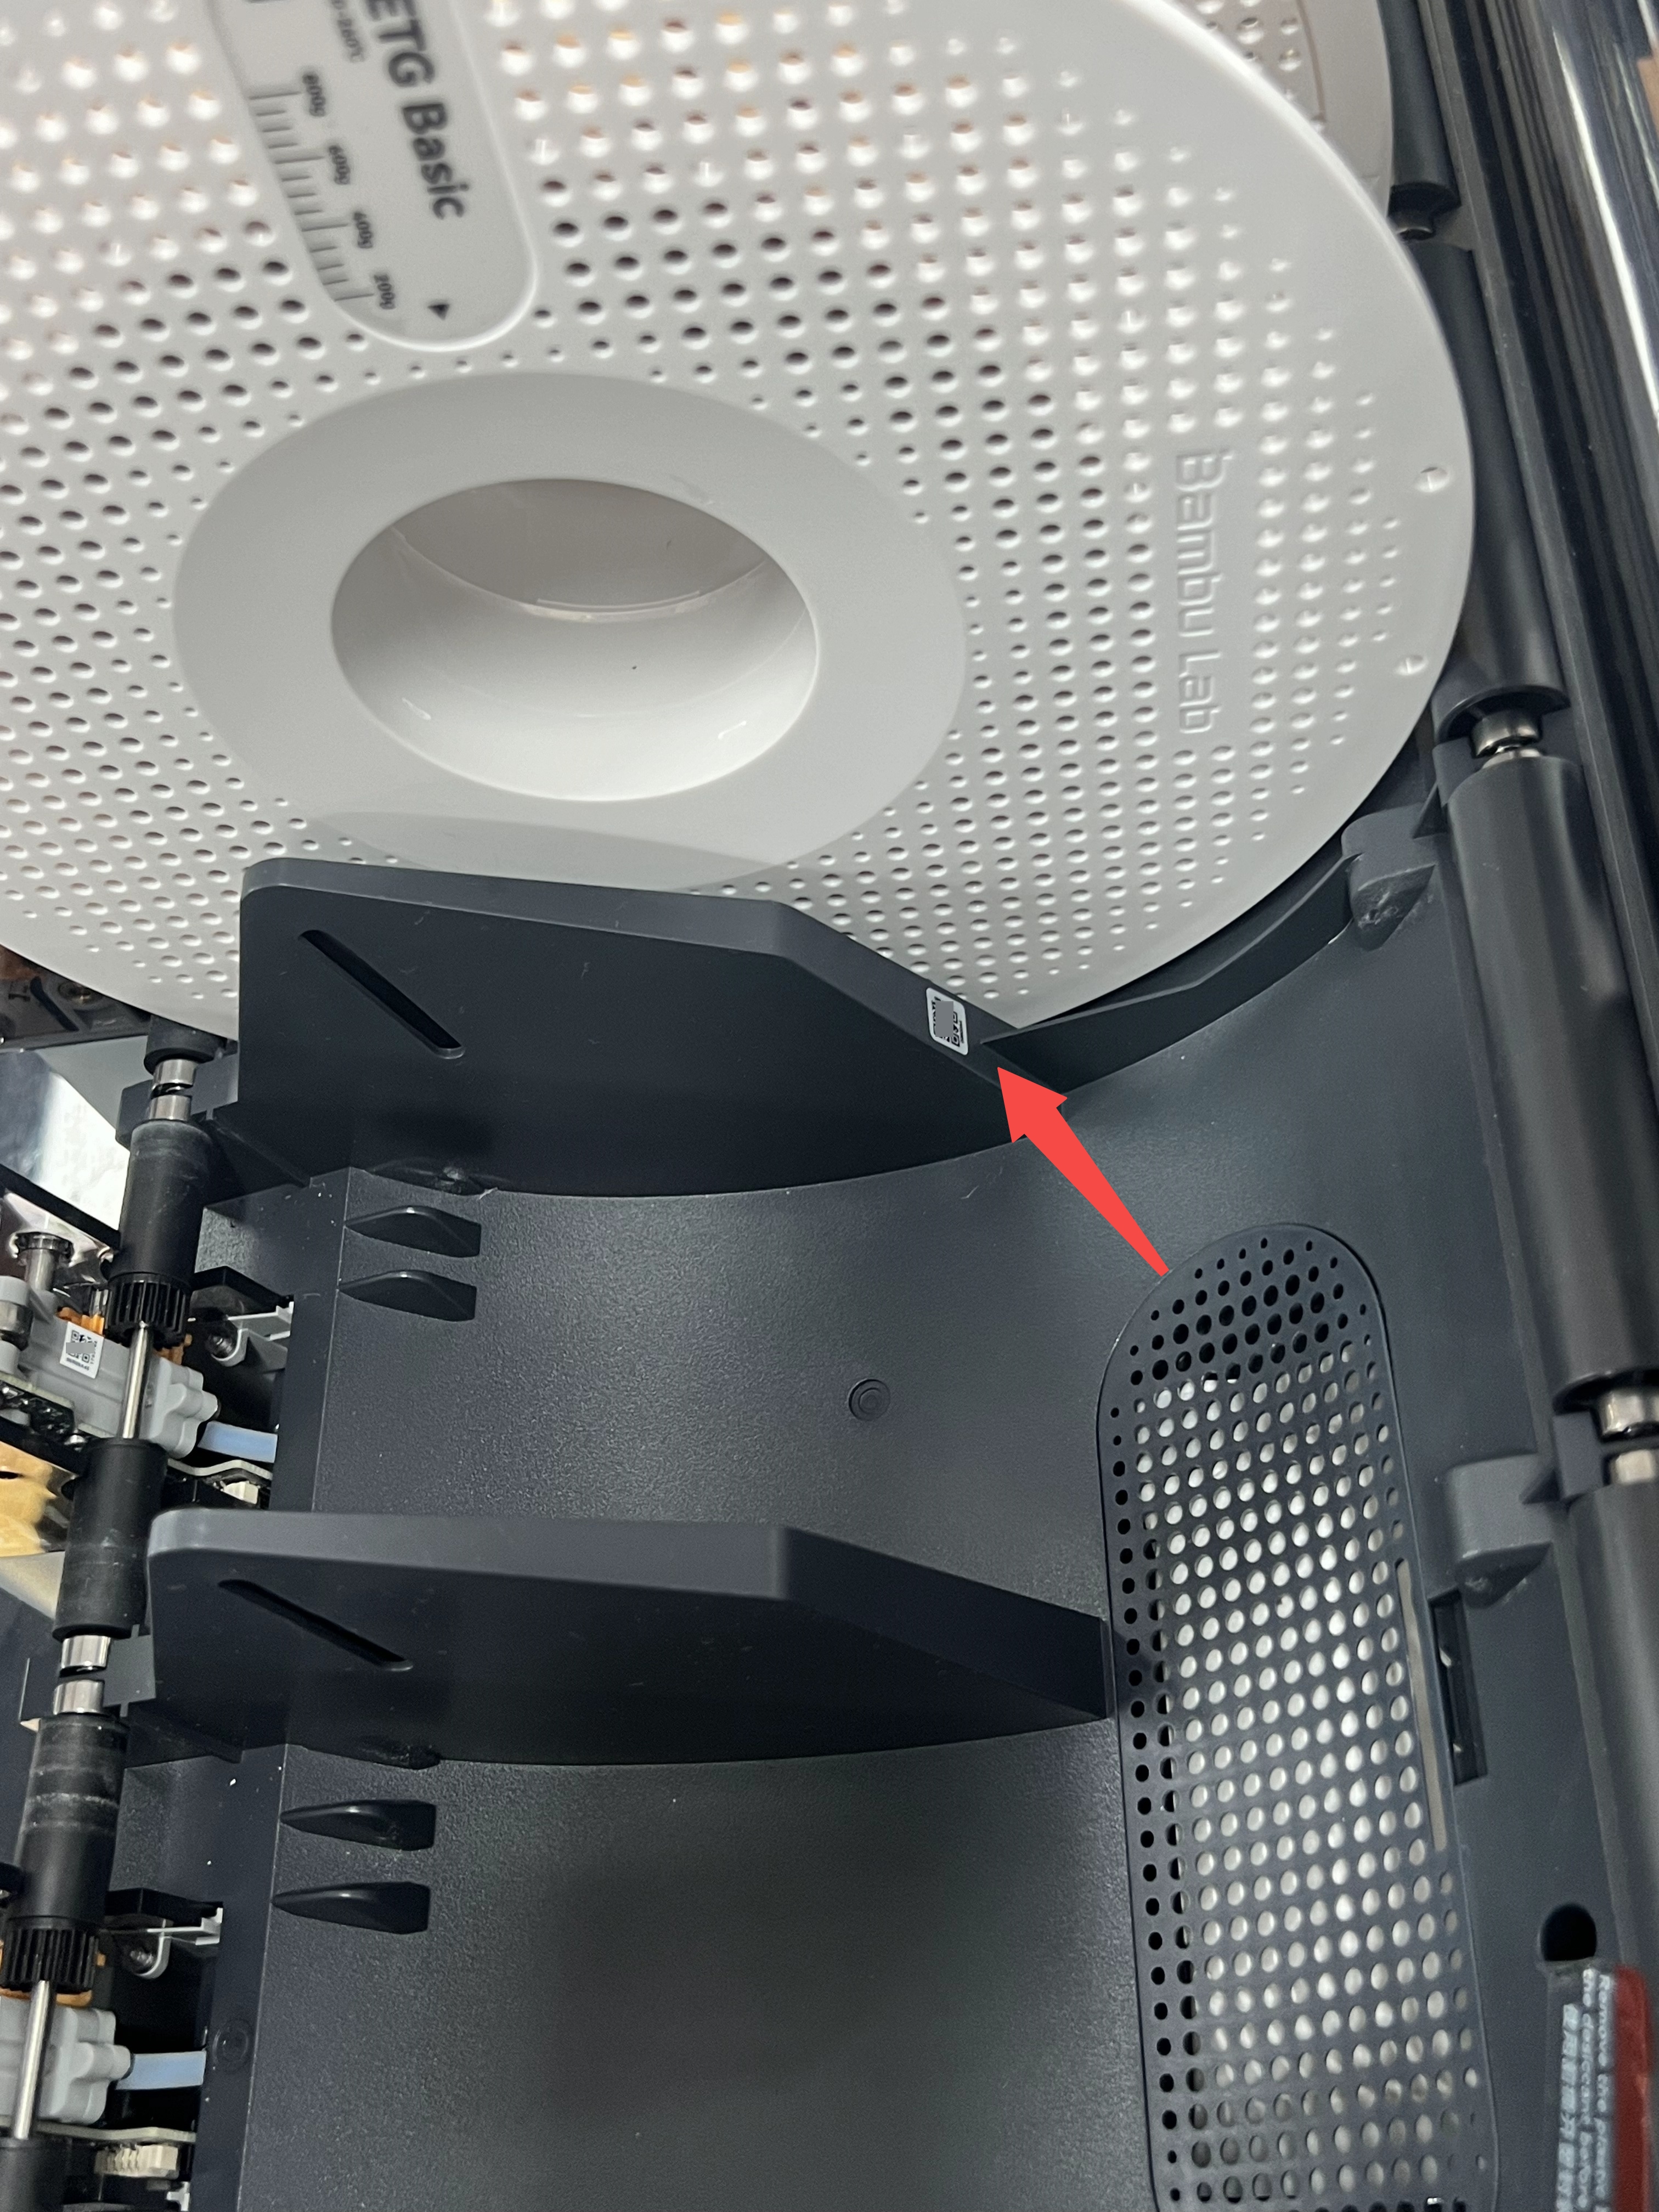
¶ H2D
Option 1: Locate the SN on the printer’s screen if it’s functioning properly
- Enter the Settings page.
- Select Device and Serial Number.

Option 2: Scan the QR code to find the SN
The H2D serial number is located on the right frame inside the chamber.
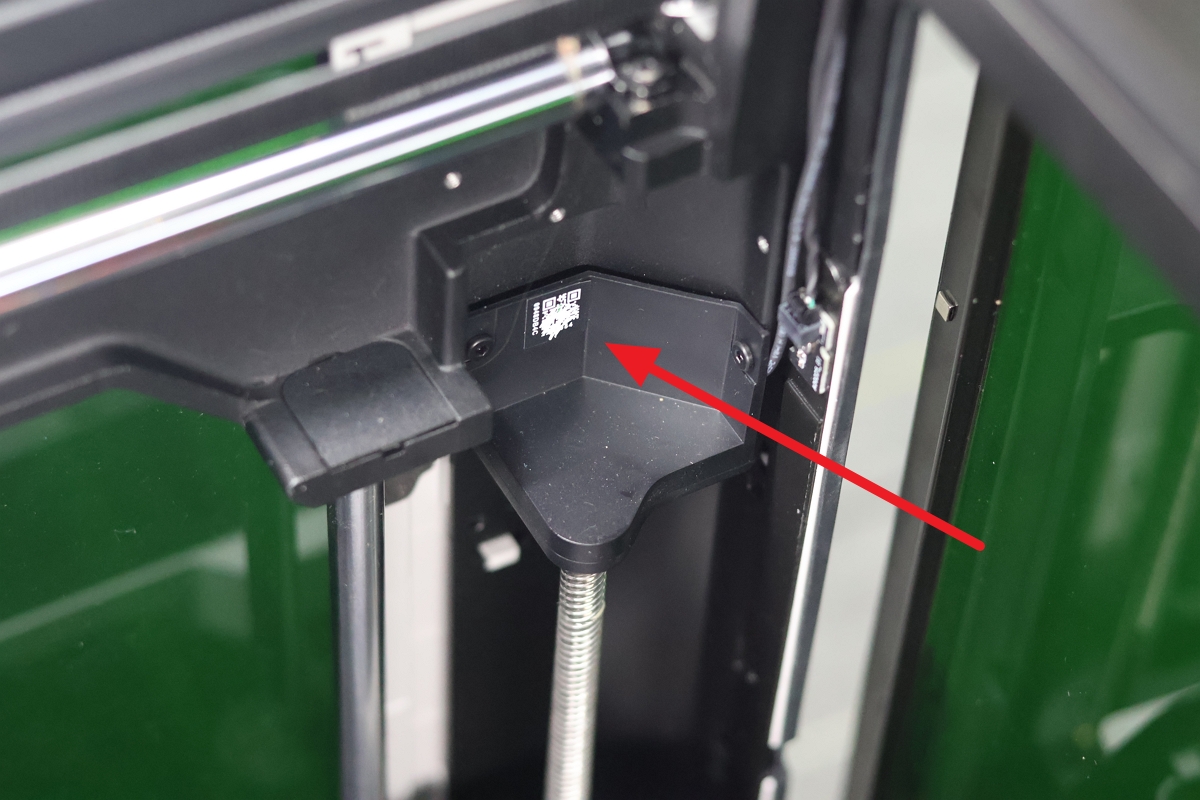
The serial number of the H2D starts with "094".
The serial number of the H2D Pro starts with "239".
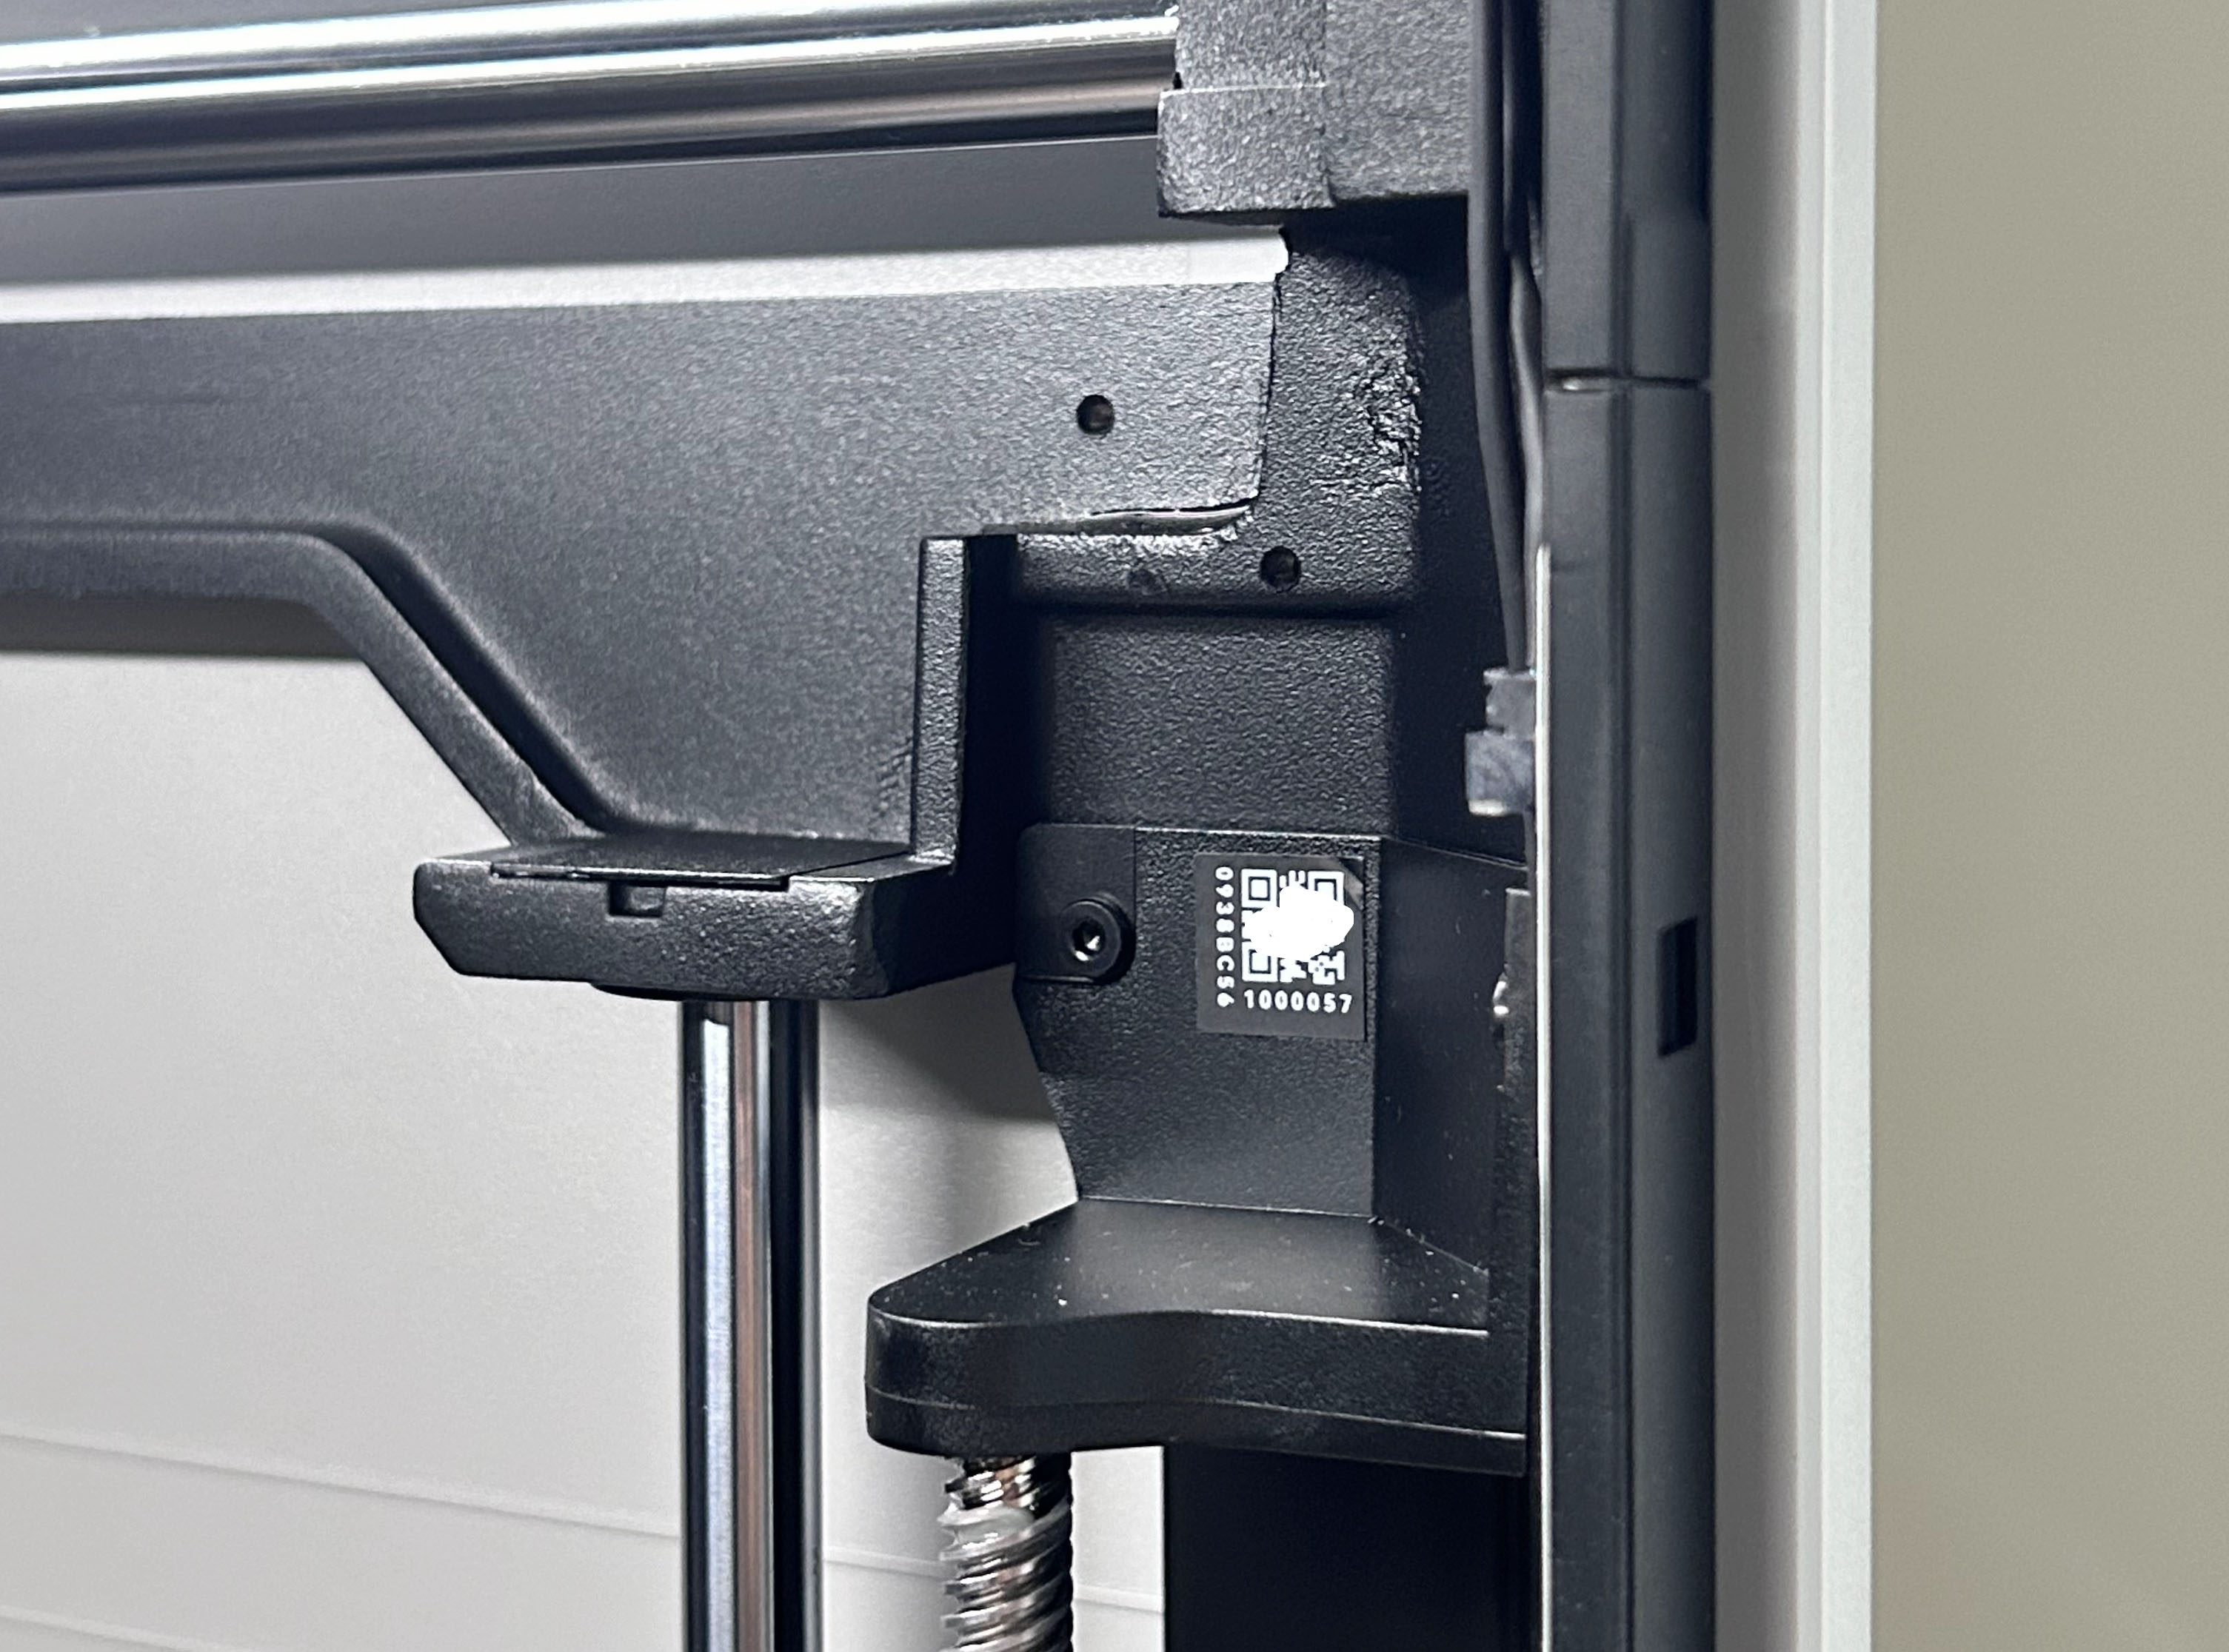
¶ X1 Series
Option 1: Locate the SN on the printer’s screen if it’s functioning properly
- Enter the Settings page from the left side of the screen;

- Select Settings;

- Find Device and Serial Number;
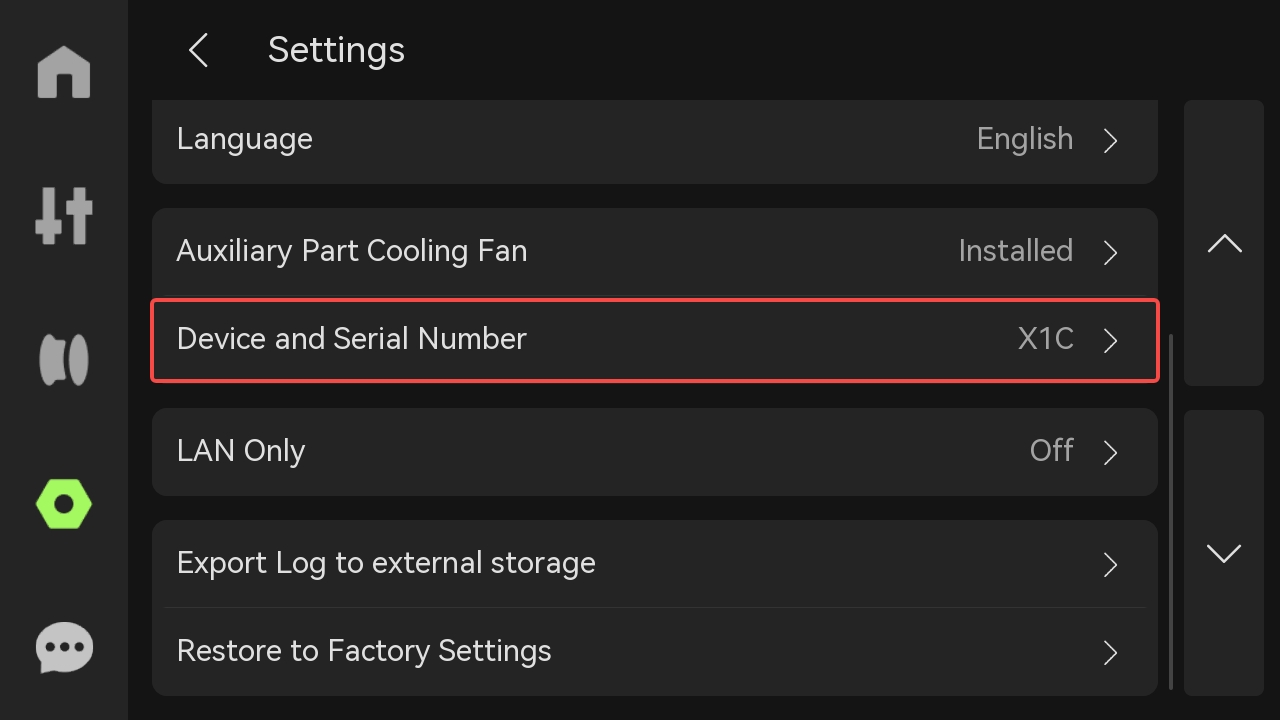
- Get SN.

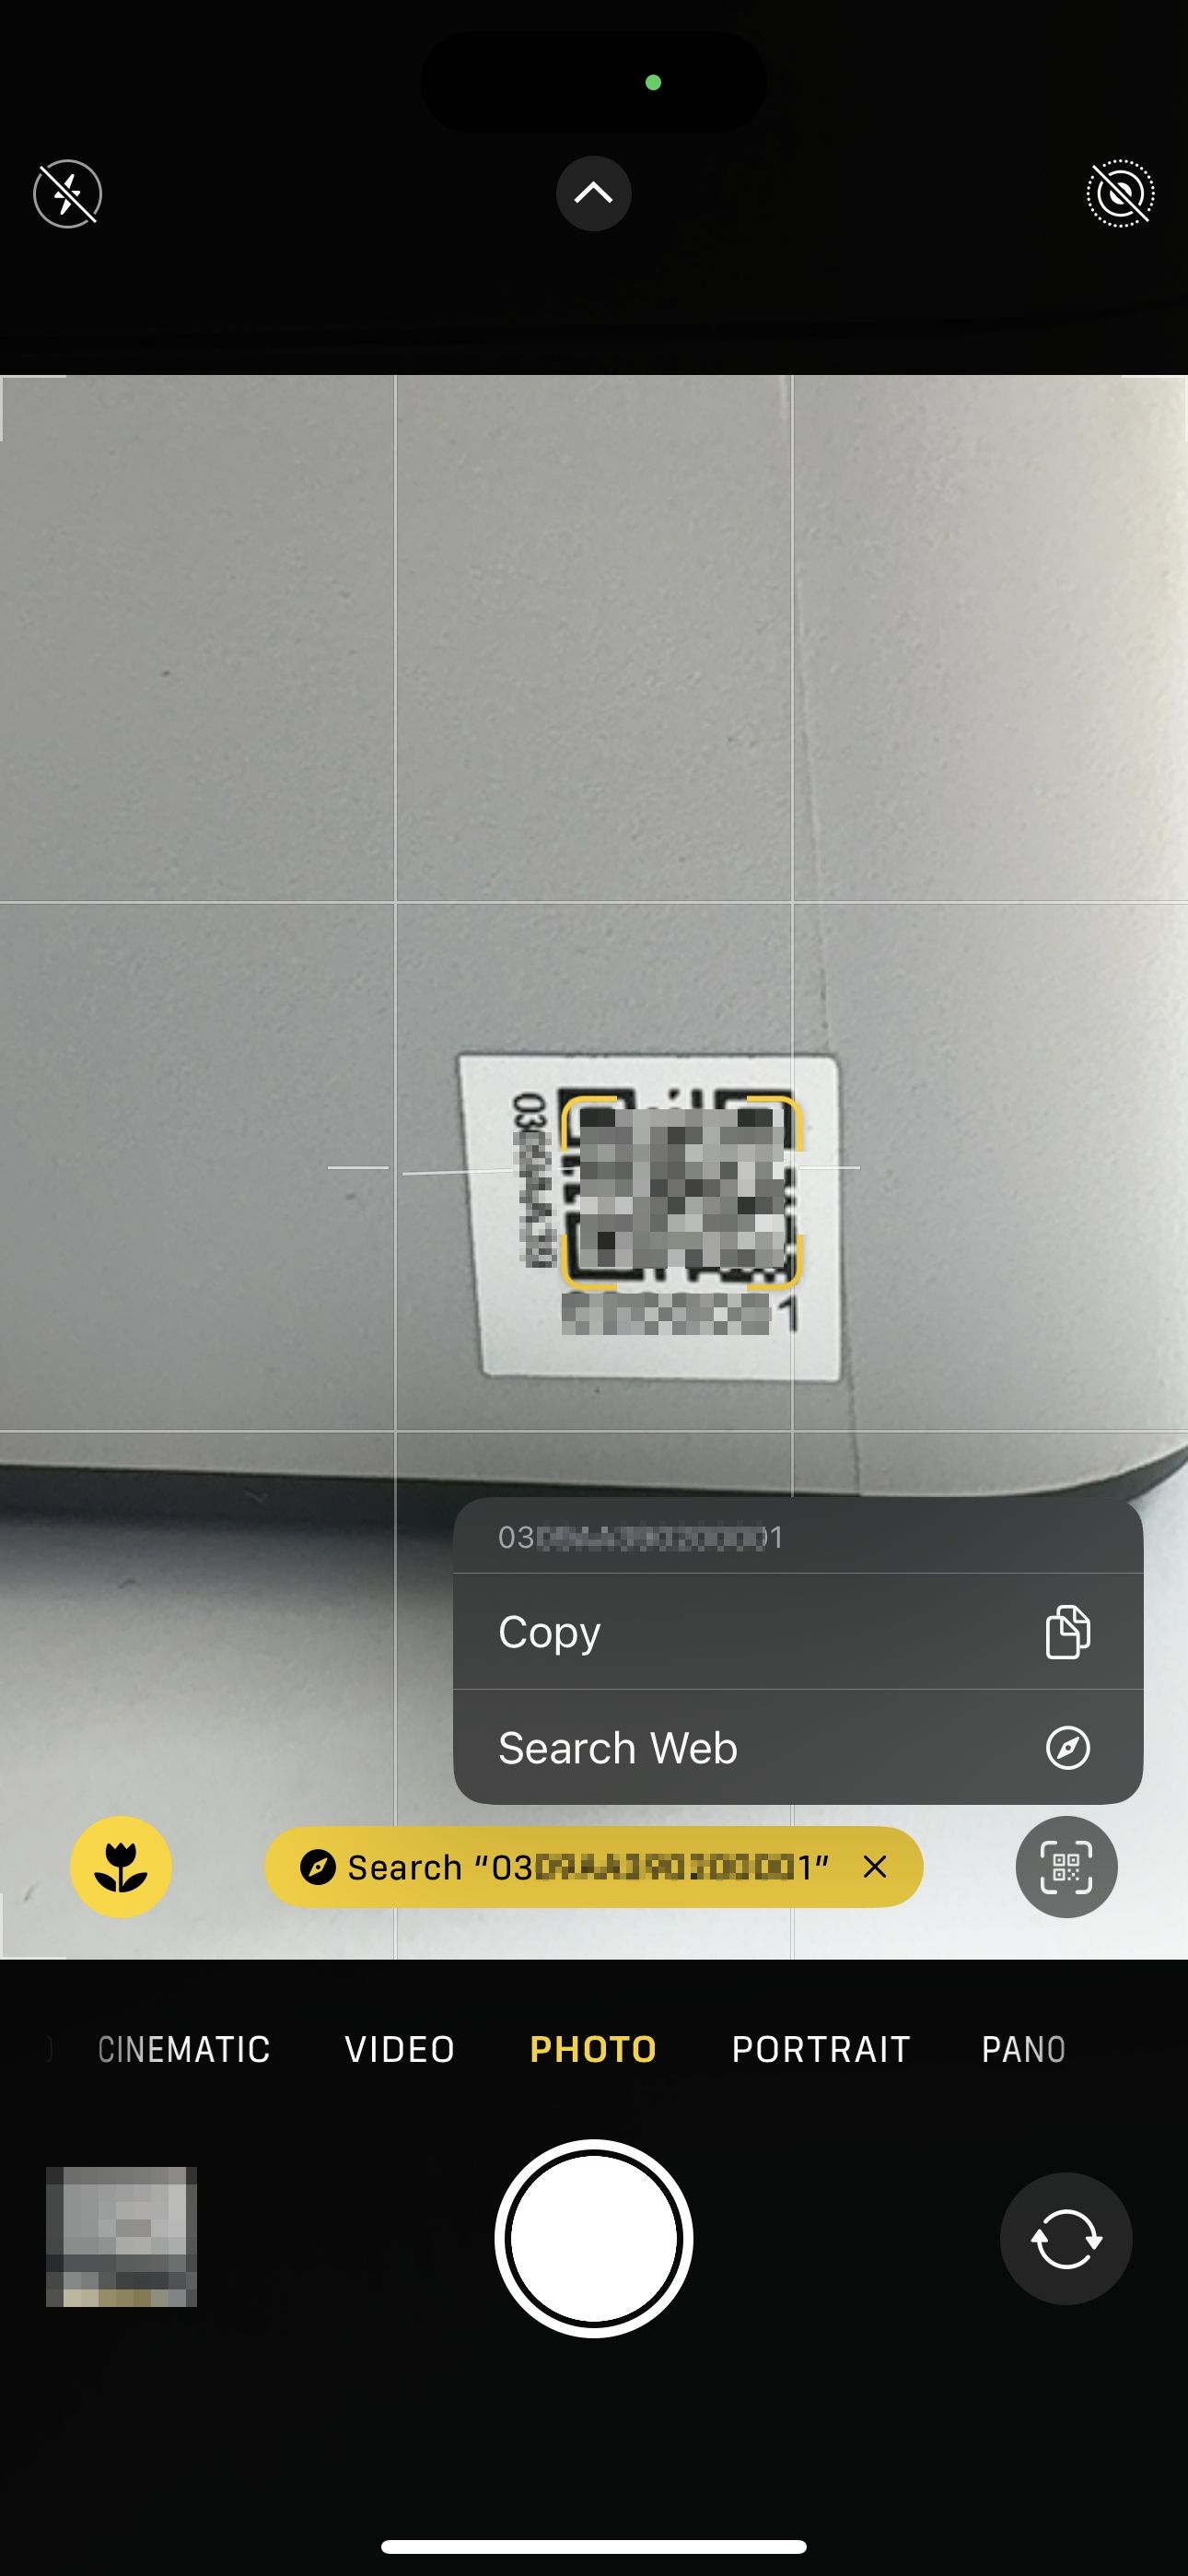
Option 2: Scan the QR code to find the SN
SN QR code is located on the top right side, opposite the AP board. It’s a sticker on the internal top frame of the unit.
We suggest using your camera to scan the QR code and read the full SN.
The serial number of the X1C starts with "00M".
The serial number of the X1E starts with "03W".
¶ P1 Series
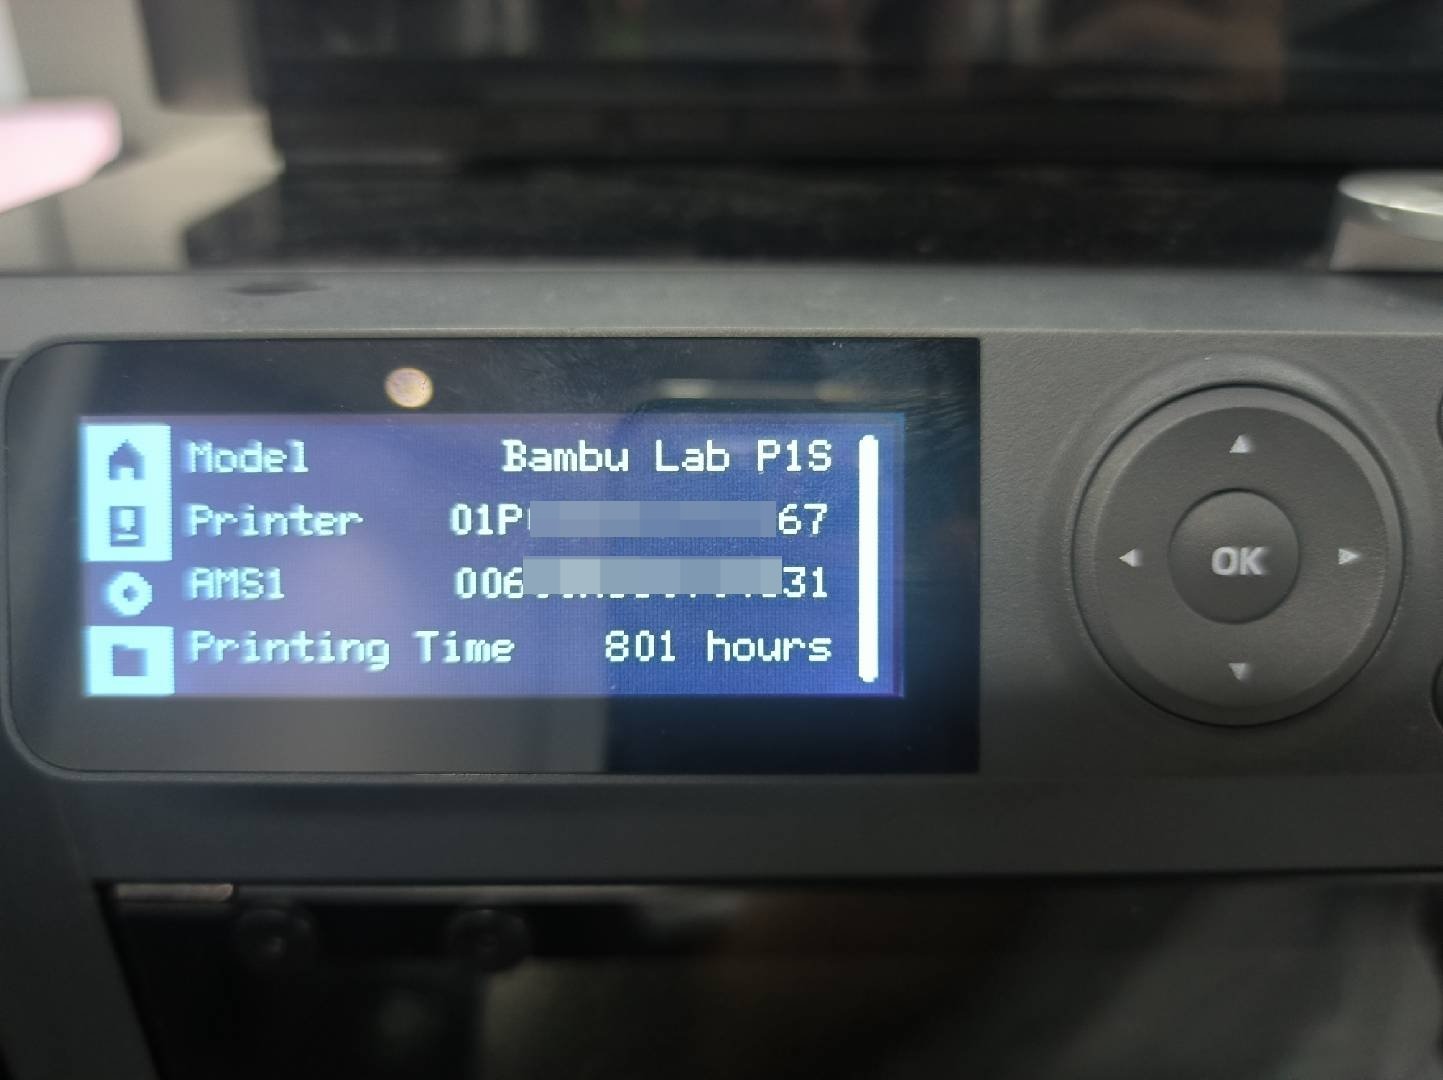
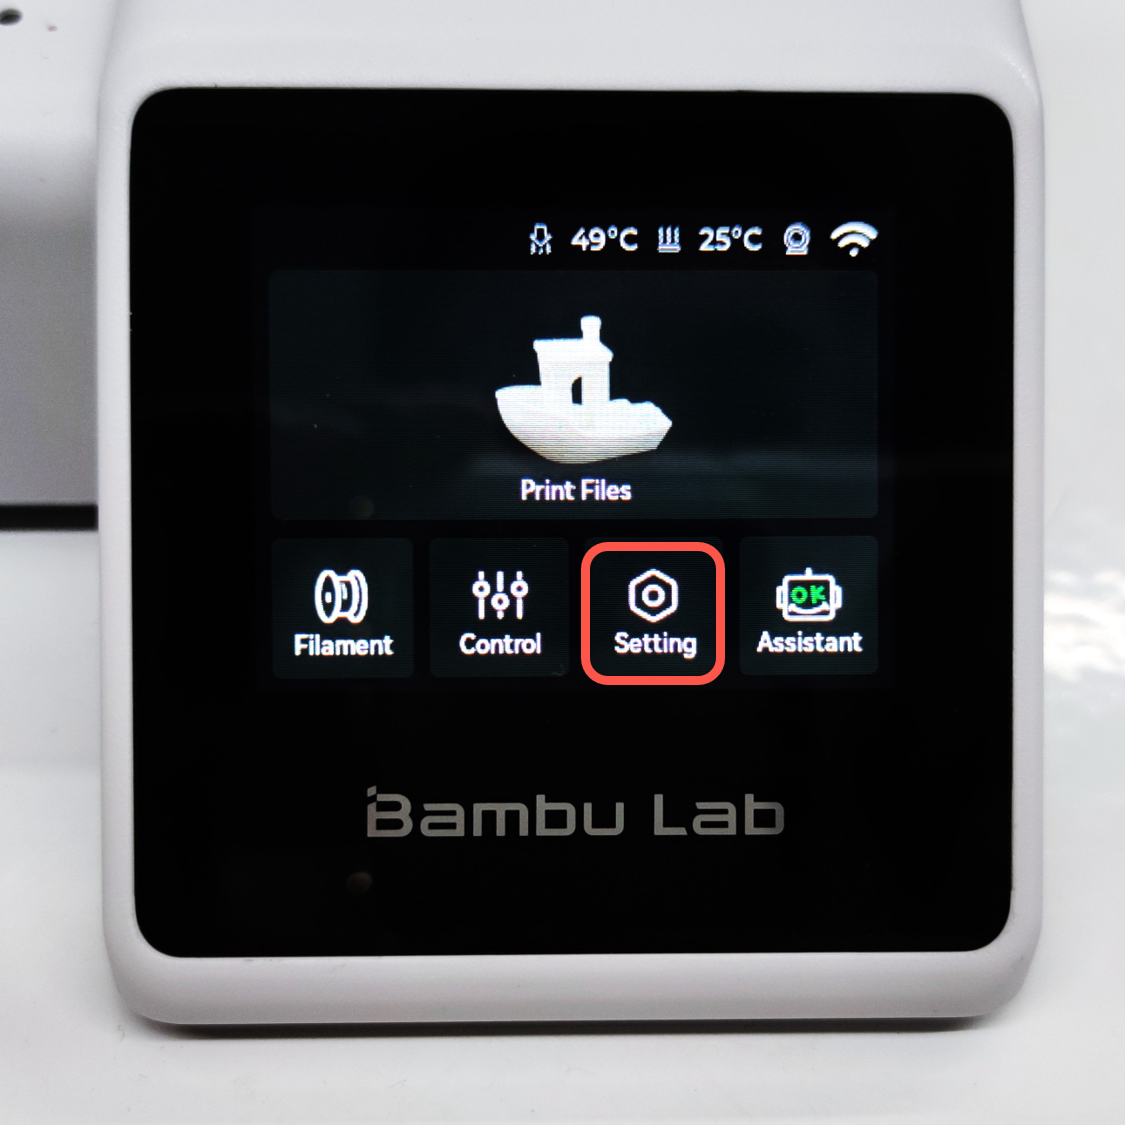
Option 1: Locate the SN on the printer’s screen if it’s functioning properly
- Click the Setting icon, and select the Device option.
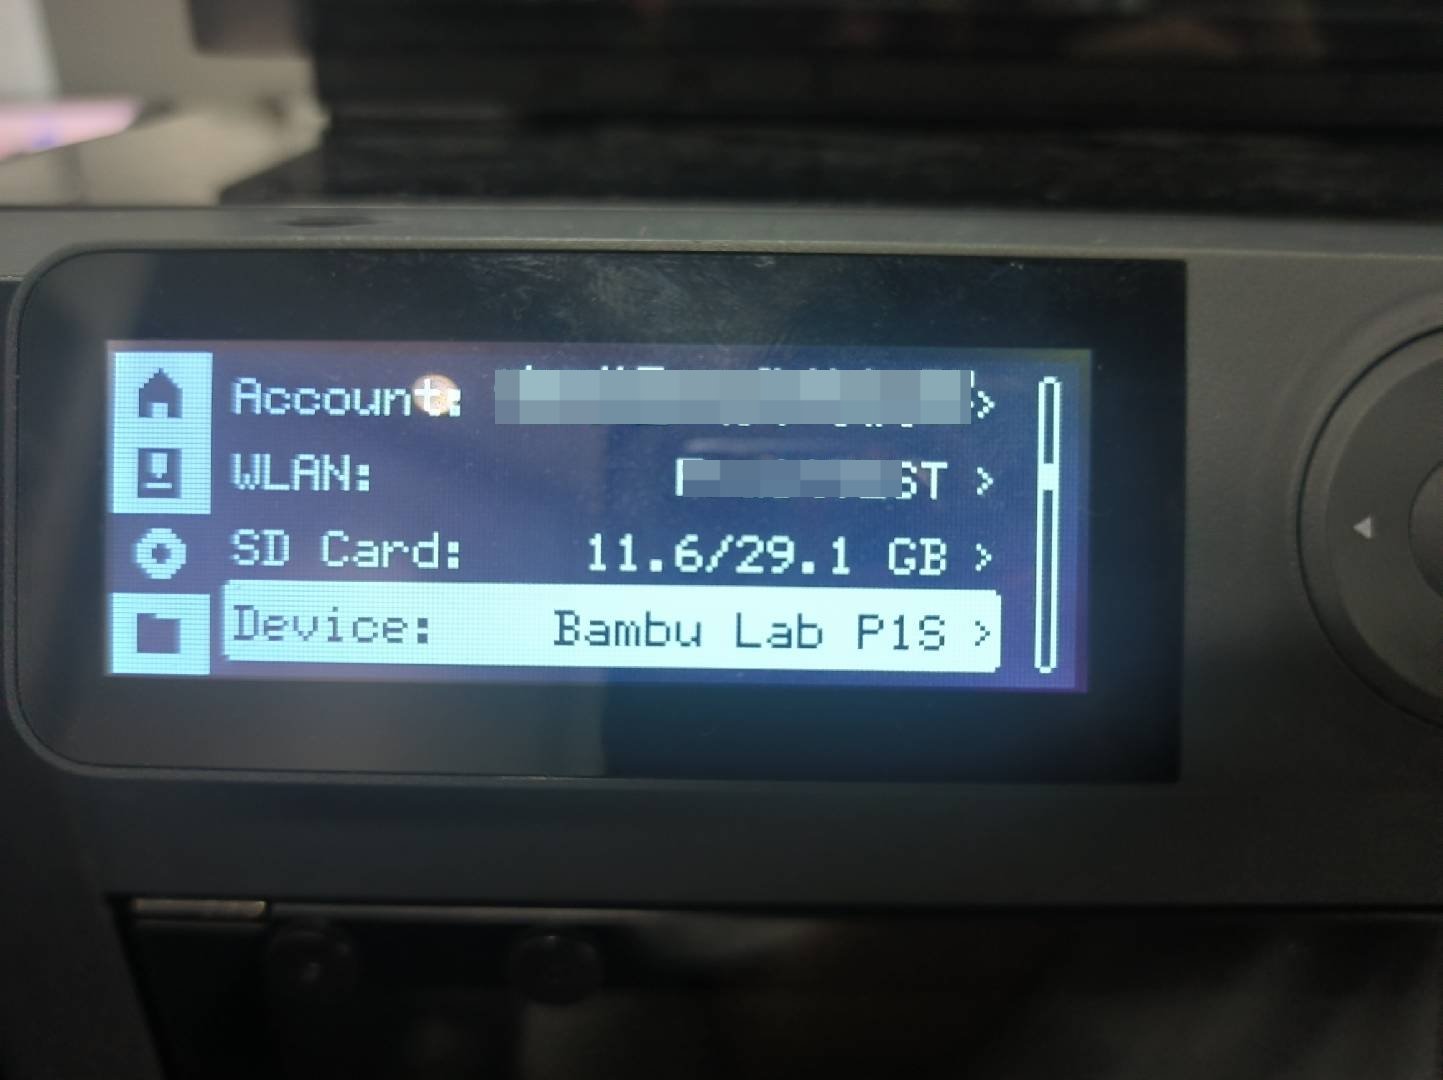
- You can find your printer's SN and AMS's SN.
Option 2: Scan the QR code to find the SN
SN QR code is located on the top right side, opposite the AP board. It’s a sticker on the internal top frame of the unit.
We suggest using your camera to scan the QR code and read the full SN.
The serial number of the P1S starts with "01P".
The serial number of the P1P starts with "01S".
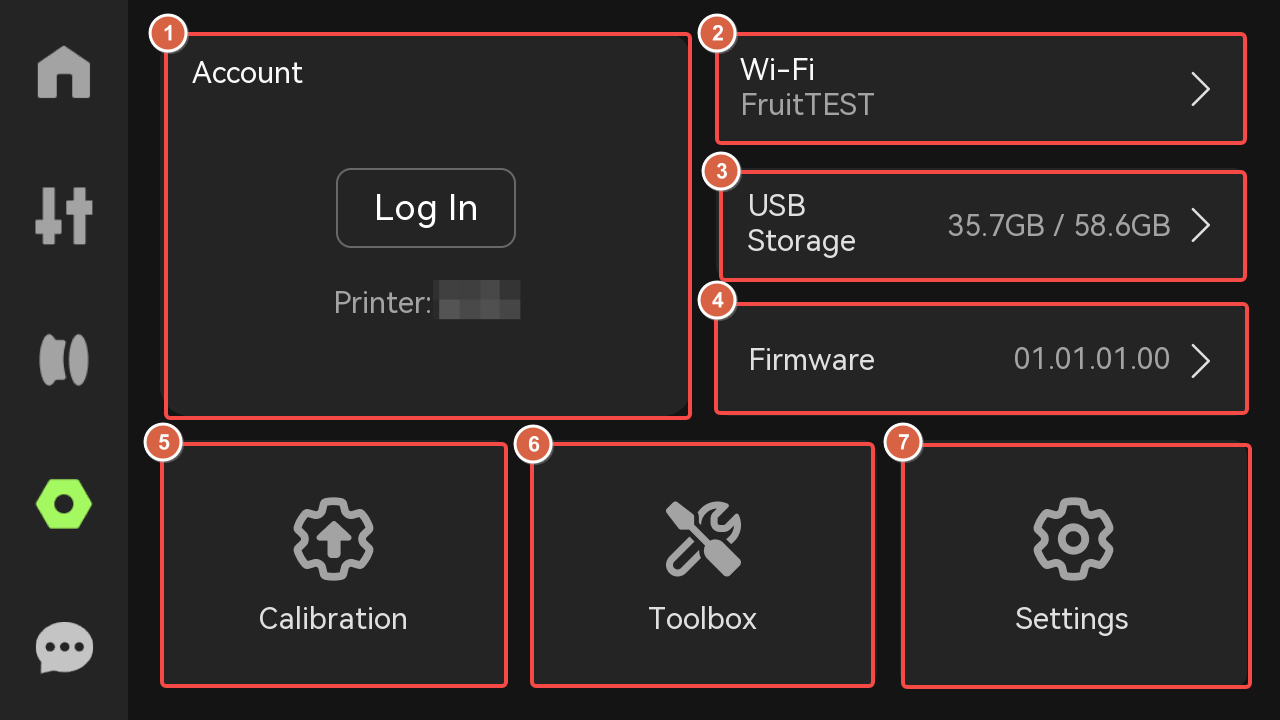
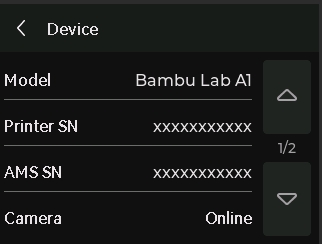
¶ A1 Series
Option 1: Locate the SN on the printer’s screen if it’s functioning properly
- Select the Setting icon.
- Select the Device option.
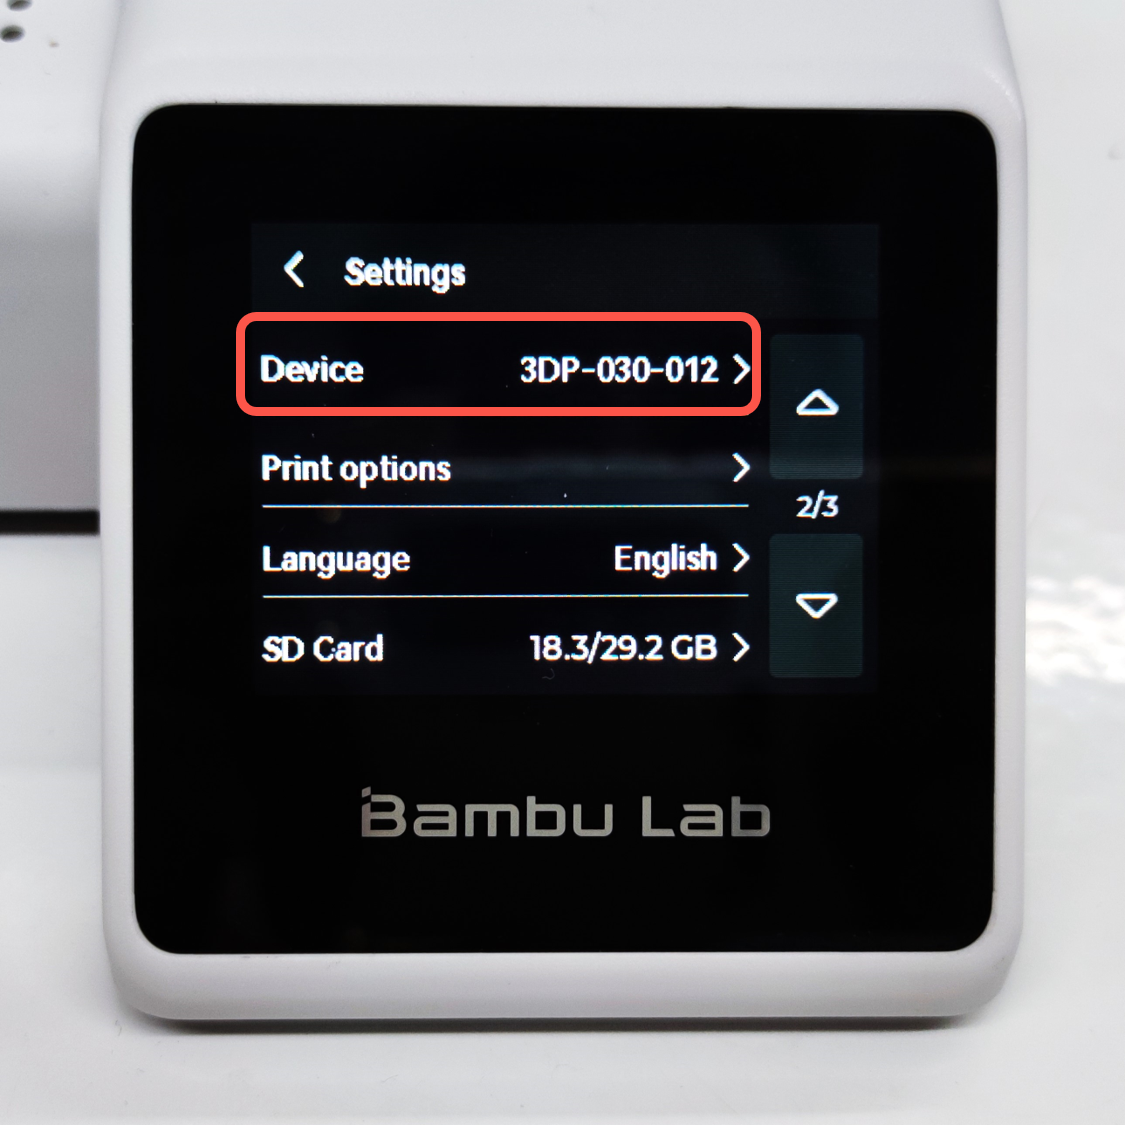
- You can find your printer's SN and AMS's SN.
Option 2: Scan the QR code to find the SN
The QR code is located near the power switch at the back of the printer.
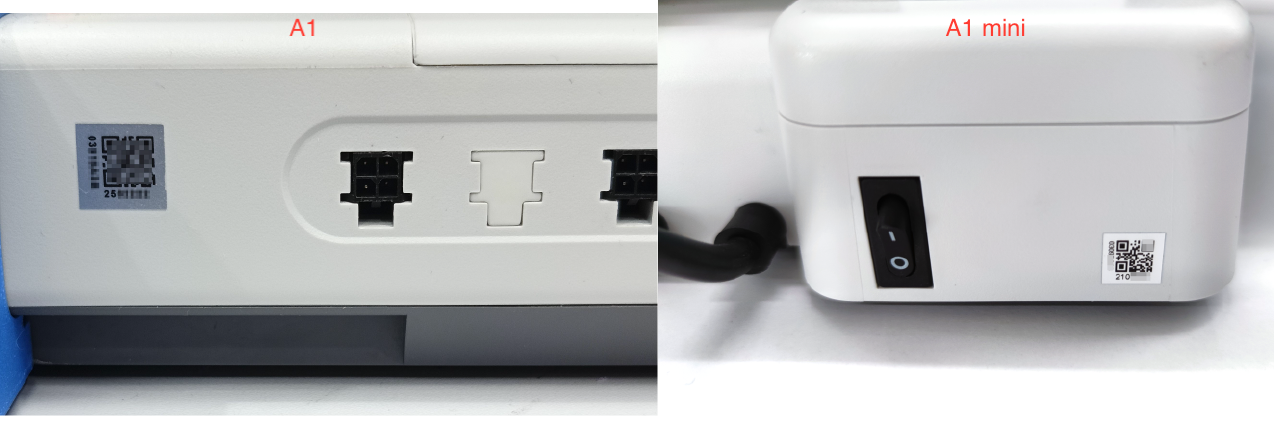
The serial number of the A1 starts with "039".
The serial number of the A1 mini starts with "030".
¶ AMS HT
The AMS HT serial number can be identified from the front of the AMS HT, just beneath the front filament roller.
¶ AMS HT Frame
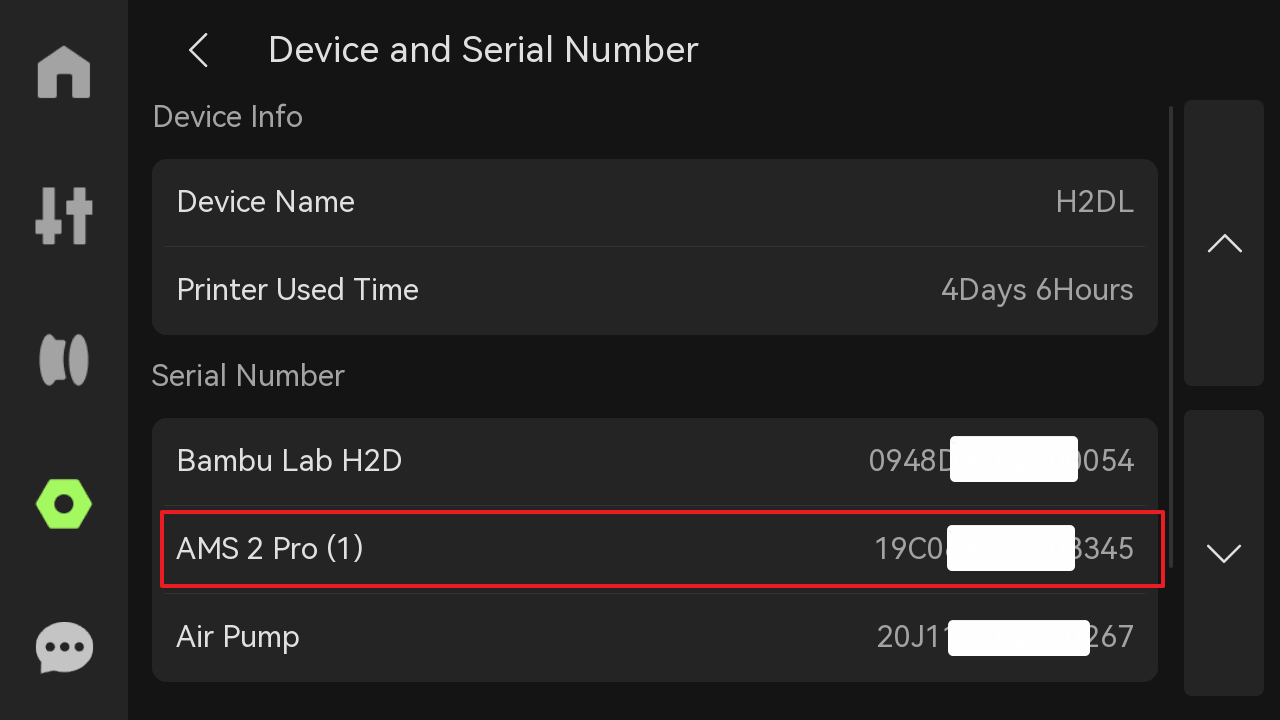
¶ AMS 2 pro
The AMS serial number can be identified from the AMS frame and the printer's screen.
¶ AMS 2 pro Frame

¶ H2D Printer Screen
- Enter the Settings page.
- Tap Device and Serial Number.
¶ AMS
The AMS serial number can be identified from the AMS frame and the printer's screen.
¶ AMS Frame
There is a QR code of AMS SN on the AMS frame.
¶ X1 Series Printer Screen
The serial number of the AMS is displayed on the screen under Settings→ General→ Device Info as shown in the image below:
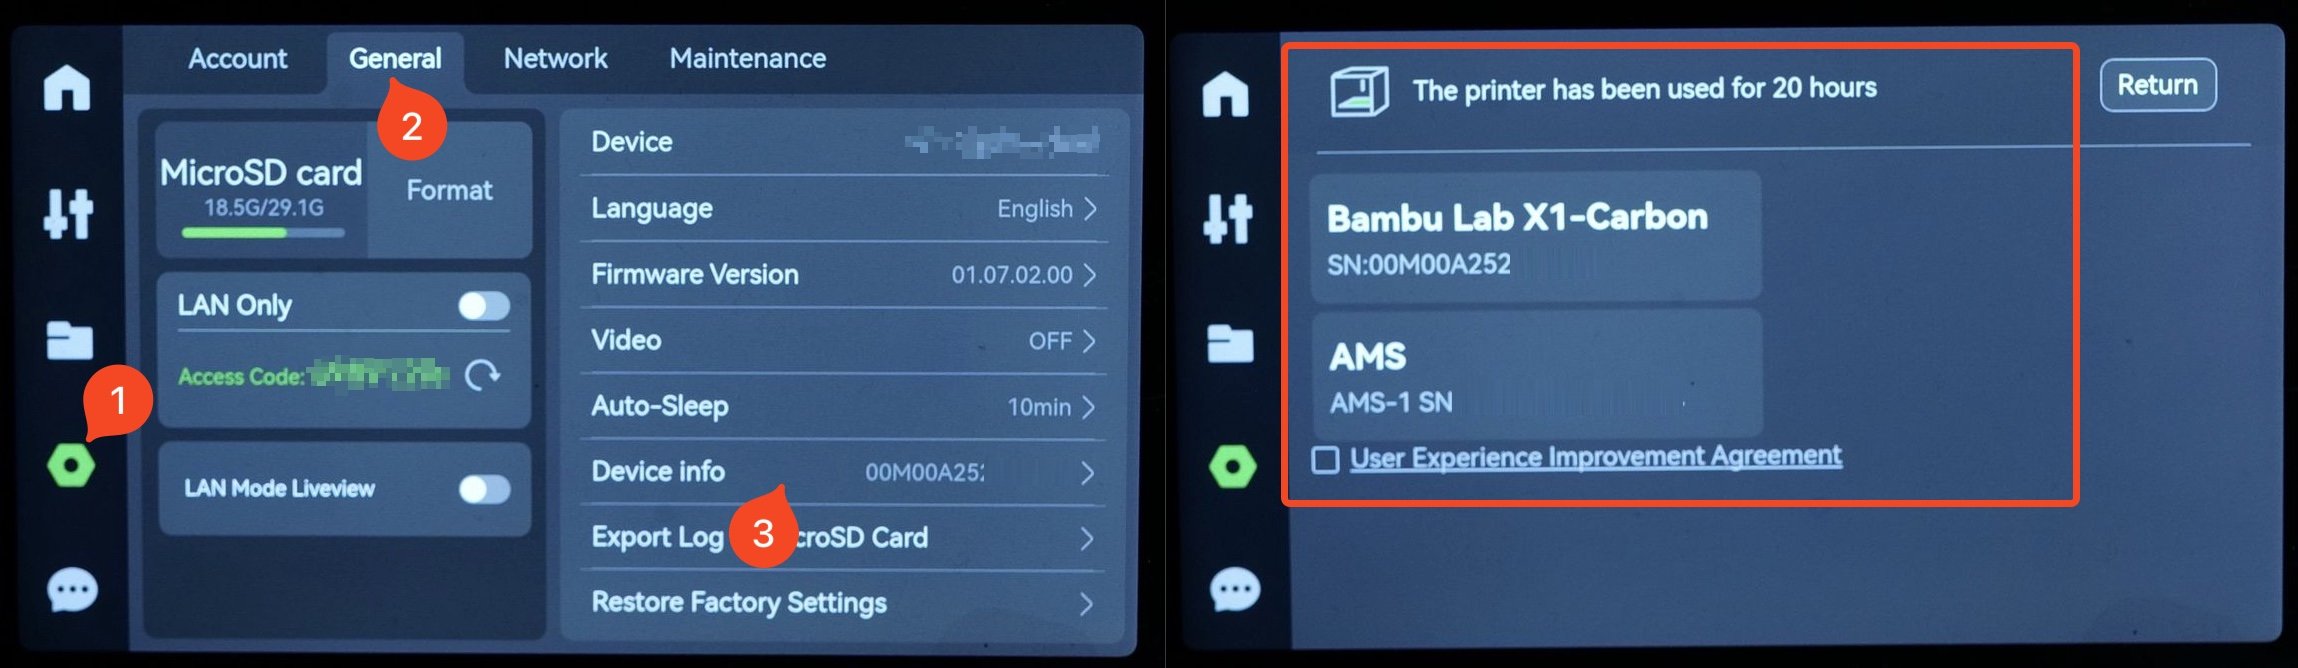
¶ P1 Series Printer Screen
The serial number of the AMS is displayed on the screen under Settings→ Device as shown in the image below:

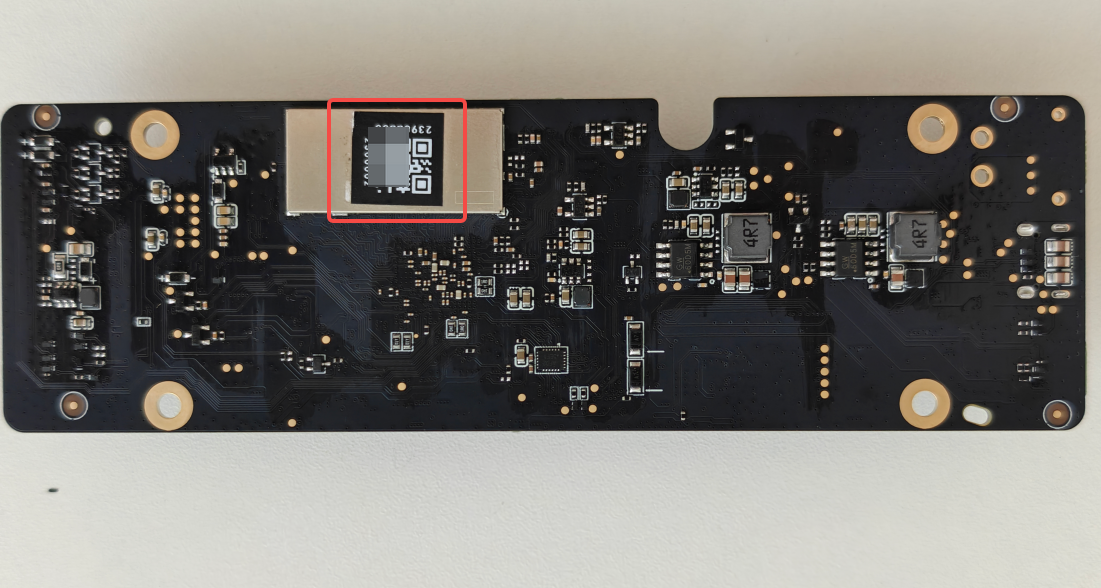
¶ How to locate your new SN on the AP board/Mainboard
Locate the QR code on the AP board to find the printer’s new SN. If the printer’s screen is functioning, you can read the new SN from the screen even if the AP board has been replaced.
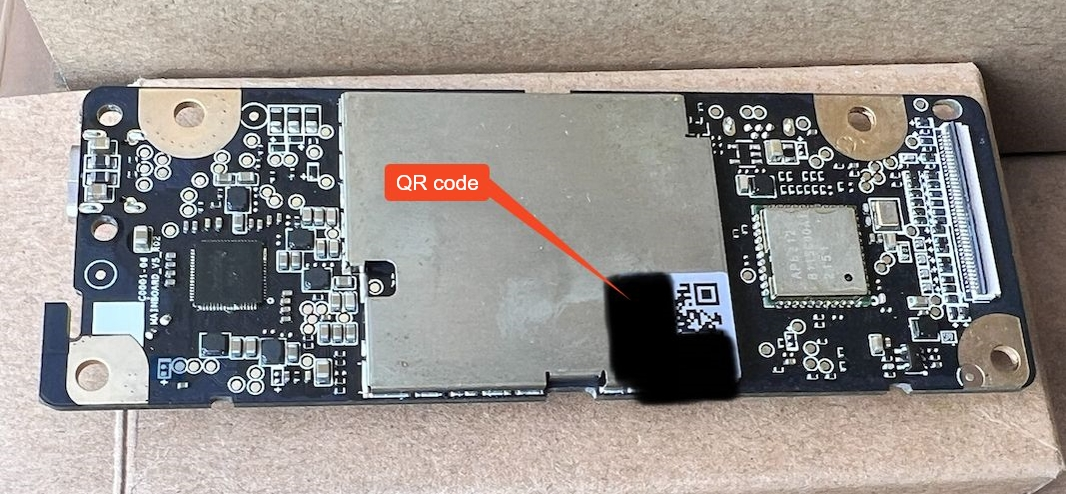
¶ H2S
The QR code for the new AP board is located on the back of the board.
¶ H2D
The QR code for the new AP board is located on the back of the board.

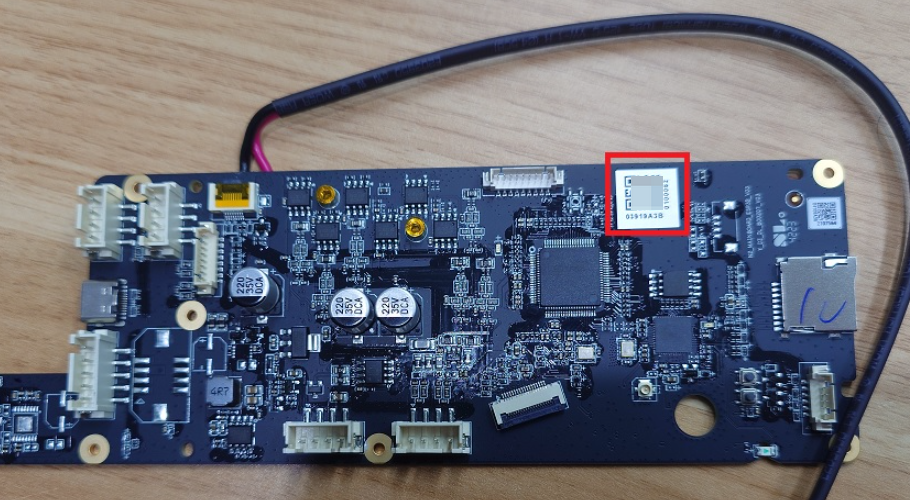
¶ X1 Series
The QR code for the new AP board is located on the back of the board, accessible once you open the AP board cover.
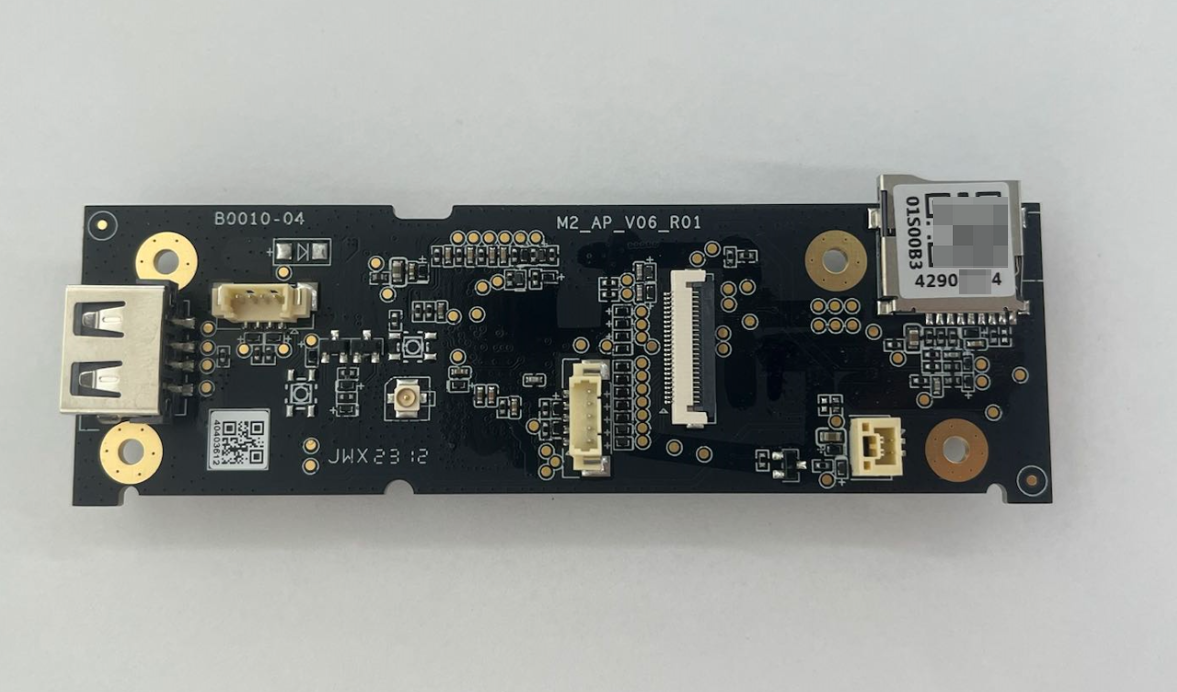
¶ P1 Series
The QR code for the new AP board is located near the micro SD slot on the board, accessible once you open the AP board cover.
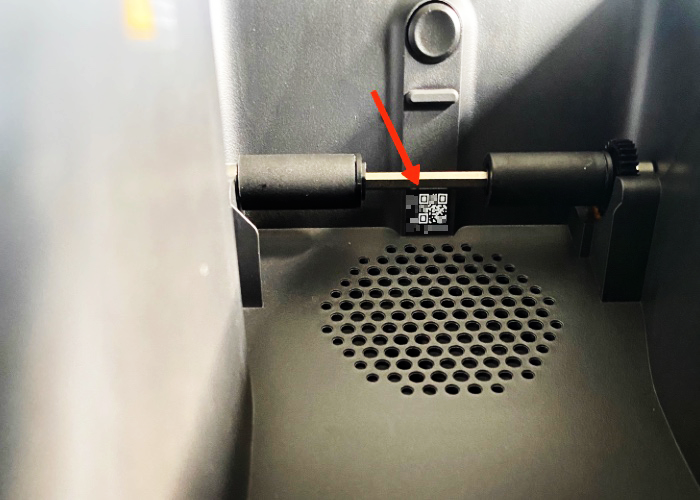
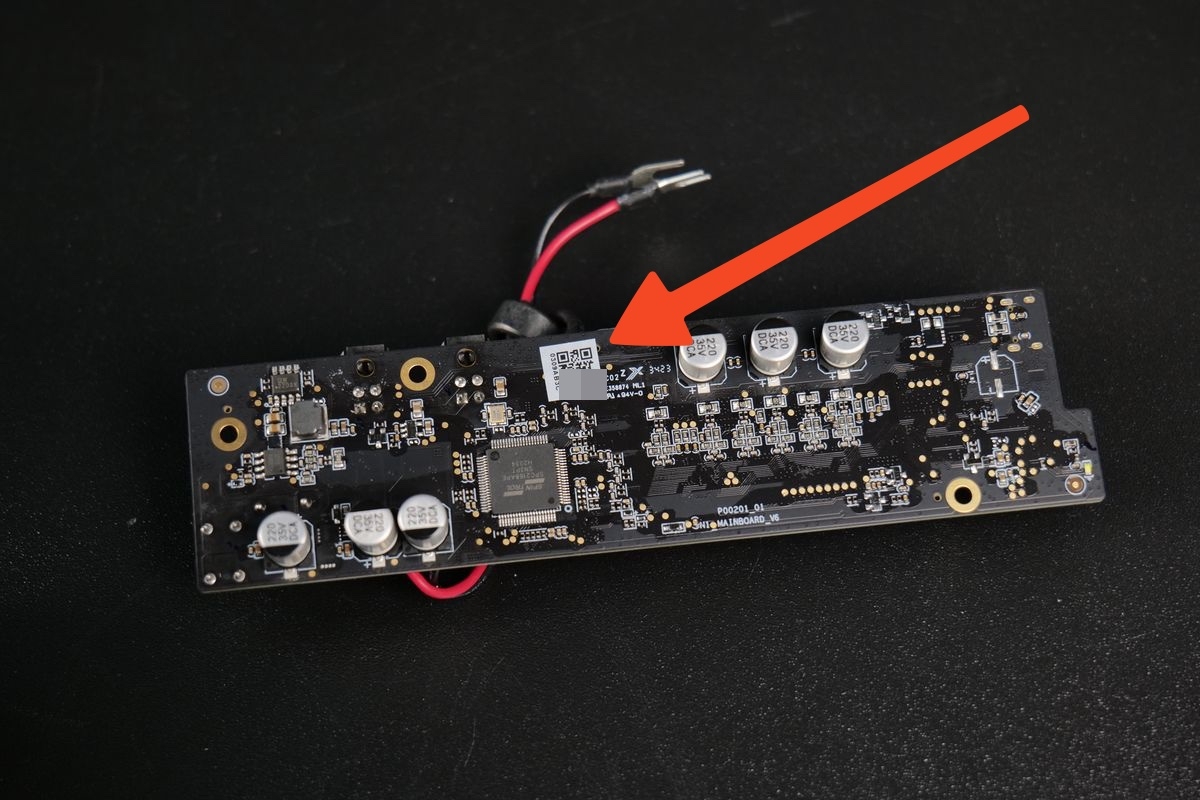
¶ A1 Series
The QR code for the new mainboard is located on the PCB.
A1:
A1 mini:
¶ How to activate the new SN
This section explains how to activate the new SN after receiving and installing the new AP board/mainboard.
Once you replace the AP board/mainboard, the printer's SN will differ from the QR code sticker on the printer. Without the AP board/mainboard being activated, to use the original SN, the printer will not be able to connect to the cloud and your account.Please follow the steps below to activate the new SN and deactivate the original one:
1. Before installing the new AP board/mainboard, take a photo of both the original and new SN for reference.
2. Go to the SN Activation Page, fill in the required information, then submit the request.
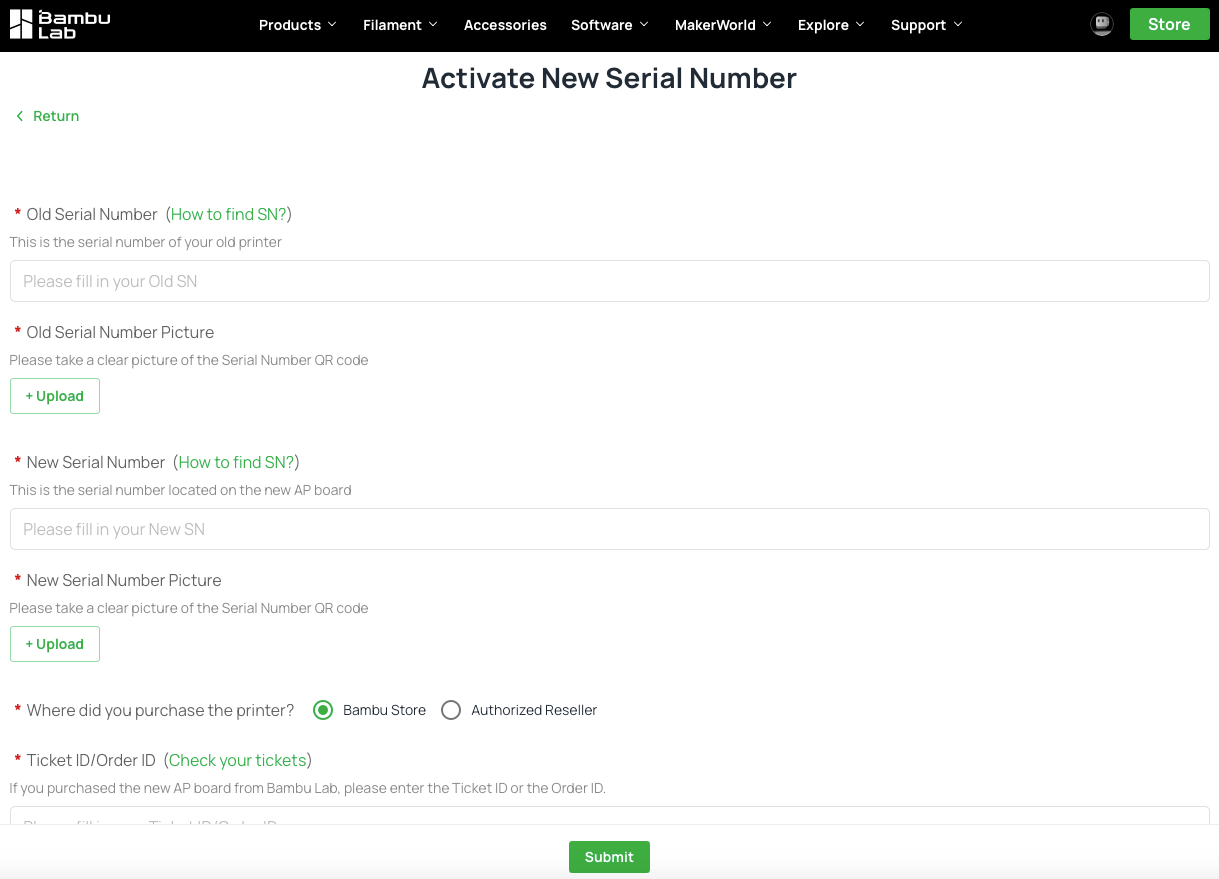
3. Our team will handle the activation in the shortest time possible, then inform you with an email once it is done.
4. After receiving the confirmation email, all that's left to do is to bind the printer to your account. For step-by-step instructions, refer to the Printer Account Binding Guide in our wiki.
If you're unable to bind the printer to your account, please restart the printer and try again.
If the issue persists, submit a support ticket and our team will provide further assistance.
¶ End Notes
We hope the detailed guide provided has been helpful and informative.
To ensure a safe and effective execution, if you have any concerns or questions about the process described in this article, we recommend reaching out to technical support team before initiating the operation. We will do our best to respond promptly and provide the assistance you need. Click here to open a new ticket in our Support Page.