¶ 1. Feature Introduction
Print Then Cut is an intelligent feature of the H2D printer that allows users to print colorful patterns on regular paper and then precisely cut along the pattern contour using the mounted Cutting Module, achieving high-precision production of stickers, labels, greeting cards, and more.
Core Advantages:
-
Multi-color Production: After printing complex colorful designs, cutting is possible, suitable for producing stickers and decorations.
-
Accurate Alignment Cutting: Printed patterns and cutting paths are automatically aligned.
-
Compatible with Various Materials: Supports thin materials like adhesive stickers and cardstock.
¶ 2. Operation Process
¶ Step 1: Design the Pattern
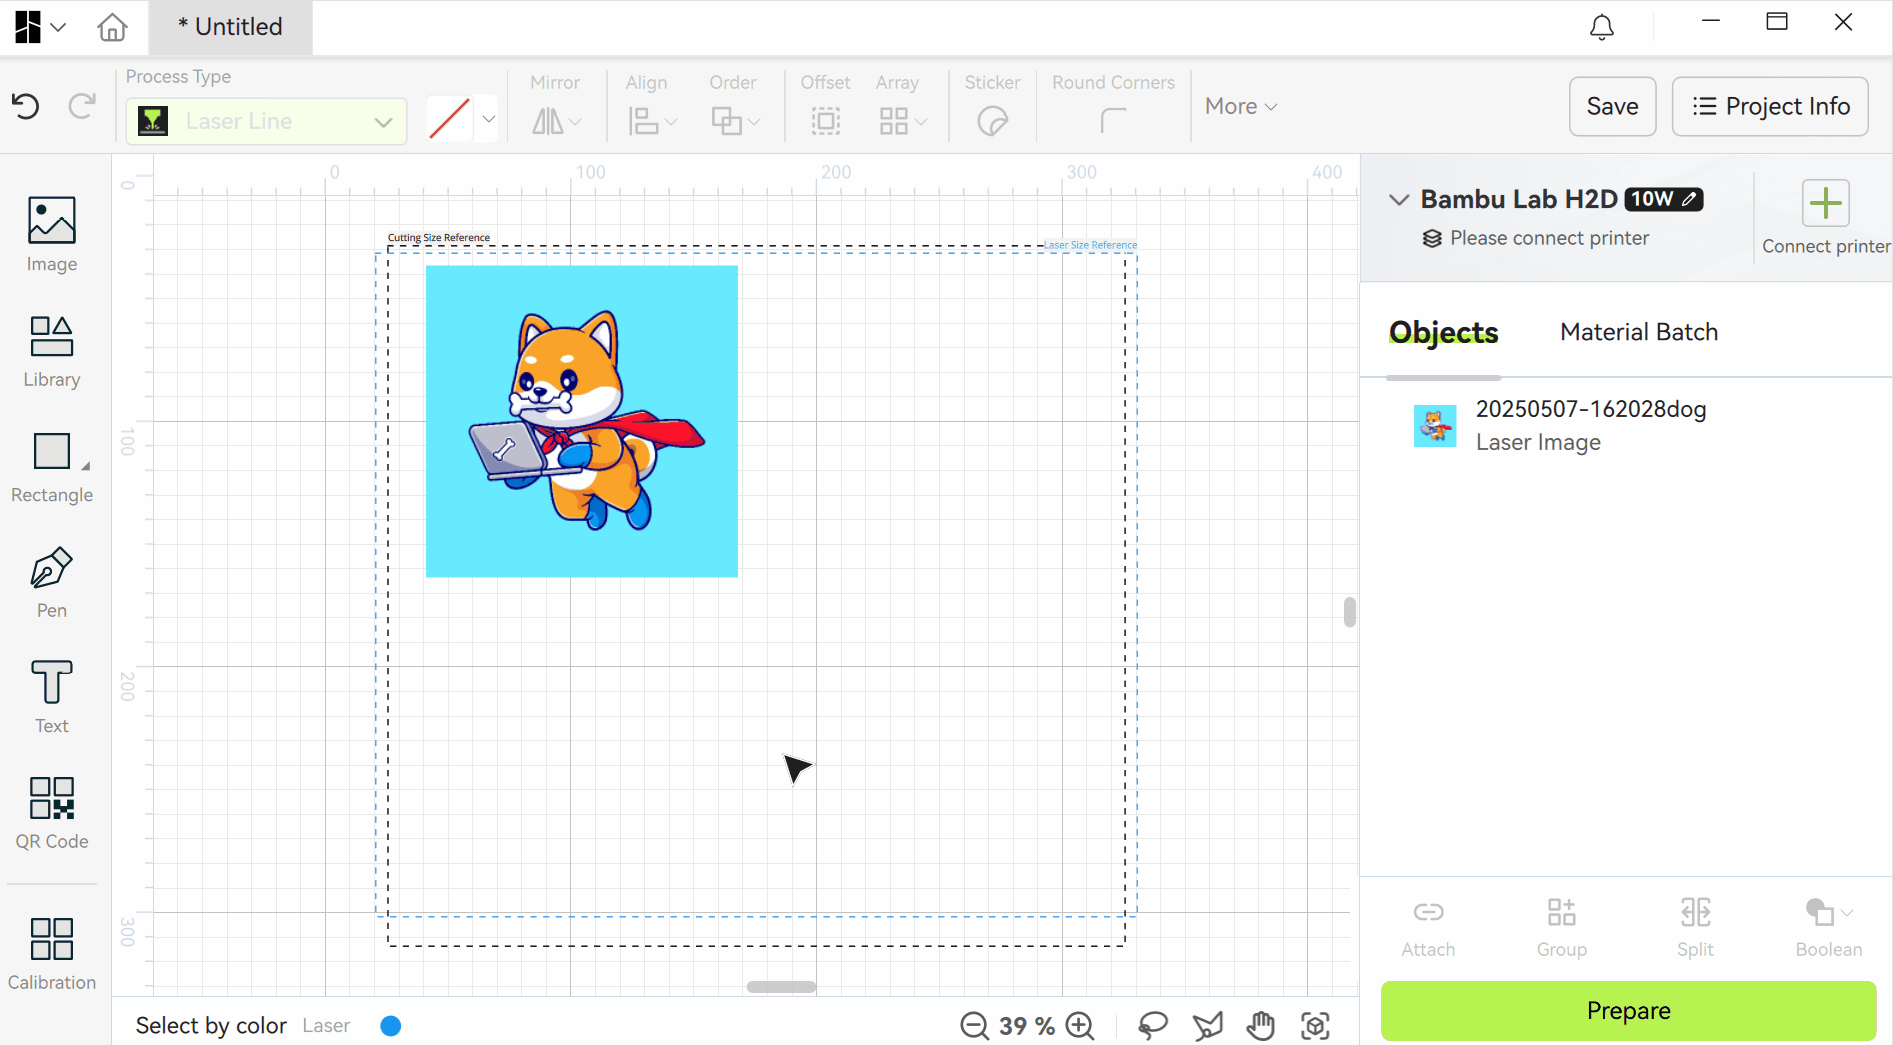
1.Import/draw 2D patterns (either bitmap or vector) in Bambu Suite.
2.Adjust the pattern size and perform other editing, such as removing the background.
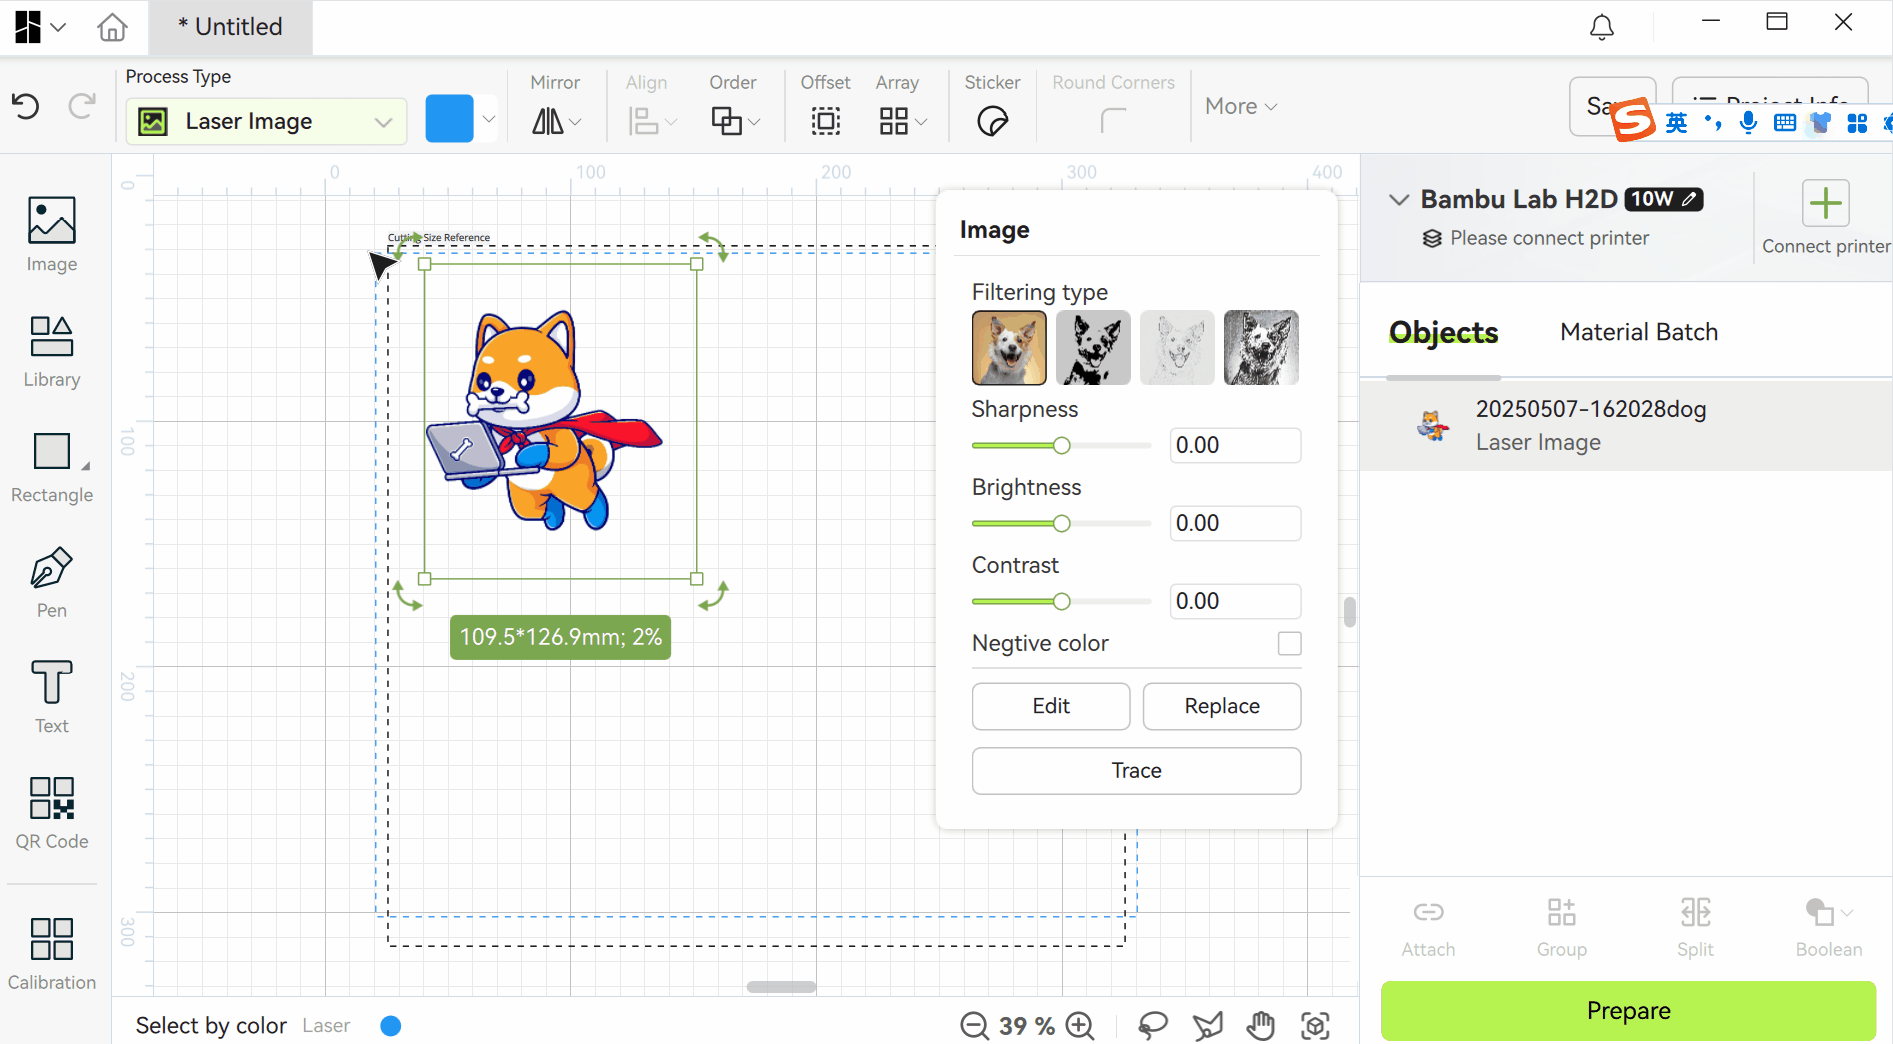
¶ Step 2: Set the Print Then Cut Process Type
Change the pattern’s Process type to Print Then Cut. If you use the sticker-tool, the software will automatically set the sticker pattern to the Print Then Cut process type. For more details, please refer to: Sticker Tool
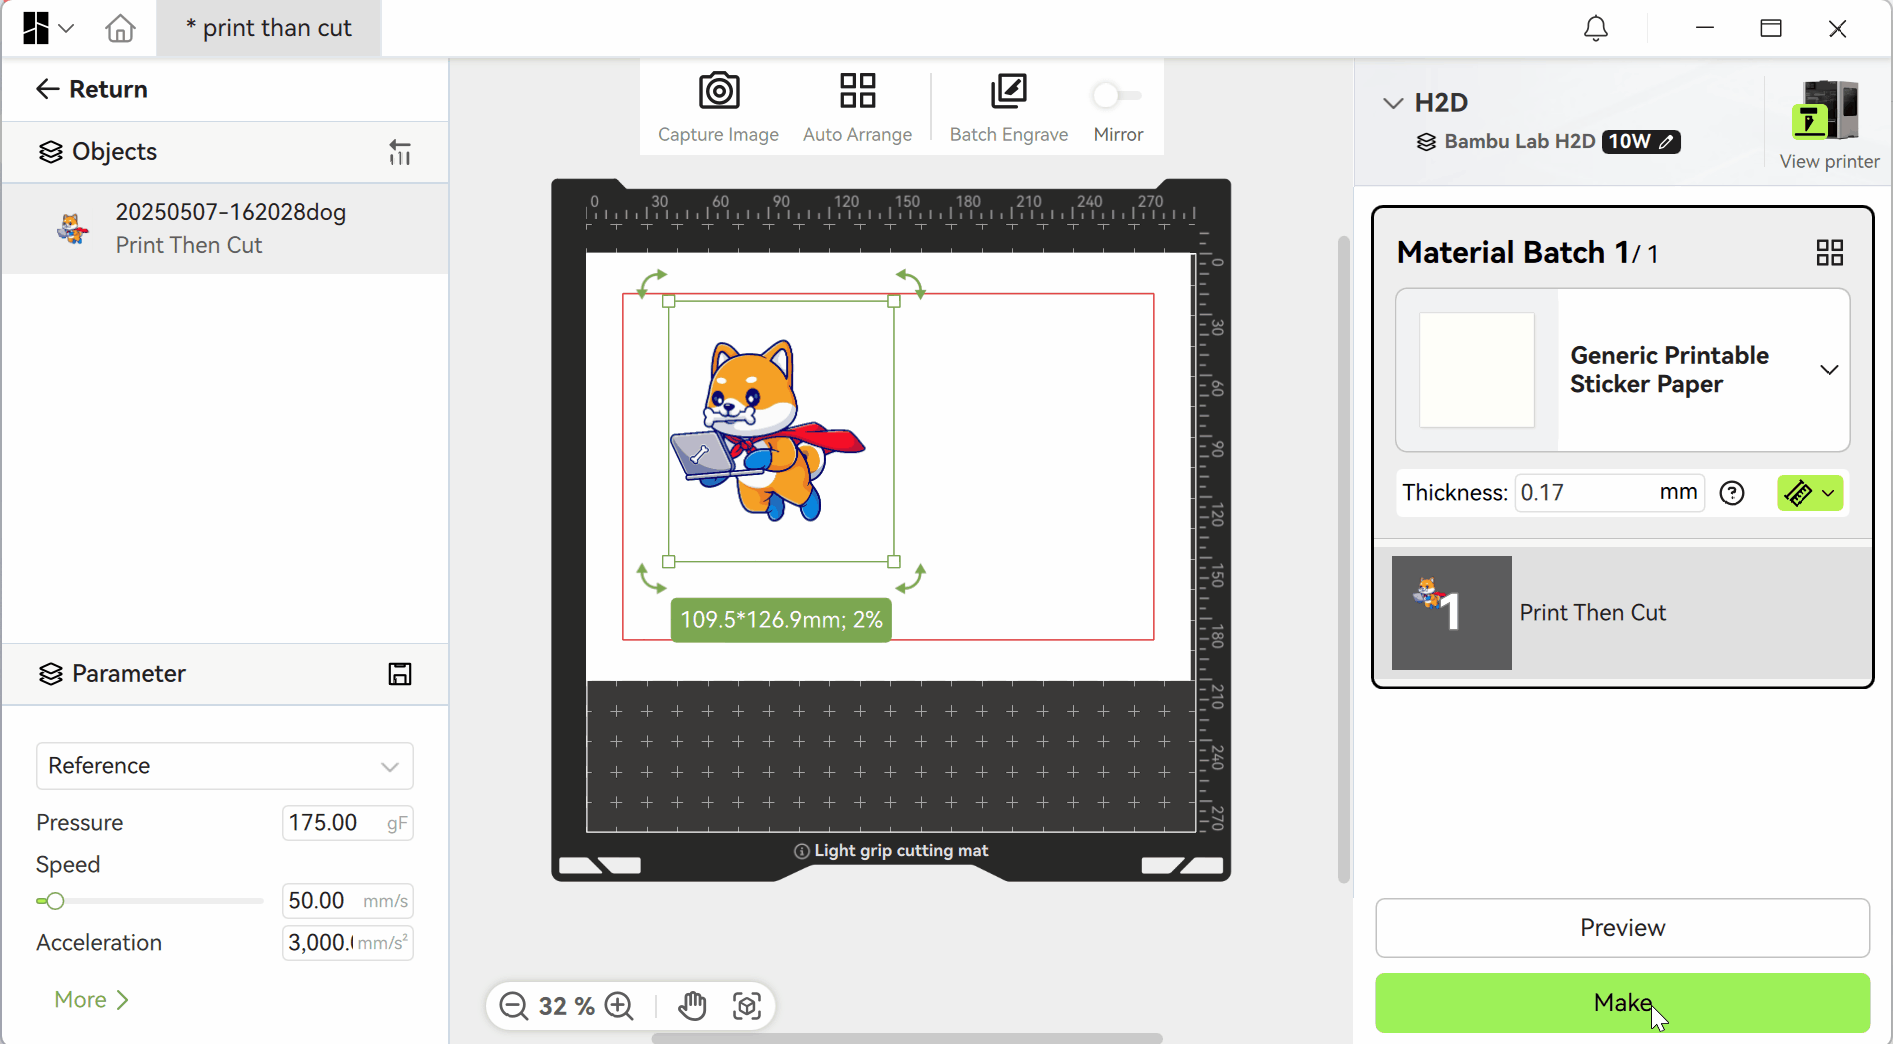
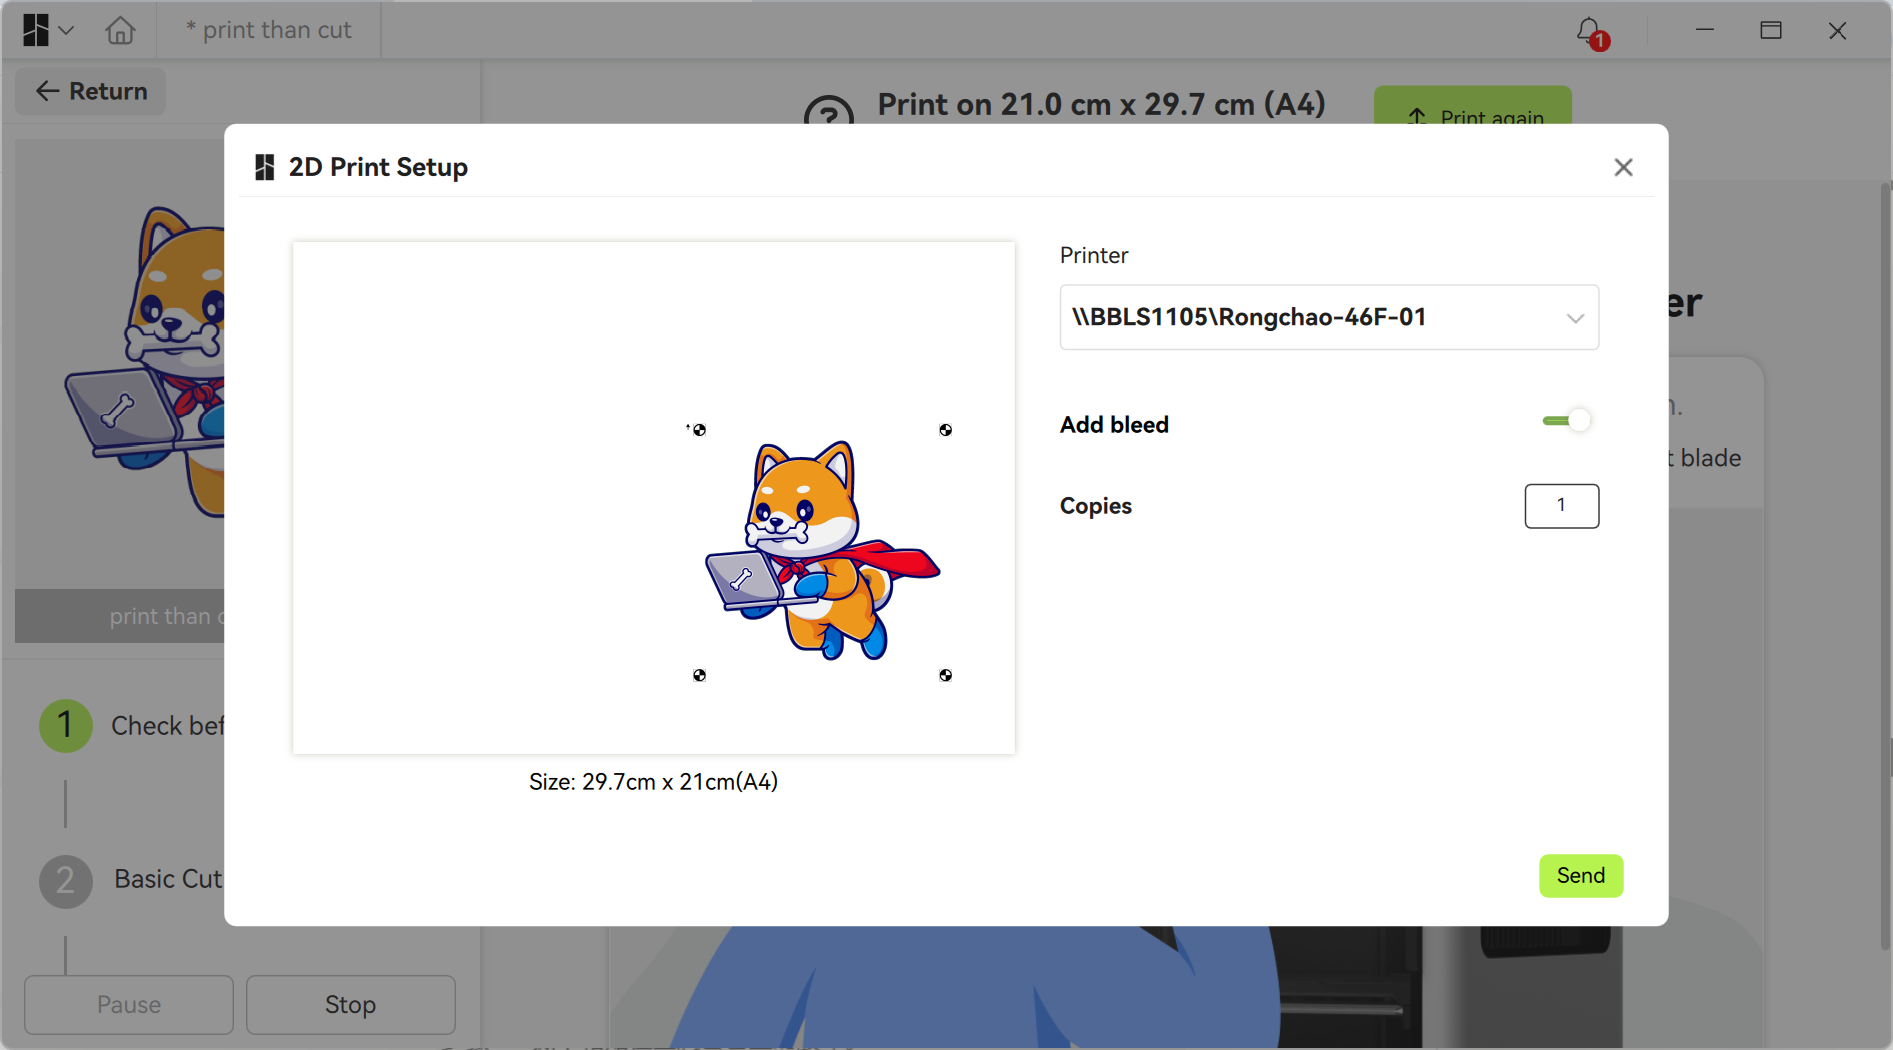
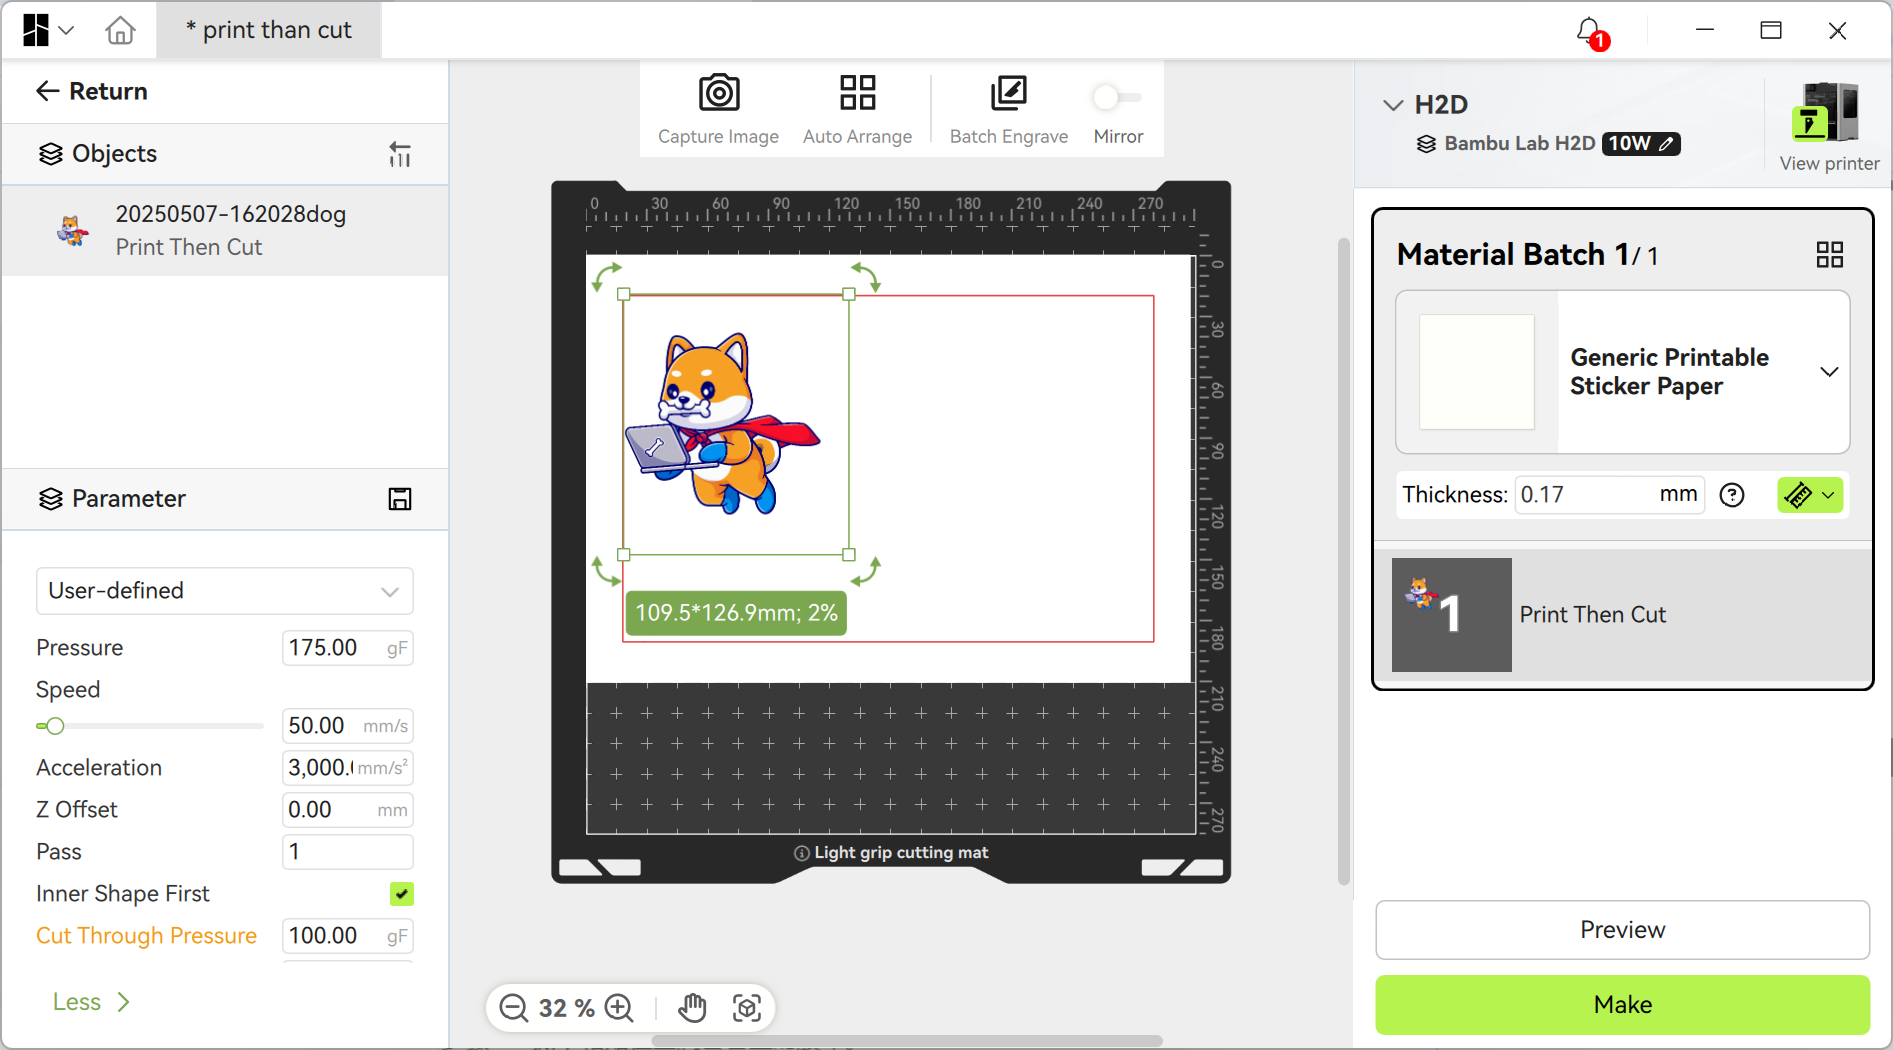
¶ Step 3: Select Material, Send Processing and Printing Tasks
- Choose the appropriate material from the material batch, such as selecting adhesive printing paper when making stickers.
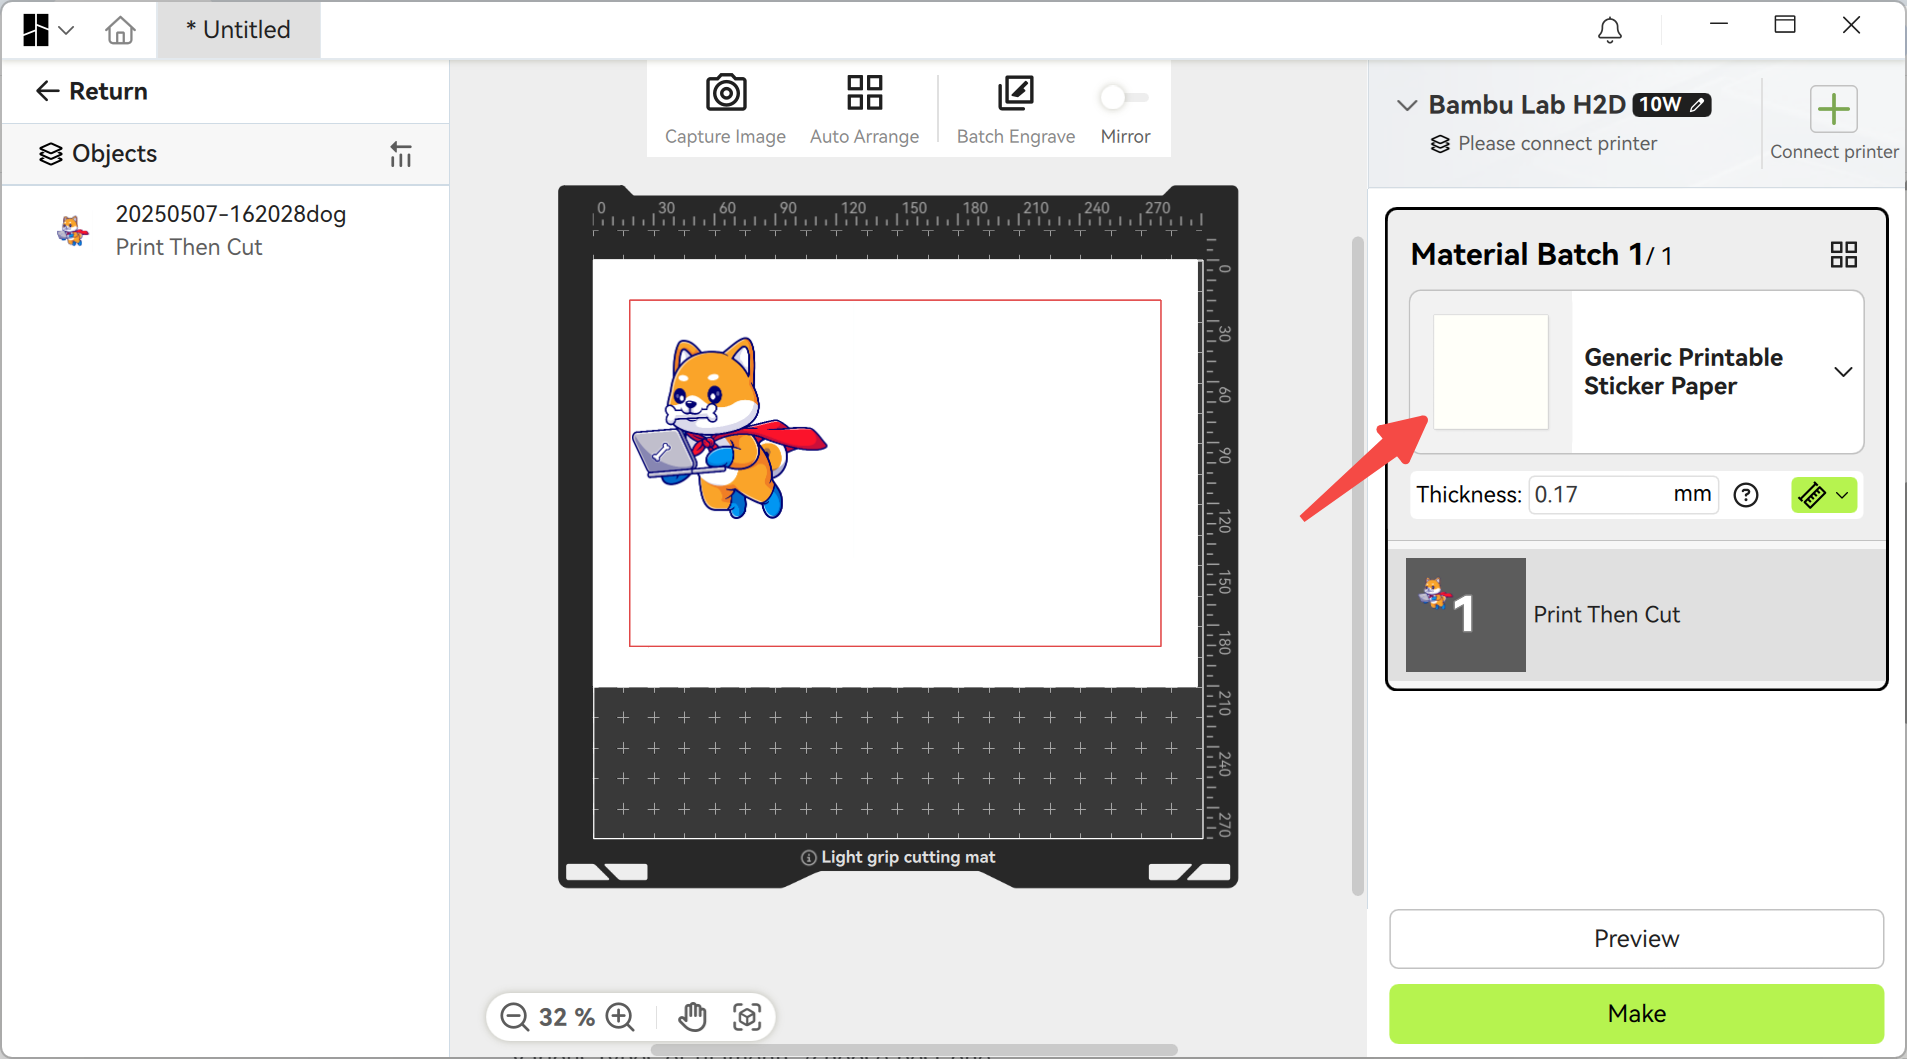
2.Click “Make” to send the task. This step sends two tasks: one to the 3D printer for processing and the other to the paper printer for 2D printing (ensure the computer is successfully connected to the paper printer).
Important Notice!
When using a 2D printer, always print at 100% scale (actual size) to ensure accurate results. Before printing, check the 2D printer’s default settings and make sure options like “Fit to page” or “Scale to fit” are turned off, as they can distort the scale and lead to incorrect dimensions or misalignment during cutting.
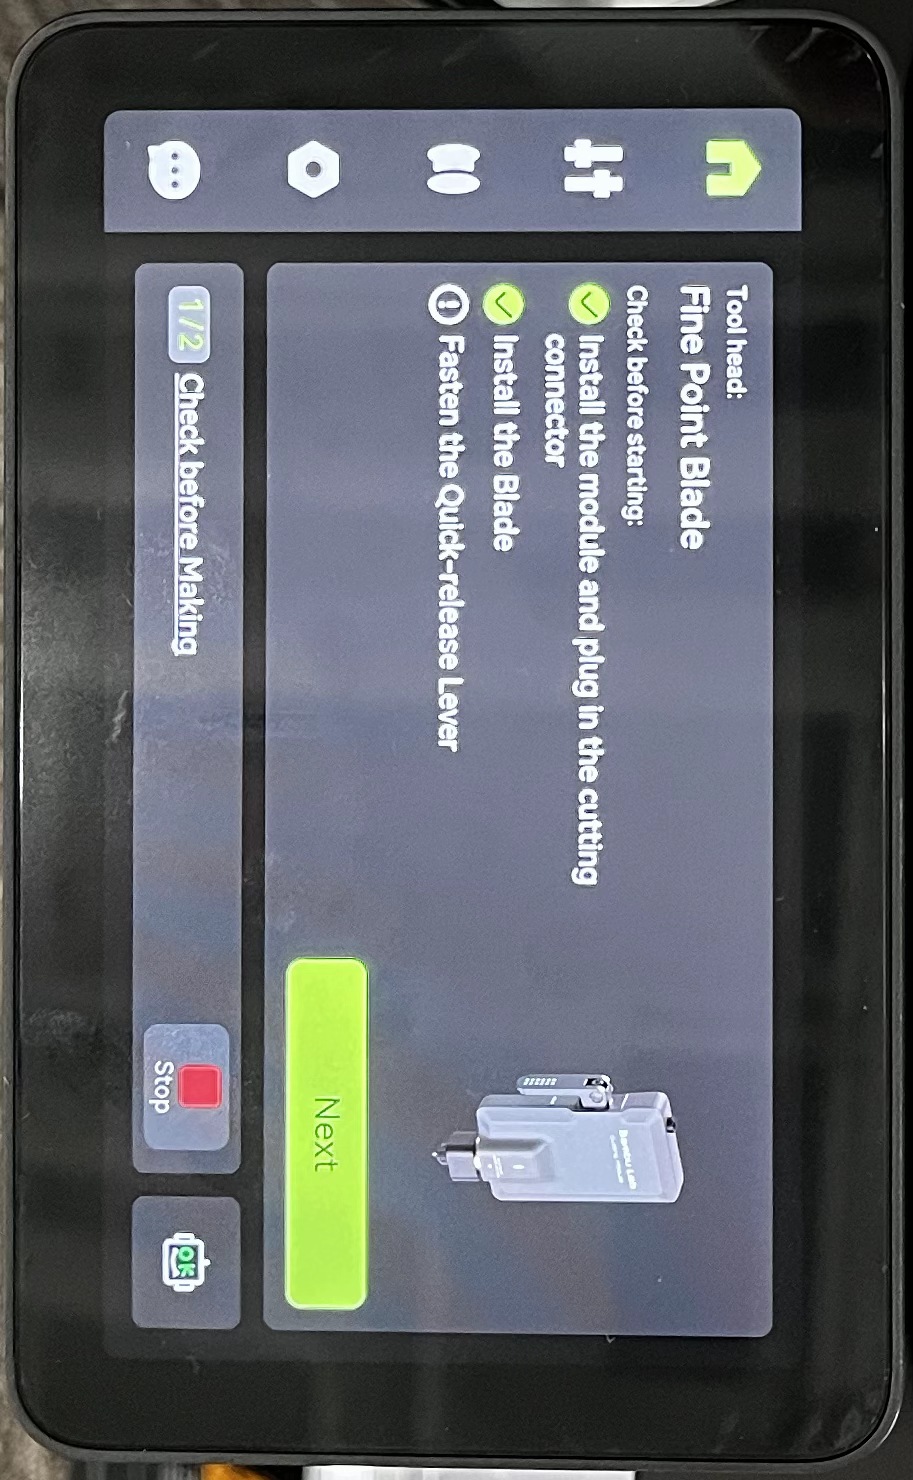
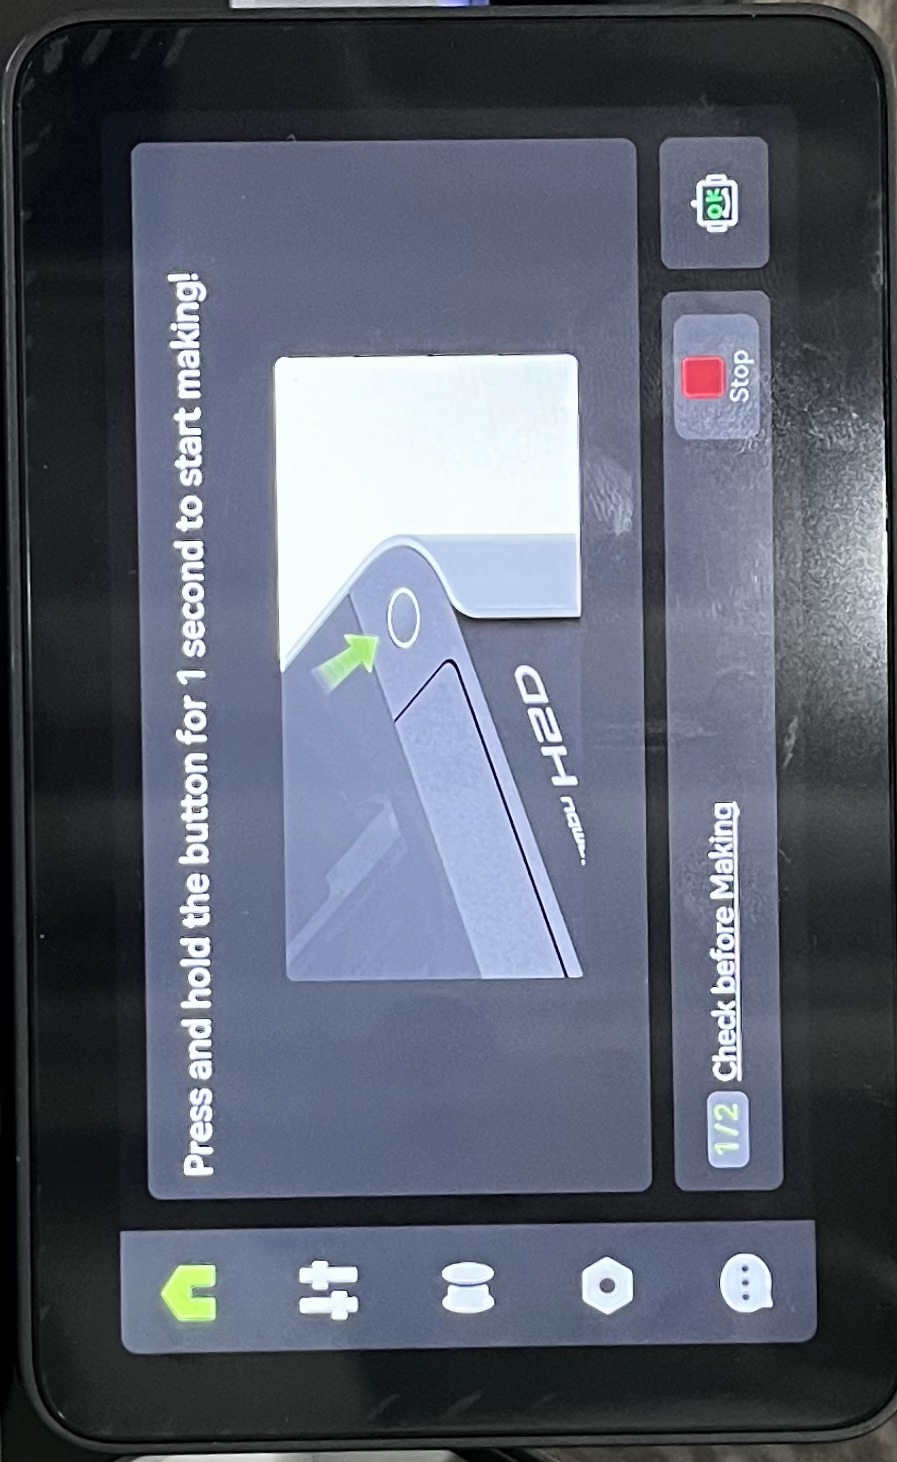
¶ Step 4: Start Making
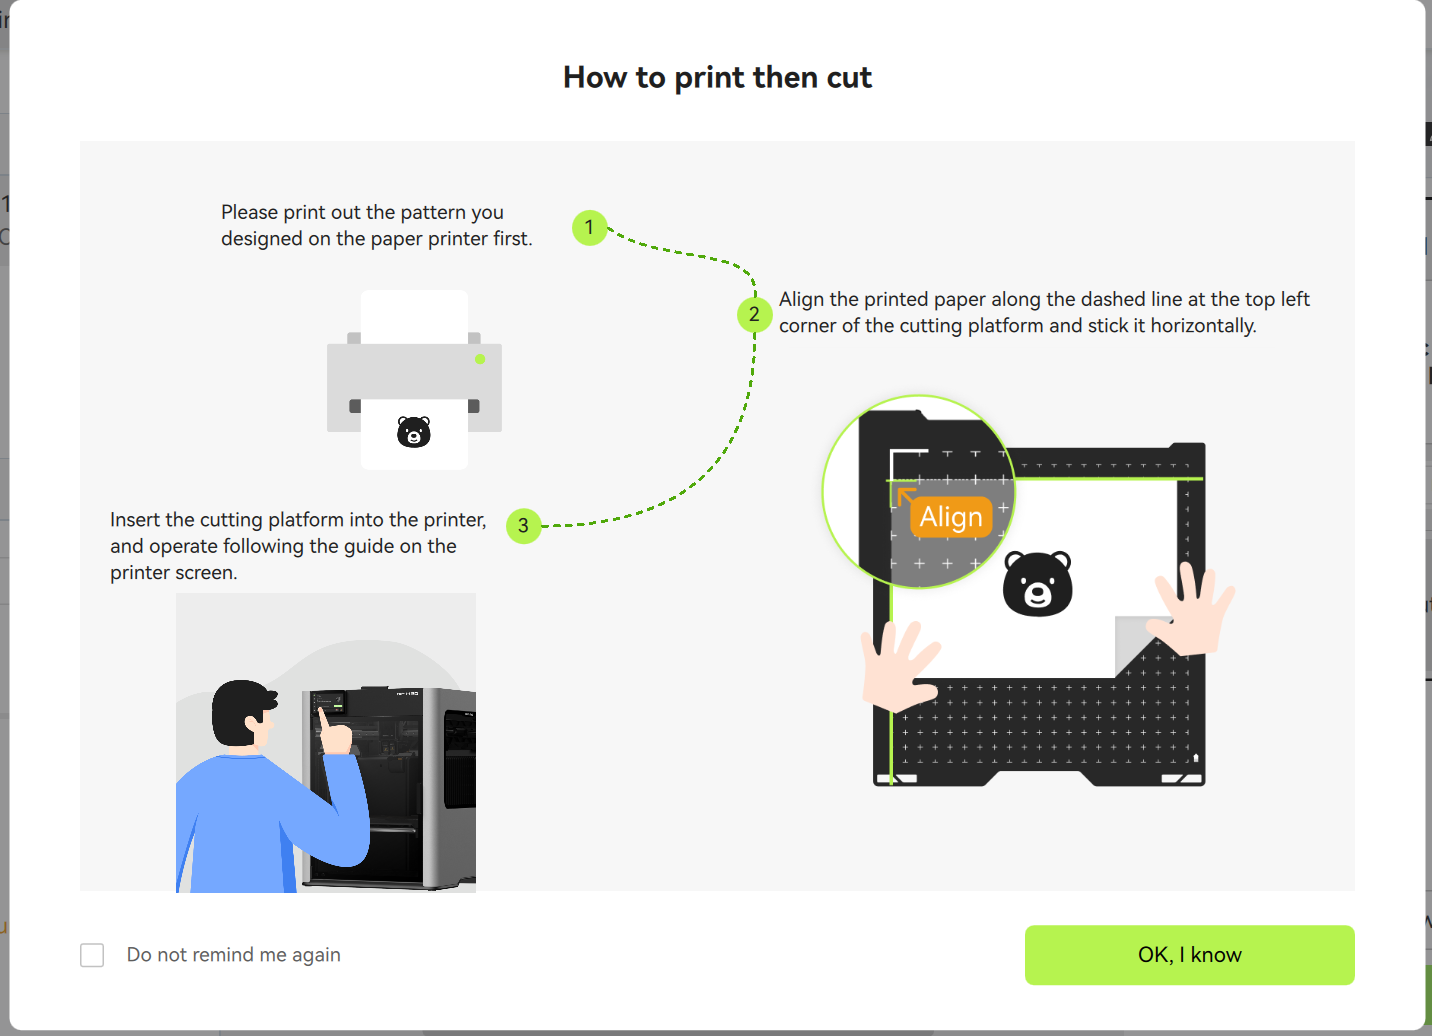
Follow the instructions on the software and screen to attach the printed paper to the corresponding position on the Cutting platform, then press the button on the machine to start the task.
¶ 3. Operation Guidelines
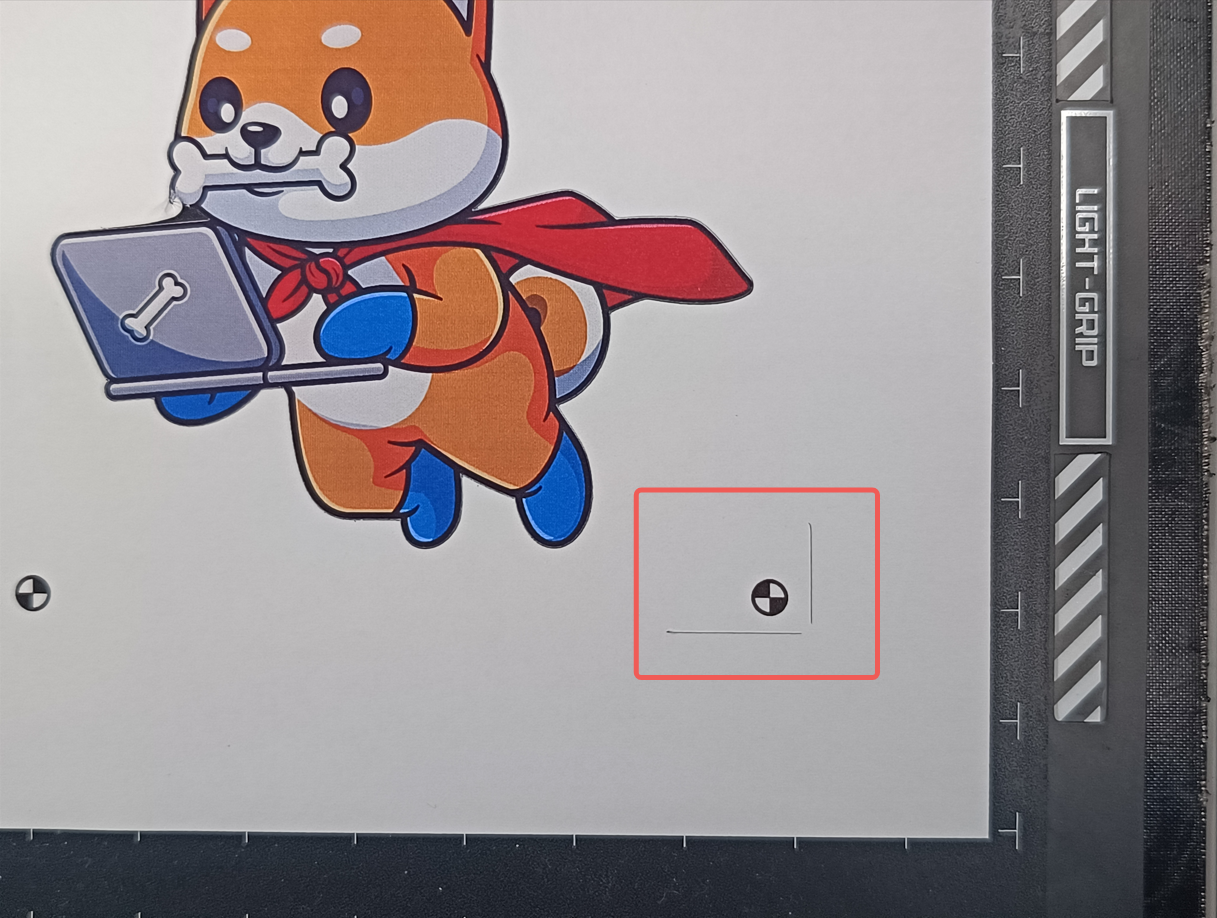
¶ Material Attachment Guidelines
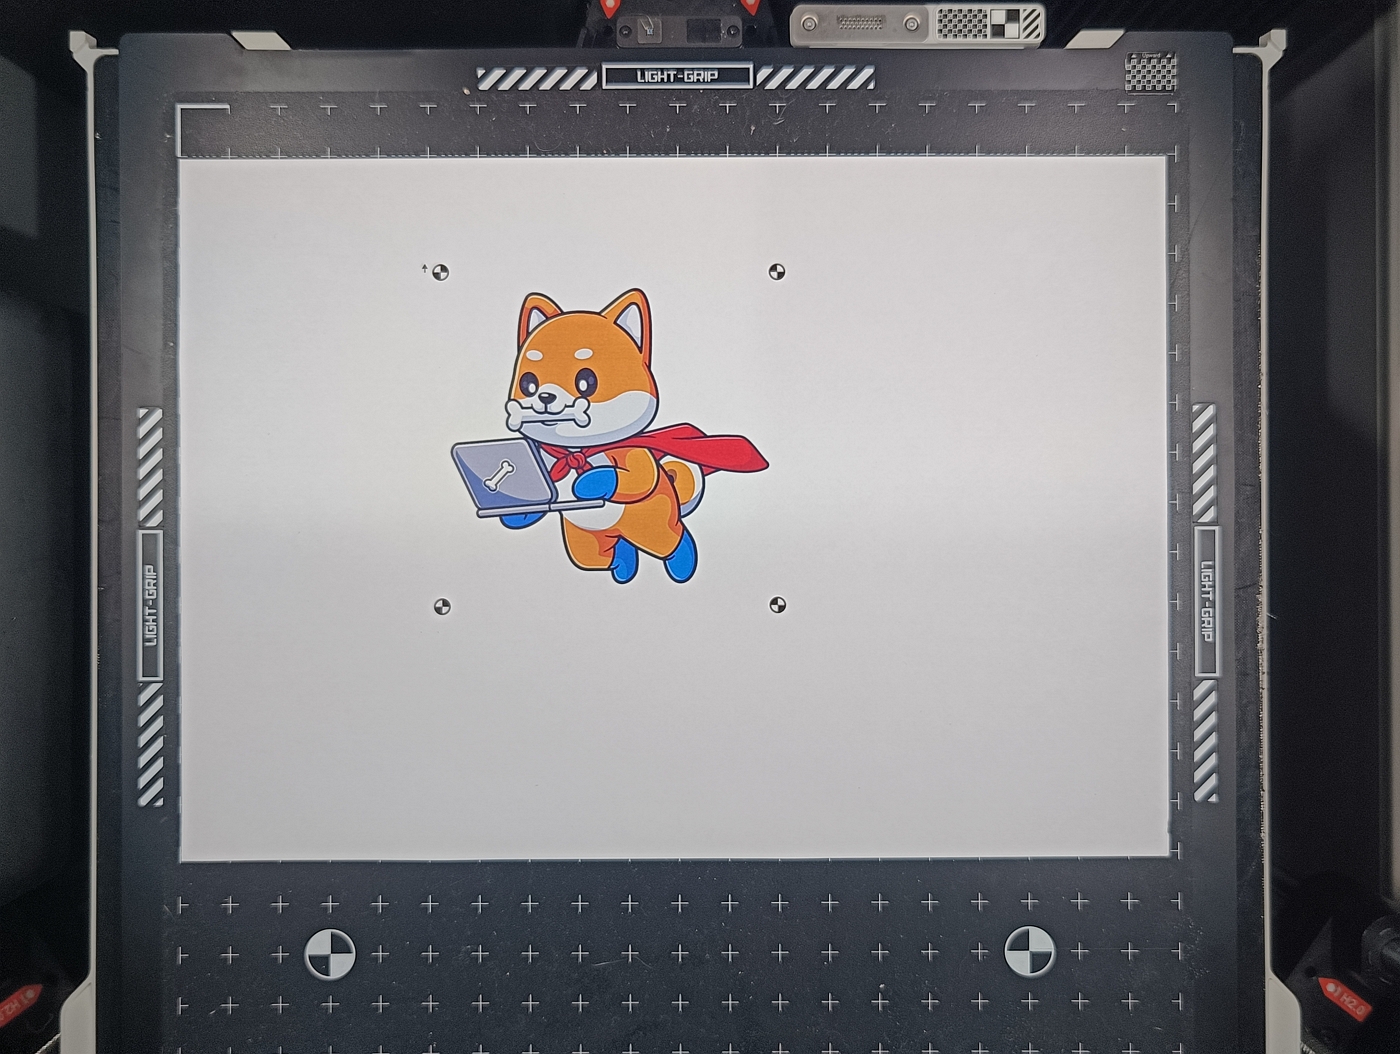
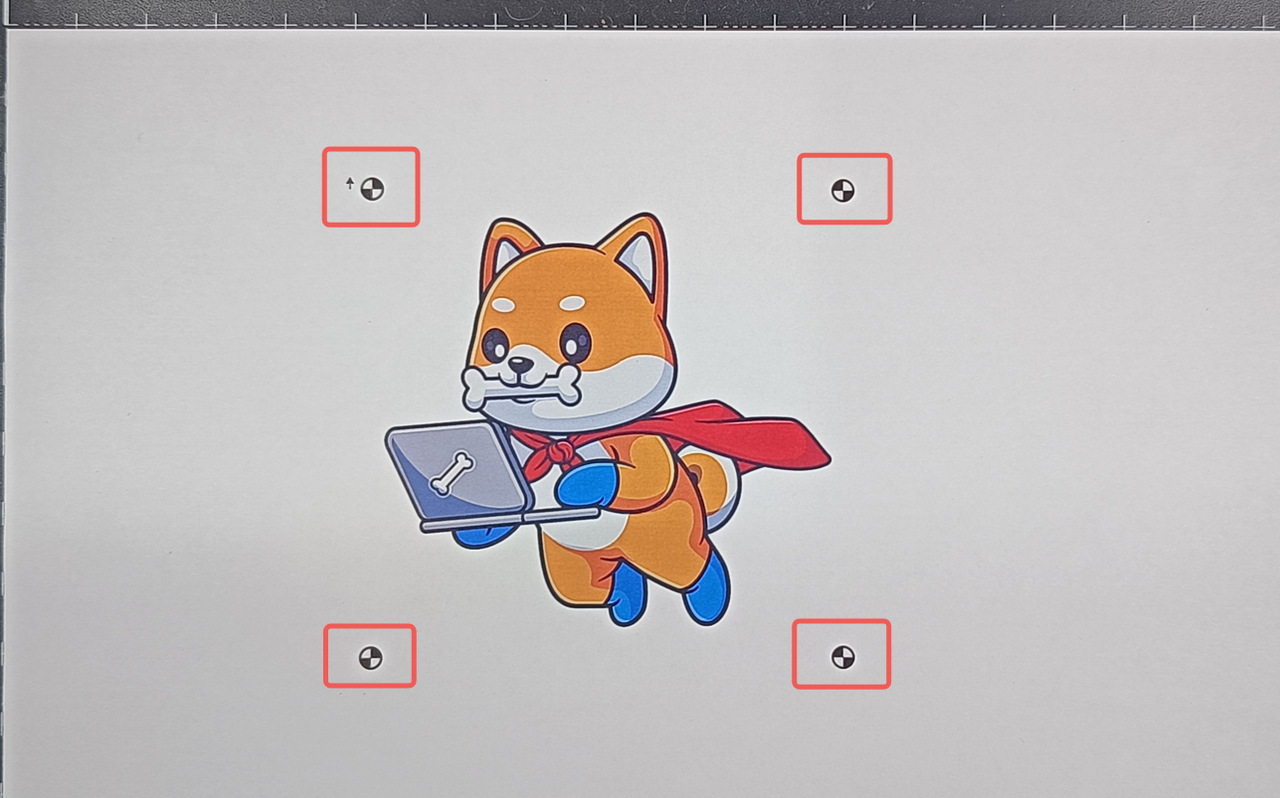
During Print Then Cut operations, the tool head camera must recognize the 4 Markers on the paper to determine the cutting position. When sending the 2D printing task, the software will automatically generate and print these 4 markers around the pattern.
-
Marker Function:
-
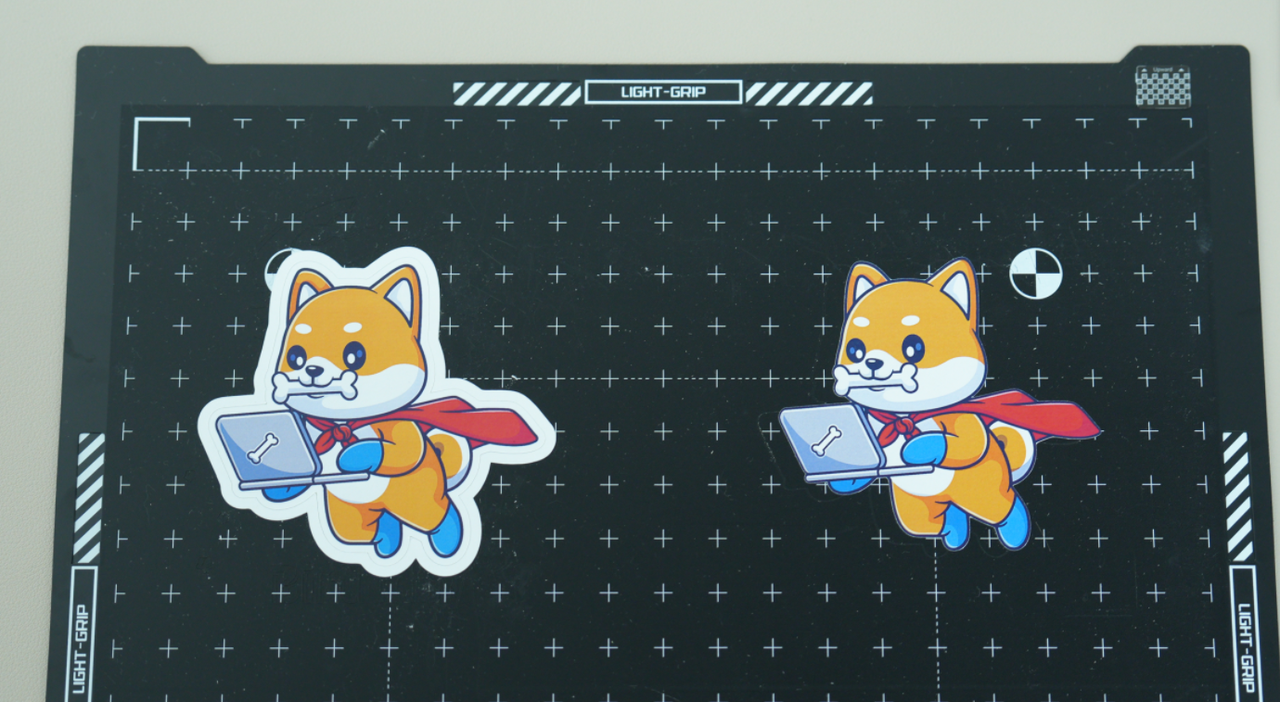
The 4 Markers ensure accurate positioning of the pattern, allowing the device to precisely cut along the pattern contour.
-
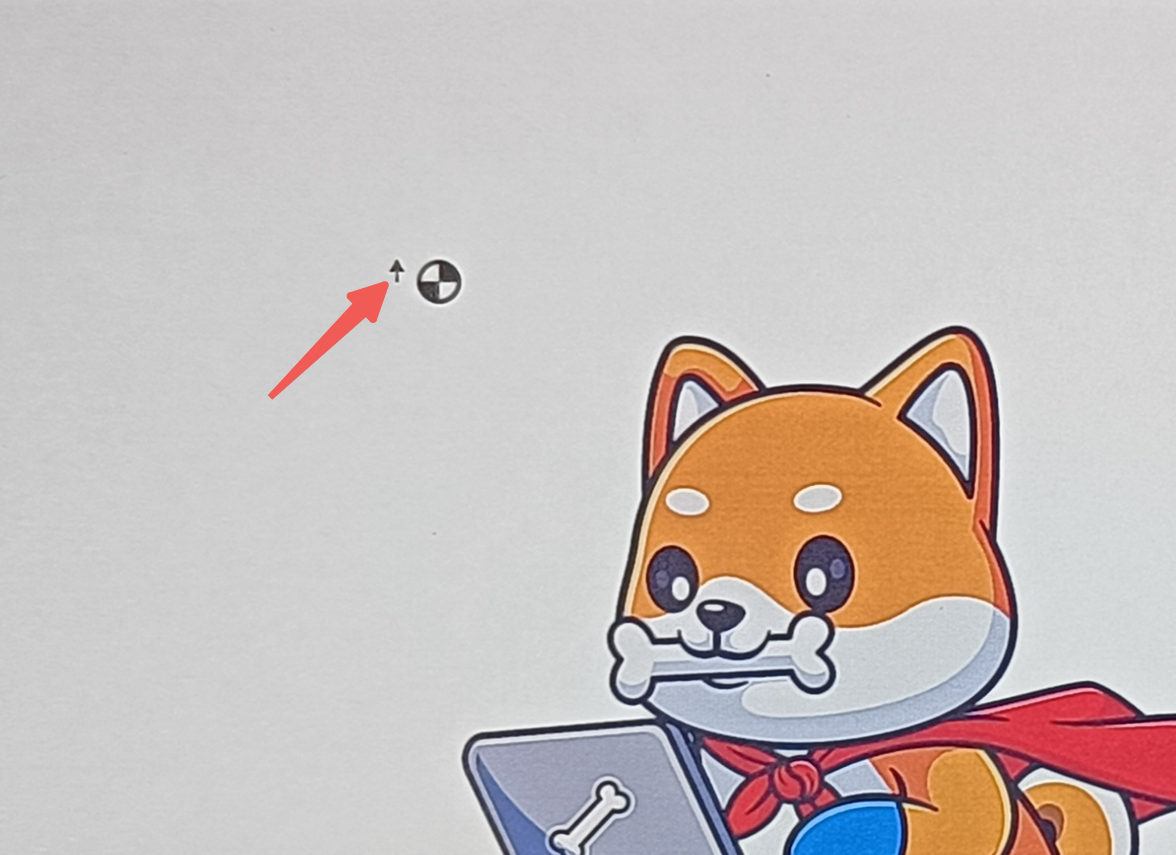
The upper-left Marker has an "Up Arrow" indicating the paper placement direction.
-
-
Operational Requirements:
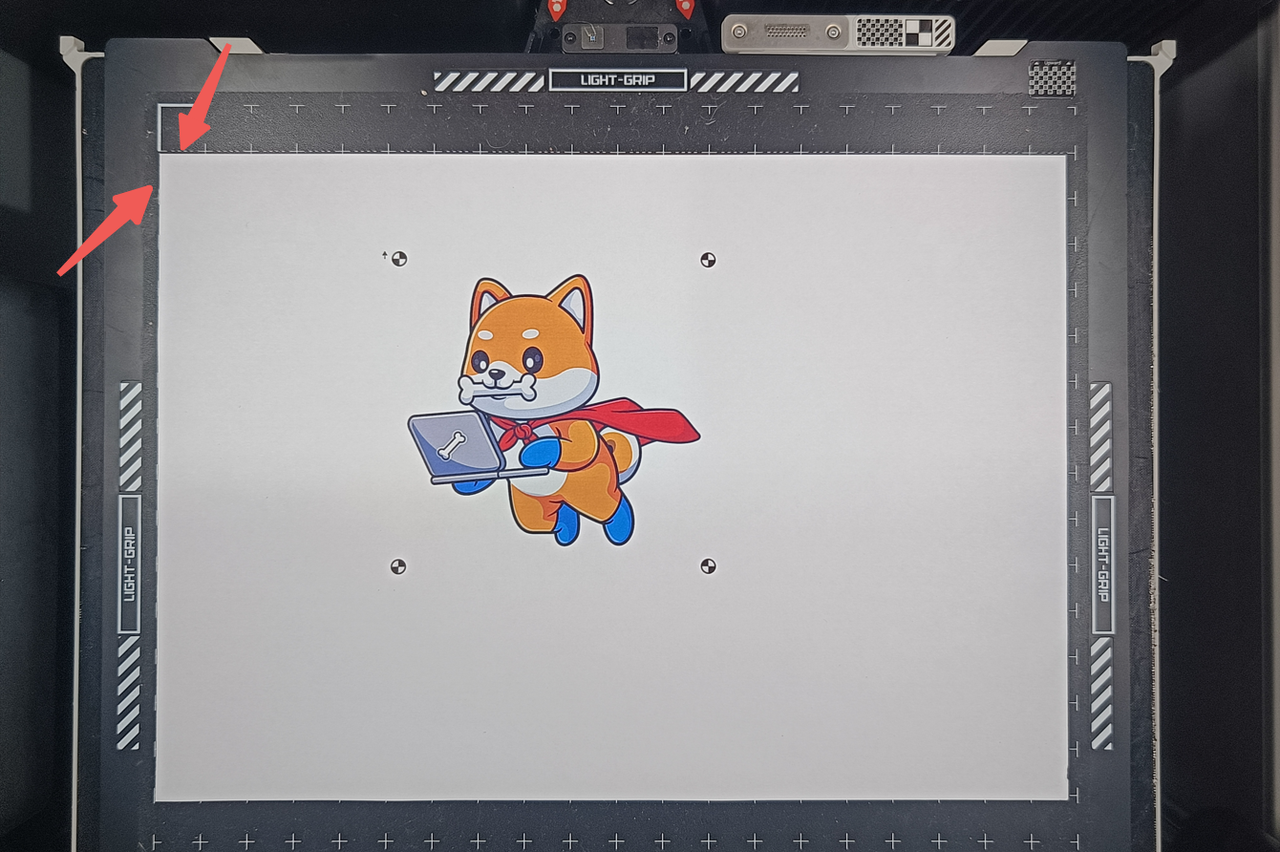
- The user needs to attach the printed pattern paper to the Cutting platform at the upper-left position of the second dashed frame, as shown below:

-
Precautions:
-
If the camera fails to recognize all 4 Markers, the processing task will be terminated;
-
The current camera recognition range is limited, and if the paper attachment deviates too much, it may fail to detect the markers.
Note: For sticker attachment in XY directions, the maximum allowable deviation is ±10mm in the X direction and ±5mm in the Y direction. Future firmware updates aim to expand the search range for locating markers.
-
¶ Bleed Area Settings
¶ What Is the Bleed Area?
The bleed area is an extra expanded region around the pattern edge during design to compensate for minor dimension deviations when the paper printer prints the pattern, ensuring the cut pattern edges remain complete without white borders.
¶ How to Set the Bleed Area?
In the 2D printing task window, enable the Add bleed to configure its settings. When enabled, the pattern will expand by approximately 0.15 mm on all sides.
¶ Eye-in-Hand Calibration Precautions
¶ Why Is Eye-in-Hand Calibration Needed?
Since the Cutting Module is removable, mechanical position shifts can occur during mounting and dismounting. Calibration is required to eliminate XY-direction errors, ensuring accurate positioning during processing.
¶ Calibration Process
Before starting the actual processing task, the cutter automatically cuts two reference lines—a horizontal and a vertical —near the lower-left Marker of the material. The tool head camera then scans these reference lines to calculate the cutter’s actual offset, storing this data for subsequent processing tasks.
¶ Key Parameter Descriptions
¶ Blade Pressure for Cutting Calibration Lines
-
Using Official Materials: To ensure the reference lines are cut, the system uses the built-in blade pressure of the selected material, which cannot be changed by the user.
-
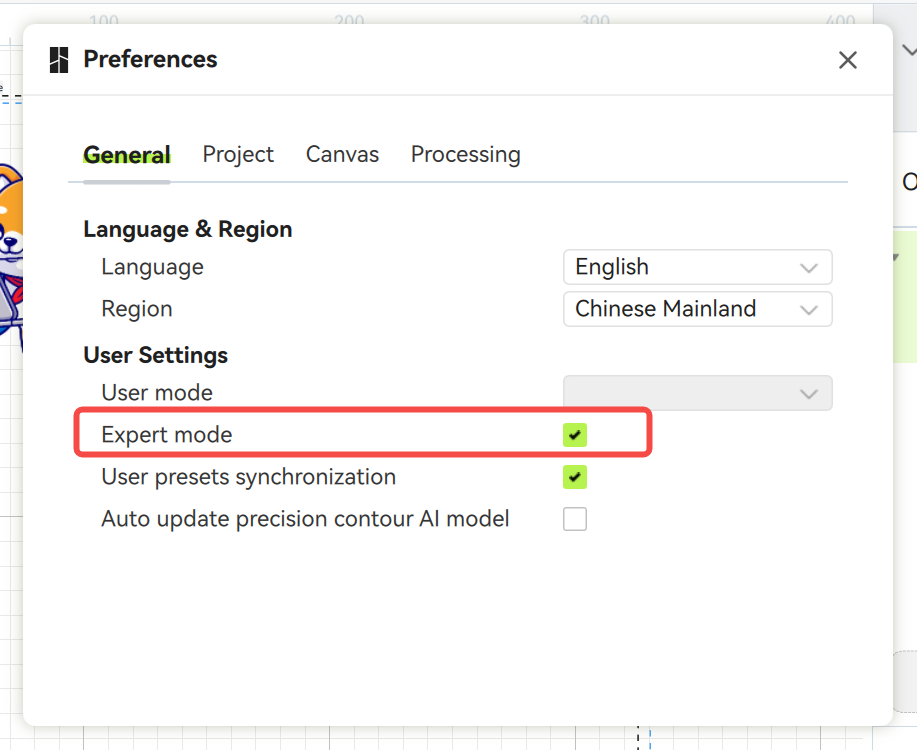
Using user defined Materials: User defined materials lack built-in blade pressure settings, so the system will refer to the user-defined Cut through pressure. If the cutting through pressure is not set, or if it is less than the normal cutting pressure, the cutting pressure will be used to cut the calibration line (Note: The cutting through pressure is only display in Expert Mode in Bambu Suite).
¶ Common Calibration Failure Reasons
-
Reference Lines Not Cut Through:
-
For custom materials, the cut through pressure may be insufficient—consider increasing the blade pressure;
-
Blade wear may be severe—inspect and replace the blade if necessary.
-
-
Reference Lines Outside Material Area:
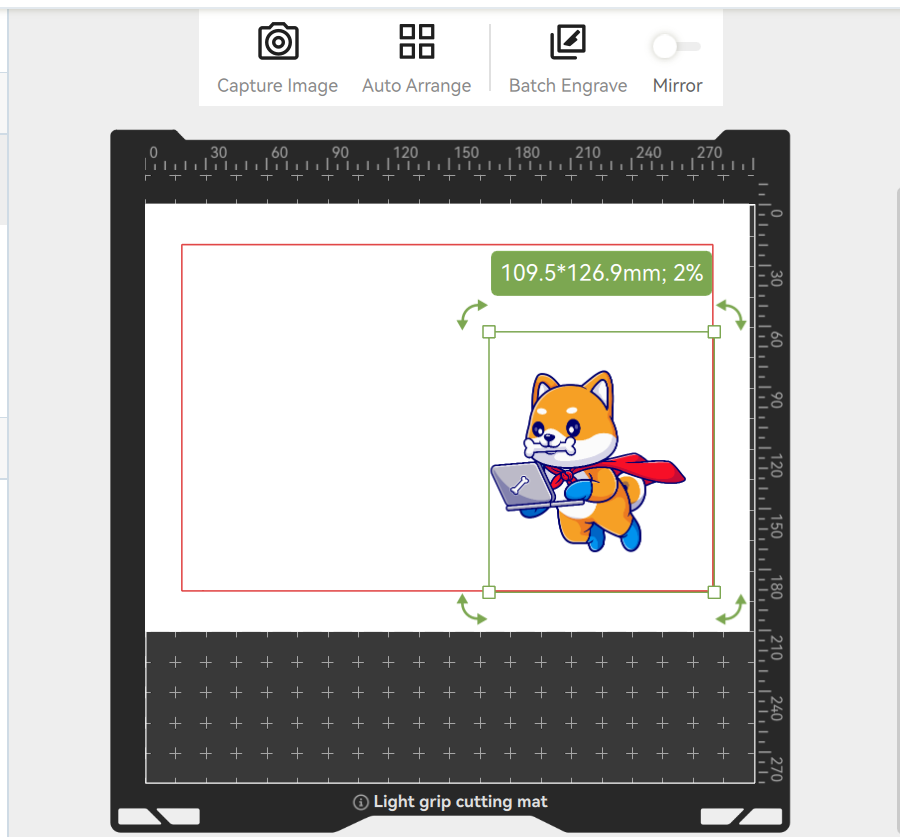
On the Bambu Suite preparation page, Print Then Cut uses A4 paper by default, and the pattern must be placed within the red frame (left). This ensures enough space for cutting reference lines during actual cutting.
If non-A4 paper is used (smaller sizes), the pattern may be too close to the edge, leaving insufficient space near the lower-right Marker. Consequently, the reference lines may cut onto the Cutting platform, making them unrecognizable by the camera.

¶ End Notes
We hope the detailed guide provided has been helpful and informative.
If this guide does not solve your problem, please submit a technical ticket. We will answer your questions and provide assistance.
If you have any suggestions or feedback on this Wiki, please leave a message in the comment area. Thank you for your support and attention!