¶ Software Architecture and Core Workflow
Bambu Suite adopts a three-interface architecture of Design → Preparation → Production Monitoring, featuring a standardized workflow:
-
Design Interface: Complete pattern creation and process configuration. Present the overall multi-layer "assembly" effect of the 2D project
-
Preparation Interface: Intelligent material grouping and adaptation
-
Monitoring Interface: Real-time tracking of processing progress
Bambu Suite supports processing techniques including laser engraving, laser cutting, basic cutting, drawing, and print-then-cutting. It allows using multiple processing techniques on various materials within a single project, while enabling multi-process combinations in a single task (see more The composability of different process types processed on the same plate). Users don't need to split tasks by process or tool modules. When tool module changes are required during production, the machine will automatically pause and prompt the user to change the tool module. After changing, users can resume the task and proceed directly to the next process.
¶ Typical Application Example: 3D Greeting Card Production
Making the 3D greeting card utilizes a few different processing methods, including pens, laser engraving, and knife cutting.;
-
Design
-
Set processing techniques for patterns on the card, such as laser engraving, two-color drawing (red and black), and basic cutting.
-
Move the patterns around to complete the greeting card design. Then, (Important!) bind those patterns together by using "Attach". So they will be made on the same pieces of material.
-

-
Preparation
-
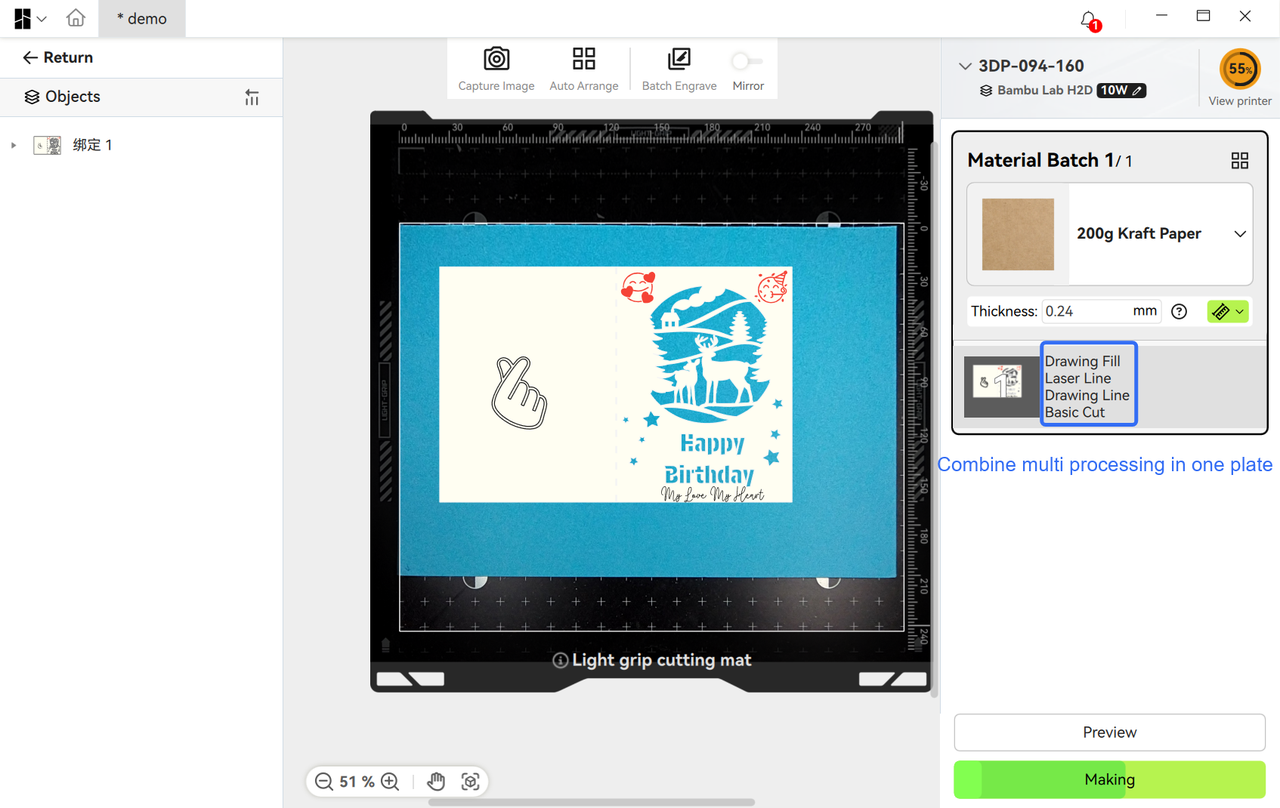
Choose Kraft Paper to make the card. We only use one material and one platform. So all processing will be done in one plate.
-
As we need multiple process types, we expect the machine to pause after each processing and let us change the tools.
-
-
Production
-
Follow the instructions on the screen or Bambu Suite, they will instruct which tool head need to be installed. In between different processings, the machine will pause and toolhead change prompts (laser module → die-cutting module and brush → switch to cutter head).
-
Users follow instructions to change tools and resume the task, completing all processes while maintaining pattern positioning accuracy throughout.
-
Key Features of Multi-Process Combination Workflow:
-
Visual assembly effect. The design canvas displays the complete "assembly" effect of multiple patterns and process layers;
-
Intelligent material grouping. Automatically groups by material type into multiple processing plates, supporting continuous mixed-process processing (e.g., engraving + cutting + painting) within a single plate, eliminating the need to split multiple processing tasks and simplifying complex project workflows;
-
Ensures processing positioning accuracy. The multi-process combination guarantees the relative positional accuracy of different process patterns, eliminating the need for users to split into multiple processings and manually align;
-
Comprehensive guidance. Step-by-step production guidance leads users through tool module changes during processing, reducing error probability;
¶ Detailed explanation of software interface workflows
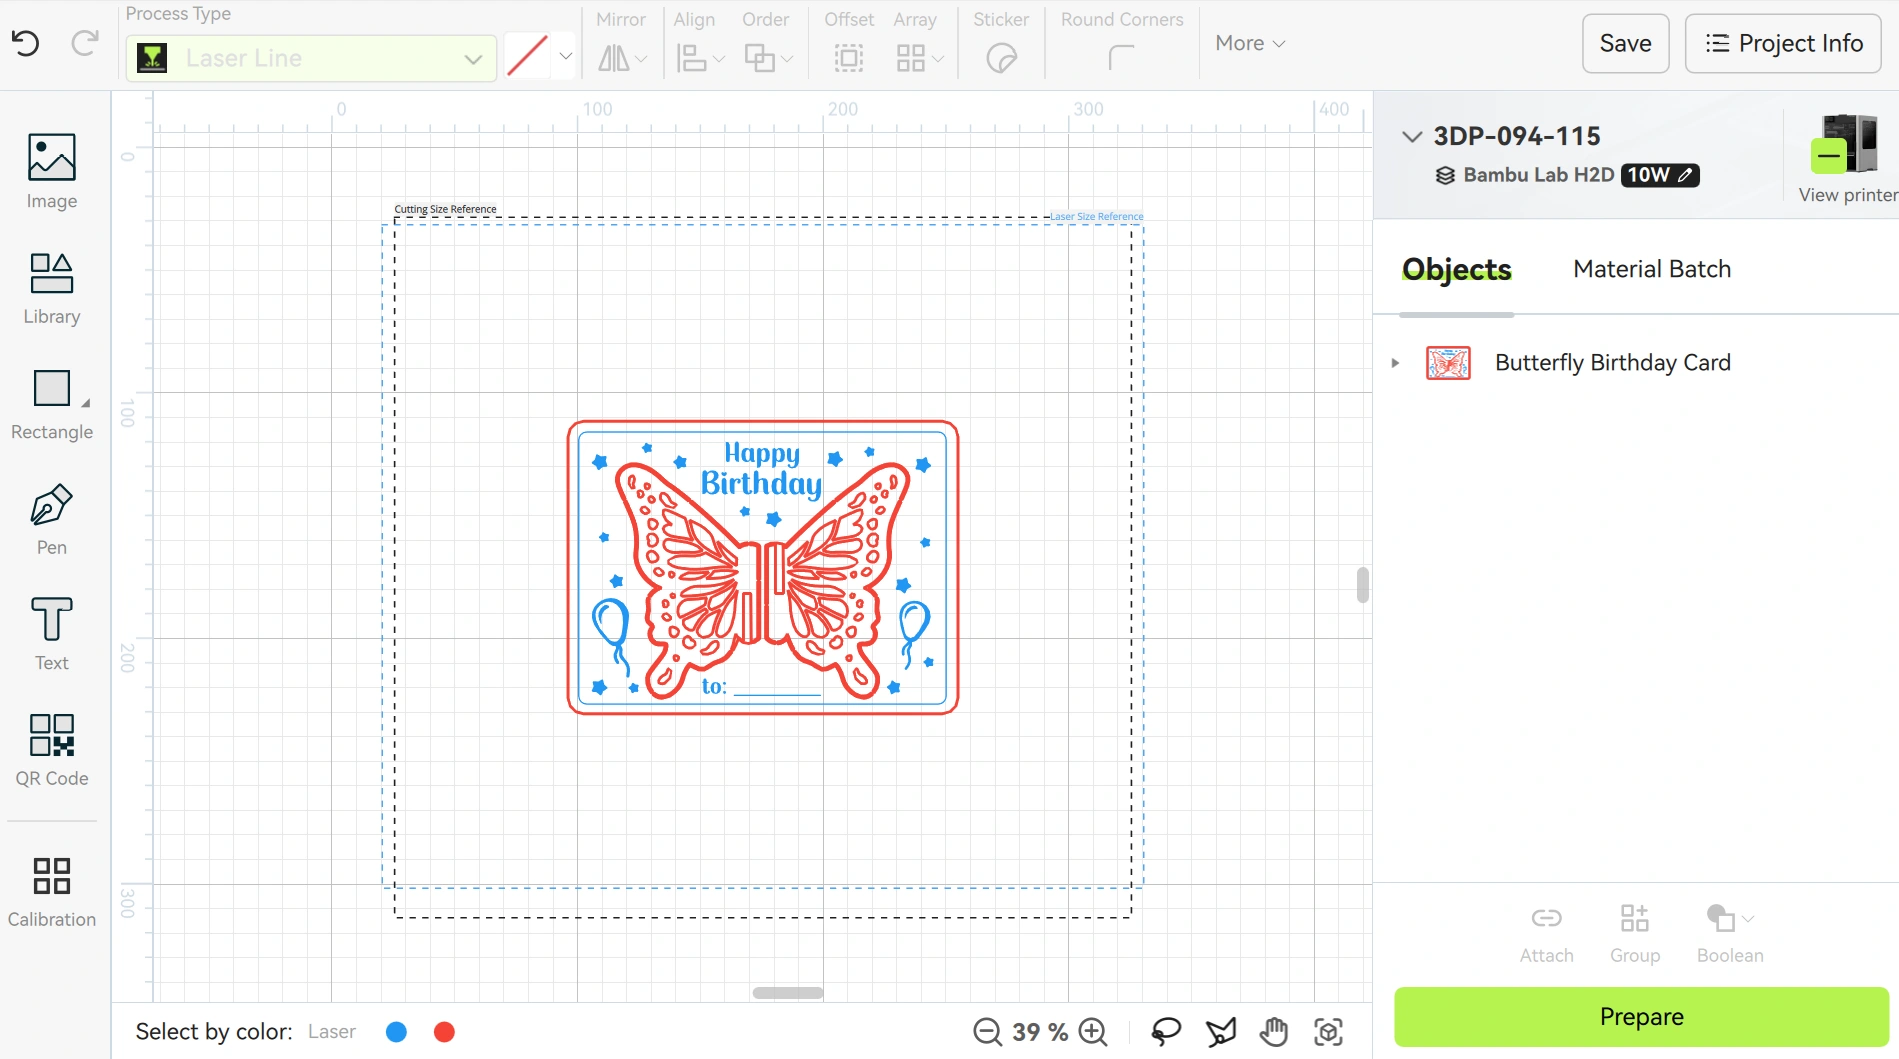
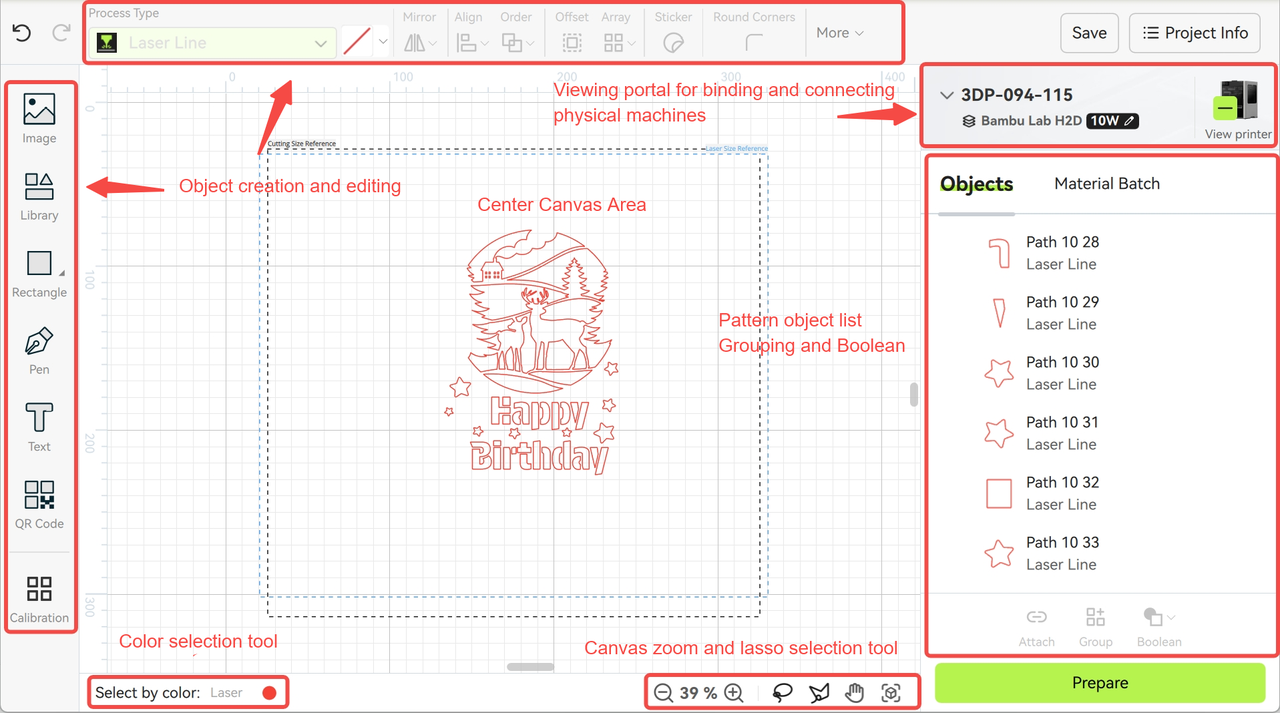
¶ Design Interface
¶ Main Functions
Bambu Suite's design interface uses an integrated canvas layout to visually display the multi-layer overlay effect of projects. After completing basic die-cutting (e.g., card outline), users can continue adding engravings or drawings on the card. Main functions include:
-
Pattern editing: Supports adjusting layer relationships and processing technique settings
-
Process selection: Provides various techniques including laser engraving (line/fill), laser cutting, brush drawing, and basic die-cutting. Click the process introduction wiki in the dropdown menu to view detailed descriptions, applicable scenarios, and production effects for each technique (see "2D Process Types Introduction (Finalized)").
-
Real-time preview: Rendering effects closely match final processing results (WYSIWYG), allowing users to intuitively view the overall "multi-layer assembly" effect of all patterns.
¶ Design Tools
The design page offers rich pattern creation and editing tools for direct project editing:
-
Creation tools: Image import, shape drawing (rectangle/circle/arc), freehand brush, text tool, QR code generator, etc.;
-
Editing tools: Set pattern coordinates, adjust pattern angles, set rounded corners, scale pattern sizes, mirror flip;
-
Sticker tools: Add sticker border attributes to patterns and set sticker cutting layers, facilitating cartoon sticker production.
¶ Interface Layout
The design interface layout is as follows:
-
Top-right: Device connection and viewing portal for binding and connecting physical machines;
-
Middle-lower right: List of all pattern objects in the project, with common object combination and Boolean tools. Click material group labels to set processing materials for different patterns;
-
Bottom: Color selection, canvas zoom, and lasso selection tools for adjusting canvas size and selecting desired pattern objects.
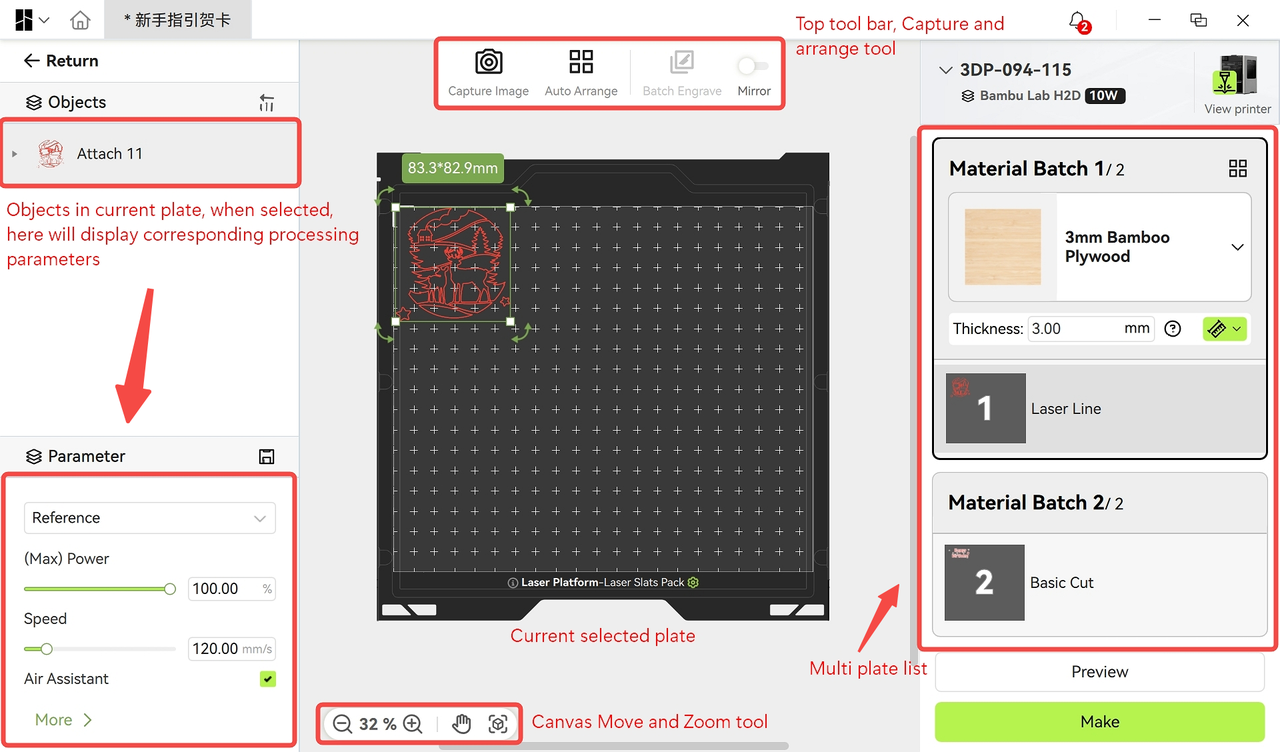
¶ Preparation Interface
Accessed via the "Prepare Production" button in the design interface, main functions include:
-
Preview and intelligent grouping:
-
Automatically groups and arranges patterns based on processing techniques, binding and grouping status, and plate size;
-
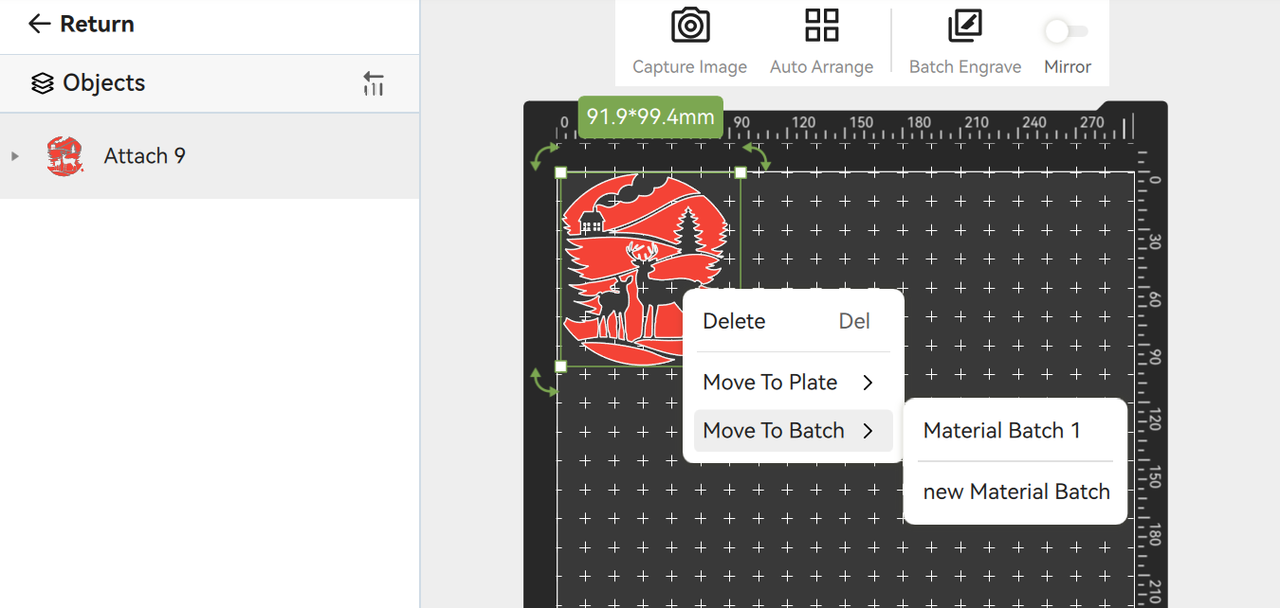
View patterns on each plate via the plate list (material groups) on the right, and assign processing materials to each group;
-
Supports manual grouping adjustments via right-click "Move to Plate" or "Move to Group" options.
-
-
Material arrangement:
-
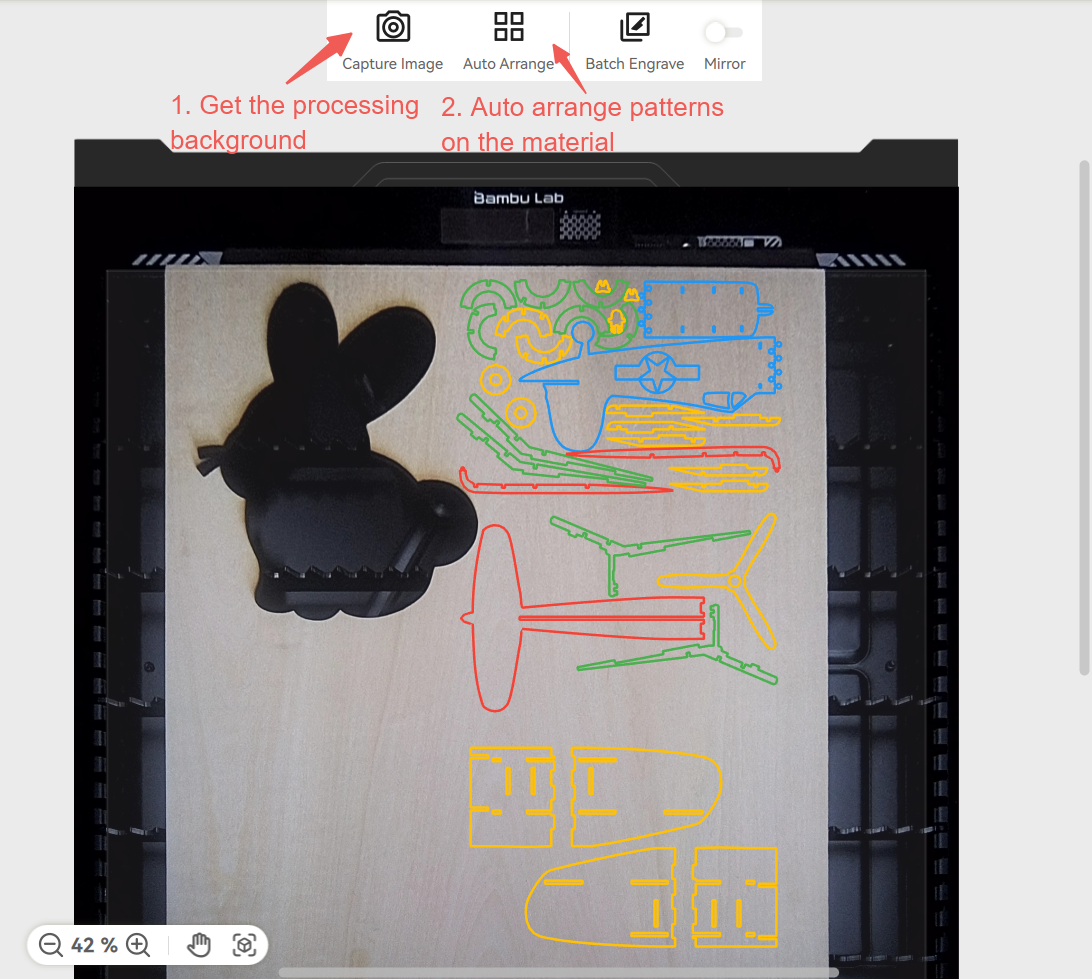
Click the "Capture Image" button to obtain a processing plane view and check pattern positioning;
-
Manually move patterns or click "Auto-arrange" for automatic material contour recognition and positioning.
-
-
Production preparation:
-
Laser processing requires precise focus on material surfaces for quality. The software provides thickness measurement to ensure focus. For reflective materials, manually measure and input thickness;
-
Click the preview button to view processing paths and duration. Drag the progress bar or click play to simulate the process;
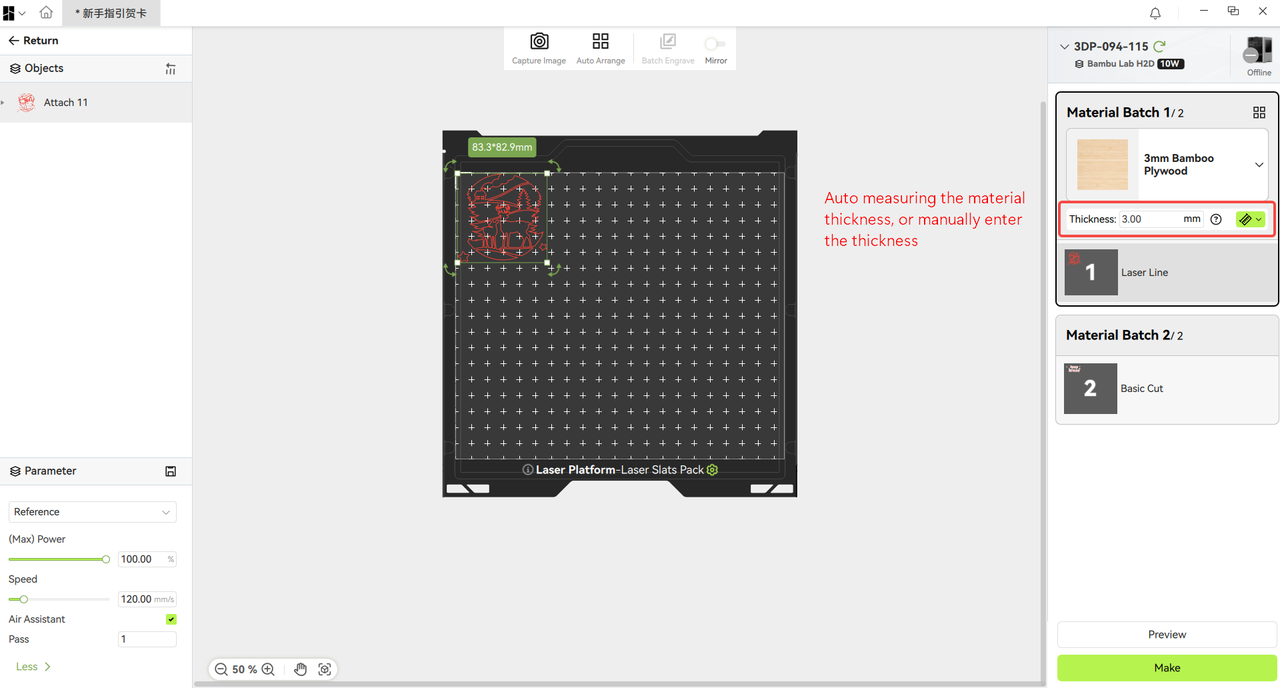

- Click "Make" to prompt toolhead and platform selection. After confirmation, click "OK" to begin processing.

-
¶ Production Monitoring Interface
- Task initiation and confirmation: After successful sending, the software automatically switches to the monitoring interface, prompting users to prepare materials, toolheads, and platforms at the machine.
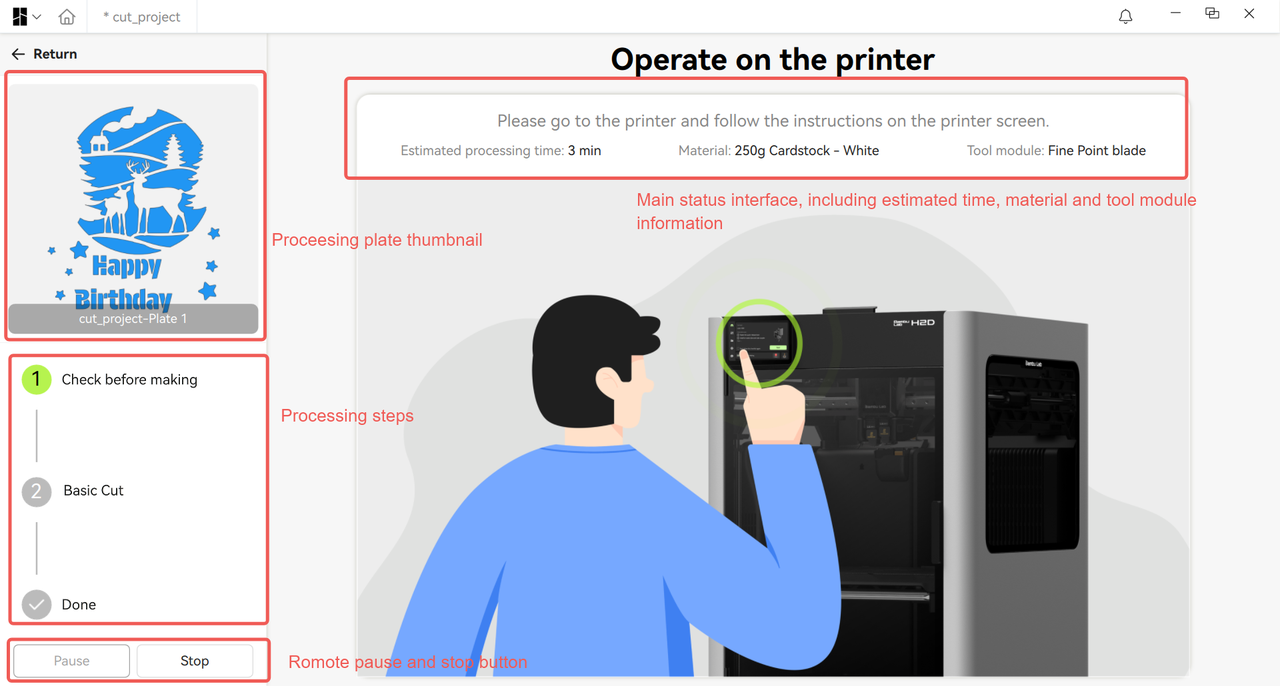
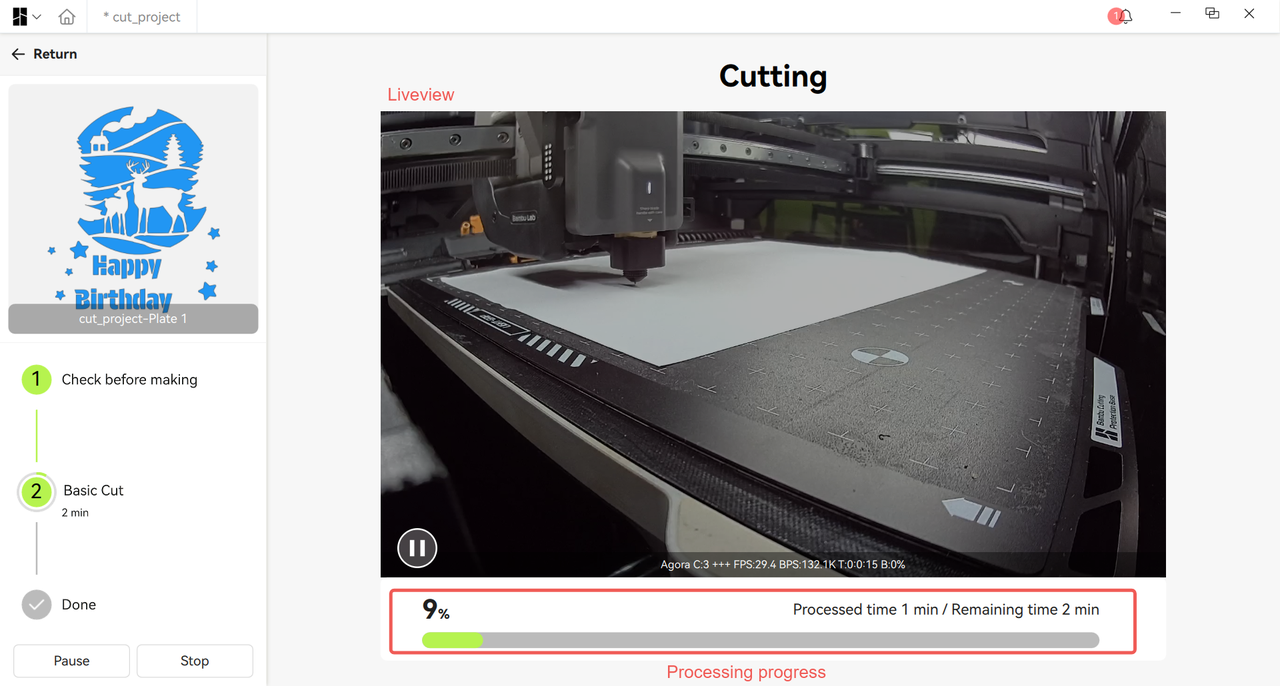
- Real-time monitoring: After confirmation, start processing via on-screen prompts. View live camera feeds during processing. Use pause/abort buttons when needed.
- Post-processing: For multi-plate projects, assemble patterns after completion. Save assembly guides and project descriptions in project files for future sharing.