Sometimes you set your 3D printer, load up the model, hit print, and the first layer doesn't turn out well, or the filament just doesn’t stick. Or worse, it turns into a stringy mess or scratches the bed. Most of us have encountered this at one point. But the good news is that this is fixable. You can do a first-layer test print to help you diagnose and fix the issue. Before we examine it, it's essential to consider what makes a good first layer.
¶ What Makes a Good First Layer?
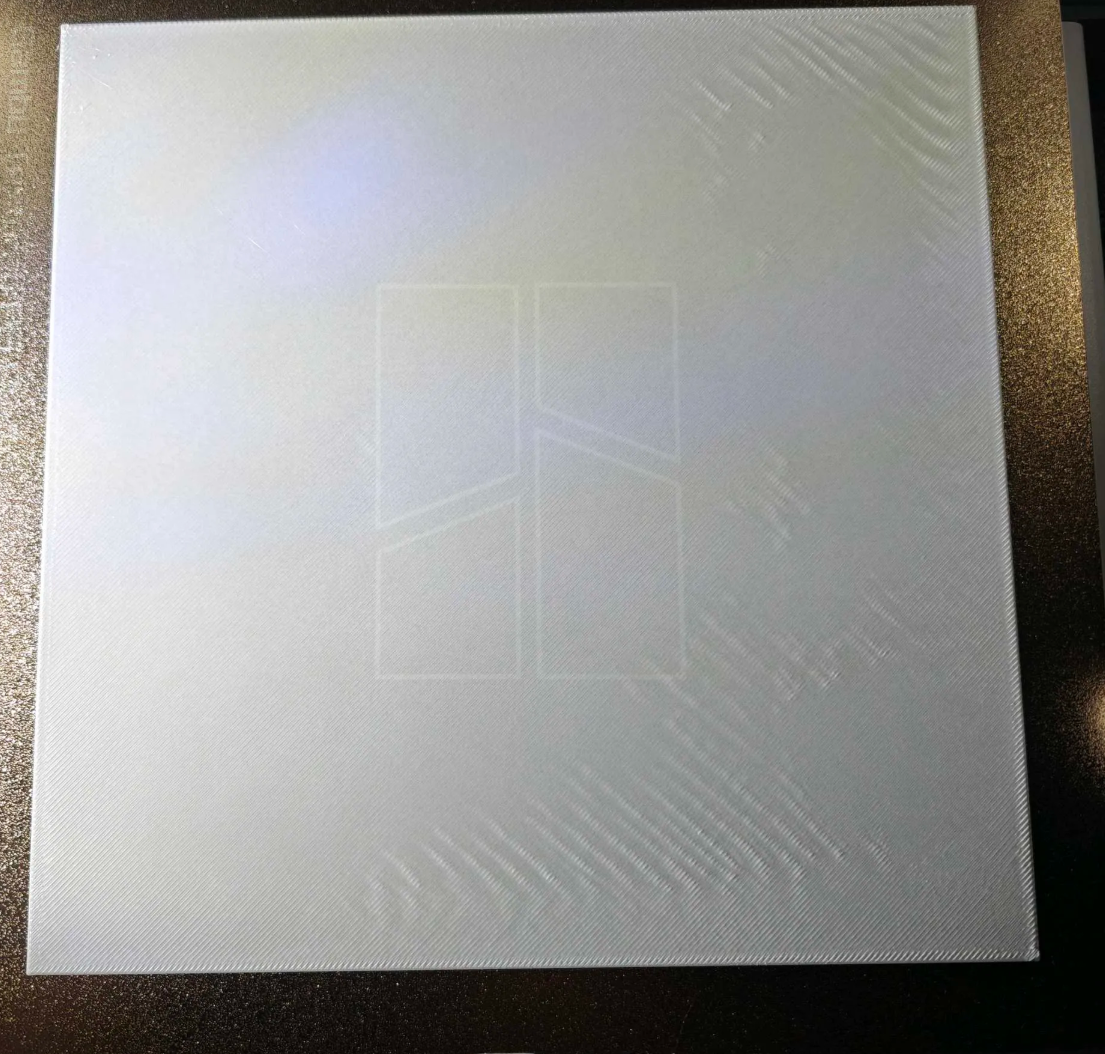
A perfect first layer should look smooth, uniform, and well-bonded to the print bed. You want to see clean lines that gently overlap without ridges or air gaps. The lines should fuse together seamlessly, creating a single, flat surface without stringing or pooling. Depending on your bed surface, the key is consistency across the entire print area. If parts of the layer look different from others, your bed may not be level, or it might be far or too close to the bed.
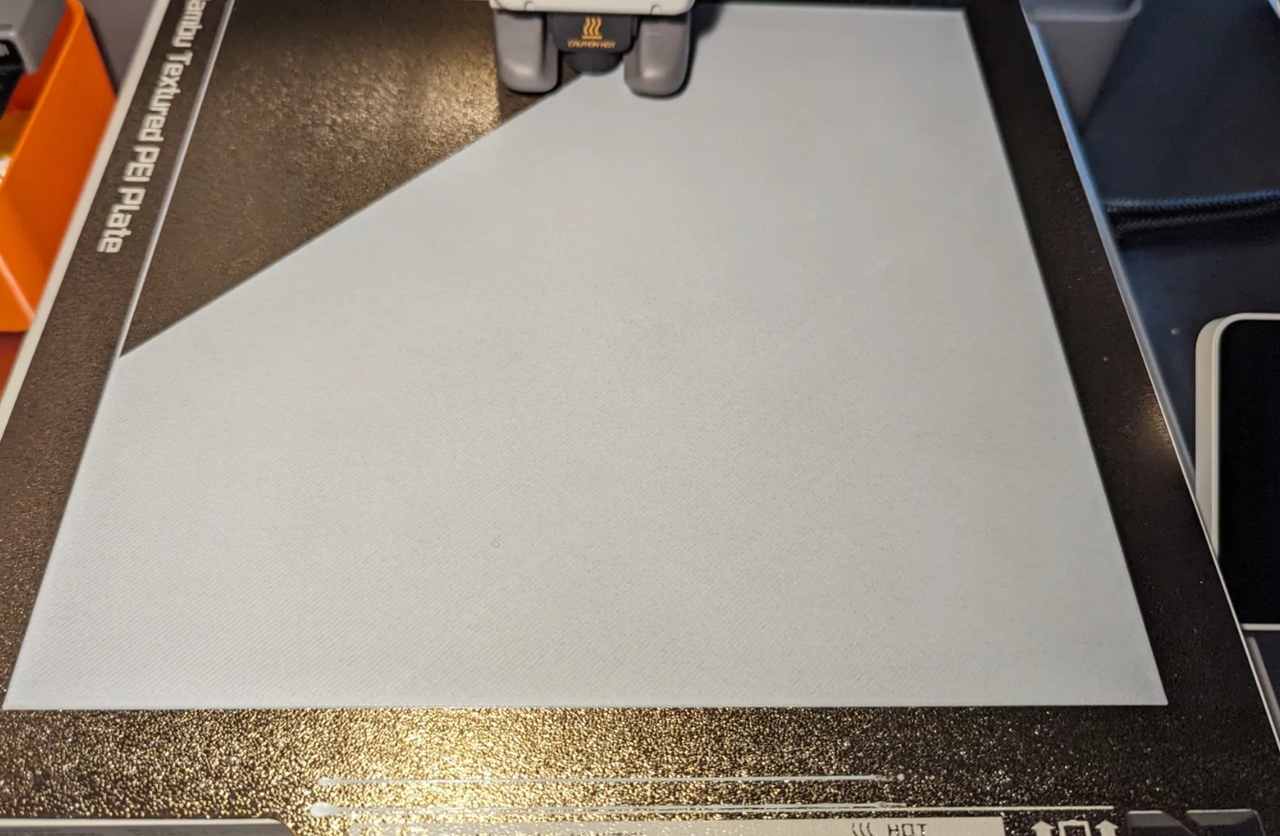
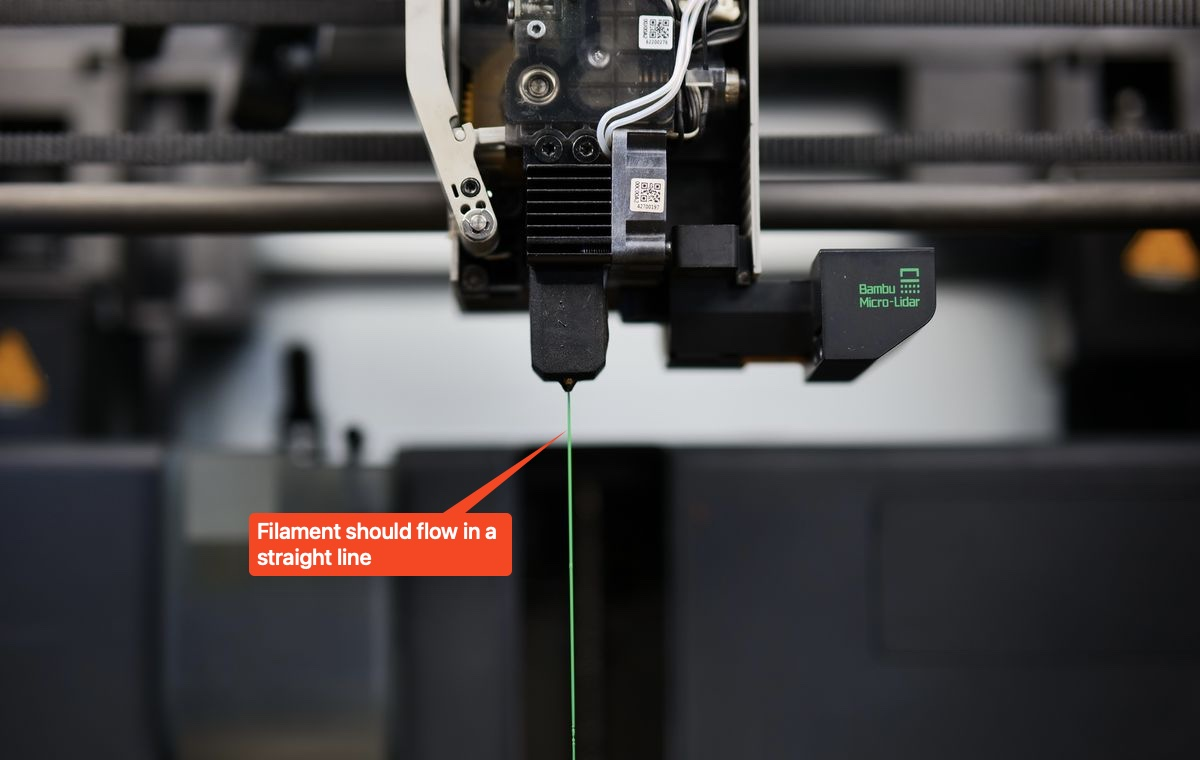
Watch closely as the filament lays down. If it’s barely sticking or appears thin and wavy, the nozzle is too high. If it’s squished to the point where it’s creating raised edges or dragging the nozzle, it’s too low. A perfect first layer will hold strong, with no curling at the corners or peeling at the edges. Below is an example of a 3D model that has been 3D printed without issues.
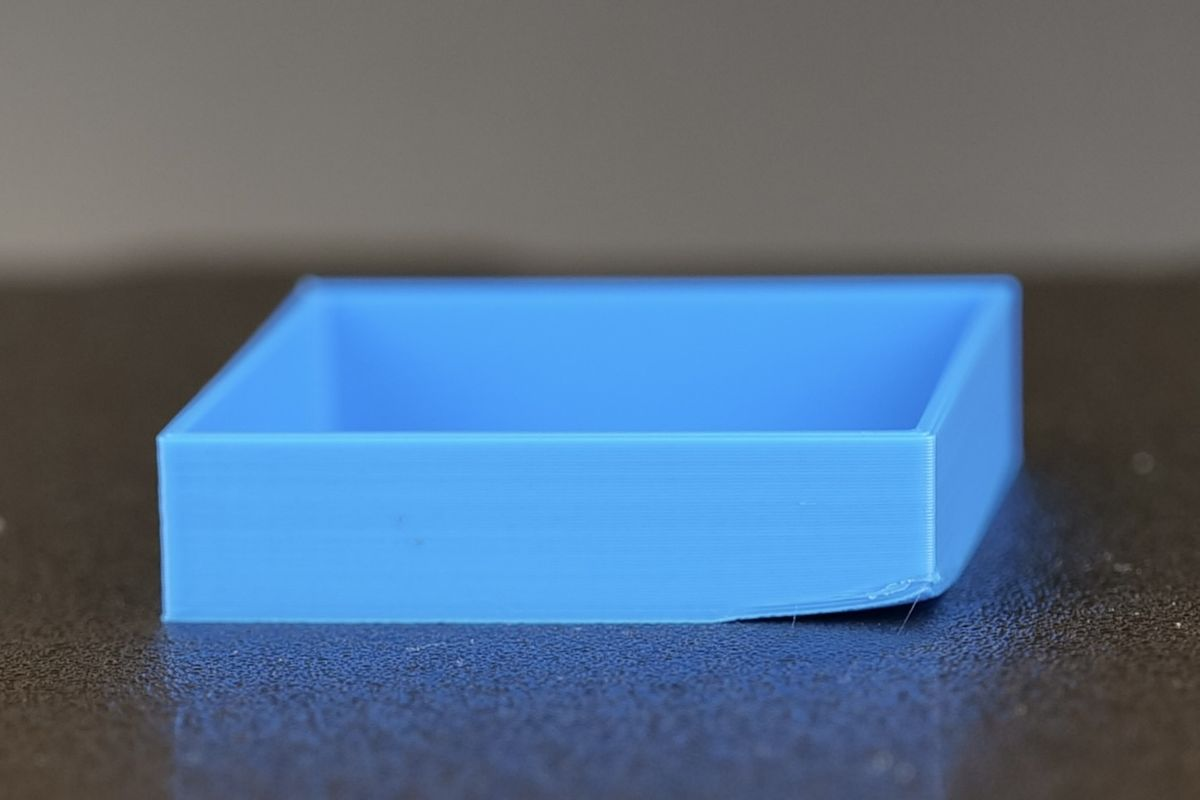
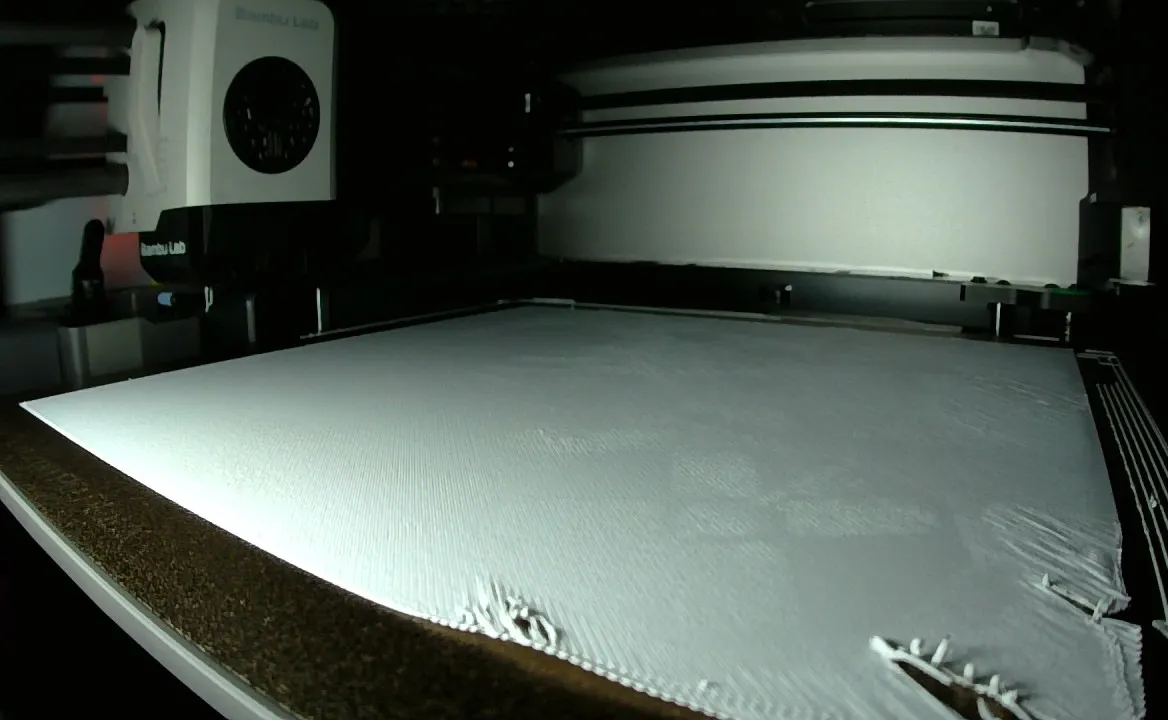
Below is an example of a 3D print that is warped at the edges.
Adjusting the settings without a test print means you're essentially guessing, which can lead to inconsistent results and wasted filament. Without a proper visual reference, it’s difficult to know if your changes are improving or worsening the first layer. To help you diagnose the issues, you need to 3D print a first-layer test design. But before you do that, there are things you need to consider.
¶ What to do Before 3D Printing First Layer Test Design
Before attempting to identify the causes of the first-layer issues, it's essential to consider several key factors that can help you achieve a high-quality print. If you implement them, in most cases, they will fix the majority of your first-layer issues. These include:
¶ 1. Wash the Build Plate
Thoroughly wash the build plate to ensure the filament adheres properly. Any dust, oils, or residue left on the surface can prevent the filament from sticking properly. Use warm water and detergent, and avoid touching the surface with bare hands.
¶ 2. Check the Nozzle and the Screws
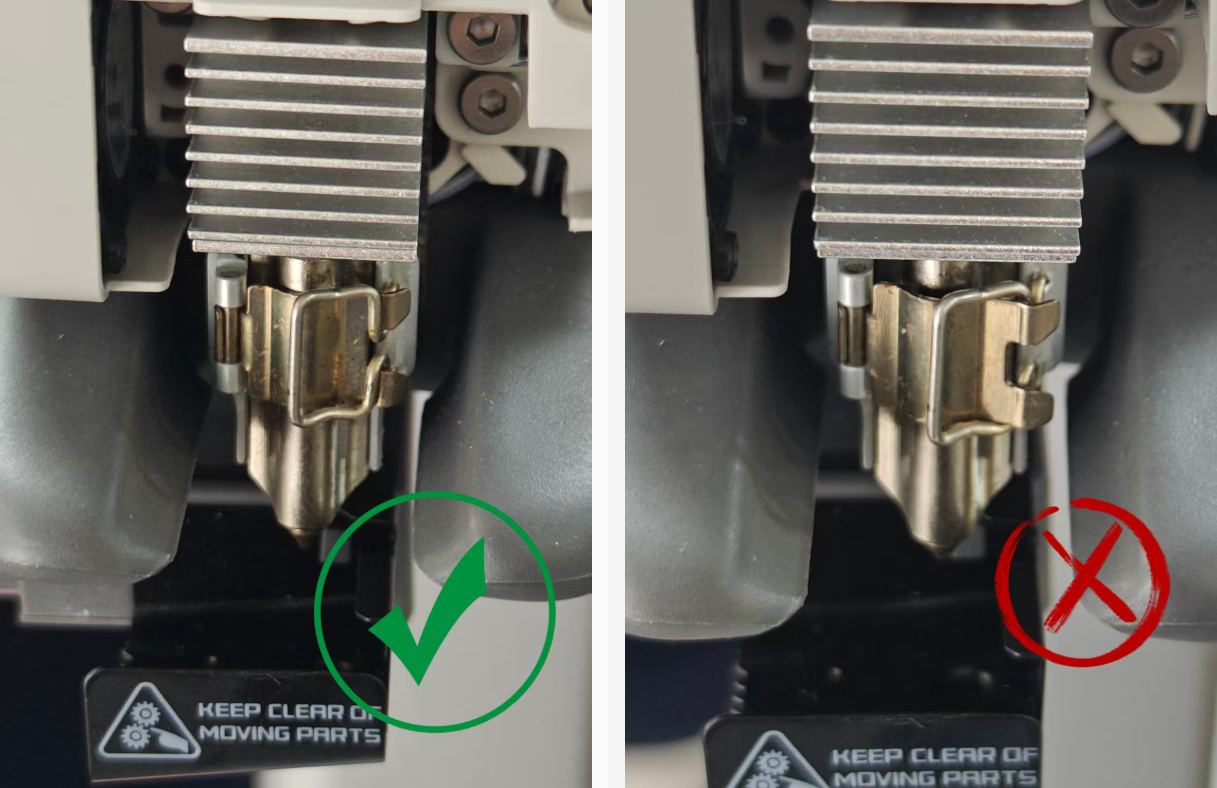
Ensure the nozzle is clean and free of clogs, as even a small blockage can disrupt filament flow and cause issues. Visually inspect it for any visible clogs or buildup of filament residue. You can also perform a manual extrusion test by heating the nozzle and then clicking the extrude button on the screen to feed it until you see filament being extruded from the nozzle tip. In addition to checking the nozzle, ensure that it is not moving. Do this by ensuring that the screws are tightened properly the X1 P1 series. For the A1 or H2D, verify that the nozzle fixing buckle is properly secured. Also, ensure that you fasten the heating assembly correctly. Below are the correct and the wrong ways to fasten the heating assembly in A1.
¶ 3. Calibrate the 3D Printer
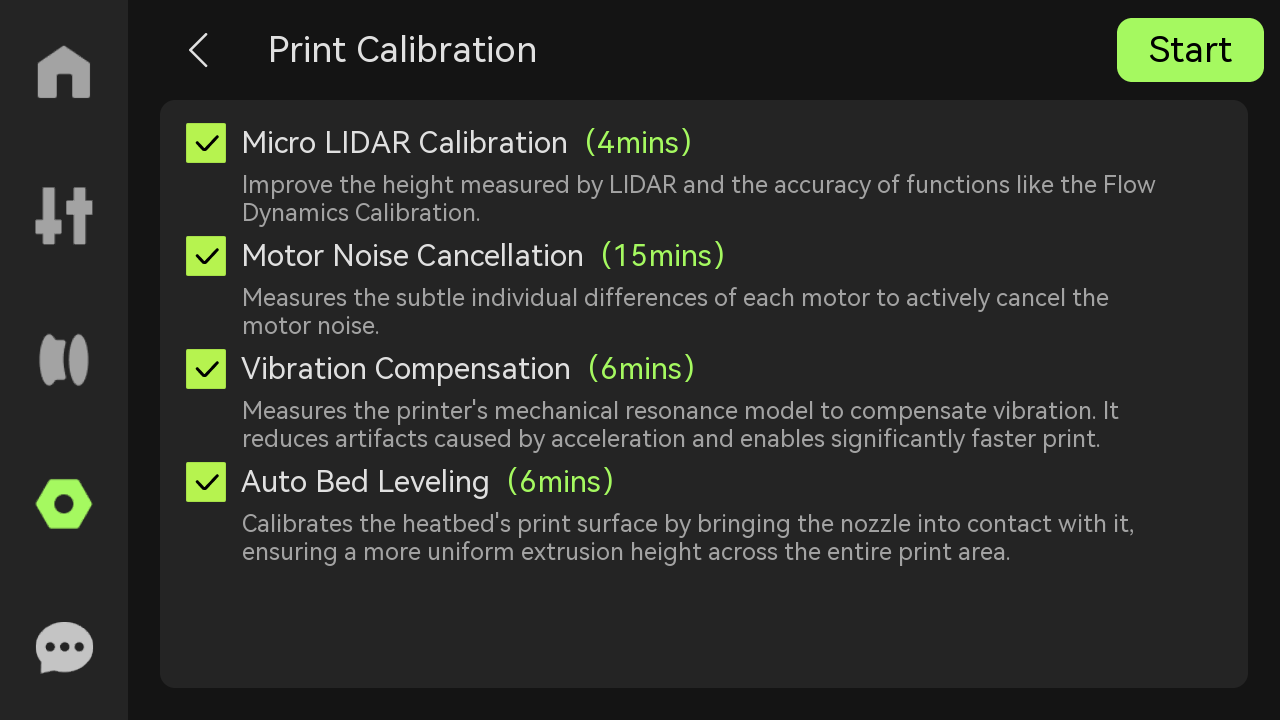
Calibrating the 3D printer is crucial in resolving most issues. With Bambu 3D printers, the process is quick and straightforward through the auto-calibration feature. It adjusts key printer settings, such as bed leveling, vibration compensation, motor noise, and nozzle height. If you are using the X1 series, go to the "Settings" panel, then click Print Calibration. Thereafter, click Start to begin the calibration process.
¶ 4. Use Dry Filament
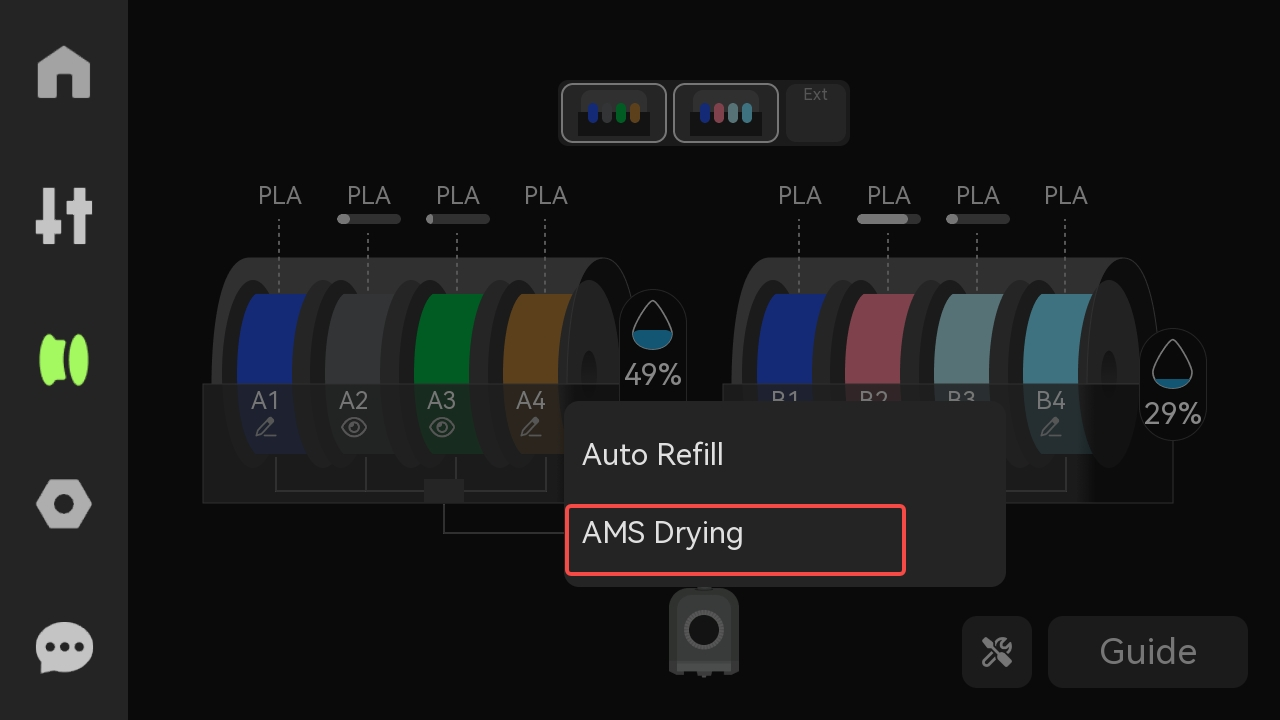
Ensure the filament you are using is dry. Moisture in the filament can cause uneven extrusion and other printing issues. This happens because the absorbed water turns to steam inside the hotend, disrupting the flow of filament. You should also always ensure that you store your filament in a dry environment. If you have an AMS 2 Pro, it helps keep filament dry. In the Filament Settings tab, you can click on the filament and select "AMS Drying".
¶ 5. Reduce the Printing Speed for the First Layer
It's also important to reduce the printing speed of the first layer. For example, you can set the outer wall speed to 30 mm/s and the infill speed to 60 mm/s. This can help the filament adhere more effectively to the build plate. Slower speeds also give the material more time to bond properly, reducing the first-layer problems.
¶ First Layer Test 3D Print
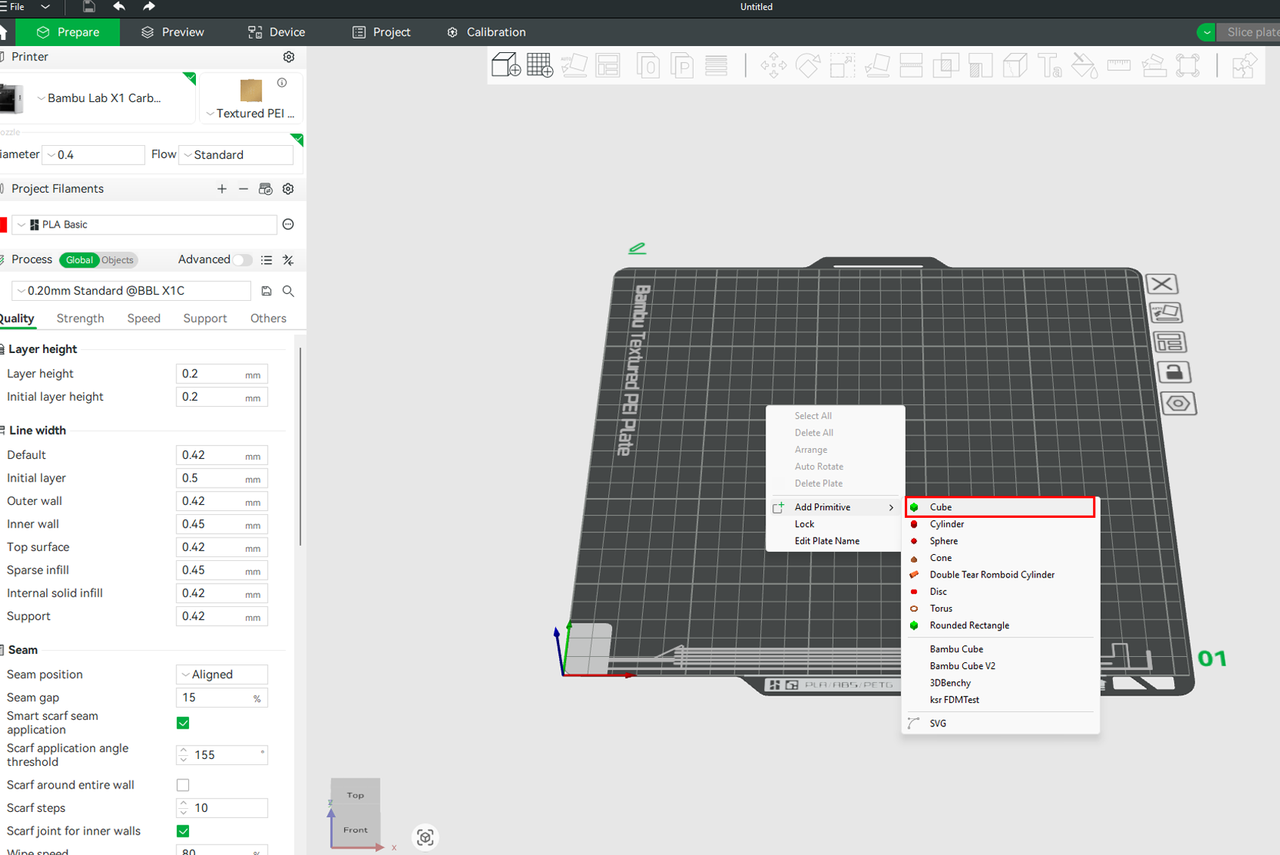
To test your first layer, create a simple cube with a thickness of 0.2mm and adjust it to fit the size of the bed. You can do this by right-clicking on the bed, then clicking "Add Primitive" and selecting "Cube."
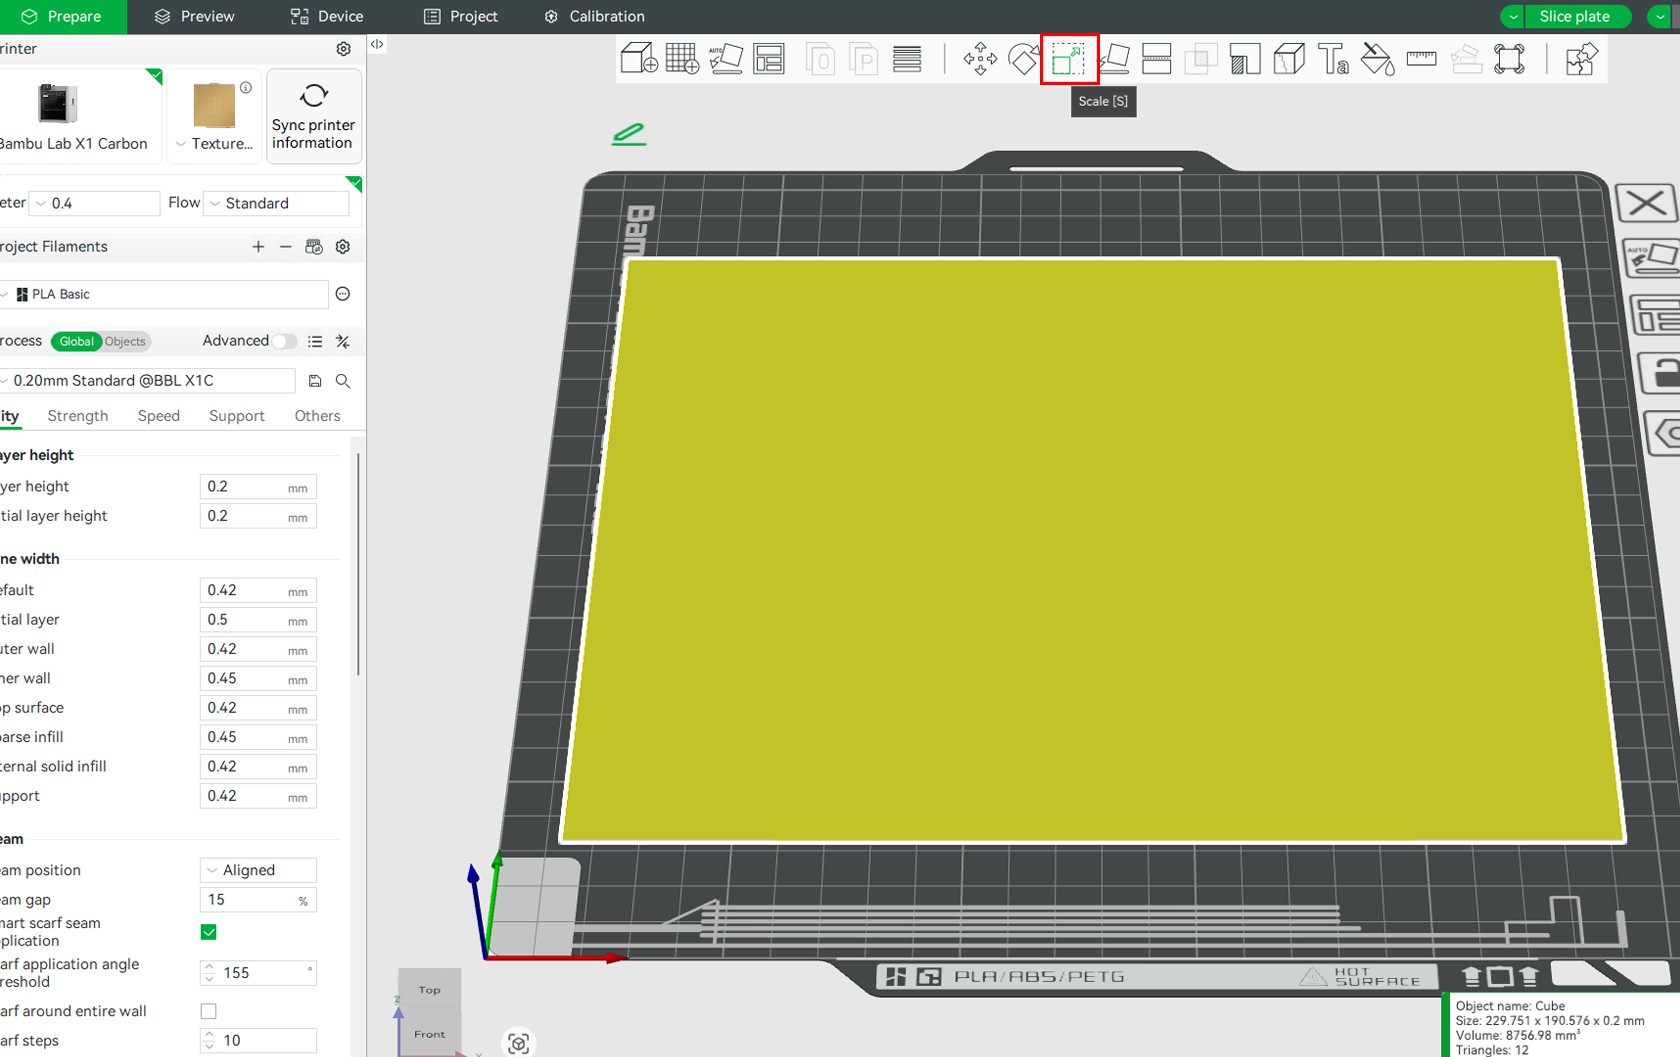
Use the scale tool to adjust the size of the cube, as shown in the Gif below.
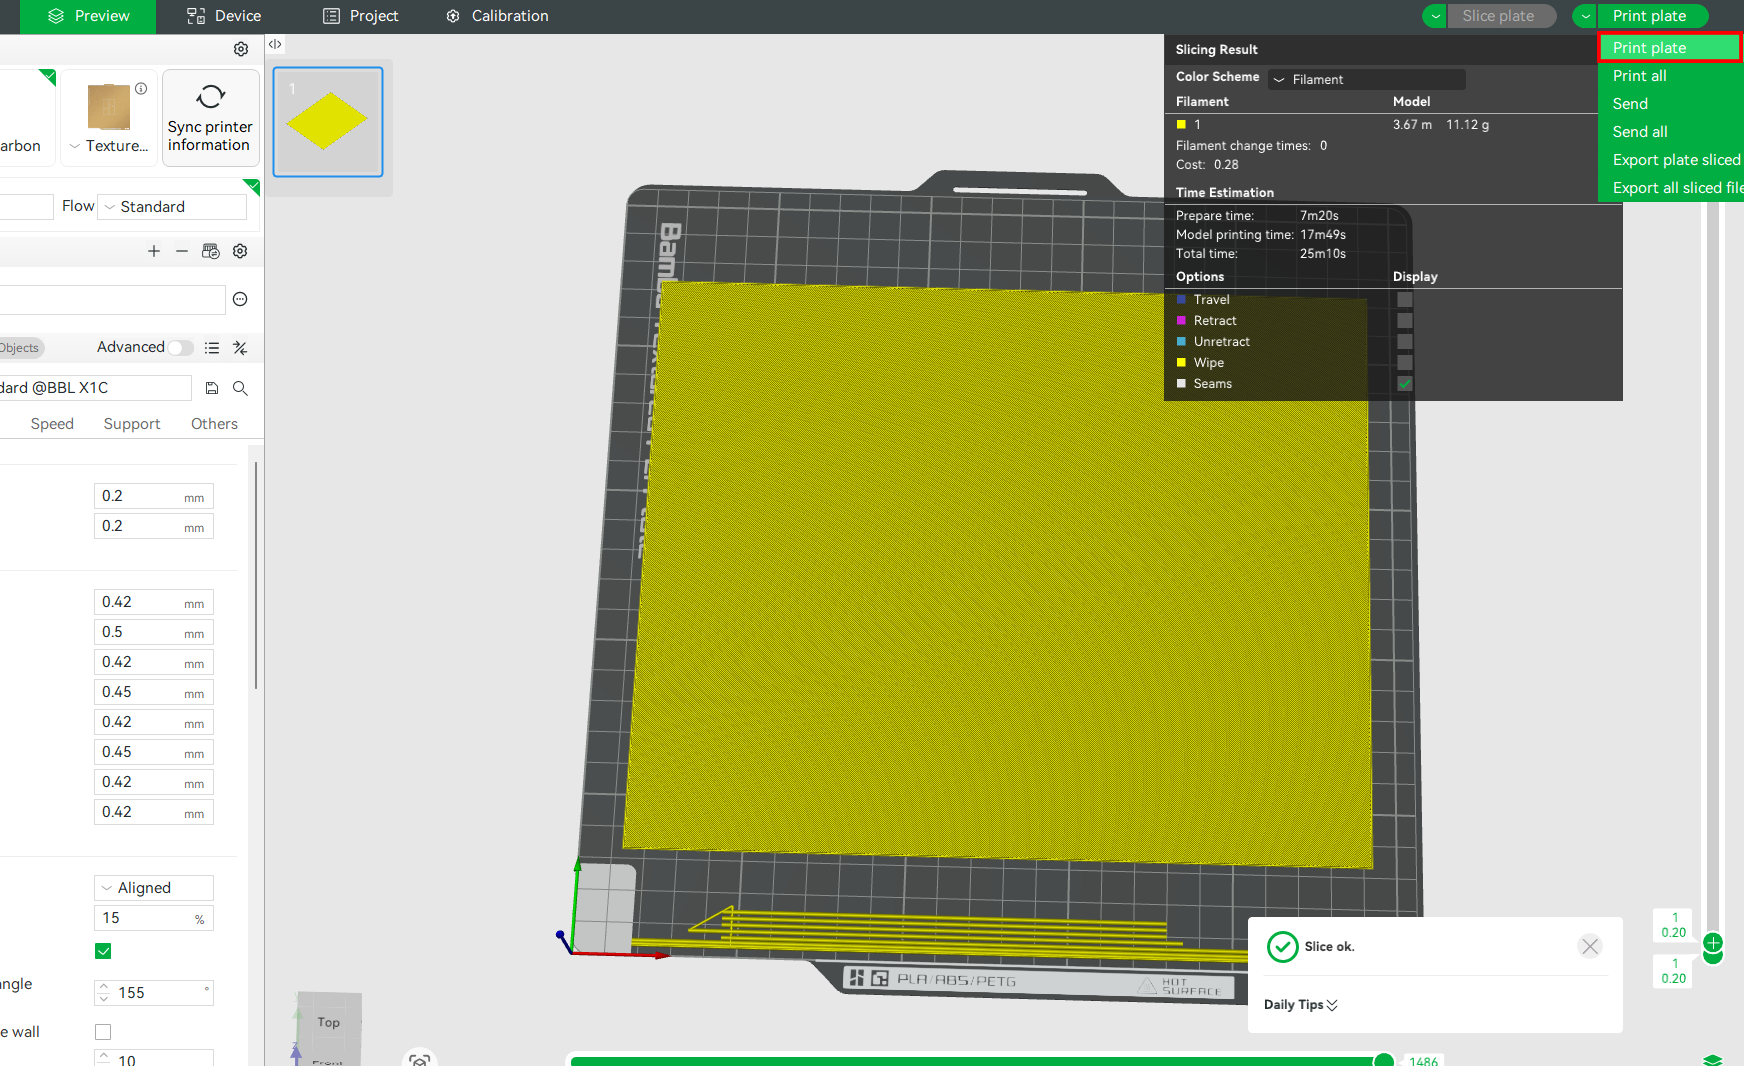
Click Slice the plate to slice the design, then 3D print.

Click Print plate to start 3D printing.
During 3D printing, the printer will only go over the first layer once for that test print. We expect the design to be printed cleanly and consistently across the entire bed if the printer and bed are properly set. Each printed line should appear smooth, even, and well-adhered to the bed, and there should not be any gaps between the lines. Additionally, there should be no overlapping or squished filament, and the layers should have a uniform finish, depending on the filament and the bed type.
The filament should also stick securely to the bed throughout the entire print, and corners and edges should remain flat, with no peeling or warping. If the print doesn't turn out as described, it means there are issues that need to be addressed.
There are various issues that can arise when 3D printing the above file, along with solutions to address them, as described below.
¶ Cracks on the Print
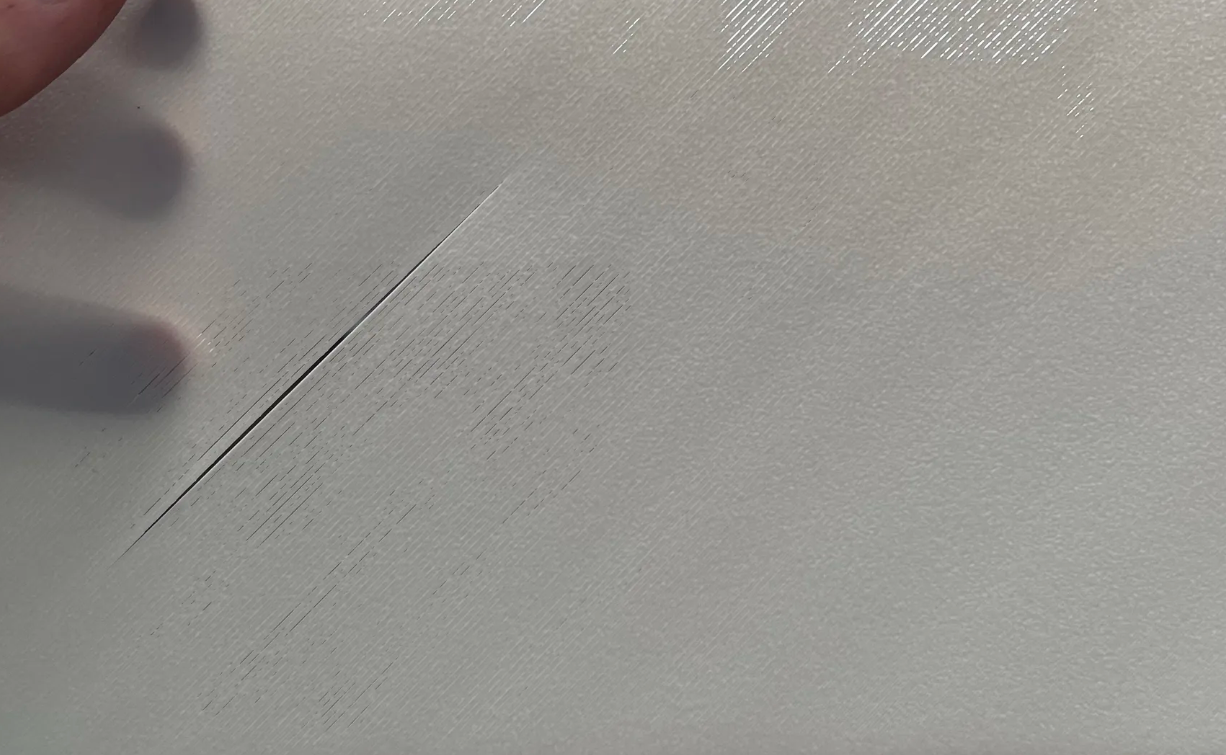
Cracks on the first layer of the test print are often caused by a dirty nozzle or the flow rate not set correctly. Ensure you clean the bed appropriately and set the flow rate correctly. To fix this, check out the flow rate calibration wiki.
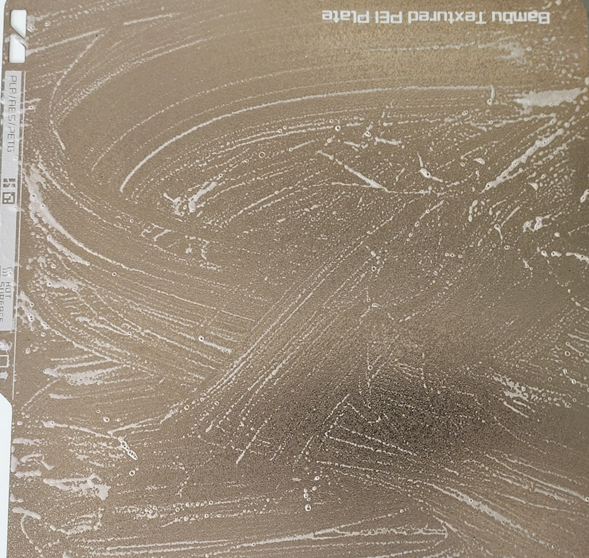
¶ Varying Texture Patterns
In the image above, the first-layer test print file exhibits inconsistent surface textures and uneven extrusion in certain sections of the print. If you encounter such, you need to perform an automated bed leveling before trying any other adjustments. In many cases, this issue can occur due to an uncalibrated bed.
It could be as a result of improper flow rate setting. Areas of the print show signs of over-extrusion where filament is squished too much and appears rough, while other sections show gaps or under-filled lines, indicating under-extrusion. This imbalance across the surface suggests that the flow rate may not be calibrated correctly for the filament or nozzle setup. To fix this, check out the flow rate calibration wiki.
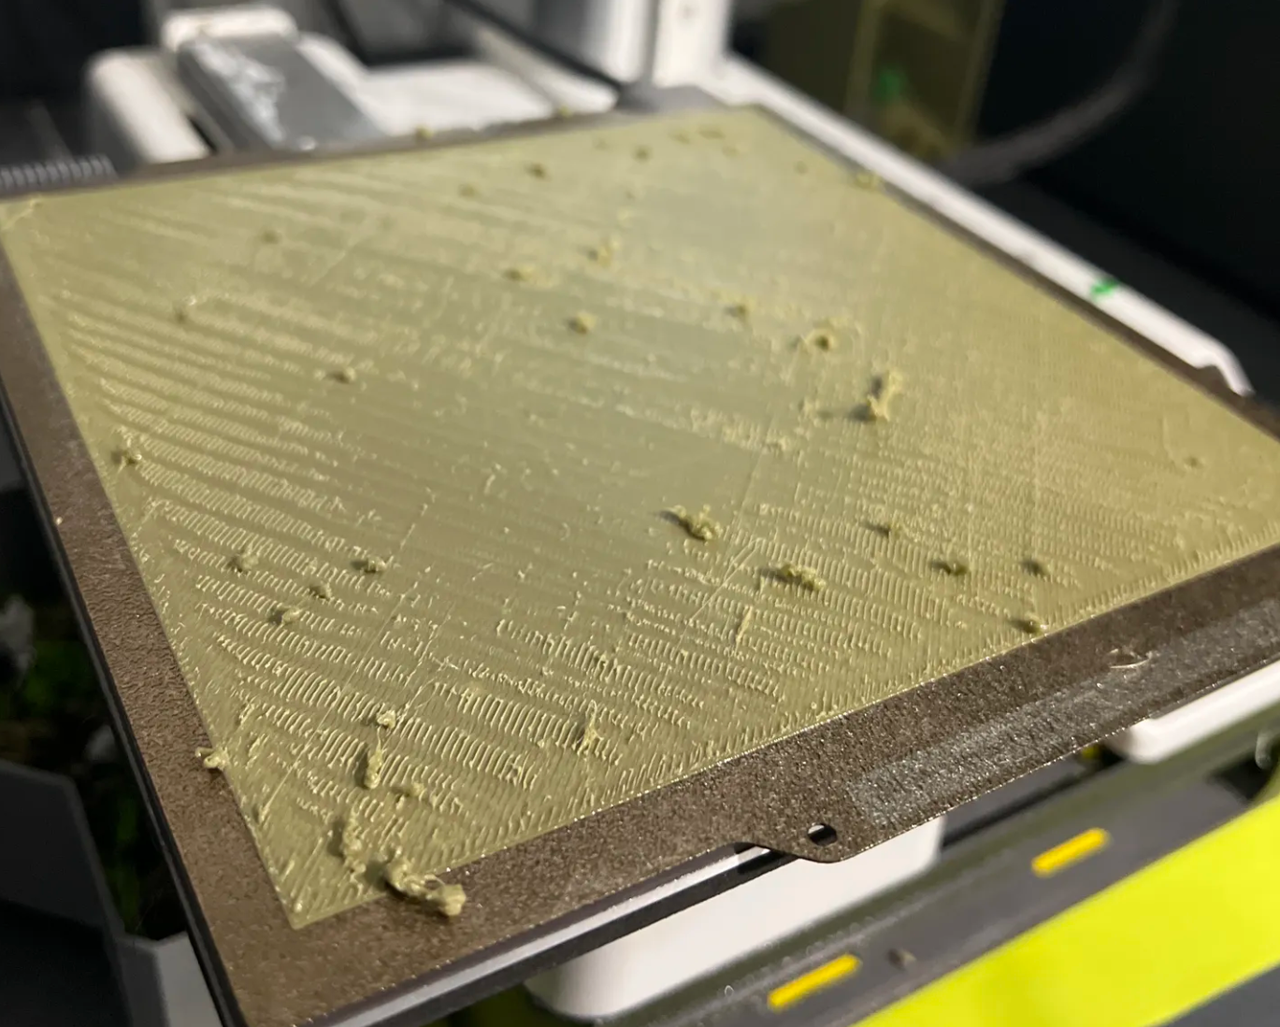
¶ 4. Curling, Nozzle Dragging, and Poor Adhesion in Specific Places
If you observe the above print, you will notice that some sections have been printed smoothly, while others aren't, particularly near the edges, where warping, dragging, and incomplete lines are evident. This is mostly caused by a dirty or oily print bed. Oils from your fingers, dust, or leftover residue can prevent the filament from sticking properly, resulting in uneven adhesion. This causes the clean parts of the bed to produce smooth lines, while contaminated sections have issues.
If you encounter this issue, thoroughly clean your print bed using hot water and detergent, and avoid touching the surface with bare hands after cleaning. You can also check out the Textured PEI plate cleaning guide to learn how to clean the bed properly.
If you have cleaned the bed and nothing changes, you should consider leveling the bed. Use the automatic bed leveling feature; if no changes are made, you can try the manual bed leveling option. This should be the last resort. You can check out the manual bed leveling wiki to learn how to do it.
¶ 5. Overextrusion and Filament Squashed on the Bed
The image above shows thick, inconsistent extrusion lines and scattered blobs in the test print. This indicates that too much filament is being pushed out, and it also shows the signs of over-extrusion. On the Bambu Lab A1, this issue can be caused by mechanical factors, specifically the loose four screws on the hotend heating assembly. You can access them by first of all loosening the three screws in front.
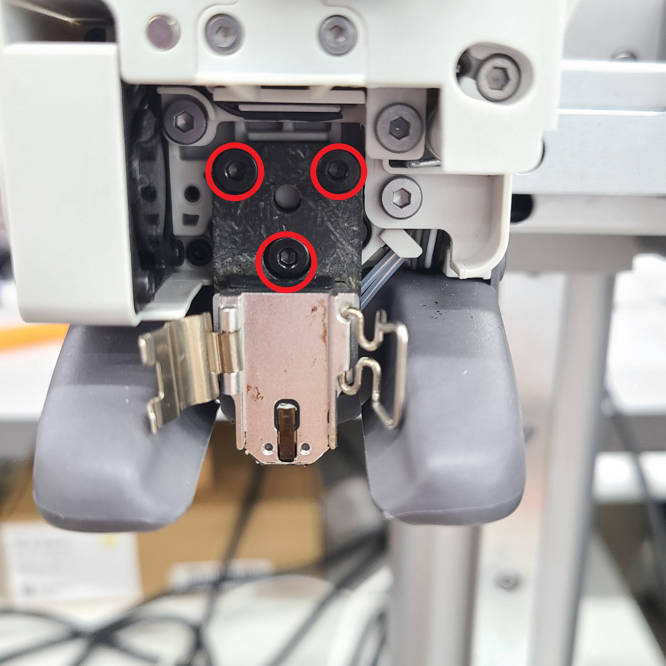
Flip the heater assembly over to access the 4 small screws at the back and use an H1.5 hex key to retighten the screws as shown in the images below.
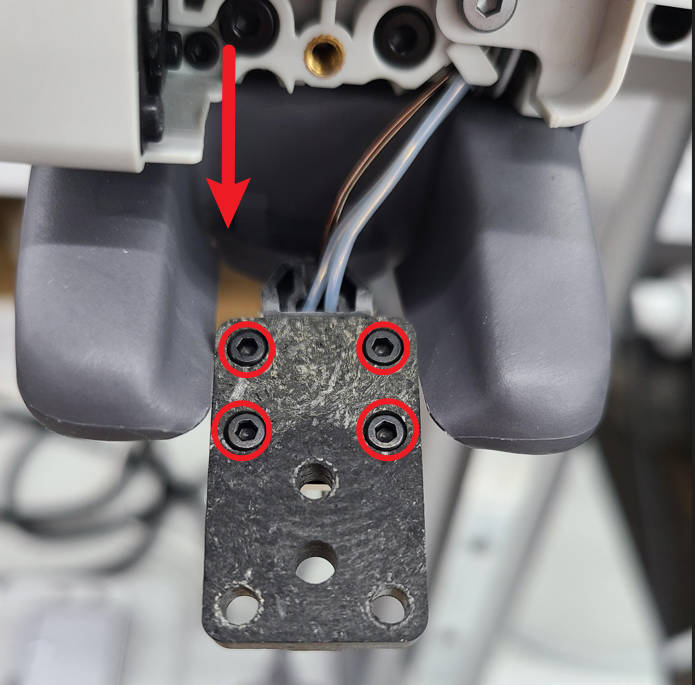
If these screws become loose, they can interfere with accurate bed probing, leading to incorrect Z-height measurements and poor first-layer performance. You can check out the A1 first layer print issues wiki to learn how to fix.
¶ End Notes
We hope the detailed guide provided has been helpful and informative.
To ensure a safe and effective execution, if you have any concerns or questions about the process described in this article, we recommend submitting a technical ticket regarding your issue. Please include a picture or video illustrating the problem, as well as any additional information related to your inquiry.