TPU printing guide for H2D, please click here
¶ Step 1: Preparation Before Printing
¶ (1) Preparation of filaments
Choose TPU with the appropriate hardness. In the industry, there are different hardness levels available for TPU. Here they are listed in descending order: 77D > 70D > 68D > 55D > 95A > 85A > 83A > 80A > 75A > 70A.
TPUs with hardness levels of 95A, 85A, 83A, and 80A are moderately hard and can be printed using Bambu printers (higher hardness levels have lower risks of print failures).
On the other hand, TPUs with hardness levels of 75A, 70A, or lower should not be printed using Bambu printers. These softer TPUs are prone to getting flattened by the extruder wheel, which can cause clogging issues.
Dry the filament. Use a forced-air type oven (recommended) or Bambu X1, X1C printers to dry the filament and prevent moisture-related issues like excessive stringing or oozing in printed models. Refer to the table below for the recommended drying parameters:
| Forced Air Drying Oven | Bambulab X1/X1C Printer | |||||
| Filament | Temperature / ℃ | Time / h | Bed Temperature / ℃ | Time / h | Turning-over Time/ h | Cover |
| TPU | 65 - 75 | 8 | 80 - 90 | 12 | Every 6 | Filament box / PC Box |
¶ Kind notes:
(1) When using an oven to dry filament, it is recommended to use a forced air-type oven with sufficient capacity. Ensure that the filament spool is kept away from the heating zone as much as possible to ensure even temperature distribution and prevent deformation or damage to the spool and filament caused by localized overheating.
(2) When drying filament with the X1 or X1C printers, it is necessary to cover the filament spool with the original packaging box or a self-printed PC box. Throughout the drying process, make sure to tightly close the top cover and front door to maintain a higher temperature inside the space. Additionally, during the drying process, it is recommended to flip the spool to ensure thorough drying of the filament. For detailed instructions, please refer to: Procedure and 3mf file for drying filament with the X1C heatbed | Bambu Lab Wiki
(3) For specific TPUs (77D and 55D) that can be printed with AMS, place the dried filament into the AMS and insert a fresh desiccant. Finally, lock the AMS to prevent the filament from absorbing moisture during the printing process.
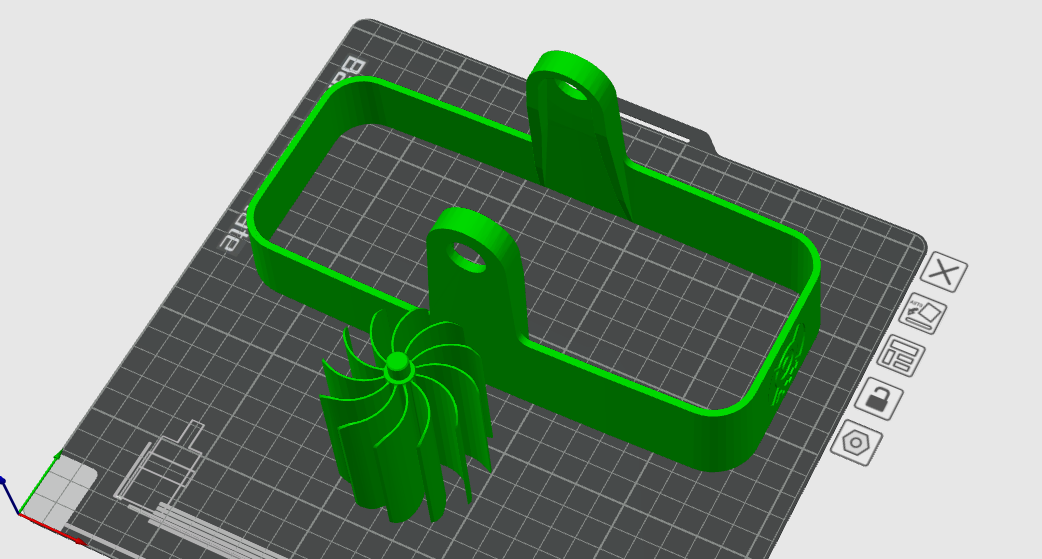
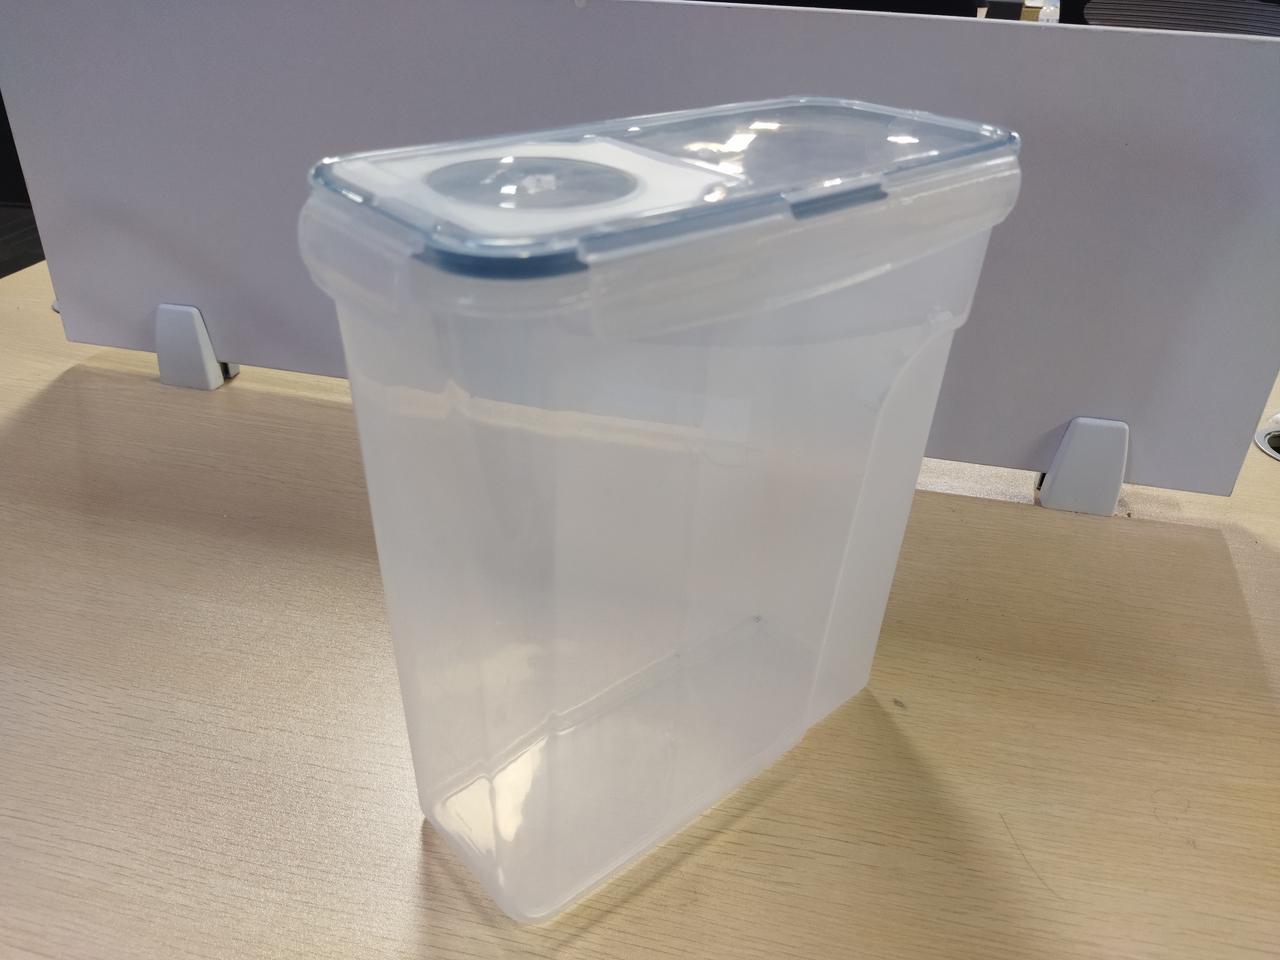
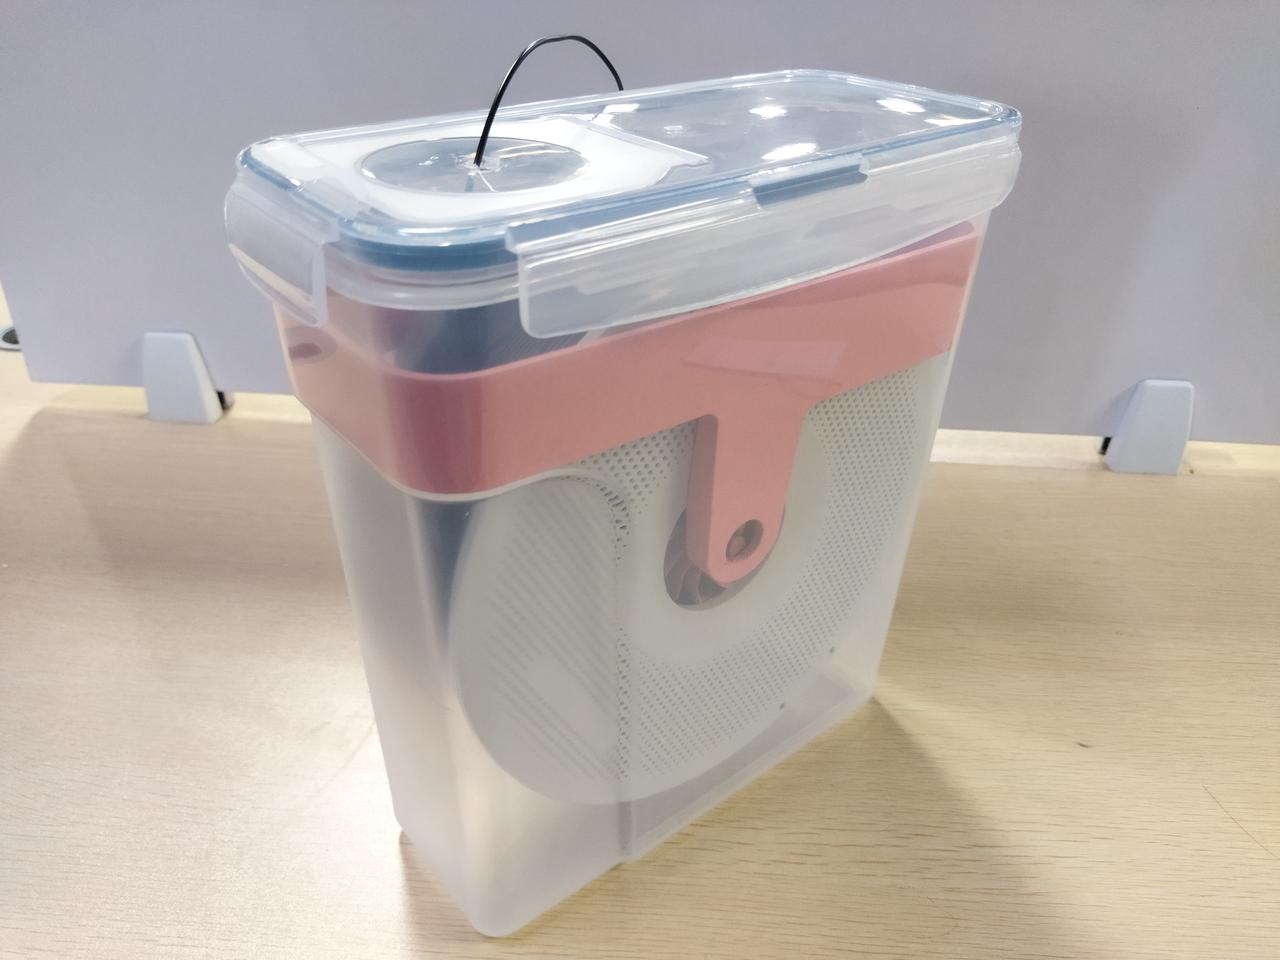
For TPU filaments that cannot be printed with AMS, place the dried filament into a sealed box with a roller axle and insert a fresh desiccant. Then, lock the box to prevent the filament from absorbing moisture during printing. The roller axle helps reduce feeding resistance and prevent feeding abnormalities caused by excessive resistance. The file, style and style of the roller after the filament is installed are as follows:
Roller file (click here to download)
Roller:
4L sealed box:
Filament is packed in 4L sealed box:
¶ (2) Choosing the printer and accessories
| Printer | AMS & AMS lite | Nozzle | Plate | Glue | |
| X1C, X1, P1S, P1P, A1 mini etc. |
Compatible: 77D, 55D, or higher hardness TPU
|
Not compatible: 95A, 85A, 83A, 80A, or lower hardness TPU | For TPU 95A/HF, 0.4mm nozzle is recommended, but 0.2, 0.6 and 0.8 nozzle is not; | Compatible: Bambu Cool plate, PLA plate, Bambu engineering plate, high-temperature plate, textured PEI plate | Compatible: Glue Stick, Liquid glue |
¶ Step 2: Parameter Settings
¶ (1) Printing Parameter Settings
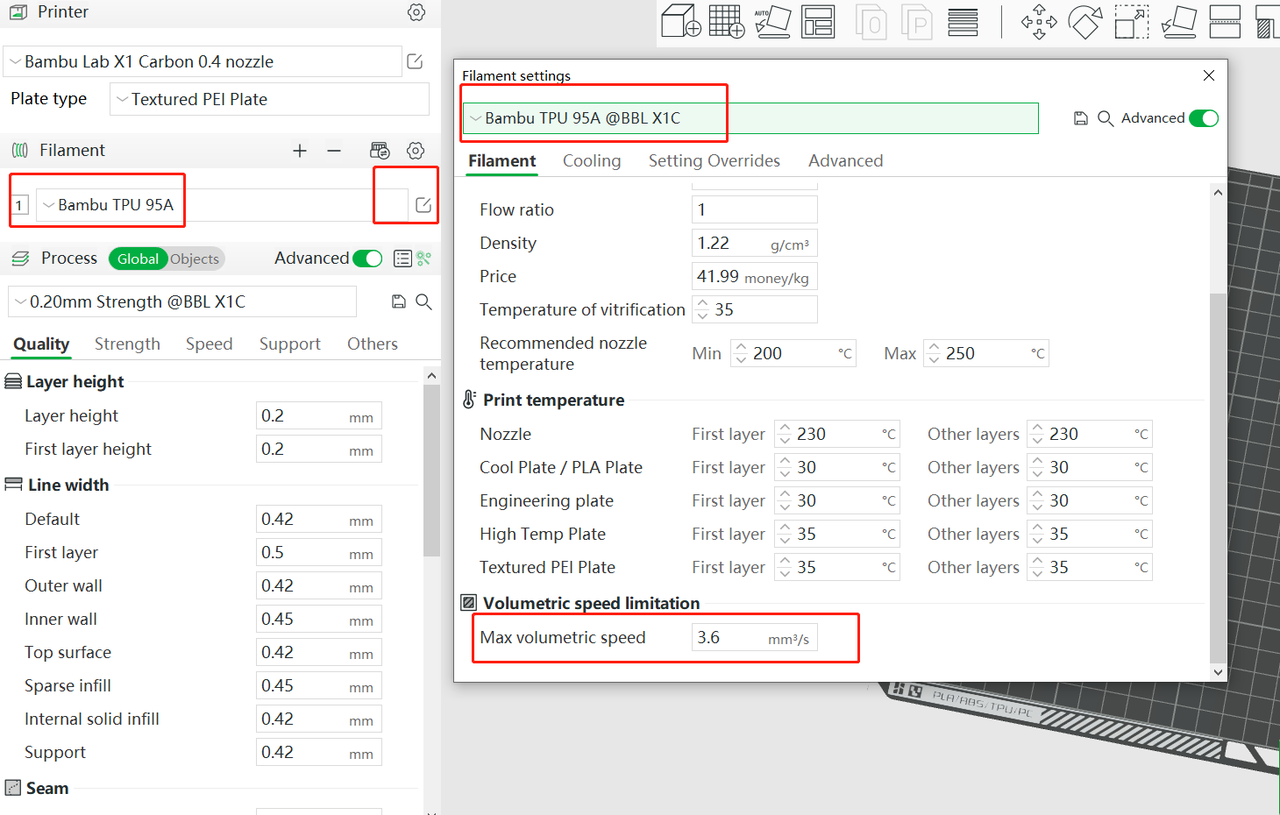
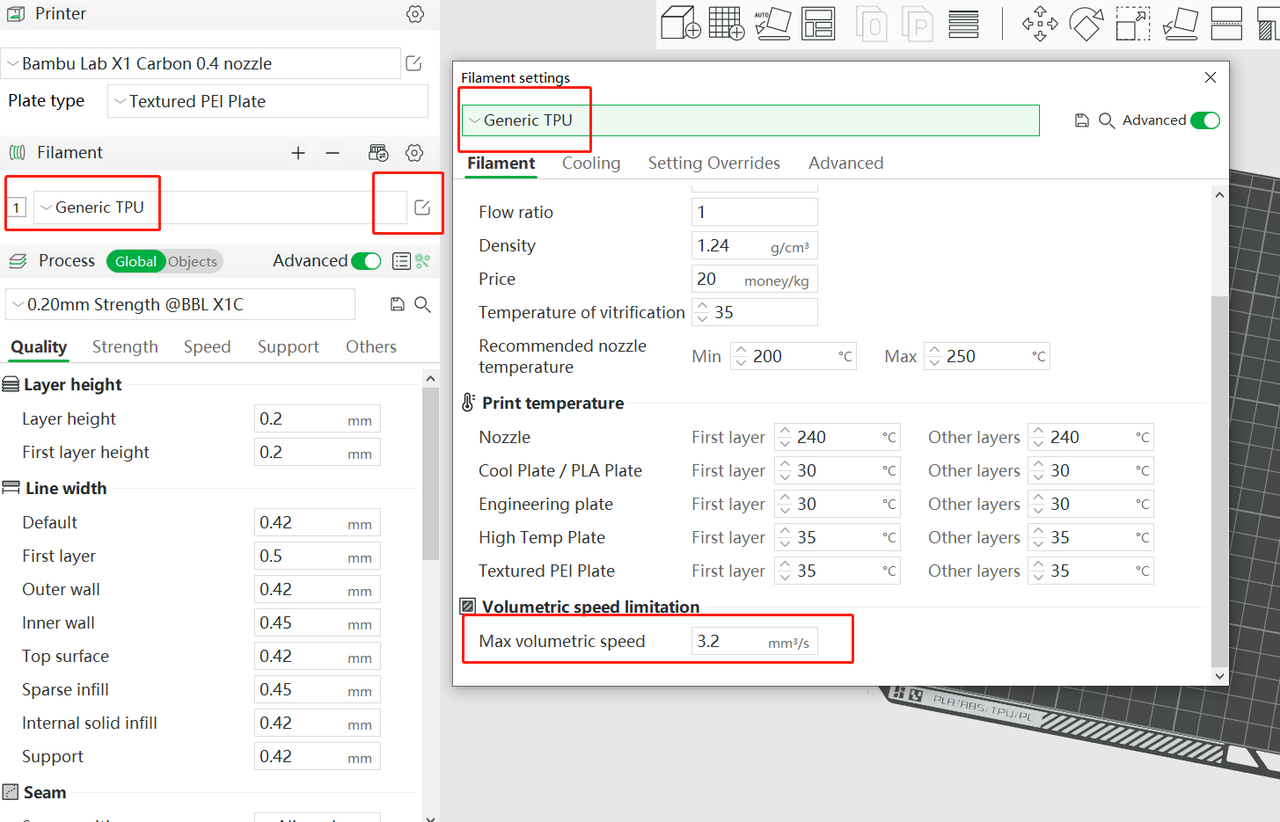
For Bambu TPU, it is recommended to use a 0.4 mm nozzle and the corresponding Bambu TPU preset. For third-party TPU, it is advised to use a 0.4 mm nozzle and select the Generic TPU preset with a lower maximum volumetric speed (print speed). If the third-party TPU has a hardness of 95A or higher and/or is specified as high-speed TPU, you may consider using the Bambu TPU preset and slightly increasing the "maximum volumetric speed" based on that.
Please note that TPU is prone to feeding failures or clogging issues at higher print speeds. If you are unsure whether the TPU can be printed at high speeds, it is recommended to use a lower print speed whenever possible.
¶ (2) Model Layout
TPU is prone to stringing. So it is important to avoid excessive travel. That is, you should avoid placing multiple models on a plate and printing by layer, but rather select a plate to place only one or a few models and print by object.
.png)
.png)
¶ (3) Disable Flow Dynamics Calibration
Dynamic flow calibration is a technology that detects the response of material flow rate changes during extrusion and movement, and automatically adjusts flow compensation parameters to optimize printing quality. This mechanism usually performs stably when handling rigid materials (such as PLA and PETG), effectively improving printing consistency. However, for flexible materials like TPU, their unique physical properties pose higher challenges to the calibration algorithm.
TPU (thermoplastic polyurethane) has properties such as high elasticity, softness, and easy deformation, and it is prone to compression and rebound during extrusion. Compared with rigid materials, TPU exhibits obvious response lag during extrusion. This lag is particularly prominent during the acceleration and deceleration phases of printing, mainly manifested as follows:
- The material fails to respond promptly to the system's extrusion commands, which is easily misjudged by the algorithm as "under-extrusion" or "over-extrusion";
- After collecting these errors, the dynamic calibration system will attempt compensation calculations, but the compensation parameters generated based on wrong judgments are often seriously inconsistent with the actual situation;
- Eventually, the flow calibration mechanism, which is originally intended to improve quality, may instead lead to a decline in printing stability, such as local excessive thickness, empty printing, and uneven lines.
In addition, the printing speed of TPU is usually low. For example, in Bambu Studio, the default maximum volumetric flow rate of "Bambu TPU 95A" is 6.4 mm³/s, while it is only 3.2 mm³/s when "Generic TPU" is selected. Moreover, the speed changes little during the printing process, so it is not easy to produce severe flow rate deviations, which further reduces the practical value of dynamic flow calibration.
Therefore, when printing with flexible materials like TPU, the dynamic flow calibration function should be disabled.
¶ Step 3: Post-Processing after finishing the print
¶ (1) Removing Models from the build plate
Generally, TPU exhibits strong adhesion to the build plate, making it challenging to remove large-bottomed models. In such cases, avoid using excessive force to prevent damage to the model or build plate. Instead, lift one corner of the model slightly to create a gap and spray alcohol into it. Then, you can carefully remove the model from the print bed.
¶ (2) Dealing with Stringing on Models
Drying the TPU filament before printing will only reduce the amount of stringing on the prints, but will not eliminate it completely, especially on models with a lot of travel. To remove the stringing from the model, you can use hot air from a hairdryer to blow on it or use the flame from a lighter to quickly burn the stringing area. However, be cautious to avoid hurting yourself and damaging the model.
¶ End Notes
We hope that the detailed guide we shared with you was helpful and informative.
We want to ensure that you can perform it safely and effectively. If you have any concerns or questions regarding the process described in this article, we encourage you to reach out to our friendly customer service team before starting the operation. Our team is always ready to help you and answer any questions you may have.
Click here to open a new ticket in our Support Page.
We will do our best to respond promptly and provide you with the assistance you need.