¶ Why does laser processing require material thickness information?
In laser processing, we need to know the thickness of the material to help the machine focus to a specific location, otherwise, the processing will fail because the laser is out of focus.
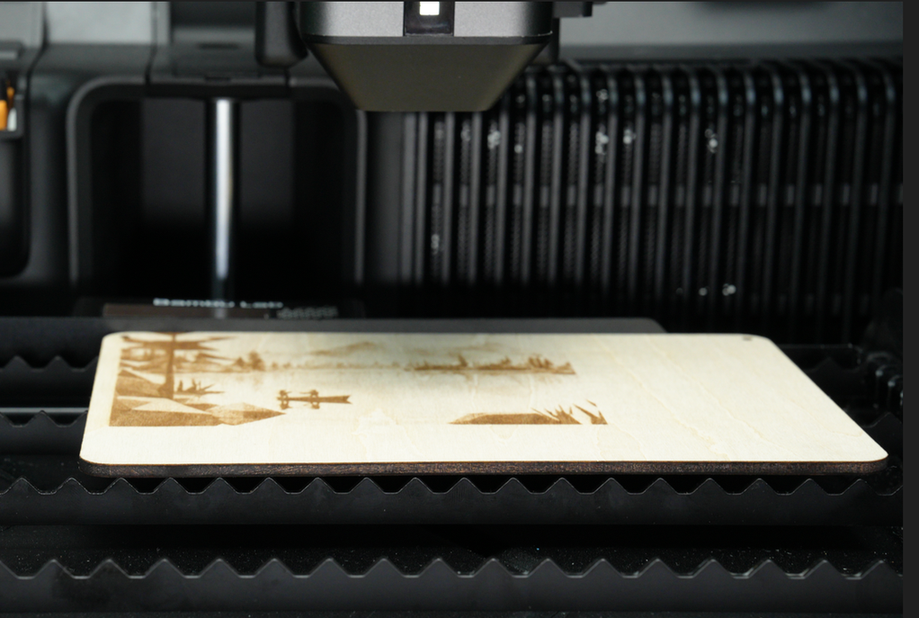 In the scenario of engraving thick objects, the machine needs to obtain the thickness of the object so that the laser can focus on the upper surface of the object In the scenario of engraving thick objects, the machine needs to obtain the thickness of the object so that the laser can focus on the upper surface of the object |
¶ How does the machine measure the thickness of the material?
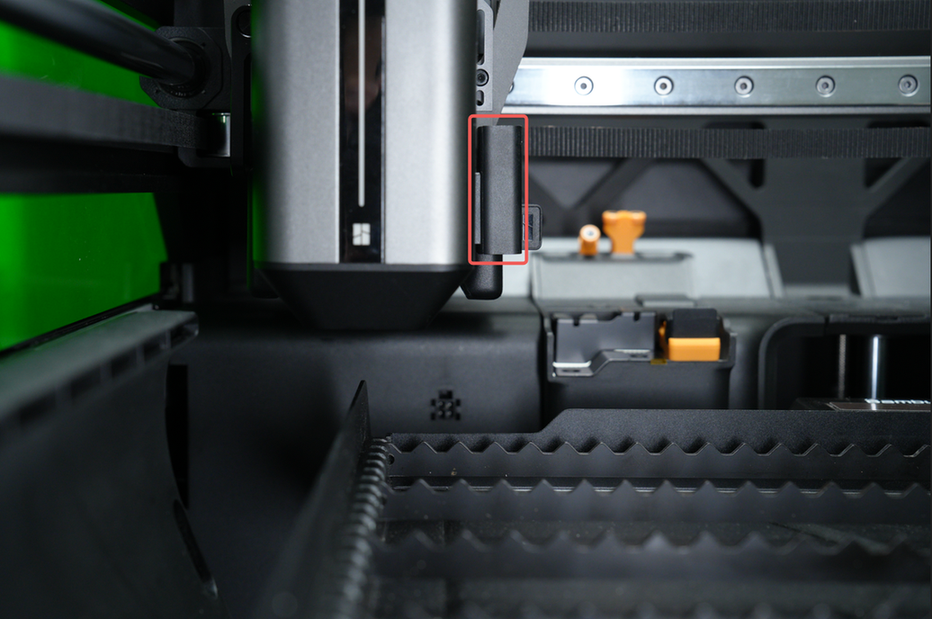
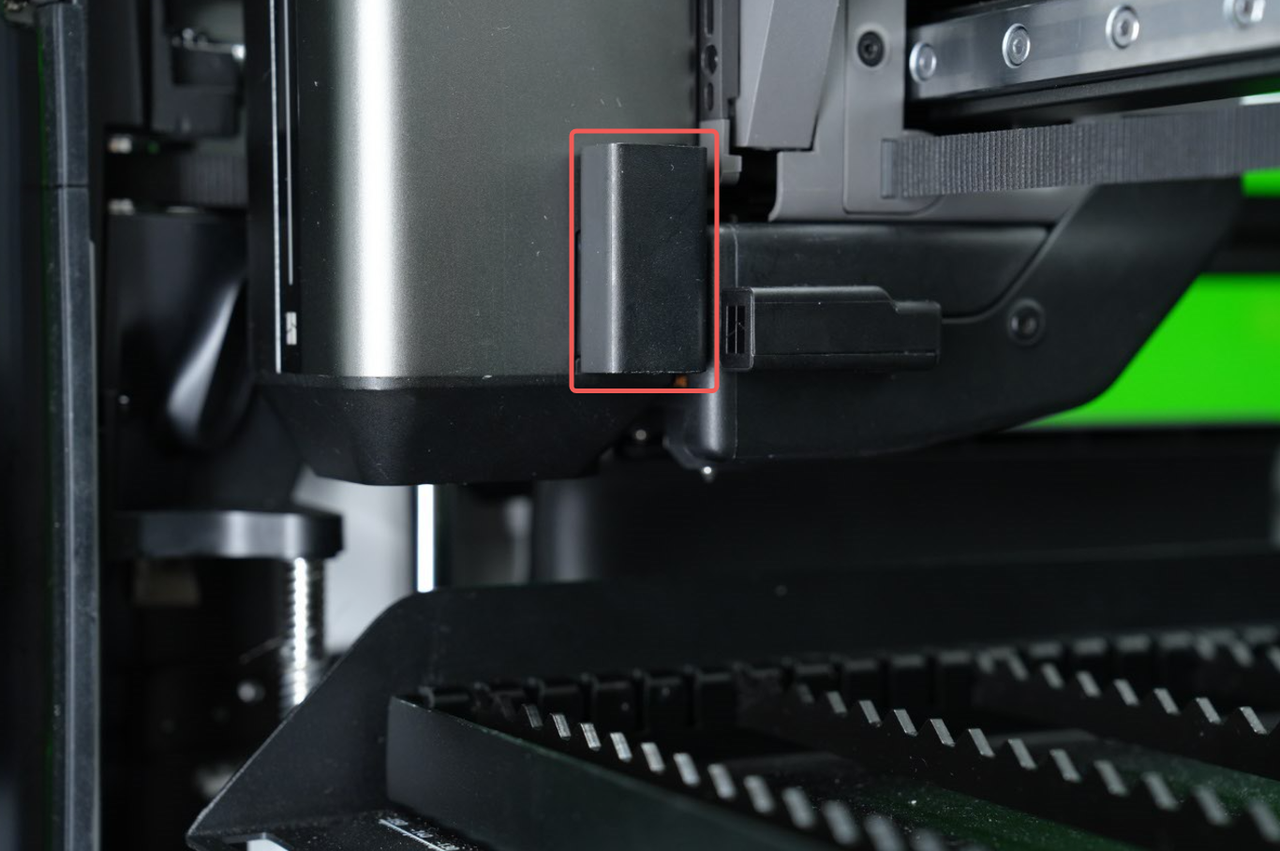
The laser height probe on the laser module realizes the material thickness measurement function. It measures the distance of objects' surface from the laser module. Using this property, the laser height probe can indirectly measure the "thickness" of materials.
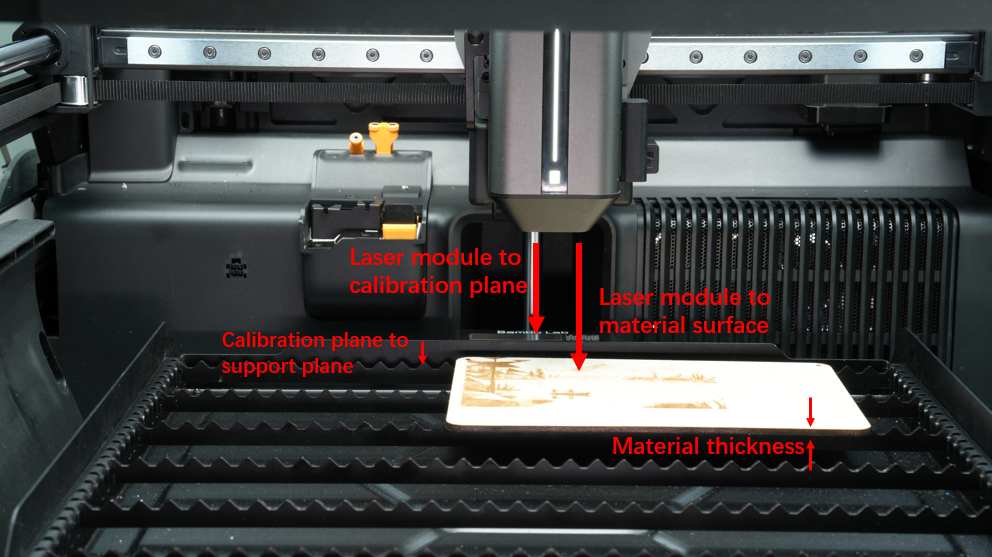
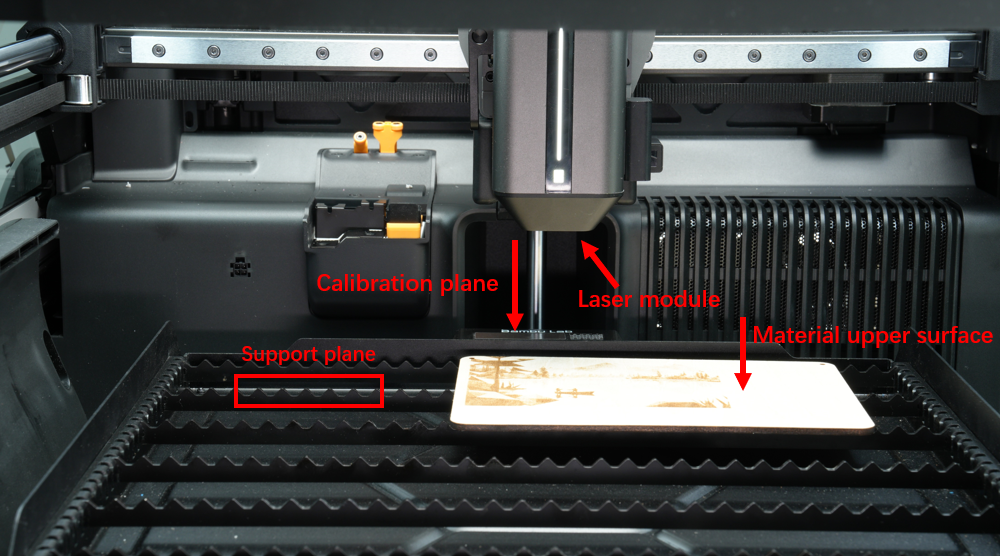
Material "thickness" = the distance from the upper surface of the material to the support surface of the laser platform * = the distance from the laser module to the calibration plane of the platform (measured value) + the distance from the calibration plane to the support plane (theoretical value) - the distance from the laser module to the upper surface of the material (measured value).
The support surface of the laser platform refers to the top surface of the support strips.
The reason for calculating the thickness indirectly in this way is to allow the user to focus the laser by inputting manually measured thickness. Without this parameter, the user does not have any easy way to achieve focus through manual measurement. After all, the user can easily measure the thickness of the material with the caliper, but can not directly measure the distance between the material and the laser module.
| Diagram of calculation method of material thickness | Laser module and other key plane diagrams |
|---|---|
 |
 |
¶ Why is the thickness measurement inaccurate? (Even negative values?)
The object's thickness measured by the method introduced above may have errors compared to the thickness measured manually. There are two main sources of error:
- The distance from the calibration plane to the support plane is a theoretical value, which may not necessarily match the actual measured value and may introduce some errors. Typical scenarios include:
- When the processing material needs to be placed on the laser platform, if other types of platforms are mistakenly placed, there will be a significant error in the height of the support plane.
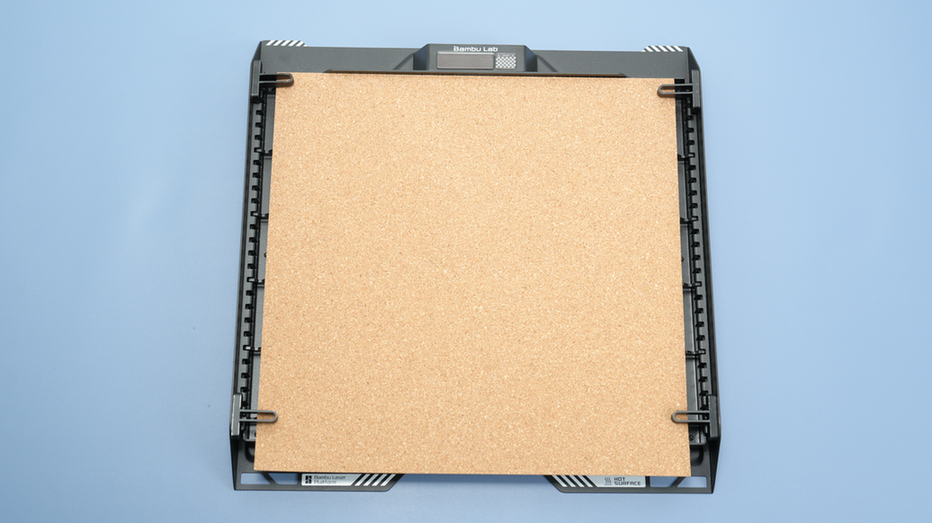
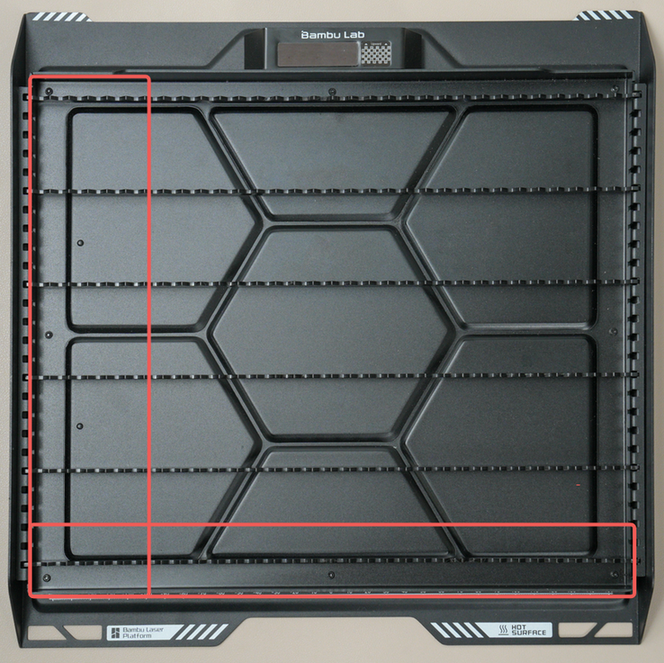
- If the laser platform's slats are not installed properly, the measured height of the support plane will increase slightly.
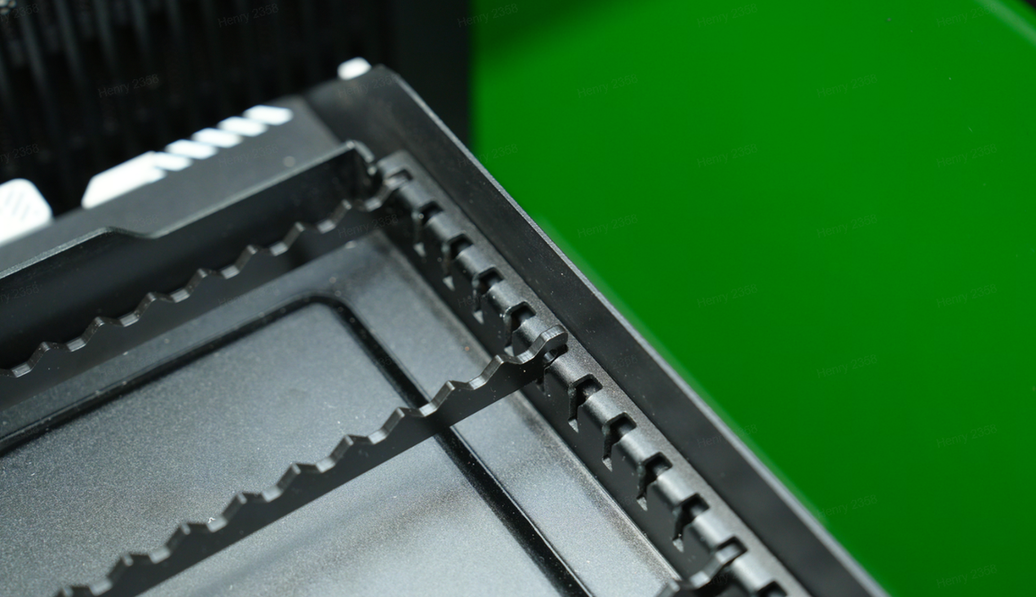 Height error of the support plane caused by the warping of the slat Height error of the support plane caused by the warping of the slat |
- Material warping can cause the distance from the object's surface to the support surface to be higher than the object's actual thickness.
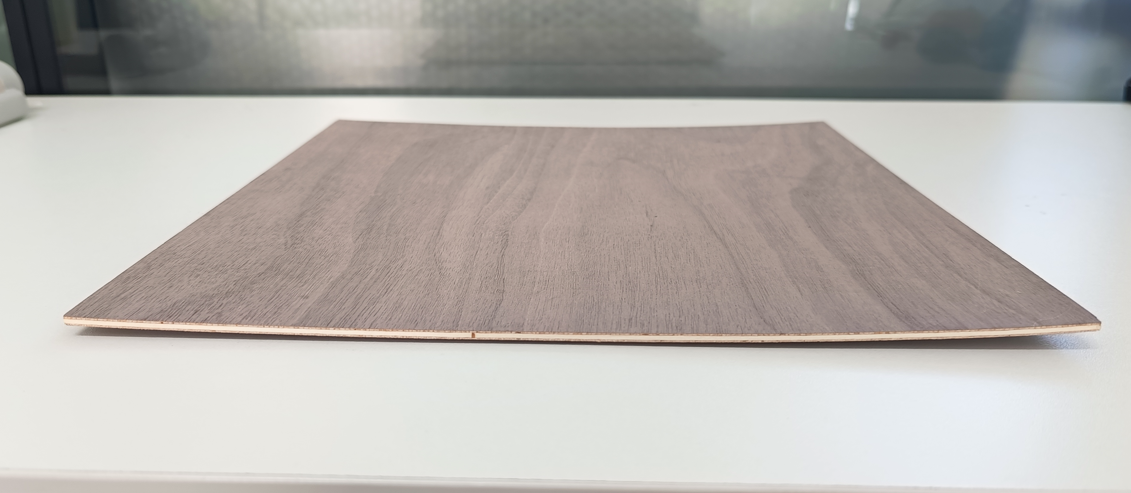 The warped board causes the distance between the support surface and the upper surface of the material to be greater than the material thickness The warped board causes the distance between the support surface and the upper surface of the material to be greater than the material thickness |
Therefore, the auto-measured thickness measurement may not be the same as the thickness measured by the vernier caliper.
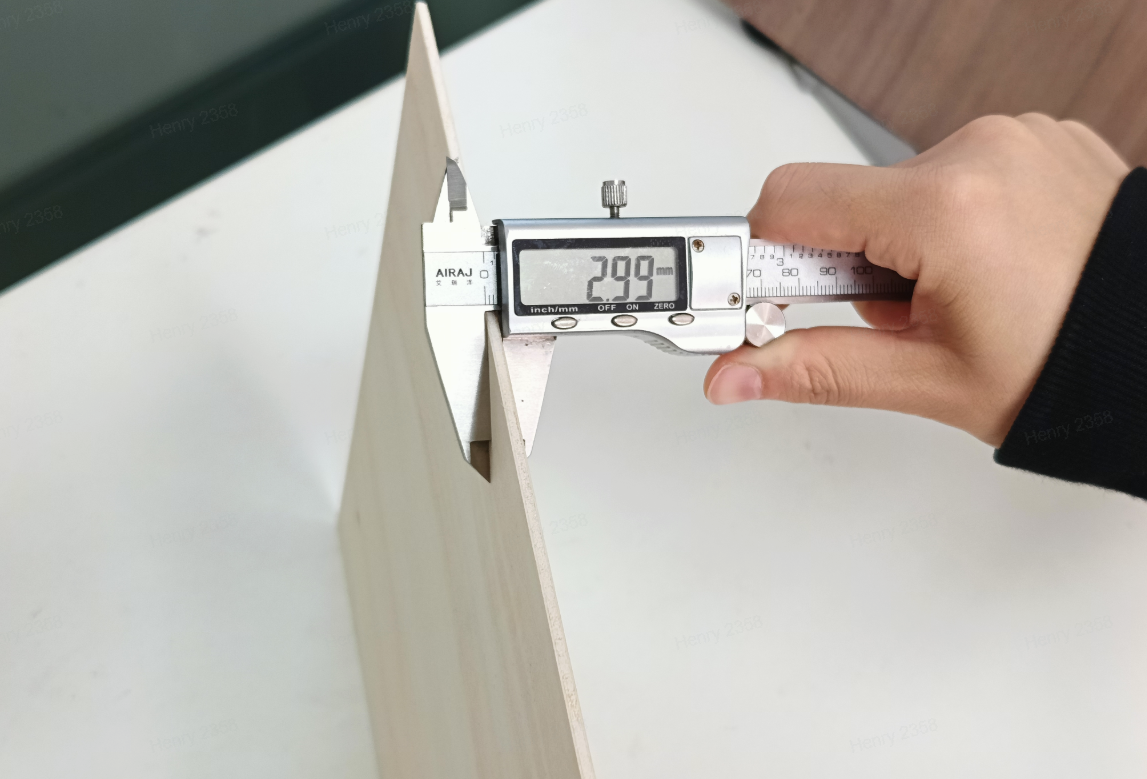 Measure thickness manually with vernier calipers Measure thickness manually with vernier calipers |
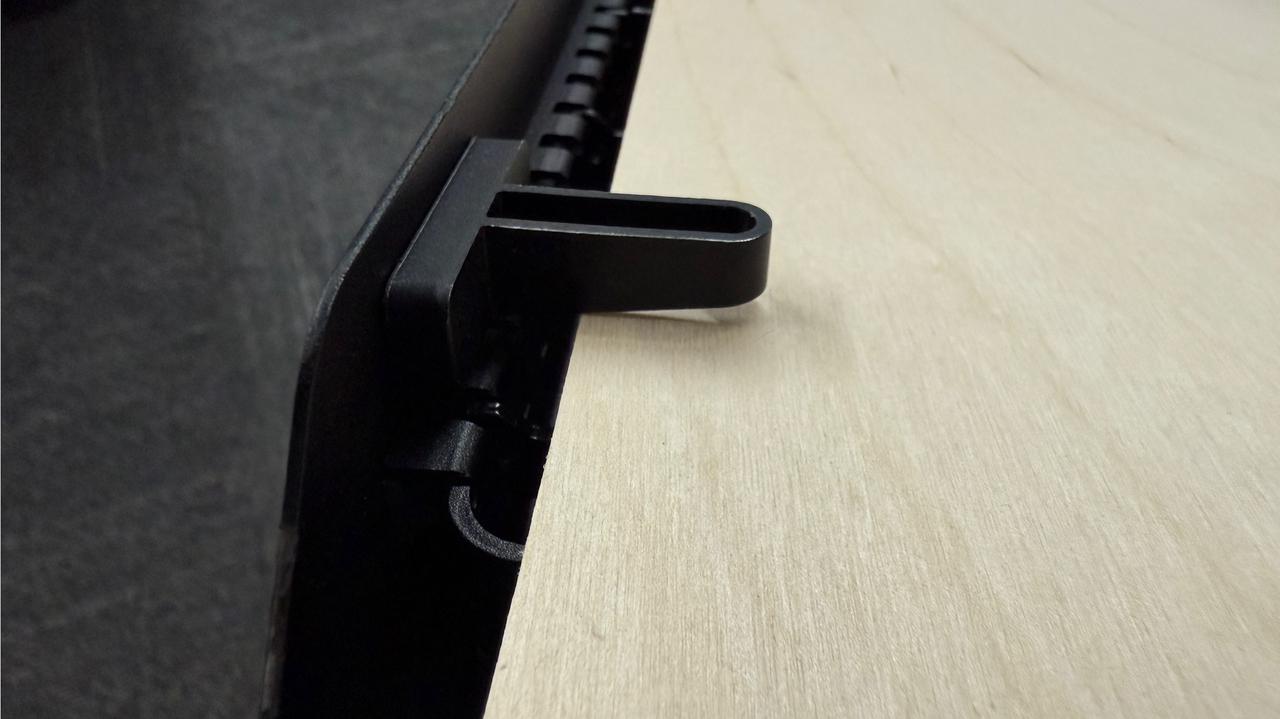
This wiki provides instructions on flattening the material to solve the warping problem Plywood Bending: Causes, Prevention, and Restoration. You can also try to improve this issue by pressing the edge of the material with the material pins. Please refer to this wiki for more details on how to use pins: Introduction to the Laser Platform and Cutting Platform
 |
 |
- In multi-process processing on the same plate, you might use the laser module while placing a cutting platform instead of a laser platform. If you run auto thickness measurement without any material on the cutting platform, negative values may appear. This occurs because the laser module performs its homing operation based on the laser platform, and the height difference between the cutting platform and the laser platform may vary slightly. This is a normal phenomenon and nothing to worry about.
- If you place very thin materials (such as A4 paper) on the platform, the thickness measurement might show a negative value. This is also because the height of the laser module's homing plane and the material placement plane may vary slightly. Don’t worry—this is completely normal.
¶ Will inaccurate machine thickness measurement affect laser focus and processing effect?
Use the measured "thickness" for processing, and the error in this thickness measurement will not affect the focusing accuracy and processing effect. For example, in surface engraving, the laser's focusing accuracy depends only on the distance from the material's surface to the laser module, which can be accurately measured directly. None of the factors listed above that affect the thickness measurement results will affect the measurement of this distance (even if it's a negative value).

¶ Thickness measurement operation steps
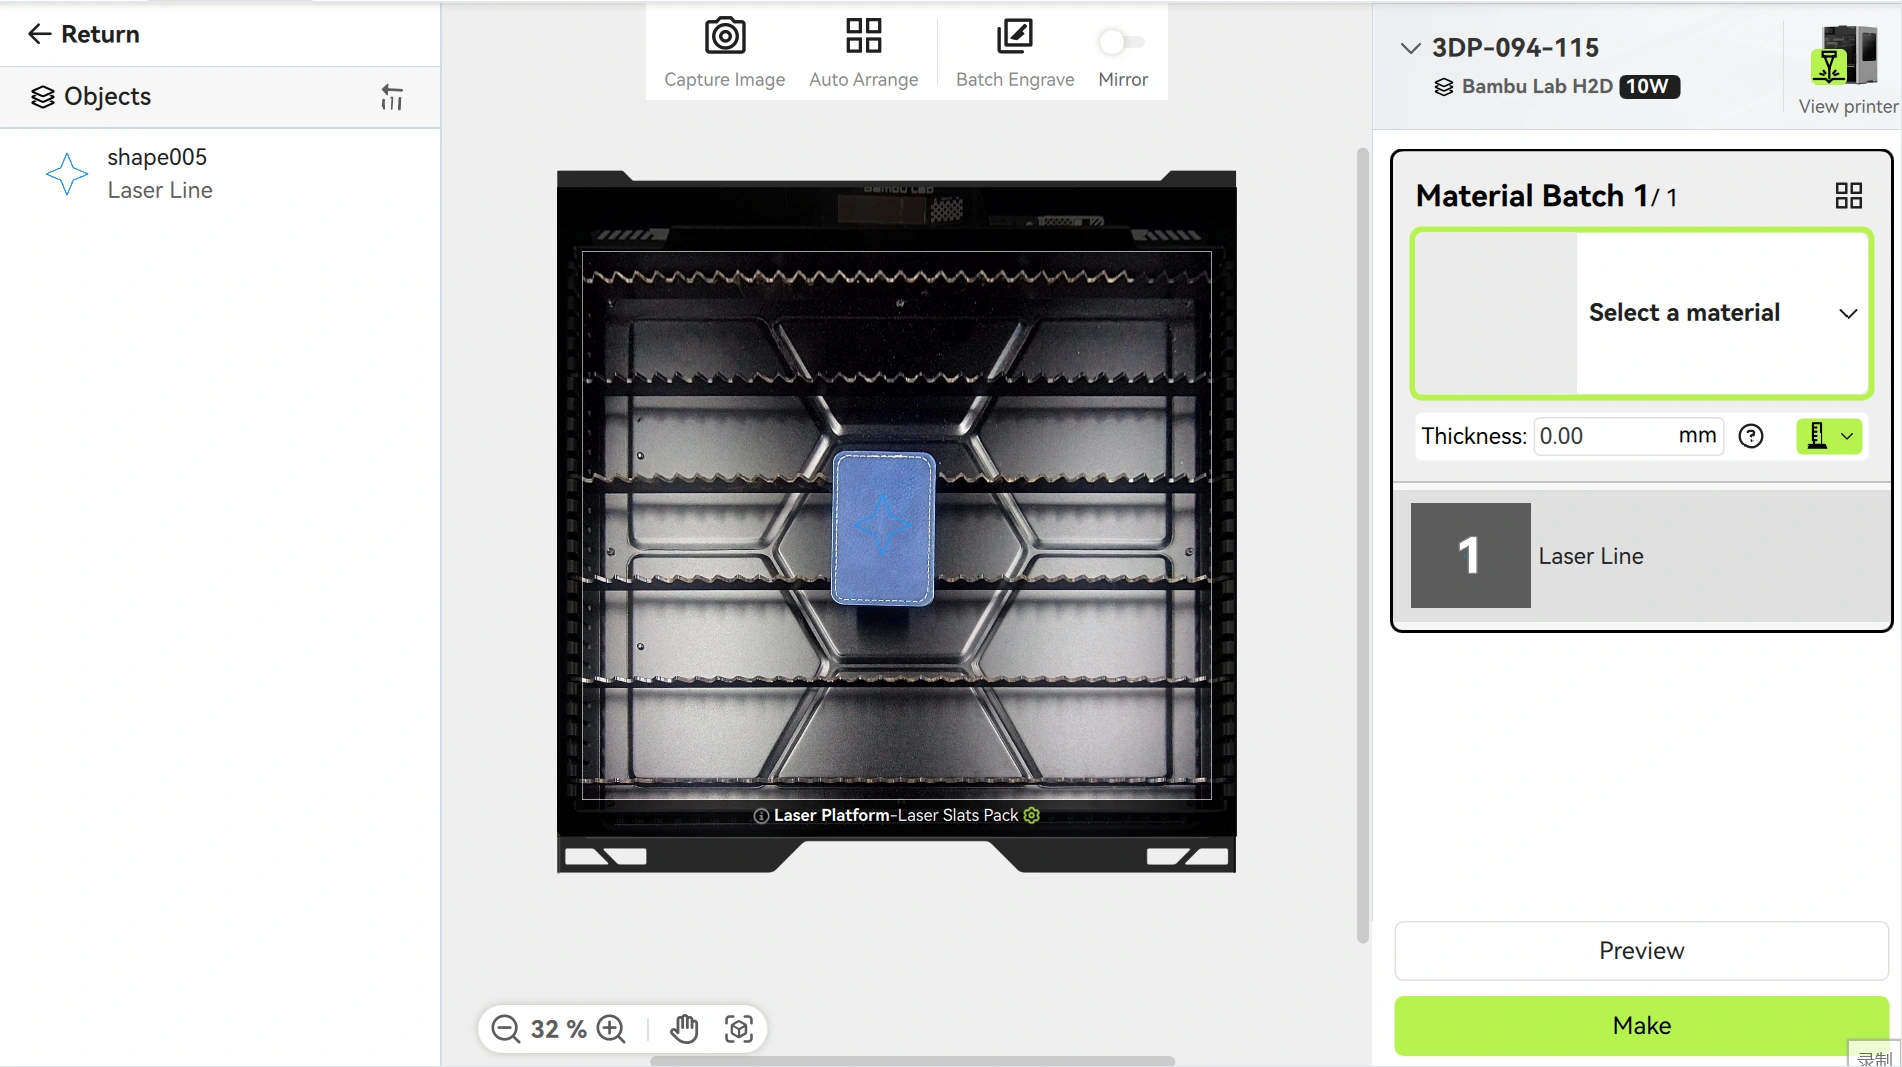
Bambu Suite provides two methods for auto-measuring material thickness, with two options available on the software's preparation page: Auto-Measure and Targeted-Measure.
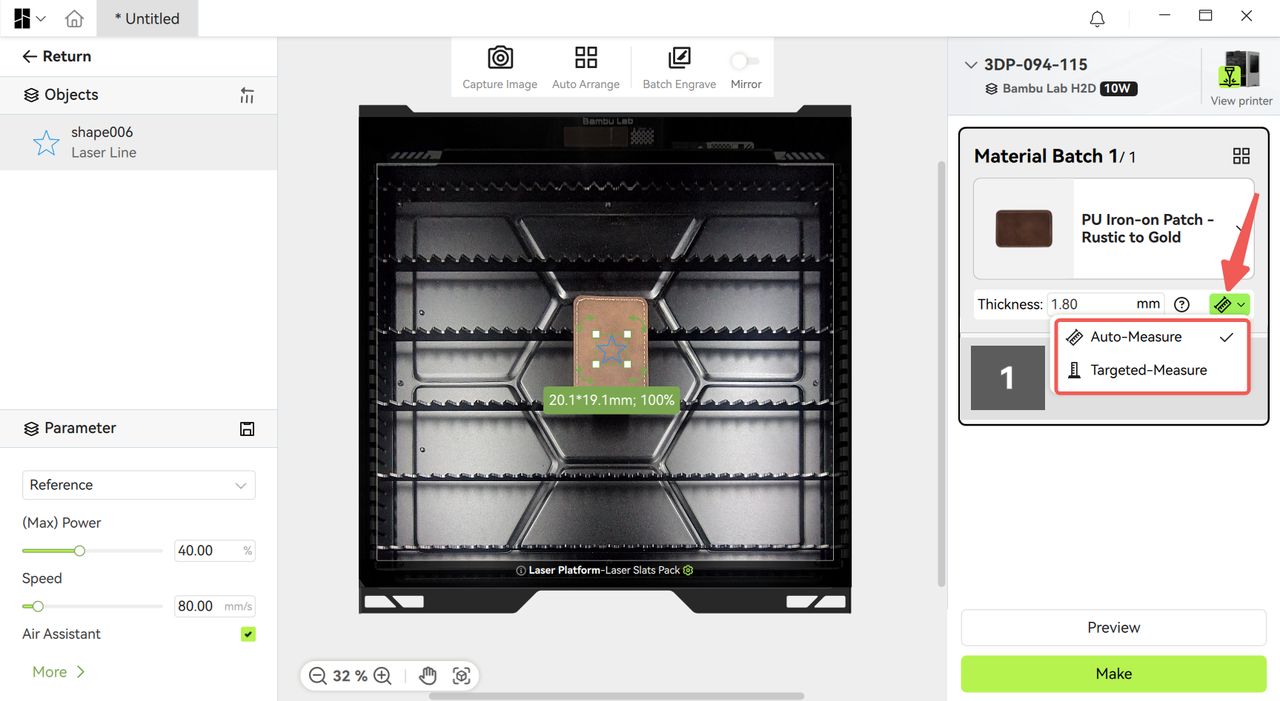
¶ Auto-Measure
Click 'Auto-Measure'. If you haven't taken a background image yet, the printer will measure the center of the processing area. If you've already captured a background image, the software will automatically find the material position, send it to the printer, and use the center of the material shape as the measurement point to check the material thickness.
¶ Possible reasons for measurement failure or abnormal measurement value
- The material is not placed, or the size of the material is very small (less than 15mm in length and width), in which case abnormal thickness values may be detected.
- The preset thickness of the material significantly deviates from the actual thickness. Please enter a preset thickness closer to the actual thickness and try again.
-
Suppose the material is small and placed at the edge of the laser platform. In that case, it may exceed the measurable range (the specific measurable range is detailed in the point measurement section below). It is recommended to place the material near the center of the laser platform to ensure accurate measurement.
-
Transparent materials, such as clear acrylic or glass, are being used. It is recommended to replace them with opaque materials and try again. If transparent materials must be used, manually measure the thickness and enter the value in the software. Note: The laser may not focus properly on transparent materials, which could affect the engraving results.
-
The material's surface is uneven. It is recommended to replace it with a flatter material and try again.
-
The software currently does not support automatic measurement for materials thicker than 30mm. If you need to engrave such materials, you can manually measure the thickness and enter the value in the software. Support for measuring thicker materials will be added in future firmware updates.
¶ Targeted-Measure
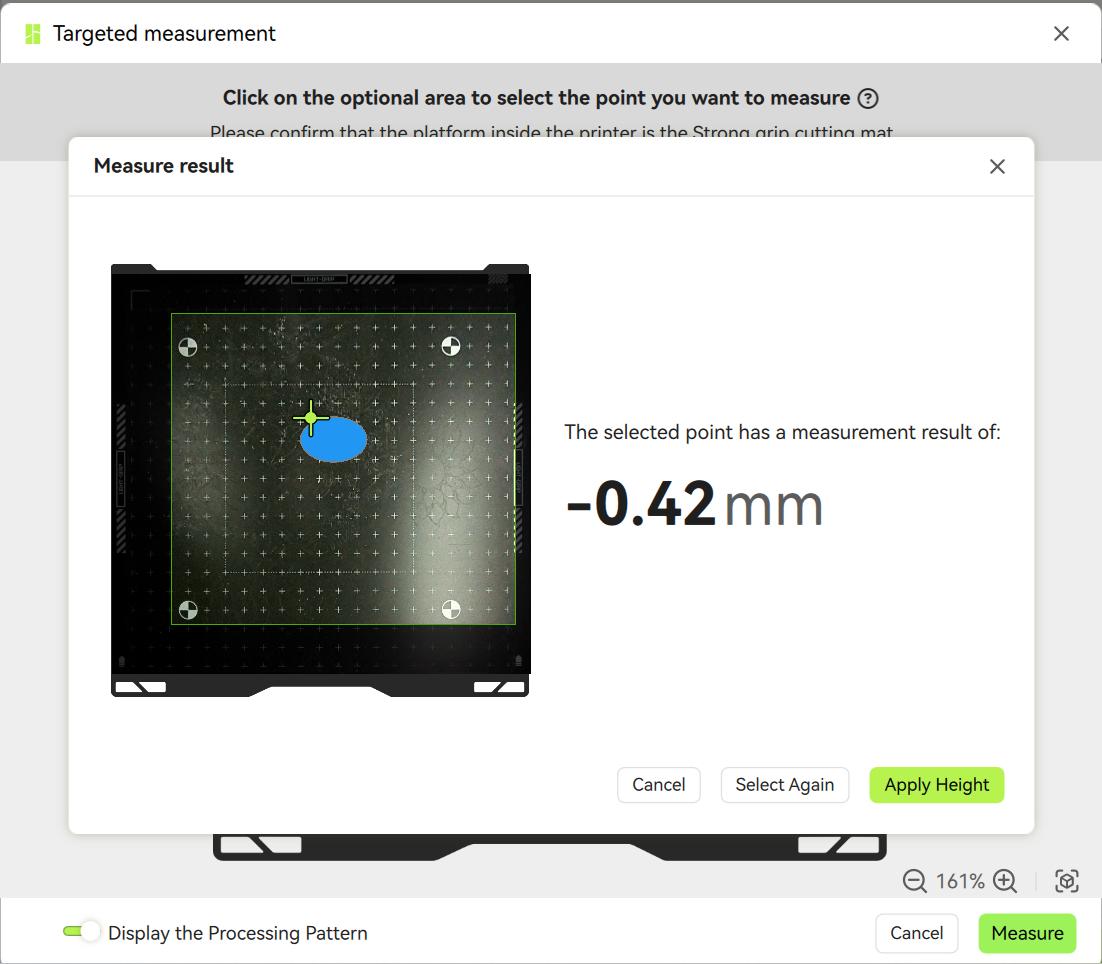
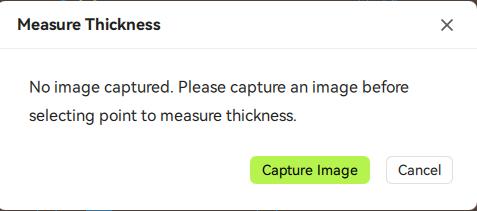
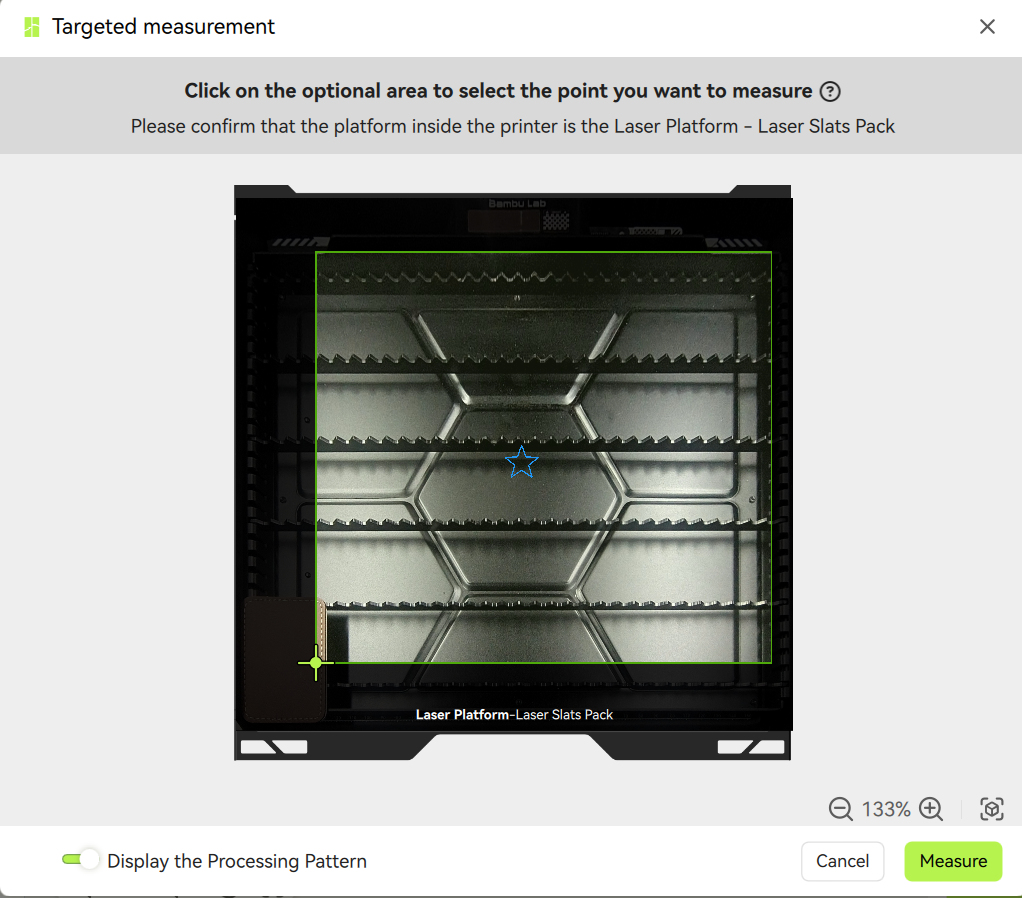
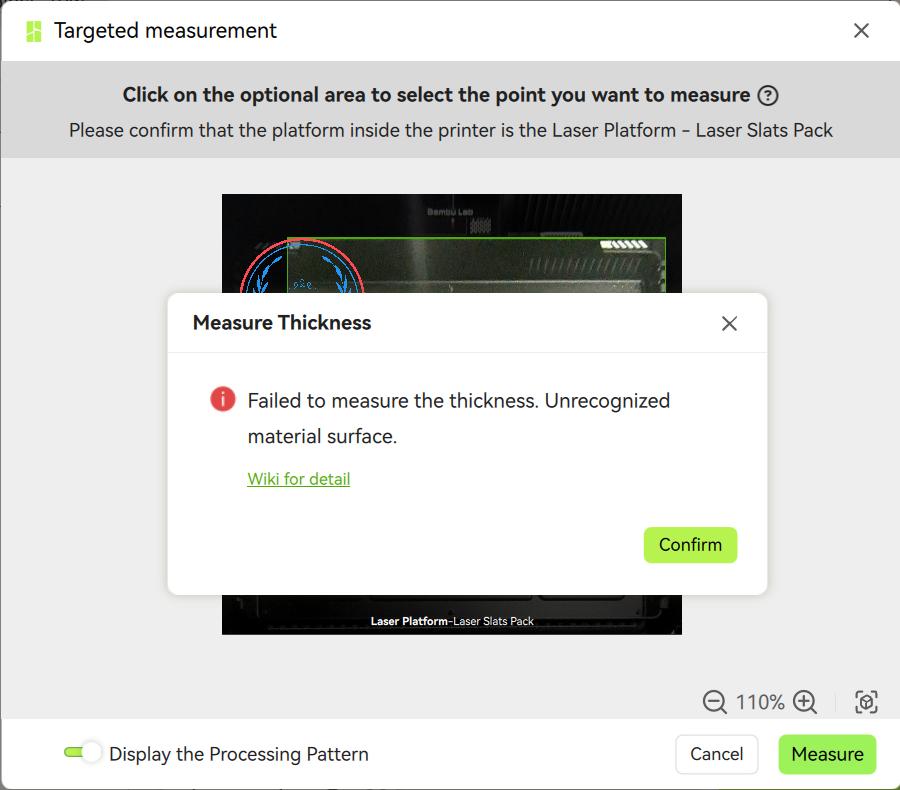
Before targeted measuring, first capture the background image of the processing plane (if not, there will be a corresponding pop-up reminder), then click "Targeted Measure" and select a point on the material surface for thickness measurement according to the prompt.
¶ Matters needing attention
When selecting the Targeted Measure, the following points should be noted:
1. Select the center position of the object as the thickness measurement point
Please lower the heatbed so that the surface of the object is below the tool head, and then try to choose the center position of the object as the measurement point to improve the fault tolerance of the thickness measurement.
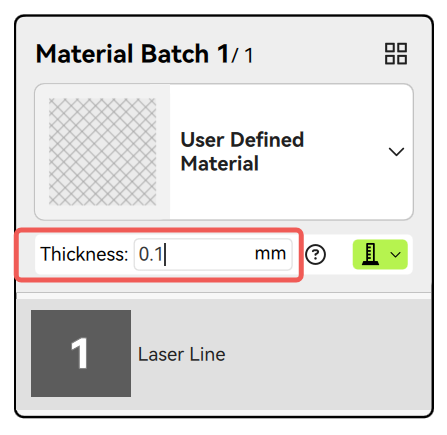
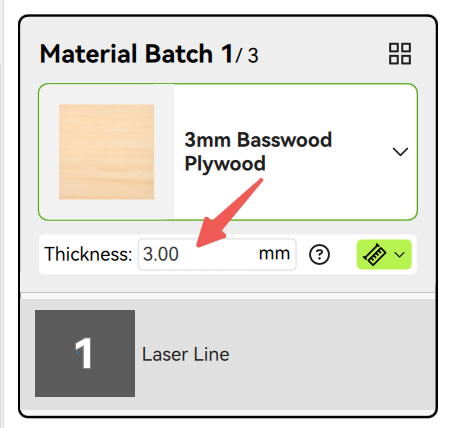
2. Adjust the preset thickness of the material properly
The more accurate preset thickness of the material can help you get a more accurate preview image, which helps the device to measure the material thickness more accurately.
You can:
-Click on 'Select Material' to load preset materials and their corresponding thickness values from the material library.
-If you are using custom materials, please enter a value close to the actual thickness of the material as the preset thickness.
-If you are unsure about the material thickness, you can estimate and enter an approximate value.
3. Choose opaque and flat materials for processing
-
Material thickness measurement relies on optical measurement function, and currently does not support thickness measurement of transparent materials.
-
If the object's surface is uneven, thickness measurement may also fail. Do not use materials with severely uneven surfaces in 2D machining mode. We suggest that you replace the opaque and flat surface material and then restart the material thickness measurement on the software.
4. There are blind spots in selecting thickness measurement points, so the selected area is smaller than the laser module processing area, and attention should be paid to the placement of materials.
- The premise of thickness measurement is that the toolhead lidar needs to recognize the object, and the area that the lidar can move to is inconsistent with the laser module. When the toolhead is moved to the far left, the lidar position is at X56. When the tool head is moved to the outermost, the lidar position is at Y40. So the overall blind spot range is X<56 and Y<40.
Inaccessible area of Lidar:
- The green box in the software represents the area that the lidar can recognize, which can be manually selected for measurement. If small pieces of material are found to be placed beyond the selectable area, please readjust the placement of the material.
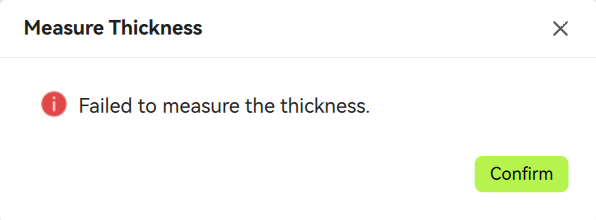
¶ Possible reasons for measurement failure
- The material is not placed, and the abnormal thickness values may be detected.
-
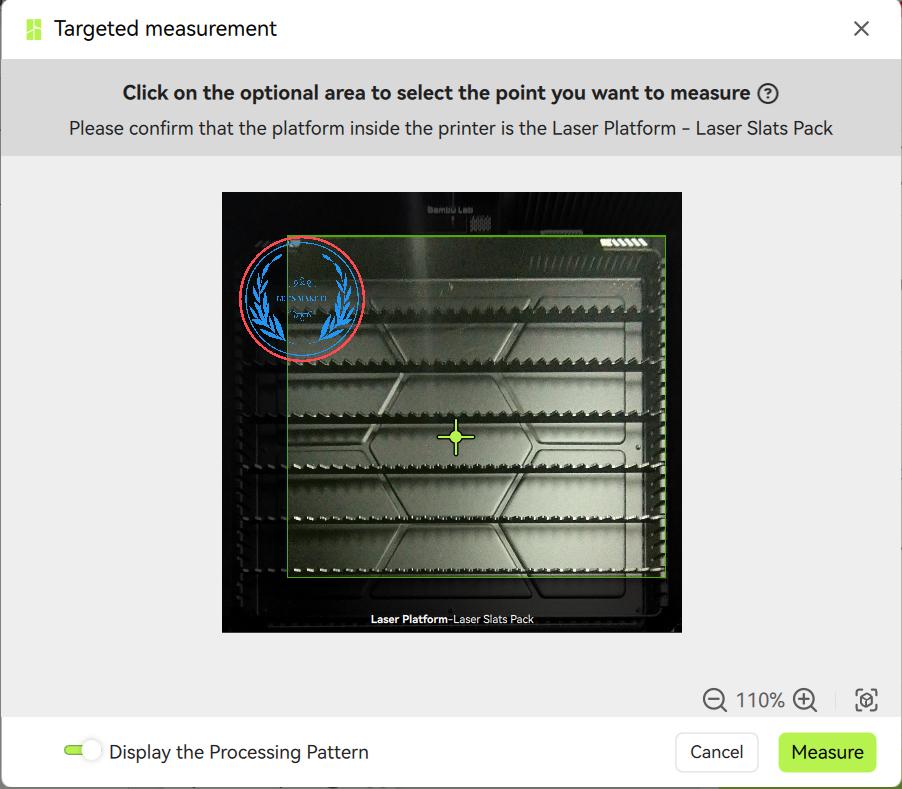
The selected measurement point is close to the edge or outside the object's surface. Please select the measurement point to the center of the object surface and try again.
-
The preset thickness of the material significantly deviates from the actual thickness. Please enter a preset thickness that is closer to the actual thickness and try again, but we will strive to optimize this issue in future firmware versions to make the whole process more automated without manual input.
-
Transparent materials, such as clear acrylic or glass, are being used. It is recommended to replace them with opaque materials and try again. If transparent materials must be used, manually measure the thickness and enter the value in the software. Note: The laser may not focus properly on transparent materials, which could affect the engraving results.
-
The material's surface is uneven. It is recommended to replace it with a flatter material and try again.
-
If no material is placed on the laser platform or the measuring point is selected in an area where no material is placed, the thickness measurement can also fail.
¶ Manual Measurement
If the material is special and cannot use the automatic thickness measurement function mentioned above, you will need to measure the thickness and input it into the software manually. The steps are as follows:
- Place a flat piece of material in the printer. Use the lidar to measure the thickness automatically, choosing either 'Automatic-Measure' or 'Target-Measure.' After the machine measures the thickness, use a vernier caliper to check the thickness manually. The difference between the two measurements is the error (ΔT), calculated as: ΔT = Machine measurement - Vernier caliper measurement.
Measure thickness manually with vernier calipers:

- When the printer cannot measure certain materials automatically, use a vernier caliper to measure their thickness. Enter the measured value, along with the possible error range (±ΔT), into the 'thickness' column of the software, and start the processing.
¶ End Notes
We hope the detailed guide provided has been helpful and informative.
If this guide does not solve your problem, please submit a technical ticket, we will answer your questions and provide assistance.
If you have any suggestions or feedback on this Wiki, please leave a message in the comment area. Thank you for your support and attention!