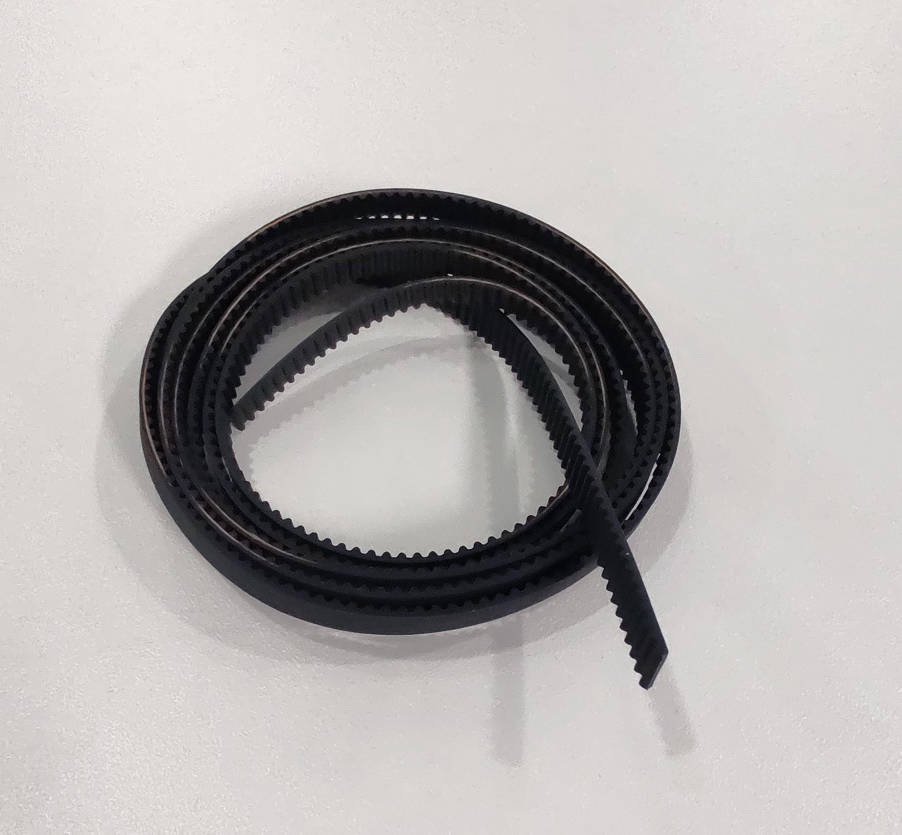
¶ XY timing belt
The XY timing belt is an open drive belt with a pitch length of 1442mm. There are 2 XY timing belts in the Bambu Lab X1/X1C printer. They connect the XY motor and the toolhead as well as drive the toolhead to complete movement in the XY direction.
There are two methods to replace the XY belt:
-
Method 1: Keep the original belt on the printer, then connect the new belt to the old belt end-to-end, and use the old belt to pull the new one through. This method is relatively simple and is more suitable for scenarios such as XY belt wear. For detailed instructions, please refer to the Wiki.
-
Method 2: Remove the original belt from the printer, then thread the new belt through the printer. This method is more difficult, takes more time, and is better suited for situations like XY belt breakage. For detailed instructions, please refer to the Wiki: Replace the XY Timing Belt
¶ When to use this guide?
- Broken belt
- Belt aging & wear that has affected function
¶ Tools and materials needed
- H1.5 Allen Key
- New XY belt (Usually 1 PCS for broken belt, but 2 PCS for aging & wear)
- Flat-tip tweezers or flat-blade screwdrivers
List of screws used for the parts in this guide
| NO. | Model | Position | Drawing | NO. | Model | Position | Drawing |
| Screw A | BT3*6 | Metal side panels |  |
Screw B | ST3*4.5 | Metal side panels, rear panel |  |
| Screw C | M3*3 | Glass door |  |
Screw D | BT3*5 | Rear panel |  |
| Screw E | MG3*12 | Aux parts cooling fan |
 |
Screw F | BT3*8 | Tension spring holder | 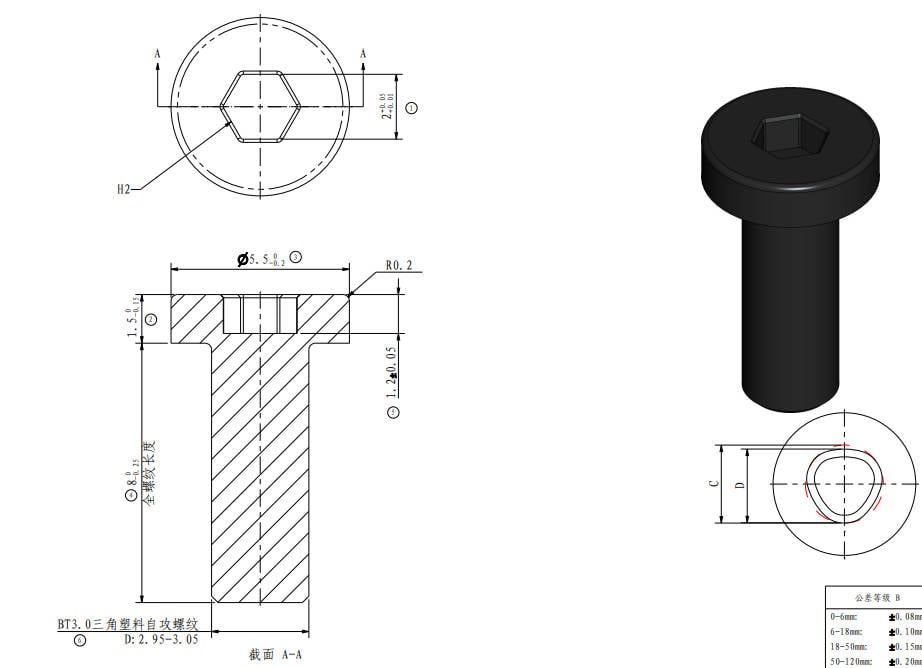 |
| Screw G | M3*6 | XY tensioner, Extruder |
 |
Screw H | BT2*5 | Tool head housing, PCBs | 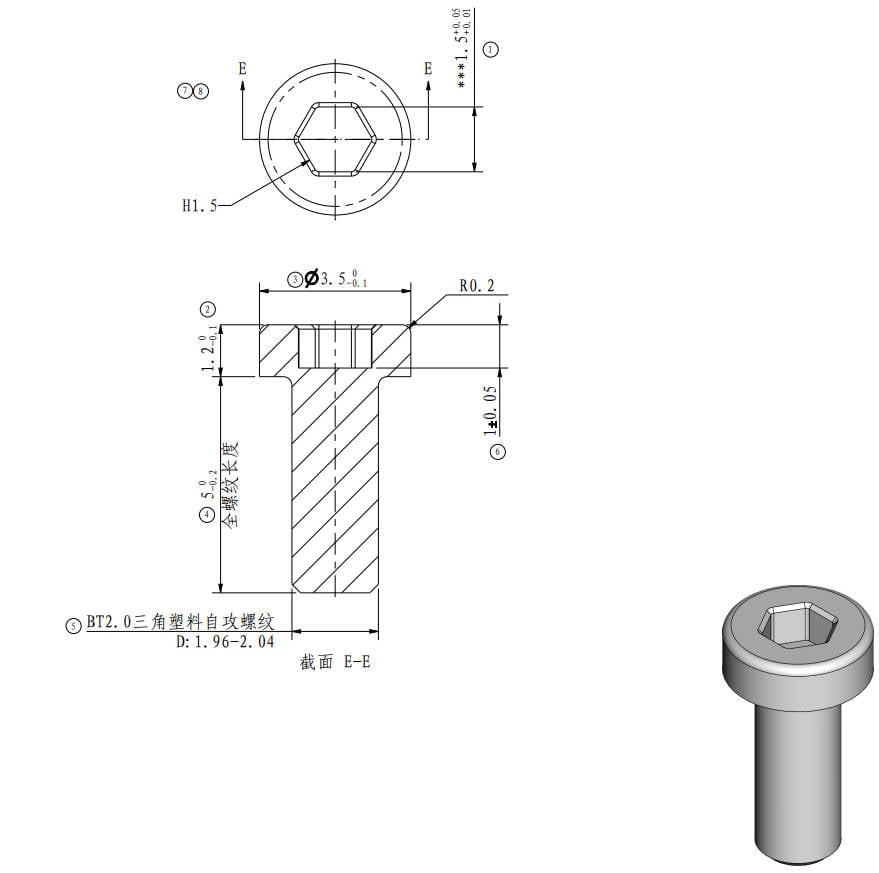 |
| Screw I | MG2.5*13 | Cutter lever | 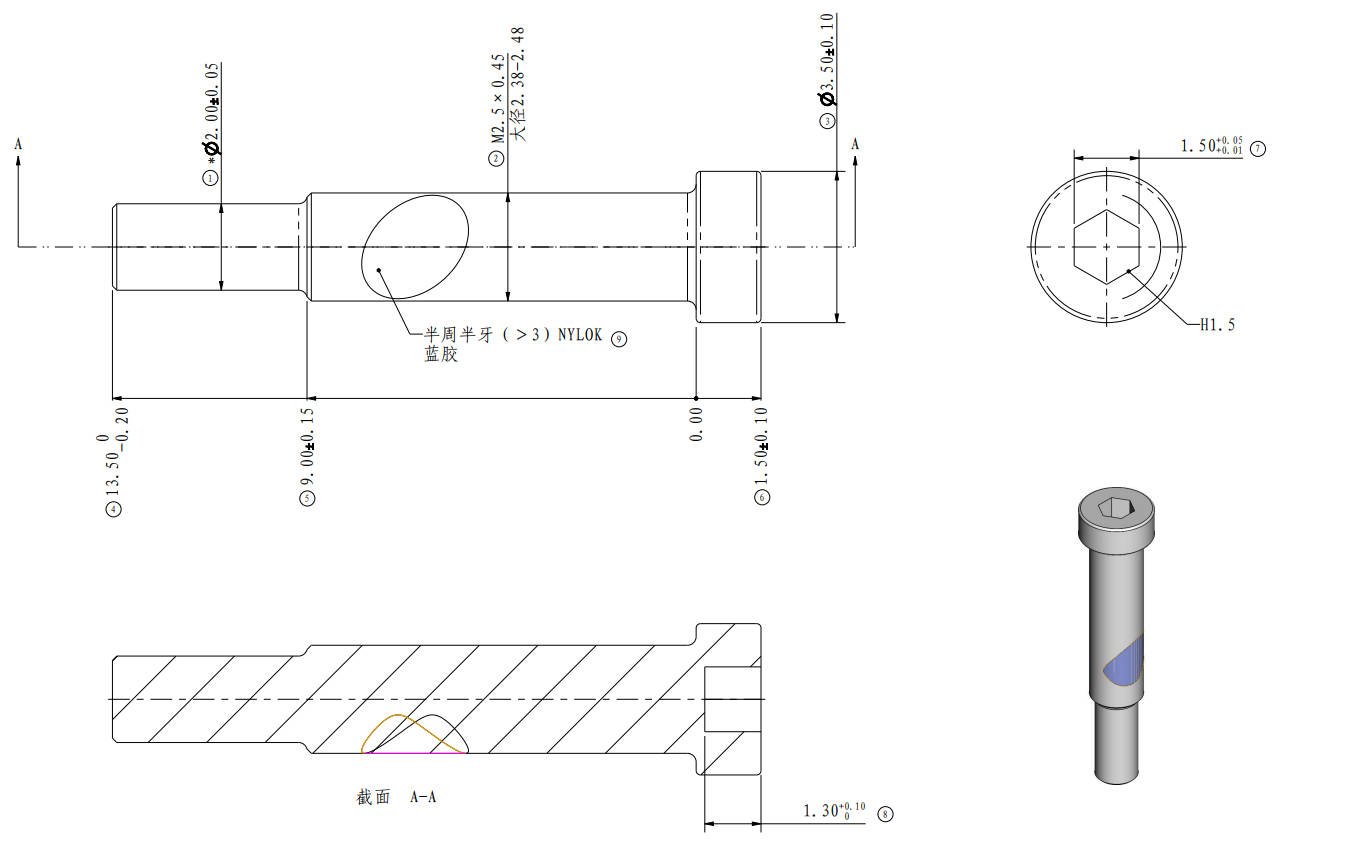 |
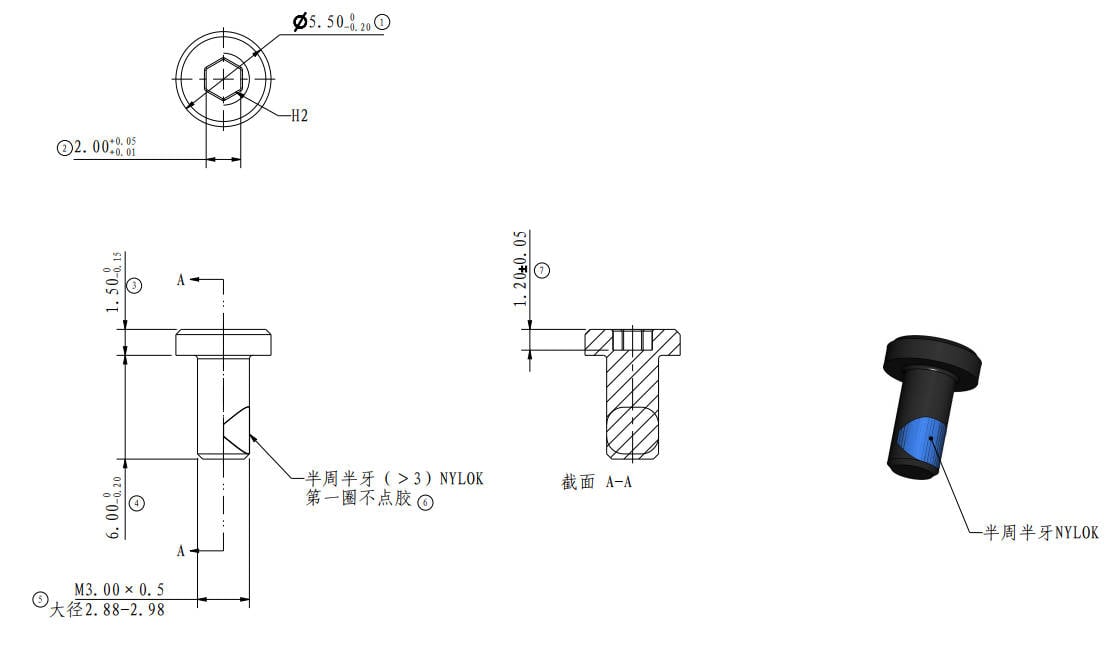
Screw J | BT2*8 | The timing belt, Y slider cover plate. | 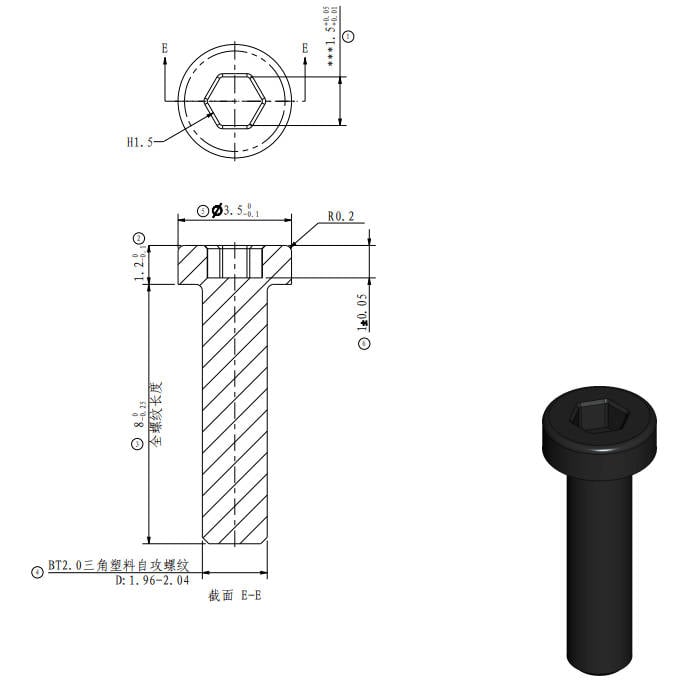 |
¶ Safety Warning
IMPORTANT!
It's crucial to power off the printer before performing any maintenance work on the printer and its electronics, including tool head wires, because leaving the printer on while conducting such tasks can cause a short circuit, which can lead to additional electronic damage and safety hazards.
When you perform maintenane or troubleshooting on the printer, you may be required to disassemble some parts, including the hotend. This process can expose wires and electrical components that could potentially short circuit if they come into contact with each other or with other metal or electronic components while the printer is still on. This can damage the electronics of the printer and cause further damage.
Therefore, it's essential to switch off the printer and disconnect it from the power source before doing any maintenance work. This will prevent any short circuits or damage to the printer's electronics. By doing so, you can avoid potential damage to the printer's electronic components and ensure that the maintenance work is performed safely and effectively.
If you have any concerns or questions about following this guide, open a new ticket in our Support Page and we will do our best to respond promptly and provide you with the assistance you need.
¶ Key points
Before replacing the new belt, there are some key points that you need to pay attention to.
- The new belt should be oriented the same as the original one.
- Confirm the path of the belt via the original one before replacing it.
- Be slow when passing through the belt, stop and check when there is obvious resistance.
- In some cases, you can bond the new belt and the old belt together on the ends, and use the original belt to guide you install the new belt, which will help you install the belt easier. (Just a suggestion, if you don't want to remove the side panels, you can have a try)
¶ Guide Video
Note: Do not lock the screws at the two tensioning pulleys first during installation, as calibration for belt tensioning is required.
¶ Disassembly Guide
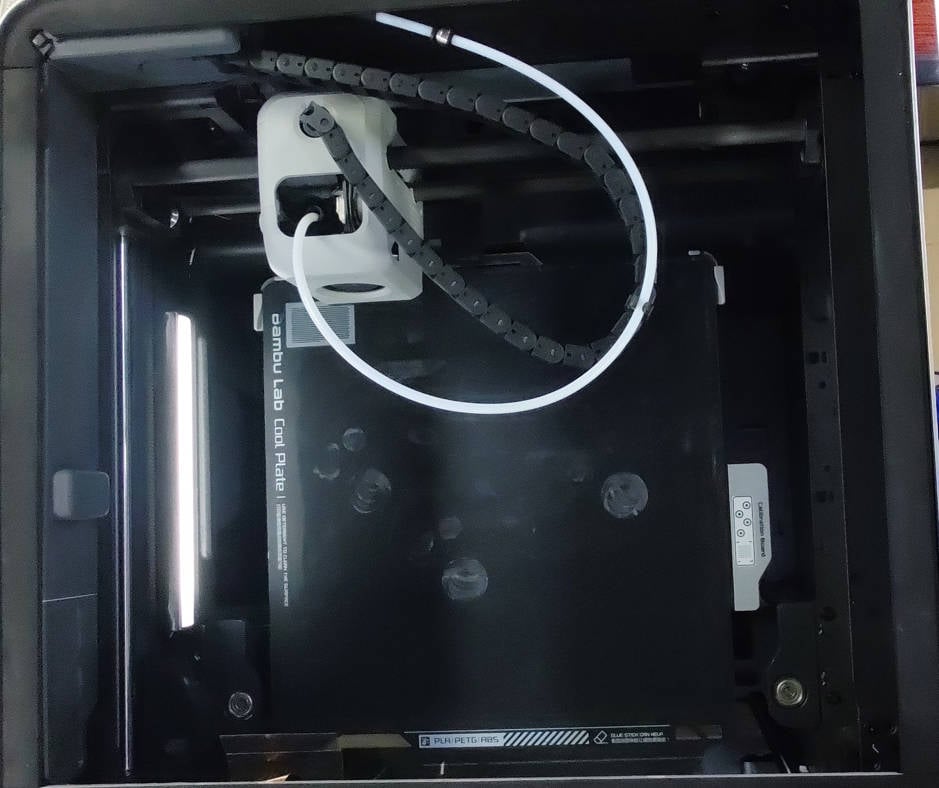
¶ Step 1 - Lower the heatbed
Turn on the printer and operate on the screen to lower the heatbed to the bottom. When completed, turn off the printer and remove the glass cover.
¶ Step2 - Remove the back cover of the tool head
Use an H1.5 Allen key to unscrew the 4 screws and remove the back cover of the toolhead.
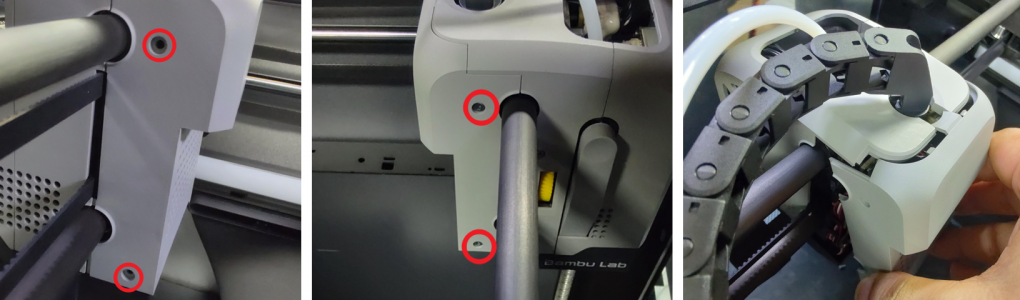
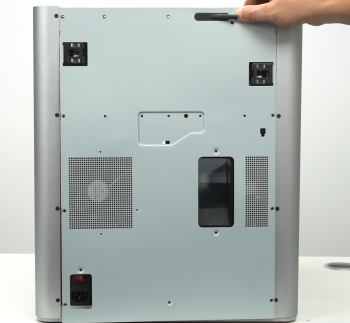
¶ Step 3 - Remove the rear cover screws
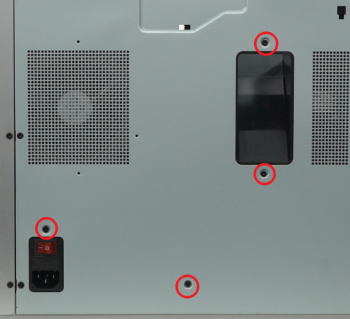
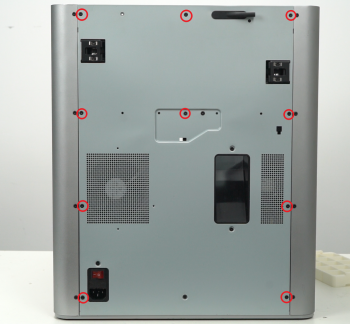
Note: This process involves a lot of screws, please distinguish them and put them in different areas to avoid mixing them up.
As shown in the picture, remove the 10 screws and 4 screws on the rear cover. These are two types of screws, so keep them separate.
 |
 |
¶ Step 4 - Remove the rear cover
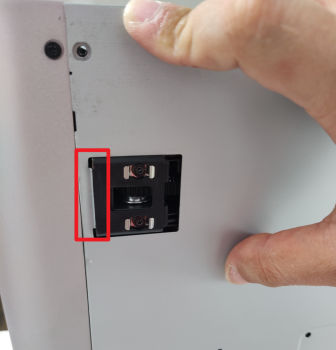
Remove the rear cover, first loosen the rear cover from the belt tensioning opening on the left side (facing the rear cover), then loosen the belt tensioning opening on the right side (facing the rear cover) to avoid getting stuck.
 |
 |
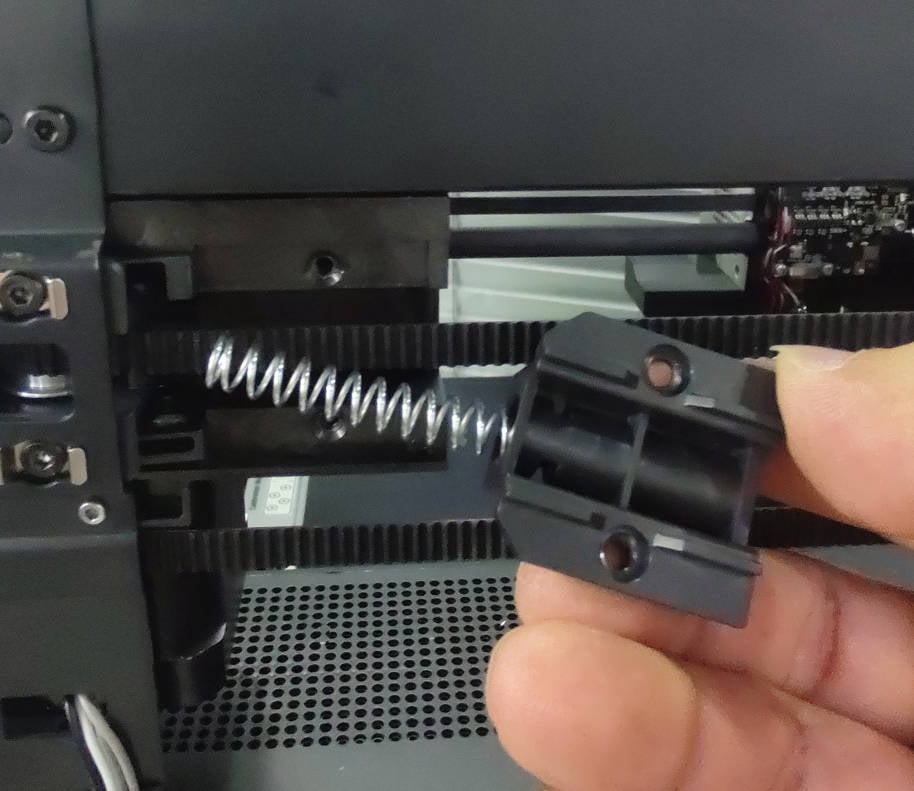
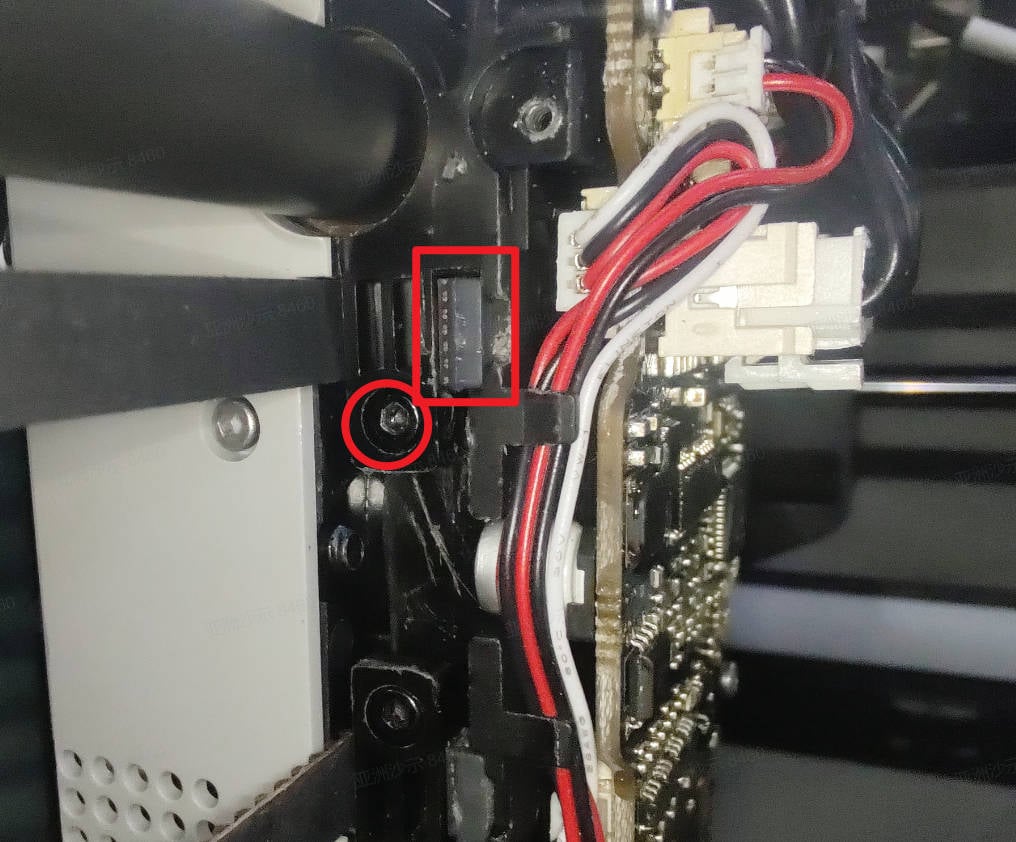
¶ Step 5 - Remove the spring and bracket
Remove the 2 screws and remove th spring and bracket.
 |
 |
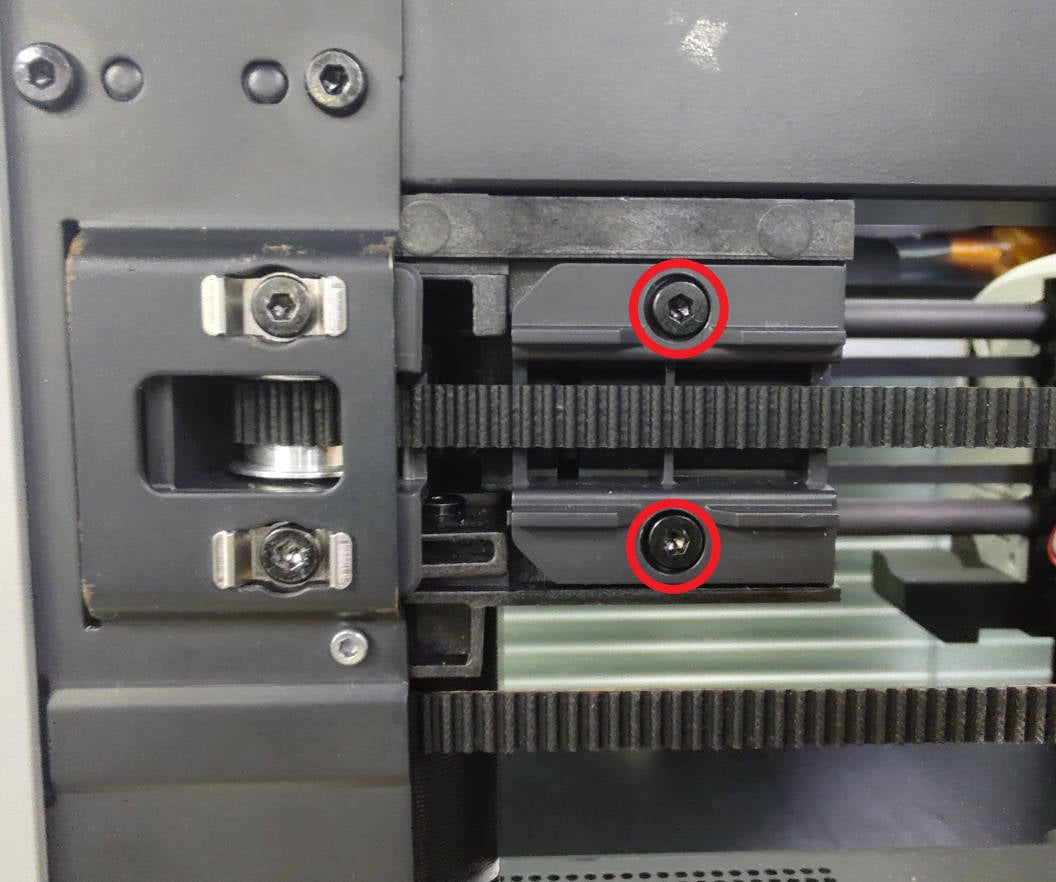
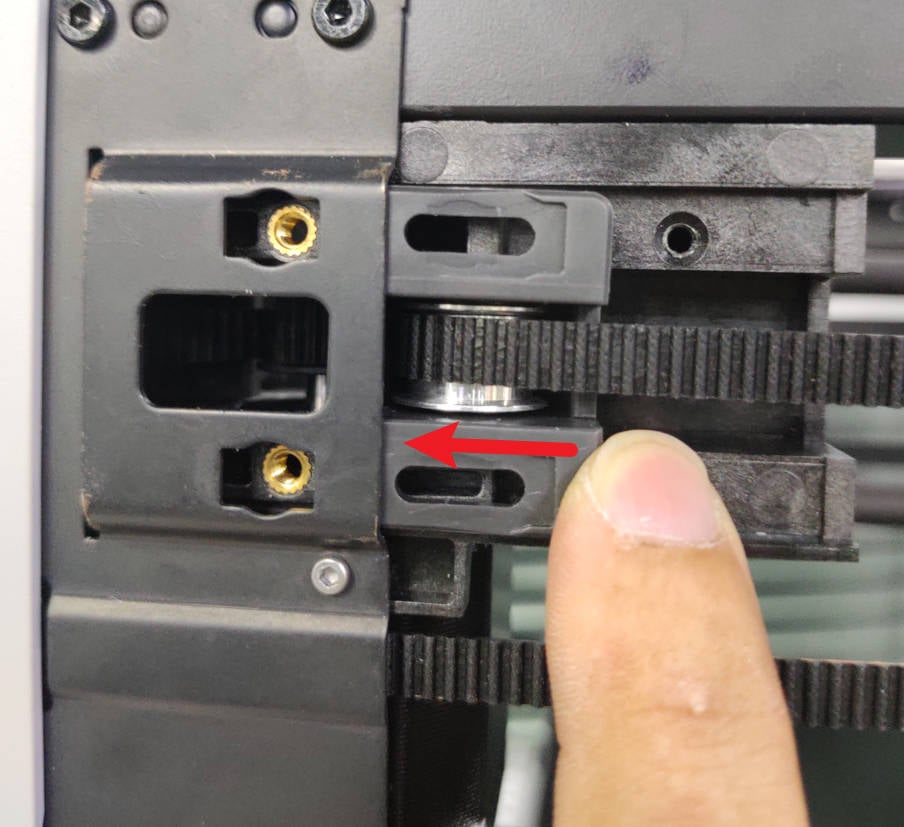
¶ Step 6 - Loosen the tensioner
Remove the 2 screws, remove the 2 metal brackets, and then loosen the tensioner assembly.
 |
 |
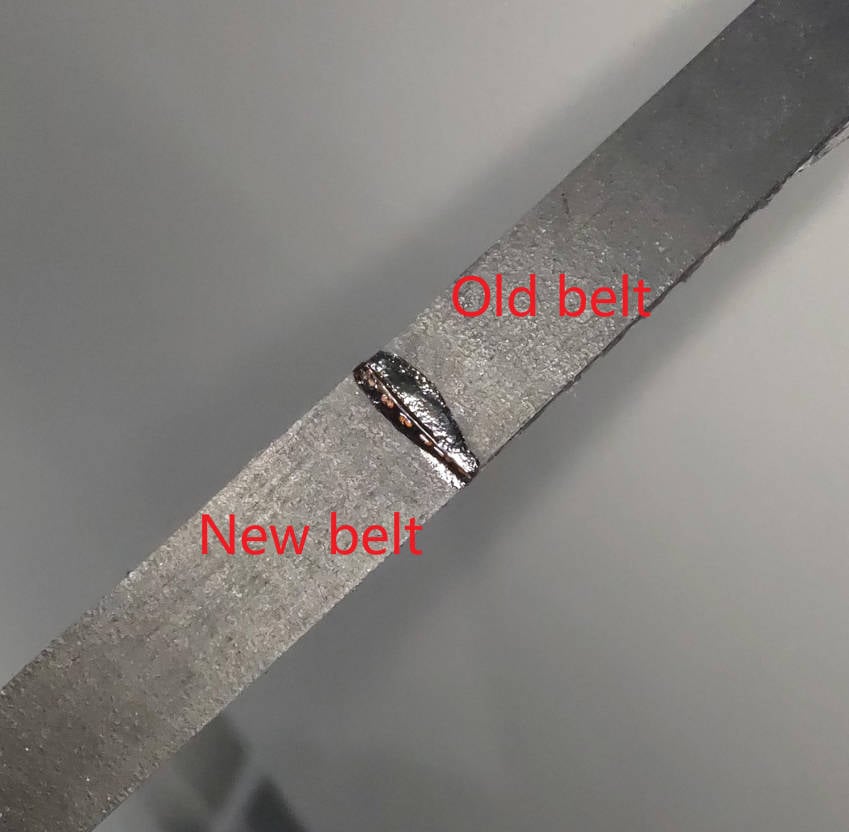
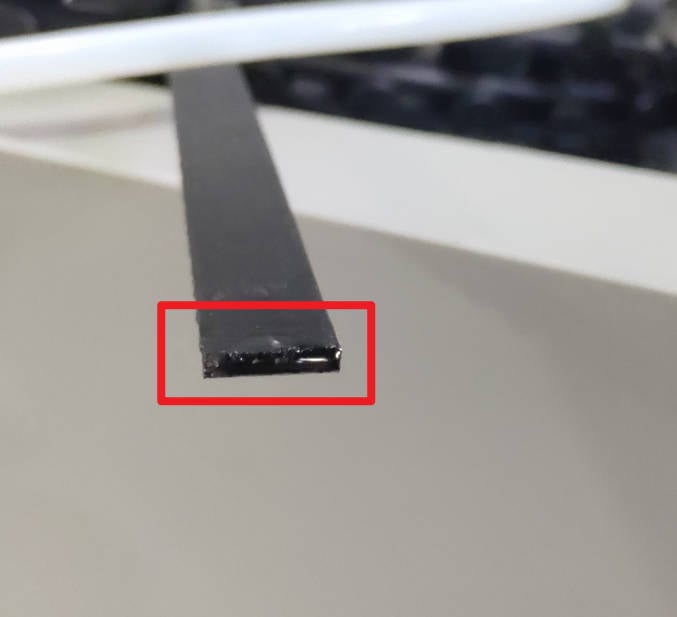
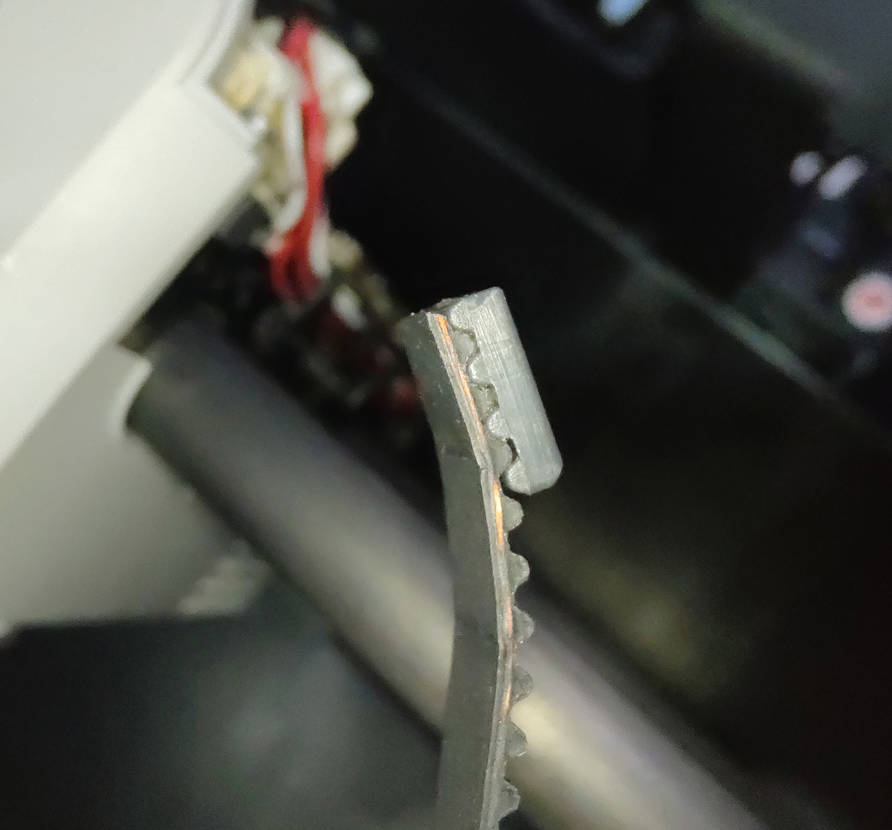
¶ Step 7 - Bond the old and new timing belts
Trim the broken surface (or cut surface) of the old belt, and then bond the old and new belts together with glue. Note that when bonding, make sure that the belts are facing the same direction and that the bonding is firm. For most cases where the belt needs to be replaced due to broken belts, you may need to bond the two ends of the new belt to the broken belt. For cases where the belt needs to be replaced due to aging, it is generally only necessary to cut the old belt close to the toolhead and then bond one end of the new belt.
 |
 |
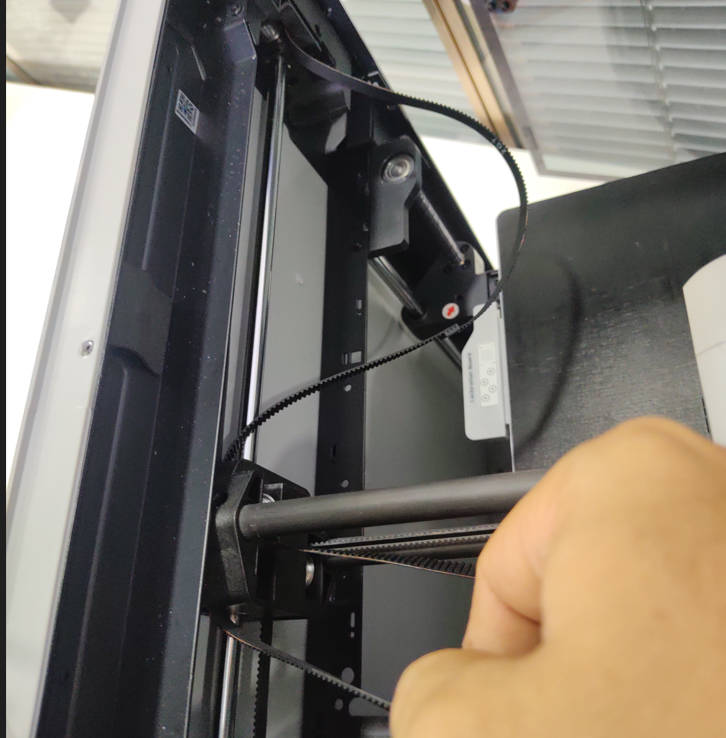
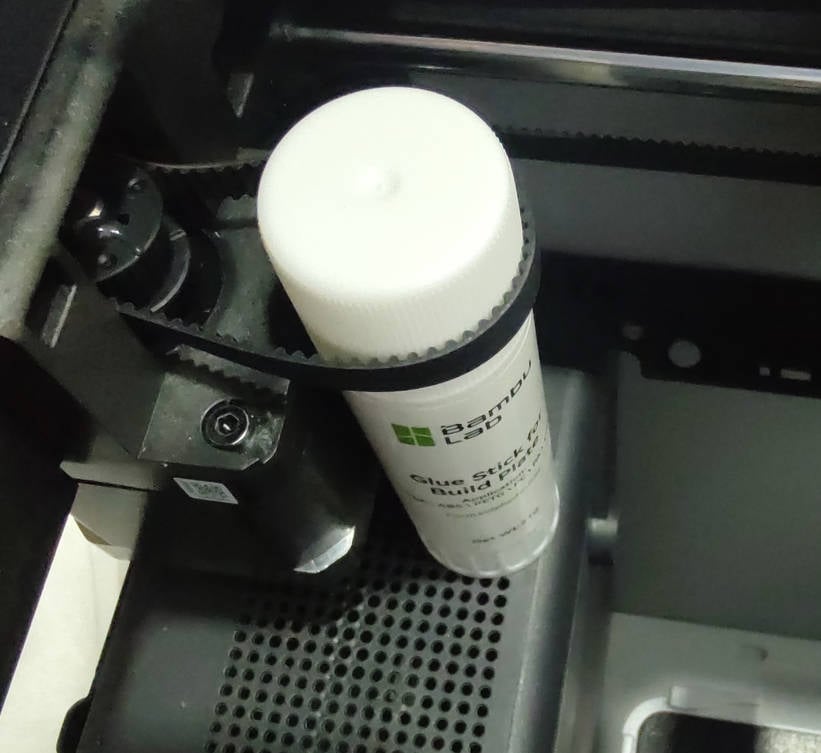
¶ Step 8 - Threade the timing belts
Using the old timing belt as a guide, thread the new timing belt through the idler pulley and the motor. But be slow and careful, and thread the timing belt by pushing it on one side and pulling it on the other. You can also use a cylindrical tool such as glue stick to make it easier for you to bypass the motor gear.
 |
 |
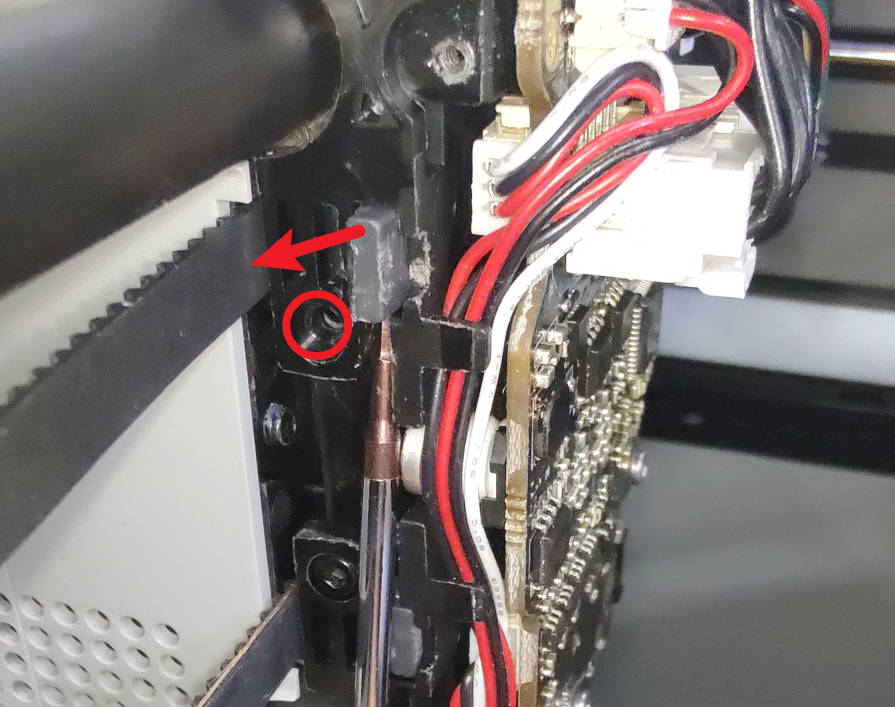
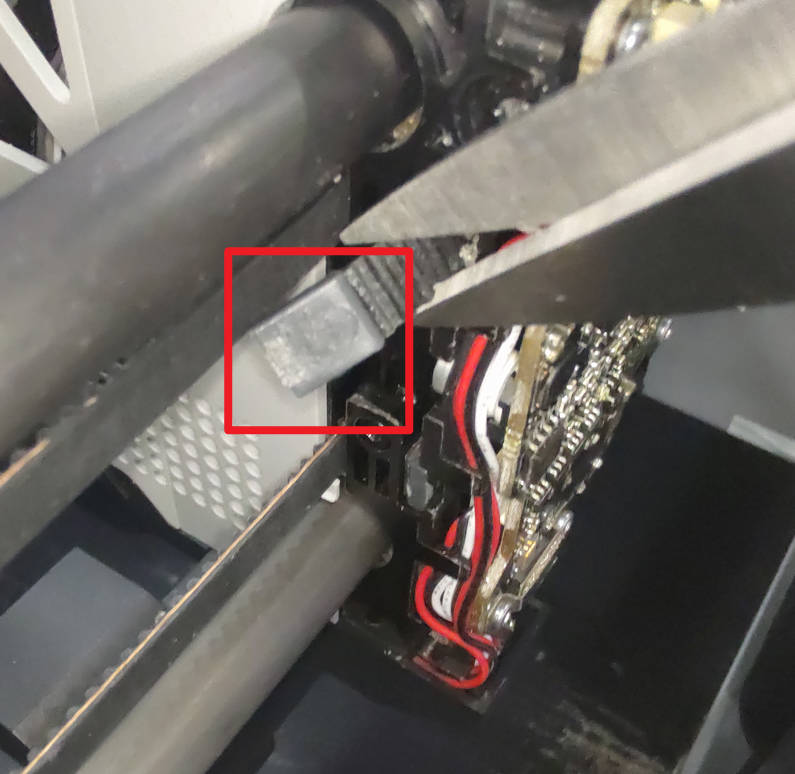
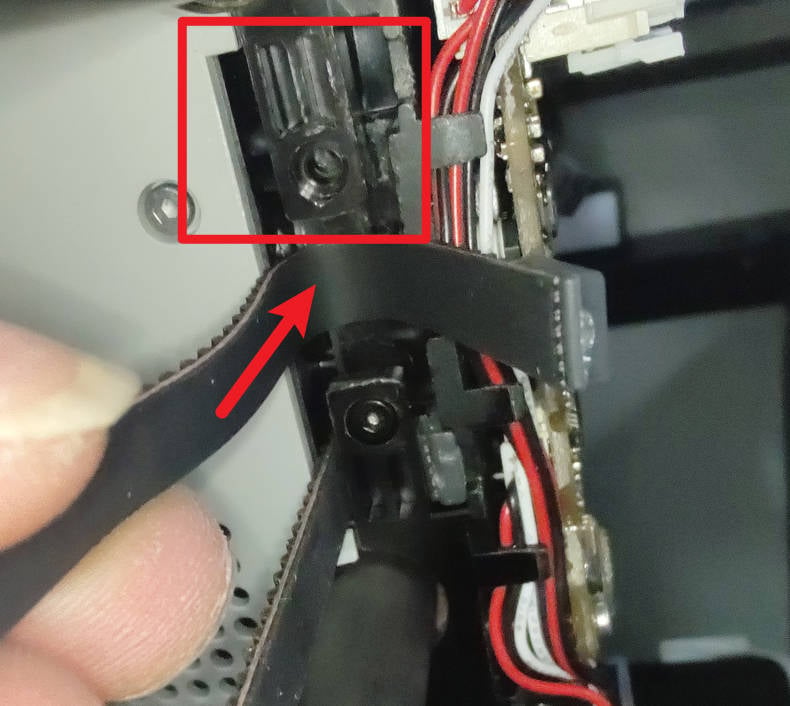
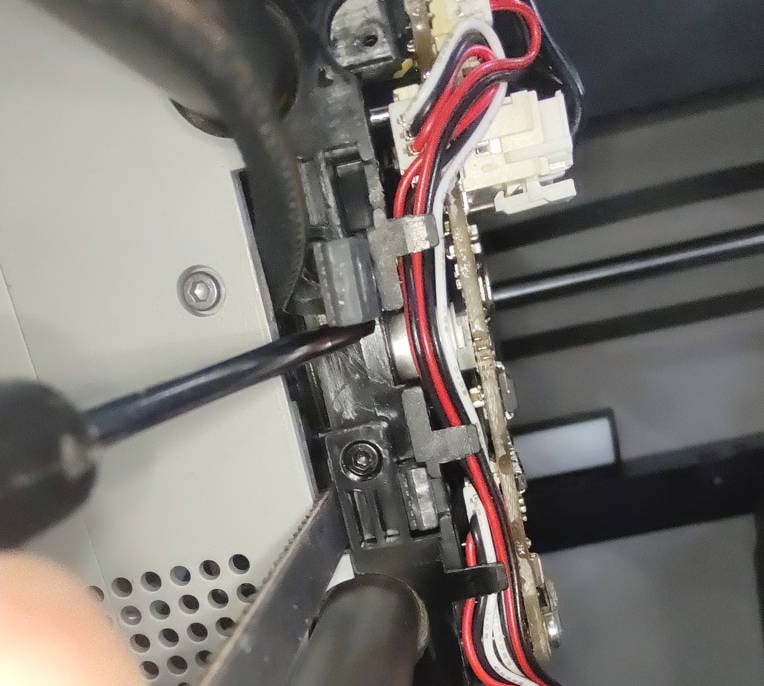
¶ Step 9 - Remove the old timing belt from the toolhead
After inserting the timing belt, remove the old timing belt from the toolhead first. Unscrew 1 screw and pry out the timing belt fixing block with flat-head tweezers or a flat-bladed screwdriver. You can use scissors to cut the old timing belt and remove the old timing belt. Use the same method to remove the old timing belt at the other end of the toolhead.
 |
 |
¶ Assembly Guide
¶ Step 1 - Glue the fixing block
As shown in the figure below, glue the fixing block to the end of the timing belt with instant glue.
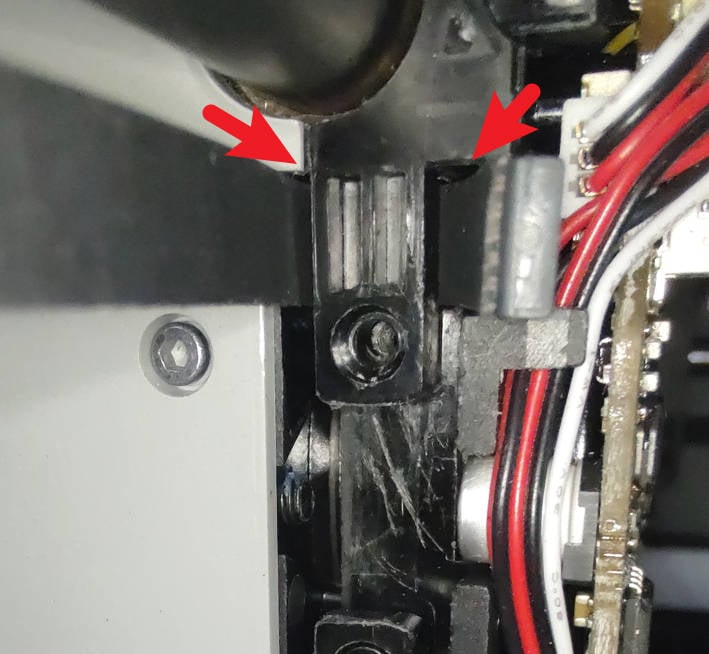
¶ Step 2 - Install the new timing belt onto the toolhead
Bend the timing belt and push it up along the side retaining groove into place.
 |
 |
 |
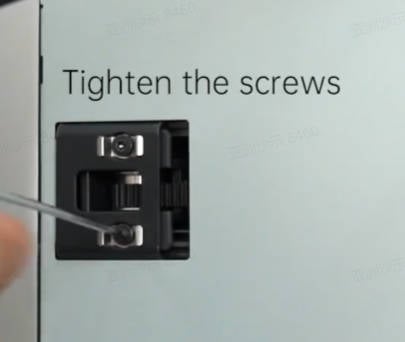
¶ Step 3 - Fix the timing belt
Use the Allen key to completely press the timing belt fixing block into place, and screw in a screw to fix it. Note that the screw should be screwed just until the nut contacts the structural part. Do not tighten it too much to prevent deformation. Follow the methods of steps 1 to 2 to complete the installation of the new timing belt at the other end of the toolhead.
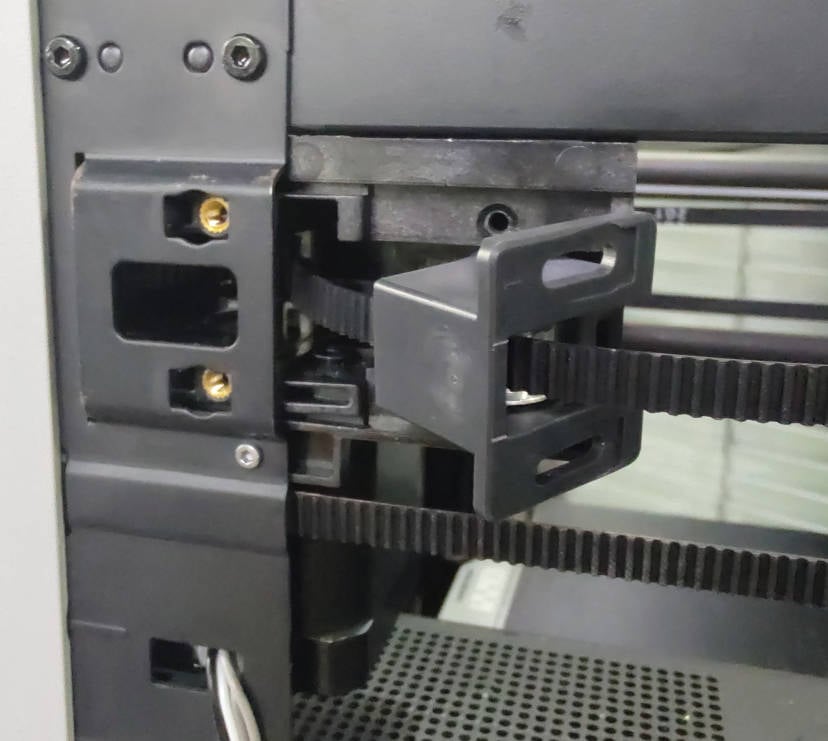
¶ Step 4 - Install the tensioner
Slide the tensioner assembly into place and screw in the 2 screws (with brackets). Do not tighten the screws, just keep them loose.
 |
 |
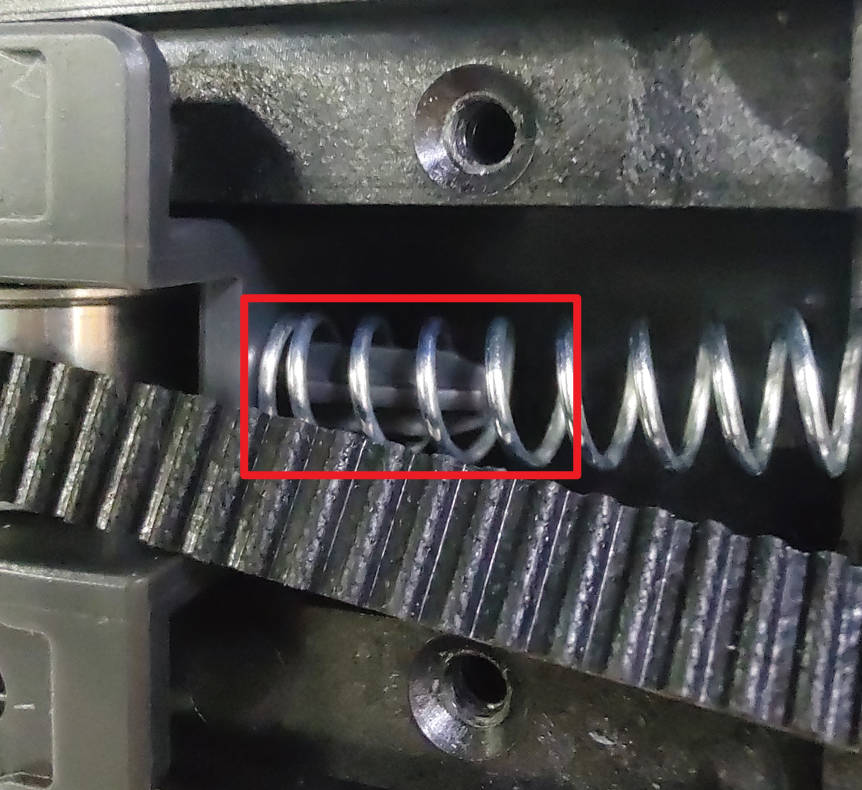
¶ Step 5 - Install the spring and bracket
Install the spring and bracket and tighten the 2 screws to secure.
 |
 |
¶ Step 6 - Install the print rear cover
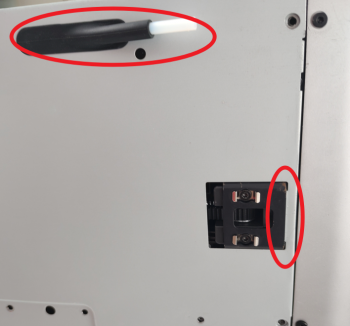
When installing the rear cover, first pass through the PTFE tube bracket and install the belt tensioning port on the right side.
|
 |
¶ Step 7 - Screw the print rear cover
Re-secure the rear cover. Note the different types of screws used (10 screws and 4 screws as shown below)
|
|
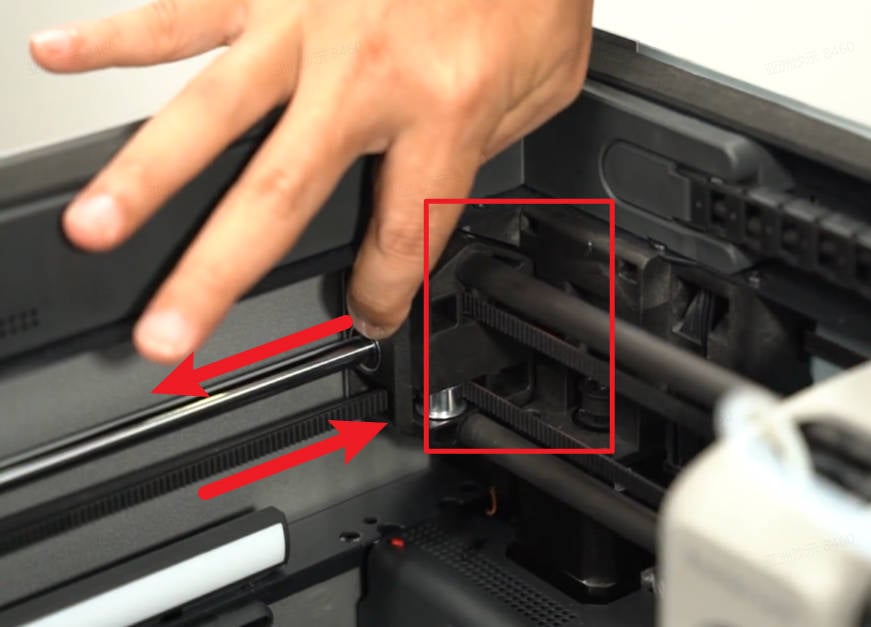
¶ Step 8 - Tension the timing belt
Loosen the two screws on the other tensioner assembly, hold the pulleys at both ends of the toolhead, move the toolhead back and forth several times, finally close the pulleys to the back, and then tighten the 4 screws on the two tensioners. For specific operations, please refer to Belt tensioning procedure
 |
 |
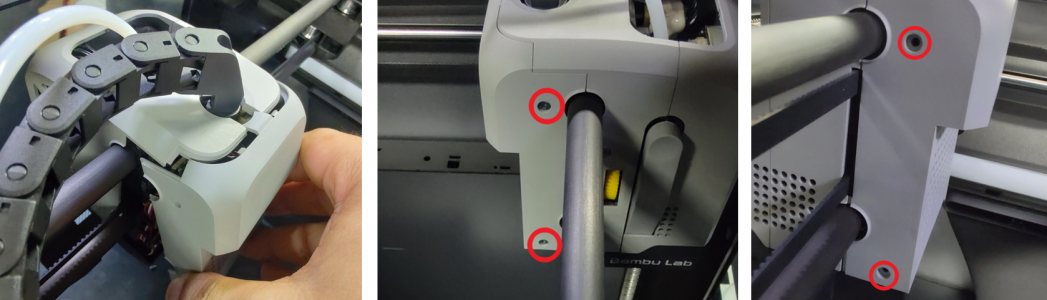
¶ Step 9 - Install the toolhead rear cover
Reinstall the back cover of the toolhead and secure it with the 4 screws (2 on each side). Once completed, place the top glass cover back onto the print.
¶ Calibration step after the operation
After replacing the carbon rods, the belts need to be re-tensioned.
- IMPORTANT: Power OFF the printer first.
- Loosen the 4 screws of the belt-tensioner (but DO NOT remove them), then gently move the toolhead back and forth several times, and finally move it to the rear end of the printer. Then, tighten the 4 screws again. The spring system in the belt-tensioner will tighten the belt to the correct tension.
- IMPORTANT: DO NOT overtighten the belt tensioning screws. Doing that can cause damage and will not provide better results. Simply tighten both screws like any other screws and don't over-torque them.
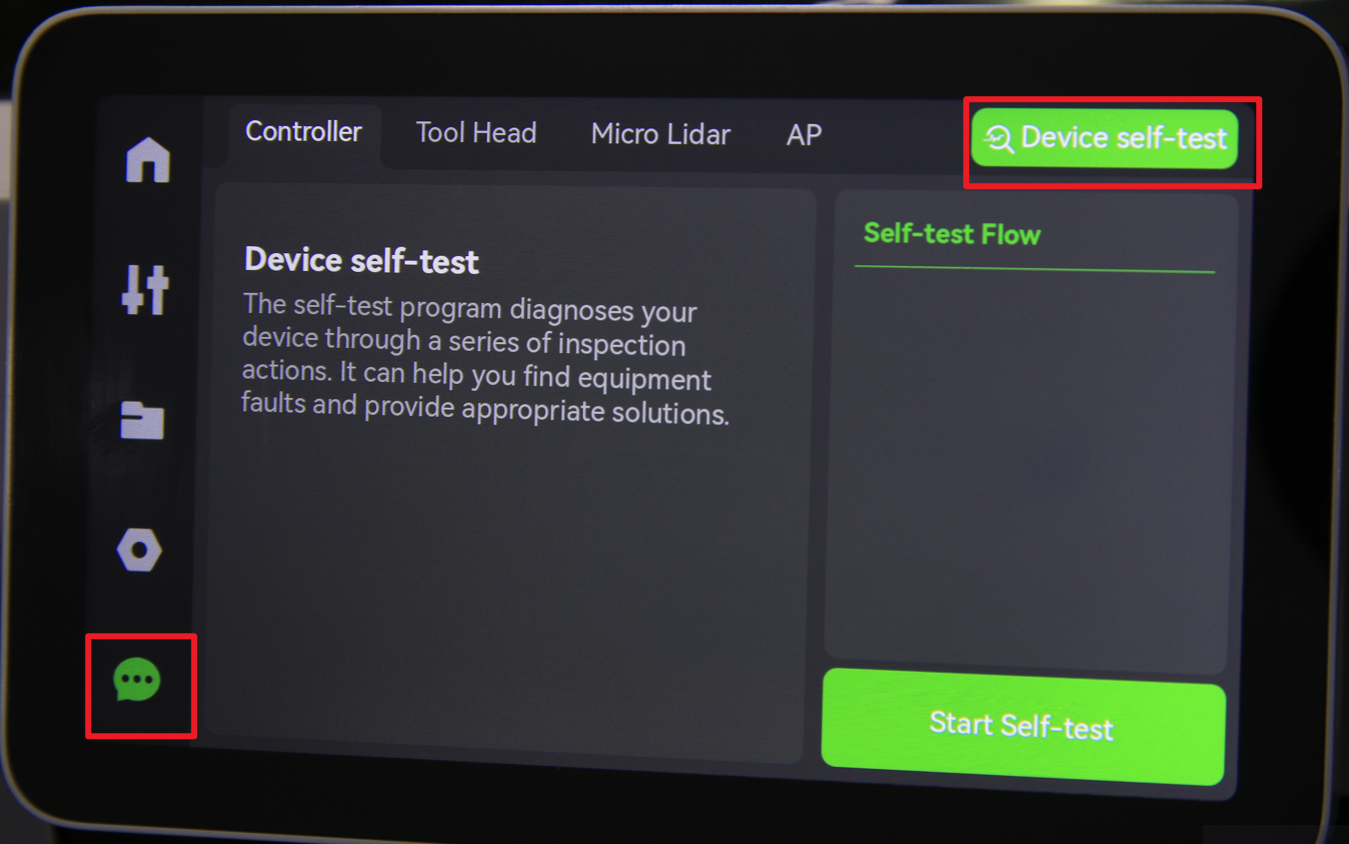
¶ Verify the functionality
- Connect the power and start the printer;
- Run the device self-test process to confirm that the self-test is OK.
Should you come across any issues, first retrace your steps and check all connections to try again. If problems persist, contact the service team for further assistance.
¶ End Notes
We hope the detailed guide provided has been helpful and informative.
If this guide does not solve your problem, please submit a technical ticket, we will answer your questions and provide assistance.
If you have any suggestions or feedback on this Wiki, please leave a message in the comment area. Thank you for your support and attention!