Statement: The content in this article is unnormal maintenance. The purpose of this article is to help some users who accidentally remove the filaments hub's circuit board and cause the internal magnets to pop up, and guide them on how to install the magnets back. If you do not have a magnet that can be used to assist with the assembly, please do not try any of the steps described in this article.
¶ What are the magnets in AMS filaments hub
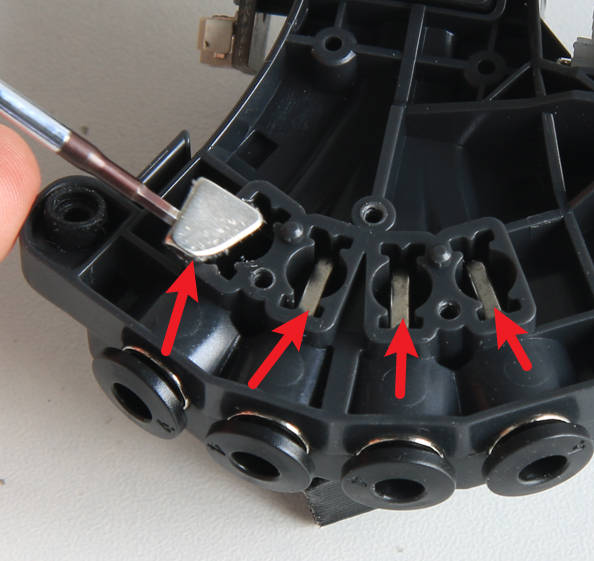
There is a magnet in each of the 4 feeding paths of the AMS filaments hub, which is used to detect the position of the filament. When the filament reaches the filaments hub, the magnet in the corresponding position will be pushed up, and the filament selection board on the top will detect that the magnet is going up, and when the threshold is reached, it is known that the filament is there.
¶ When to use
When cleaning the fragments in the filaments hub, maybe you have to disassemble the filament selection board. At this time, these magnets are likely to pop out. In this case, you need to reinstall the 4 magnets according to this operating instruction.
¶ Tools and materials needed
- Bar magnet (assistant disassembly and assembly,self-prepared)
- H2.0 & H1.5 Allen keys
- Tweezers
¶ Safety warning and Machine state before starting operation
Turn the power OFF to the printer and disconnect the AMS connection with the printer.
¶ Disassembly Guide
¶ Step 1 - Remove the filaments hub from the AMS
Please refer to Replace AMS filaments hub to remove the filaments hub from the AMS and separate the motor.
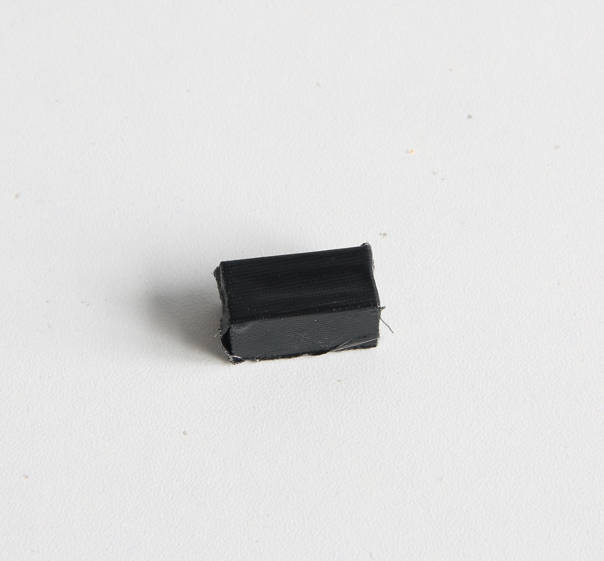
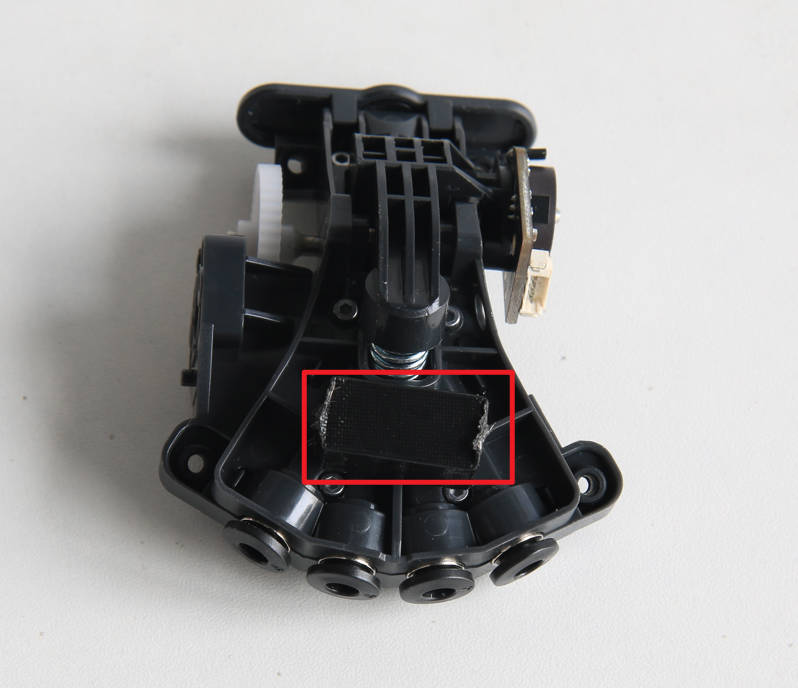
¶ Step 2 - Attach the auxiliary magnet to the filaments hub
 |
 |
¶ Step 3 - Remove the filament selection board
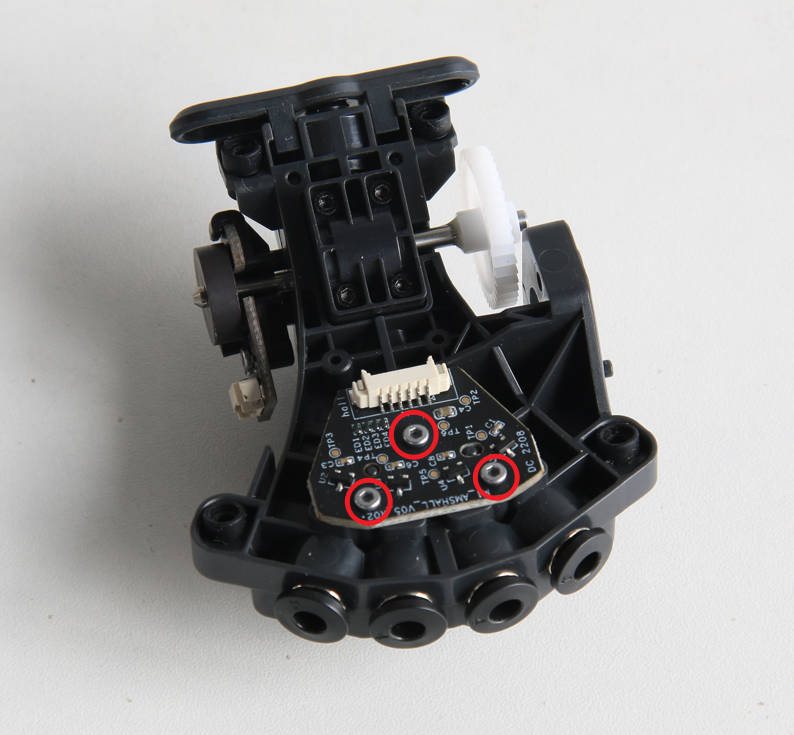
Remove the 3 screws that fix the filament selection board with the H1.5 hex key, and then remove the filament selection board.
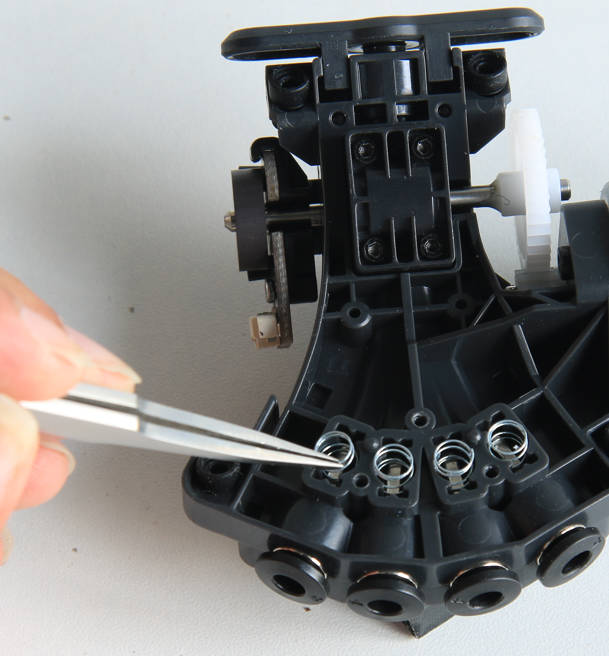
¶ Step 4 - Remove springs
Remove the 4 springs with tweezers one by one, be careful to keep the springs to prevent loss.
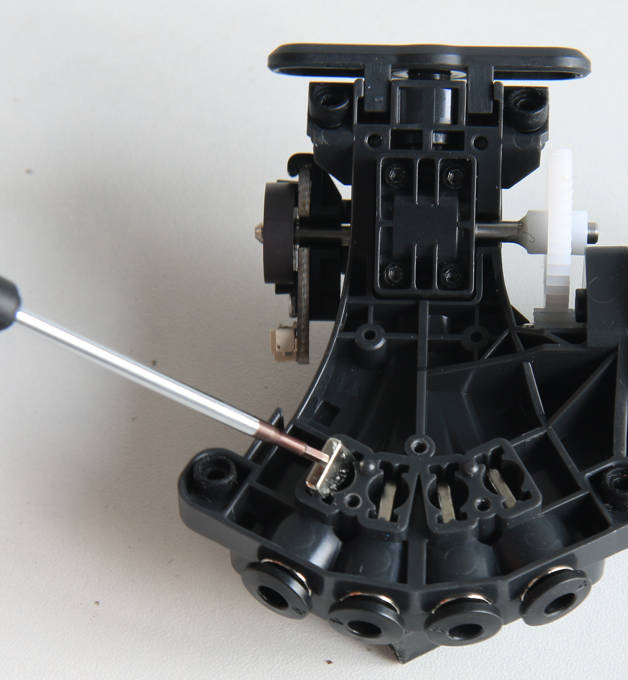
¶ Step 5 - Remove the magnets
The magnets can be easily removed one after another with a hex key.
¶ Assembly Guide
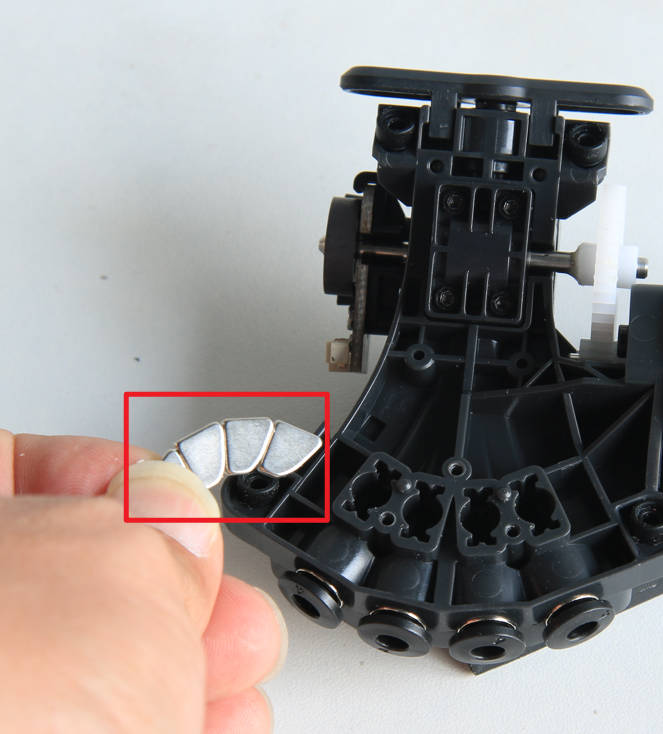
¶ Step 1 - Install the magnets
Keep the auxiliary magnet on the other side of the filaments hub, attach the 4 magnets together as shown in the figure below, and then insert the magnets into the corresponding slots one by one.Pay attention to the installation direction of the magnets.
 |
 |
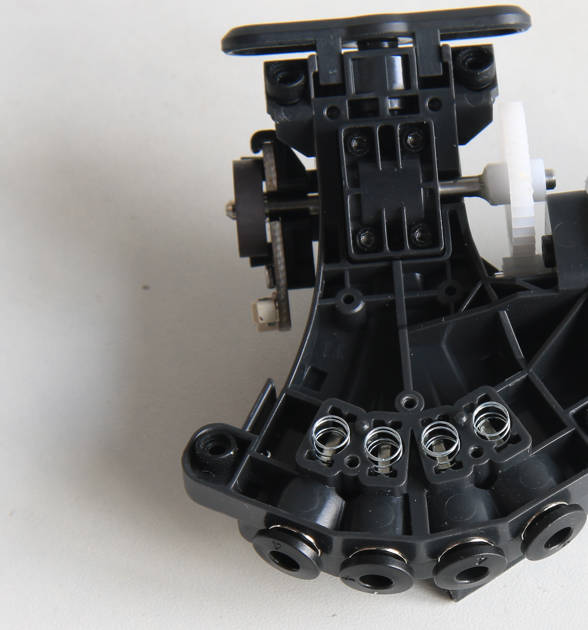
¶ Step 2 - Install the springs
Place the springs over the installed magnets.
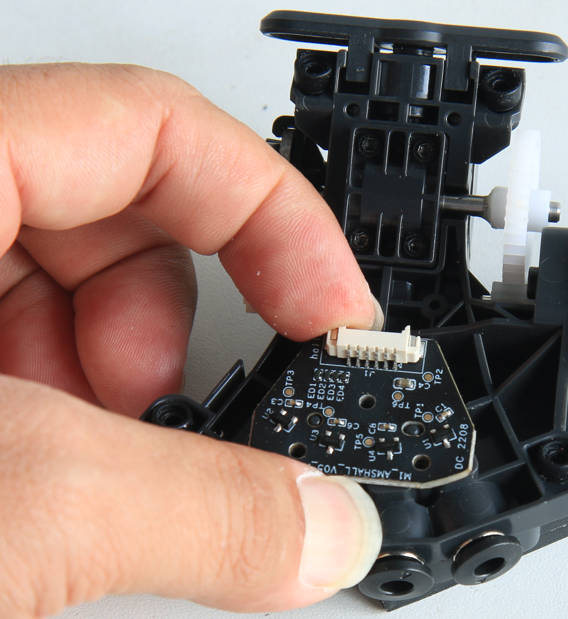
¶ Step 3 - Install the filament selection board
Install the filament selection board and lock in 3 screws.
 |
 |
¶ Step 4 - Install the AMS filaments hub
Please refer to Replace AMS filaments hub to install the motor on the filaments hub and assemble the AMS.
¶ How to verify completion/success
Connect the AMS to the printer and turn the power ON. Load filaments to all slots of the AMS and click "Load" on the screen to start loading the filament.
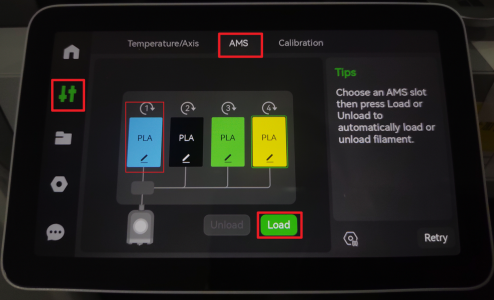
After the filament in slot 1 loads, choose AMS slot 2 to load the filament in slot 2, and then load the filament in slot 3 & slot 4.
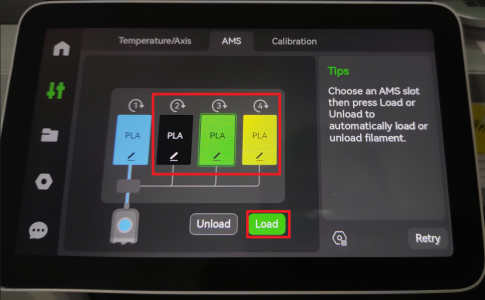
If all the loading process functions are OK, the installation is complete and successful.
Otherwise, check the connections of all the cables and PTFE tubes. If no errors are found and the malfunction continues, contact the Bambu Lab service team for further assistance.
¶ End Notes
We hope the detailed guide provided has been helpful and informative.
If this guide does not solve your problem, please submit a technical ticket, we will answer your questions and provide assistance.
If you have any suggestions or feedback on this Wiki, please leave a message in the comment area. Thank you for your support and attention!