¶ AMS Internal Hub Unit
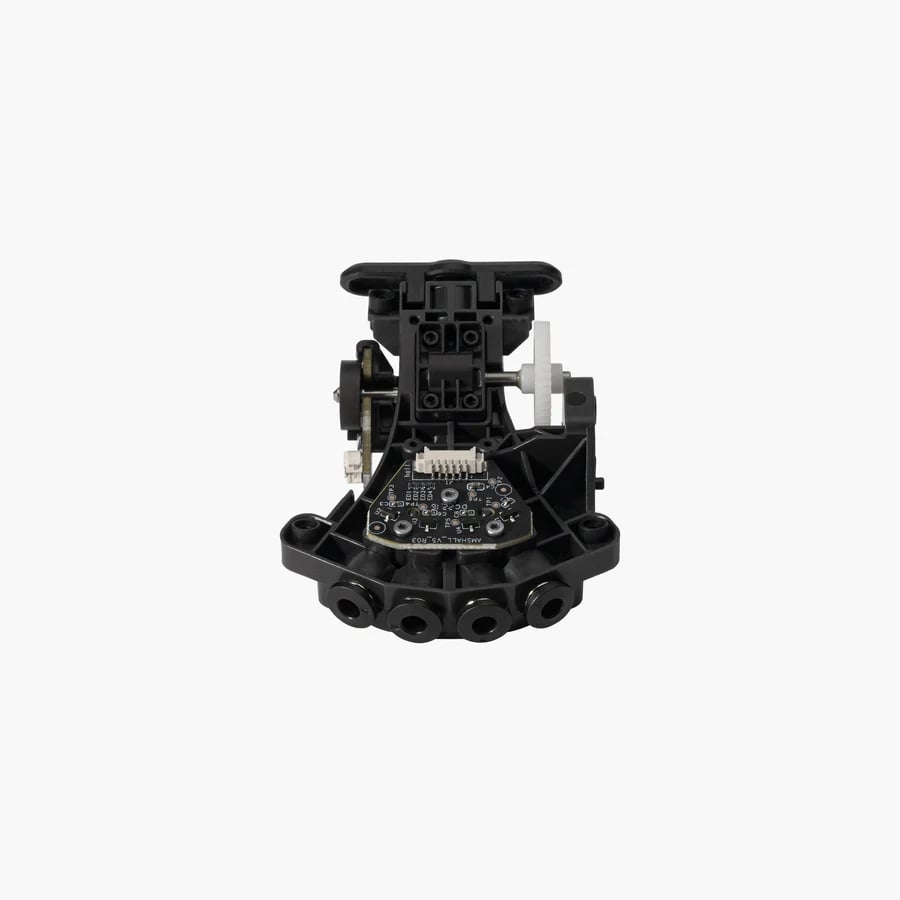
AMS Internal Hub Unit is the material selection device (4-in 1-out) of the AMS, which is responsible for sending the specified filament to the printer and pulling the filament that has been sent to the printer back to the AMS.
You can purchase it at our store here:
AMS Internal Hub Unit
¶ AMS Internal Hub Motor
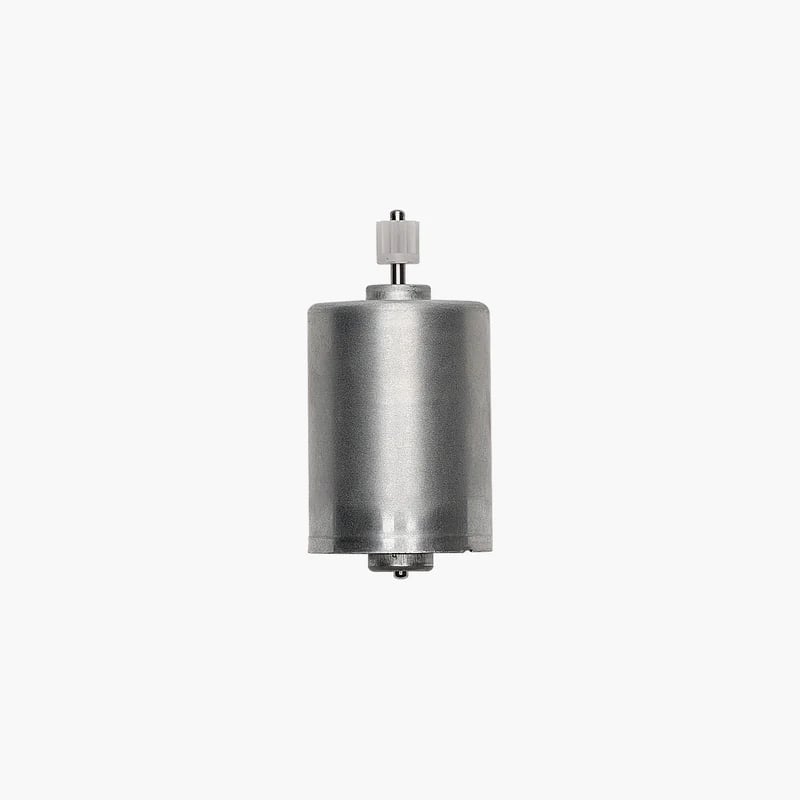
The AMS Internal Hub Motor is used to provide energy for the operation of the AMS internal hub unit.
You can purchase it at our store here:
AMS Internal Hub Motor
¶ When to use
The filament is stuck in the AMS Internal Hub Unit, and all the PTFE tubes have been checked and are securely connected.
¶ Tools and materials needed
- New AMS Internal Hub Unit or AMS Internal Hub Motor
- H2.0 & H1.5 allen keys
¶ Safety warning and Machine state before starting operation
Please turn off the power to the printer and disconnect the AMS connection from the printer.
¶ Operation guide
¶ Step 1 - Disconnect the PTFE tube
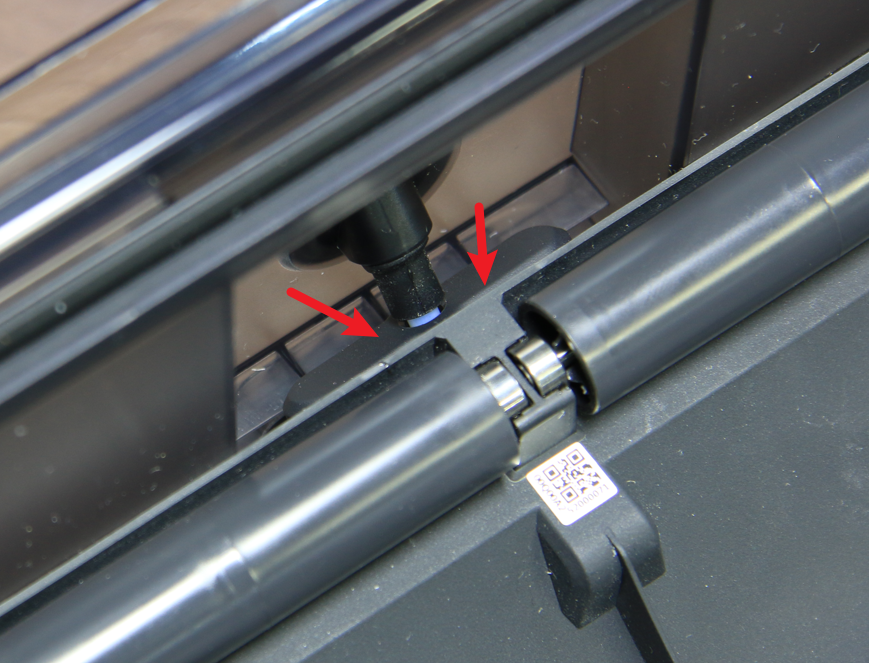
Open the AMS cover, press the button on the filament hub and pull out the PTFE tube.
 |
.png) |
¶ Step 2 - Remove 2 screws
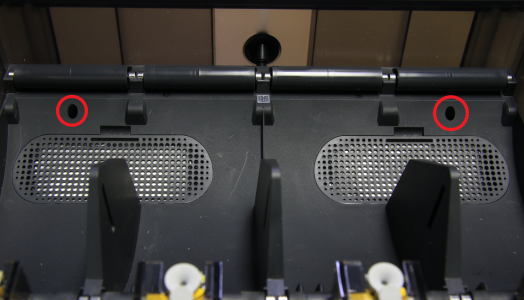
Remove 2 screws, and then flip the middle frame upward.
¶ Step 3 - Remove the AMS Main Frame
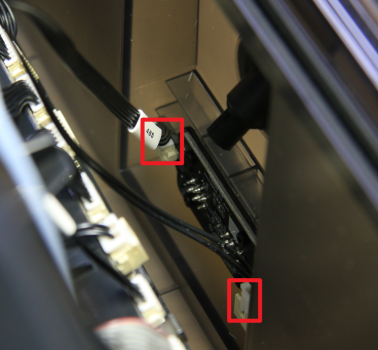
Disconnect the AMS 485 connection cable and the AMS Power cable(Know more about the AMS Cable Pack (5-in-1)), and remove the middle AMS Main Frame module.
¶ Step 4 - Disconnect the 4 PTFE tubes
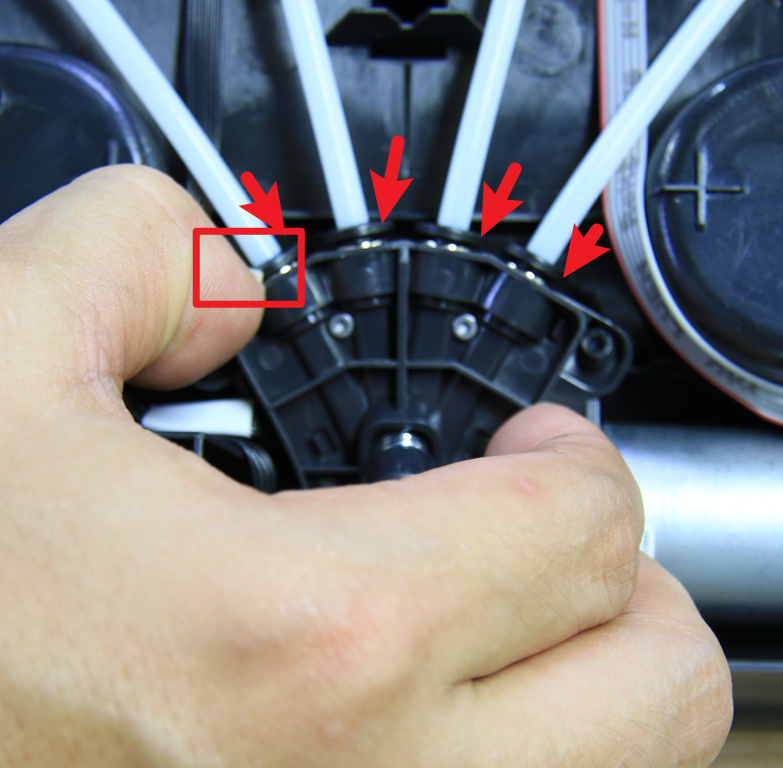
Depress the plastic couplers to disconnect the 4 PTFE tubes.
 |
 |
¶ Step 5 - Remove 4 screws
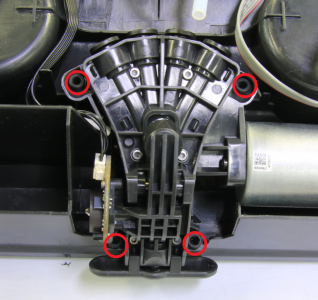
Remove 4 screws, and turn the AMS Internal Hub Unit assembly over.
¶ Step 6 - Disconnect 3 cables
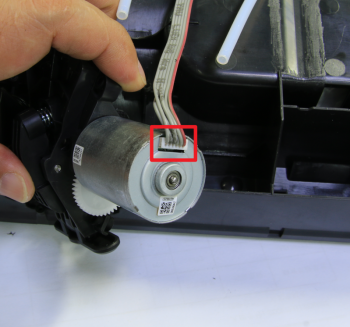
Disconnect the motor cable, the Material selection cable(labeled "HALL") and the Speed board connection line, and then remove the AMS Internal Hub Unit assembly.
 |
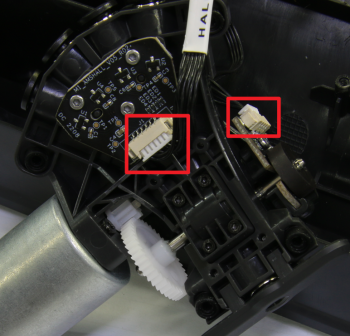 |
Note: To prevent the connector from loosening, glue has been applied to the motor cable. When disconnecting the cable, carefully remove the glue with a heat gun or tweezers (removal will not affect the warranty).
¶ Step 7 - Remove the AMS Internal Hub Motor
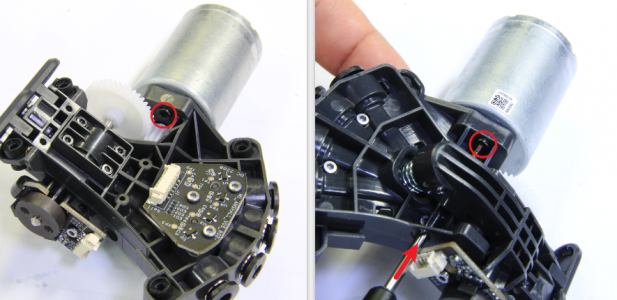
Remove 2 screws, and then remove the AMS Internal Hub Motor.
¶ Step 8 - (Assembly) Install the AMS Internal Hub Motor
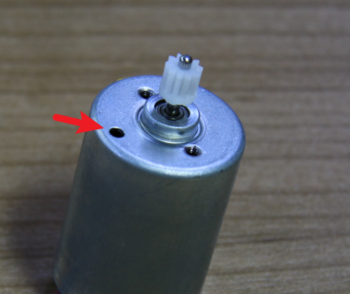
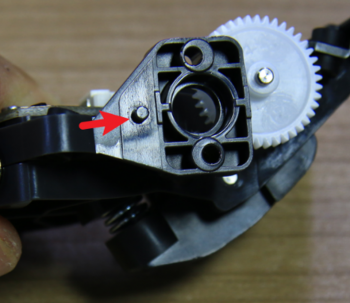
Install the AMS Internal Hub Motor to the filaments hub according to the positioning post and screw holes.
 |
 |
¶ Step 9 - Install 2 screws
Lock the AMS Internal Hub Motor with 2 screws.
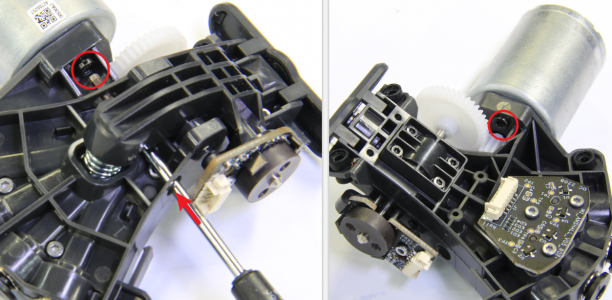
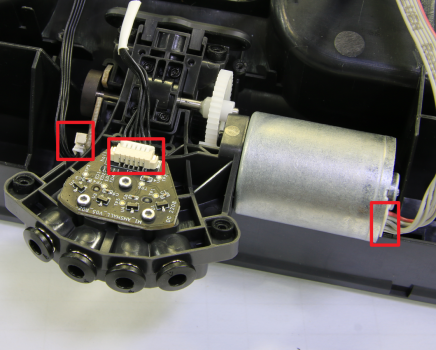
¶ Step 10 - Connect 3 cables
Connect the AMS Internal Hub Motor cable, the Material selection cable(labeled "HALL") and the Speed board connection line.
¶ Step 11- Install the AMS Internal Hub Unit
Install the AMS Internal Hub Unit to the middle AMS Main Frame, and lock in 4 screws.

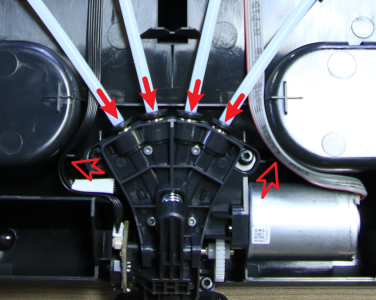
¶ Step 12 - Connect 4 PTFE tubes
Arrange the cables, and connect the 4 PTFE tubes.
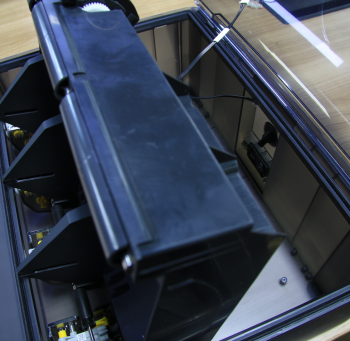
¶ Step 13 - Install the AMS Main Frame
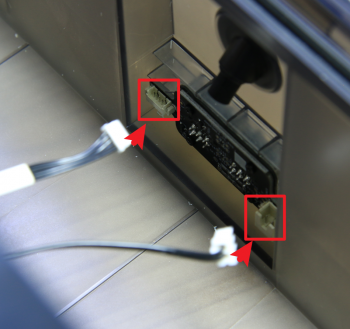
Place the middle AMS Main Frame into the AMS shell, and connect the AMS 485 connection cable and the AMS Power cable.
 |
 |
¶ Step 14 - Lock 2 screws
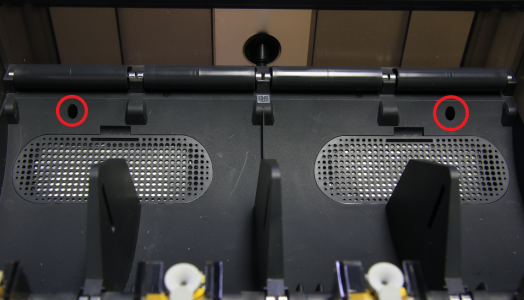
Install the middle AMS Main Frame in place, and lock with 2 screws.
¶ Step 15 - Connect the PTFE tube
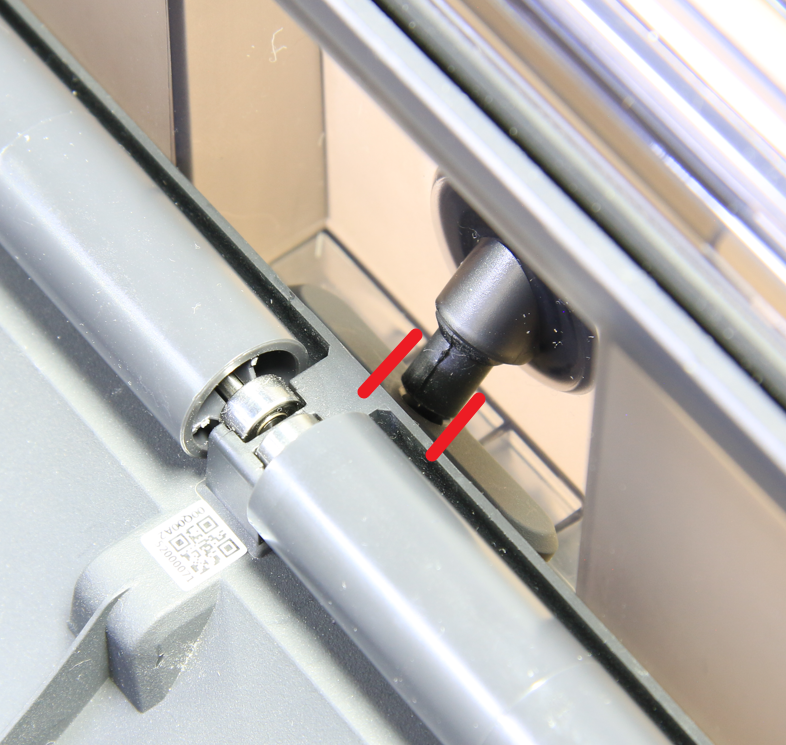
Check the tube bracket and insert the PTFE tube. Give it a gentle pull to ensure the tube is well connected.
 |
.png) |
¶ How to verify completion/success
Connect the AMS to the printer and turn the power on. Load filament into all slots of the AMS. On the screen, click "Load" to start the filament loading process.
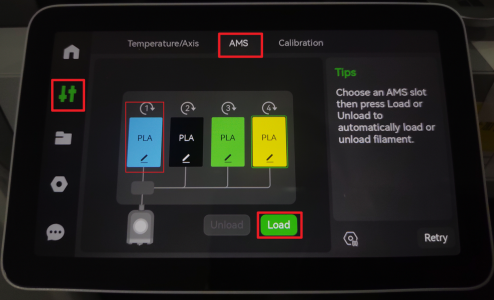
After the filament in slot 1 loads, choose AMS slot 2 to load the filament in slot 2, and then load the filament in slot 3 & slot 4.
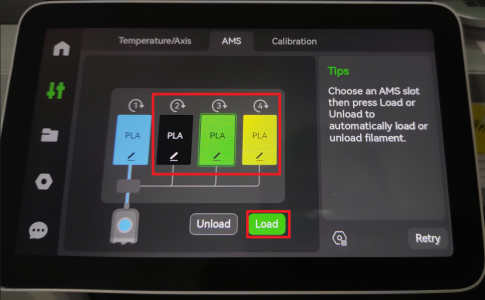
If all loading process functions are functioning properly, the replacement has been successfully completed.
Otherwise, please ensure that all cables and PTFE tubes are properly connected. If no errors are detected and the issue persists, please contact the Bambu Lab service team for further assistance.