One of the smart features in Bambu X1C is the door sensor. This component plays a crucial role in ensuring that you are always alerted when the door of the 3D printer is open. This guide covers everything you need to know about the door sensor: how it works, how to activate it, and how to replace it.
¶ How the Door Sensor Works
The door sensor is a small magnetic switch-based component that detects whether the front door of the printer is open or closed. It is mounted inside the enclosure near the top-right frame, as shown below. Below is how it looks like in the machine.
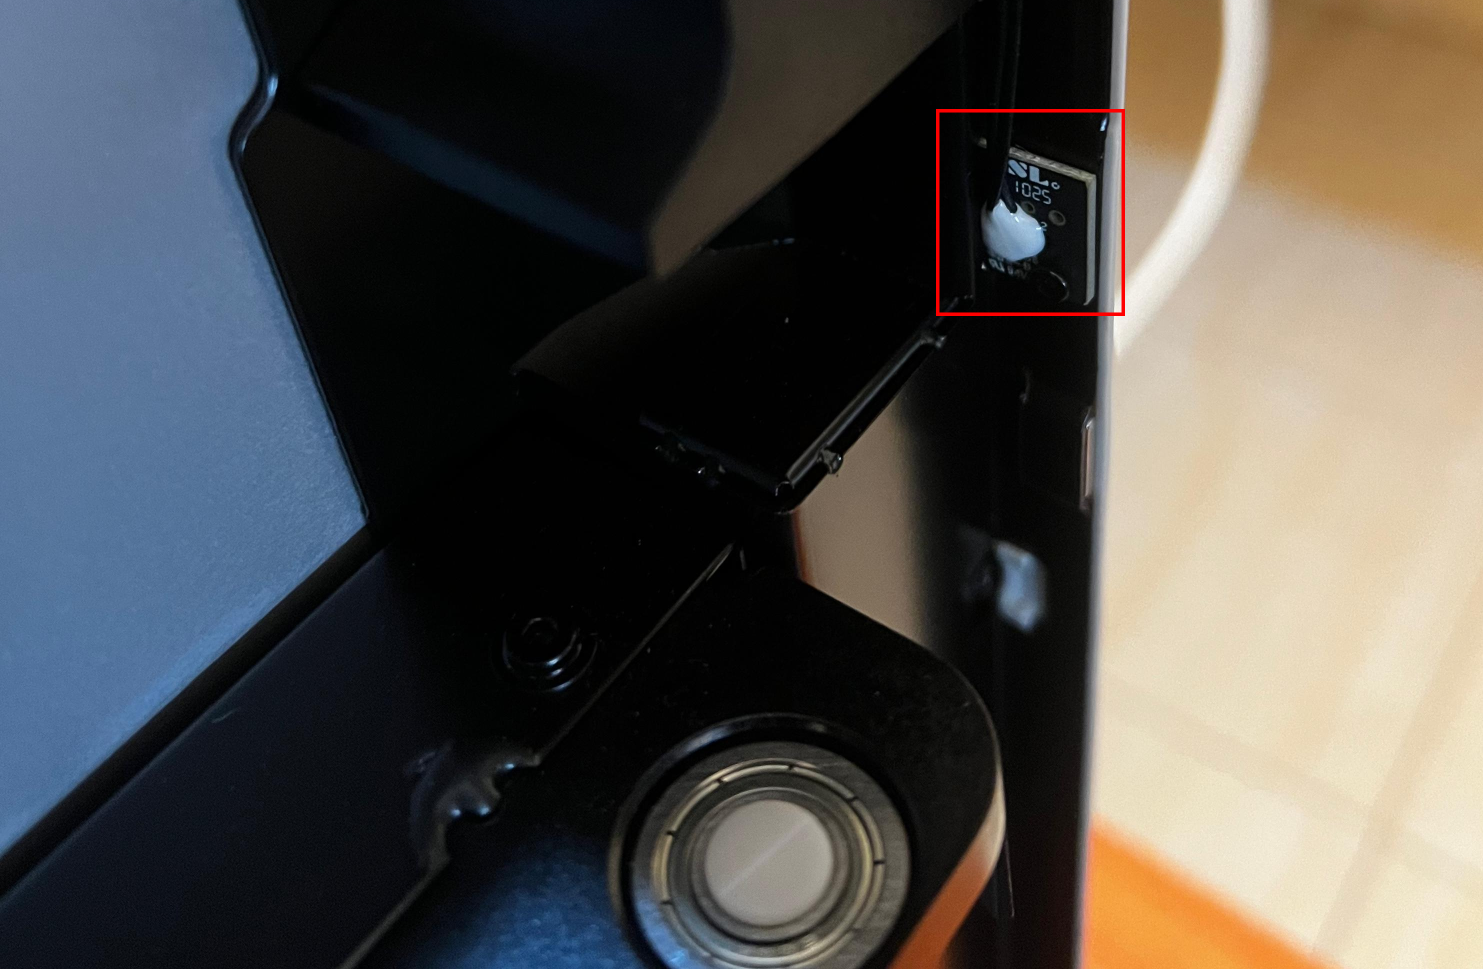
It features a switch-based section that passes through a small hole in the frame of the 3D printer from the inside.
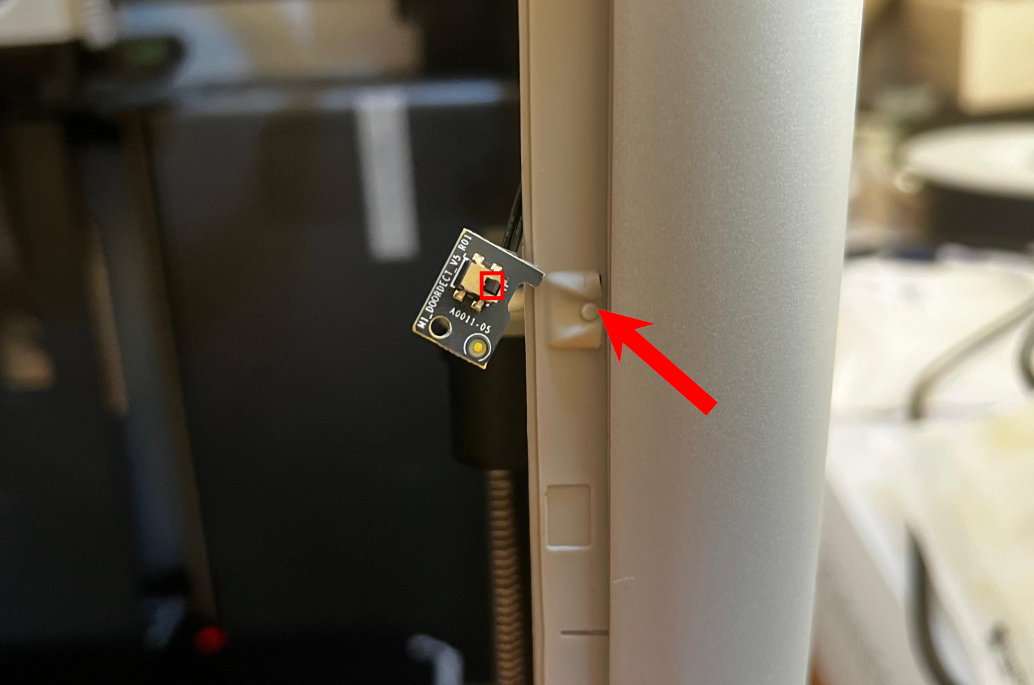
When the door is closed, one side of the door presses against the trigger or switch, keeping it engaged; if the door is opened, the switch is released, and the sensor signals the printer to respond—either by sending a notification or pausing the print, based on your configured settings (we have explained the two settings available for door sensor in this wiki).
It's important to note that this feature does not automatically close the door when it detects it's open; it only alerts you so you can take the appropriate action.
¶ Benefits of the Door Sensor
When 3D printing, it's essential to maintain a stable temperature in the chamber environment, especially when using filaments that are sensitive to temperature fluctuations, such as ABS. When the door is open, the printer detects it immediately, allowing you to take action and ensure better temperature regulation within the machine. However, when printing low-temperature filaments like PLA, TPU, or possibly PETG, the front door should be partially open to prevent heat creep.
It's also important to keep the door closed for noise management purposes. When it is closed, the printer can run its internal fans and stepper motors more quietly, as the enclosure helps reduce the sounds. This is particularly beneficial in your home or office settings, where excessive noise can be distracting.
The feature is not activated by default. To do so, you can either use Bambu Studio app or the LCD screen of the 3D printer.
¶ Activating Door Sensor in Bambu Studio
Open Bambu Studio and ensure that you have set it up correctly, including connecting your 3D printer. If you haven't, check out the Bambu Studio quick start wiki to learn how to do it. Once you launch the software, go to the Device section.
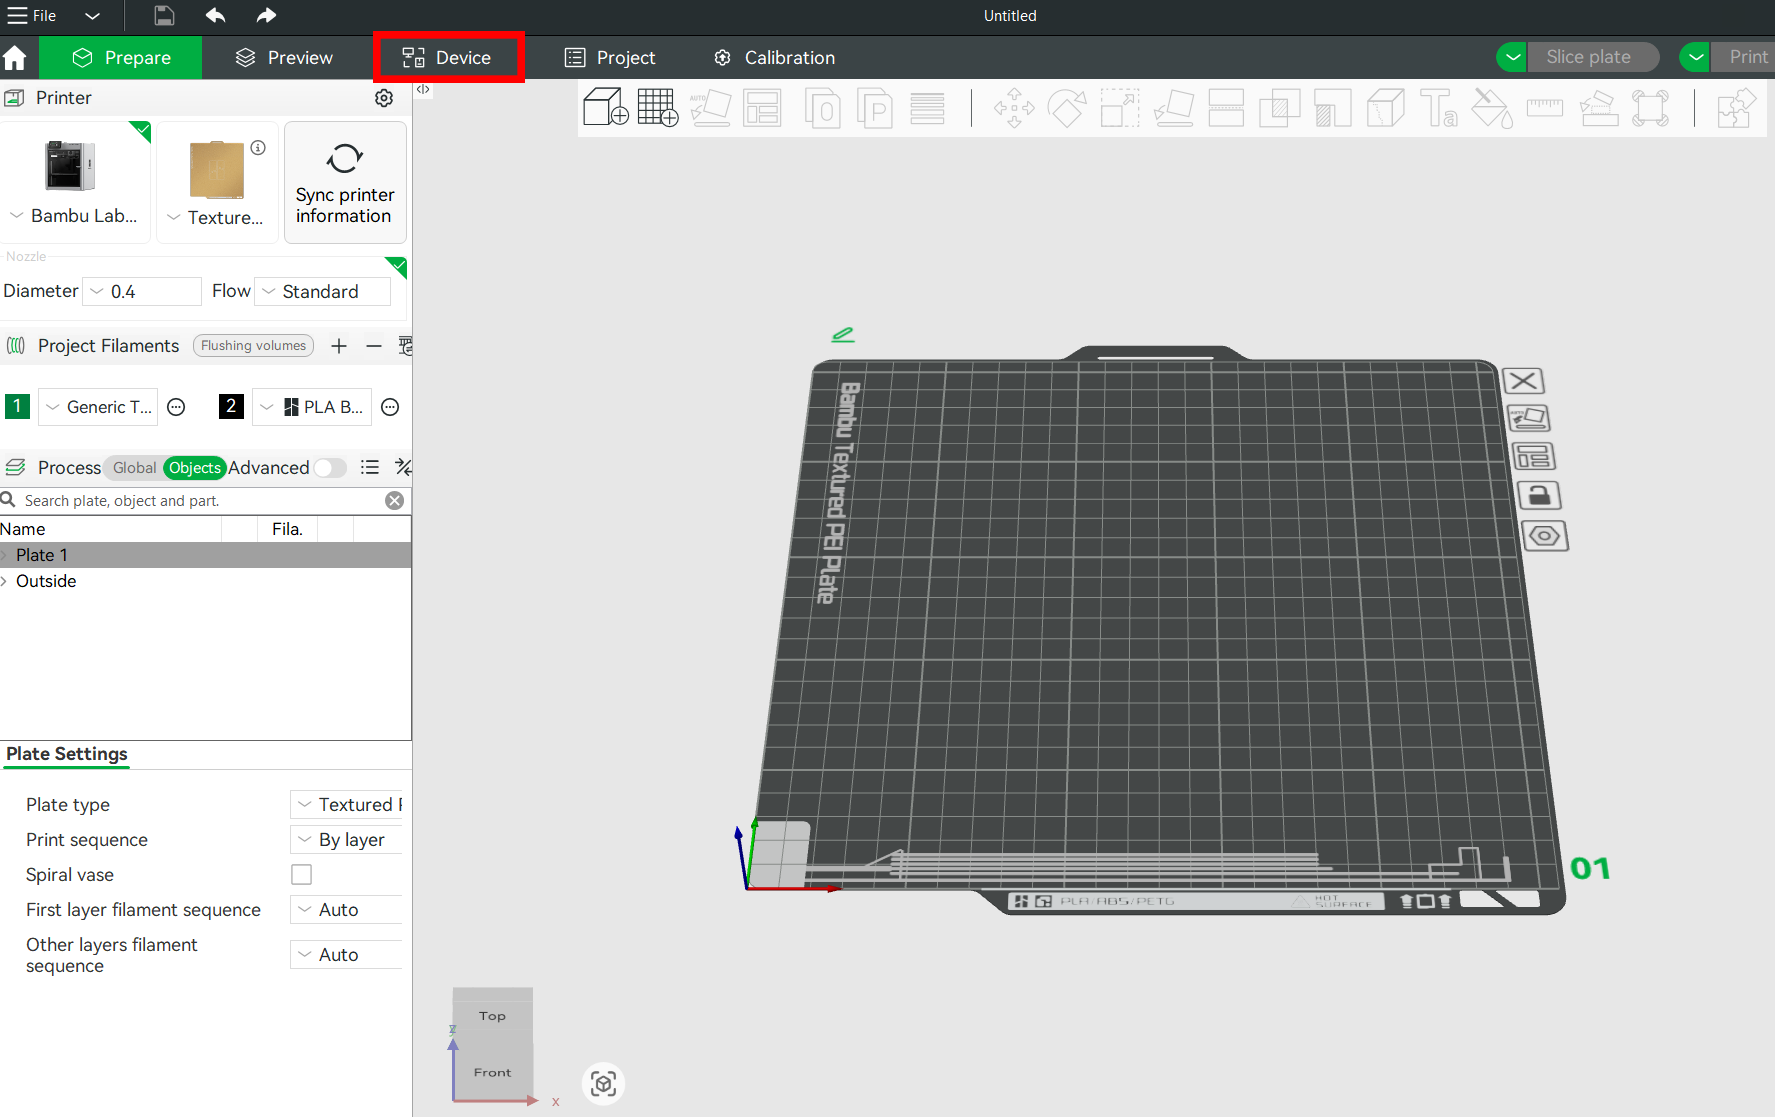
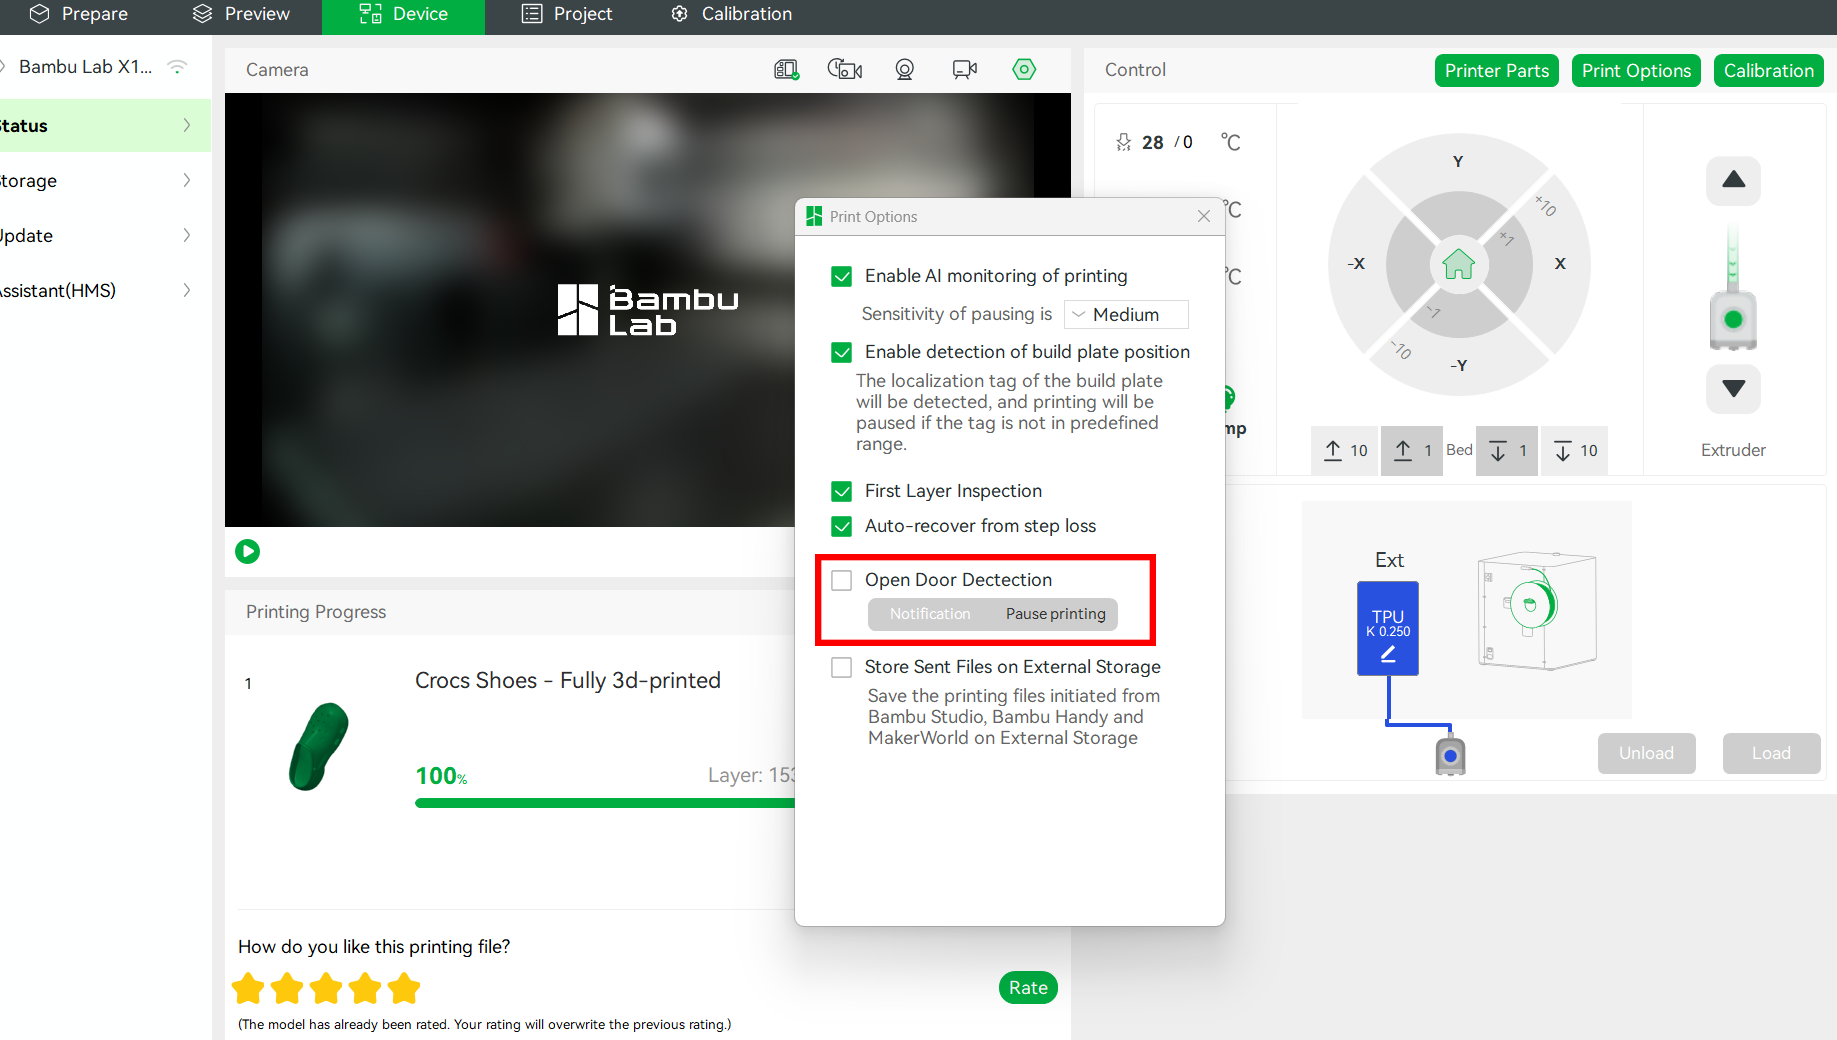
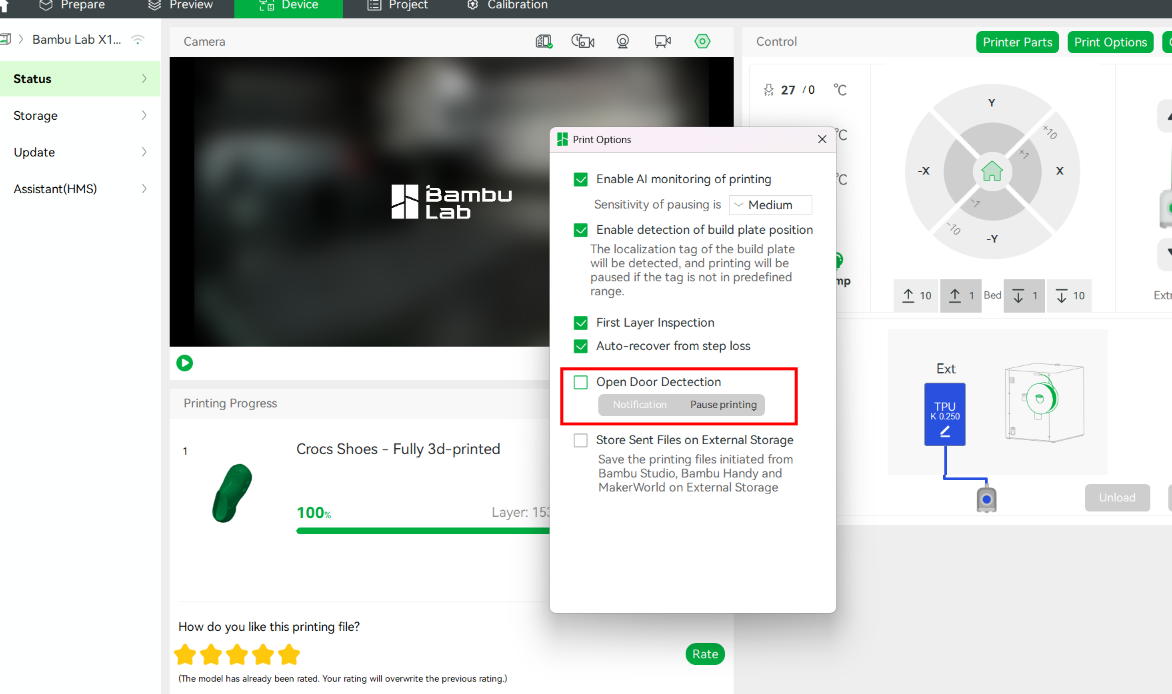
Next, click on Print Options.
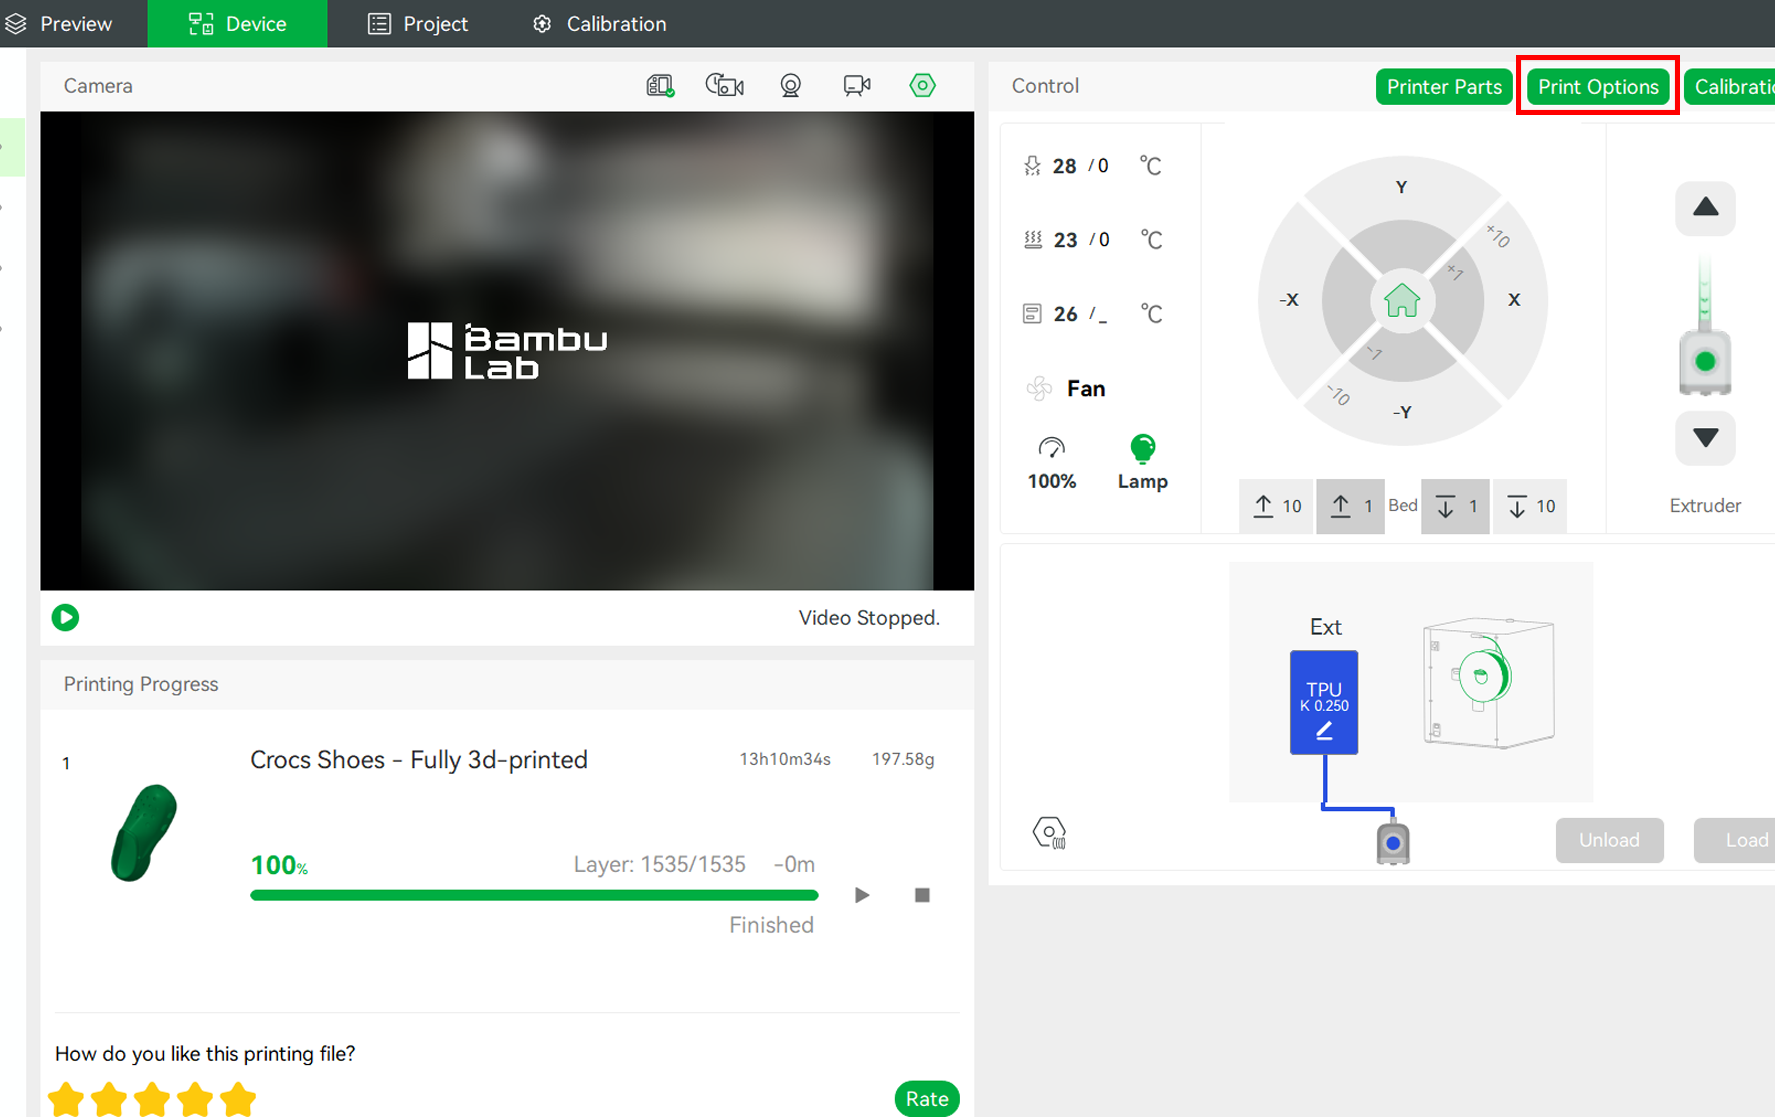
In the new window that launches, ensure you click the Open Door Detection checkbox.
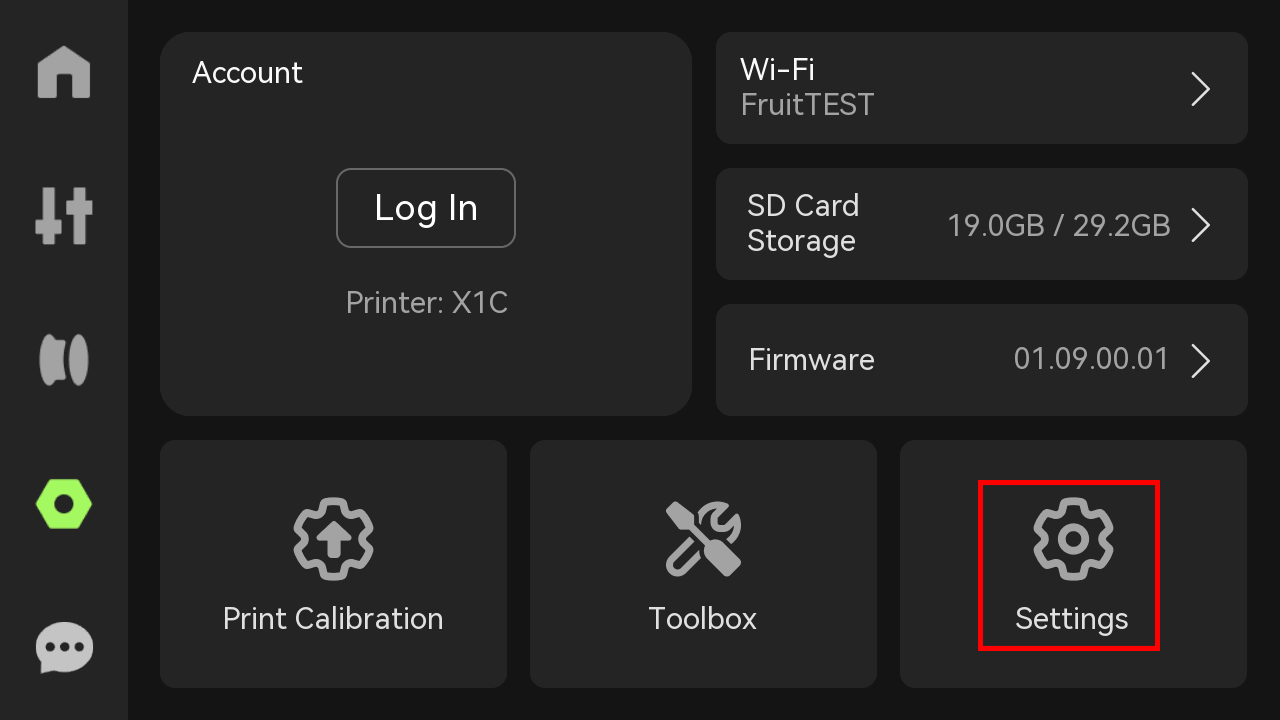
¶ Activating Door Sensor Using LCD Screen
Go to the settings section.
Next, select Print options.
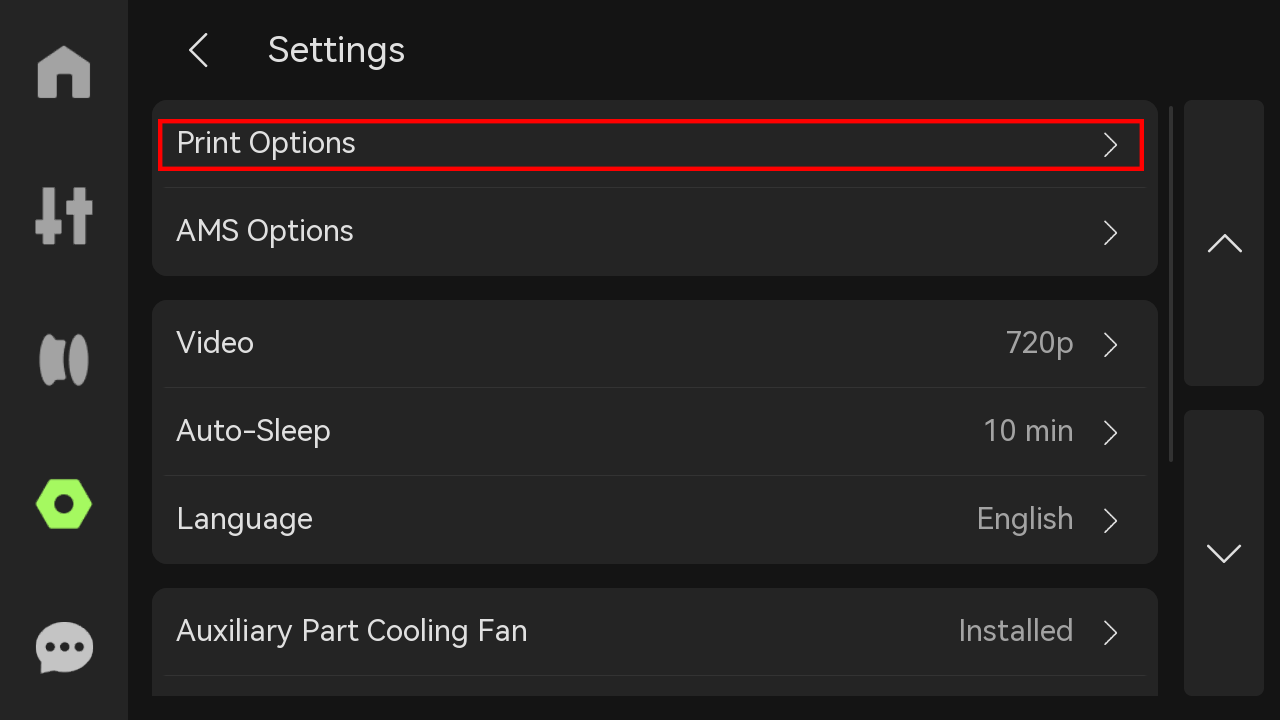
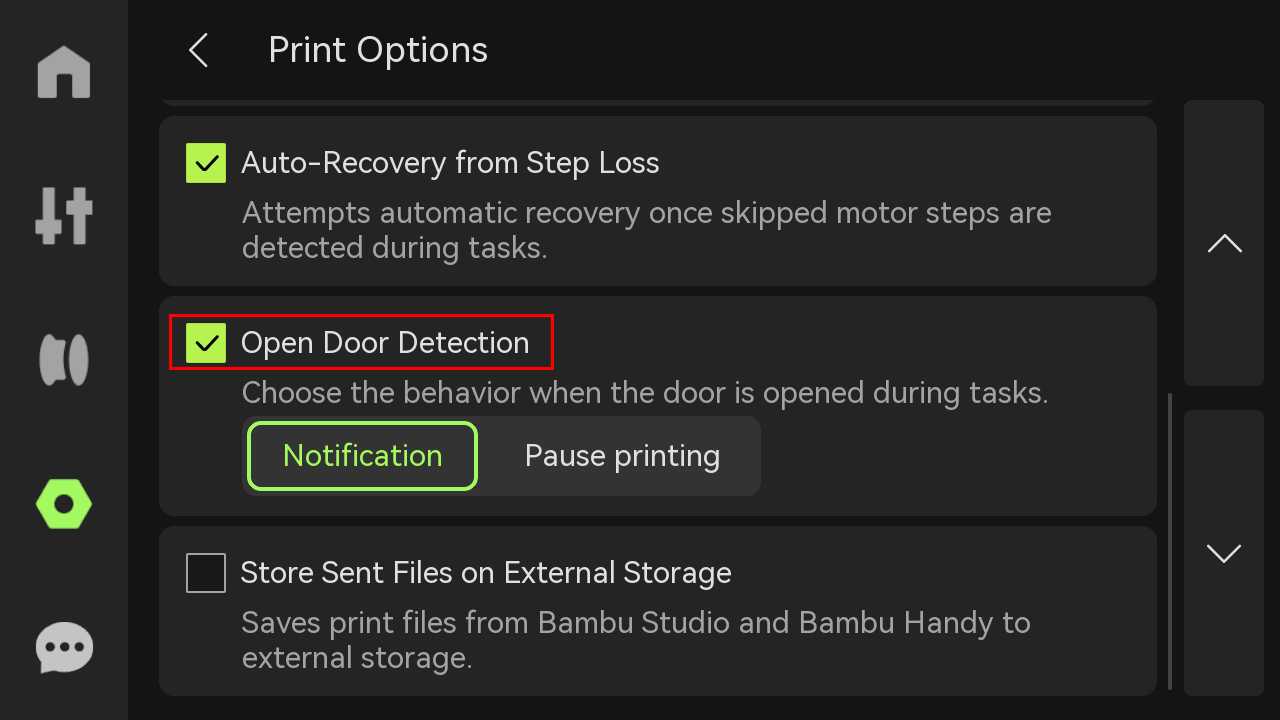
Use the arrow down option to scroll until you see Open Door Detection.

Click the checkbox to activate it.
¶ Open Door Detection Settings
When you activate this setting, you see two options: Notification and Pause Printing. Each of these options is discussed below.
- Notification
- Pause Printing
¶ 1. Notification
If the door is opened while the printer is running and the Notification option is selected, a warning message will appear in the notification area on the touchscreen. This is the default option.

This message alerts you that the door seems to be open. Alongside the warning, the screen will also display an error code and a QR code that you can scan for more details.
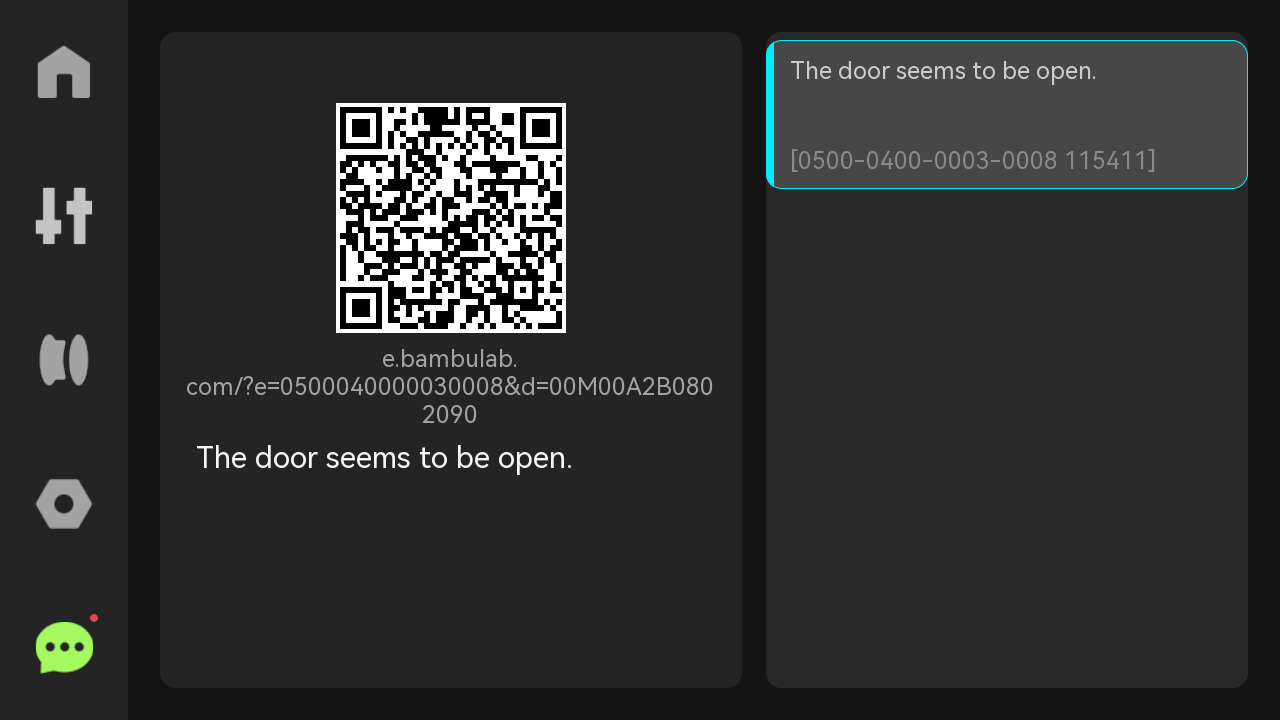
Scanning the QR code will redirect you to this Door Sensor Wiki. Remember this option won't pause your print.
¶ 2. Pause Printing
When you choose this option, the printer will pause printing if the door is opened. A notification will appear on the screen indicating that the door is open, and you will be presented with three options: Resume, Stop, and Check Assistant.
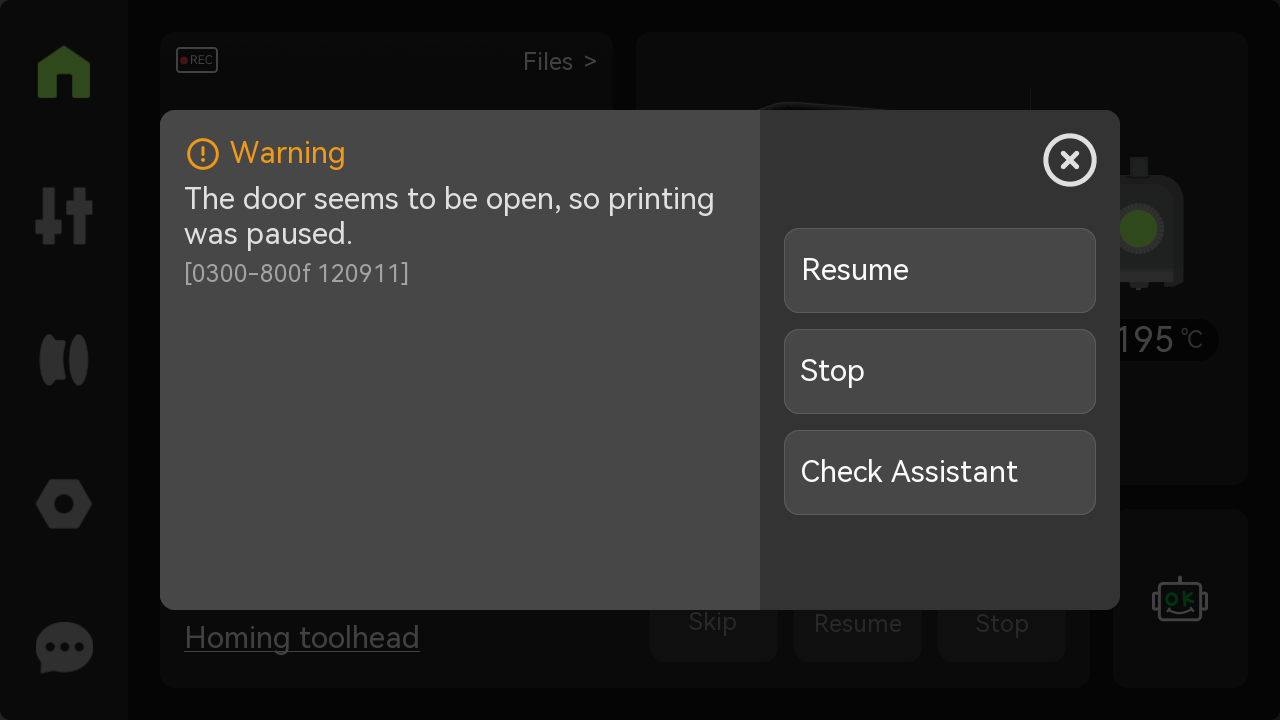
Selecting 'Resume' will continue the 3D print, while 'Stop' will halt the print entirely. Choosing Check Assistant will redirect you to the notification page, where you can scan the QR code, which will open this wiki page.
¶ Door Sensor Not Working: Possible Causes and Solutions
If you have tried activating it and it's not doing anything, there are possible causes and solutions. These include:
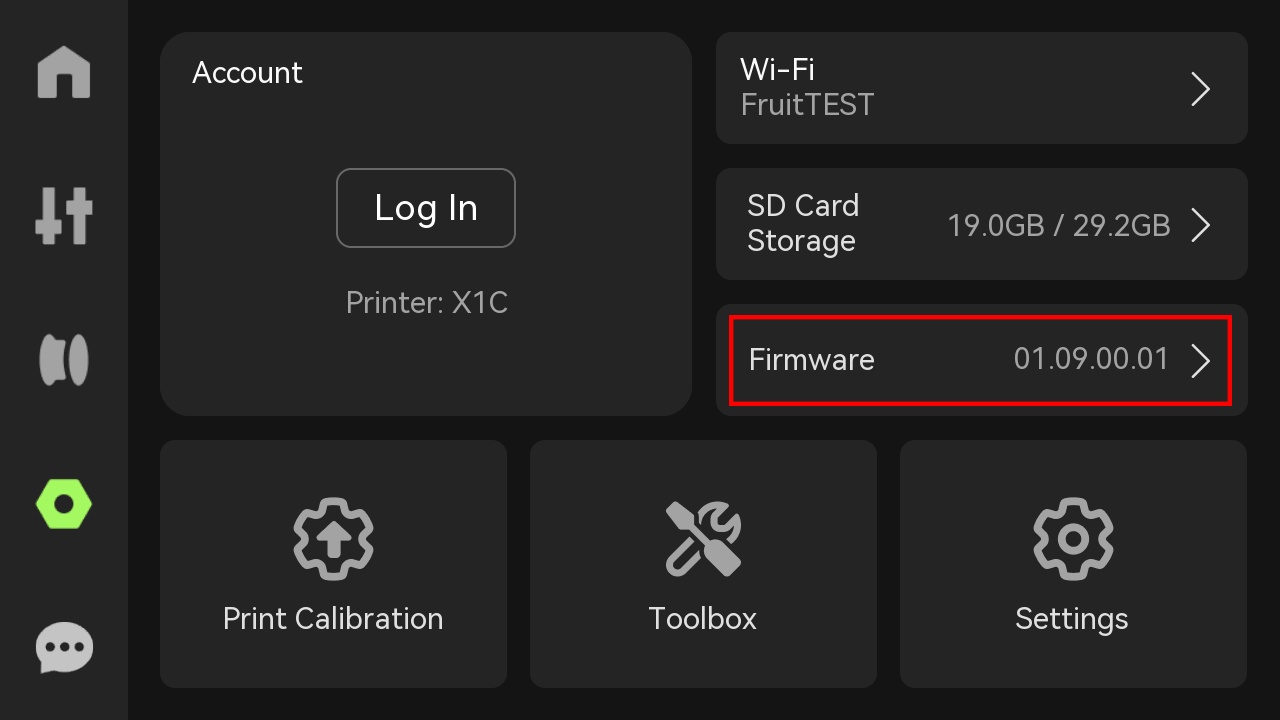
¶ 1. Firmware Issues
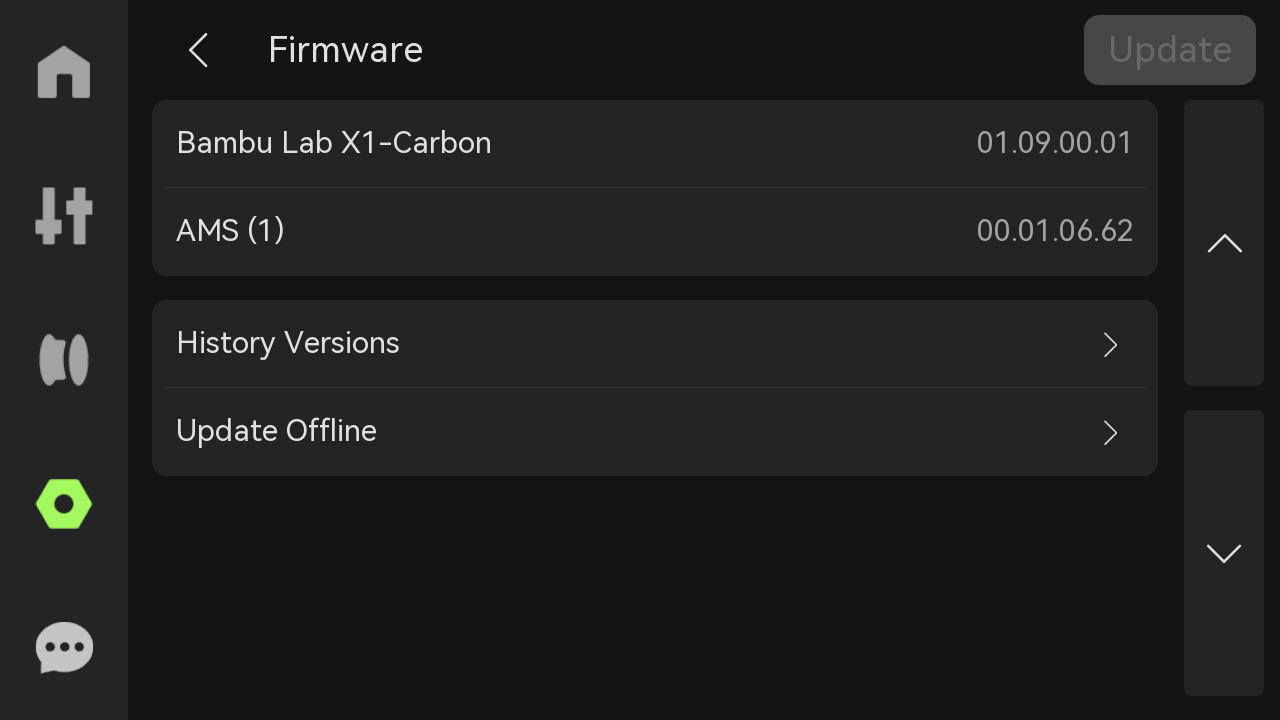
You should consider updating the firmware to the latest version to see if it can fix the issue. You can do this by selecting Firmware in the settings section.
In the new window that opens, you will see the firmware version history. If yours is not up to date, click Update from the top right section.
¶ 2. Door Switch Not Tightly in Place
If the door switch is not securely in place, it may shift or fail to align properly with the door, causing it to malfunction or not register when the door opens or closes. Since the switch is held in place using just one screw, it's essential to ensure that the screw is tightened securely but not overtightened, as this could damage the switch or its mount. A loose or misaligned switch won't press or release accurately, which means the printer may not respond correctly when the door state changes.
¶ 3. Faulty or Broken Wire
If the wire connected to the sensor is faulty or not properly attached, the door detection feature may stop working.
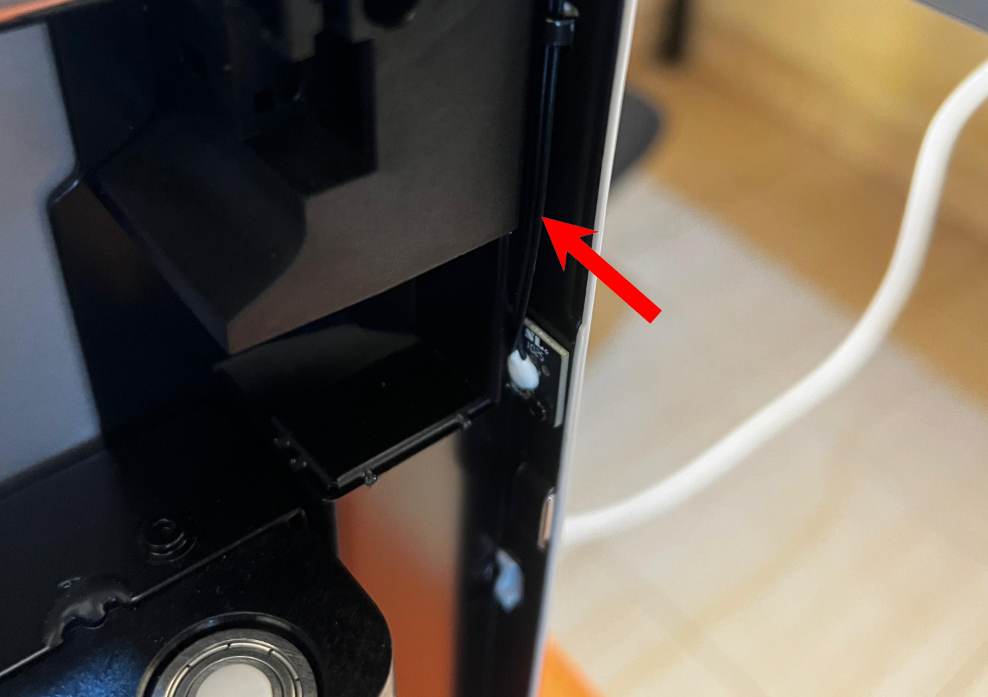
You should carefully check the two wires connected to the sensor and ensure that their ends are securely inserted into the top connector.

If it's loose or improperly seated, it can prevent the sensor from sending signals to the printer. Additionally, look out for any signs of damage or wear on the wires that could interrupt the connection.
¶ 4. Faulty Door Sensor
If the door sensor switch itself is faulty, it can prevent the printer from detecting whether the door is open or closed, regardless of the wiring or switch alignment. This can lead to missed notifications or failure to pause the print when the door is opened. In such cases, the only effective solution is to replace it. Check out the door detection switch replacement wiki to learn how to replace it.
¶ How to Disable Door Sensor Feature
If you prefer not to be frequently alerted when the door is open, you can choose to disable the door sensor notifications. To do this, follow the same steps outlined earlier for activating the feature, but instead of checking the checkbox, simply deselect it. You can do it in Bambu Studio or on the LCD screen.
In the LCD screen of the 3D printer, uncheck the box.
This will turn off the door monitoring feature, preventing pop-up alerts or pauses during prints when the door is opened.
¶ End Notes
We hope the detailed guide provided has been helpful and informative.
To ensure a safe and effective execution, if you have any concerns or questions about the process described in this article, we recommend submitting a technical ticket regarding your issue. Please include a picture or video illustrating the problem, as well as any additional information related to your inquiry.