¶ Note
The term "red" mentioned in this article refers to infrared light, so single red means IR-blue version, and dual red means dual IR version.
¶ An Introduction to the Bambu Lab Micro Lidar
Bambu Micro Lidar brings micrometer-level precision into 3D printing. The system probes the nozzle height, calibrates the flow, and scans the first layer, so the possibilities are endless.
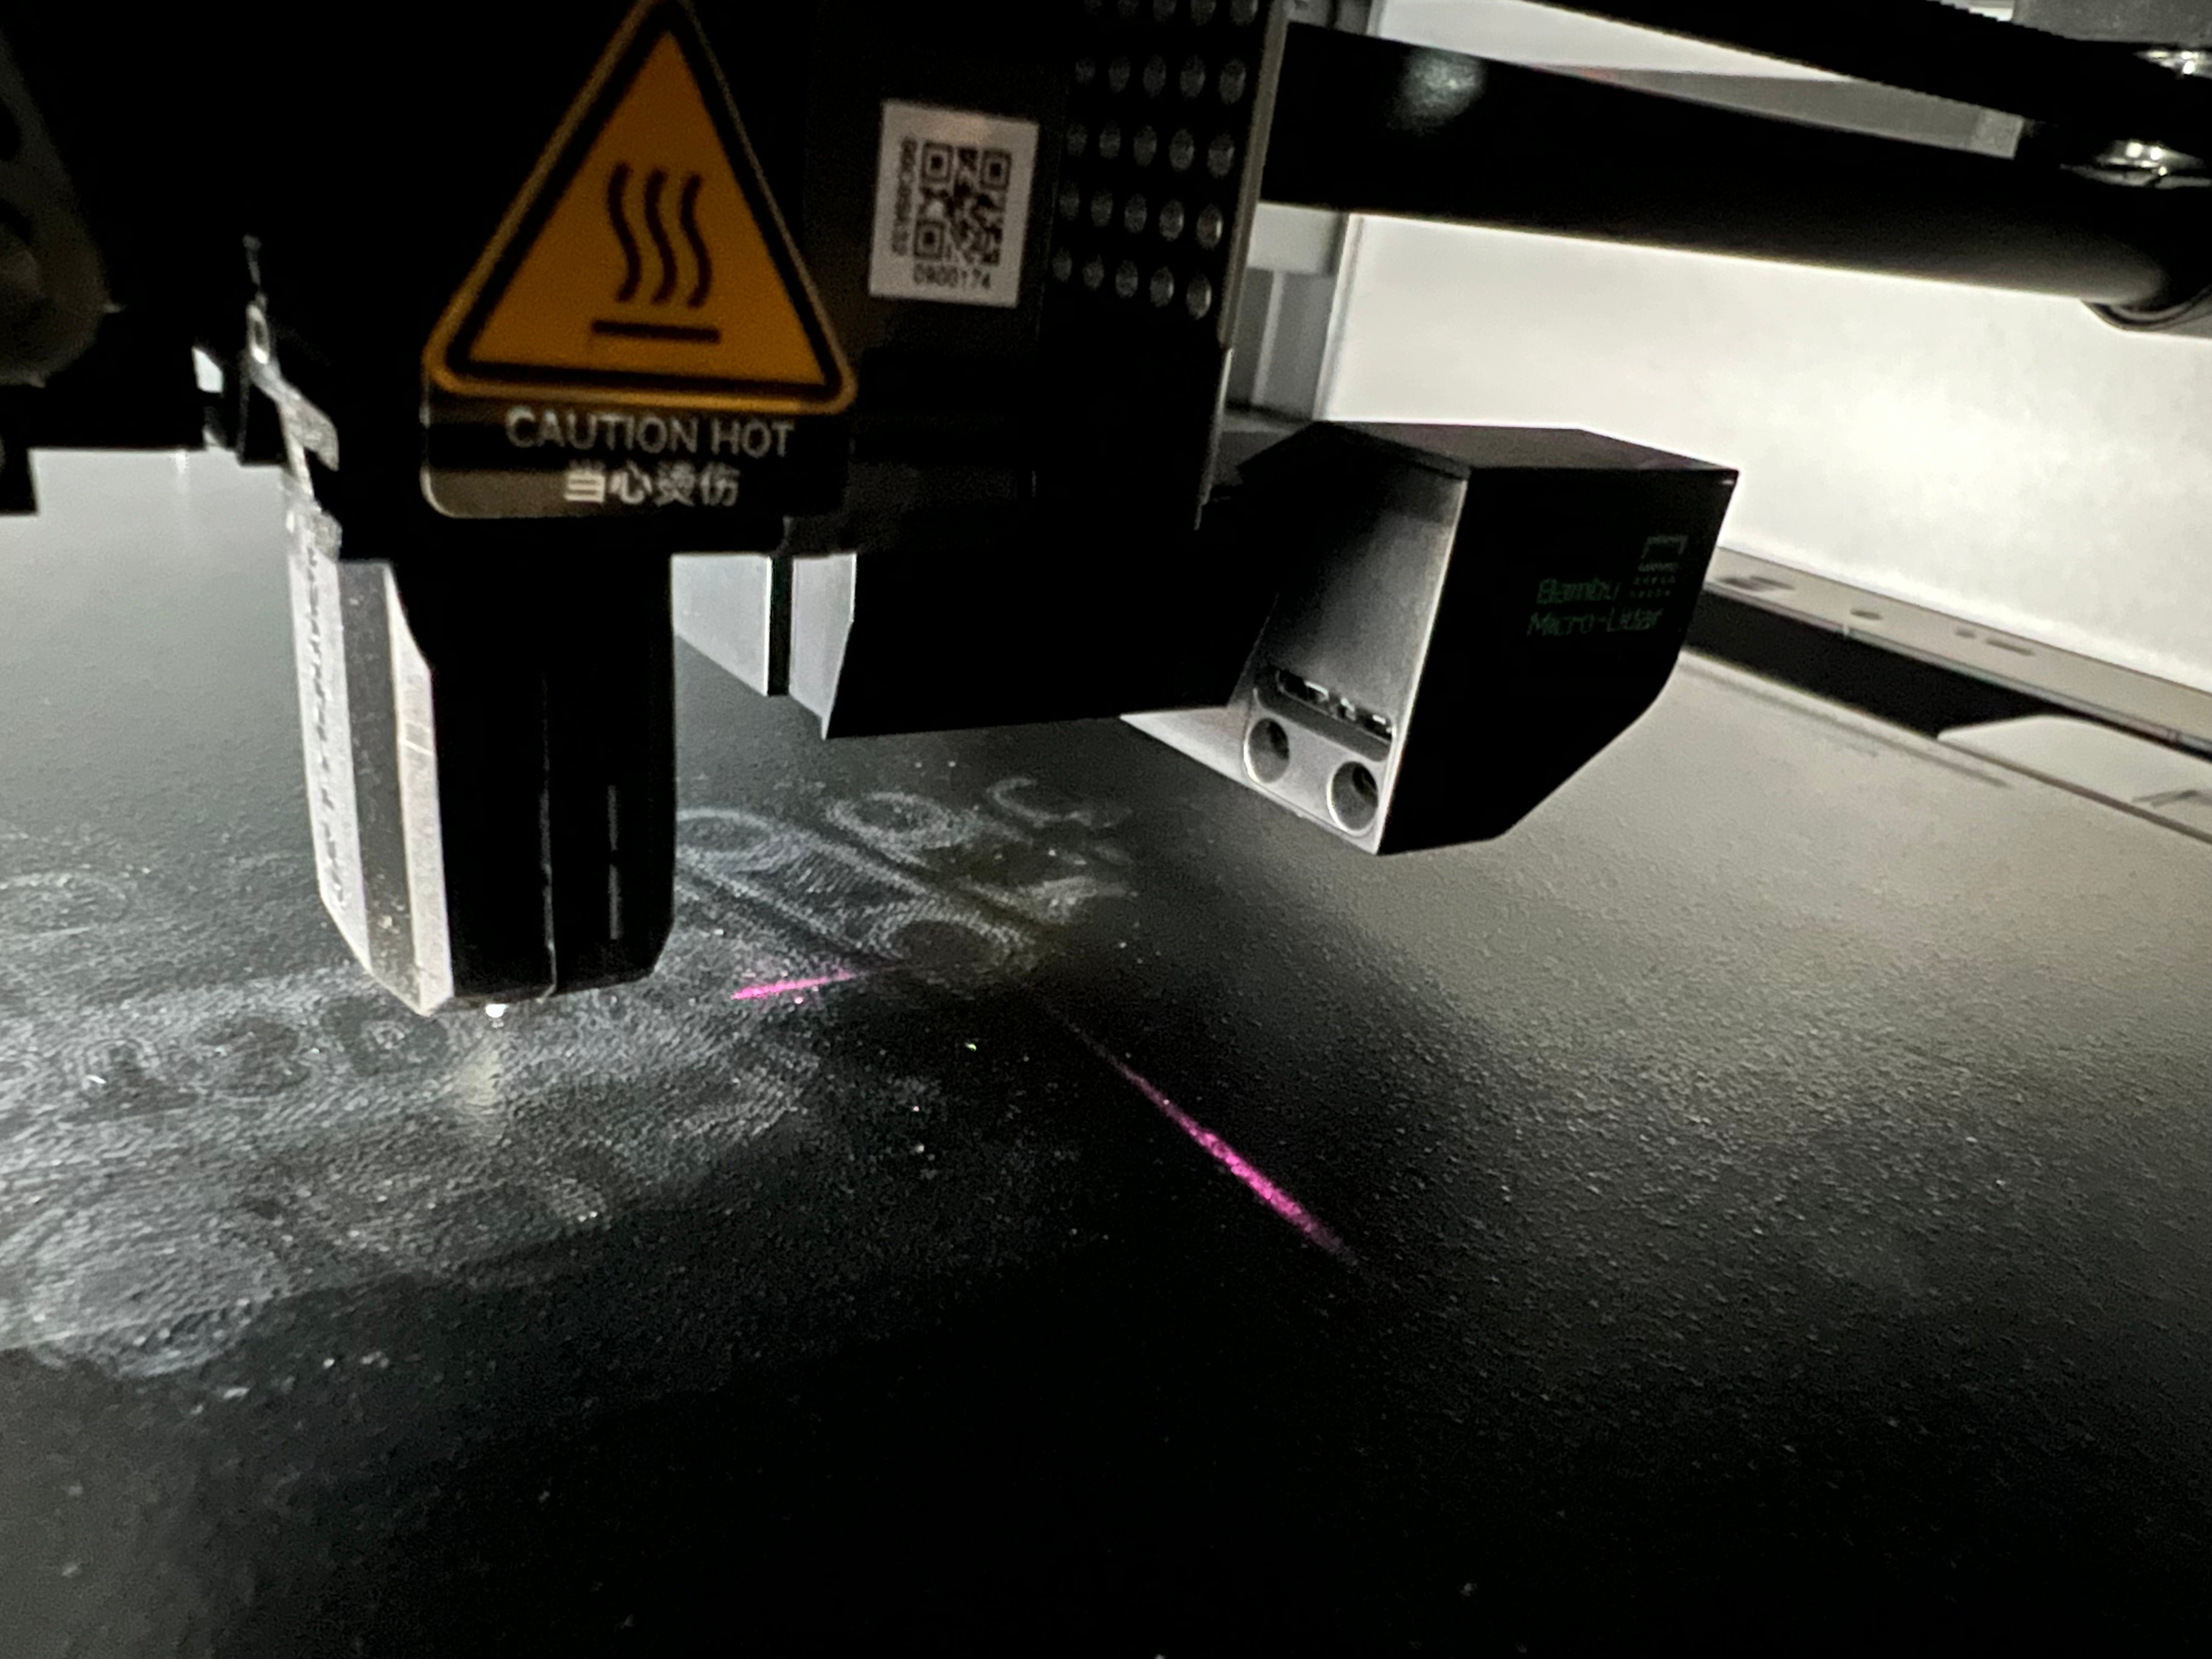
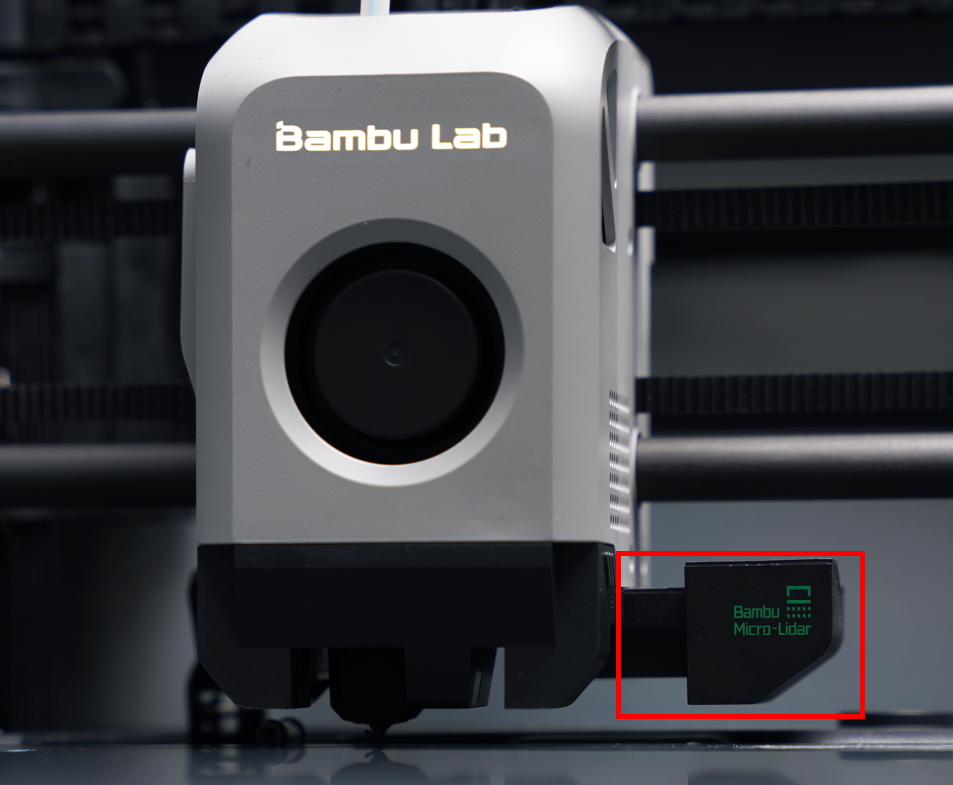 Bambu Lab Micro LiDAR Overview |
 Detailed view of Bambu Lab Micro LiDAR |
¶ Bambu Lab Micro Lidar Models
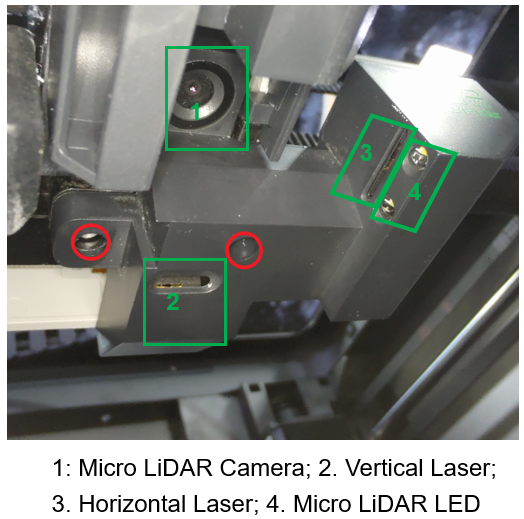
Currently, the X1C is supplied with two types of micro LiDAR. The key distinction is that they are equipped with two types of lasers (see the figure below for details). This variation is a result of changes in our production schedule. There is no way to choose which micro LiDAR you will receive, but rest assured that there is no difference in functionality between the Dual IR laser version and the IR-blue laser combination version.
| X1 Series | |||
| laser (Choose one, random delivery) |
Laser model | Safety scale | Laser parameters |
| 1(Dual IR version) | Class 1 laser product | Wavelength | 850 nm、850 nm |
| Maximum Output | <0.778 mW | ||
| 2(IR-blue version) | Class 2 laser product | Wavelength | 405 nm、808 nm |
| Maximum Output | < 1 mW |
¶ How do I know the model of my Micro LiDAR?
Please note that each Micro LiDAR version corresponds to the tool head circuit board (from now on referred to as the TH board). If you need to replace the Micro LiDAR or TH board, you must use the correct spare parts model for your Micro LiDAR. Otherwise, it will cause the electronic components on the Micro LIDAR and TH to burn out.
With that in mind, if you need to replace the Micro LiDAR or TH board, please provide the following information and contact the after-sales technical support to confirm the model of the laser and TH board.
¶ Method 1:
Upload the printer log by opening a ticket; the after-sale technical support will help you confirm the model through the relevant information in the log.
¶ Method 2:
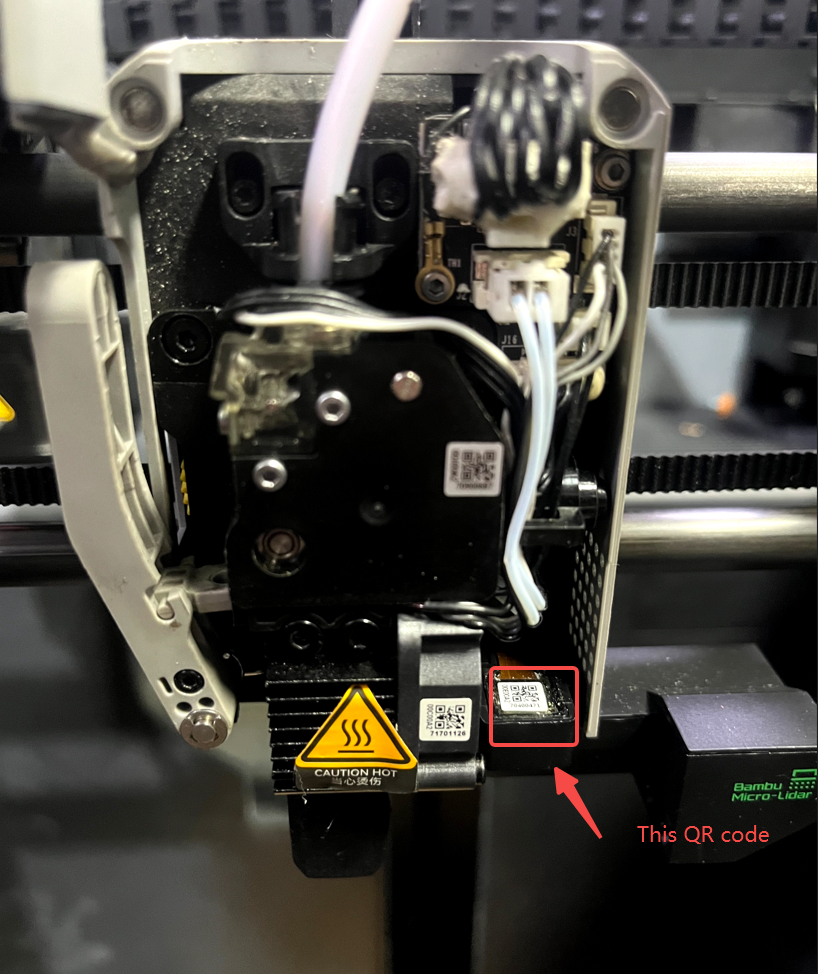
Open the front cover of the tool head and upload the photo of the SN QR code of the Micro LiDAR and the SN information obtained by scanning the QR code to the technical tickets, as shown in the figure below:
¶ Method 3:
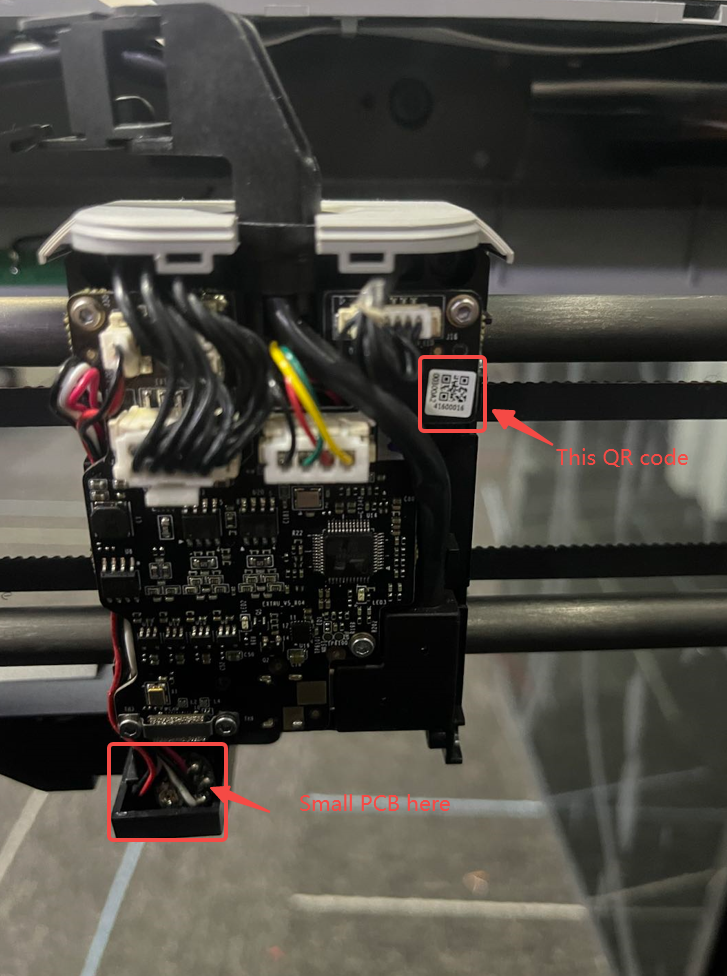
Open the back cover of the tool head and upload the photo of the SN QR code on the TH board and the SN information obtained by scanning the QR code to the ticket, as shown in the picture below:
(The specific location of the QR code may be different from the picture below.)
¶ Method 4:
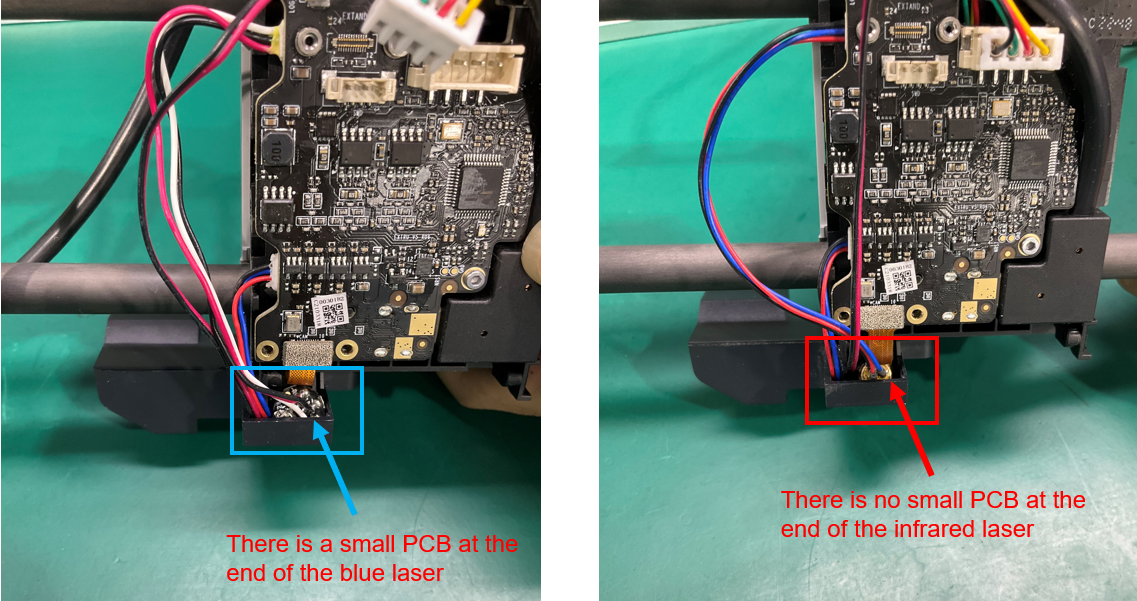
Open the back cover of the tool head and observe the bottom of the vertical laser. If a small PCB is at the bottom, the laser is an IR-blue laser combination. If there is no small PCB, it is a dual infrared laser.
¶ Method 5:
Observe the color emitted by the laser in the video recording. It should be noted that the wavelength of the dual infrared laser is in the infrared band, which is invisible to the naked eye, and the color can only be observed through the camera video. In addition, some cameras have an IR cut function, which may make it challenging to see infrared light clearly. In general, however, this method is not necessarily accurate for confirming the laser model. Please be assured that if there is a problem with the LiDAR (for example, the laser does not function), the HMS will notify you.
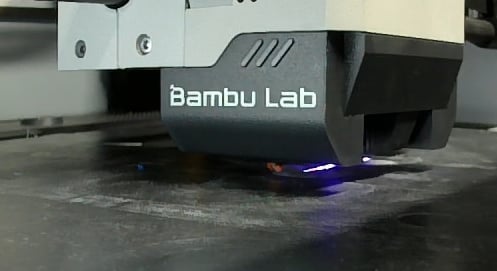 Blue light from the vertical laser |
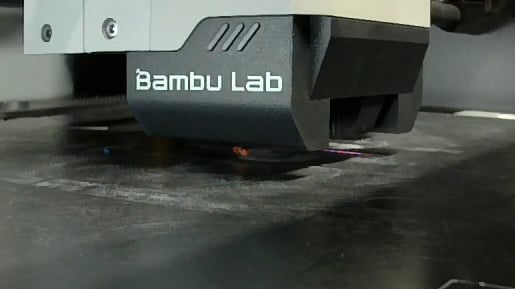 Infrared light from the horizontal lasers (invisible to the naked eye) |
In most cases, only the light emitted by the horizontal laser can be seen in the video recorded by the chamber camera. The chamber camera is located on the left side, so the horizontal laser light coming from the right side can be captured by the camera, but the build plate will reflect the vertical infrared light on the rear side, so most of the light cannot be captured by the chamber camera, as shown below:
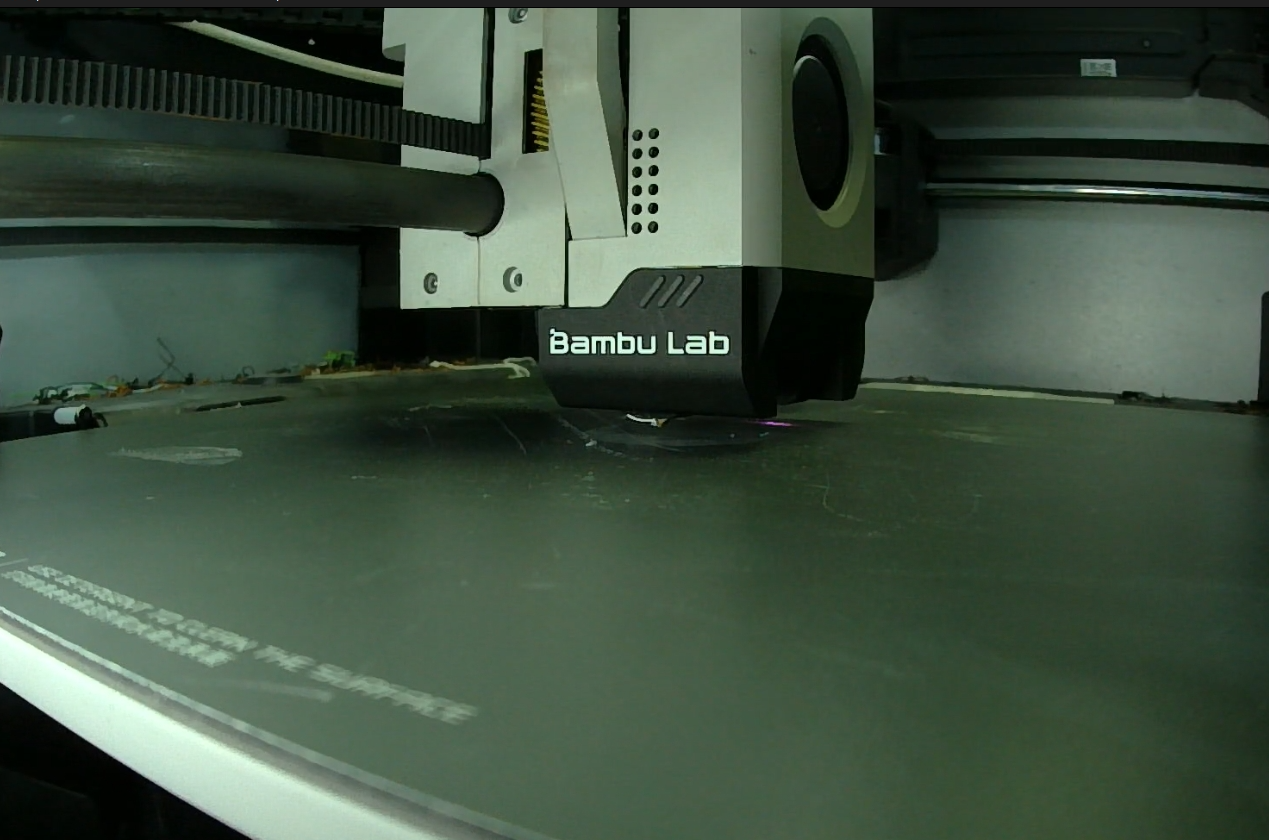
We can only observe the horizontal infrared light emitted by the dual infrared lasers through the chamber camera video recording, but the vertical infrared light will be reflected and cannot be captured by the camera
If you move a phone camera closer and use a 45-degree oblique angle, there is a chance to capture the light from the rear vertical laser with the camera, as shown in the figure below.
¶ Conclusion
To summarize, we recommend that you provide both Method 1 and Method 2 information at the same time to ensure reliable confirmation. Once again, no matter which model you receive, there is no effect on functionality. You can use it with confidence and enjoy your printing!
¶ Logic for determining the versions of the micro lidar and TH board:
Before ordering the TH board or micro lidar for X1C/X1, please determine their versions to avoid the wrong version, which results in compatibility issues.
|
The QR code photo of the micro lidar's SN; |
The QR code photo of the TH board's SN; the actual location of the QR code may vary from the image. |
Based on the aforementioned methods 2 and 3, you can obtain the serial numbers (SN) of the micro lidar and TH board, respectively. In this step, you can use the following encoding logic from the provided list to determine the versions of your micro lidar and TH board:
| single red laser combinations | Dual IR laser | |
| Micro Lidar SN | 00ExxA | 00ExxB |
| TH board SN | 003xxA 003xxB |
003xxC 003xxD 003xxY |
| x represents any number. Y represents a letter after the letter D, such as E. |
¶ Logic explanations:
If the Micro Lidar SN starts with 00ExxA, it means that the lidar is a single red version, and the TH board should also be a single red version with an SN starting with 003xxA or 003xxB.
If the Micro Lidar SN starts with 00ExxB, it means that the lidar is a dual red version, and the TH board should also be a dual red version with a serial number starting with 003xxC, 003xxD, or 003xxY.
¶ Example1:
Micro Lidar SN: 00E00A270400471
TH board SN: 00301B2B2904166
The SN of Micro Lidar begins with 00ExxA, indicating that it is a single red micro Lidar. The TH board's SN begins with 003xxB, indicating that it is a matching single red TH board, as double-confirmed by the verification above.
¶ Example2:
Micro Lidar SN: 00E00B321201095
TH board SN: 00301C313004727
The SN of Micro Lidar begins with 00ExxB, indicating that it is a dual red micro Lidar. The TH board's SN begins with 003xxC, indicating that it is a matching dual red TH board, as double-confirmed by the verification above.
¶ Example3:
Micro Lidar SN: 00E09B341300483
TH board SN: 00301D331803375
The SN of Micro Lidar begins with 00ExxB, indicating that it is a dual red micro Lidar. The TH board's SN begins with 003xxD, indicating that it is a matching dual re TH board, as double-confirmed by the verification above.
¶ End Notes
We hope the detailed guide provided has been helpful and informative.
To ensure a safe and effective execution, if you have any concerns or questions about the process described in this article, we recommend submitting a technical ticket regarding your issue. Please include a picture or video illustrating the problem, as well as any additional information related to your inquiry.