¶ Tip: When using a 0.2mm nozzle for multi-color printing, it's important to be aware that the filament switching process may take longer due to the limited maximum volumetric speed. Therefore, it may be necessary to wait for a period of time when changing filaments.
¶ Load filaments to AMS and configure filament information
Before starting multi-color printing, it is necessary to insert the (AMS) with the filament and set up the filament information. If you are using an official Bambulab filament, the AMS will automatically detect the filament type and color through RFID technology. However, if you are using a third-party filament, you will need to manually configure the relevant information. For details, please refer to AMS setup and loading filament.
¶ Slicing and sending print jobs in Bambu Studio
After configuring the AMS information, you need to set up and slice the multi-color model in Bambu Studio. For detailed instructions on coloring and parameter settings in Bambu Studio, refer to Multi-Color Printing Guide | Bambu Lab Wiki.
¶ Synchronize Filament Information
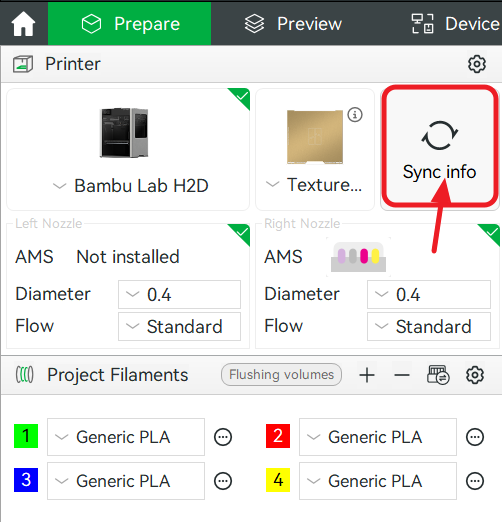
Switch the device page to the corresponding printer, and click the Sync Info button to synchronize the nozzle information and the number of AMS units.
Note: The device page determines which printer’s filament information is synchronized.
Click to continue syncing the filament information.

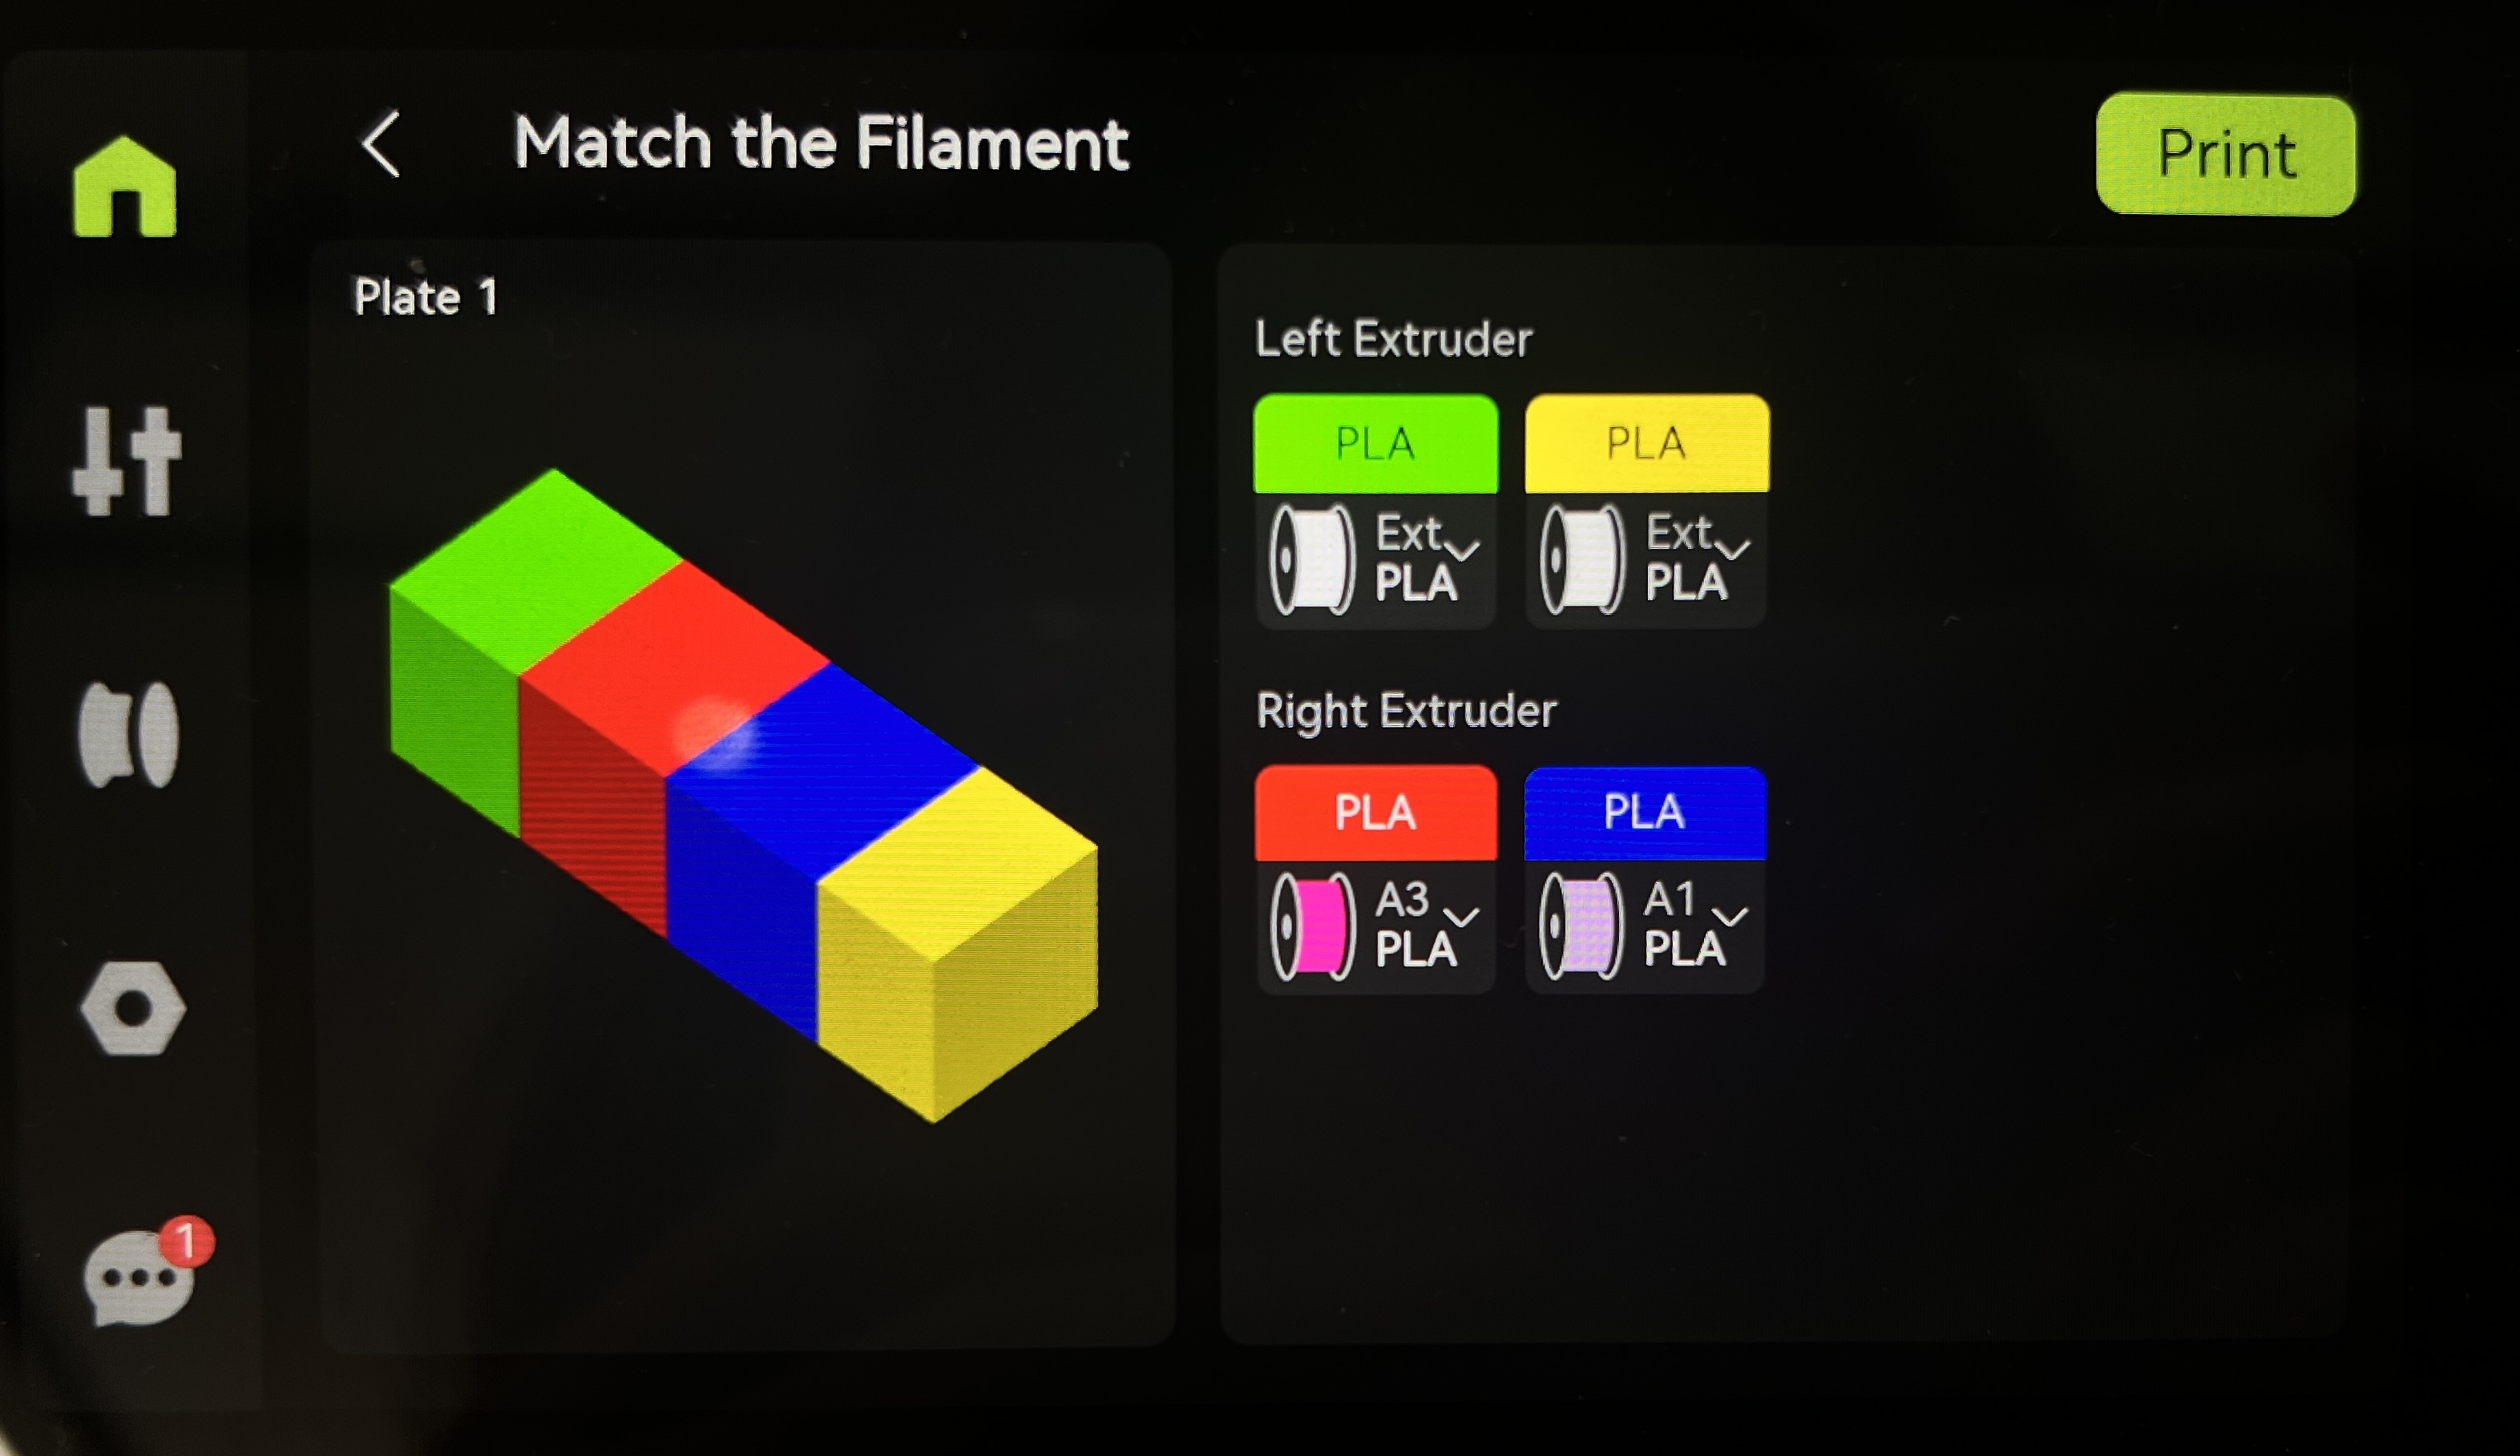
You can now see the mapping between the matched items and the corresponding filaments.
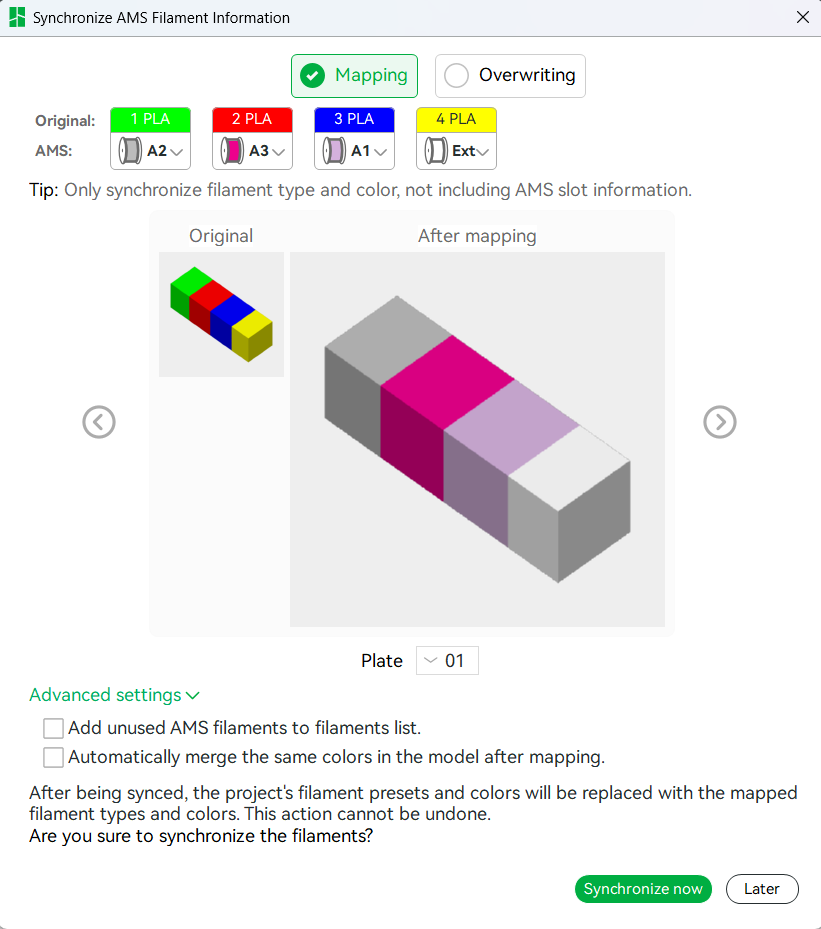
Note: The number in front of each filament color in Studio is only the sequence index of the filaments and has nothing to do with the AMS slot number.
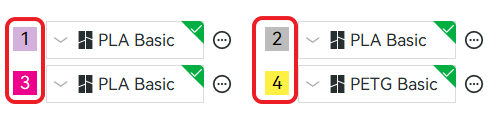
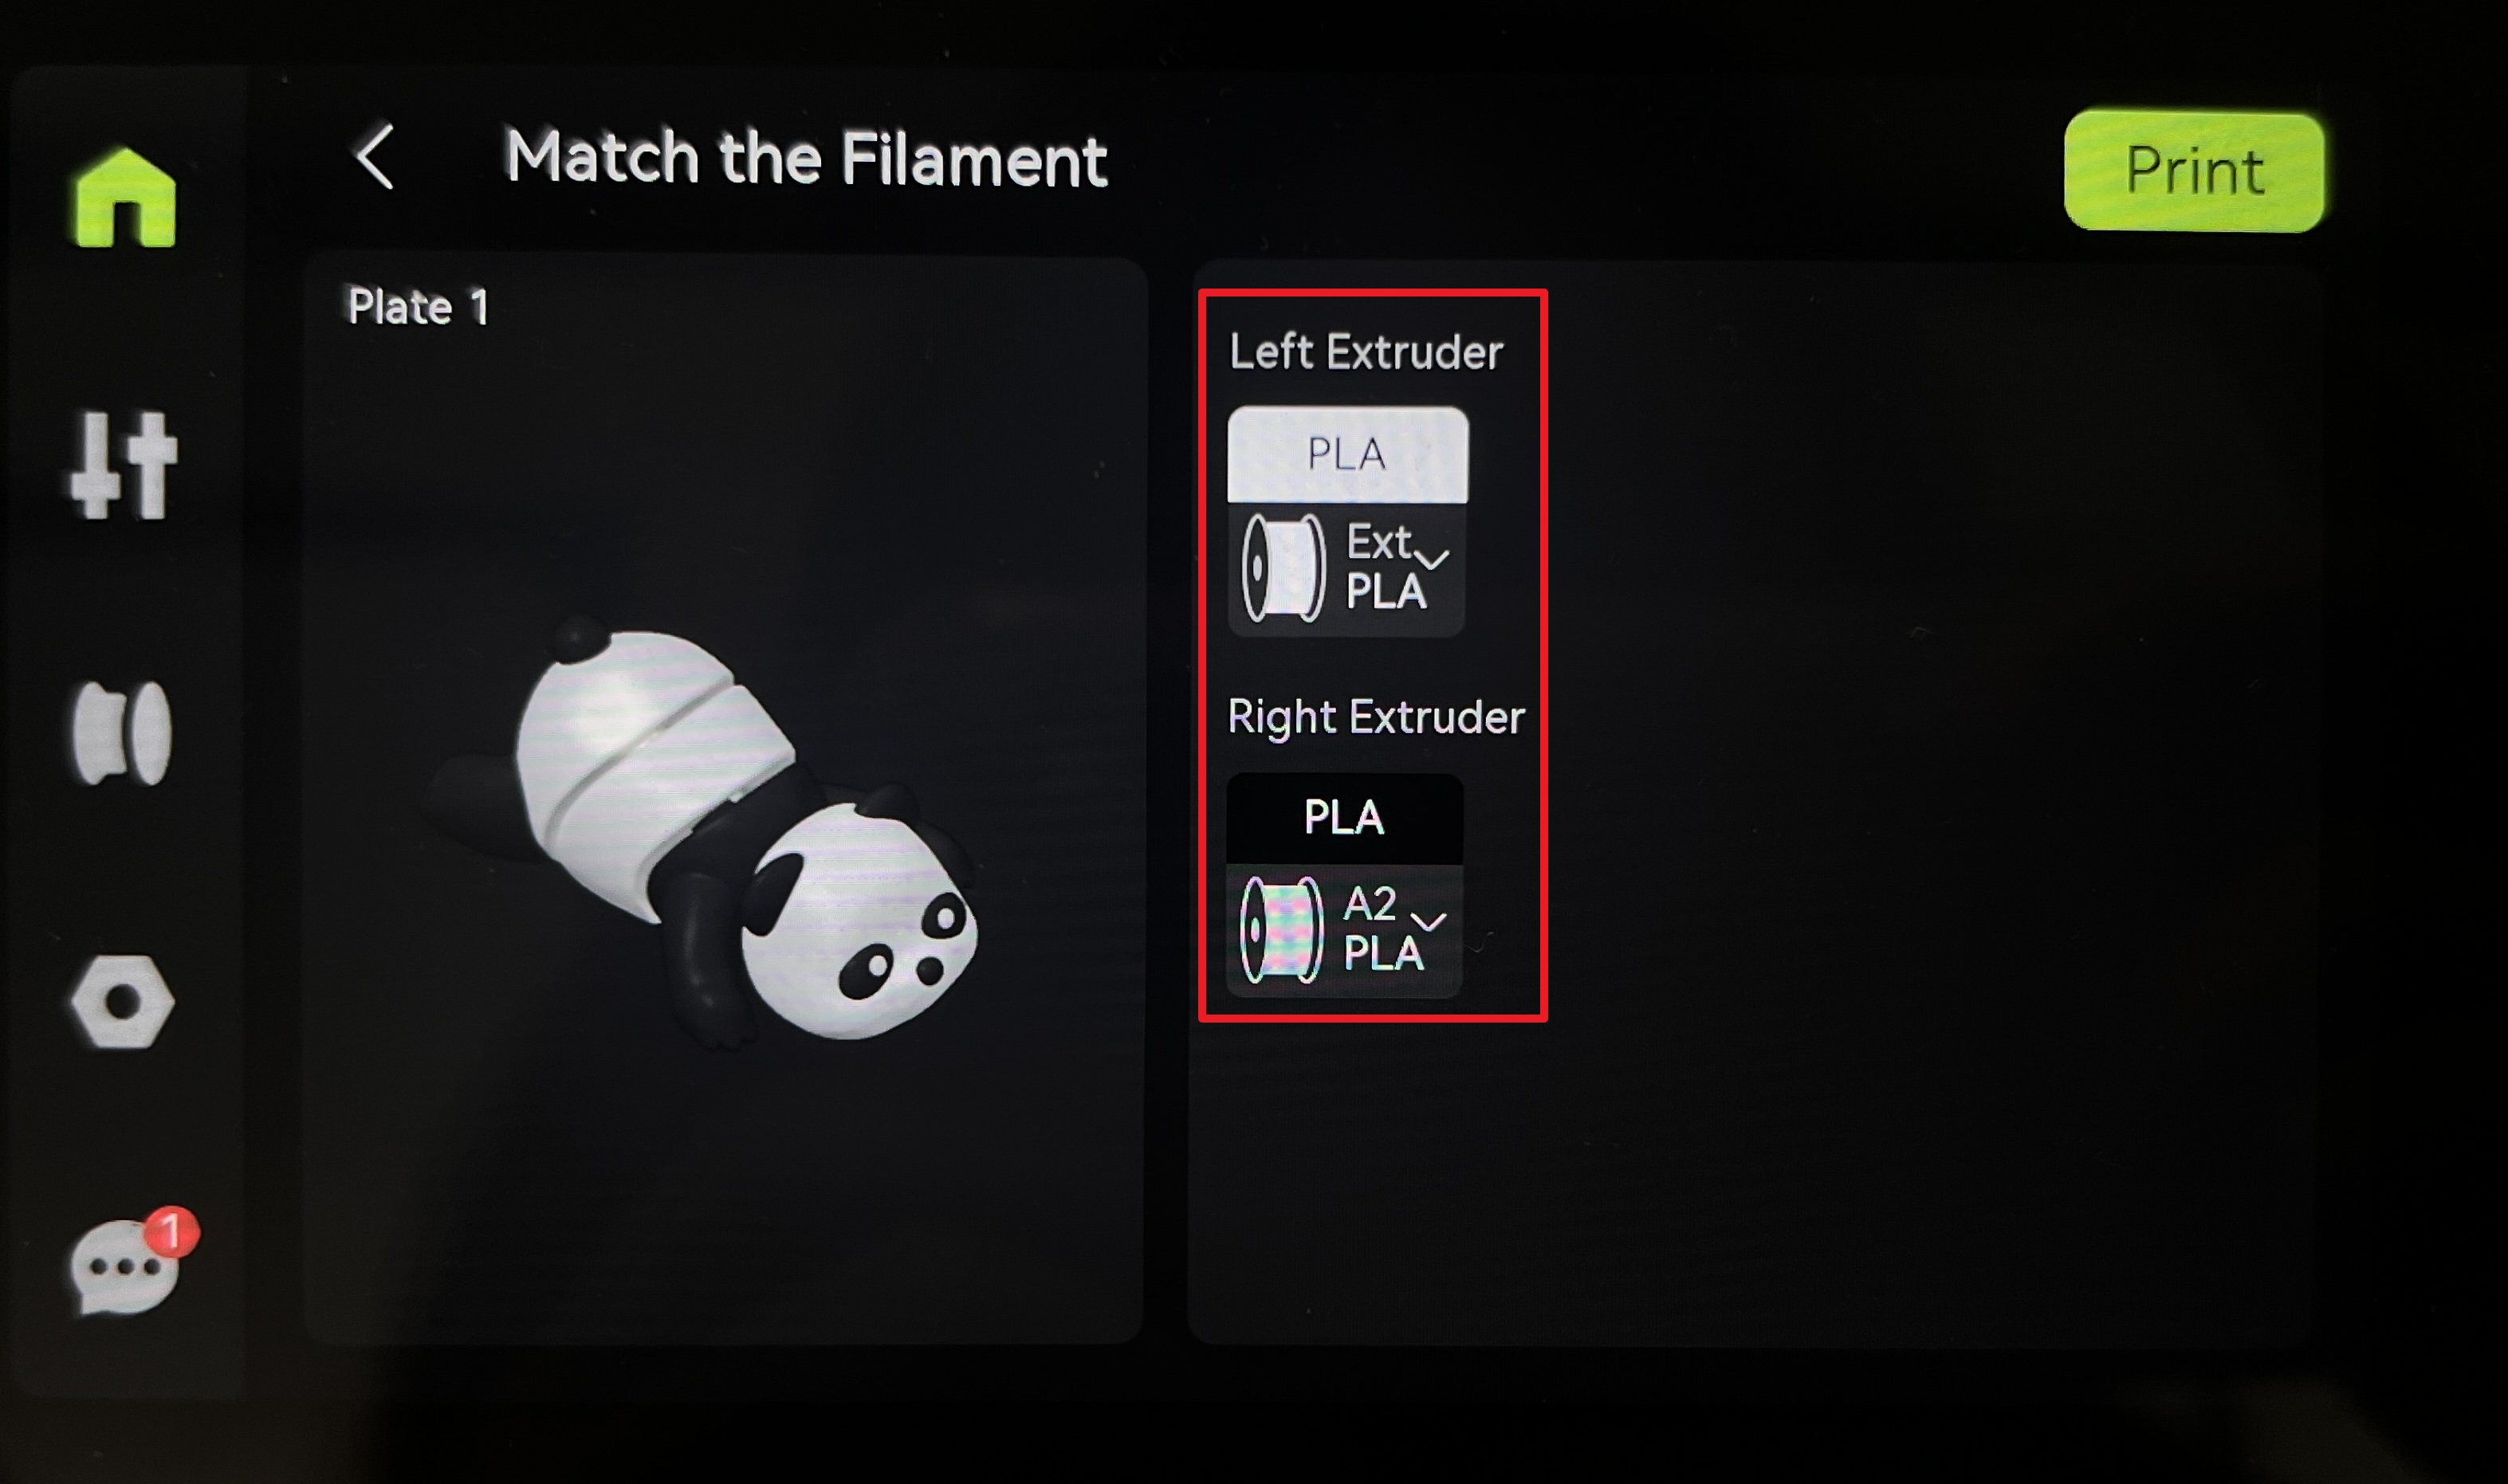
When initiating a print from Bambu Studio, it will automatically map to the filament of the same type and closest color. You can manually adjust this mapping if needed.
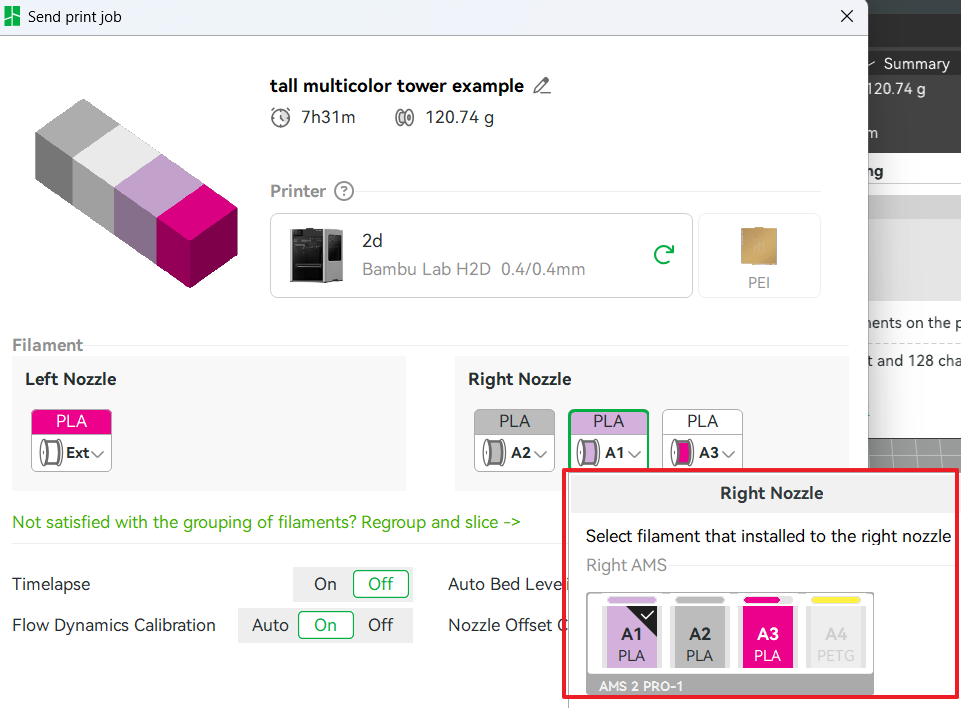
Before sending the print task, carefully check the popup window to confirm whether each selected color corresponds to the expected AMS slot. If not, you can still modify it at any time.
If a slot shows “?”, it means a third-party filament is being used and filament information has not been configured. However, you can still select it for printing (make sure the filament in that slot matches the slicing material type).
¶ Start the print job from the SD card
If you are starting a print job using the SD card, there is no need to pre-select the AMS slot information during the slicing process in Bambu Studio. Instead, you can simply slice the model and import the sliced file directly to the SD card.
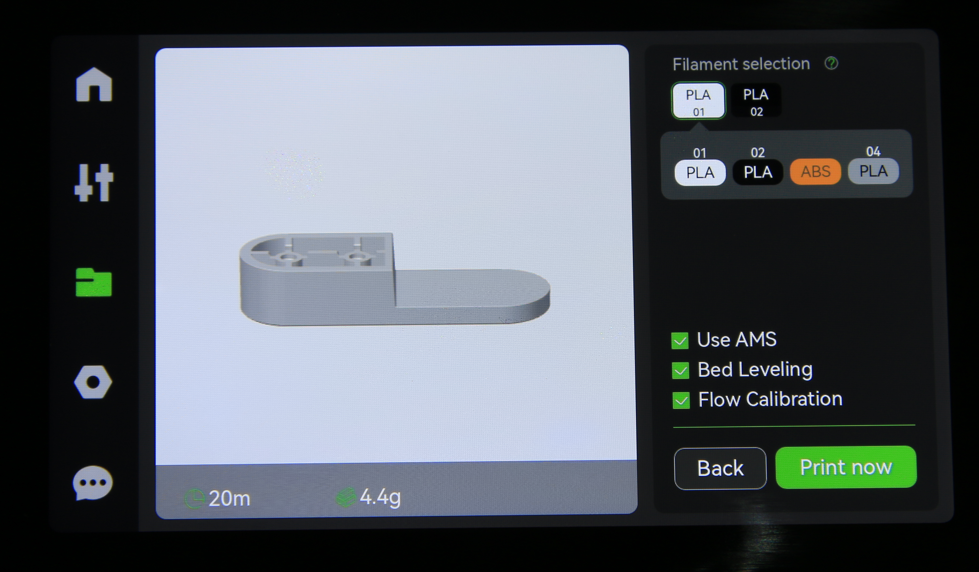
After selecting the printed file on the SD card, it will first automatically map the slot that matches the filaments of the same kind with the closest color, as shown in the figure below:
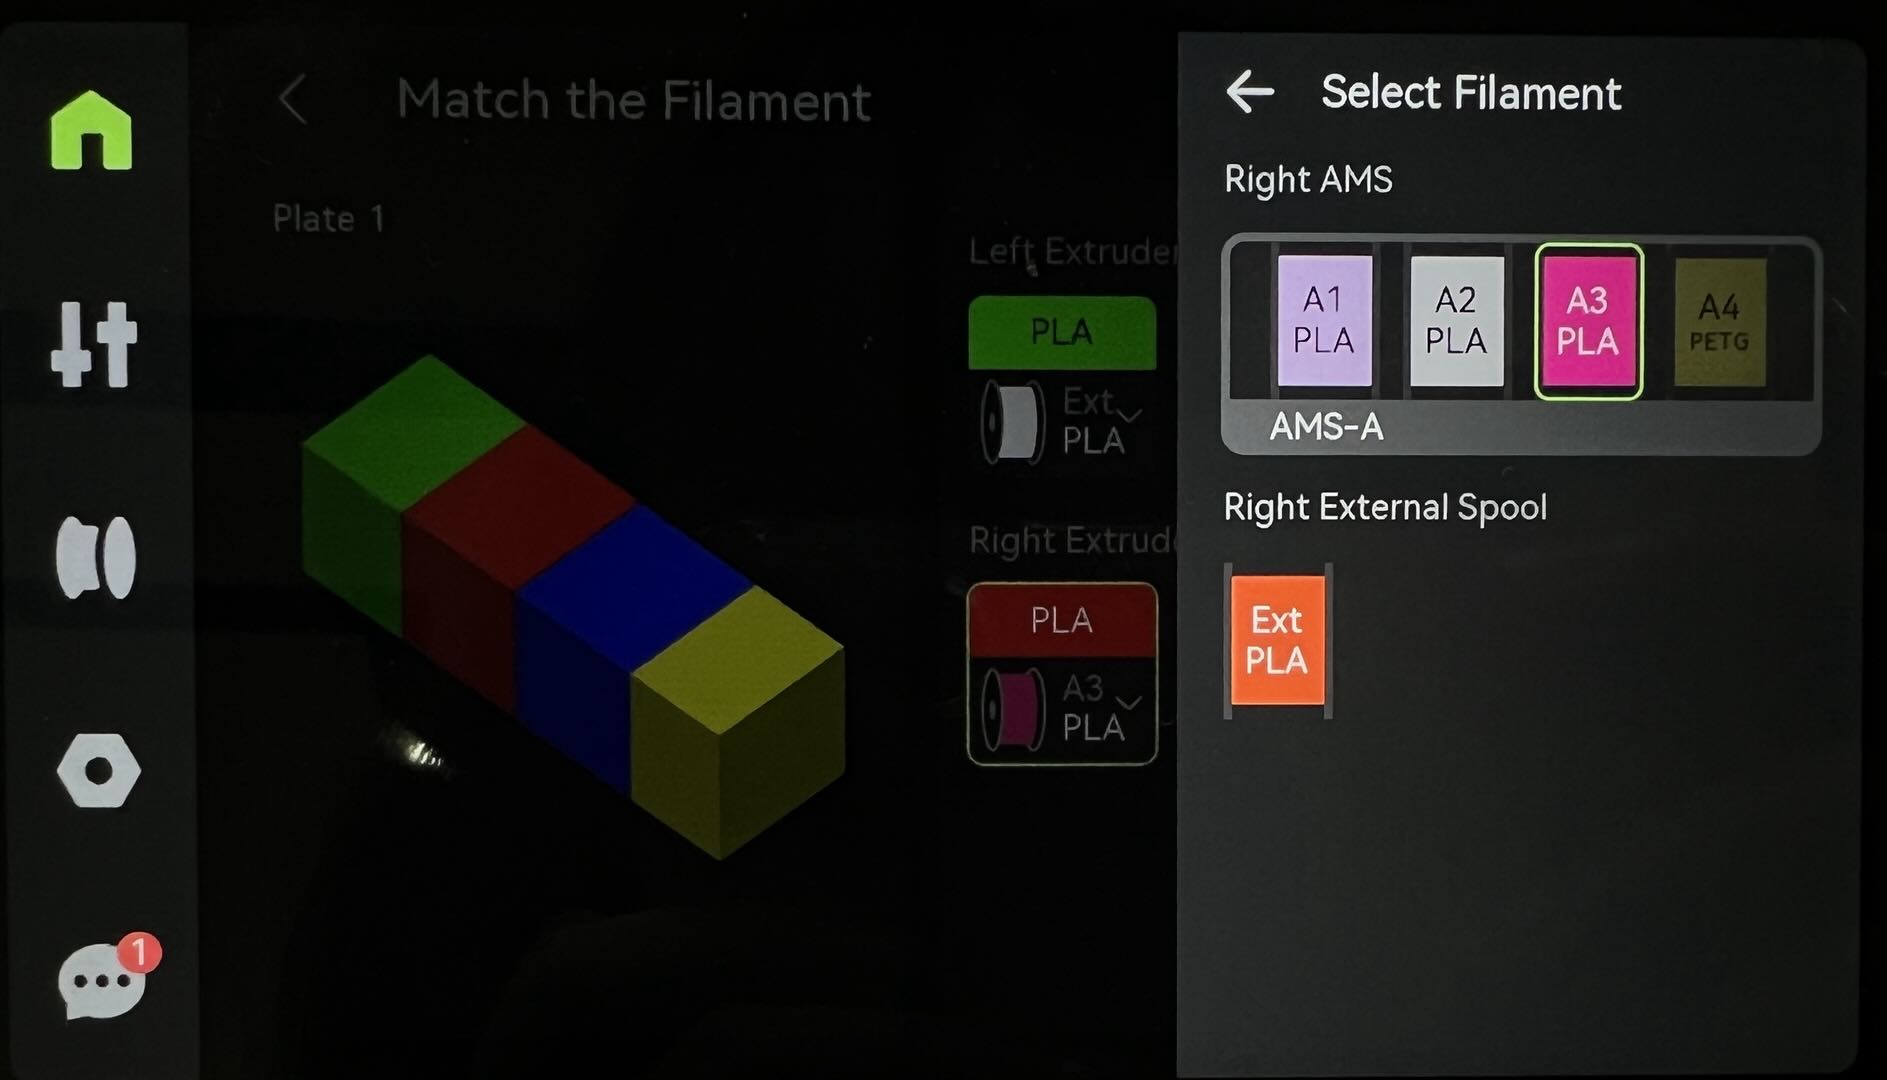
If you wish to modify the mapping of colors, you can manually select the corresponding slots for each color on the screen.
If the filament type used for slicing does not match the filament type recognized by the AMS, you will not be able to select that filament for printing. In the example figure below, you can see that PLA slice files can be selected for printing using AMS slots 1, 2, and 4, but ABS in slot 3 cannot be selected.
¶ Print built-in models
¶ End Notes
We hope the detailed guide provided has been helpful and informative.
If this guide does not solve your problem, please submit a technical ticket, we will answer your questions and provide assistance.
If you have any suggestions or feedback on this Wiki, please leave a message in the comment area. Thank you for your support and attention!