¶ Introduction
This guide is intended to introduce the X1 series printer screen buttons and operating functions.
¶ Homepage
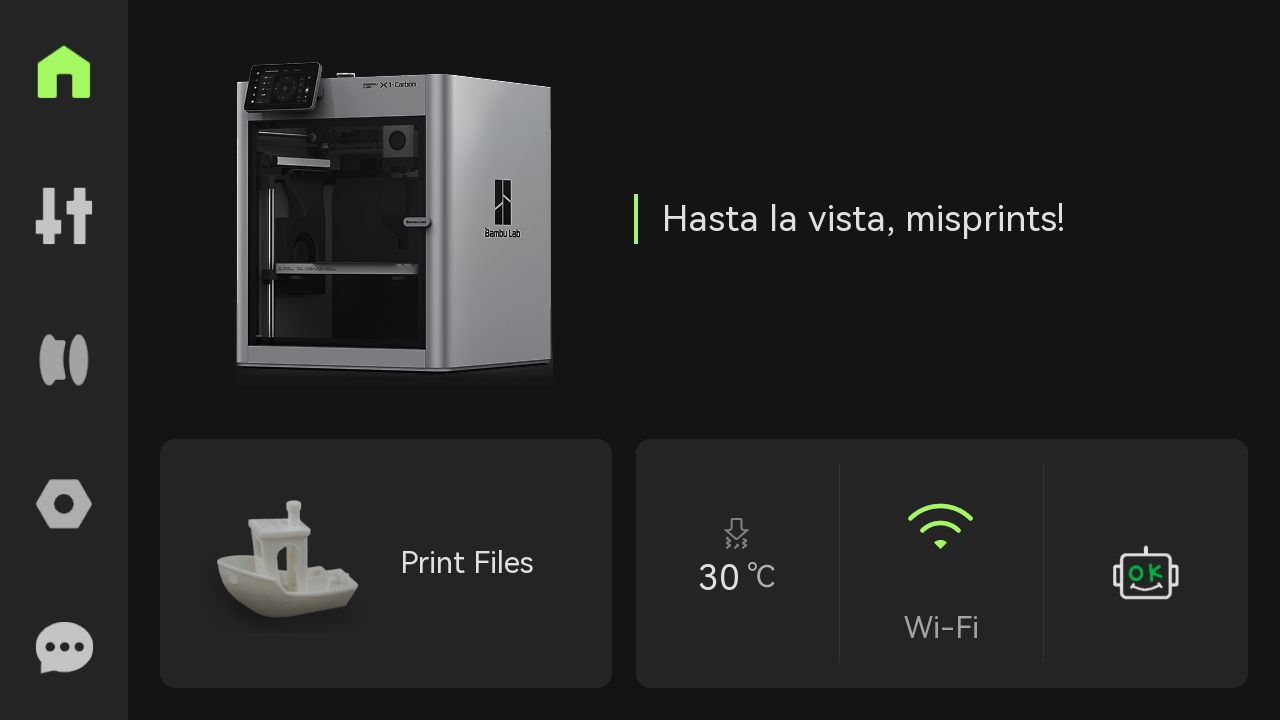
On the left side of the homepage is an on-screen menu bar that includes Homepage, Controls, Folders, Settings, and HMS; on the right side is the Print Files, Nozzle Temperature, Filament, Network Settings, and HMS.
¶ Controls
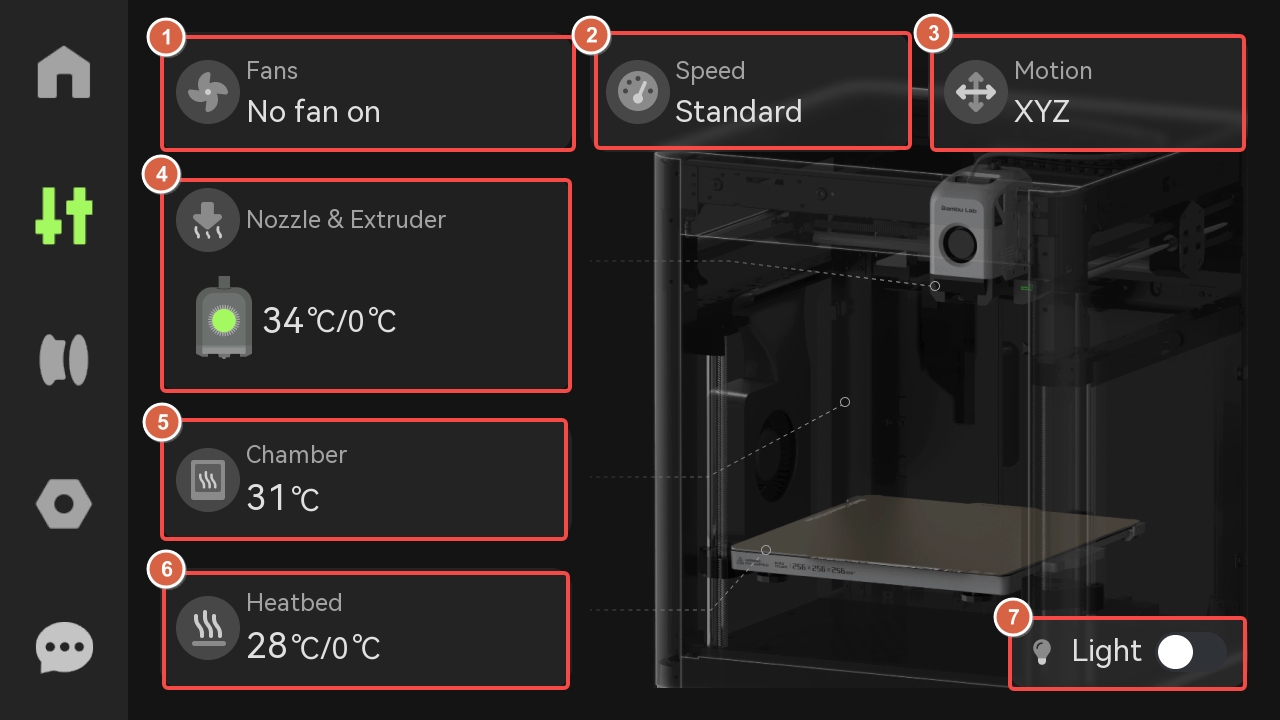
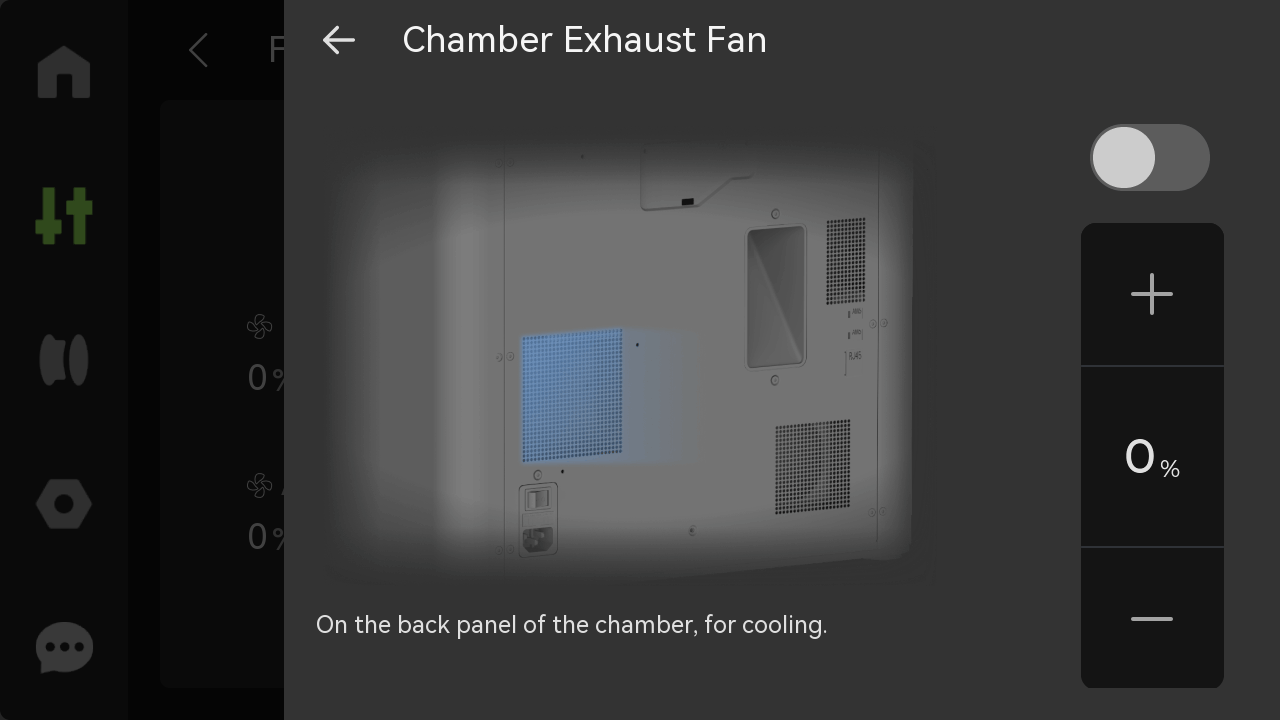
¶ 1. Fans

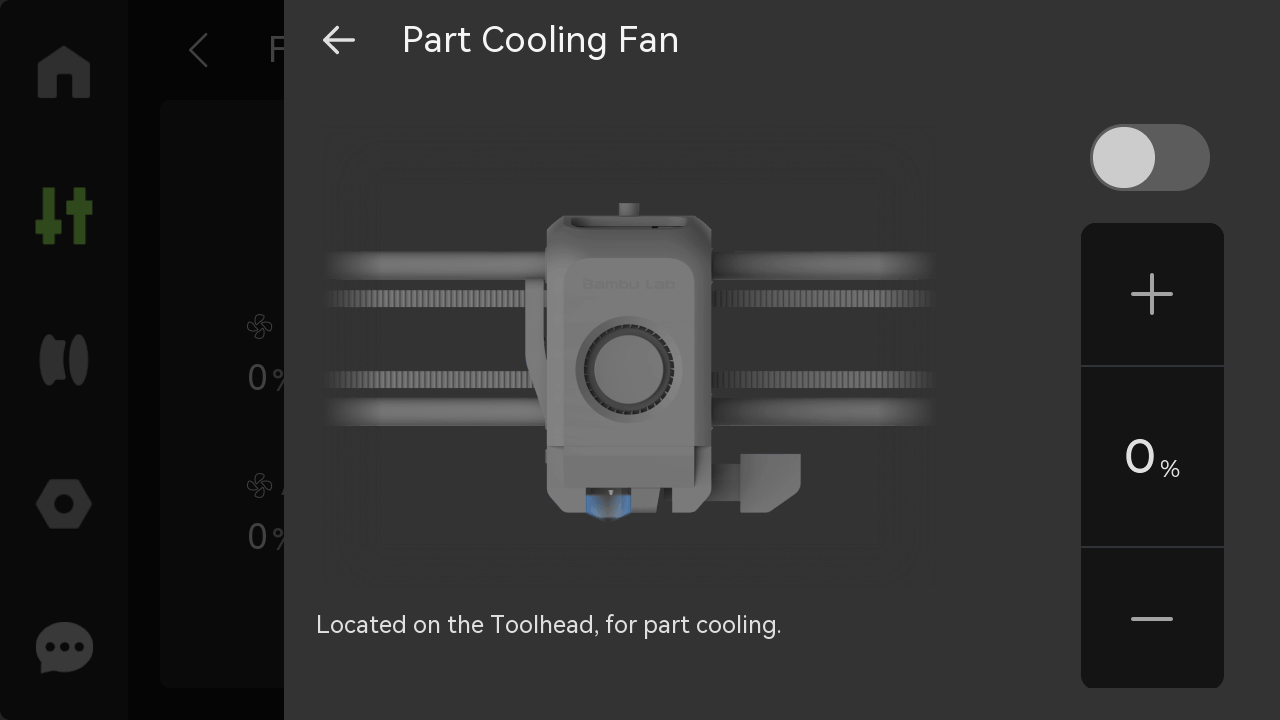
Turn on or off the part cooling fan, auxiliary part cooling fan and chamber temperature regulator fan, and set the speed.
- Part Cooling fan: It is installed on the toolhead, and is used to ensure adequate cooling of the printed layers during the printing process. It helps in rapidly cooling the material as it is extruded, allowing each layer to solidify and maintain its shape before the next layer is deposited.
- Auxiliary Part Cooling Fan: It is installed on the left side of the chamber, and provides a better cooling condition for high-speed printing.
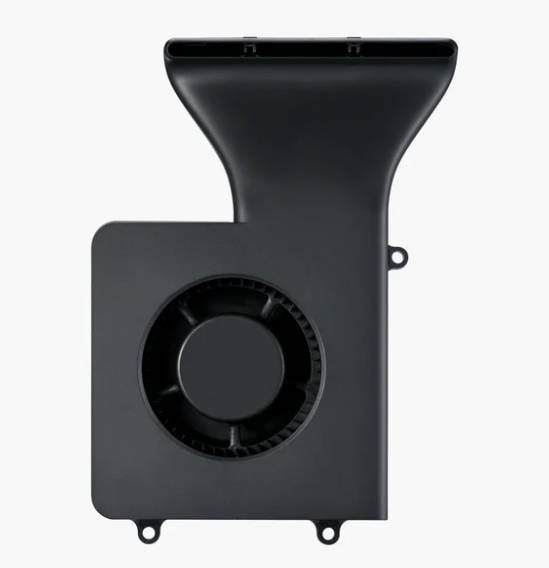

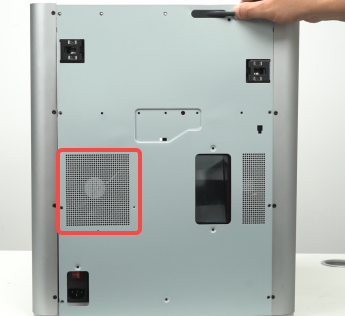
- Chamber Exhaust Fan: It is installed on the right inner lining of the printer, it is mainly used to adjust the temperature inside the printer chamber.
¶ 2. Speed
Set the printing speed mode.

- Ludicrous: 166% of normal print speed and acceleration
- Sport: 124% of normal print speed and acceleration
- Standard: normal print speed and acceleration
- Silent: 50% of normal print speed and acceleration
Please note that changing the print speed from the screen only increases the print speed and does not adjust the hotend temperatures to compensate. It is recommended to use lower layer heights when using higher print speeds adjusted from the screen, and to adjust the print settings correctly to avoid print failures.
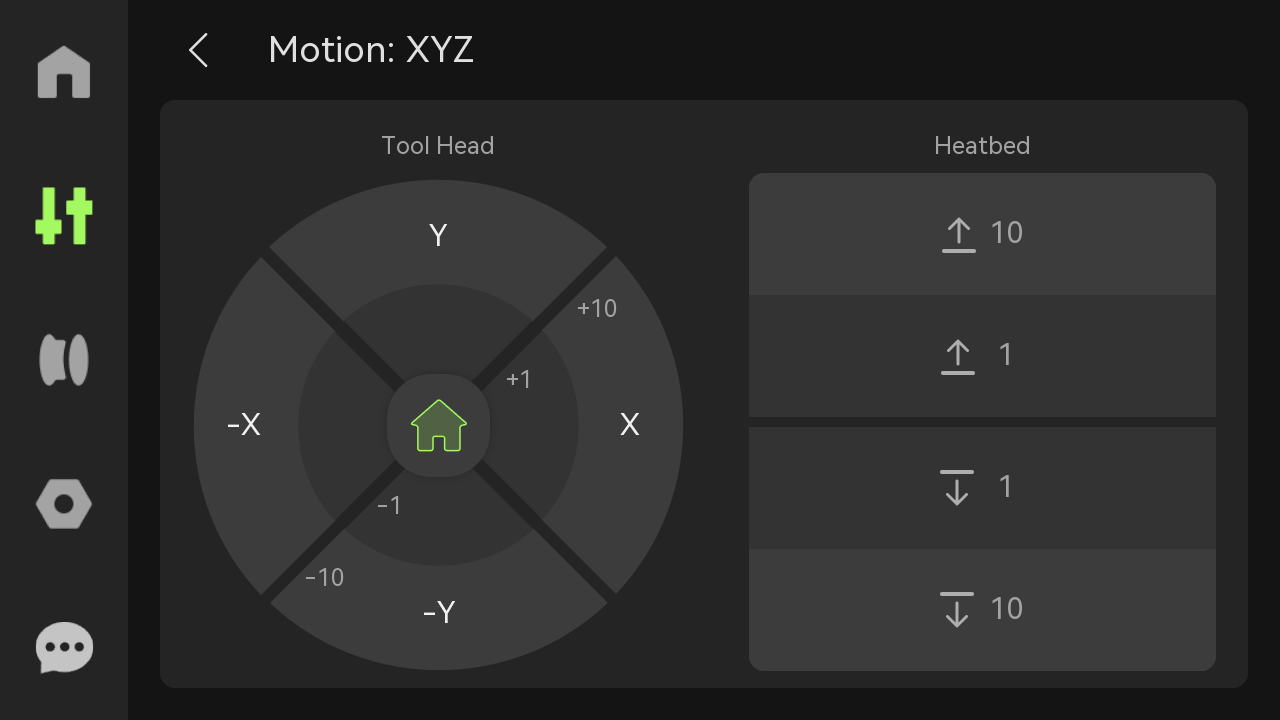
¶ 3. Motion
Toolhead: Click +1 or +10 to control the toolhead movement in the X-axis and Y-axis.
Heatbed: Click the 1 or 10 move button to raise or lower the heatbed.
¶ 4. Nozzle & Extruder
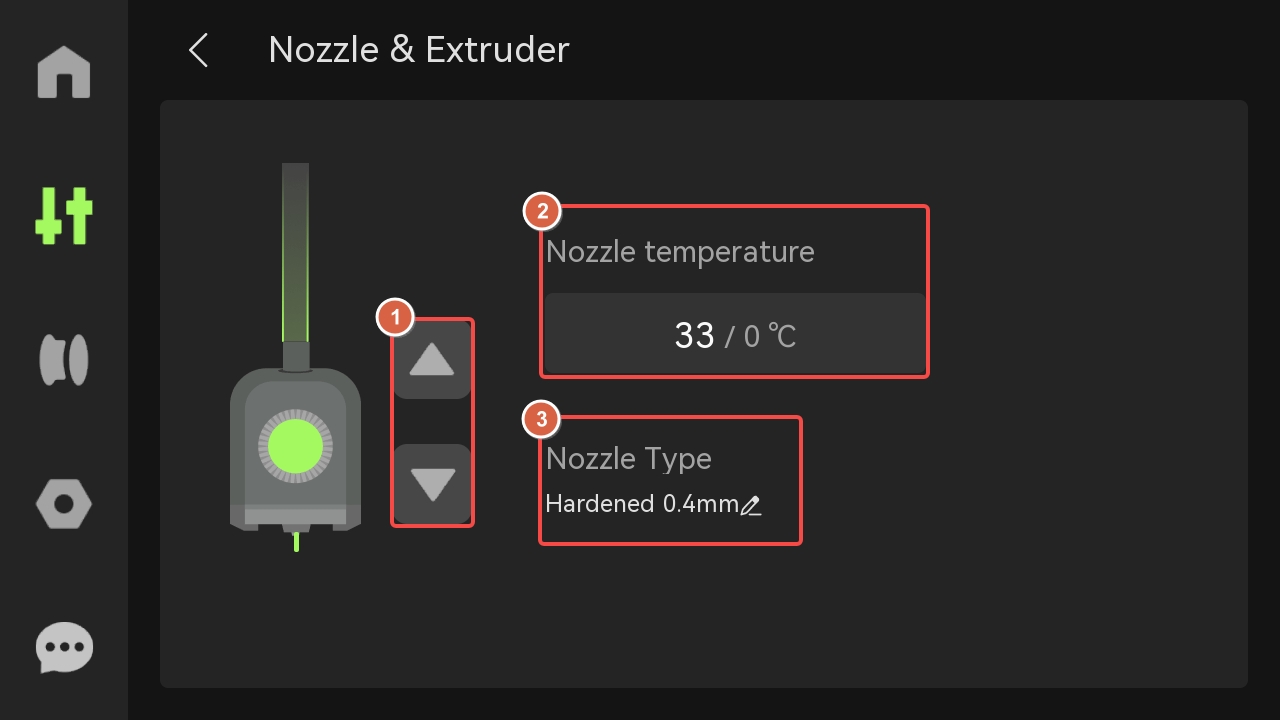
- Extruder: Click the up and down buttons to manually extrude or eject 1 cm of filament.
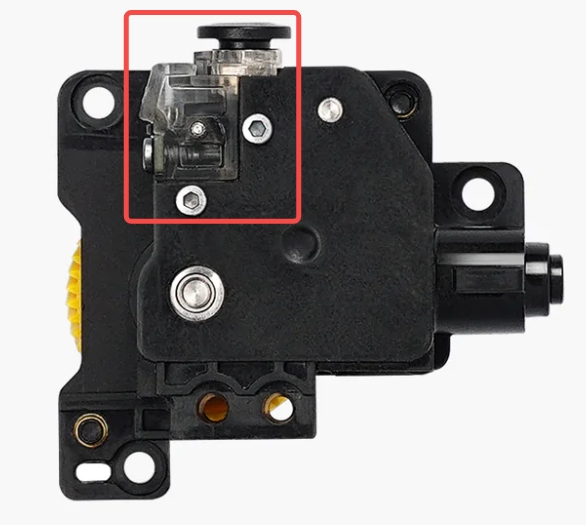
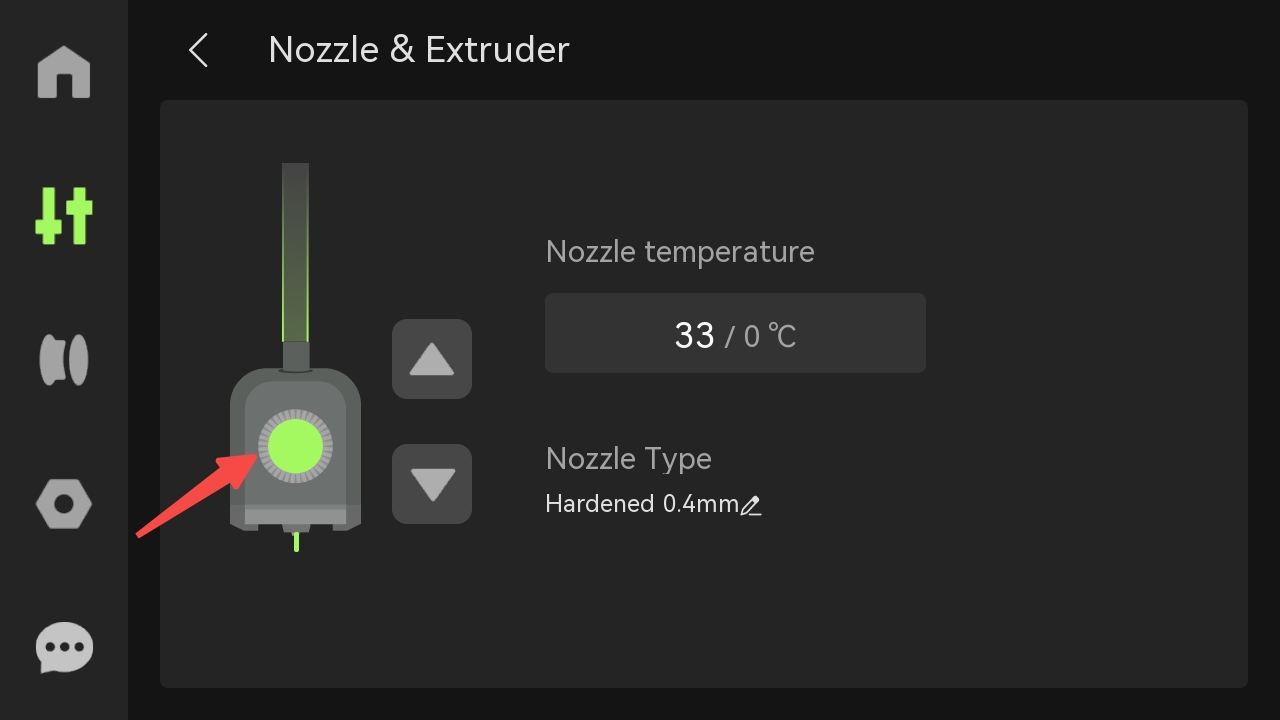
If the green light is on, the extruder filament sensor has detected the entry of filament.
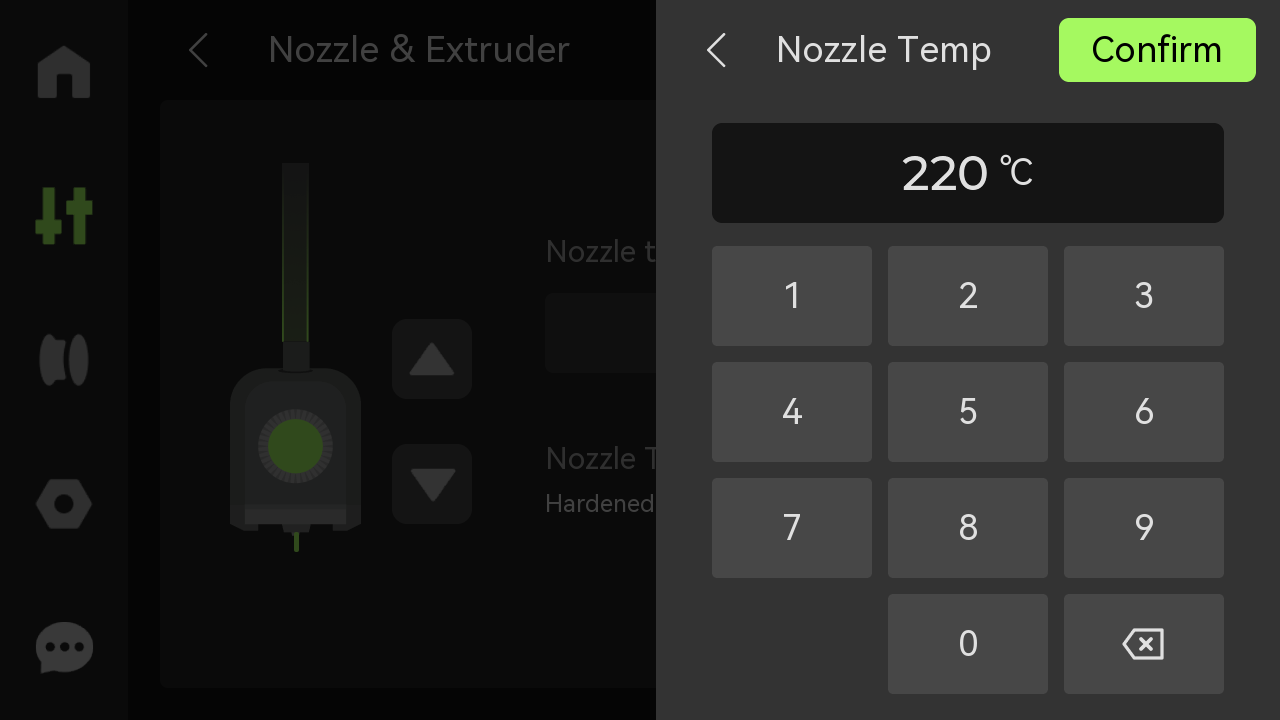
- Nozzle Temperature: Enter a value to set the temperature of the left nozzle.
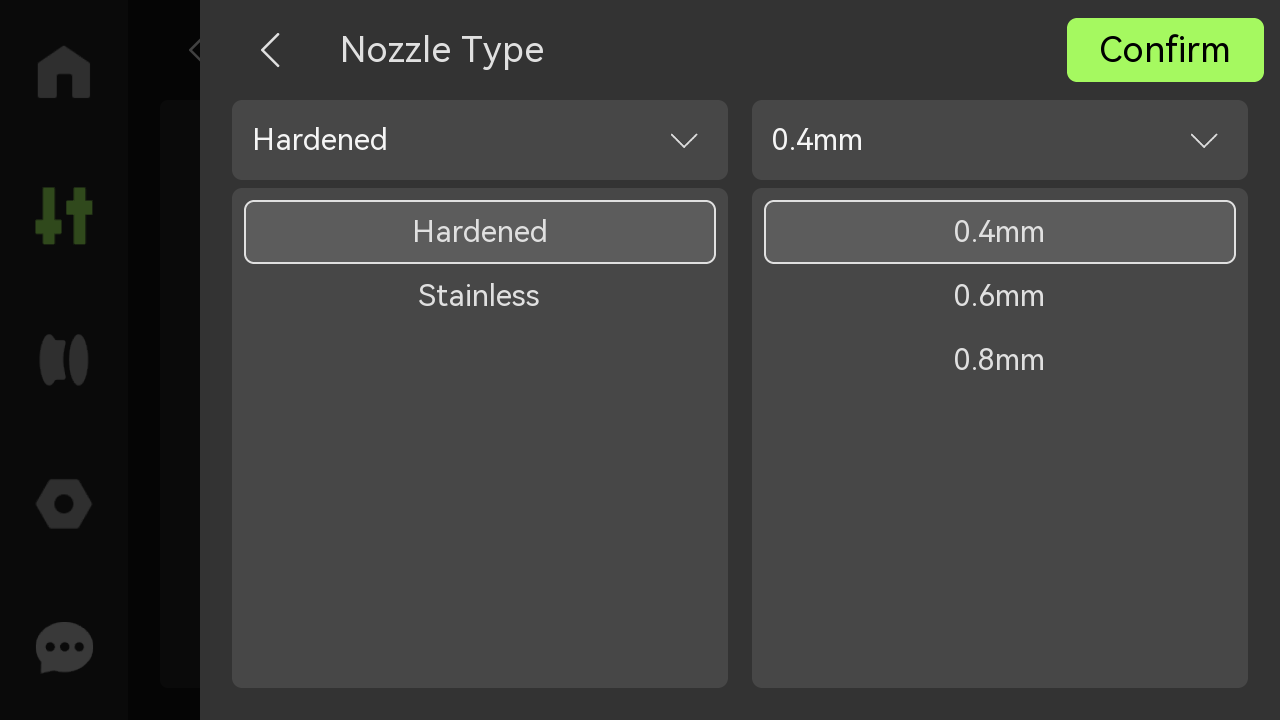
- Nozzle type: Set the type, material, and diameter of the nozzle.
¶ 5. Chamber
Display the chamber temperature. (X1E can set the chamber temperature actively, please refer to: X1E Chamber Setting Guide)
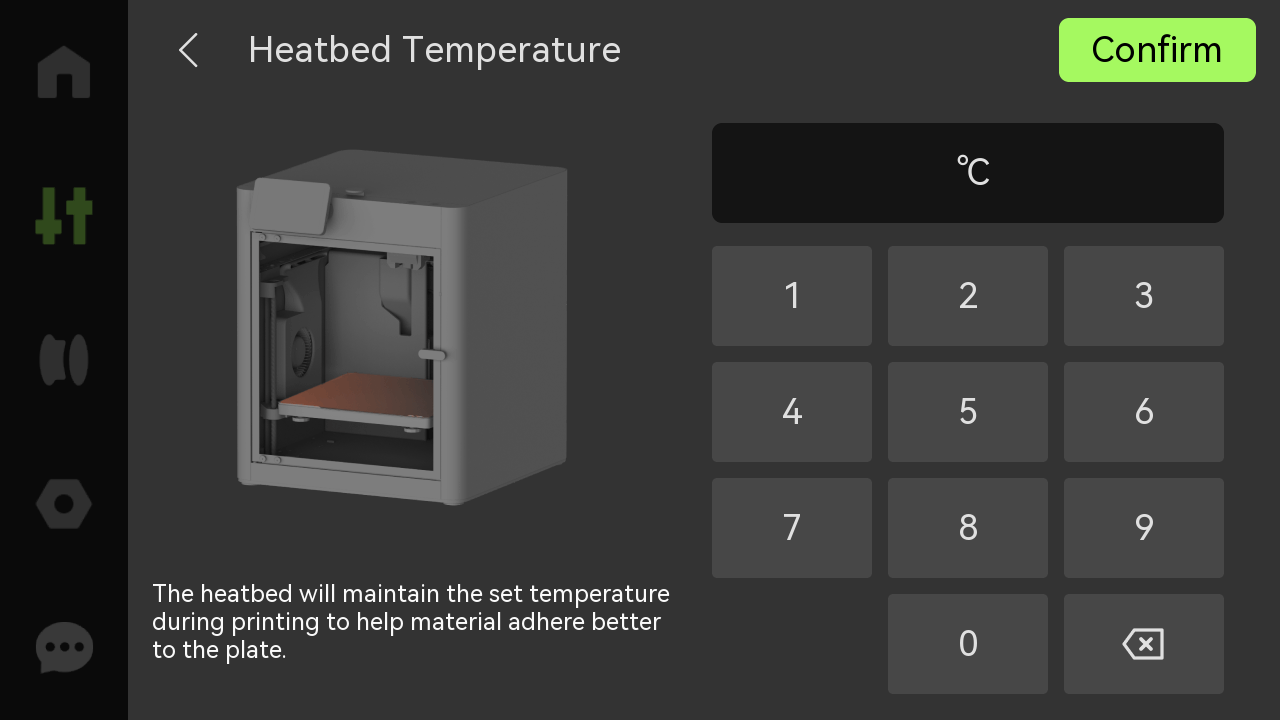
¶ 6. Heatbed
Enter a value to set the heatbed temperature.
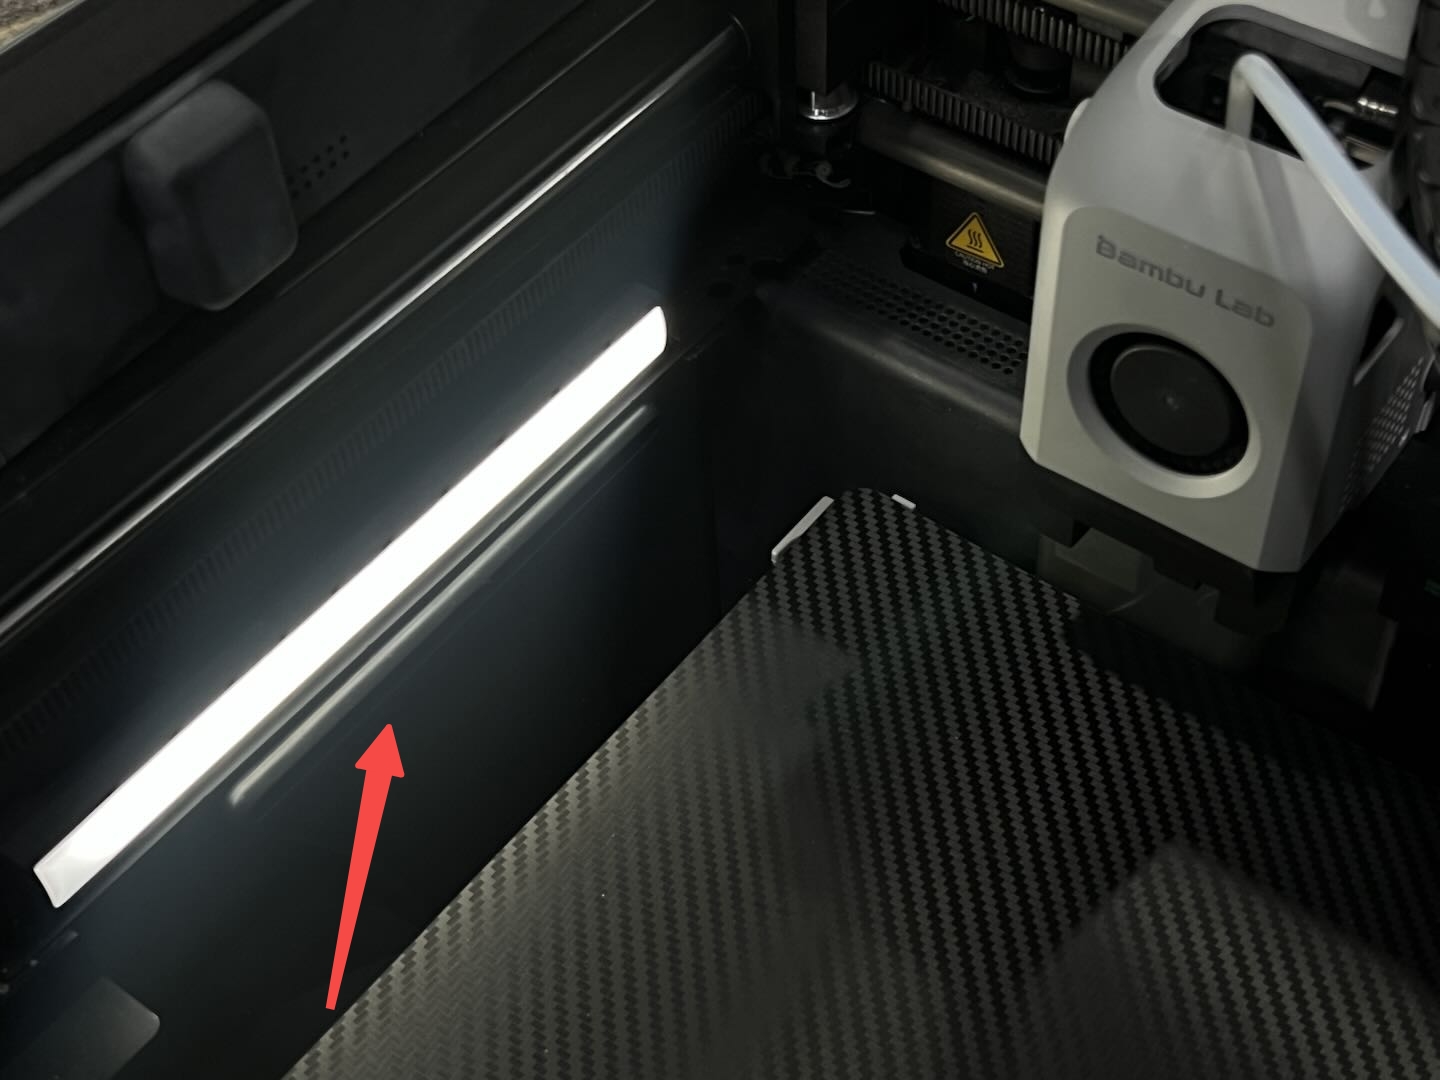
¶ 7. Light
Click the icon to open or close the LED light.
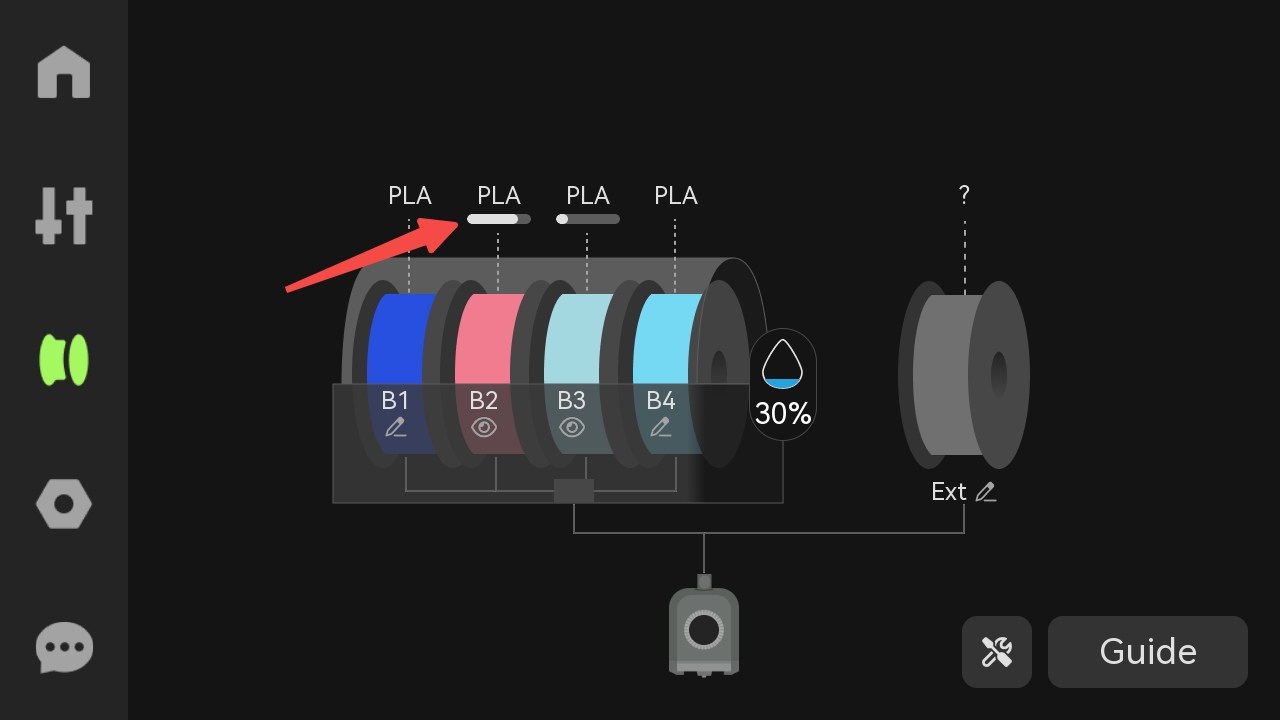
¶ Filament
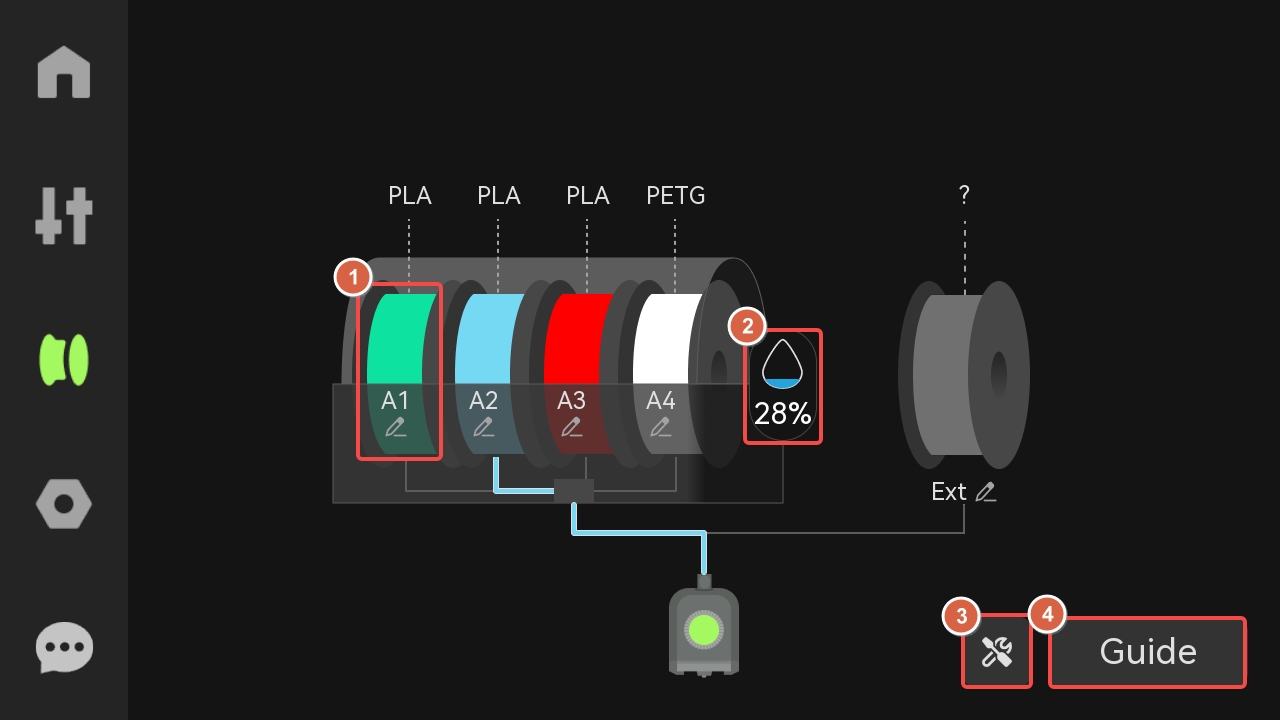
¶ 1. Spool
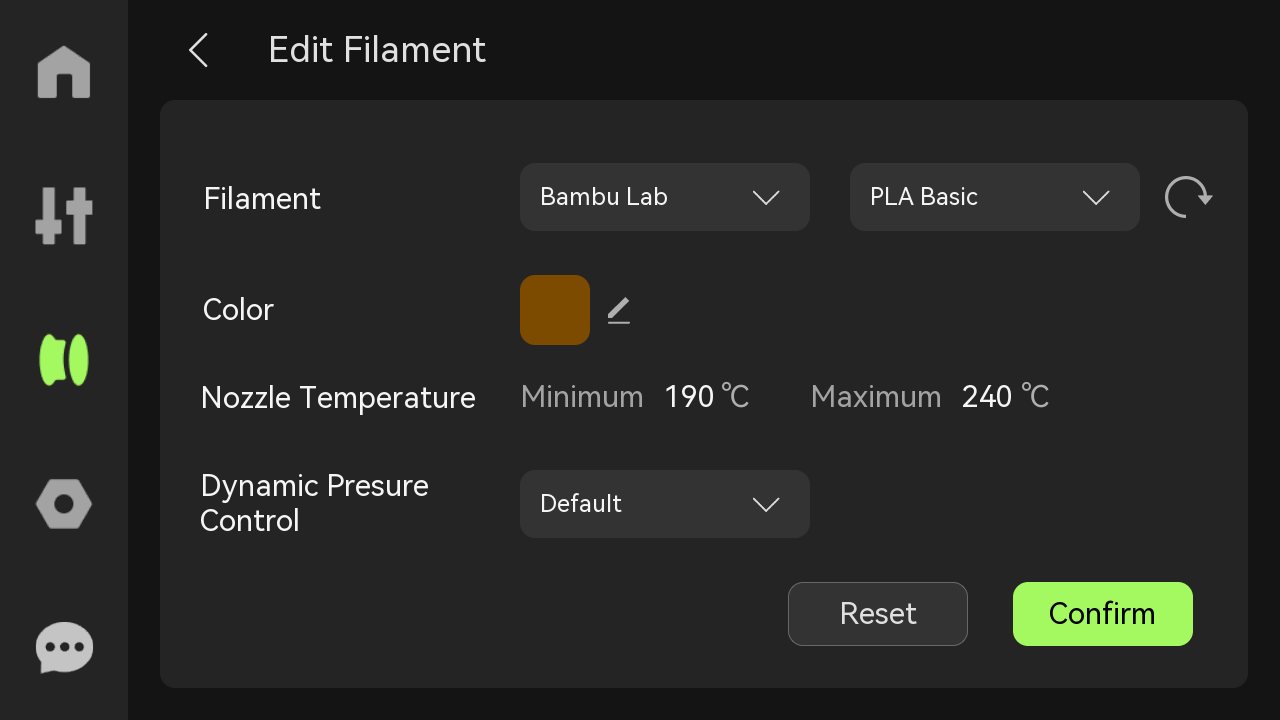
Click any spool icon to edit, load/unload, and re-read filament RFID.
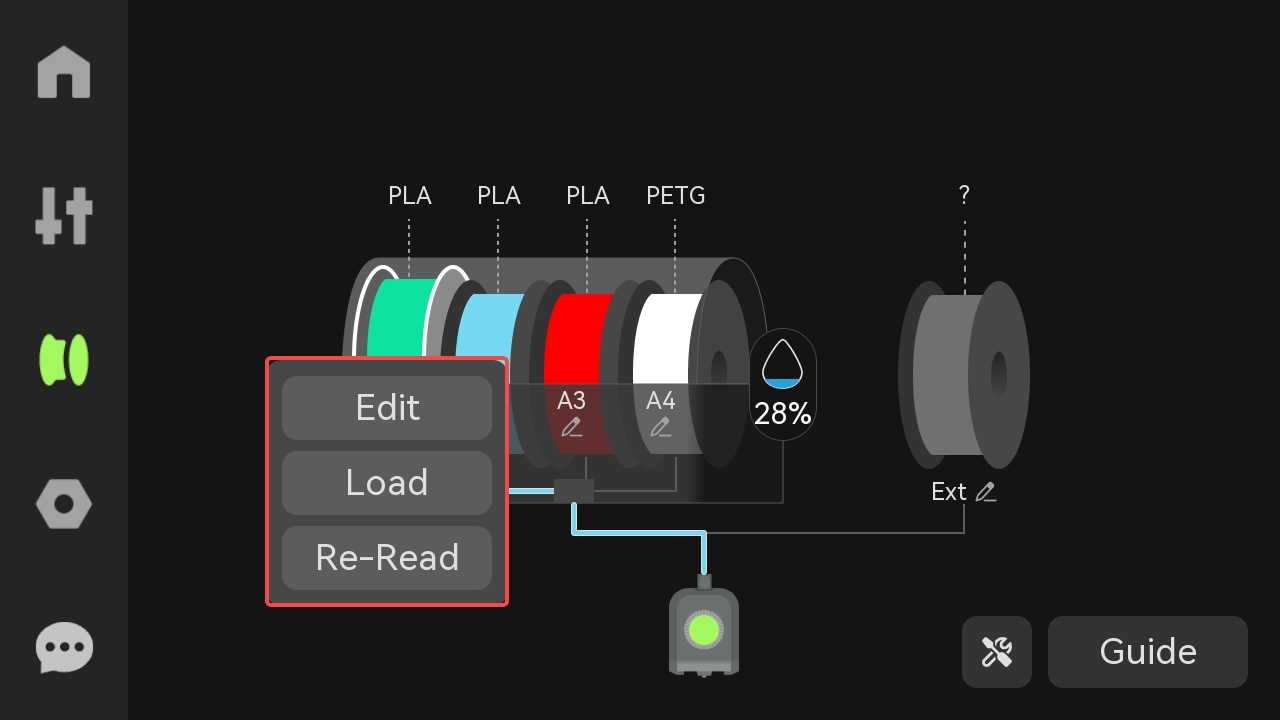
- Edit: If AMS has identified a spool through RFID, you can view the filament information here, but you cannot modify the filament parameters; if the RFID is not read, you can modify the filament information here;
RFID read:

RFID not read:
Load: Click the button, and the AMS will automatically feed the filament into the extruder;
Re-Read: Click the button, and AMS will reread the RFID of the spool in the slot.
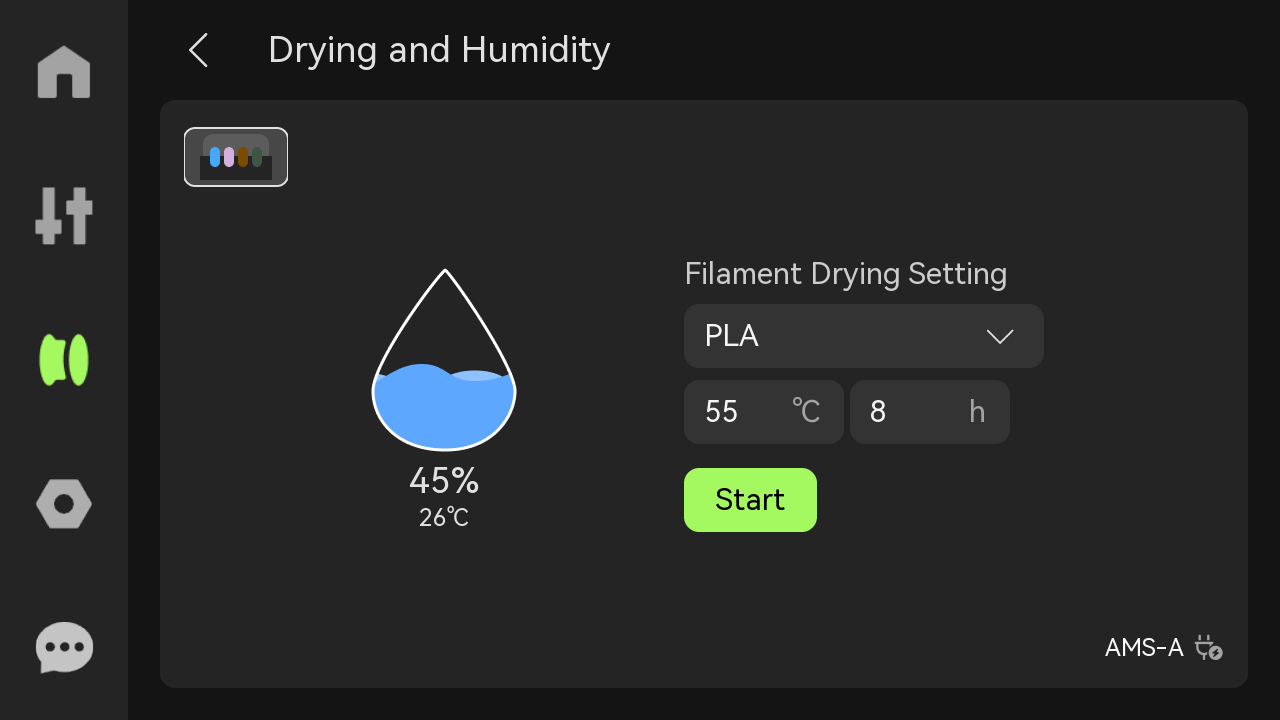
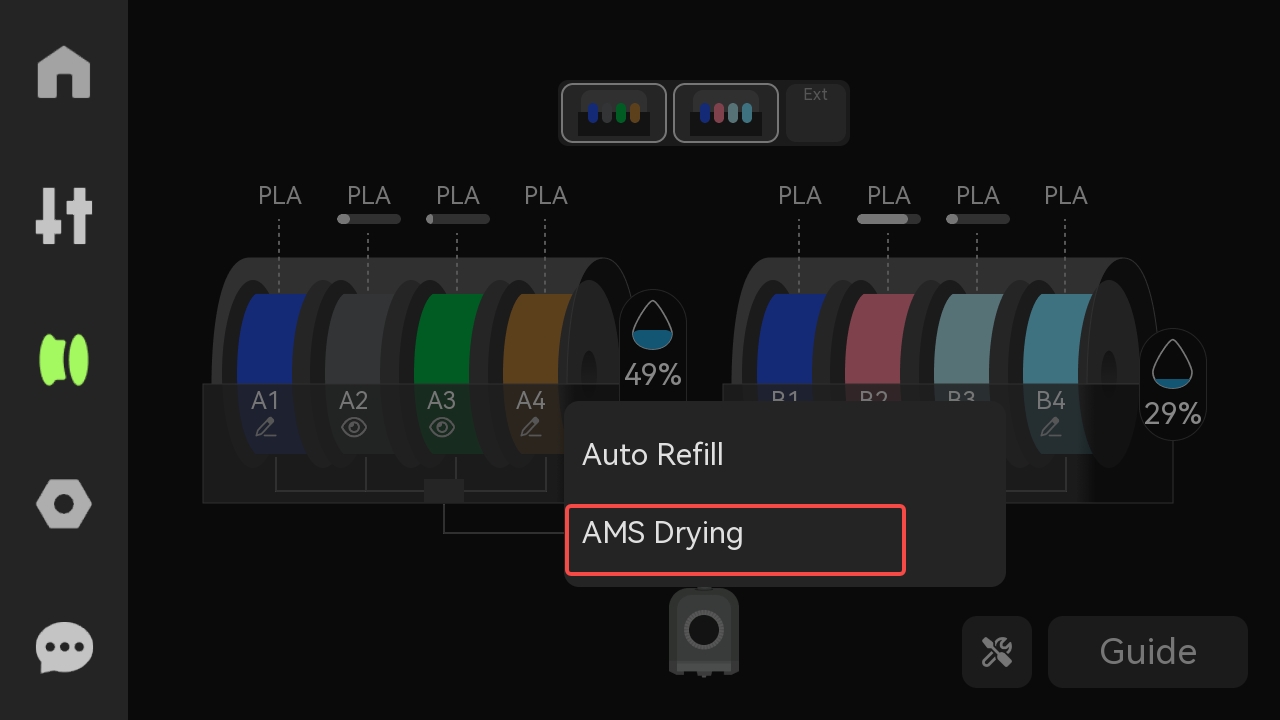
¶ 2. Humidity
You can check the humidity inside the AMS.
If the AMS 2 Pro is connected, the humidity and temperature inside the AMS 2 Pro will be displayed. Click to enter the drying page to dry the filaments.

¶ 3. External Spool
If an spool holder is used, you can configure the filament color and type here. This information will always be displayed whether or not the spool holder have filaments.
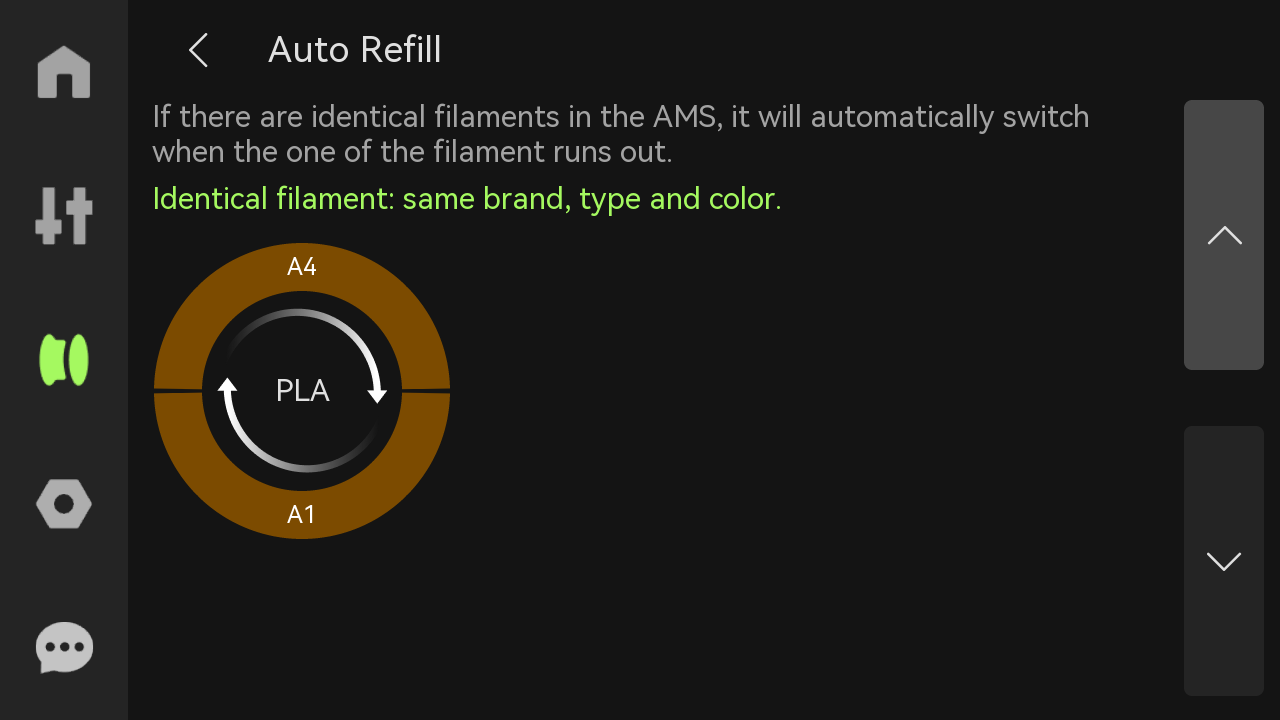
¶ 4. Tools
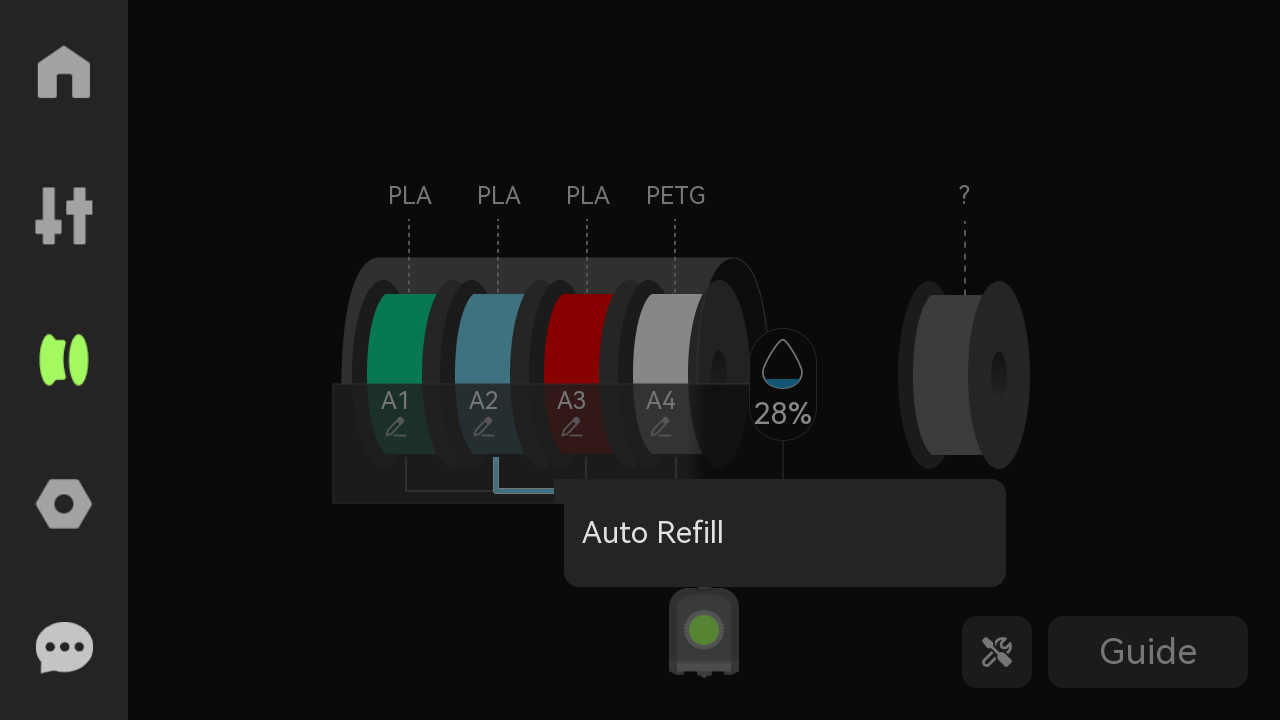
Auto Refill: AMS will continue to another spool with the same properties of filament automatically when the current filament runs out. Ensure that the spool contains supplies with the same properties and that the corresponding spool information on AMS is accurate. Please enable this feature in AMS Settings.
If AMS 2 Pro is connected, the "AMS Drying" function will also be displayed here. Click it to enter the drying page and dry the filaments.
¶ 5. Guide
Instructions for feeding operation: Select a specific slot, click the spool icon, and then click the Load button to trigger automatic loading.

¶ Setting
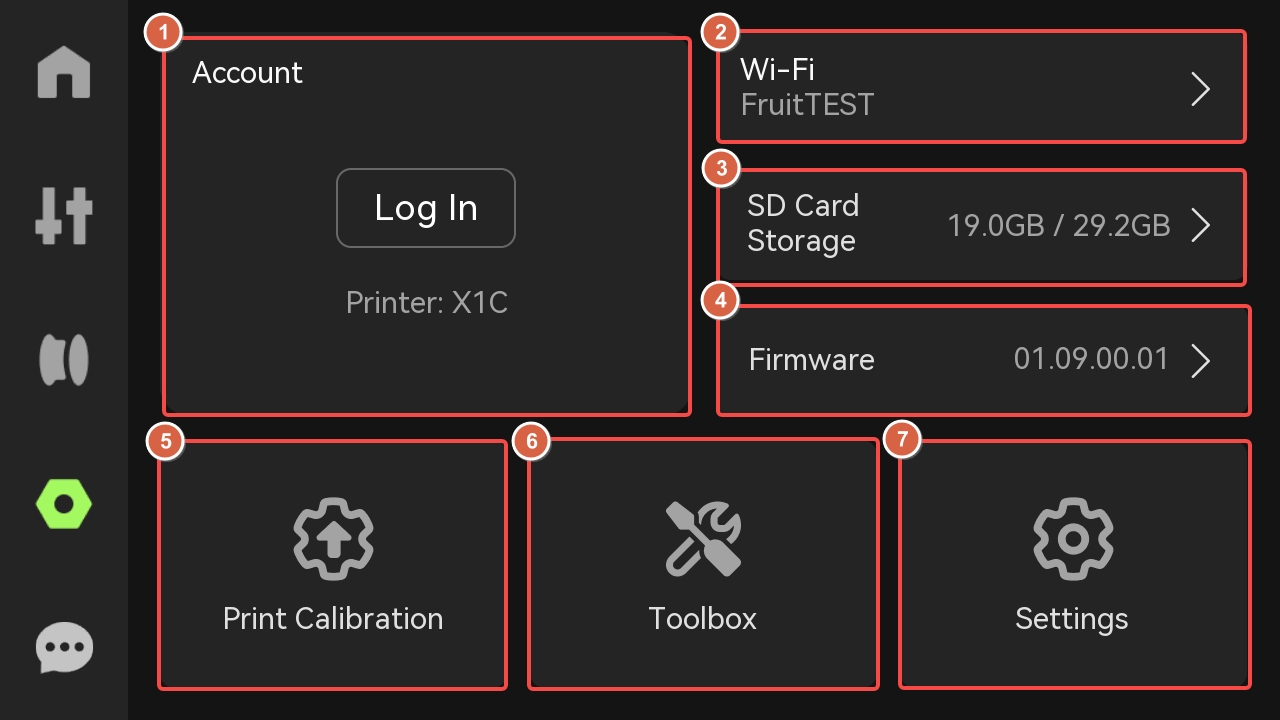
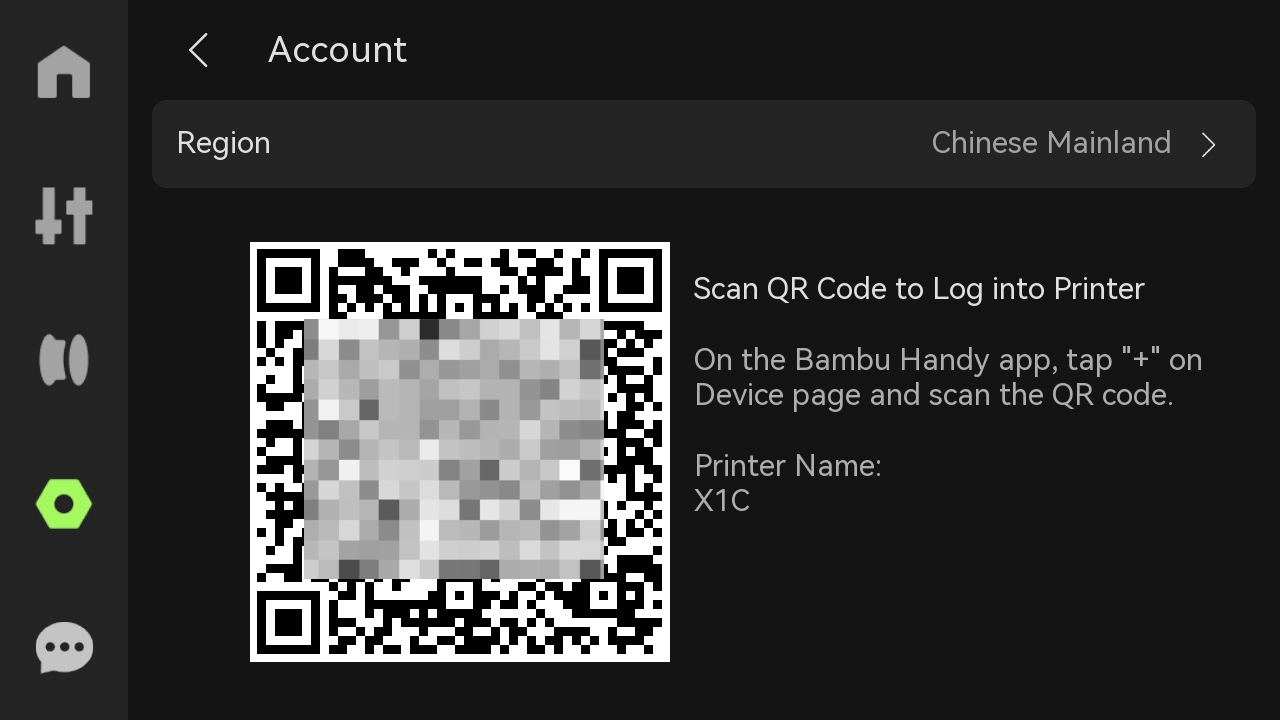
¶ 1. Account
Open Bambu Handy and scan the code to access the account.
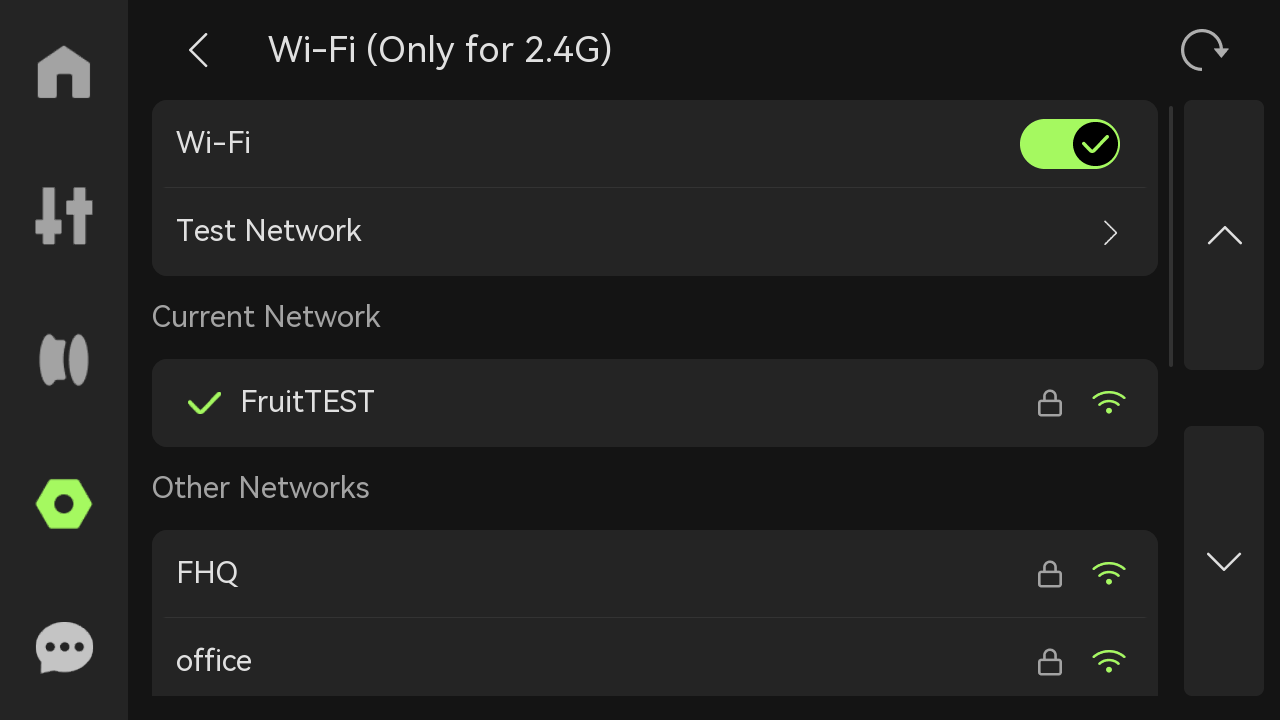
¶ 2. Wi-Fi
Set up the WLAN, view the current network, test network, or view and add other networks.
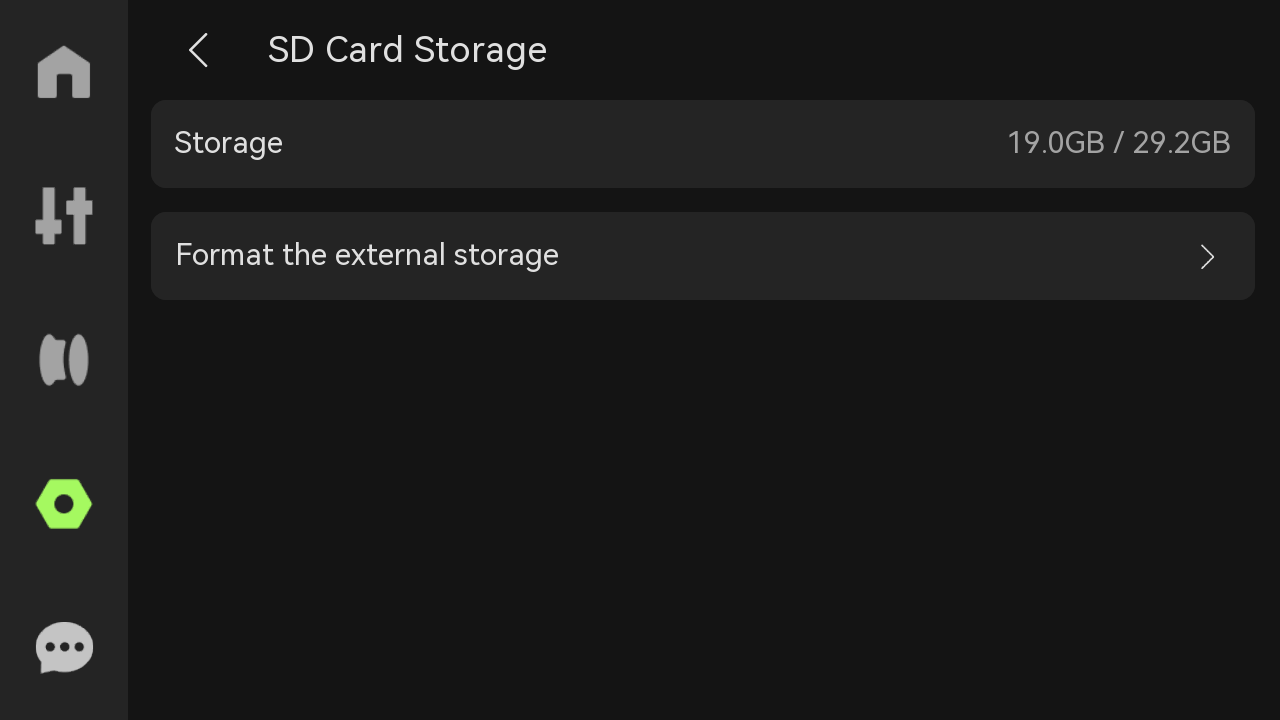
¶ 3. SD Card
Storage: Display the used capacity and maximum capacity of the USB flash drive.
Format external storage: Once reset, the storage cannot be restored.
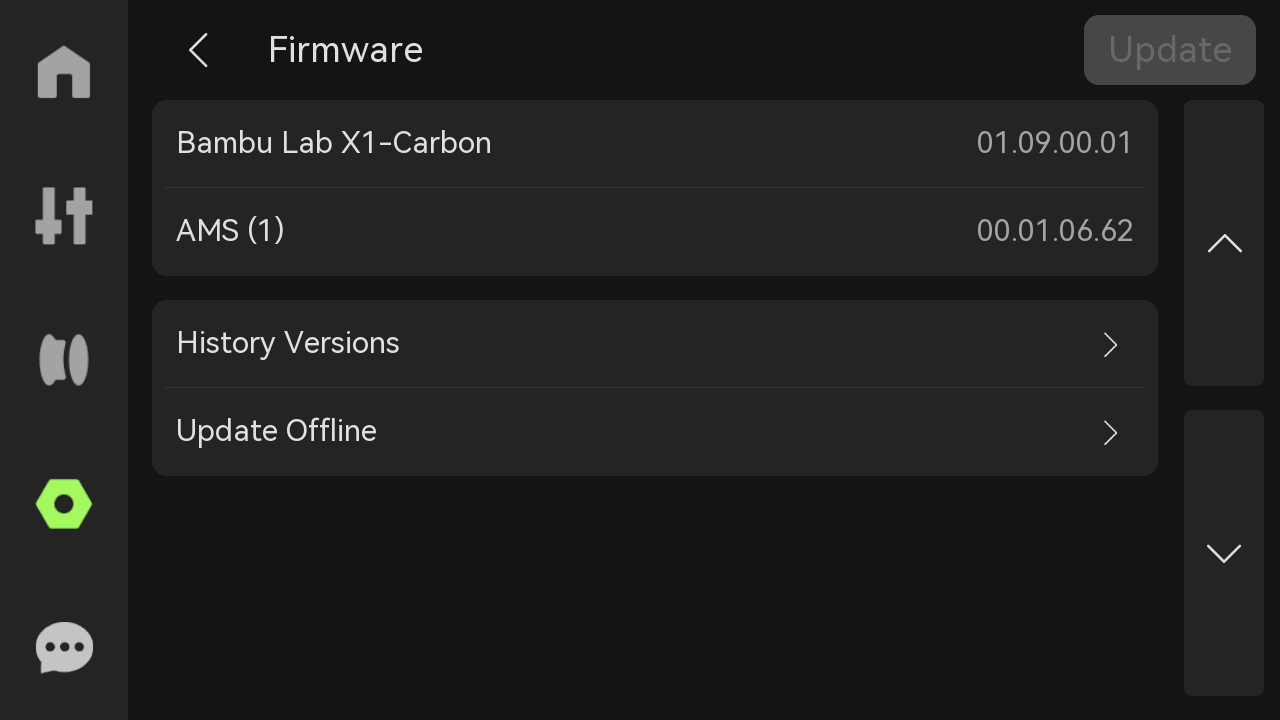
¶ 4. Firmware
View the current version of the device and historical versions, or perform offline upgrades. If the firmware needs to be updated, the "Update" button in the upper right corner will light up.
¶ 5. Print Calibration

- Micro LIDAR Calibration: Adjust the position of the laser and camera to ensure clear and accurate images of the laser line at different positions.
- Motor Noise Cancellation: Reduces motor noise during printing, especially when printing for extended periods or at high speeds, and makes the print surface smoother.
- Vibration Compensation: When any vibration is detected in real-time during printing, the toolhead position can be automatically adjusted to ensure the accuracy of printing. Especially when printing complex or detailed models, this calibration can effectively prevent errors caused by vibration and ensure that each layer is completed accurately.
- Auto Bed Leveling: Adjust the distance between the nozzle and the build plate to ensure that the gap is consistent at each corner and to improve printing accuracy.
¶ 6. Toolbox

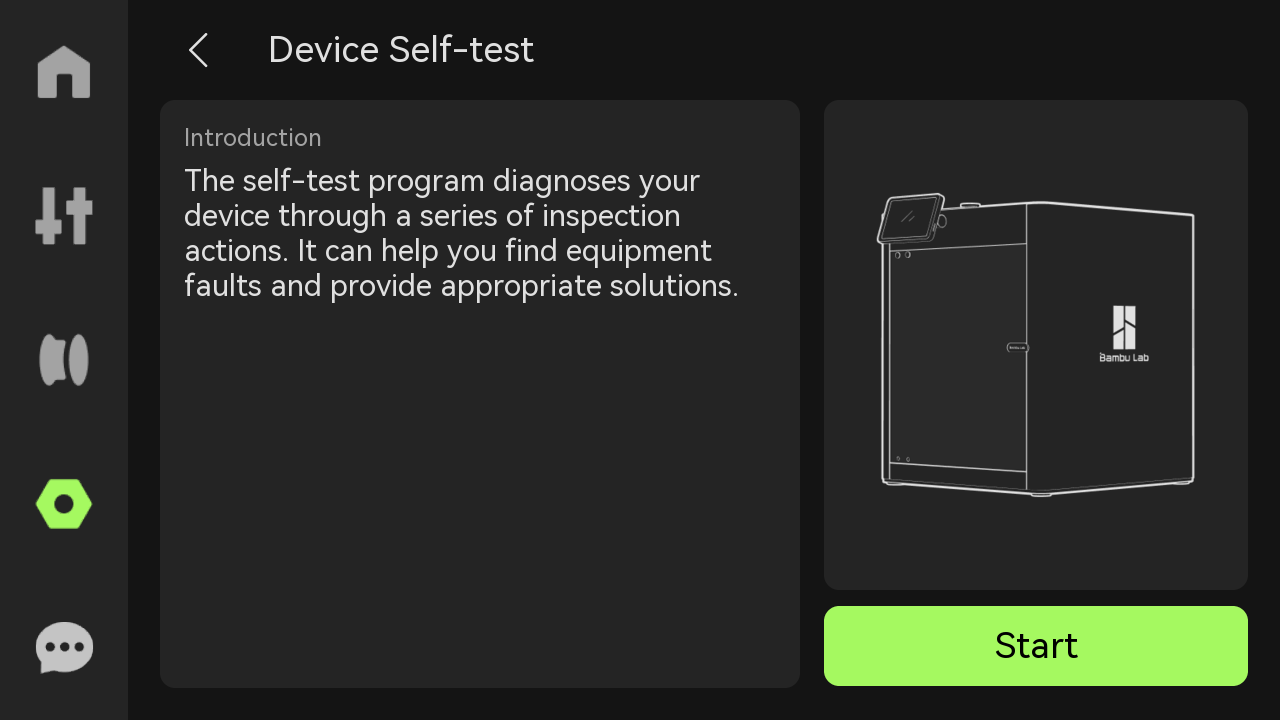
- Device Self-test:If the printer encounters a malfunction, the problem can be detected by the device self-test.
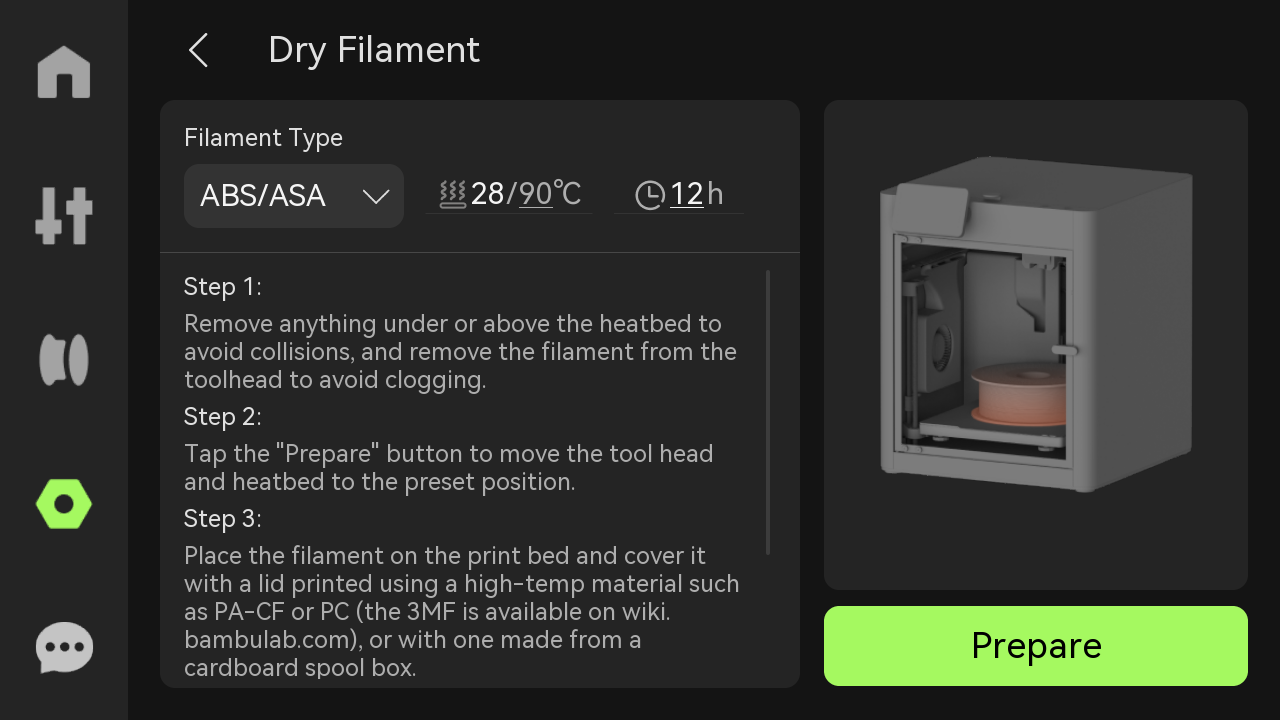
- Dry Filament: Set the drying temperature and time duration to dry the filament. Please refer to this wiki for more information.
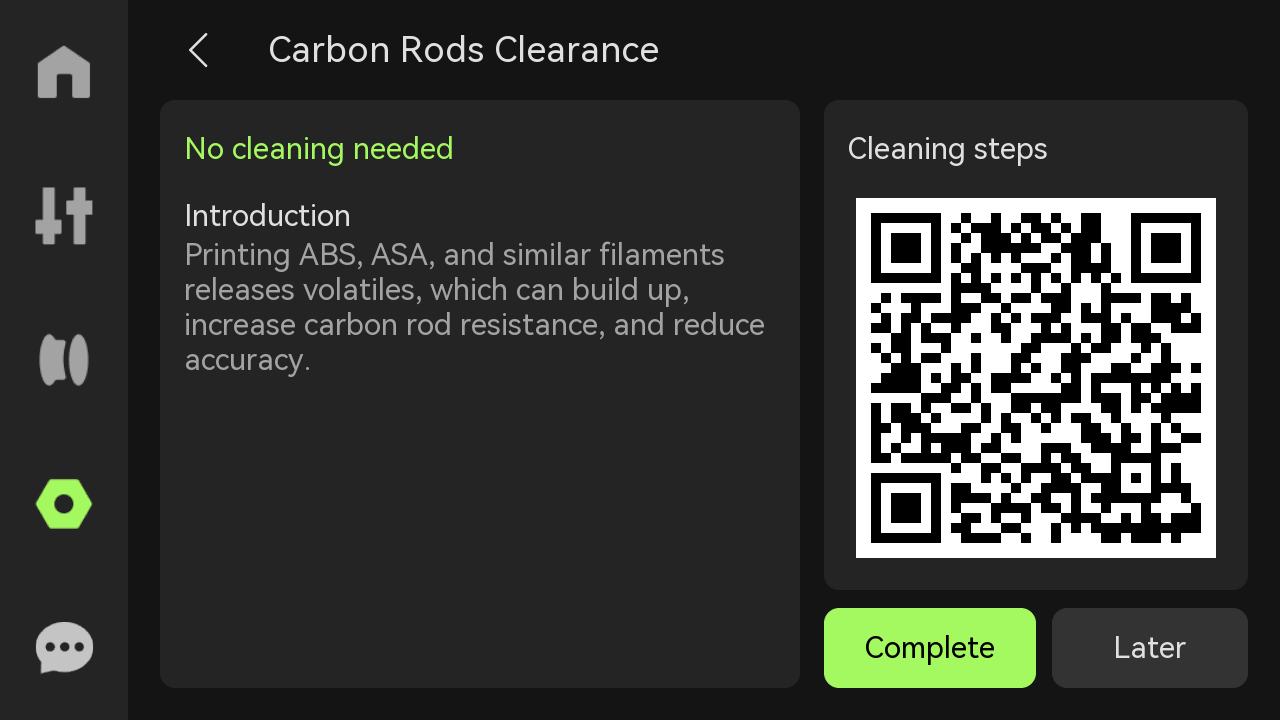
- Carbon Rods Clearance: The accumulation of more volatile substances will increase the resistance of the carbon rods, resulting in a decrease in the accuracy of the printer. If the carbon rods of the printer needs to be cleaned, this page will prompt you. Please scan the QR code on the right to view the tutorial.
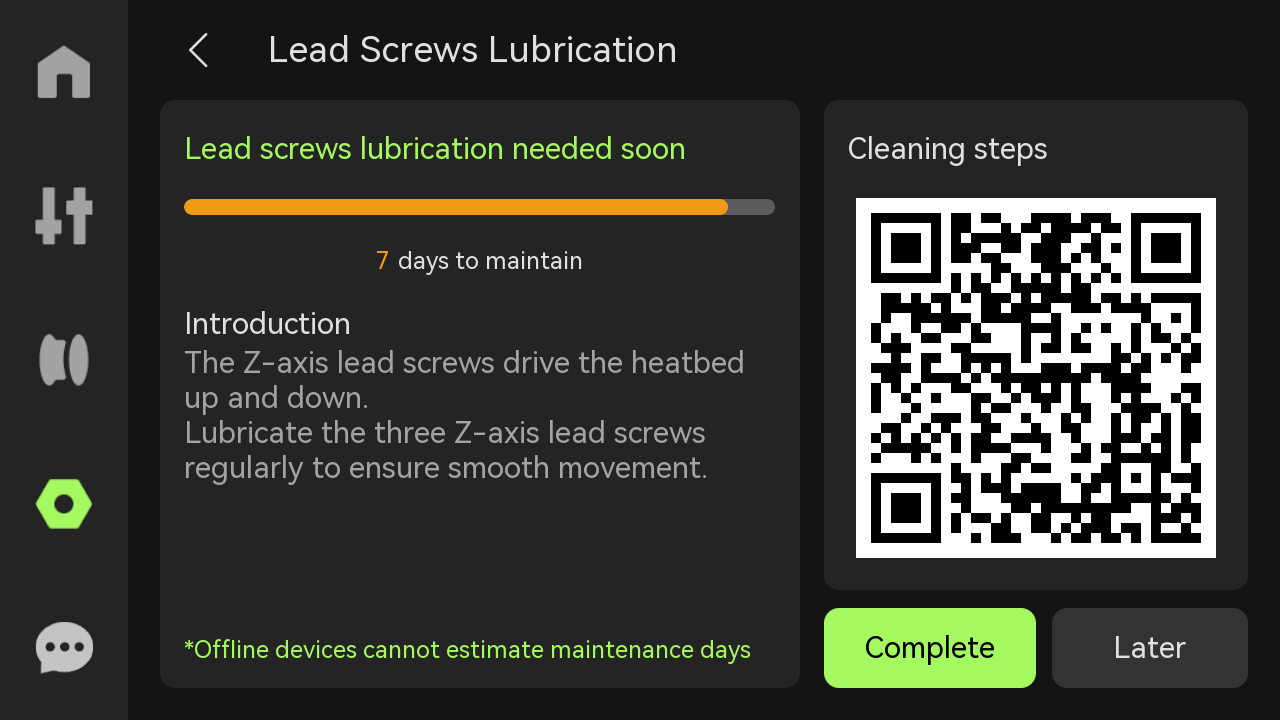
- Lead Screws Lubrication: The three Z-axis lead screws drive the heatbed to perform vertical movement and require regular lubrication to maintain smooth operation. If the printer's lead screws need lubrication, this page will prompt you. Please scan the QR code on the right to view the tutorial.
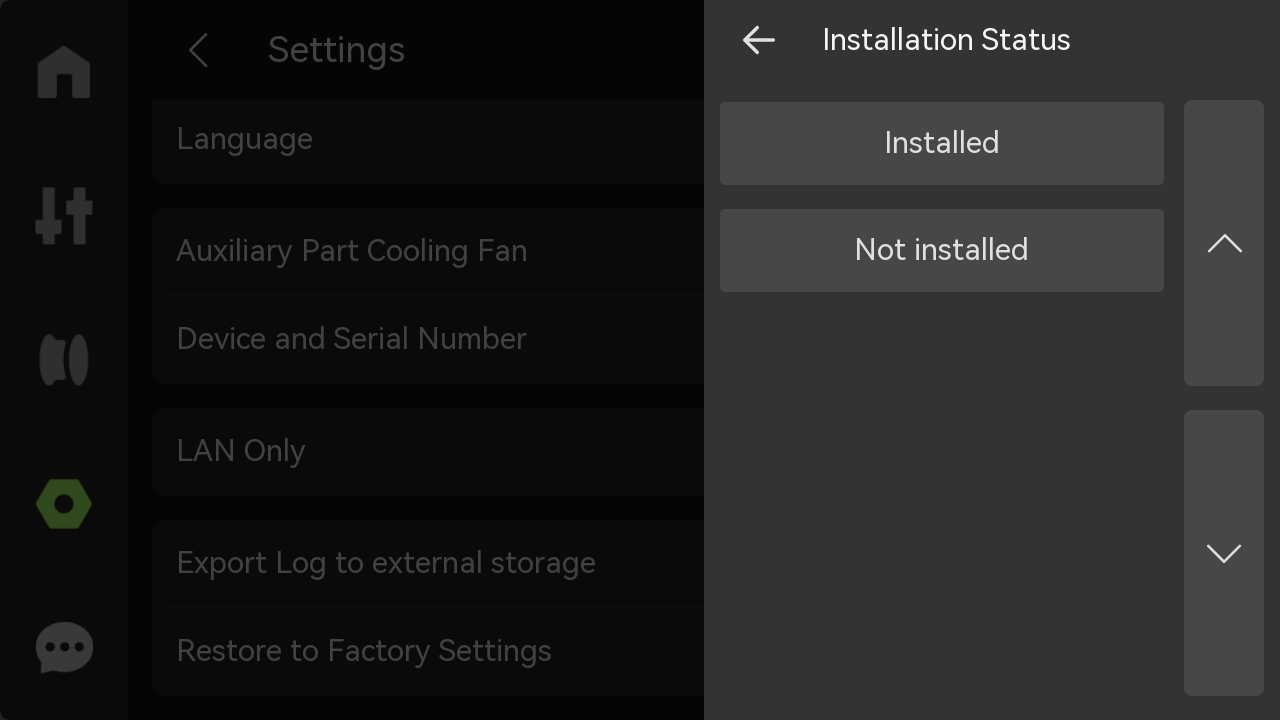
¶ 7. Settings

- Print Options
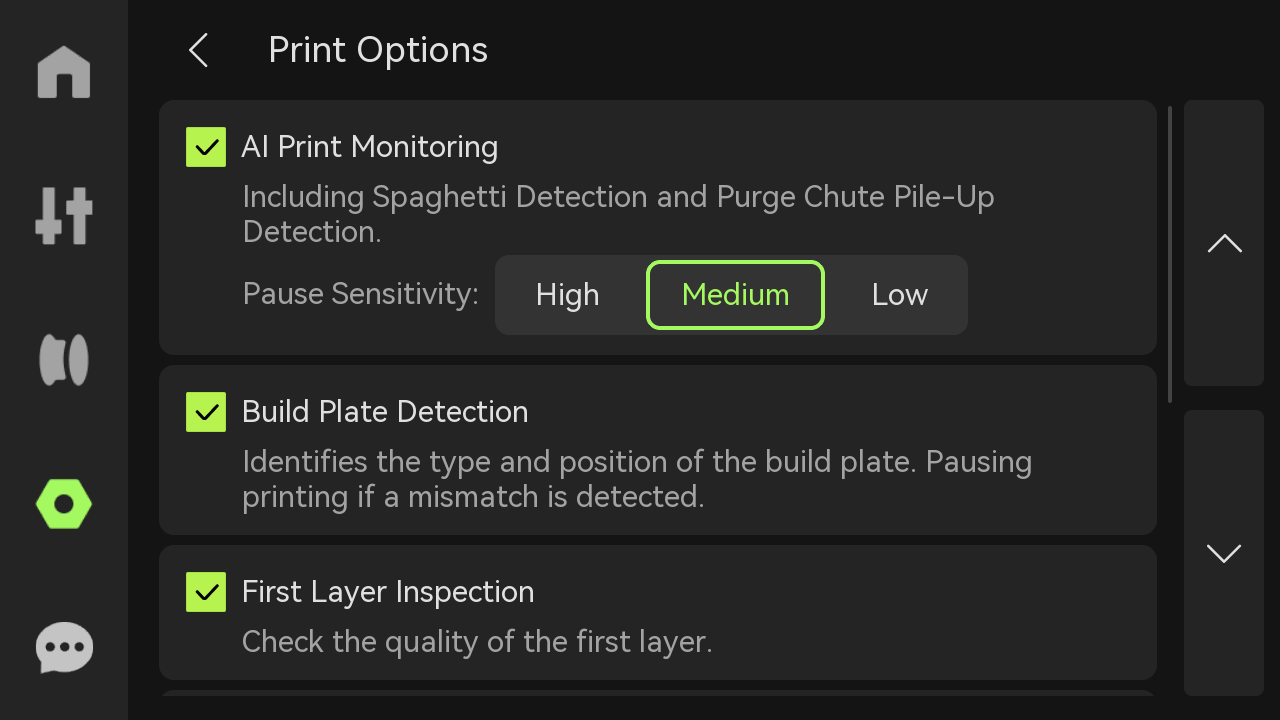
AI Print Monitoring: Detect spaghetti, purge chute pile-up and nozzle clumping during the printing process, and select the sensitivity to pause printing. The pause sensitivity is divided into high (pausing immediately when small problems are found), medium (pausing when a certain degree of problem occurs), and low (pausing only when there is an obvious abnormality) to adapt to different print quality needs.
Build Plate Detection: Detect print plate markings. If the markings are not within the predefined range or do not match the slice file, the printer stops printing. This prevents unplaced or misplaced print plates.
- First Layer Inspection: Once the first layer has been printed, the system automatically detects the print quality and warns you if an abnormality is detected.
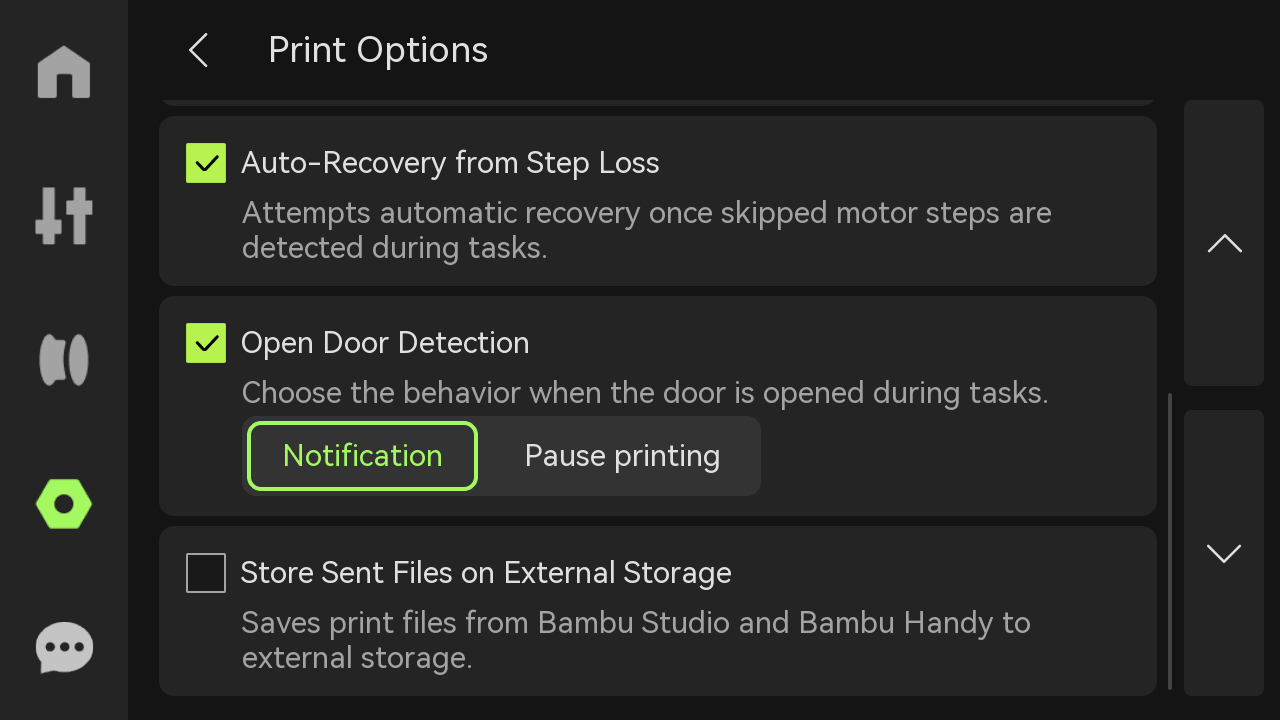
Auto-Recovery from Step Loss: When the motor detects a position shift (lost step), the X-axis, Y-axis, and Z-axis are repositioned and returned to their pre-shift positions, allowing the unfinished G-code to be executed and ensuring print quality.
Open Door Detection: When enabled, the printer detects whether the front glass door is open, allowing you to choose whether to trigger a notification or pause printing when the door is opened.
Store Sent Files on External Storage: If printing is initiated through the cloud, the print files will be cached in external storage.
- AMS Options
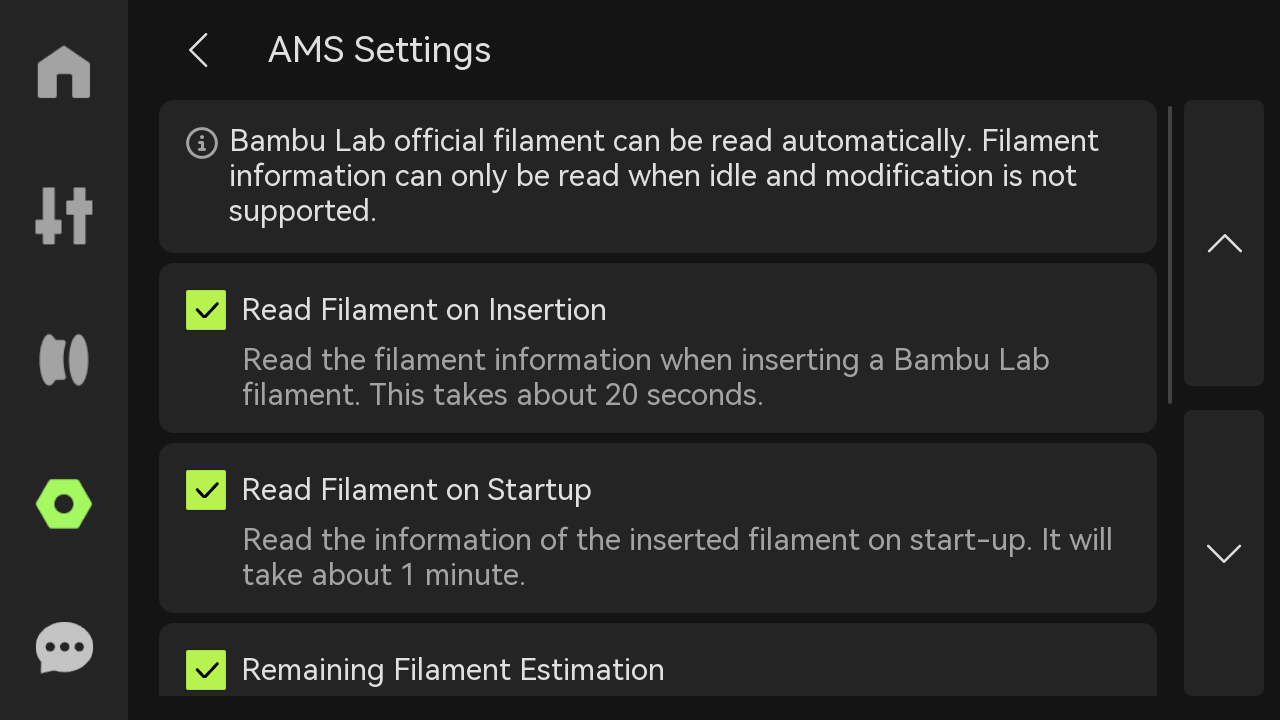
Read Filament on Insertion: After inserting the filaments for pre-loading, AMS will perform RFID reading operation.
Read Filament on Startup: Every time you restart the printer, AMS will automatically read the information of the inserted filaments (the reading process will rotate the filaments).
- Remaining Filament Estimation: Remainder estimation of filaments while RFID is being read. When this feature is turned on, the RFID will perform two readings, one for filament information and one for residual quantity estimation. The small horizontal bar below the filament name shows the estimated remaining filaments. Please refer to AMS main functions and workflow introduction for more information.
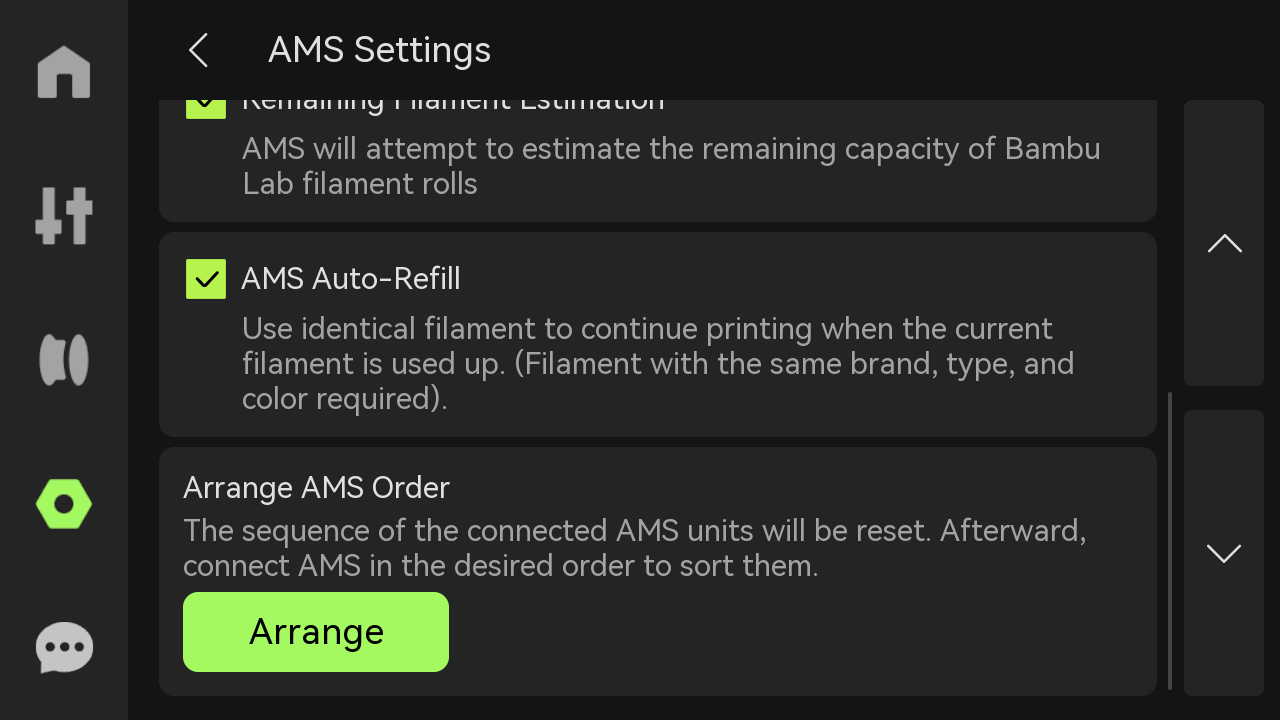
- AMS Auto-Refill: When the filaments in one slot of the AMS run out, it can automatically switch to filaments with the same properties in other slots. These properties include brand, type, color, and nozzle temperature. Please ensure that you configure the information for all filaments before printing to meet the auto-refill requirements.
- Arrange AMS Order: Each AMS is assigned a sequence and displayed on the screen. The purpose of assigning AMSID is to facilitate the identification of their connections. The logic of assigning IDs is: the one directly connected to the printer is AMS-A, the one connected to AMS-B is AMS-C, and so on. If you need to reorder the AMS, you can click "Arrange", which will reset the order information of the AMS. After the reset is completed, please connect the AMS in sequence as needed.
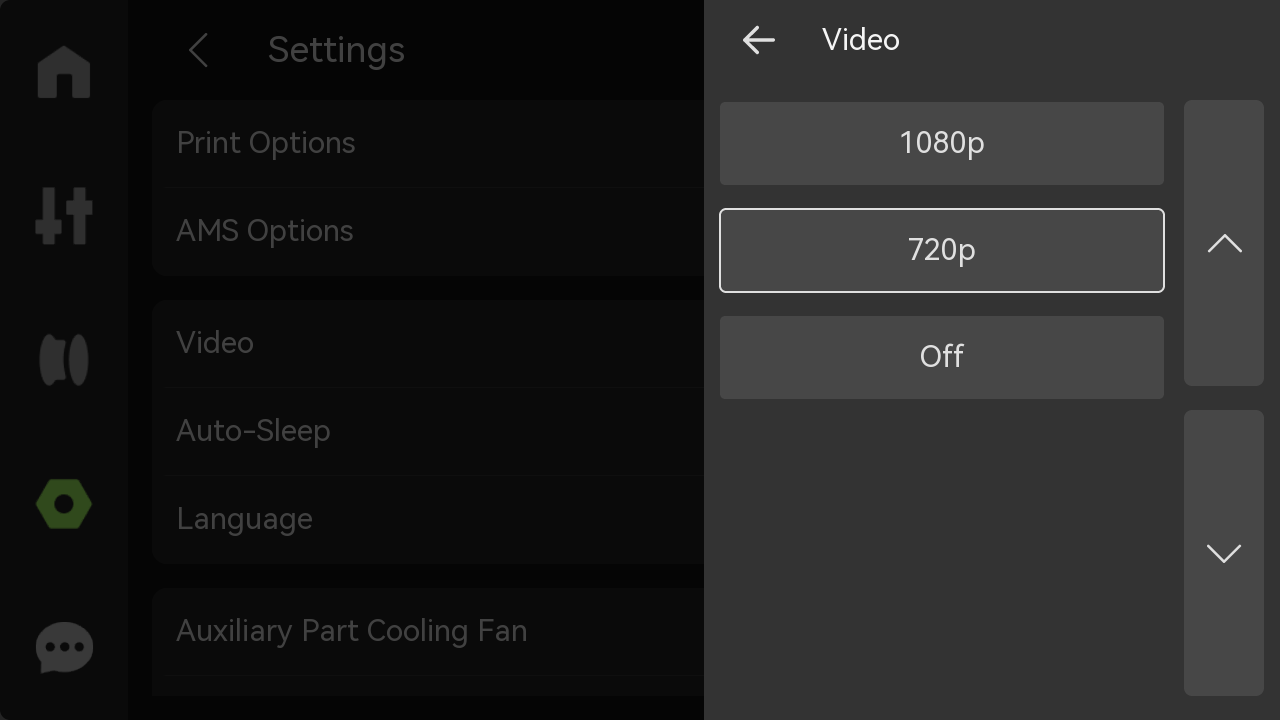
- Video: Set the video resolution. Higher resolution requires more storage space.
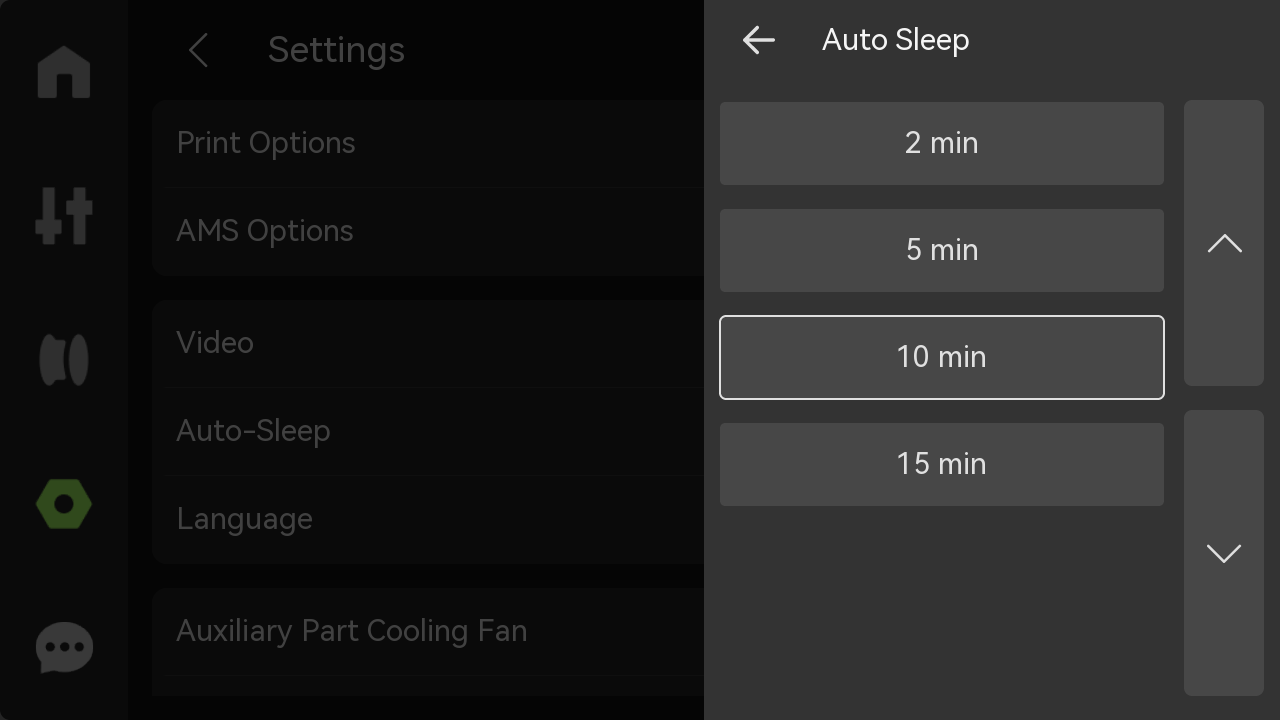
- Auto-Sleep: Select the length of time the printer will automatically sleep.
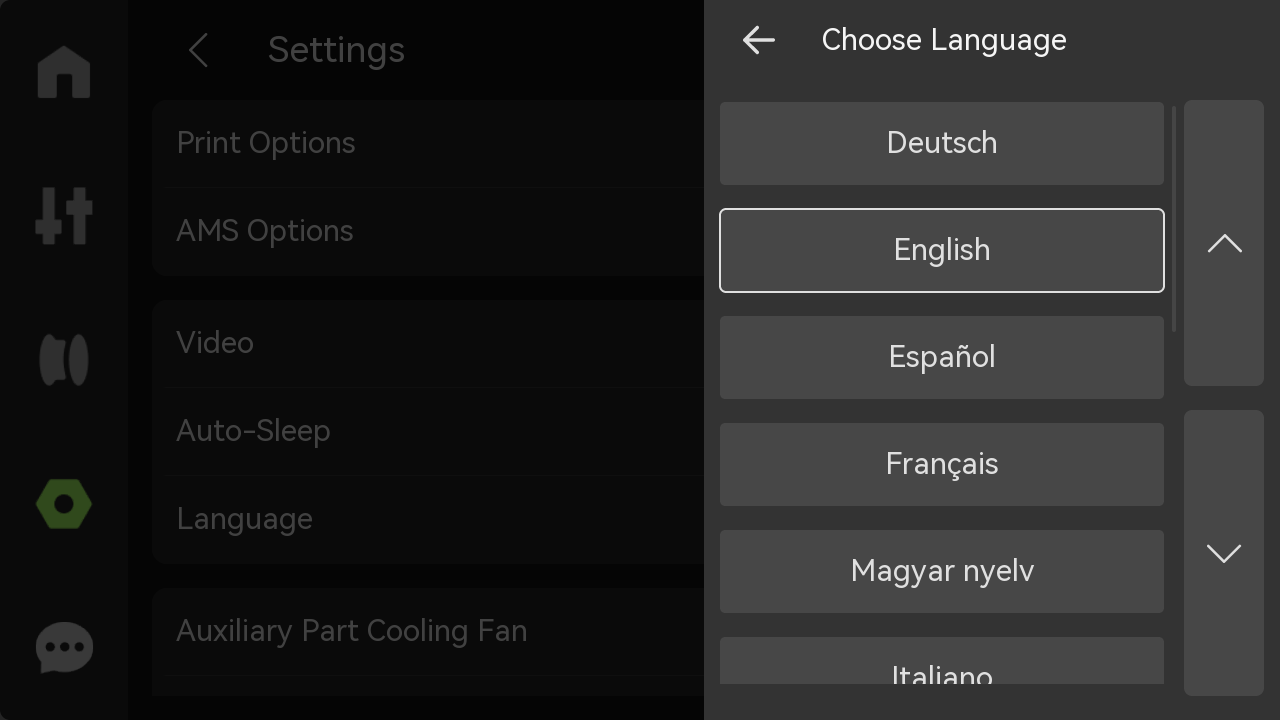
- Language: Select the language in which the printer screen is displayed.
- Auxiliary Part Cooling Fan: If the accessories have been replaced, reset the auxiliary part cooling fan to ensure print quality.
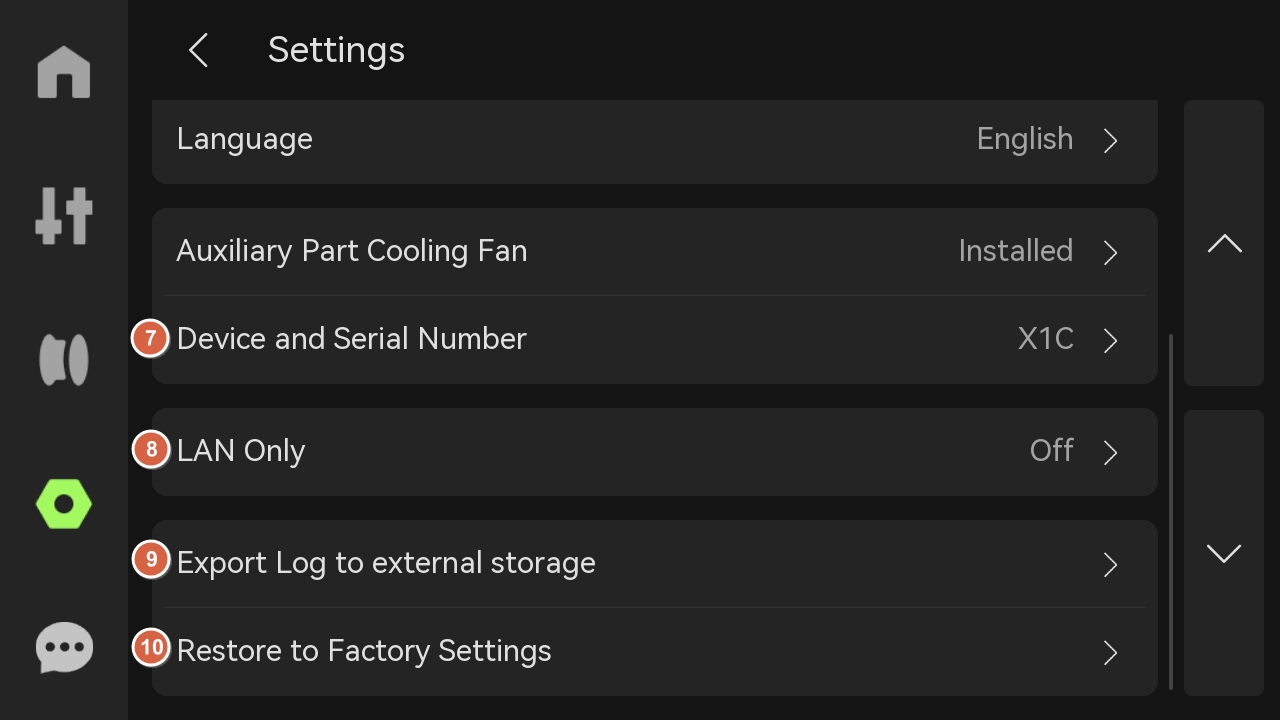
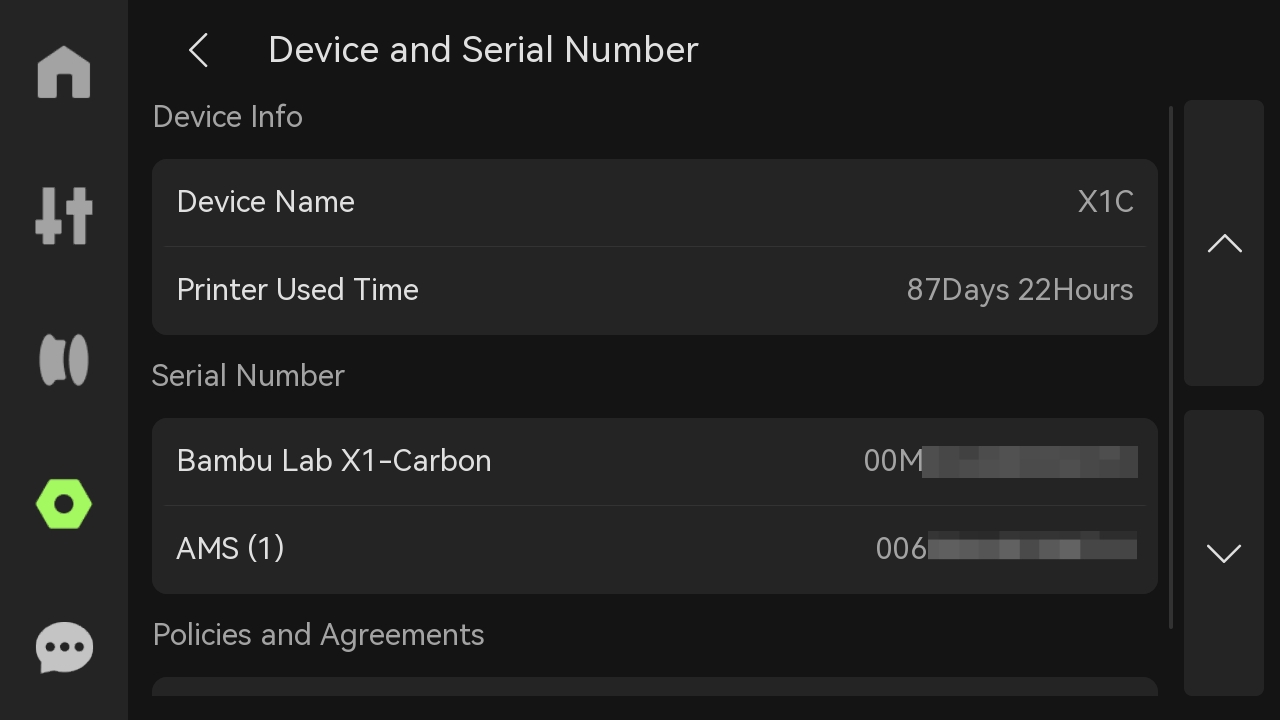
- Device and Serial Number: View the device name, device usage time, and serial number. Choose whether to join the user experience improvement program. Once enabled, the machine data (such as printing time, error information, etc.) can be uploaded to the official backend for subsequent statistics and improvements.
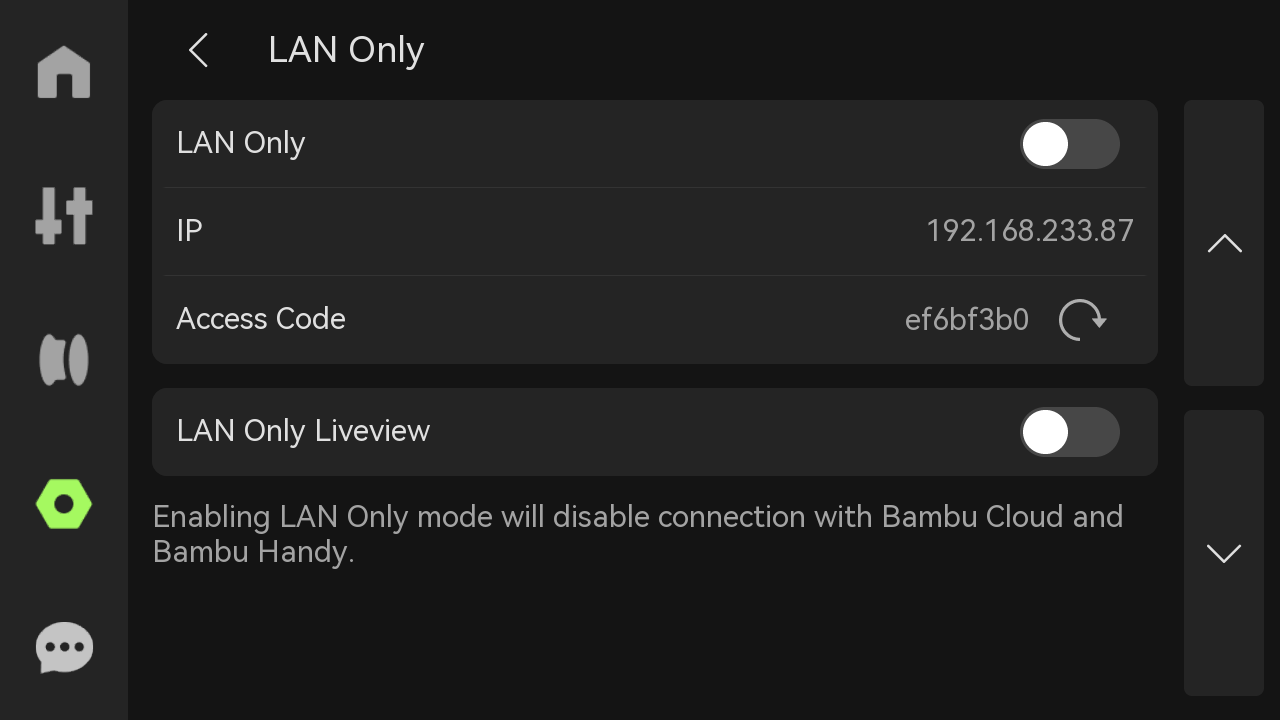
- LAN Only: When turned on, the printer can only be connected and accessed within the local network and cannot be accessed or controlled remotely over the Internet. If multiple devices are connected via the same LAN, live view or data sharing is possible.
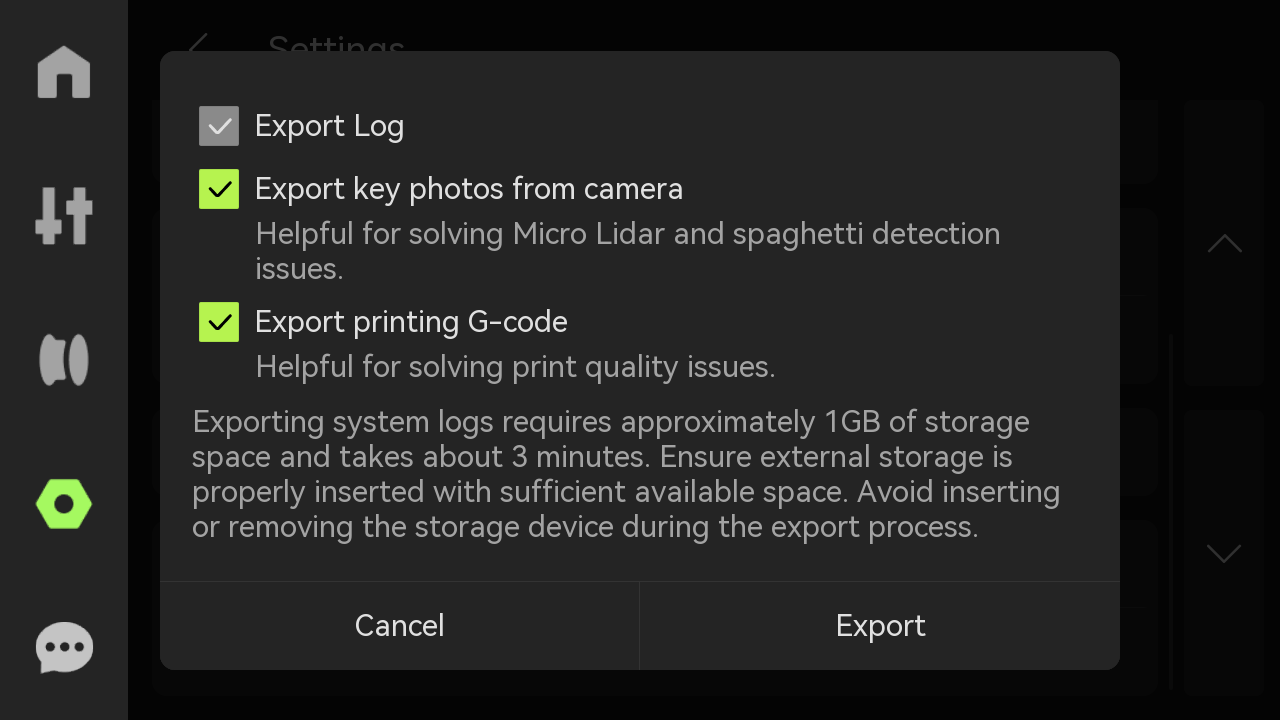
- Export Log to external storage: Choose whether to export all logs, key photos (to determine micro radar and spaghetti problems), and G-code (to determine print quality problems) according to your needs.
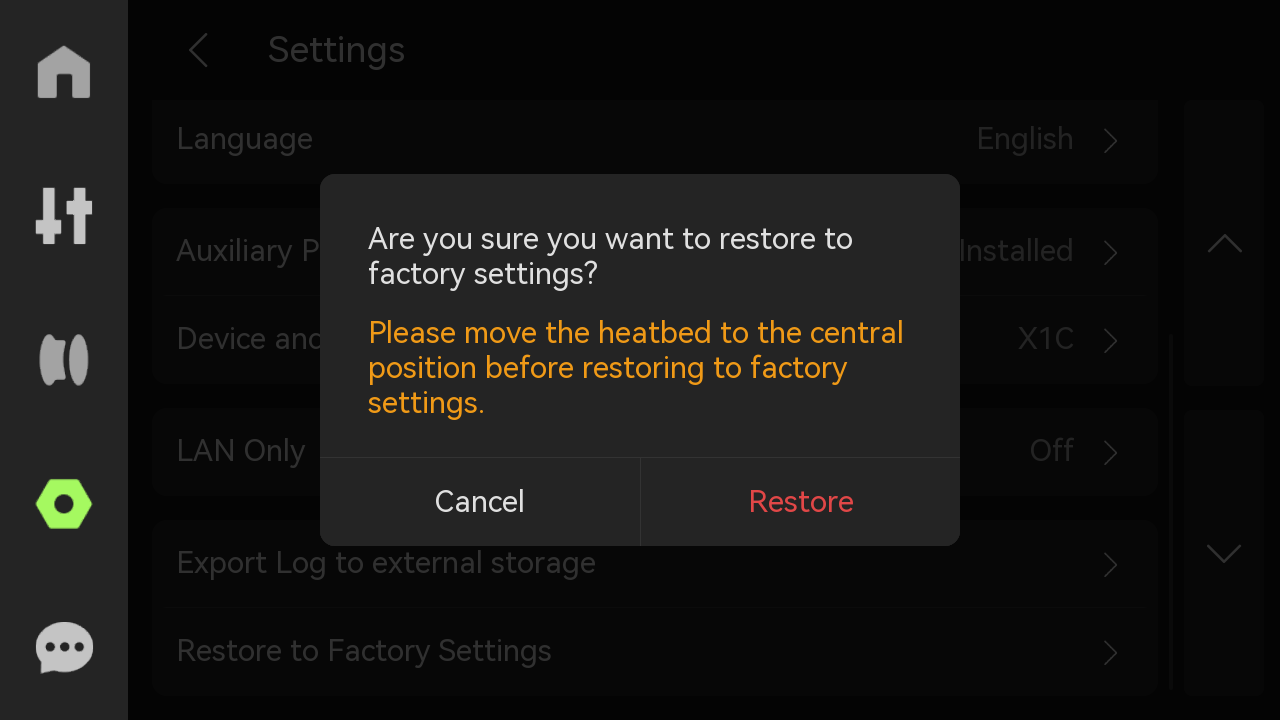
- Restore to Factory Settings: Reset the printer to the factory settings. Once reset, the settings cannot be restored.
¶ HMS
If there is a problem with the printer, an error message will be displayed here.

For more information on HMS, please refer to HMS home page.
¶ End notes
We hope the detailed guide provided has been helpful and informative.
To ensure a safe and effective execution, if you have any concerns or questions about the process described in this article, we recommend submitting a technical ticket regarding your issue. Please include a picture or video illustrating the problem, as well as any additional information related to your inquiry.