If your spool does not sit flush on the spool holder located at the back of the machine, there are a few methods of approach.
1. Remove the filament buffer
2. Use an external spool holder or a dry box
3. Print your own spool holder
¶ Remove the Filament Buffer
This step applies to users using large filament spools together with the AMS (Automatic Material System). Large spools typically have a wider diameter, which can cause interference with the filament buffer during operation.
If you're using a large external spool and find it difficult to mount due to space constraints, it's recommended to remove the filament buffer to avoid obstruction or friction.
If you're not using the AMS unit, you will not have a filament buffer installed, and you can safely skip this step.
Note: Before proceeding with any disassembly, make sure to power off the machine and follow proper safety precautions.
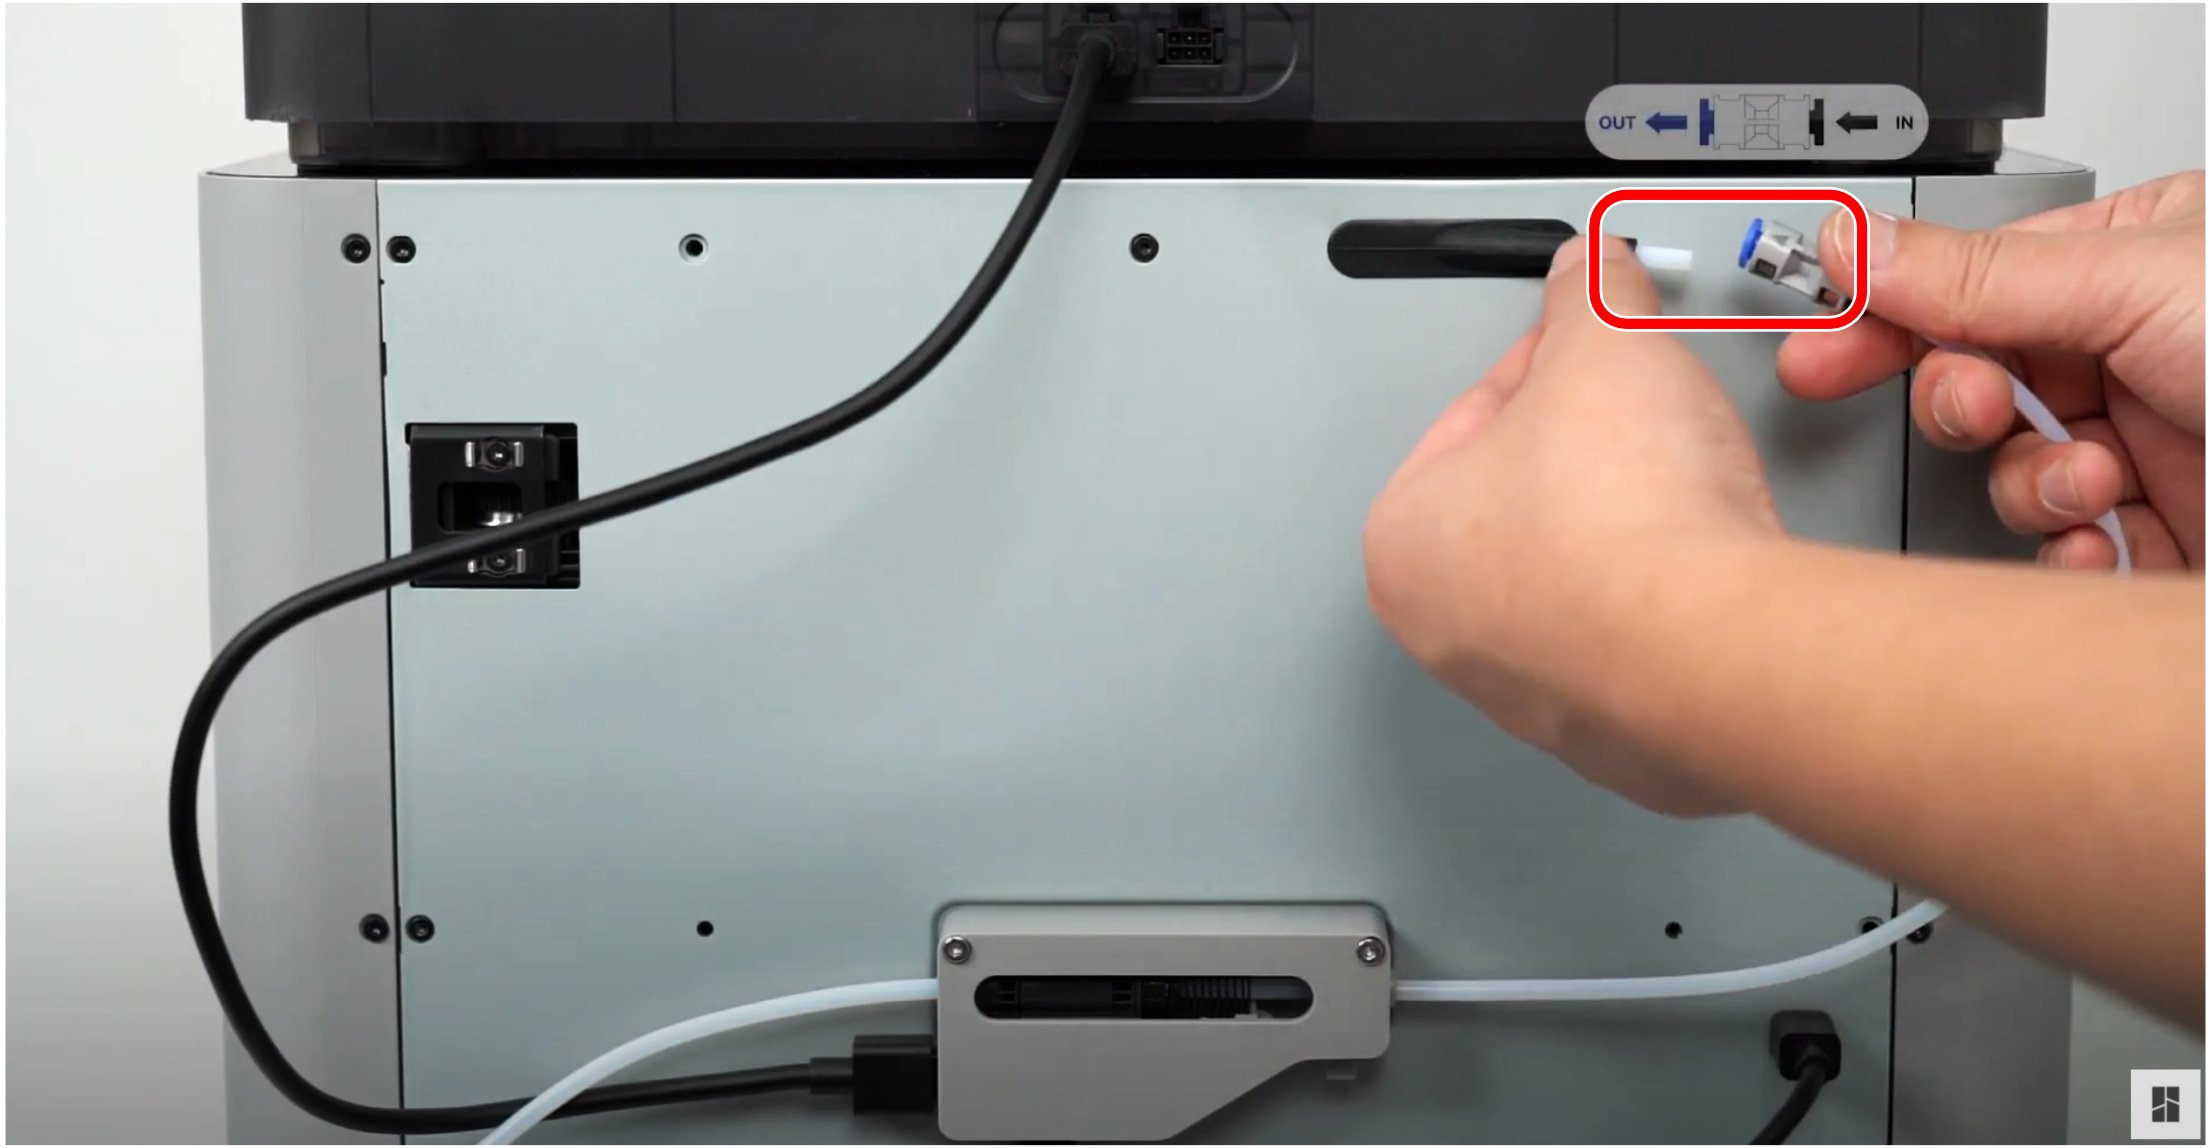
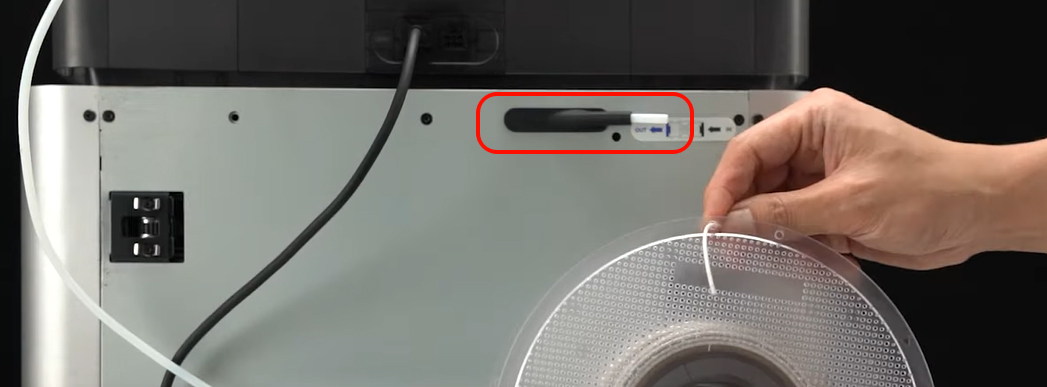
¶ Step 1: Detach the blue PTFE coupler
Press down on the blue clip to release the coupler from the PTFE tube.
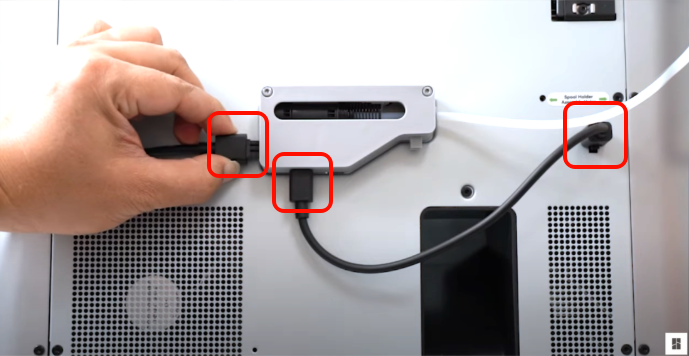
¶ Step 2: Remove the bus cables
Remove the 4-pin cable connected to the back of the machine, and the 6-pin cable connected to the AMS respectively.
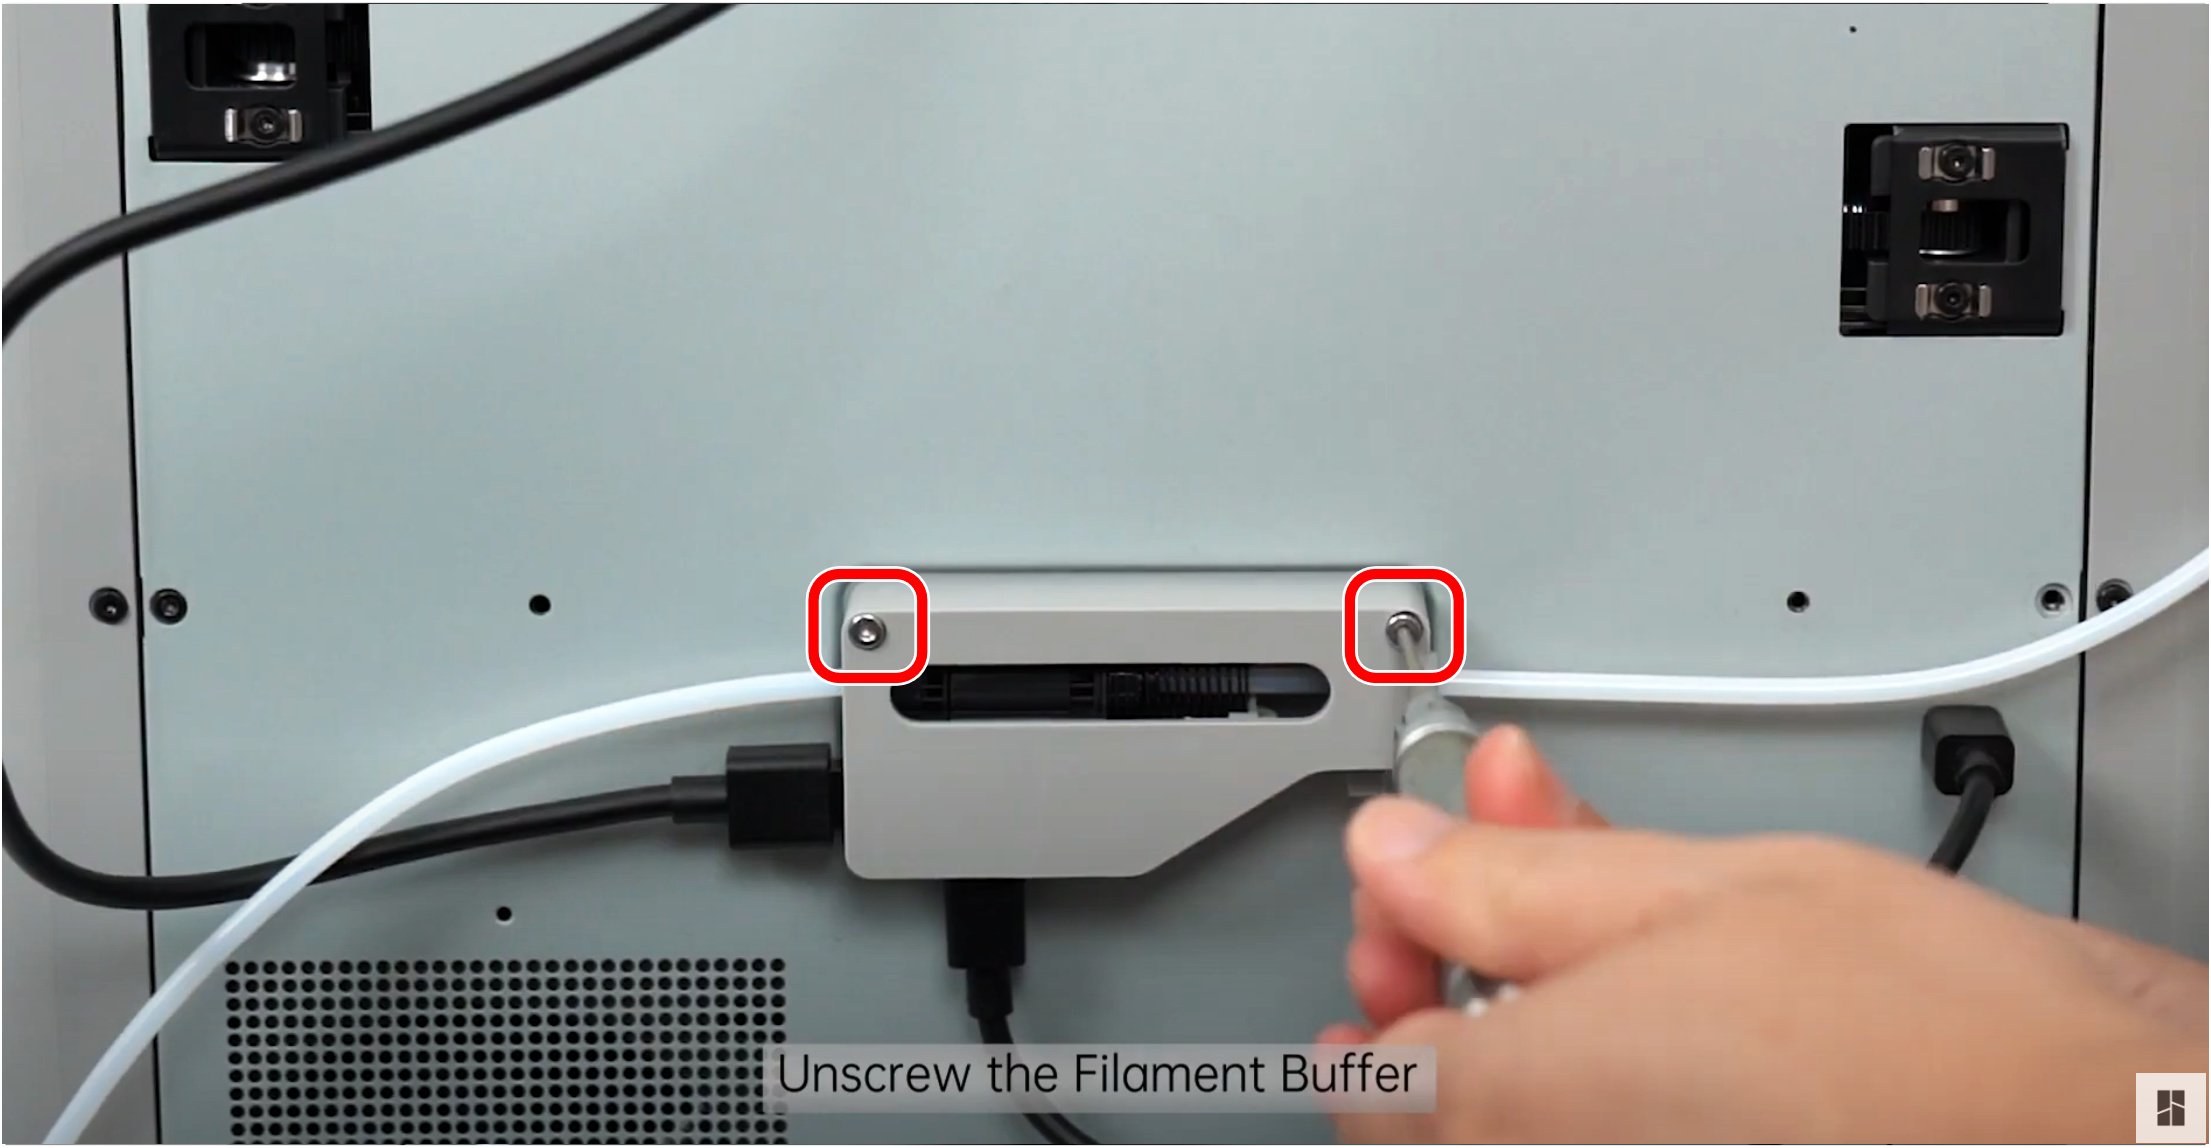
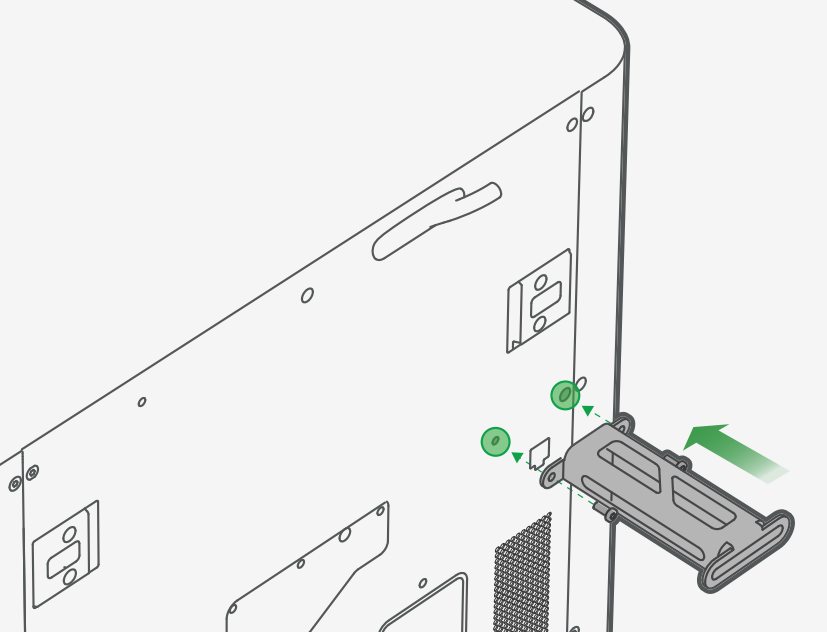
¶ Step 3: Unscrew the filament buffer
Unscrew the two screws holding the filament buffer.
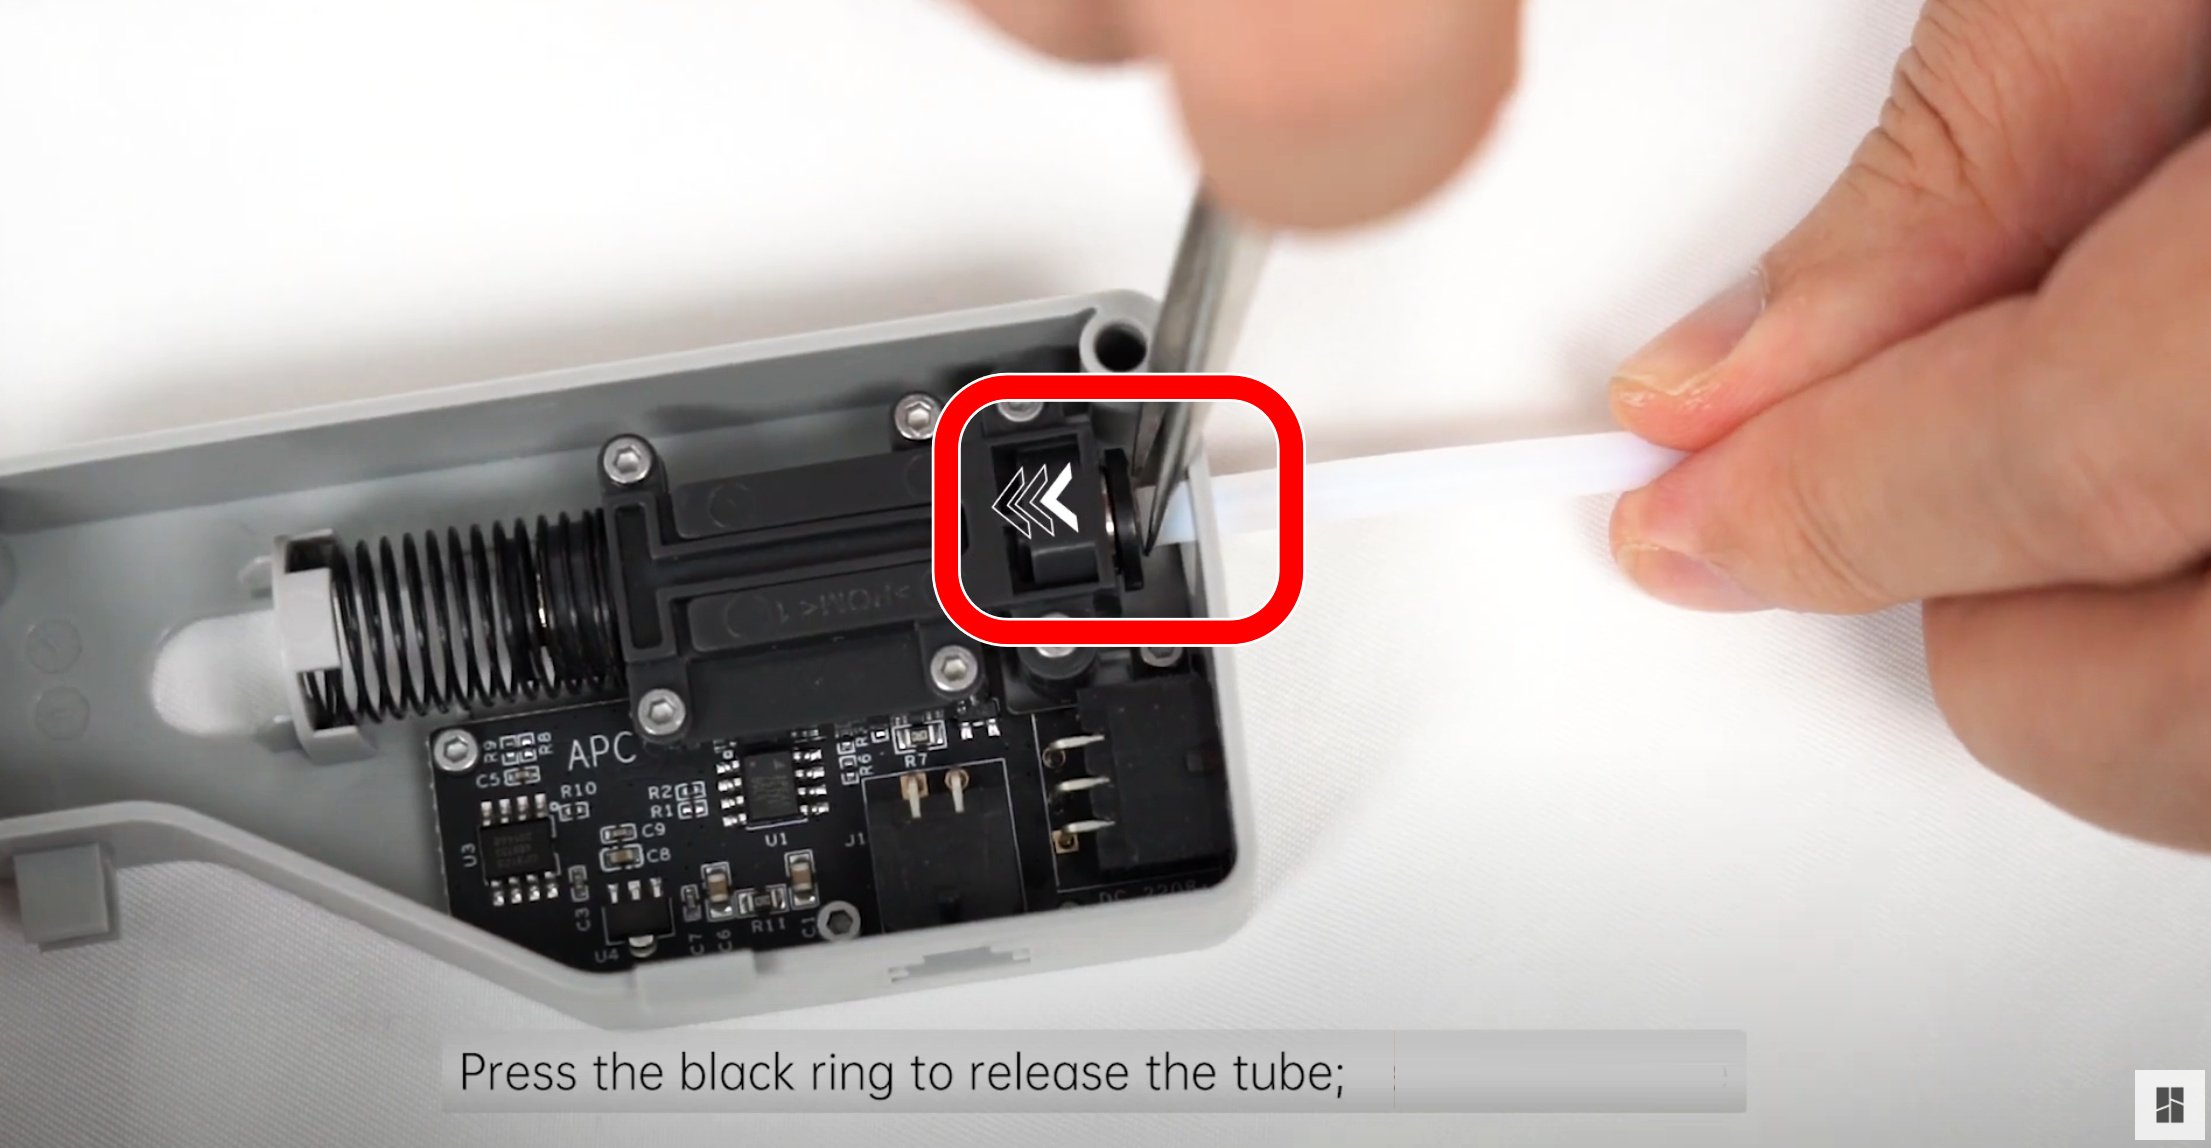
¶ Step 4: Remove AMS PTFE tube from filament buffer
Remove the PTFE tube by pressing down on the black coupler clip located in the filament buffer.
Note: You can use the Allen key provided, to press down on the clip. Tweezers were used in the image.
¶ Step 5: Try Mounting the Spool
Please set aside the AMS PTFE tube that you removed earlier.
At this point, the PTFE tube port on your device should be in a disconnected state as shown in the image below, and the buffer should have been removed as well.
You can now try mounting the large filament spool again.
¶ Using an External Spool Holder or Filament Dry Box
¶ Install an external spool holder or filament dry box
If the original spool holder, as shown below, does not meet your specific size or usage requirements, you can browse relevant models on MakerWorld. For example, search using keywords like “X1 spool holder external” to find and download suitable models for 3D printing.
Choose a spool holder that fits your needs and install it accordingly. If you prefer to design your own or download a custom spool holder, please refer to the next section: “Print Your Own Spool Holder” for helpful links and resources.
For oversized filament spools that still require moisture protection, you may consider building a custom-sized dry box by referring to the Sealed Box | Bambu Lab Wiki.
If you're unsure whether your chosen filament needs a dry box, you can refer to this comparison guide to help you make an informed decision: Choosing the Right Filament – Bambu Lab 3D Printing Filament Guide.
¶ Print Your Own Spool Holder
There are many excellent spool holder models available on MakerWorld that you can refer to. For example:
A desktop spool holder for the A1, designed by @StefB: Spool Holder Base for A1.
A side-mounted spool holder compatible with the X1 and P1 series, designed by @Mdesign: P1S/X1C Side Spool Holder.
You can choose and print the spool holder that best suits your specific machine and application needs.

Note: The model(s) referenced in this article are the property of their respective creators and are used here for educational and non-commercial purposes only. If there is any copyright concern, please contact us for removal.
¶ Setup and Verification
¶ Step 1: Configure External Filament Settings in Bambu Studio
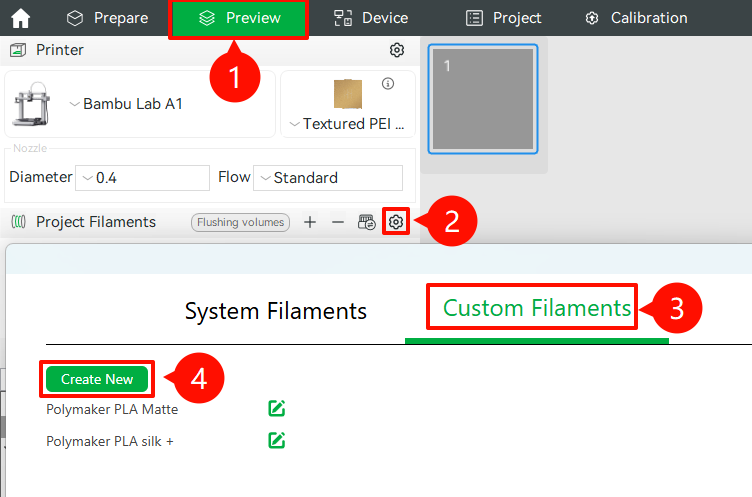
Starting from version 1.9.1.0, Bambu Studio supports not only the built-in system filament profiles, but also the creation and customization of third-party filament profiles—referred to as “Custom Filaments” (see Step 3 in the diagram below).
For most printing needs, users can simply select one of the available Generic filament profiles, which are compatible with a wide range of materials and typically work without issue.
However, if you want to fine-tune print quality for a specific filament—such as adjusting temperature, flow rate, or cooling settings—you can also create and manage a custom profile tailored to your material.
These custom settings will be synced to your printer and the mobile app, ensuring consistency across platforms.
Users can create and manage custom filament profiles directly in Bambu Studio. These profiles can then be assigned to specific spool slots via the "Device" tab in Studio. Once configured, the settings will automatically sync to both the printer and the Bambu Handy app.
If you’d like to learn more about filament parameter settings, please refer to the Setting Guide of Slicing Parameters | Bambu Lab Wiki
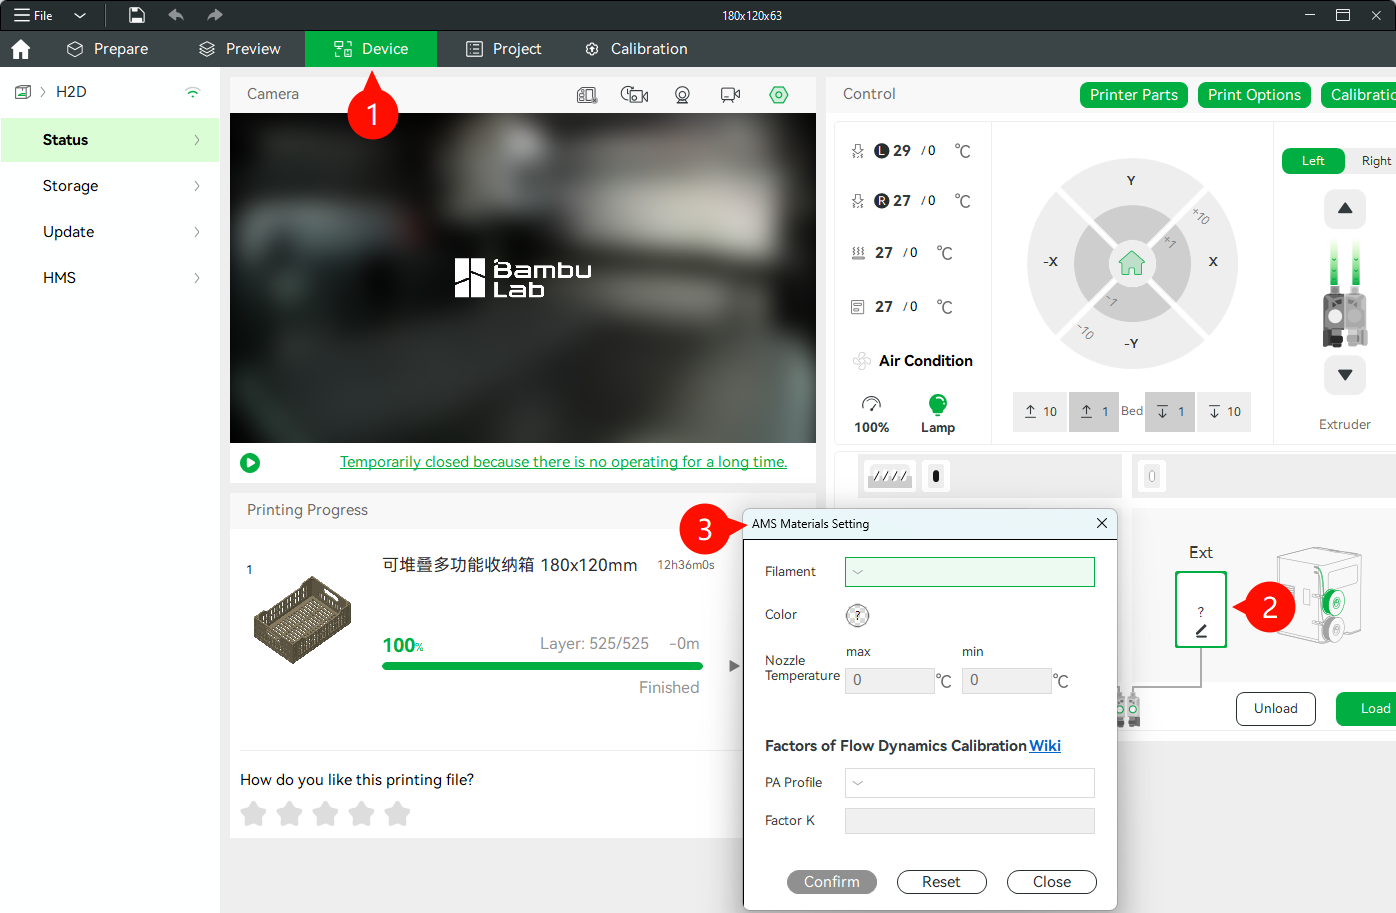
¶ Step 2: Configure Filament Parameters and Load the Filament
Next, follow the instructions in the tutorial video to configure the filament parameters.
Once completed, press the "Load" button on your printer to begin feeding the filament into the system.
¶ Step 3: Start a Test Print and Verify External Spool Holder Functionality
To verify that the external spool holder is functioning properly, you can:
Import the model you want to print into Bambu Studio, adjust the print settings as needed, then click “Slice Plate”, followed by “Print Plate” to send the job to the printer.
Alternatively, select a model from the printer’s built-in library and start a test print directly from the machine.
For detailed instructions on how to initiate a print from Bambu Studio, please refer to the following guide: Printing from Bambu Studio | Bambu Lab Wiki
¶ End Notes
We hope the detailed guide provided has been helpful and informative.
To ensure a safe and effective execution, if you have any concerns or questions about the process described in this article, we recommend submitting a technical ticket regarding your issue.
Please include a picture or video illustrating the problem, as well as any additional information related to your inquiry.