¶ What is it?
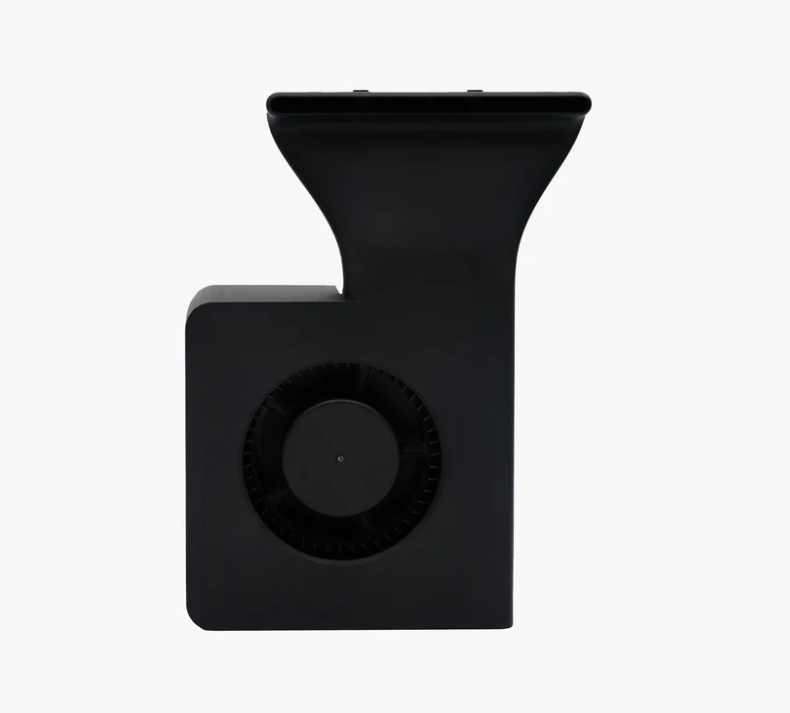
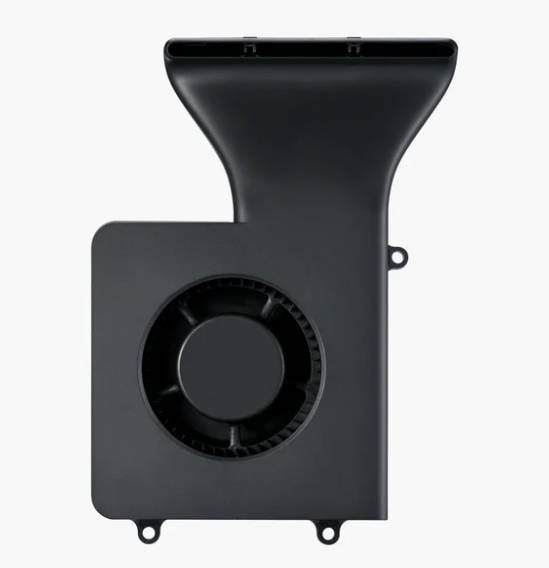
The auxiliary part cooling fan is a powerful 12W cooling fan installed on the left side of the chamber, it provides a better cooling condition for high-speed printing.
|
|
¶ When should you replace it?
Damaged blades, or a faulty fan motor.
Update X1 with an auxiliary part cooling fan.
¶ Tools and materials needed
- Auxiliary part cooling fan
- H2.0 hex key
- Tweezers.
¶ Safety warning and Machine state before starting operation
Prior to commencing with the process in this guide, please make sure the machine is switched off and that the AMS along with the PTFE tube and filament buffer are removed
¶ Operation guide
¶ Step 1 - (Disassembly) Undoing the back cover screws
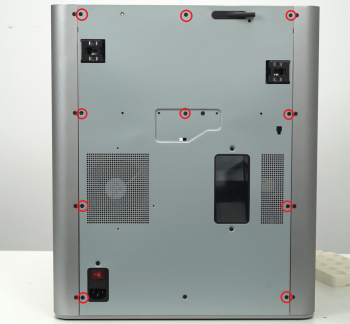
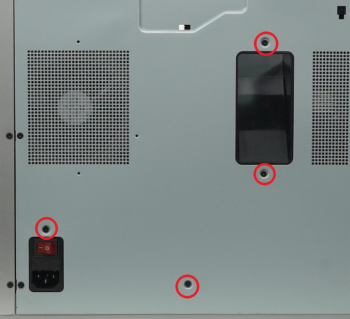
Undo the screws at the back of the printer as marked below. There are a total of 14 screws to undo, 10 of them in the first image and 4 in the second image as shown below.
 |
 |
¶ Step 2 - Removing the rear cover
To remove the rear cover, it is important to first pull the left side so that the left belt tension port doesn't get in the way, followed by the right side. Push the PTFE tube outlet inwards to free it from the cover.
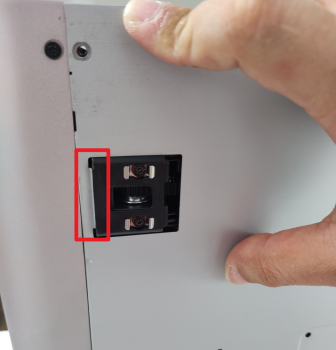 |
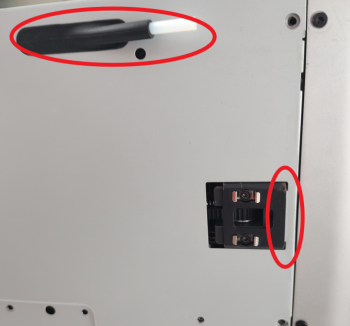 |
¶ Step 3 - Disconnecting the auxiliary part cooling fan cable
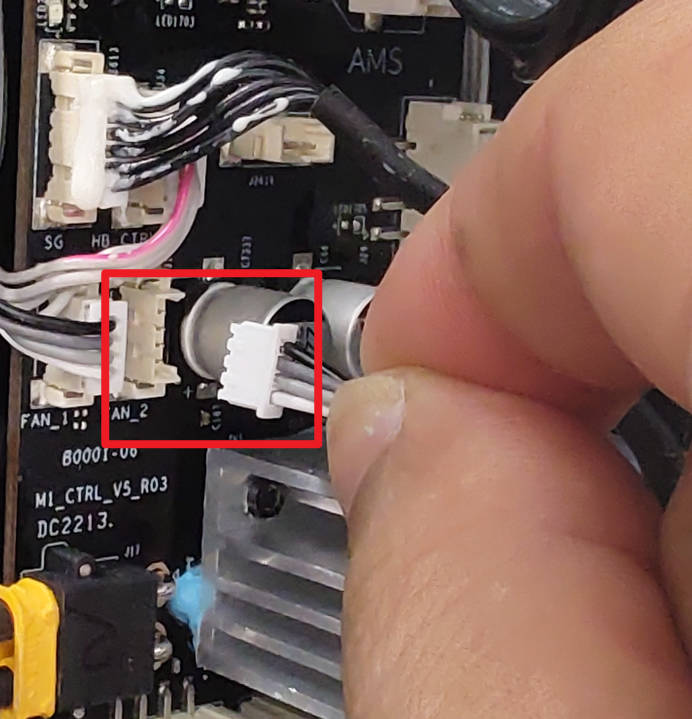
Locate the connector of the aux fan on the MC board, and then disconnect the cable.
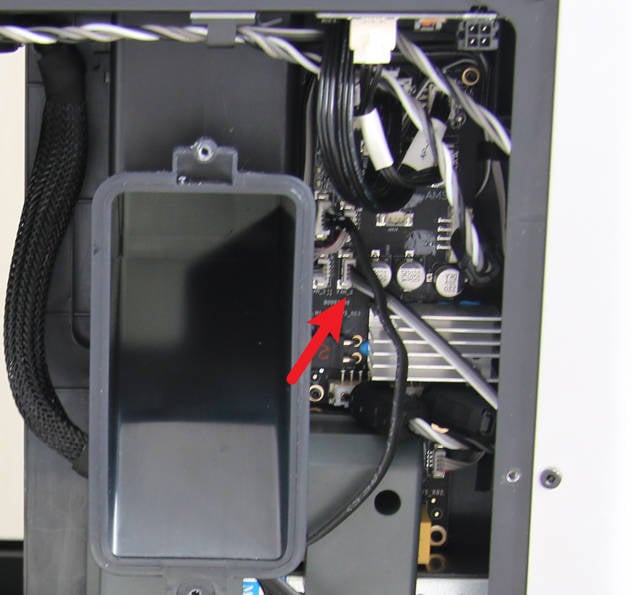 |
 |
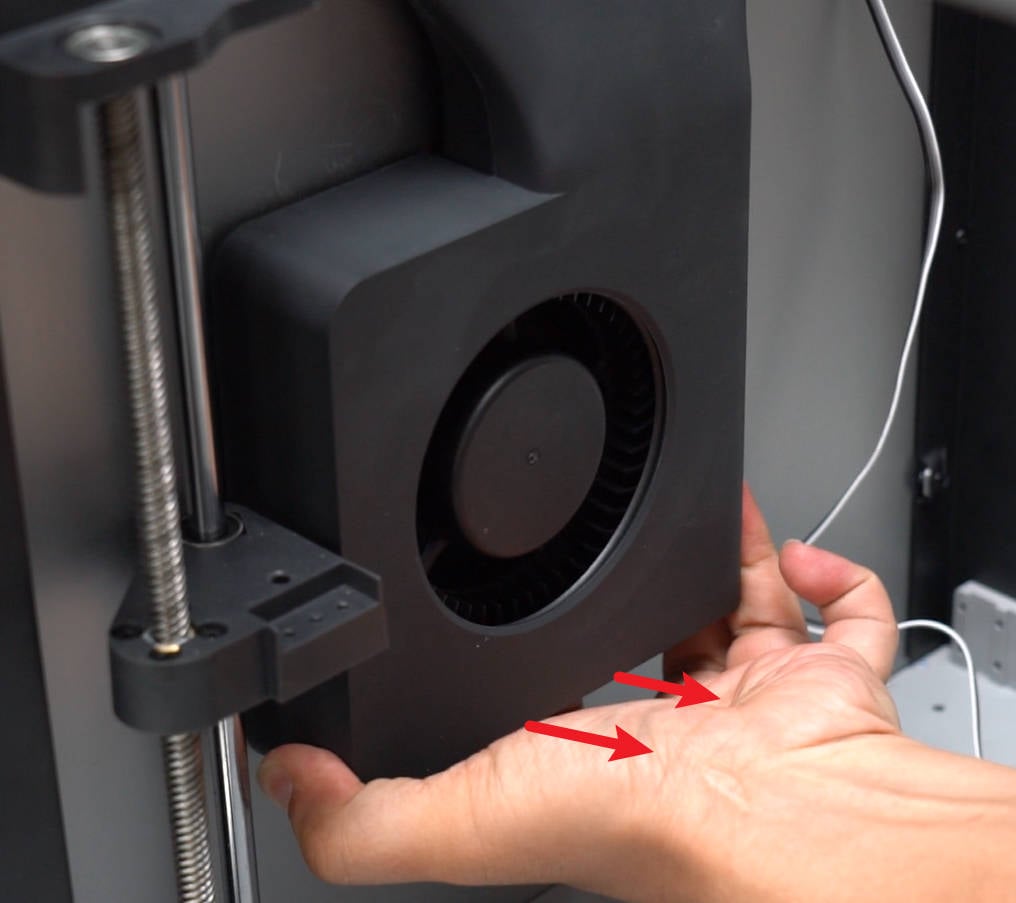
¶ Step 4 - Removing the auxiliary part cooling fan (Old version)
Pull the cable toward the fan, and then detach the fan by force.
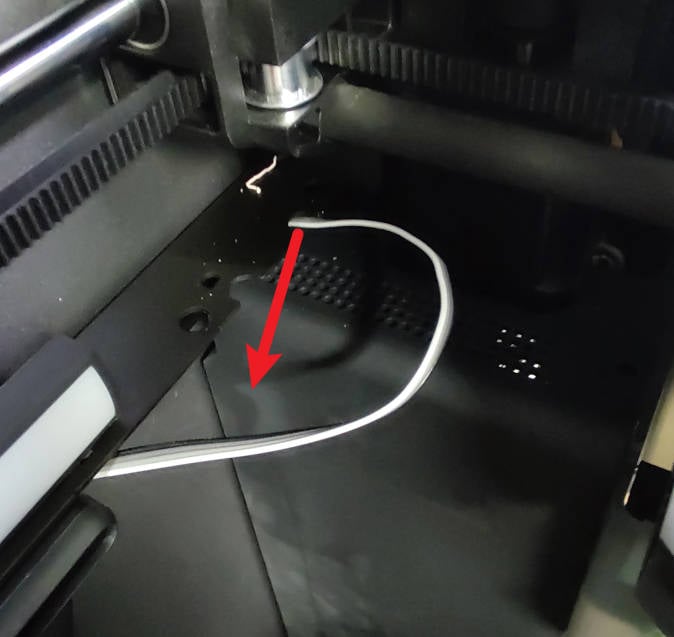 |
 |
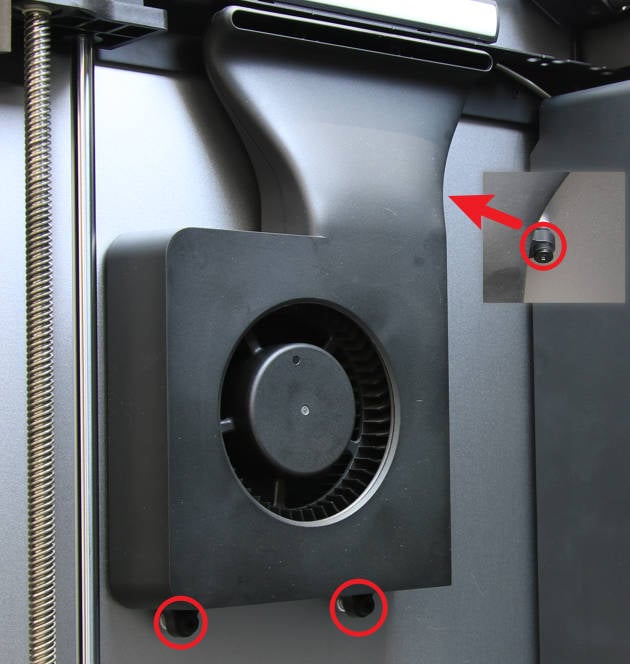
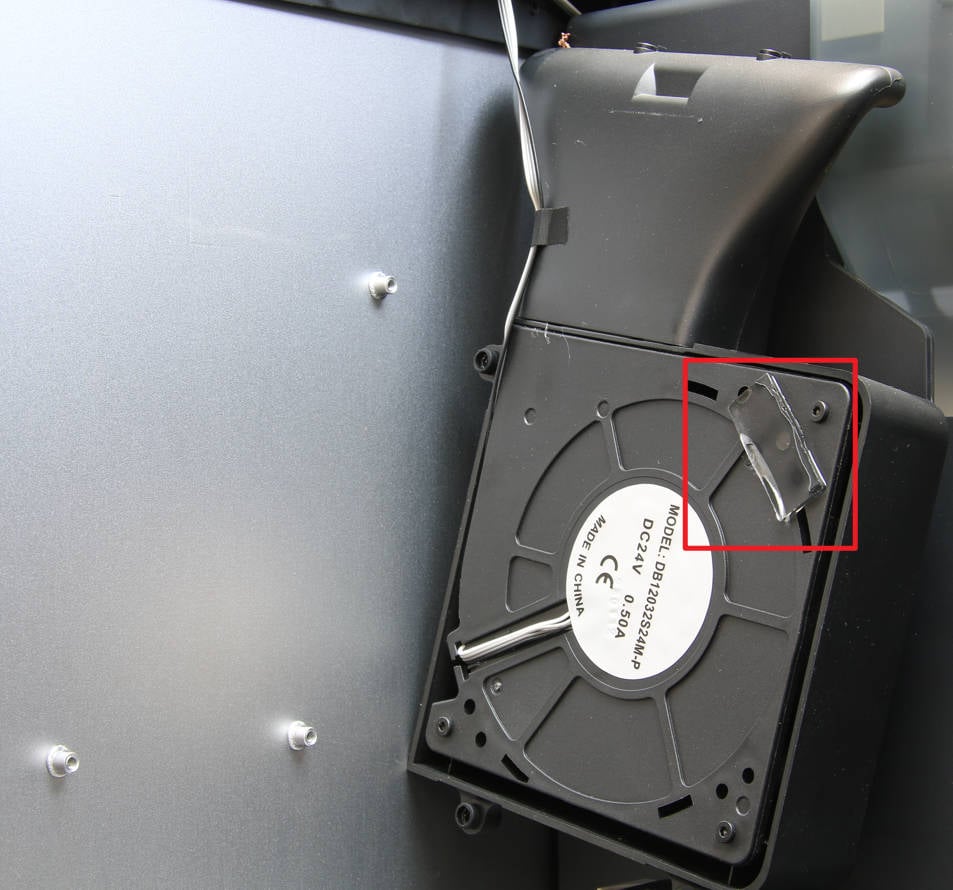
¶ Step 4 - Removing the auxiliary part cooling fan (New version)
Pull out the fan cable toward the fan, use the H2.0 hex key to unscrew the 3 screws that fix the fan, then separate the fan from the side panel, and remove the fan.
 |
 |
¶ Step 5 - (Assembly) Attaching the fan
Follow the How to reattach the auxiliary part cooling fan to attach the new auxiliary part cooling fan.
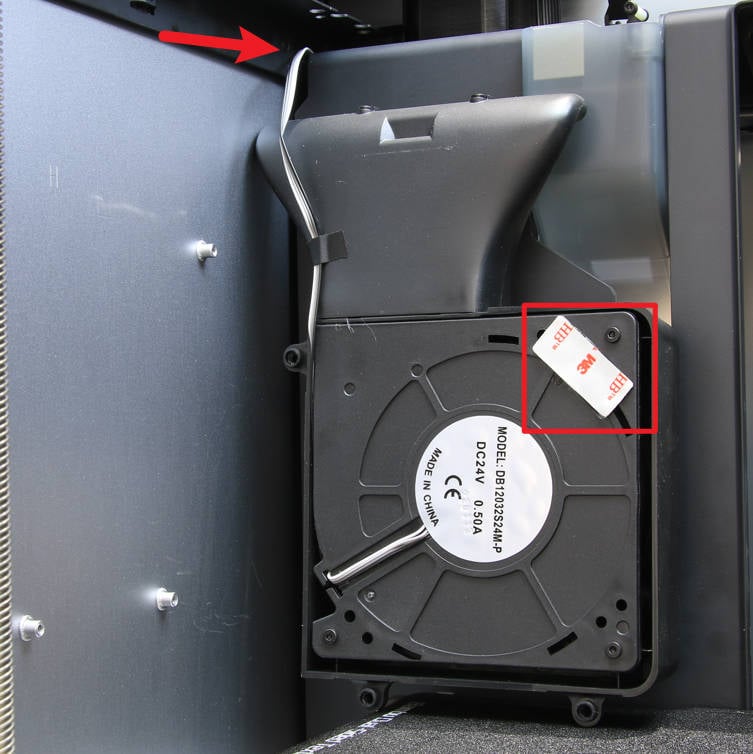
¶ Step 5 - Installing the attaching the fan
Pass the fan cable through the inner holder, tear off the double-sided adhesive protective paper on the fan, install the fan in place according to the position of the stud, and then lock in 3 screws to fix it.
 |
 |
¶ Step 6 - Connecting the fan cable
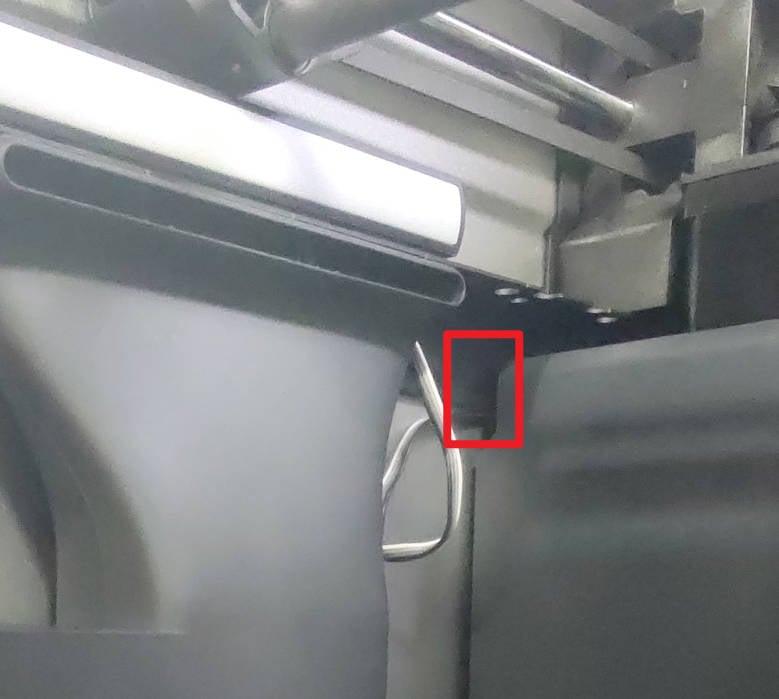
Pass the fan cable through the gap between the side panel and the inner sheld, and connect the cable to the connector on the MC board.
 |
 |
¶ Step 7 - Installing the rear cover
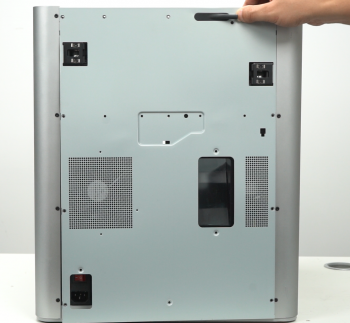
First, pass through the tube bracket and then secure the right side of the back cover past the right belt tensioner as shown below, followed by the left belt tensioner.
.png) |
 |
¶ Step 8 - Locking screws
Screw the back panel back on. Take note of the different types of screws (10 and 4) used as pointed out previously
 |
 |
¶ How to verify completion/success
Connect the power cable and turn on the printer, and operate on the screen to turn on auxiliary part cooling fan.
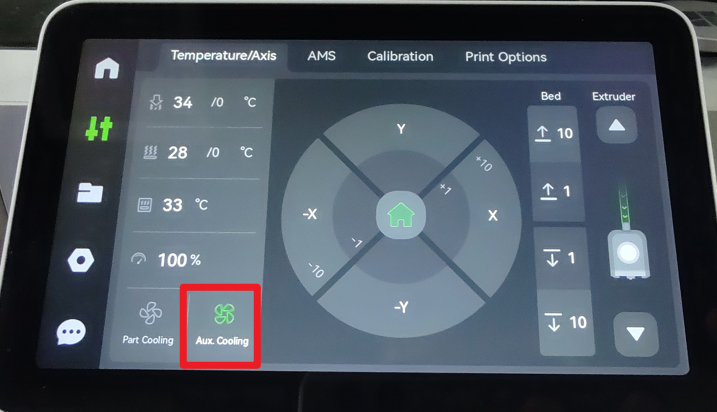
If the auxiliary part cooling fan works as expected, and the replacement is done and successful. Otherwise, retrace your steps and check the connection to try again. If problems persist, contact the service team for further assistance.