The Bambu Lab AMS is our solution for achieving multi-color 3D printing, and provides a smooth experience doing it. The article will guide you to connect the AMS to the printer, load filament in the AMS and configure filament information.
¶ Preliminary Operation
Before connecting the AMS to the printer, please complete the unboxing process of the printer. For detailed steps, refer to Unboxing X1C Combo | Bambu Lab Wiki.
¶ Video Guide
¶ Step 1 - Connecting the AMS to the printer
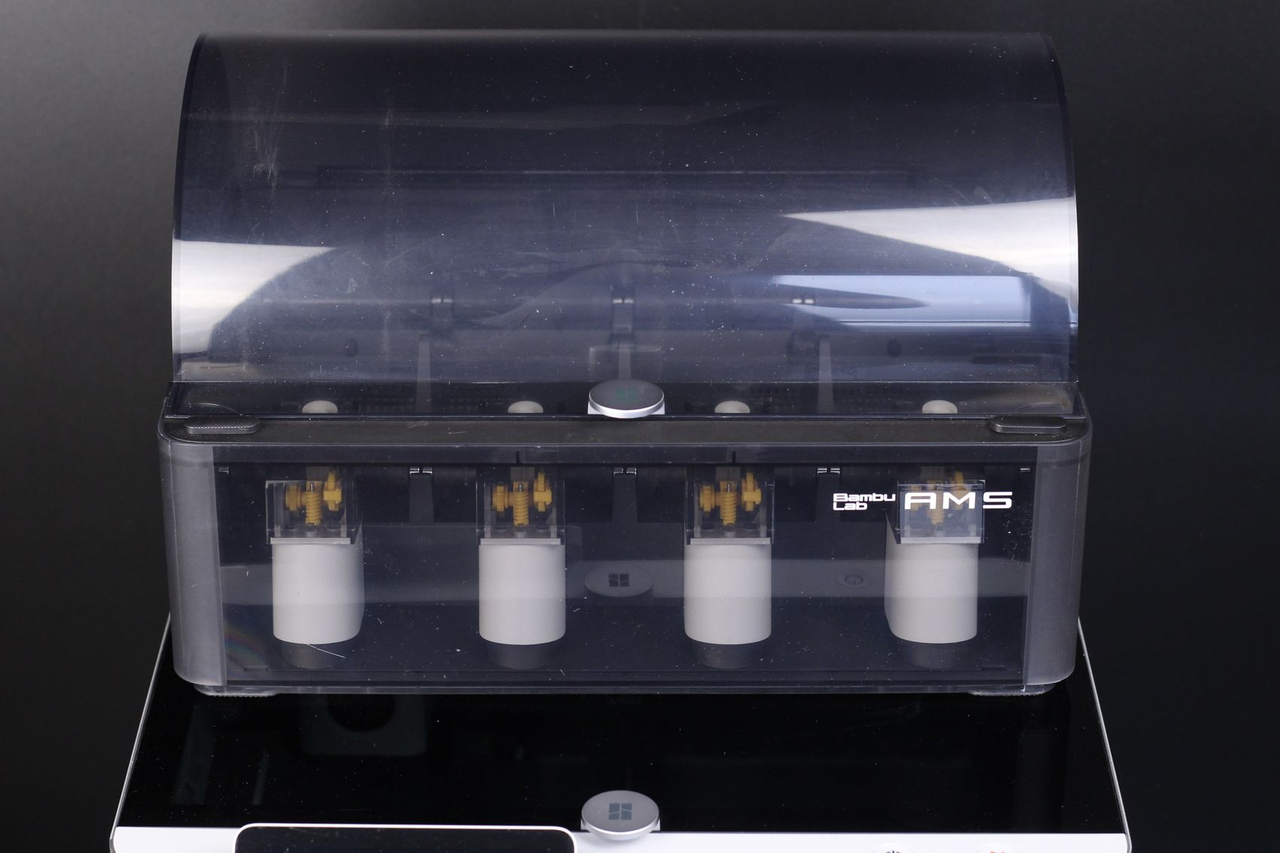
- Remove all the packaging films from the AMS and place it on the printer.
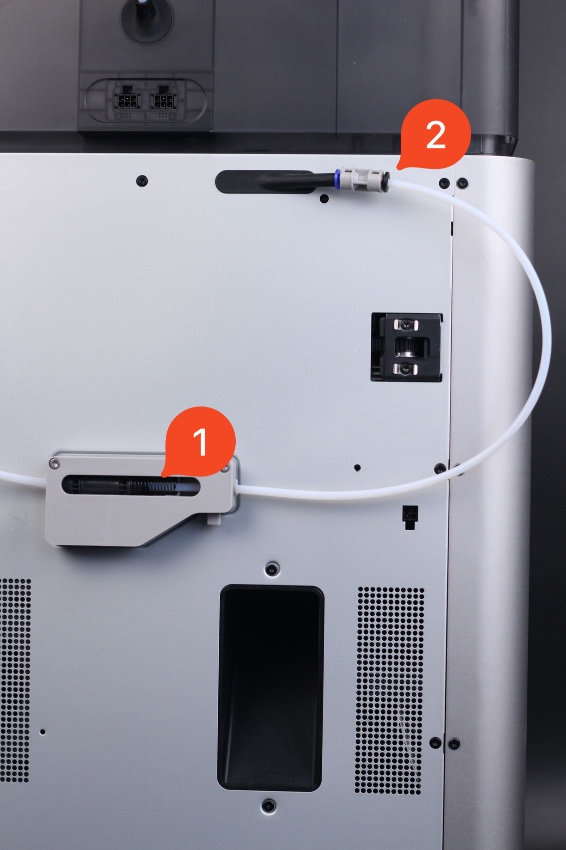
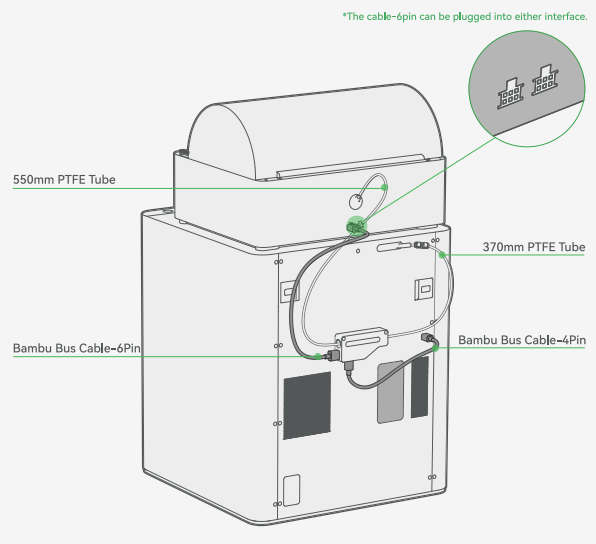
- Connect the PTFE tube from the AMS to filament buffer behind the printer, in the left PTFE connector.
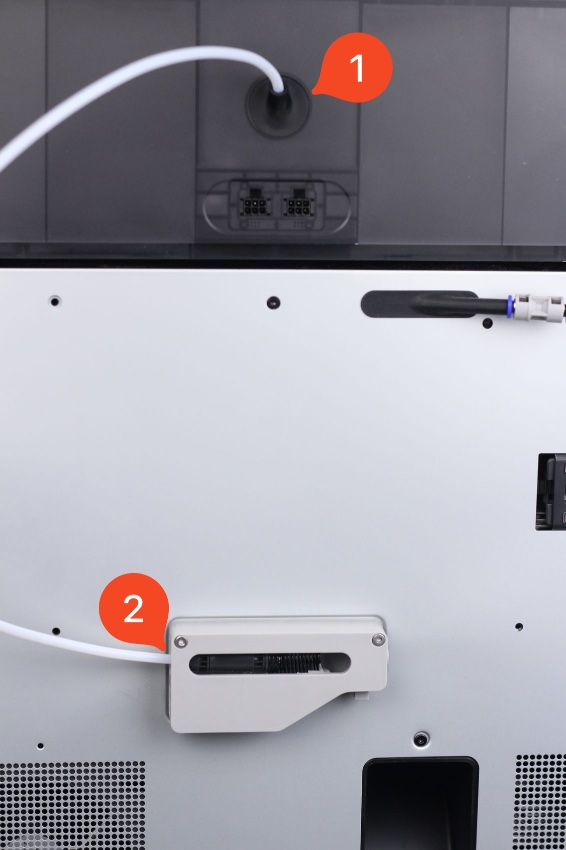
- Connect the other PTFE tube to the right side of the filament buffer and then connect it to the back PTFE coupler that directs the filament to the extruder.
- Connect one end of the 6-pin cable to the left side of the filament buffer and the other end to any of the bottom ports on the back of the AMS.
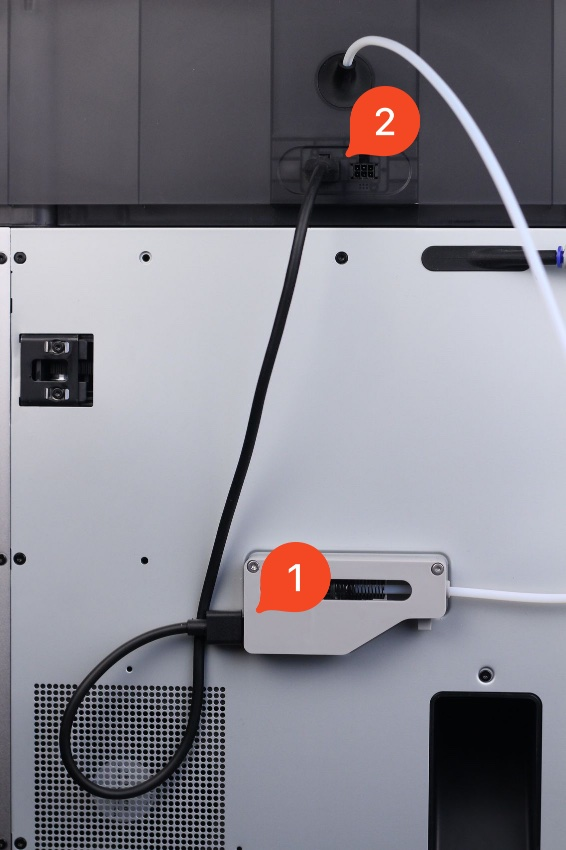
- Connect one end of the 4-pin cable to the bottom of the filament buffer and insert the L-shaped end into the 4-pin port on the back of the printer.
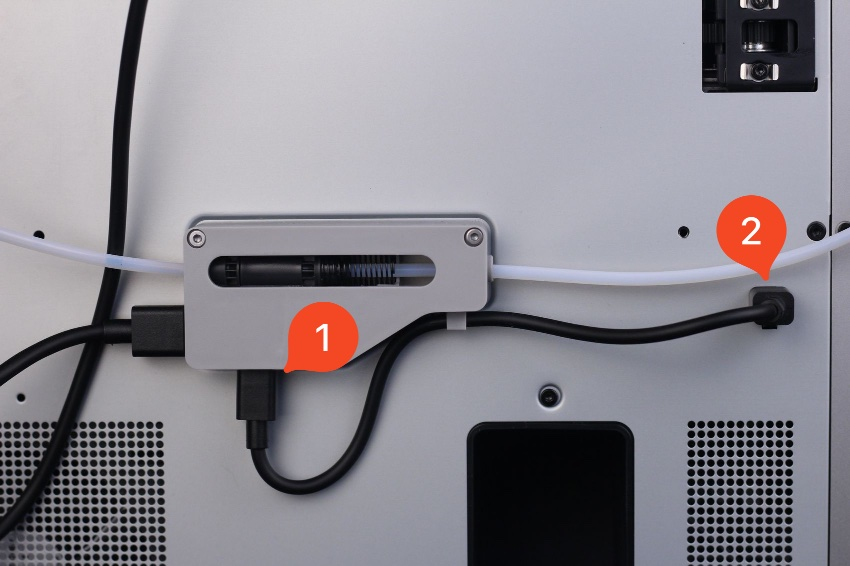
The complete connection effect is shown in the figure below.
¶ Step 2 - Loading filament in the AMS
After the AMS has been connected to the printer, the filament can be loaded.
-
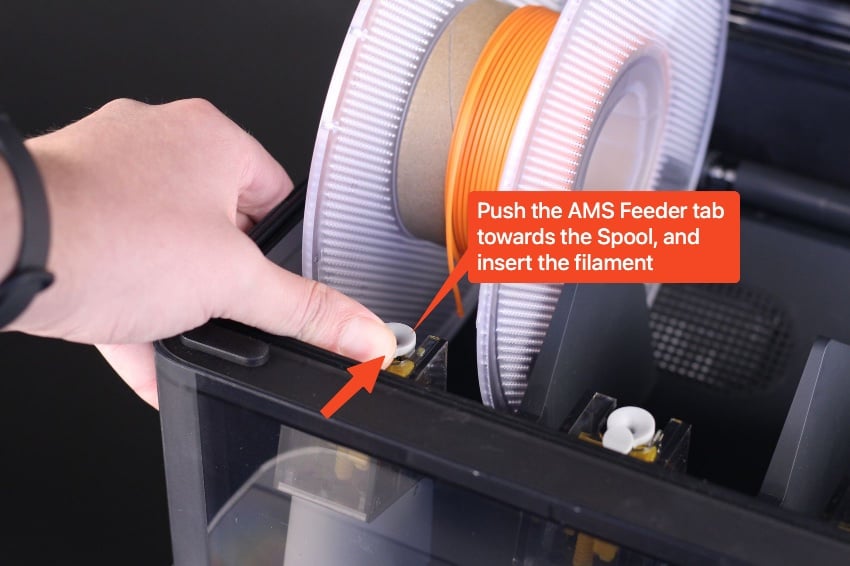
Open up the cover of the AMS and put the first filament spool in Slot 1.
-
Gently push the grey tab in front of the feeder, and push the filament for about 2 cm. The AMS will detect the filament and will start the loading procedure.
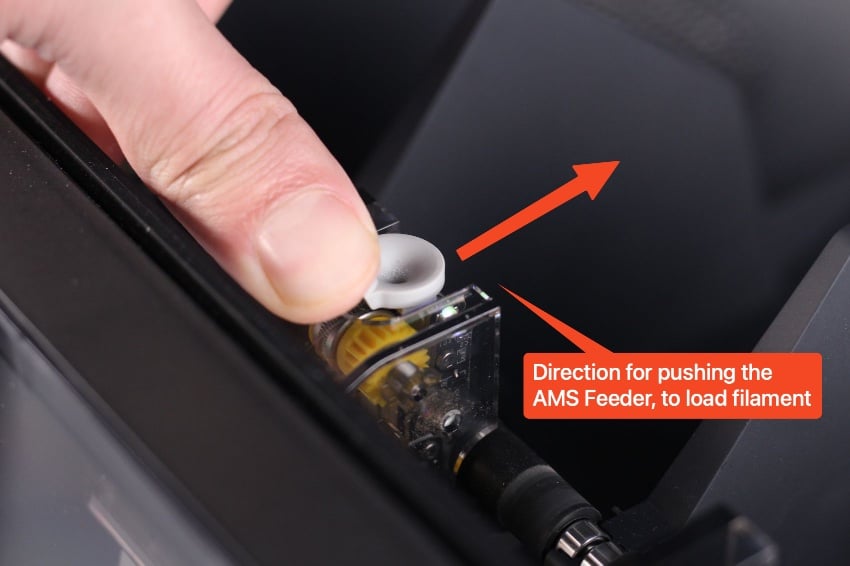
Here is another view of the AMS feeder tab. To load the filament, it needs to be pushed towards the back of the AMS. While there is a bit of resistance from the AMS feeder tab, you can push it without worry, as it is made to withstand the force of this process.
¶ Step 3 - Configuring filament information
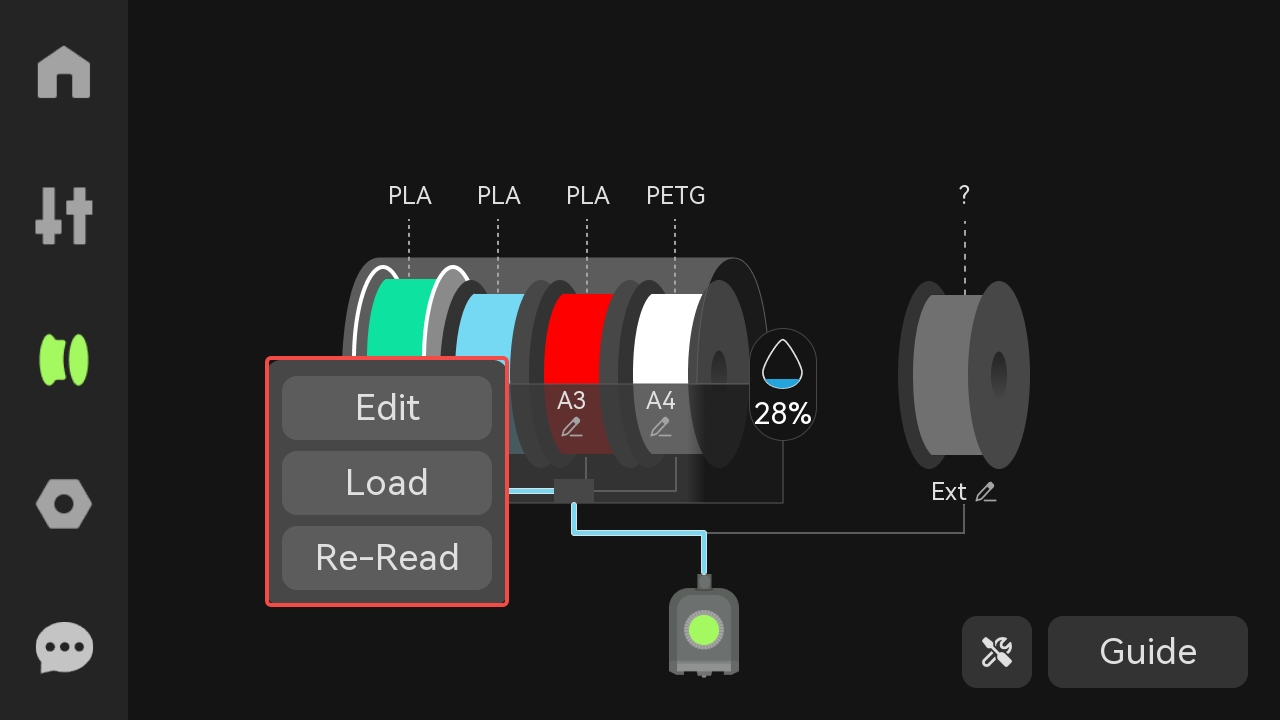
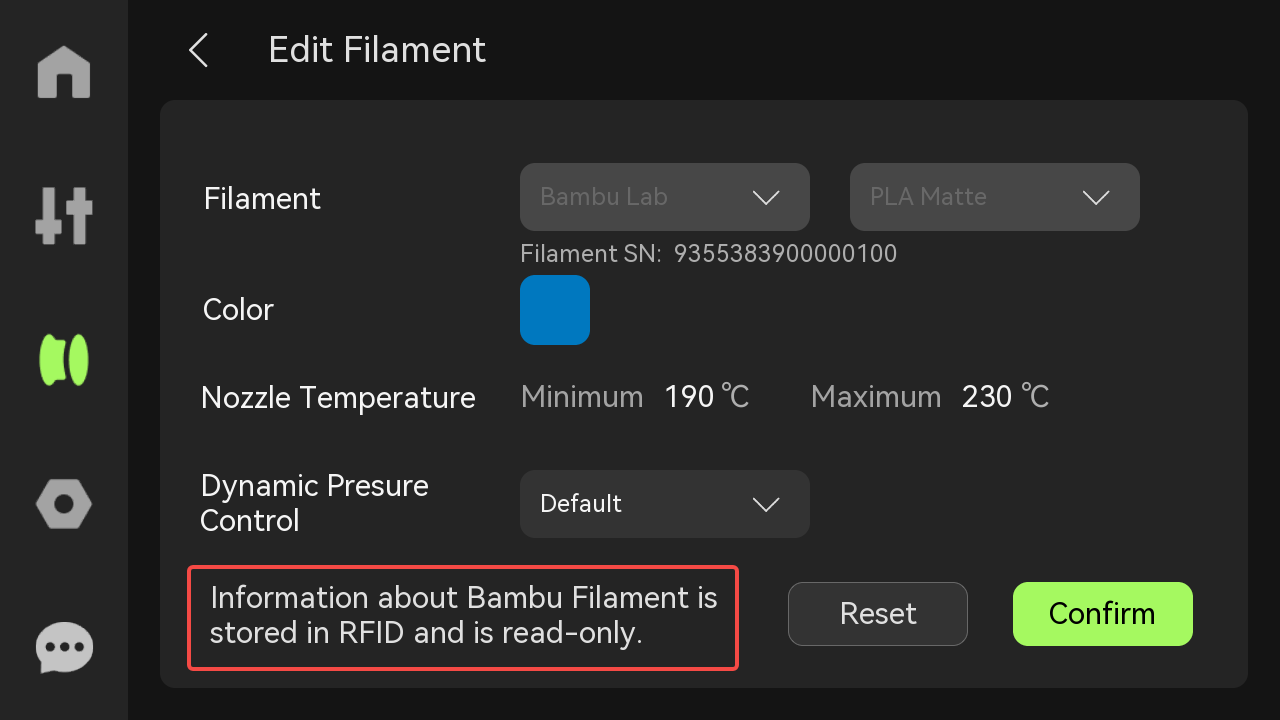
If you are using an official Bambulab filament spool, AMS will automatically identify the type and color of the filament via RFID. You can tap the slot of the identified filament on the screen to view the specific information, but you cannot manually modify it.
If you are using an unofficial filament spool, you need to manually configure the filament information on the screen. After a slot has been configured, the next time you insert another unofficial filament it will still display the previous information, you can also tap to reconfigure its information.
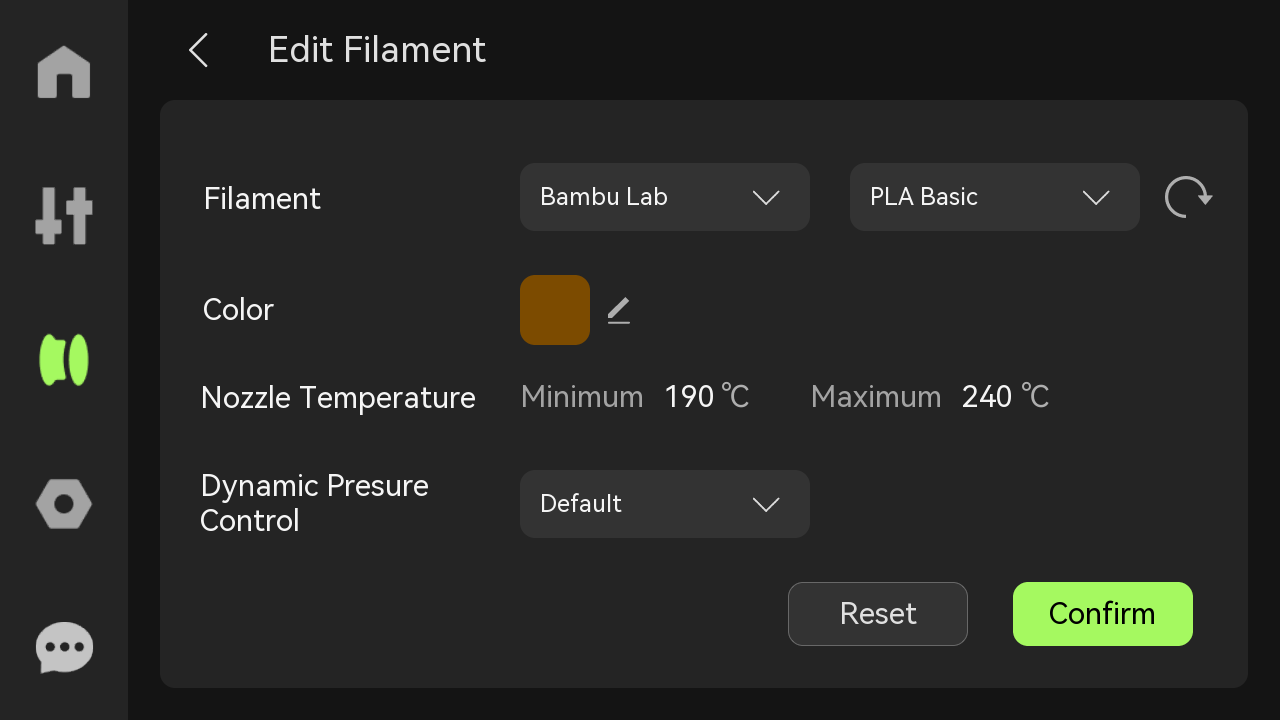
Of course, you can also configure filament information in Bambu Studio.
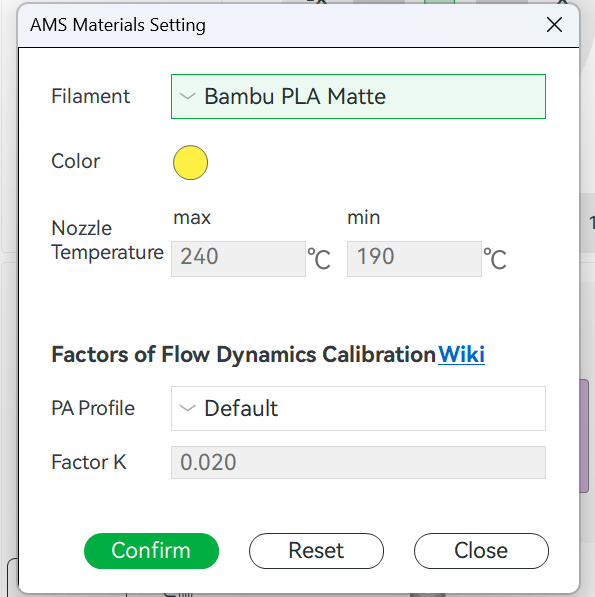
📌 Note: You can not edit the filament information during printing.
¶ Step 4 - Unloading filament
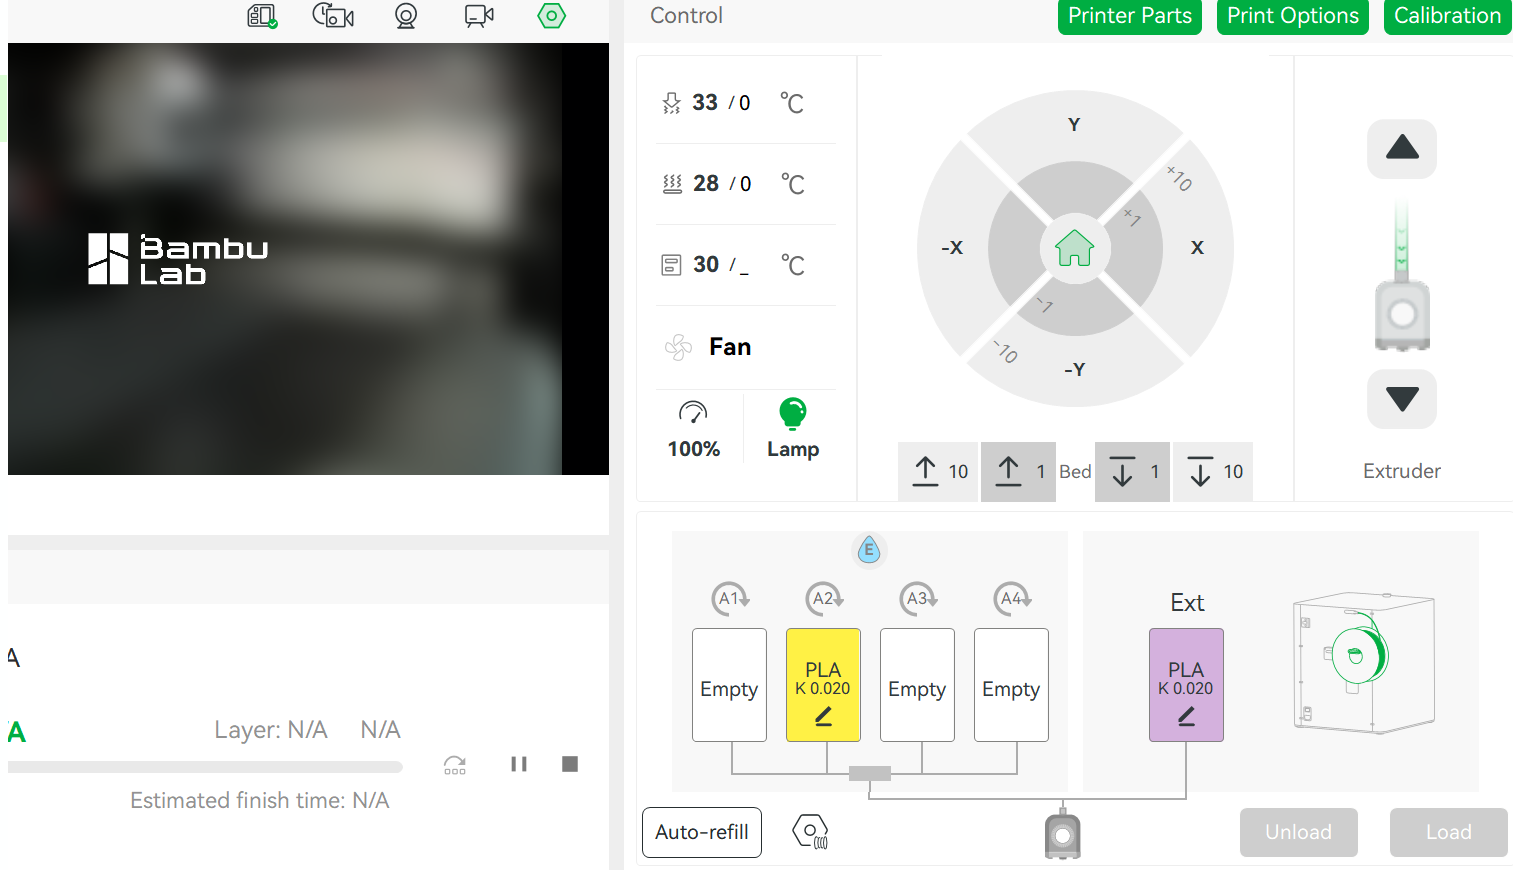
To unload the filament, first touch "Unload" on the screen to return the filament from the extruder to the AMS.
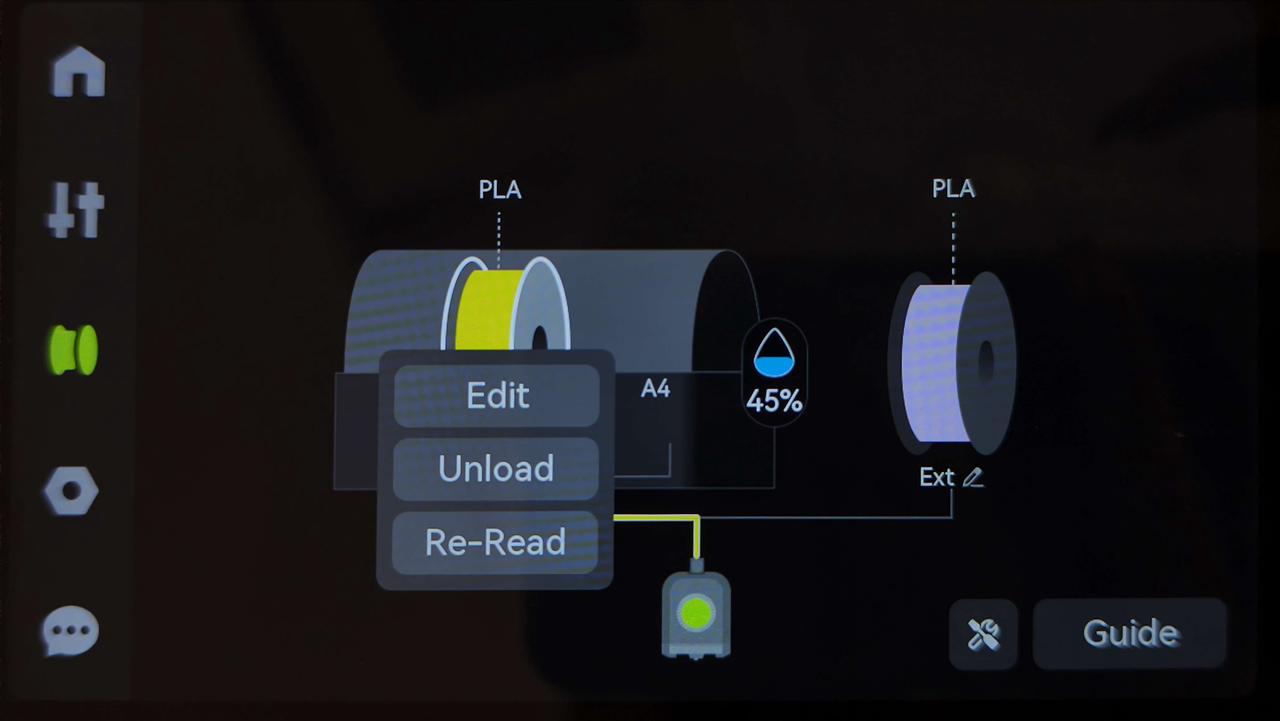
Then, please push the feeder tap forward by hand, and then pull out the filament by hand.
At times, the AMS rollers can become stuck (usually due to power failure or other errors) and be engaged to the drive gear. If this occurs, you will feel resistance in pulling out the filament and rewinding it onto the spool. See below.

If this happens, simply push the filament roll gently towards the front of the AMS, and then back again, the yellow gear should disengage from the black gear on the roller.
You can now roll the remaining filament onto the spool.
¶ End Notes
We hope that the detailed guide we shared with you was helpful and informative.
We want to ensure that you can perform it safely and effectively. If you have any concerns or questions regarding the process described in this article, we encourage you to reach out to our friendly customer service team before starting the operation. Our team is always ready to help you and answer any questions you may have.
Click here to open a new ticket in our Support Page.
We will do our best to respond promptly and provide you with the assistance you need.