¶ When to Perform This Procedure
If excessive filament debris or residue accumulates inside the filament hub, causing increased resistance during filament loading or unloading, it is recommended to disassemble the hub for internal cleaning.
¶ Required Tools and Materials
- H2.0 and H1.5 hex wrenches (Allen keys)
- Cleaning tools (e.g., lint-free cloth, small brush, air blower, etc.)
¶ Disassembly Guide
¶ Step 1 – Remove the Filament Hub
Refer to the AMS 2 Pro Disassembly and Assembly Guide to detach the filament hub (including the 3520 motor) from the AMS 2 Pro and separate the motor from the hub, following steps 1, 2, 3, 4, and 7 in the guide.
¶ Step 2 – (Optional) Remove the 3520 Motor
Screw locations to be removed

Remove the two screws
After removing the screws, apply gentle outward force to detach the motor.
Note that two loose bearings may fall out during this process—please keep them properly stored.
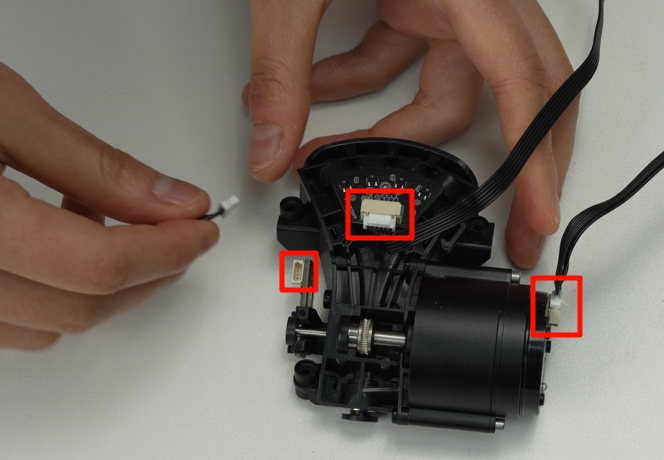
¶ Step 3 – Disconnect the Cable
Disconnect the three motor cables from the filament hub.
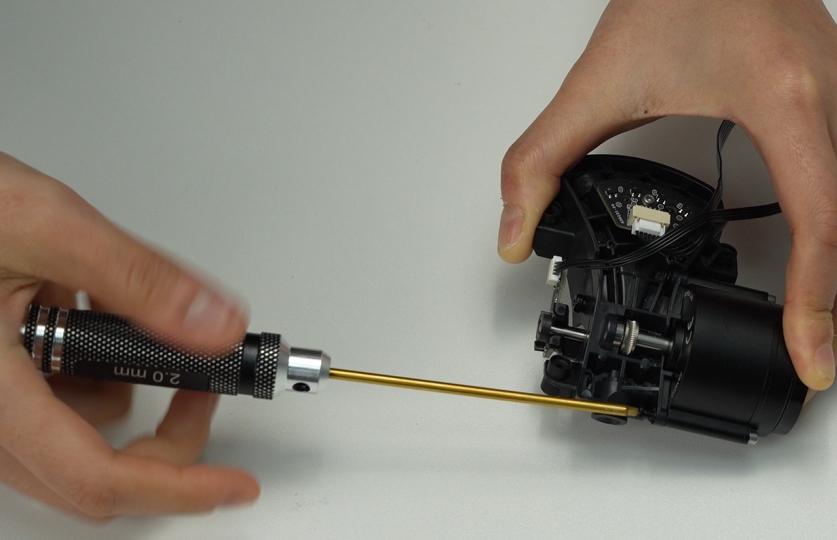
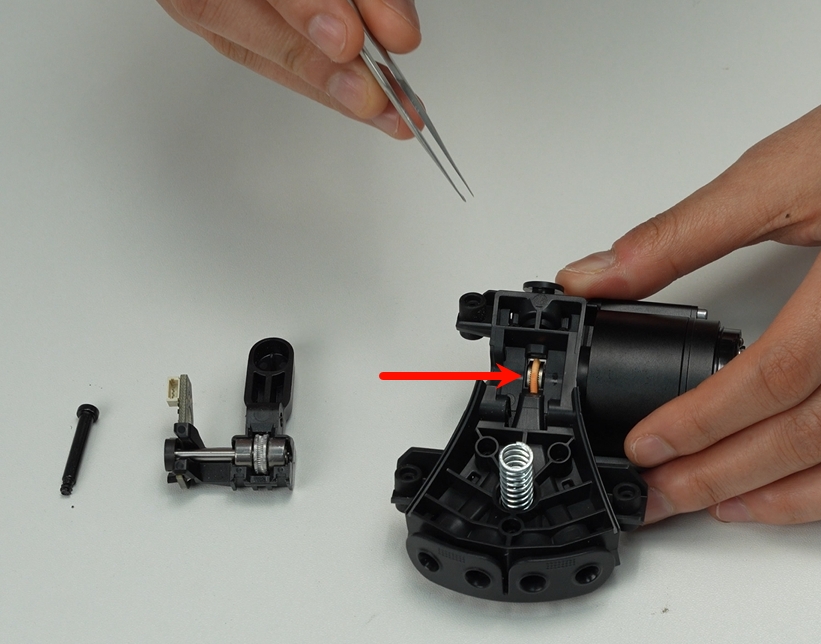
¶ Step 4 – Remove the Filament Selector Button
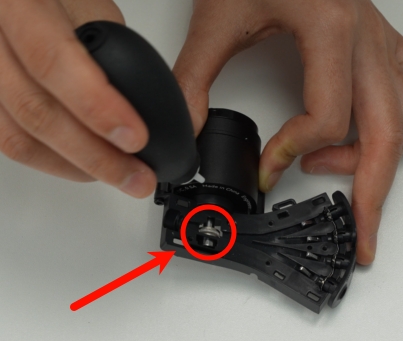
Use a 2.0 mm hex wrench to remove one screw.

Once the screw is removed, the AMS hub idler lever can be taken off.
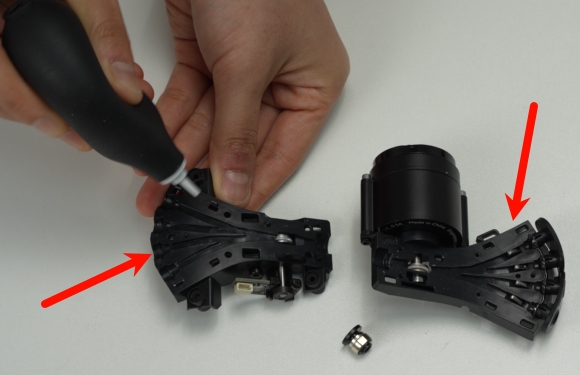
Use tweezers to remove any broken filament pieces.
Use an air blower to clean the internal structure of the hub.
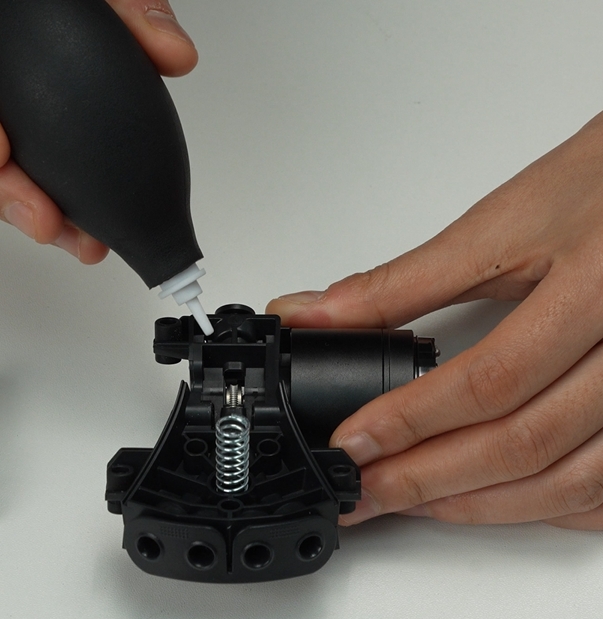
Rotate the internal mechanism while using the air blower to ensure thorough cleaning.
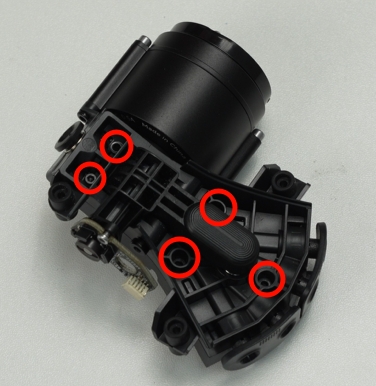
¶ Step 5 – Separate the Upper and Lower Housings of the Filament Hub
Use a hex wrench to remove the five screws.
Insert the hex wrench through the pneumatic connector opening to gently pry apart the upper and lower housings.
Caution: This operation may cause the pneumatic connector, as well as the internal magnets and springs, to become loose and fall out during disassembly—handle with care.
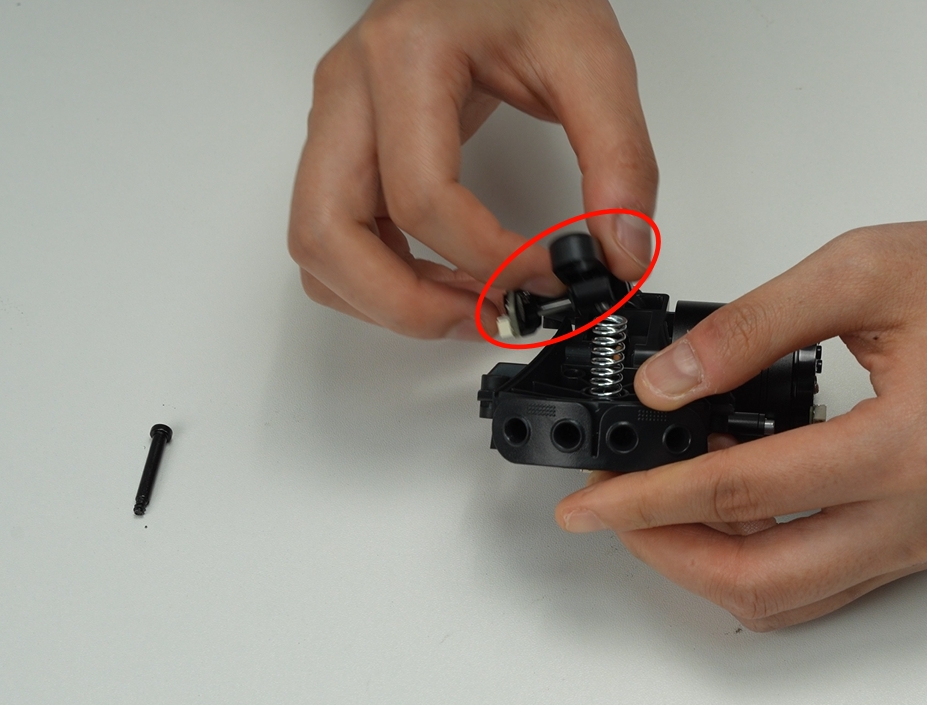
¶ Step 6 – (If the pneumatic connector is not clogged, it is recommended to skip this step.) Remove the Pneumatic Connectors
Due to the complexity of disassembling and assembling the pneumatic connector, which can easily damage components, it is recommended to skip this step if the pneumatic connector is not clogged.
Refer to the animation below to see how to remove the pneumatic connectors using a hex wrench for leverage.
¶ Step 7 – (Optional) Internal Cleaning
Use appropriate cleaning tools to remove filament debris and dust from the gears, pneumatic connectors, filament channels, and narrow gaps. Perform dust removal separately on both the upper and lower housings.
Use fine cleaning tools (e.g., small brushes or compressed air) to clean detailed and hard-to-reach areas.
¶ Reassembly Guide
¶ Step 1 – Install the Four Pneumatic Connectors
Align the four pneumatic connectors with their corresponding mounting holes and insert them securely.
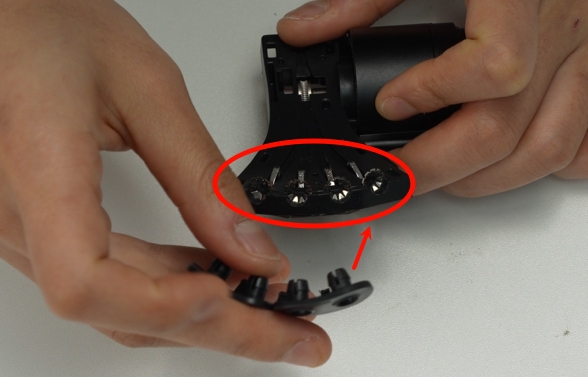
Refer to the image below for correct installation alignment.
¶ Step 2 – Install the Remaining Pneumatic Connector

¶ Step 3 – Reassemble the Upper and Lower Housings
Align the upper and lower housings properly.
Press the housings together firmly until fully seated.

¶ Step 4 – Fasten the Upper and Lower Housings
Tighten the five connecting screws using a hex wrench.
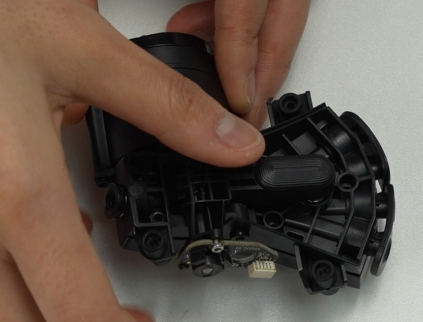
¶ Step 5 – Install the Filament Selector Button
Align the recessed section of the button with the spring.

Press down vertically to fit the button into place.
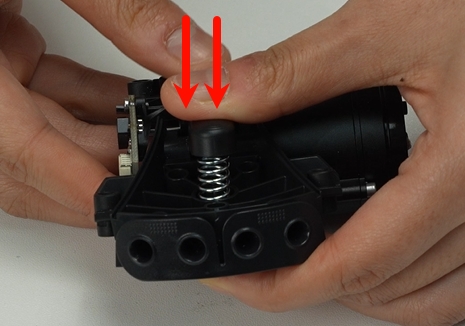
While holding the button, align the screw hole and insert the screw.
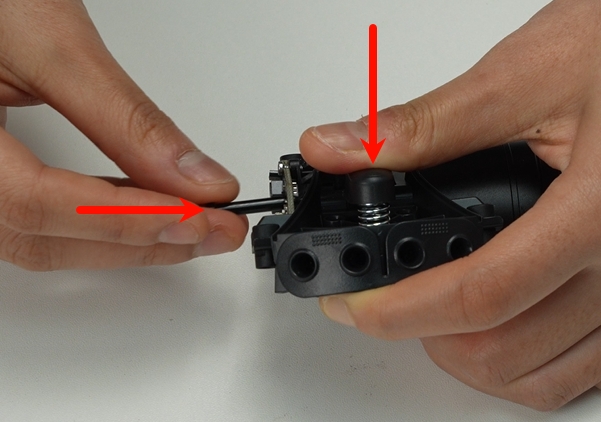
Tighten the screw with a hex wrench.

¶ Step 6 – Install the 3520 Motor
Before installation, identify the correct locations for the two bearings:

Insert the bearings into both the motor and the filament hub before attaching the motor. The small one goes filament hub, the large one goes on the motor.

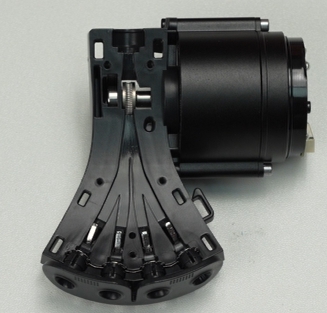
Note: Pay attention to the motor orientation. Ensure that the motor's cable port is facing toward the four pneumatic connectors before installation.

¶ Step 7 – Connect the Three Cables
Identify the correct connectors and cable port positions.
Plug in the three cables securely.
¶ Step 8 – Install the Filament Hub onto the AMS 2 Pro
Refer to the AMS 2 Pro Disassembly and Assembly Guide to reinstall the filament hub (including the 3520 motor) into the AMS 2 Pro unit.
¶ Verify the Functionality of the Filament Hub
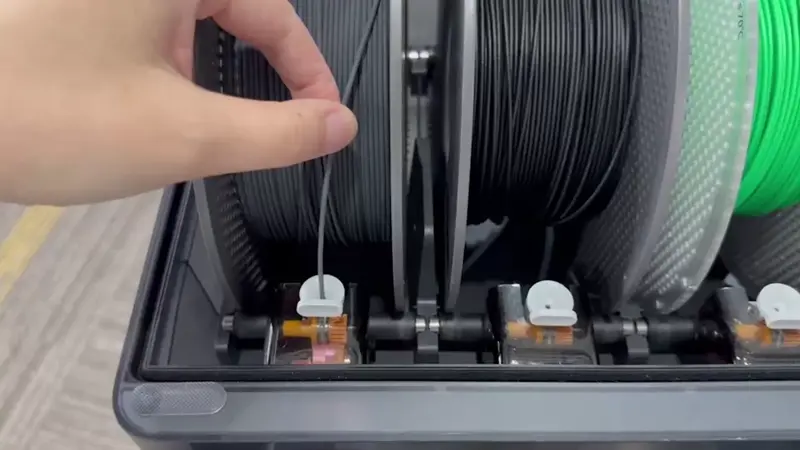
- Manually insert or remove filament through the loading/unloading module.
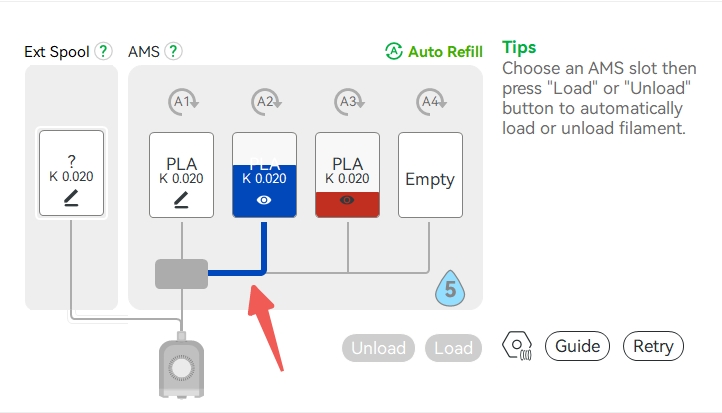
If the sensors in the AMS filament hub are functioning correctly, the system will detect the filament and display the corresponding slot on the screen. After a brief recognition process, the AMS will identify and show the filament type and color on the display. This step can be used to verify whether the sensors for each slot in the AMS filament hub are working properly.
Manually insert filament into the loading module (H2D).
Use Bambu Studio to verify whether the sensors are functioning correctly.
Otherwise, please check the cable connections and try again.
If no abnormalities are found but the issue persists, contact the Bambu Lab Support Team for further assistance.
- During filament loading or when starting a print, the filament may fail to feed from the AMS. In this case, the loading/unloading module may flash a red light, and the following error message may appear:
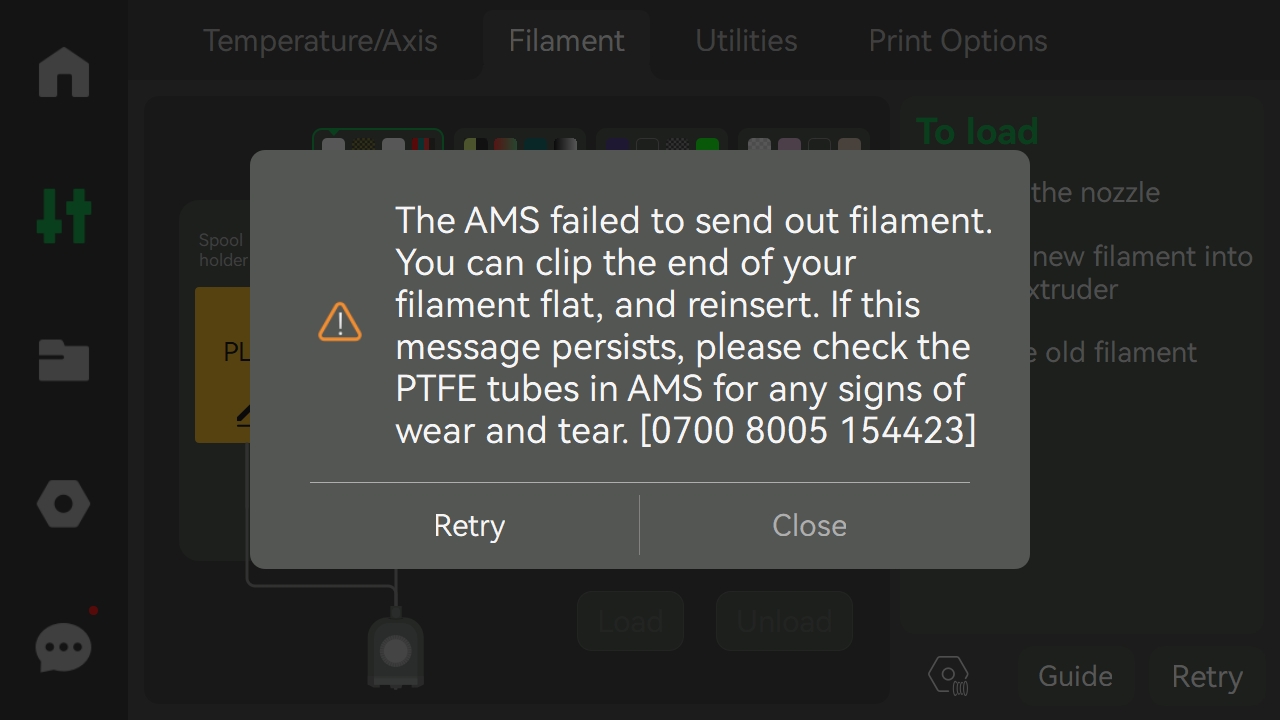
An error message appears on the machine.
The red indicator light flashes at the loading/unloading module.
Note: If you removed any magnets during disassembly, please check whether they were reinstalled in the correct orientation.
Refer to Remove and install the magnets in AMS filaments hub to correct any incorrectly installed magnets.
¶ Possible Issues and Solutions
If any issues arise after disassembling or cleaning the Filament Hub, please refer to the following potential problems and their corresponding solutions:
1. Filament hub does not detect filament / Slot appears empty
Check the cable connections mentioned in Step 9. Ensure all three connectors are properly and securely plugged into the mainboard. Reconnect them if necessary and restart the machine.
2. Filament loading or unloading is abnormal / Feels stuck
Make sure the internal cleaning of the filament hub was thorough—especially around the gears, pneumatic connectors, and filament paths. Reopen the hub if needed and clean the critical areas again using a blower or brush.
3. Filament hub button is hard to press / Spring does not return properly
Refer to “Step 5 – Install the Filament Selector Button” to confirm the spring is installed in the correct orientation and the button is properly aligned with the slot. If necessary, disassemble the button and readjust the spring position.
¶ Preventive Maintenance Tips
To avoid similar issues in the future, it’s important to perform regular maintenance on your AMS 2 Pro. Keep filaments away from dust and moisture by storing them in sealed containers or dry boxes. Periodically clean the AMS, especially the filament hub and feeding paths, to remove any debris or residue. Regular inspection and care will help ensure smooth filament feeding and extend the life of your equipment.
¶ End Notes
We hope the detailed guide provided has been helpful and informative.
If this guide does not solve your problem, please submit a technical ticket, we will answer your questions and provide assistance.
If you have any suggestions or feedback on this Wiki, please leave a message in the comment area. Thank you for your support and attention!