¶ H2D Laser Upgrade
If you want to upgrade your H2D to an H2DL, simply purchase the 10W/40W laser upgrade kit and follow the steps in this guide. This guide uses the 10W laser module as an example to provide you with a clear and safe upgrade process.
The Laser Upgrade involves a more advanced installation process. Before starting, we strongly recommend reviewing the Bambu Lab Wiki in its entirety, and watching the Laser Upgrade Kit video to ensure you're confident with the procedure.
¶ Tools and Materials Needed
- Laser Upgrade Kit
- H2.0 Allen key
- 1.5h
¶ Safety Warning
IMPORTANT!
It's crucial to power off the printer before conducting any maintenance work, including work on the printer's electronics and tool head wires. Performing tasks with the printer on can result in a short circuit, leading to electronic damage and safety hazards.
During maintenance or troubleshooting, you may need to disassemble parts, including the hotend. This exposes wires and electrical components that could short circuit if they contact each other, other metal, or electronic components while the printer is still on. This can result in damage to the printer's electronics and additional issues.
Therefore, it's crucial to turn off the printer and disconnect it from the power source before conducting any maintenance. This prevents short circuits or damage to the printer's electronics, ensuring safe and effective maintenance. For any concerns or questions about following this guide, we recommend submitting a technical ticket regarding your issue and we will do our best to respond promptly and provide the assistance you need.
¶ Video Guide
¶ Operation Guide
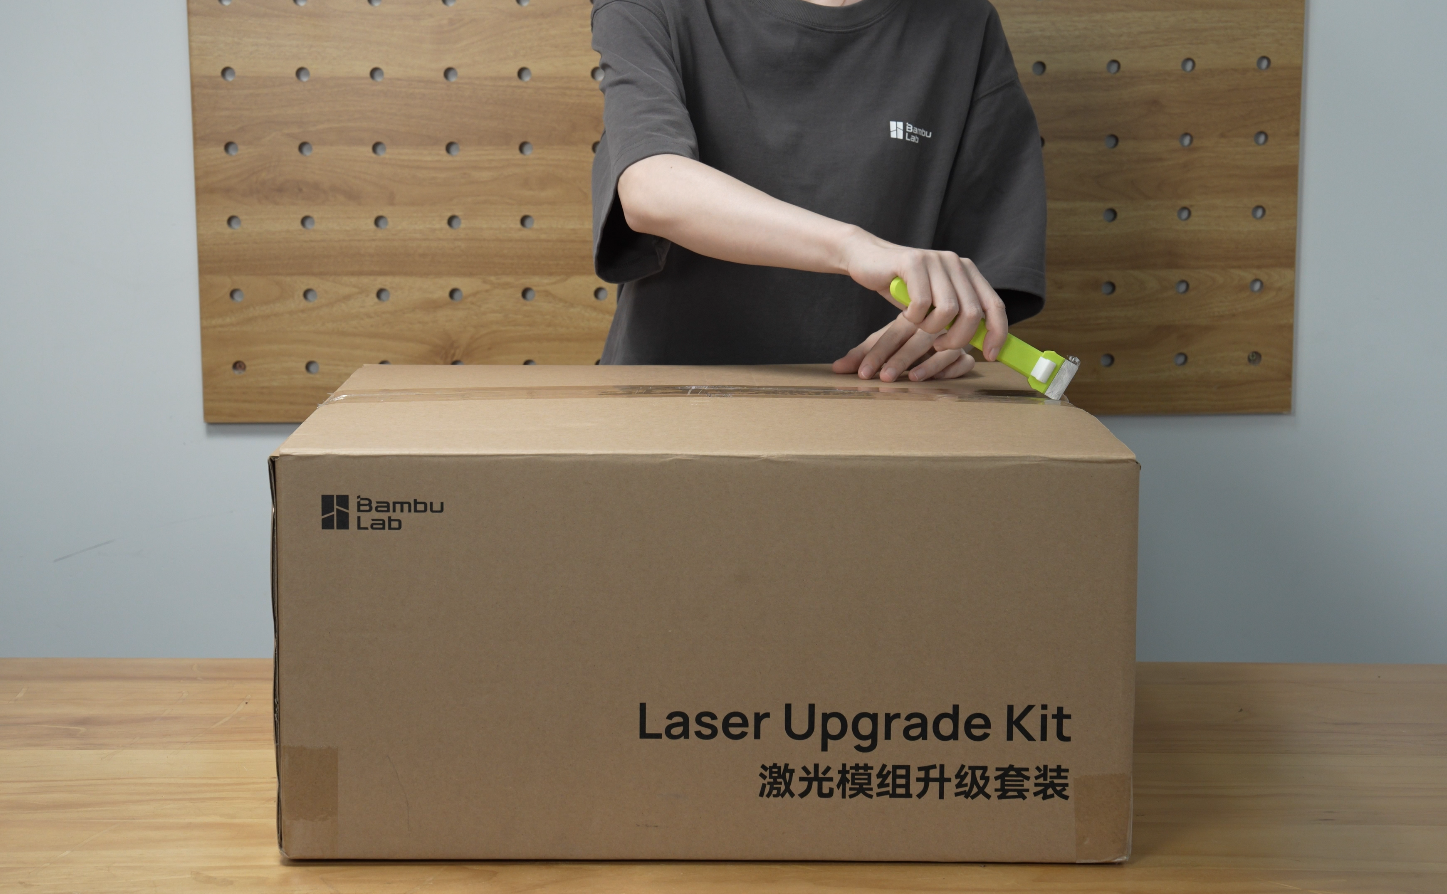
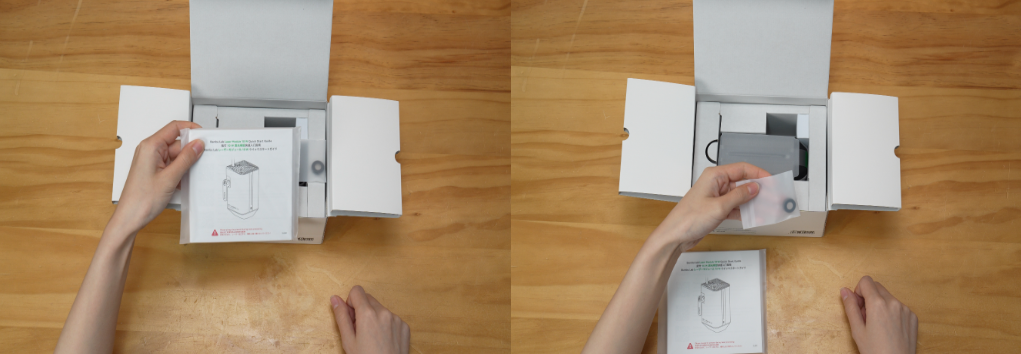
¶ Unpack the Laser Upgrade Kit
- Carefully cut open the Laser Upgrade Kit Box.
- Remove foam inserts to reveal the kit components.
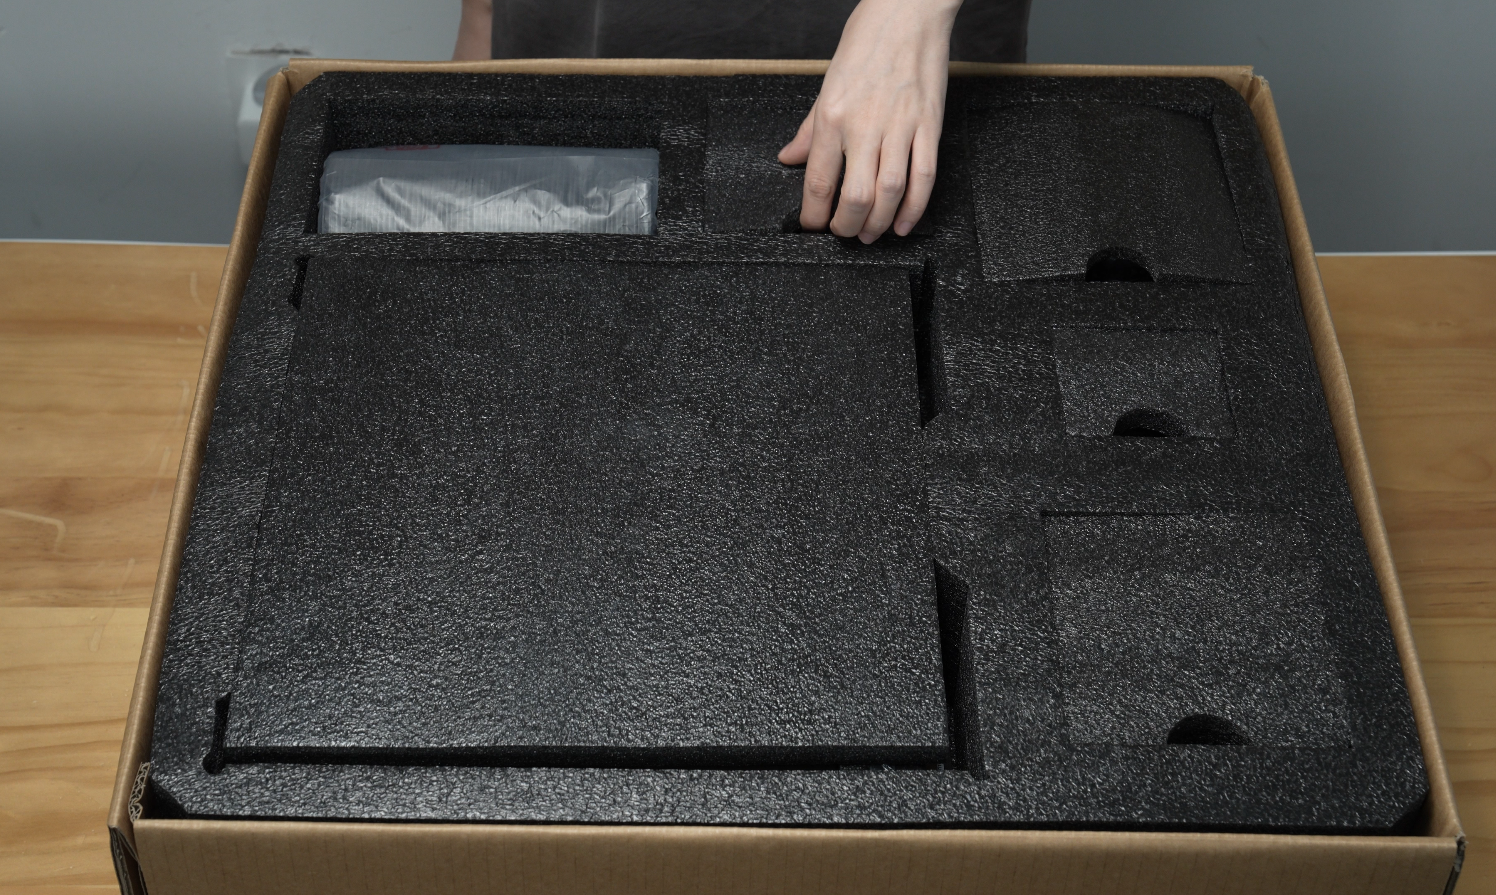
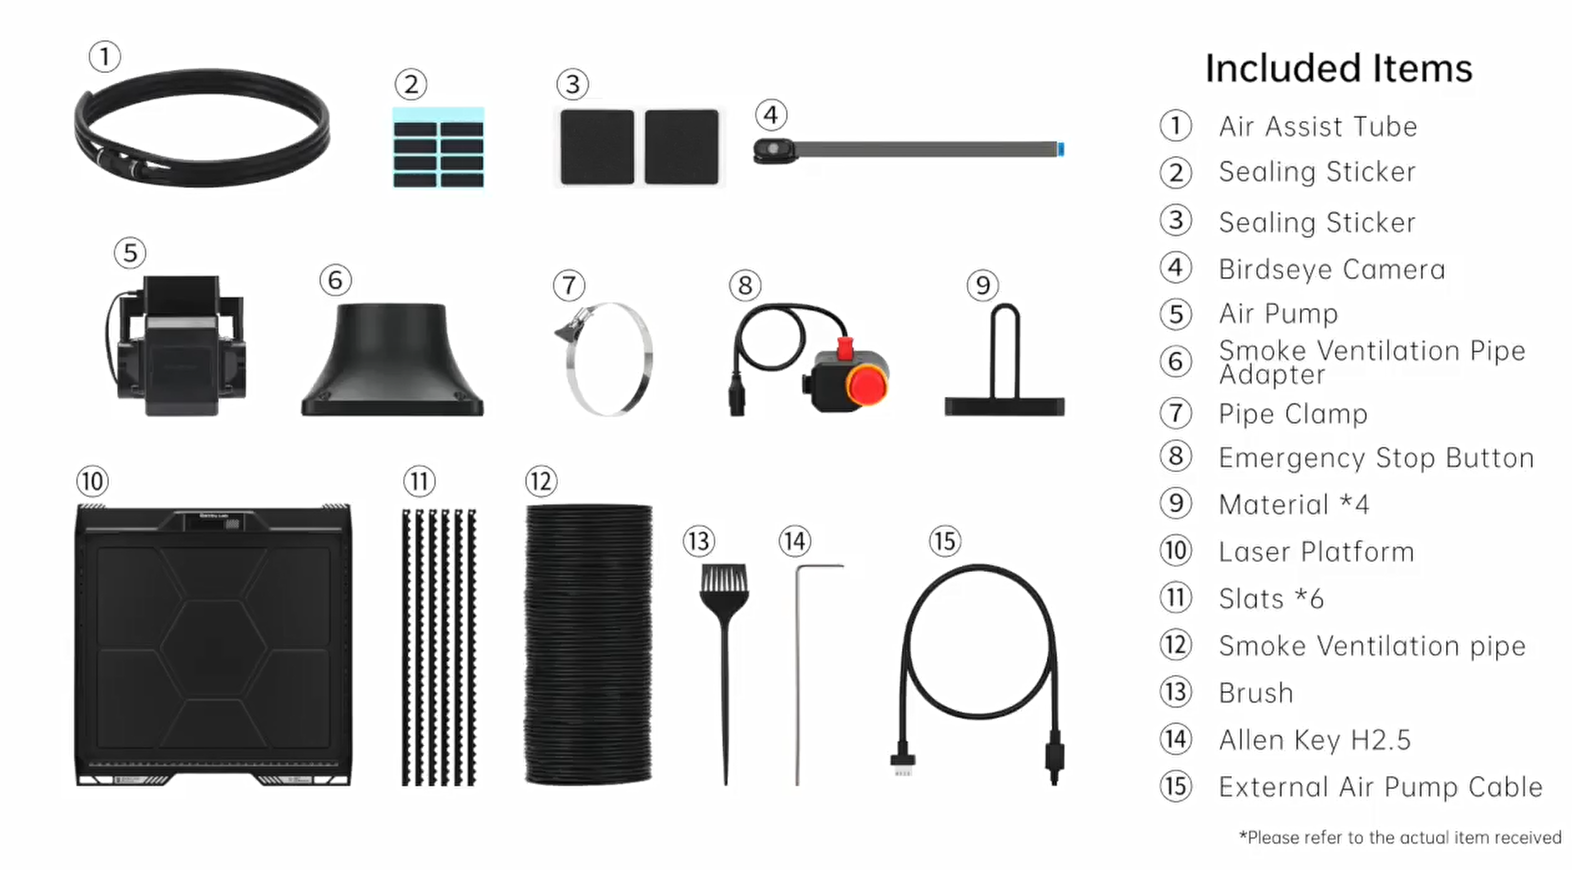
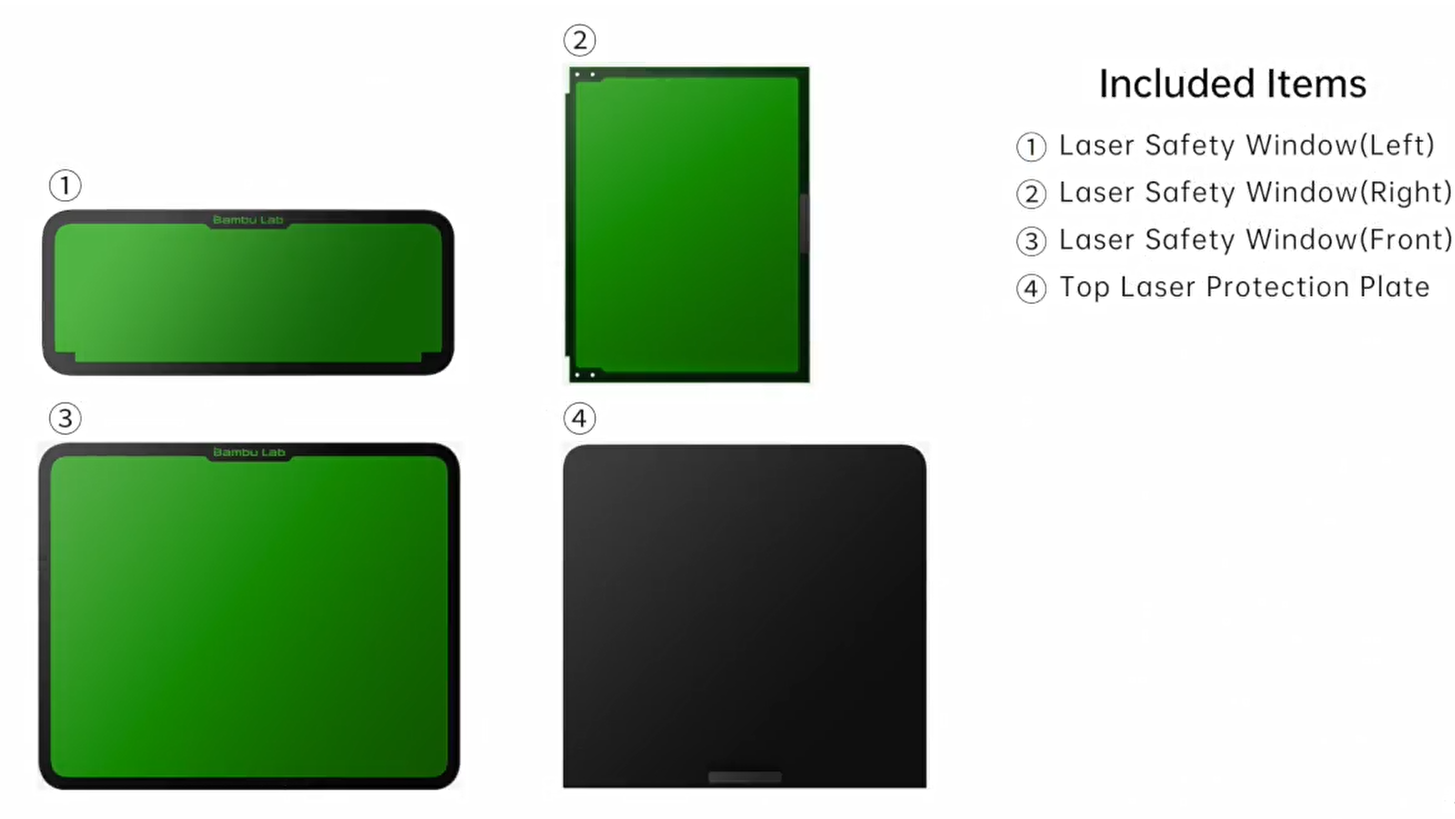
- Remove all kit components from the foam and place them on your working surface.
Note: The BirdsEye camera clips and screws are not marked in the following image, but are included in the upgrade kit.
¶ Replace the Front Laser Safety Window
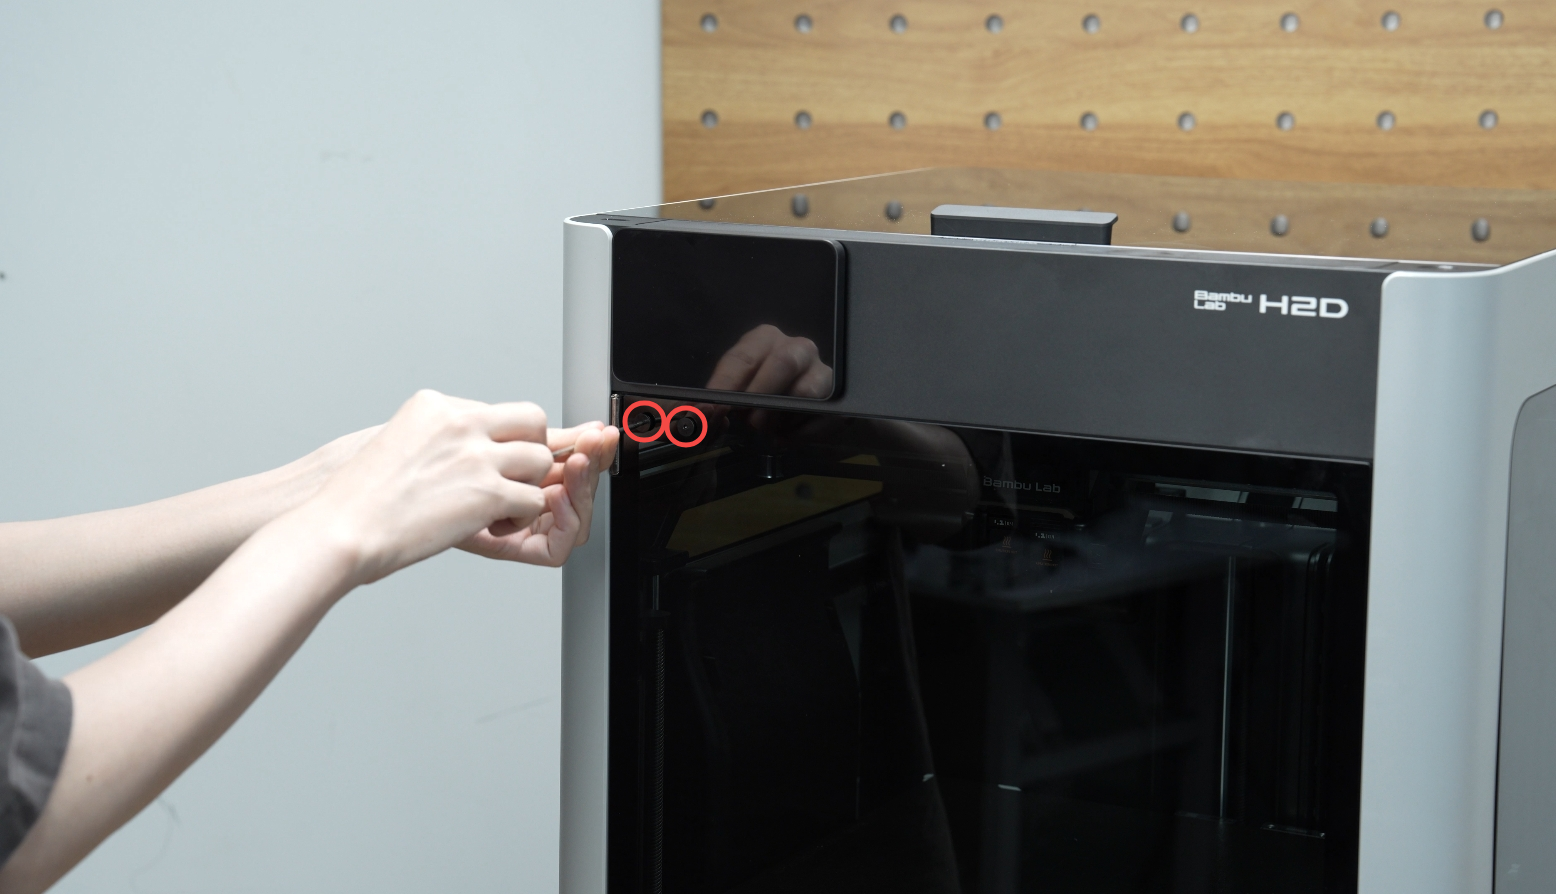
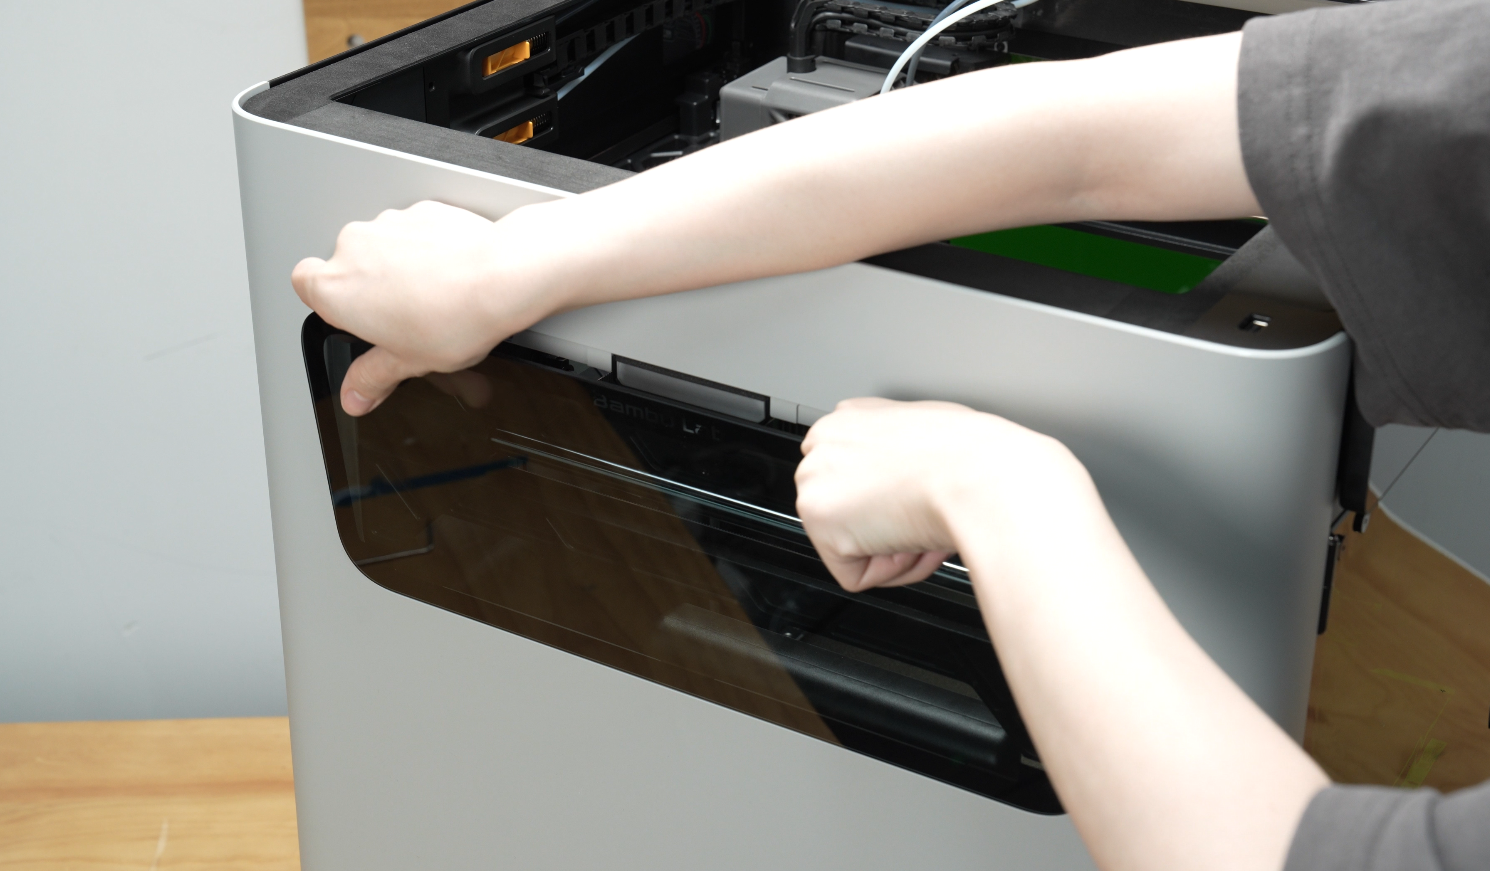
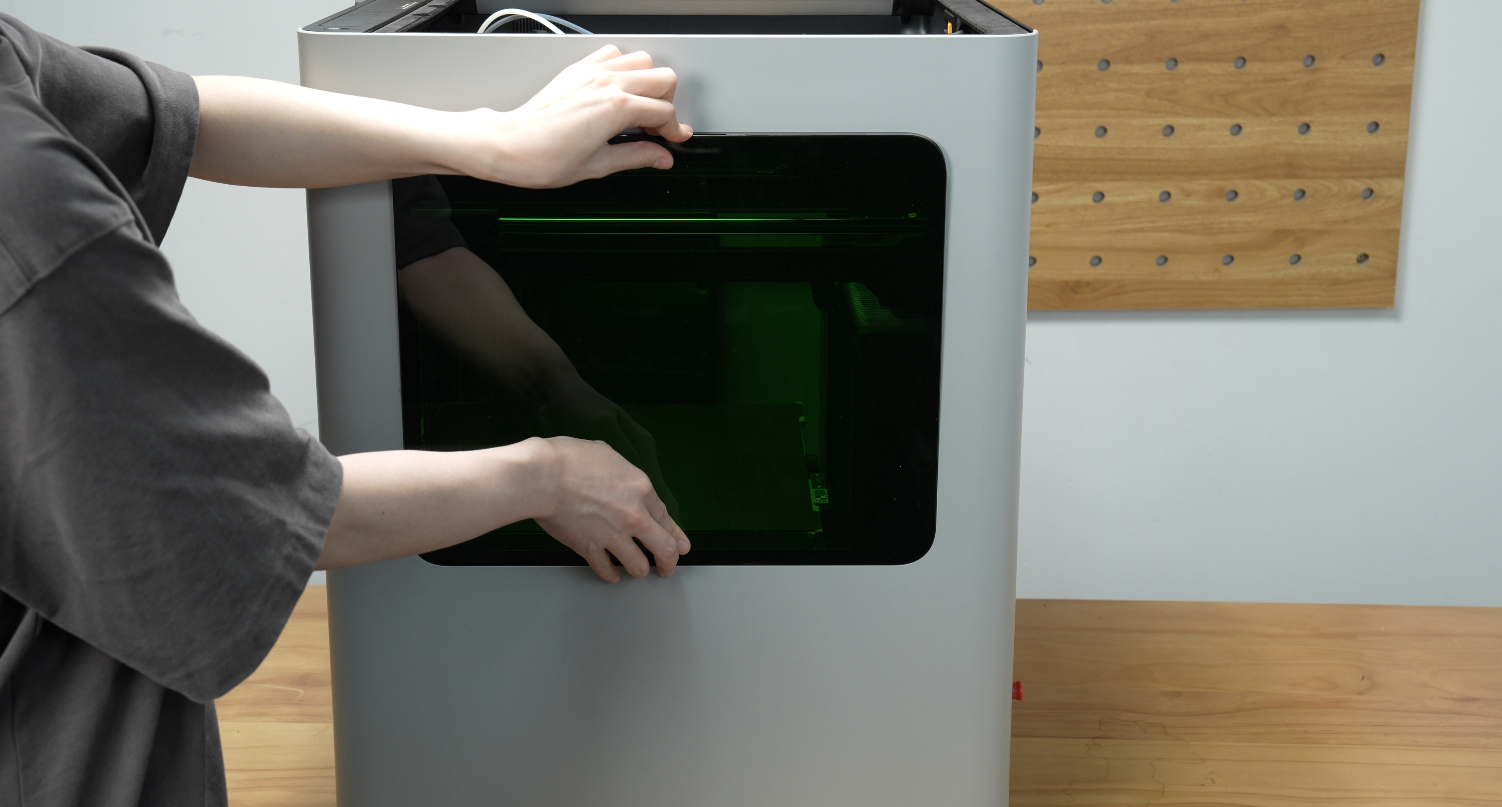
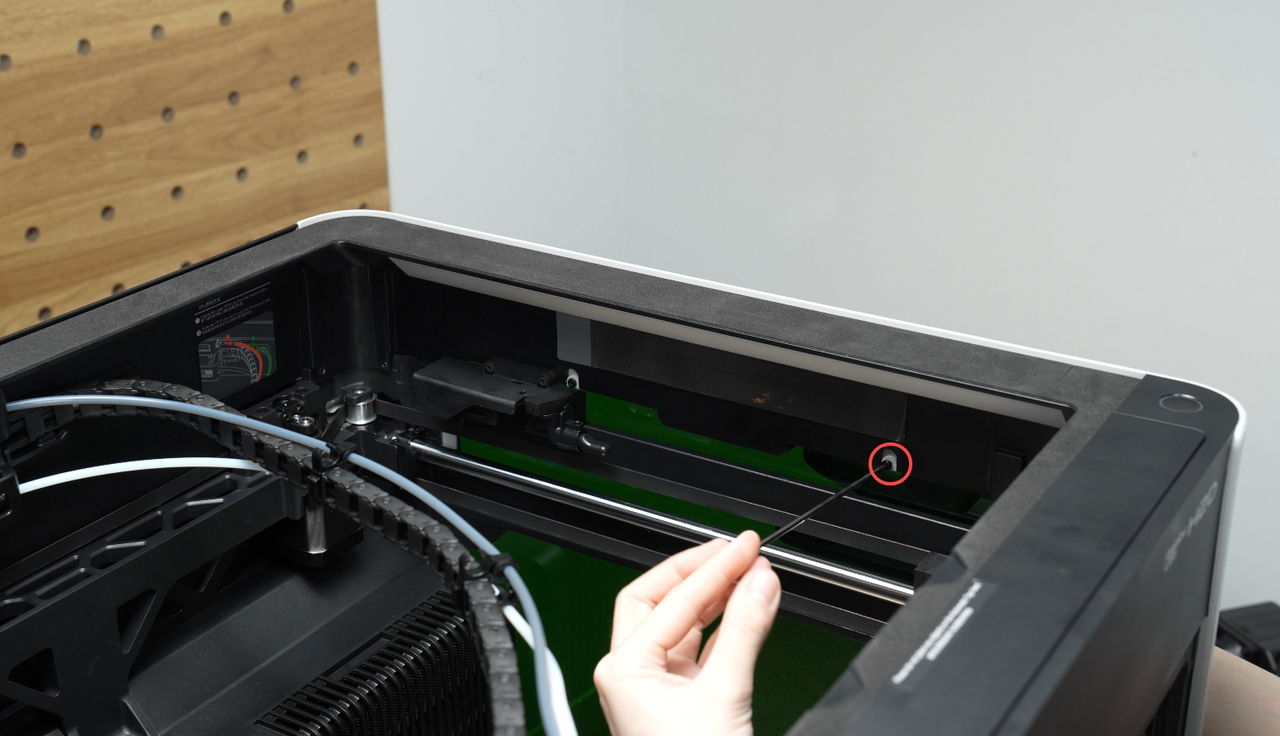
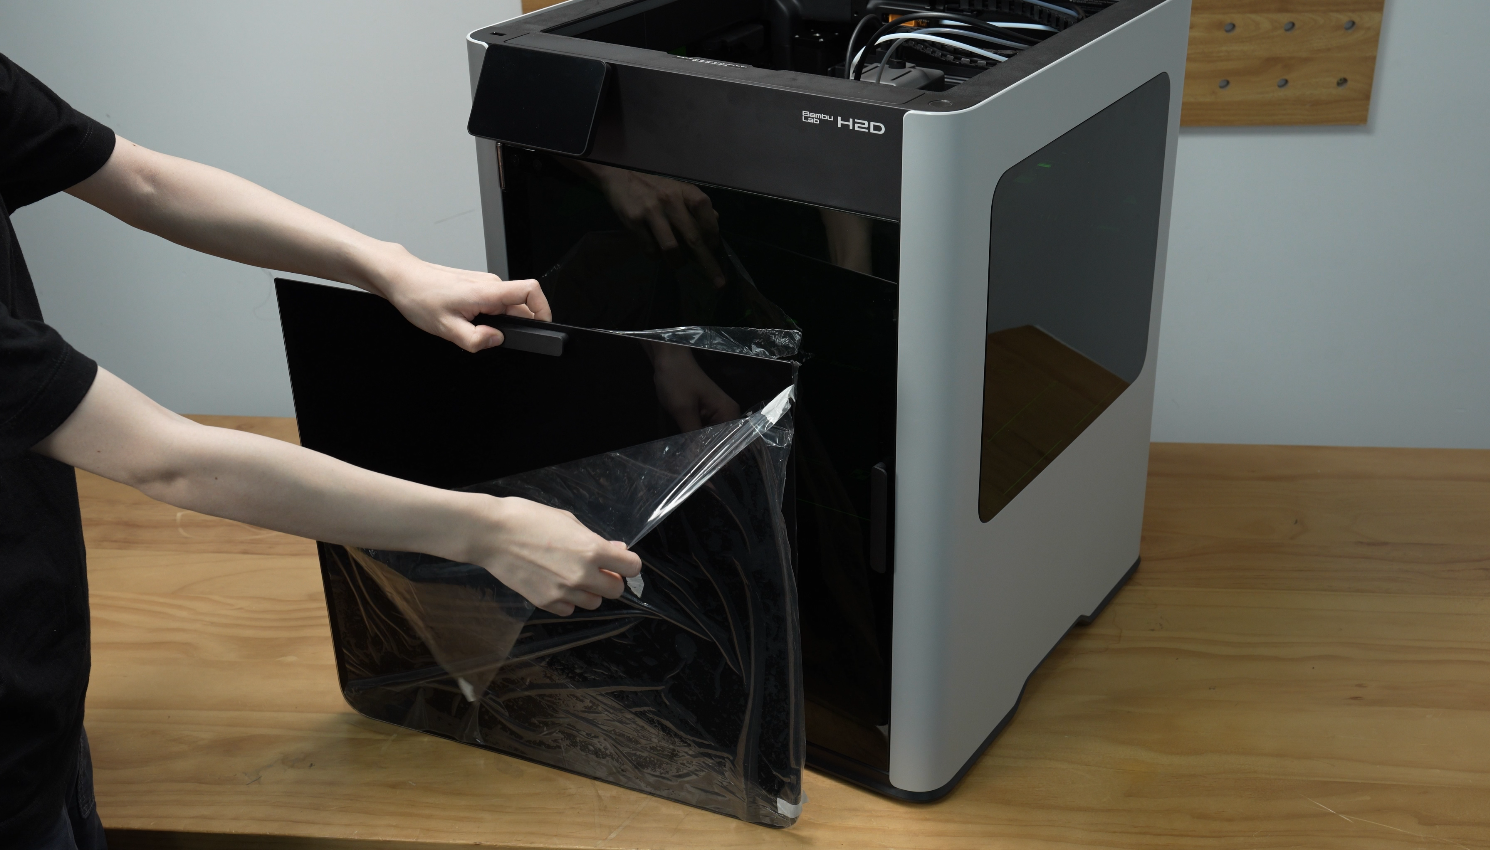
¶ Remove the normal H2D Front Glass Door
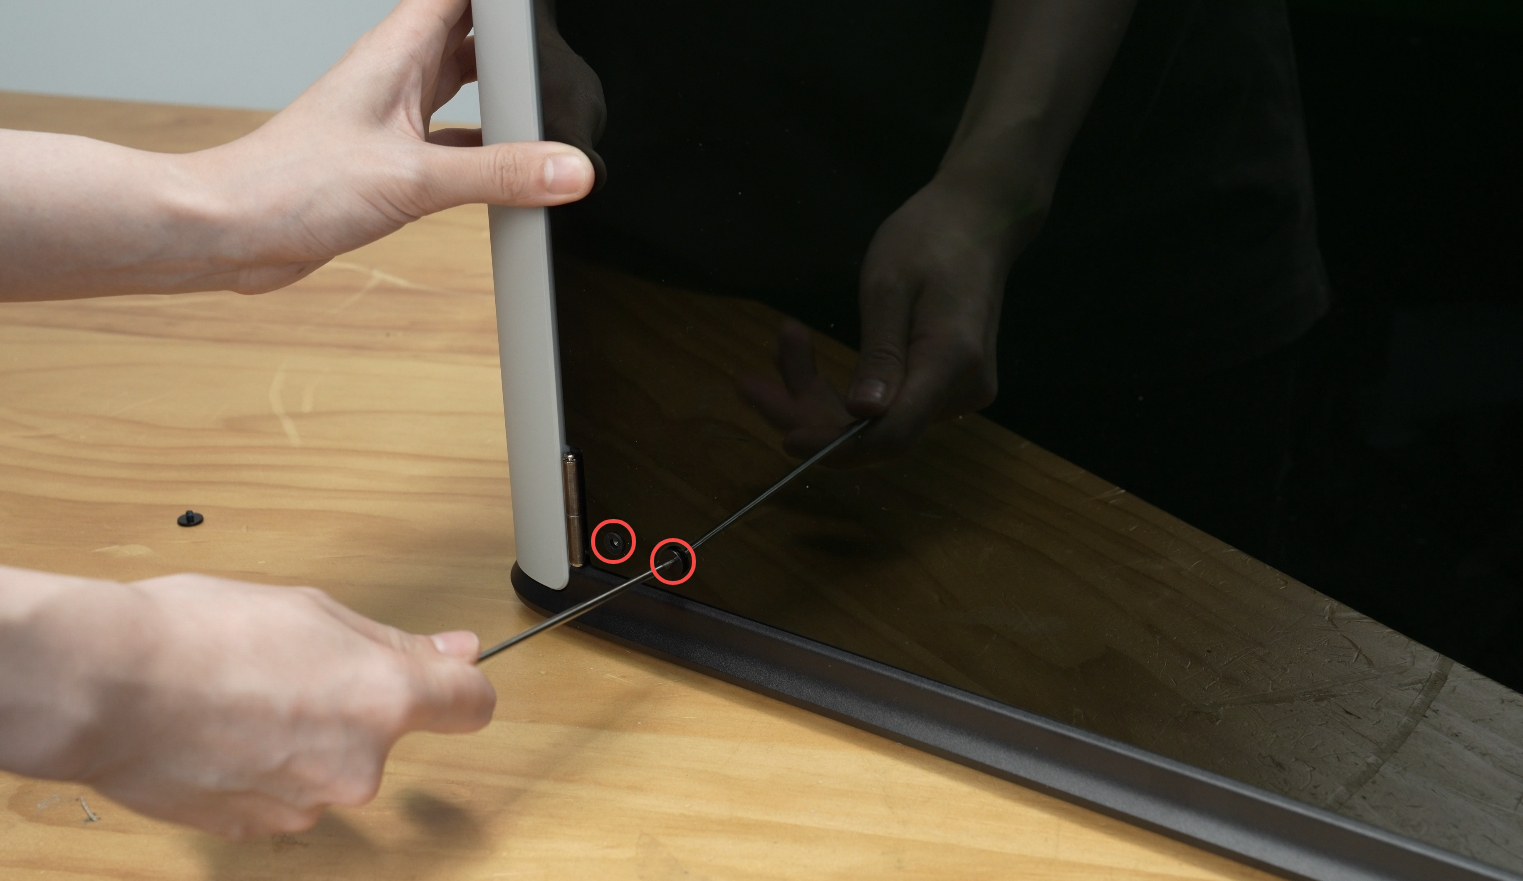
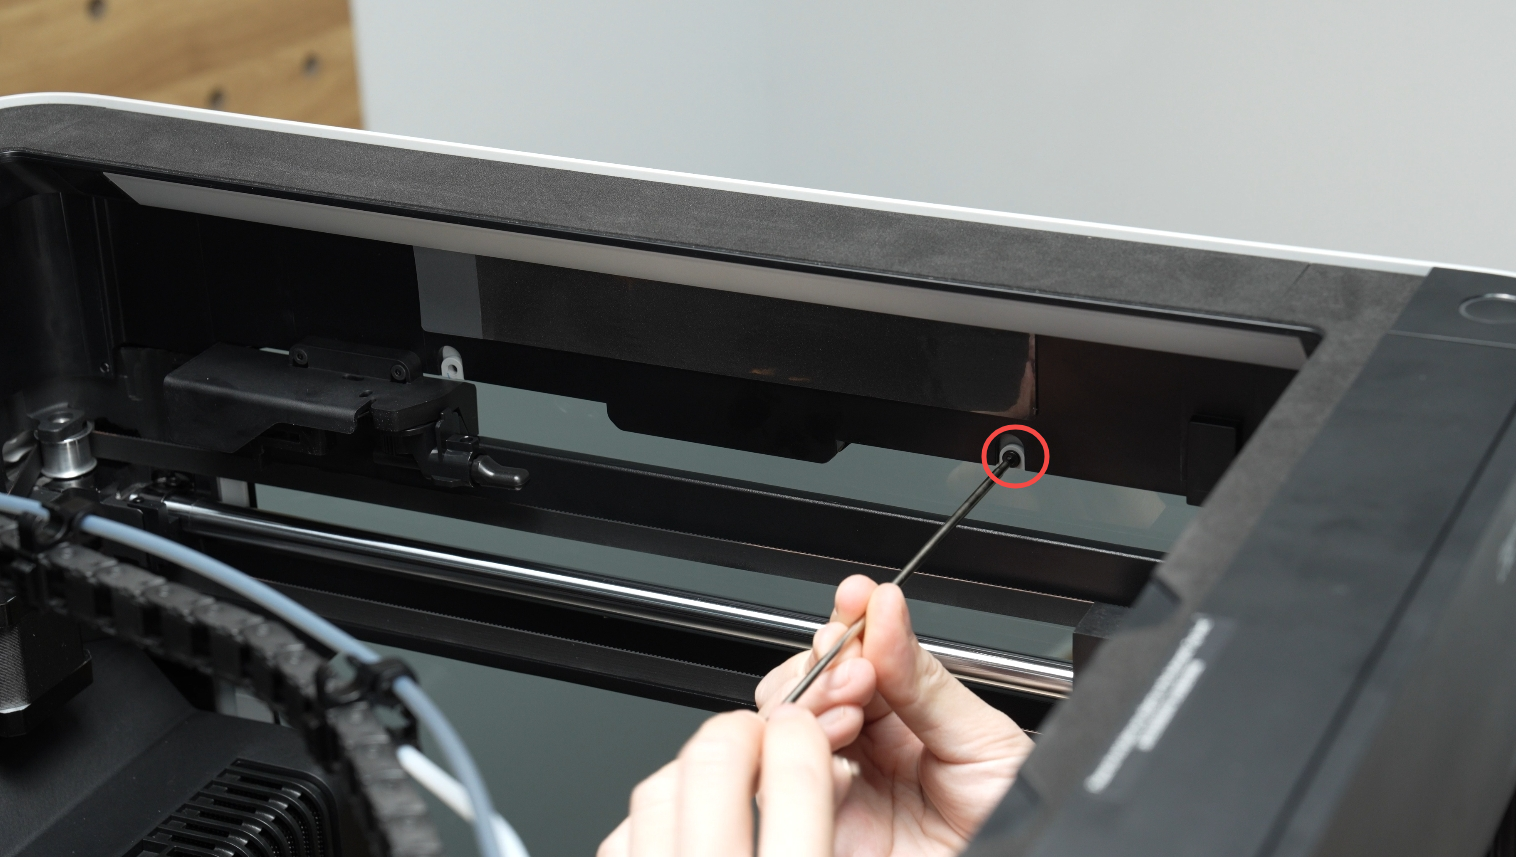
- Remove two screws on the top and bottom of the door near the hinge.
Note: While removing the last screws, be sure to hold the front glass door with your hands to prevent it from falling and getting damaged.
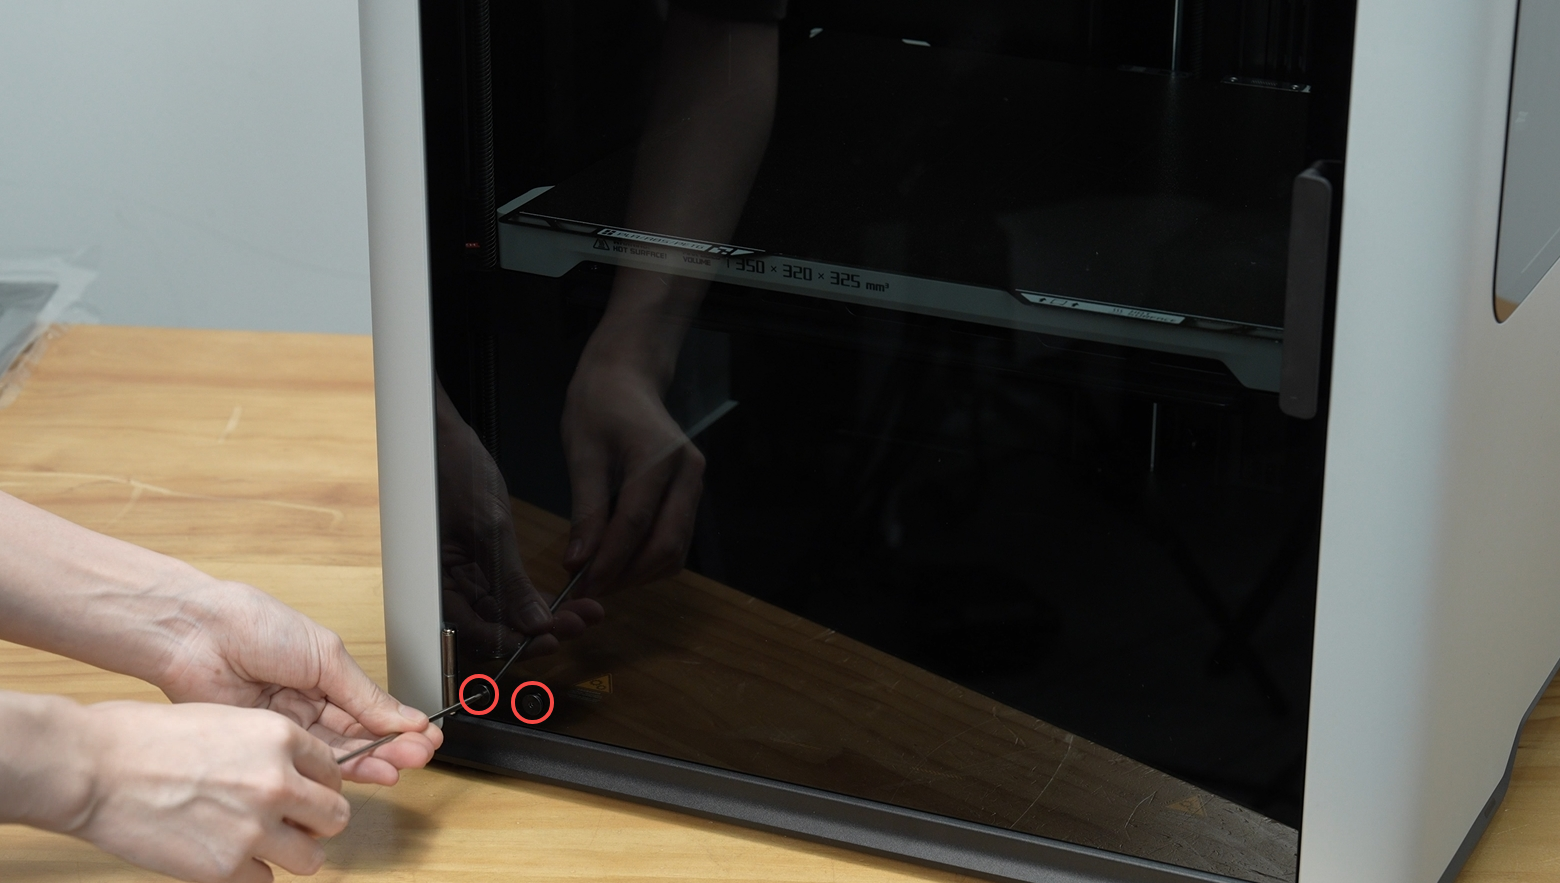
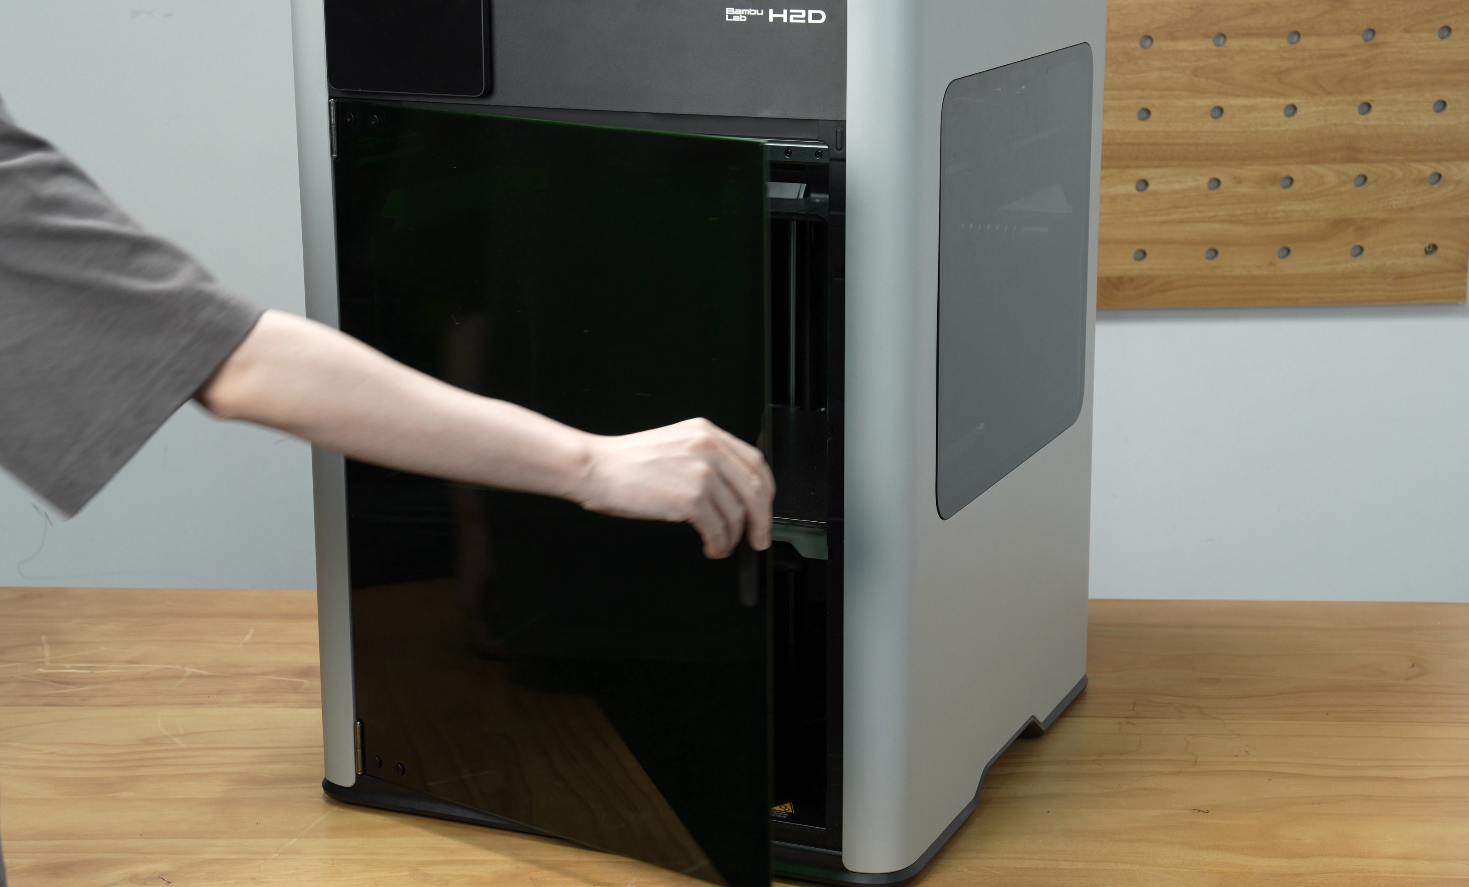
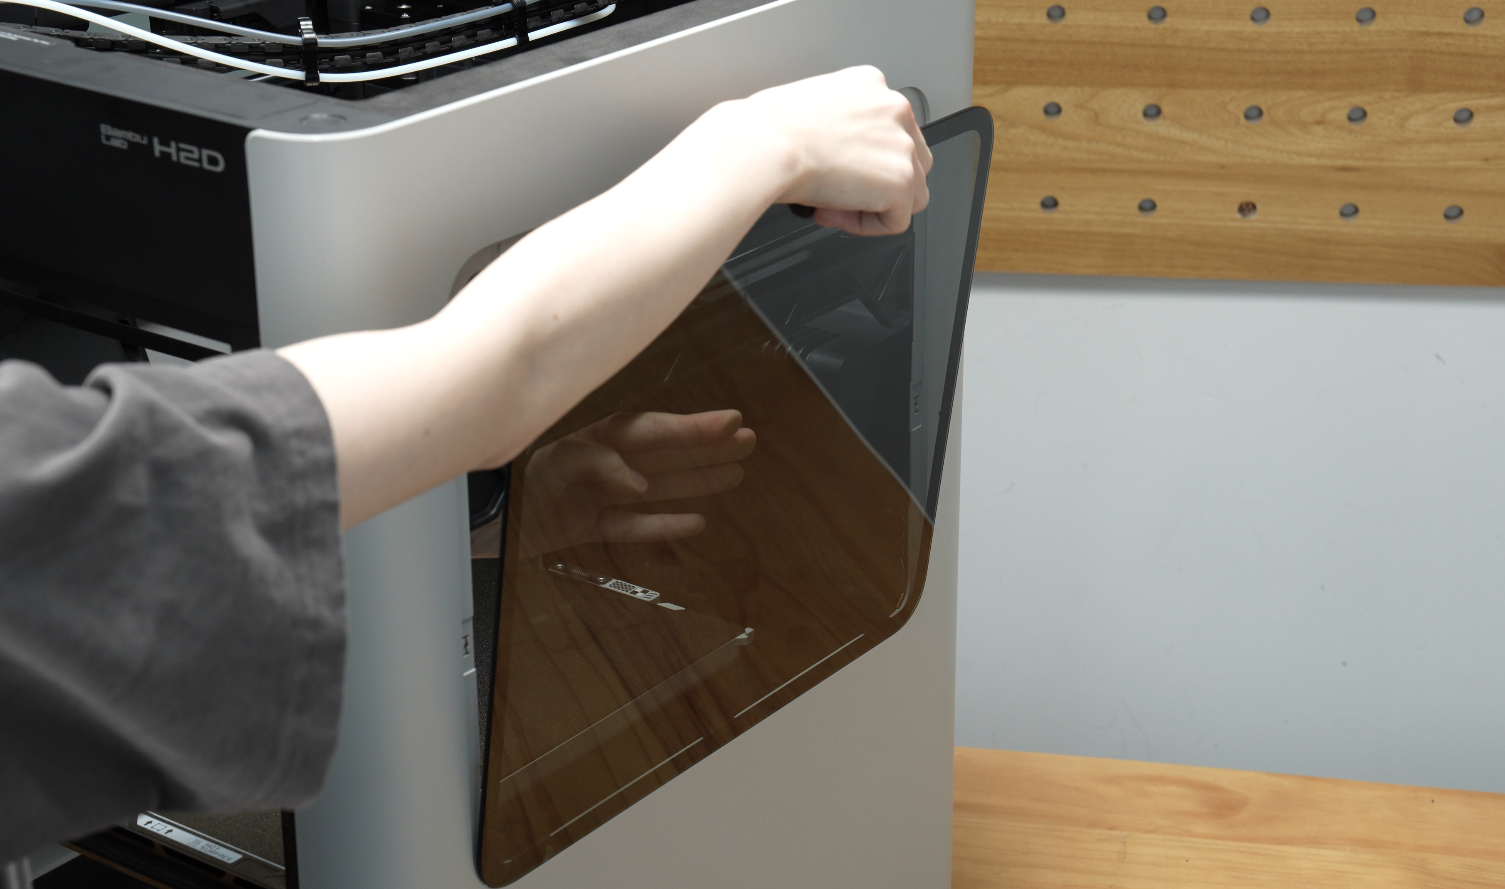
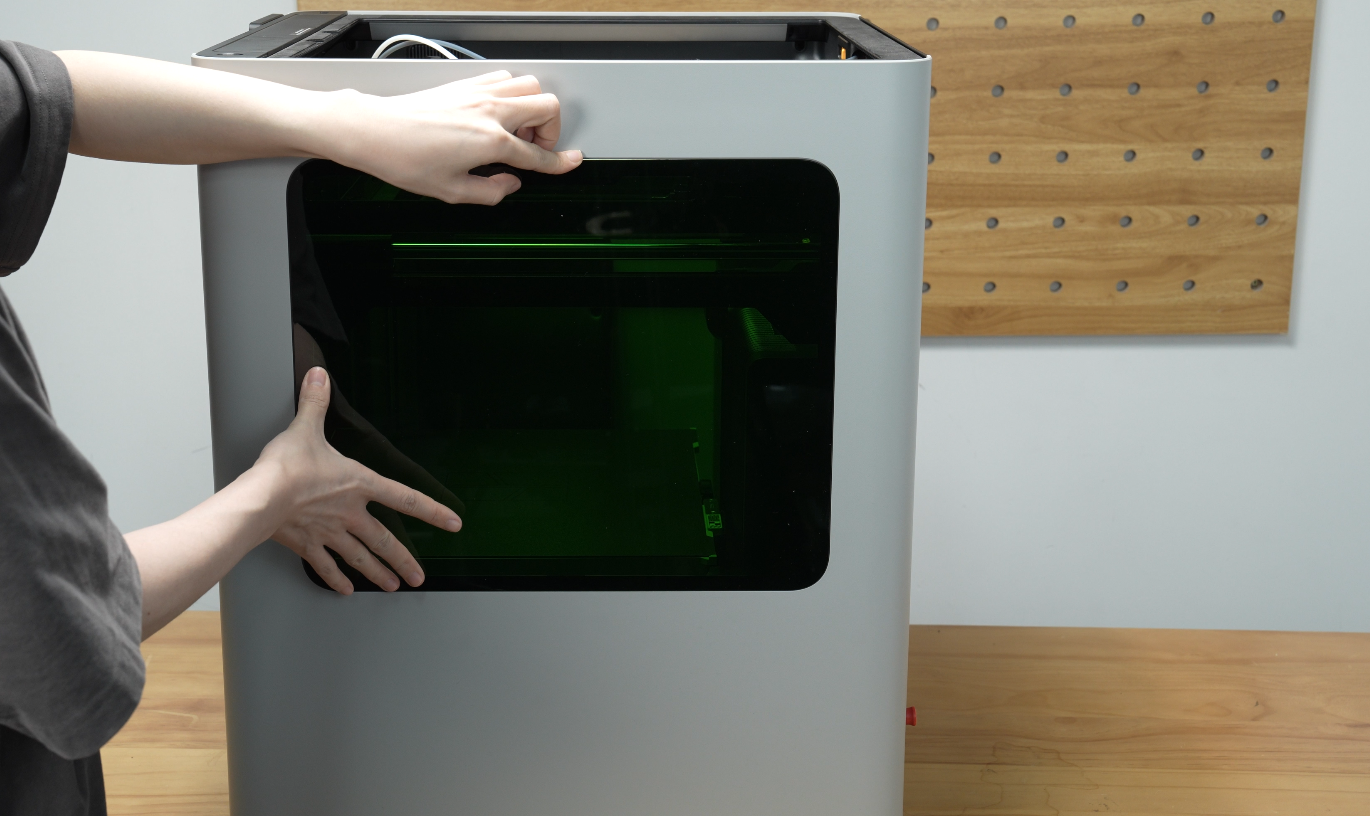
- Remove the front door glass.
Note: Take special care to avoid anything hard from bumping into the glass door while handling it or storing it. Take special care to protect the outer edges of the glass.

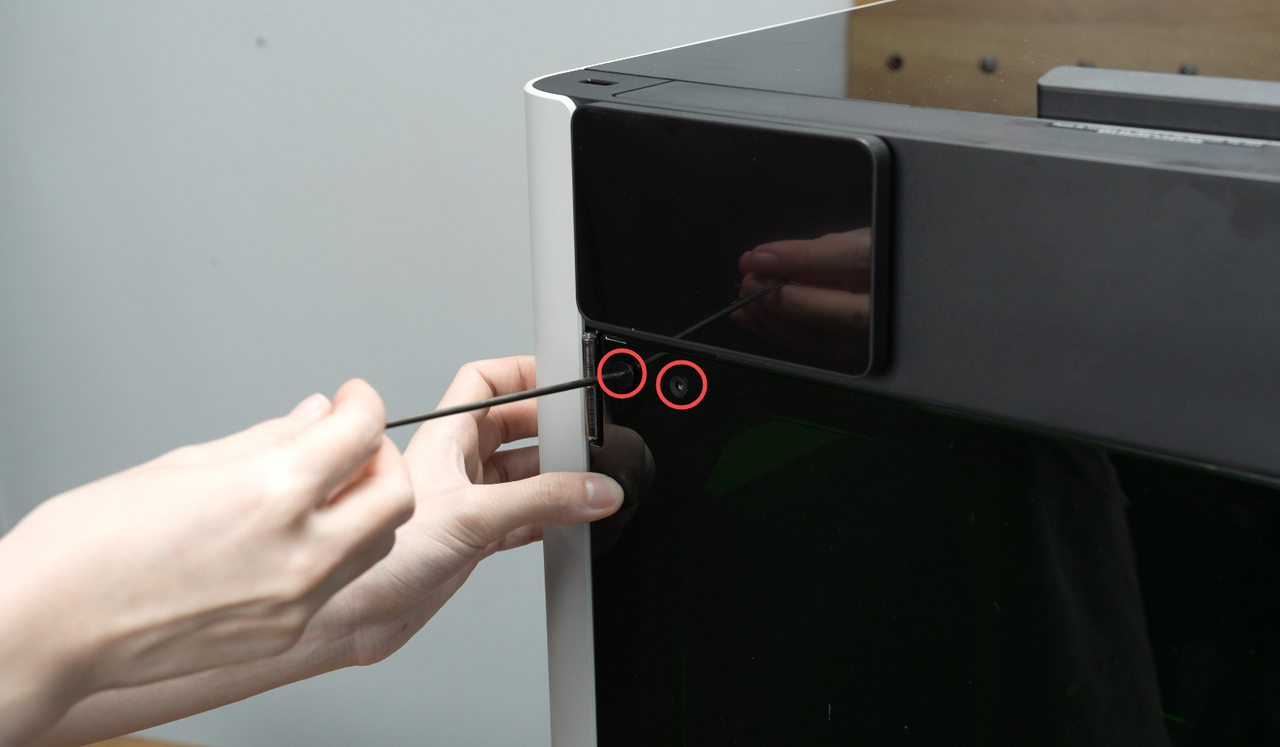
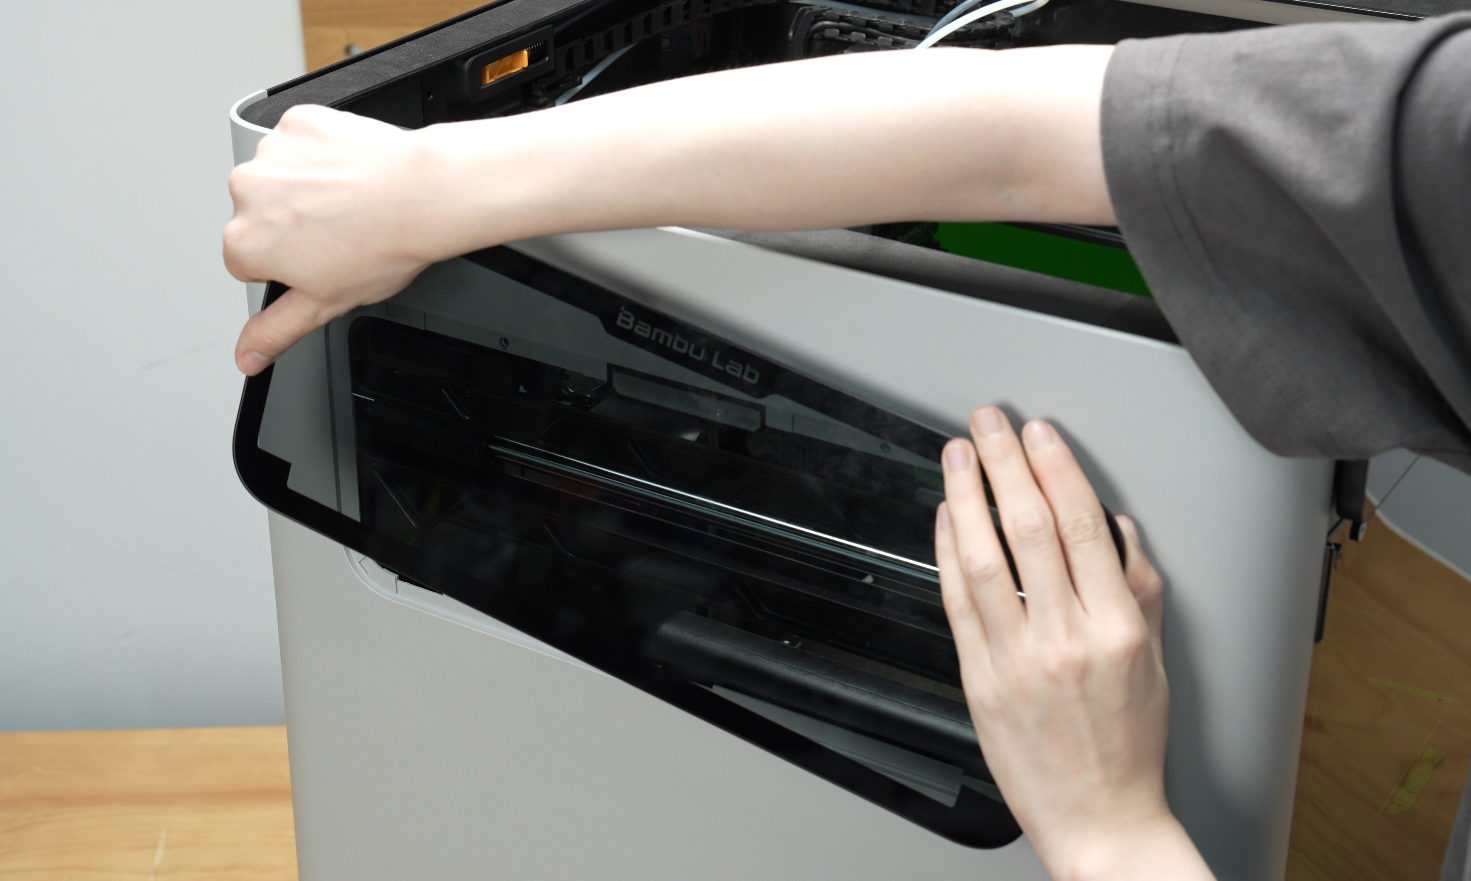
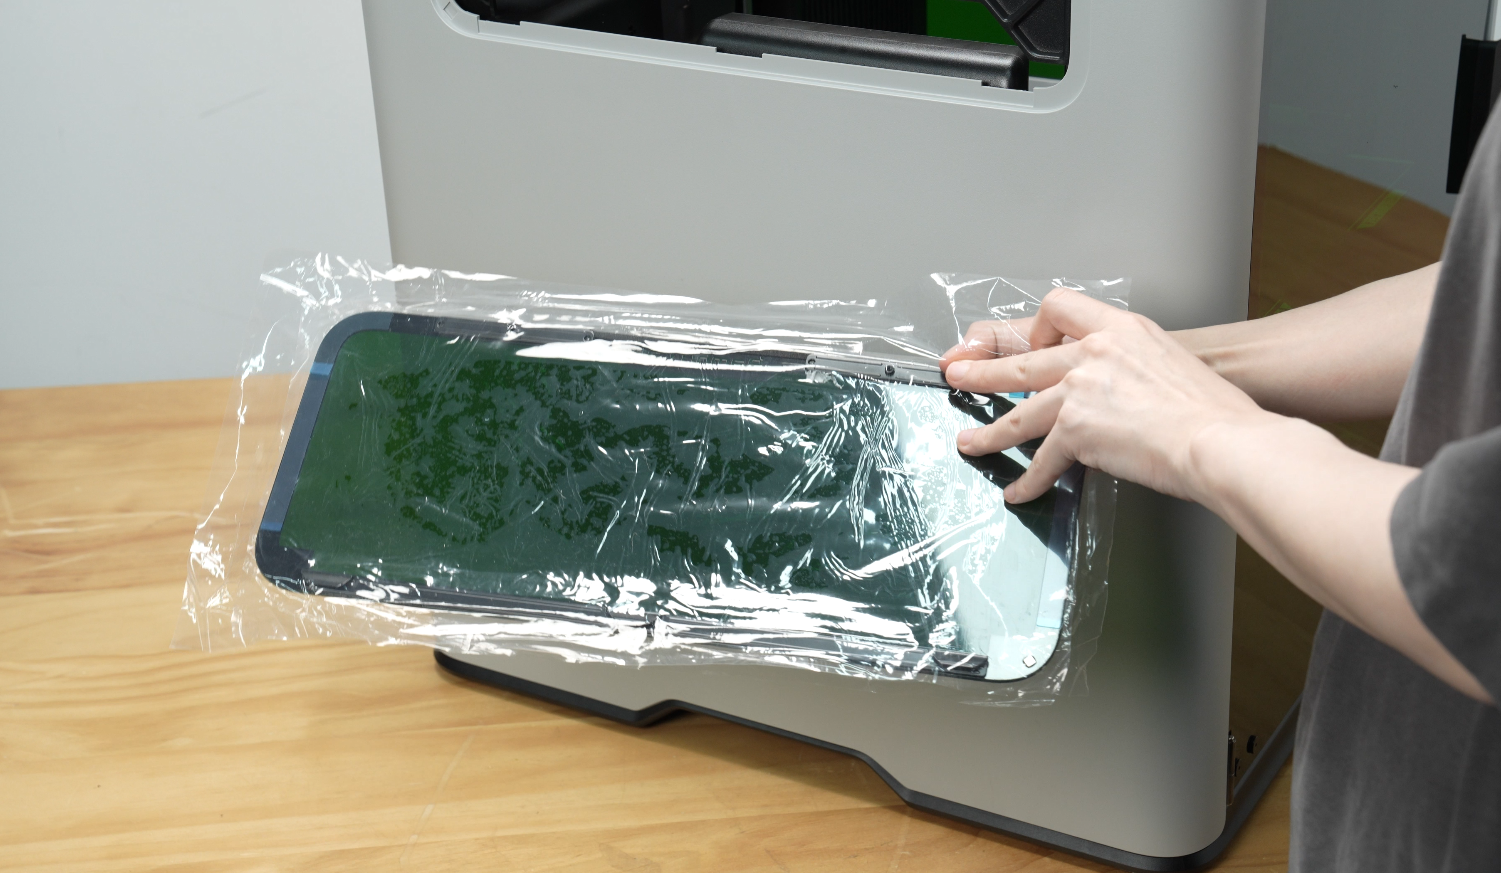
¶ Install the Front Laser Safety Window
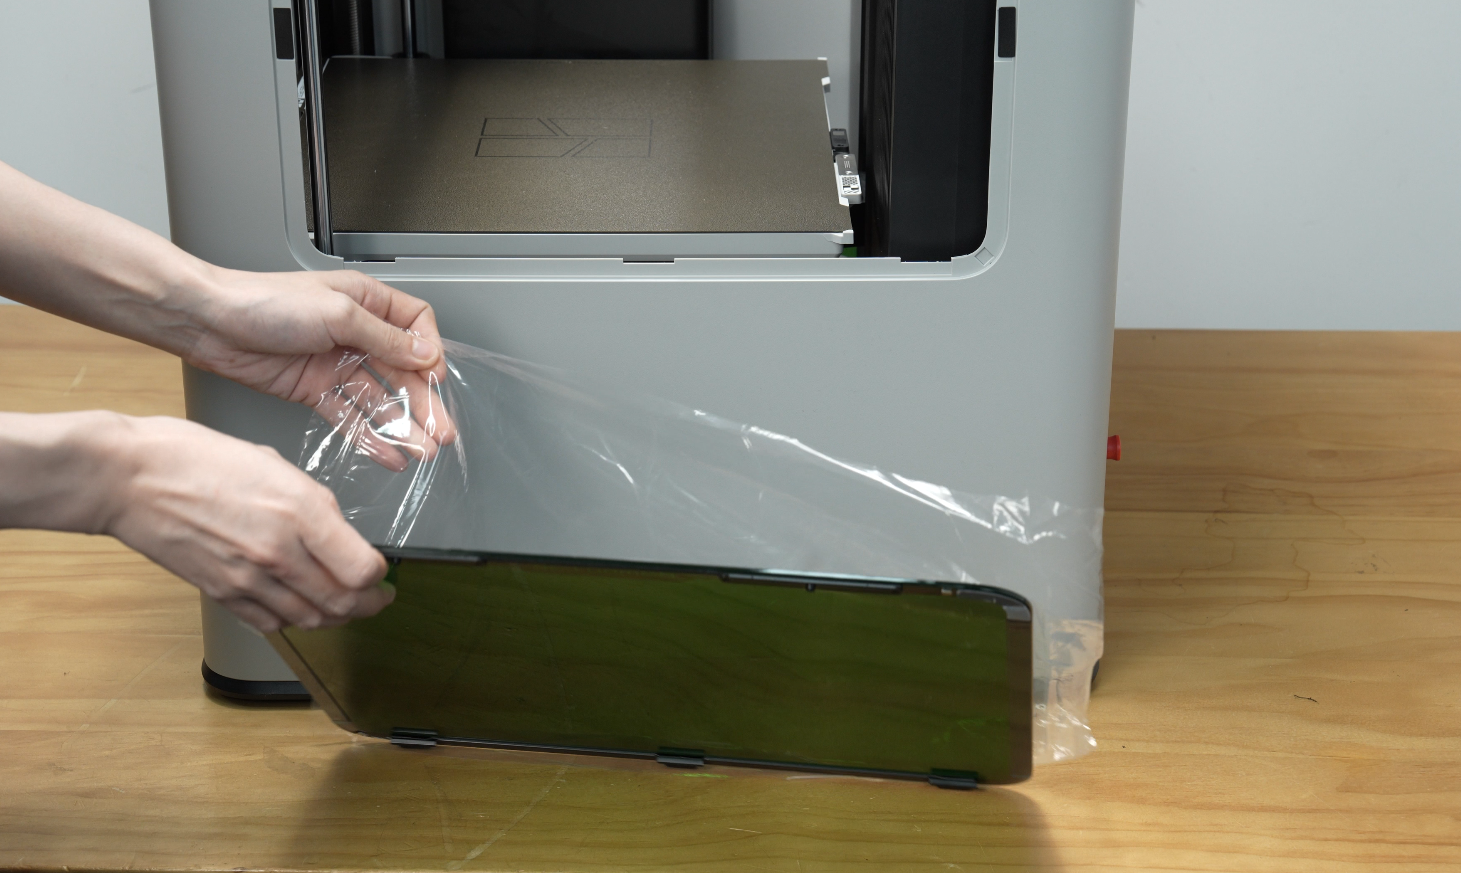
- Remove the protective film from the front laser safety window;

- Gather the 4 screws which held on the original door.
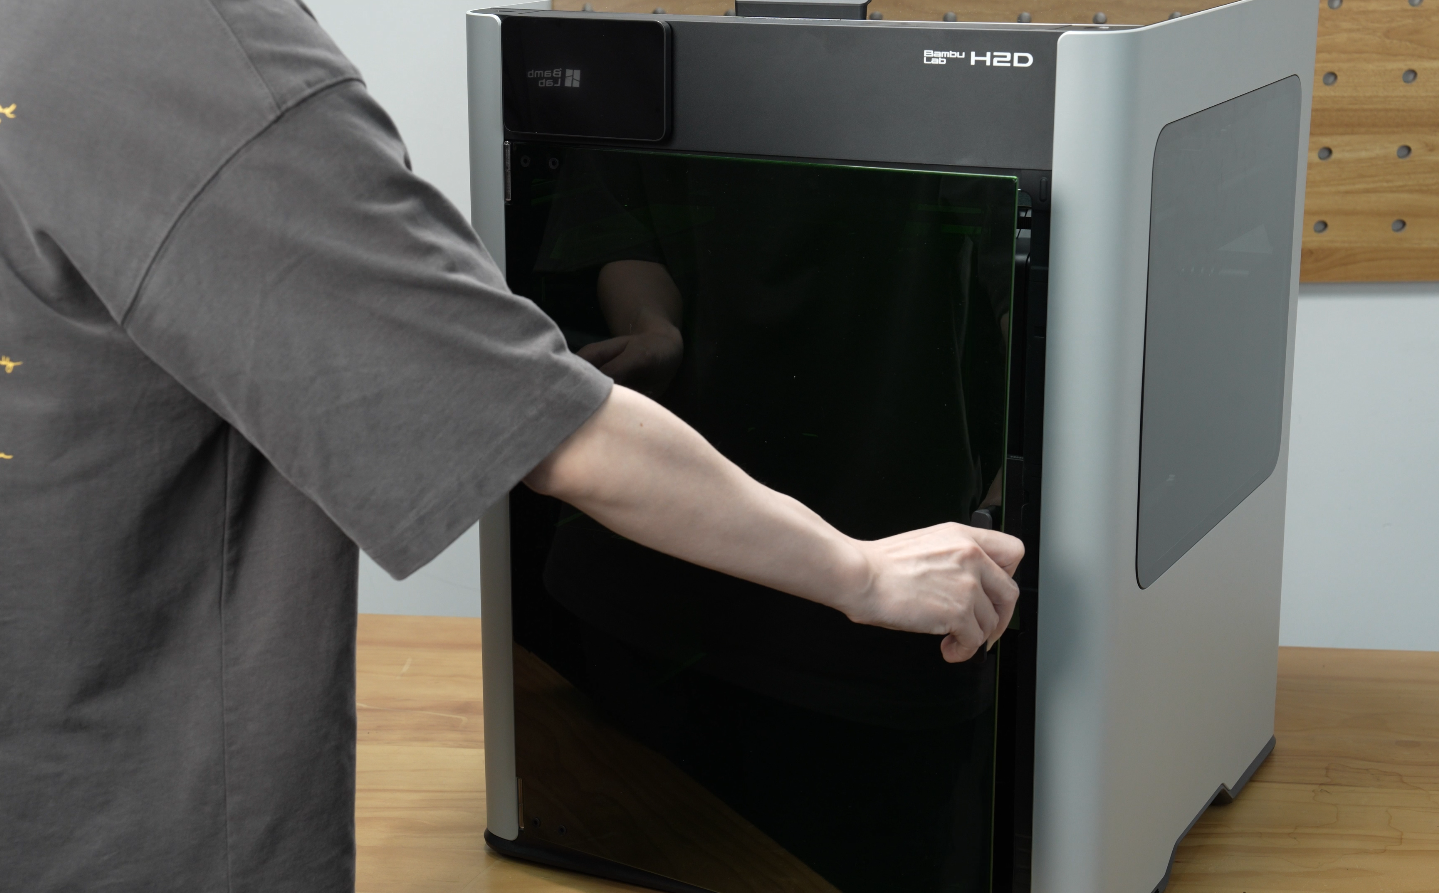
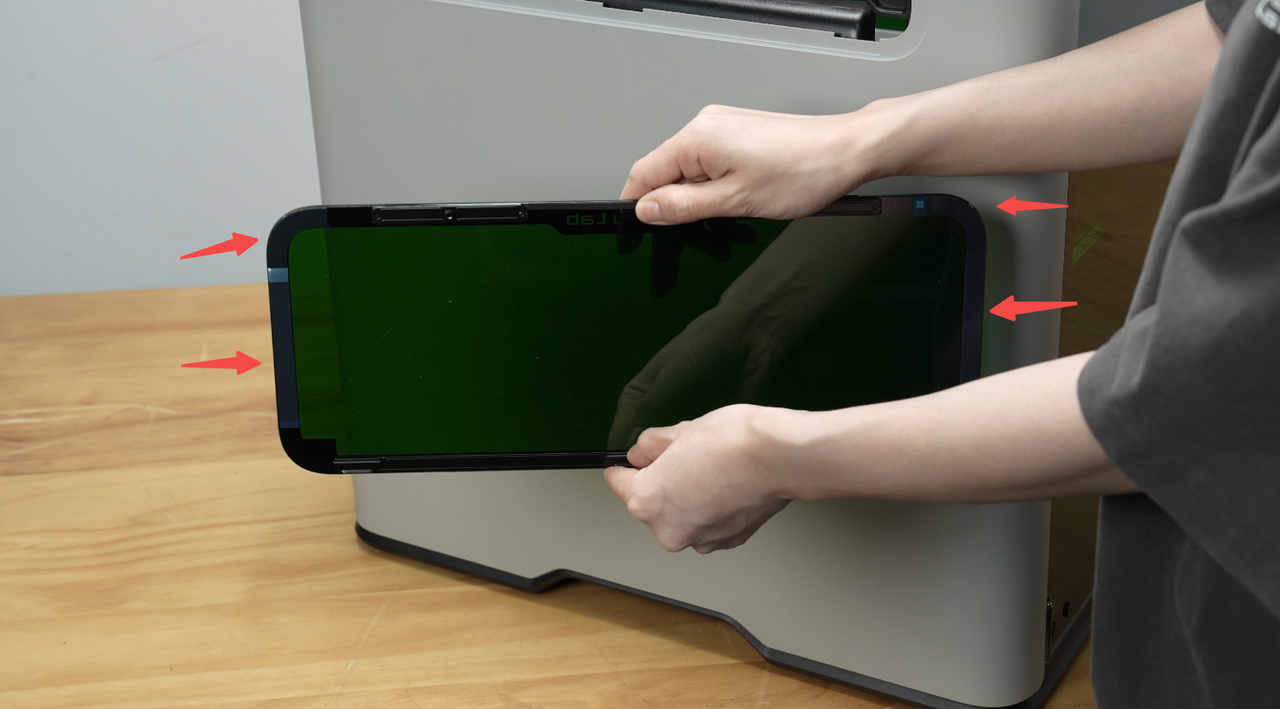
- Hold the laser safety window in place and aligned with the screw holes with your hand and tighten the two screws on the top and two on the bottom. The screws should be snug, but do not overtighten.
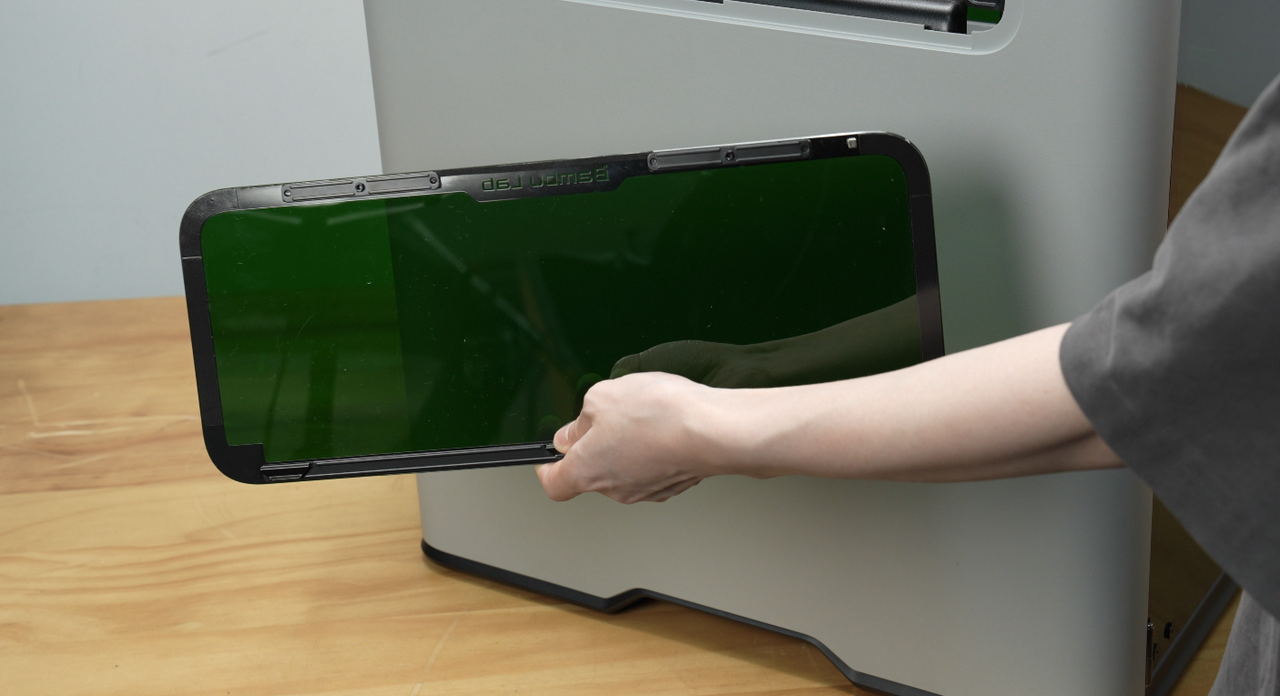
- After installation is complete, test the front laser safety window by opening and closing it to check that it is properly installed.
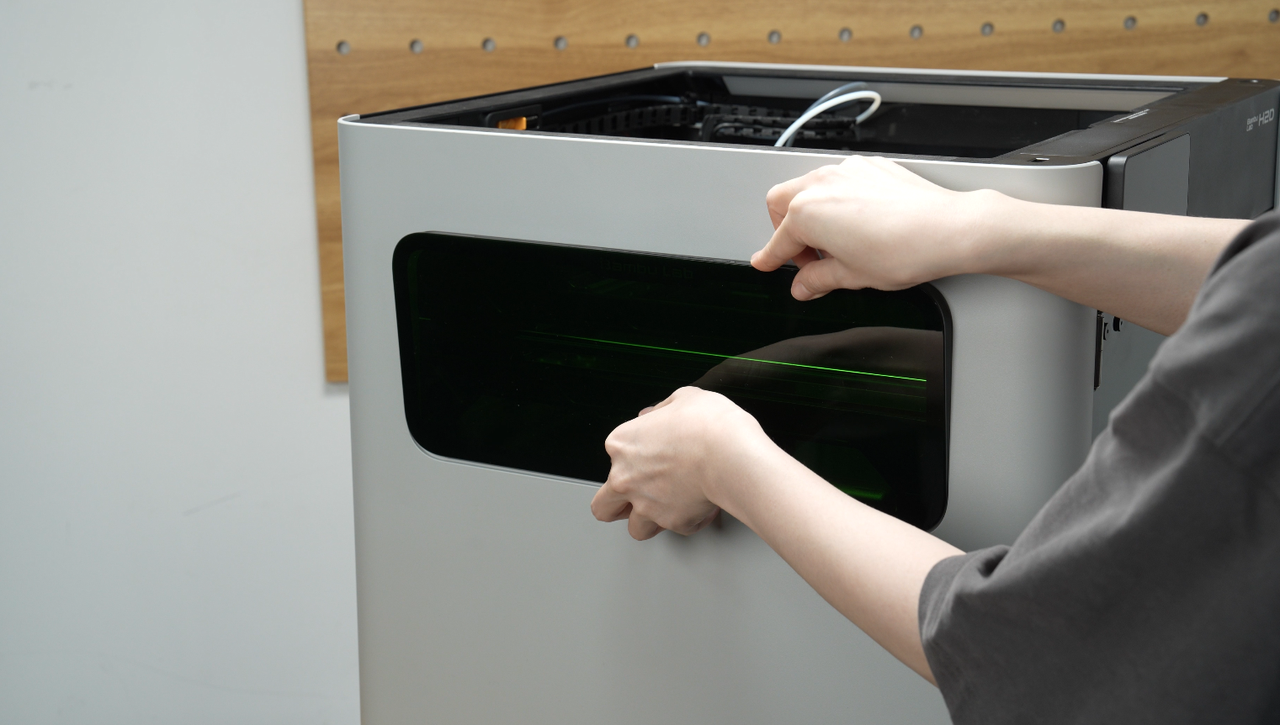
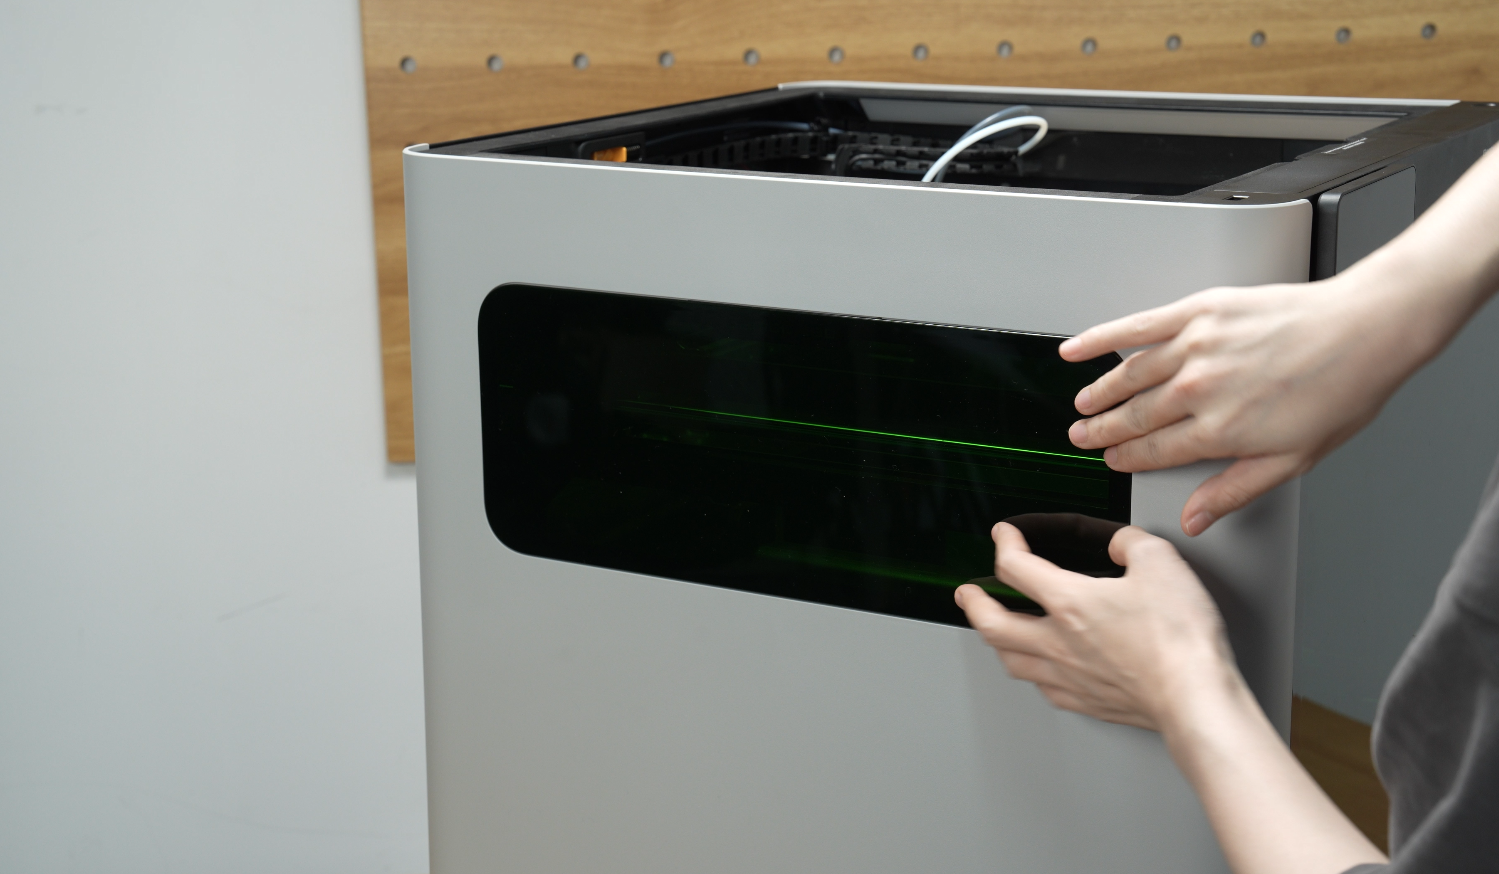
¶ Remove the Side Glass
¶ Remove the Right Side Glass
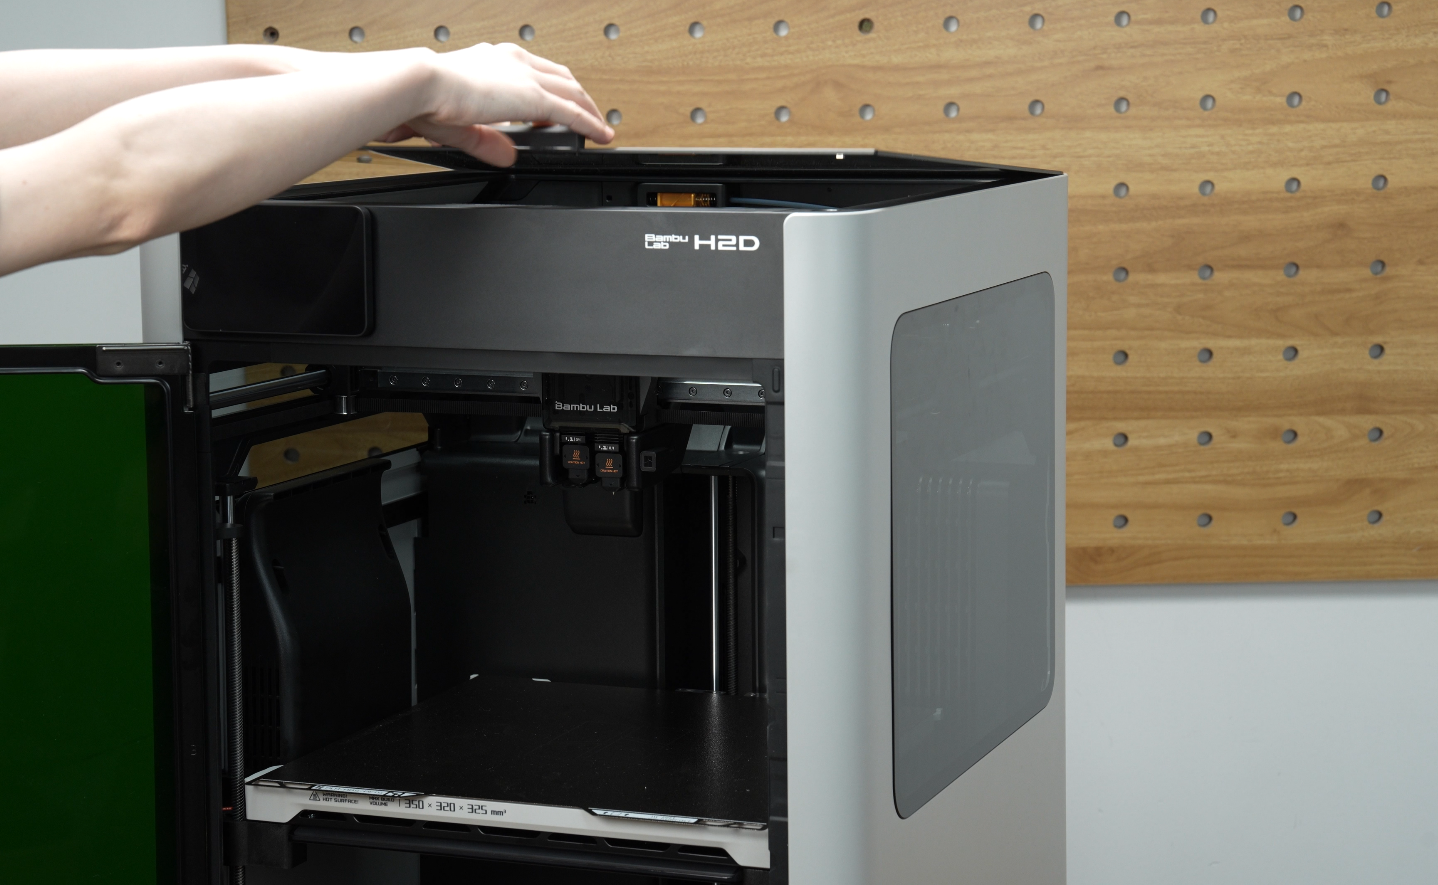
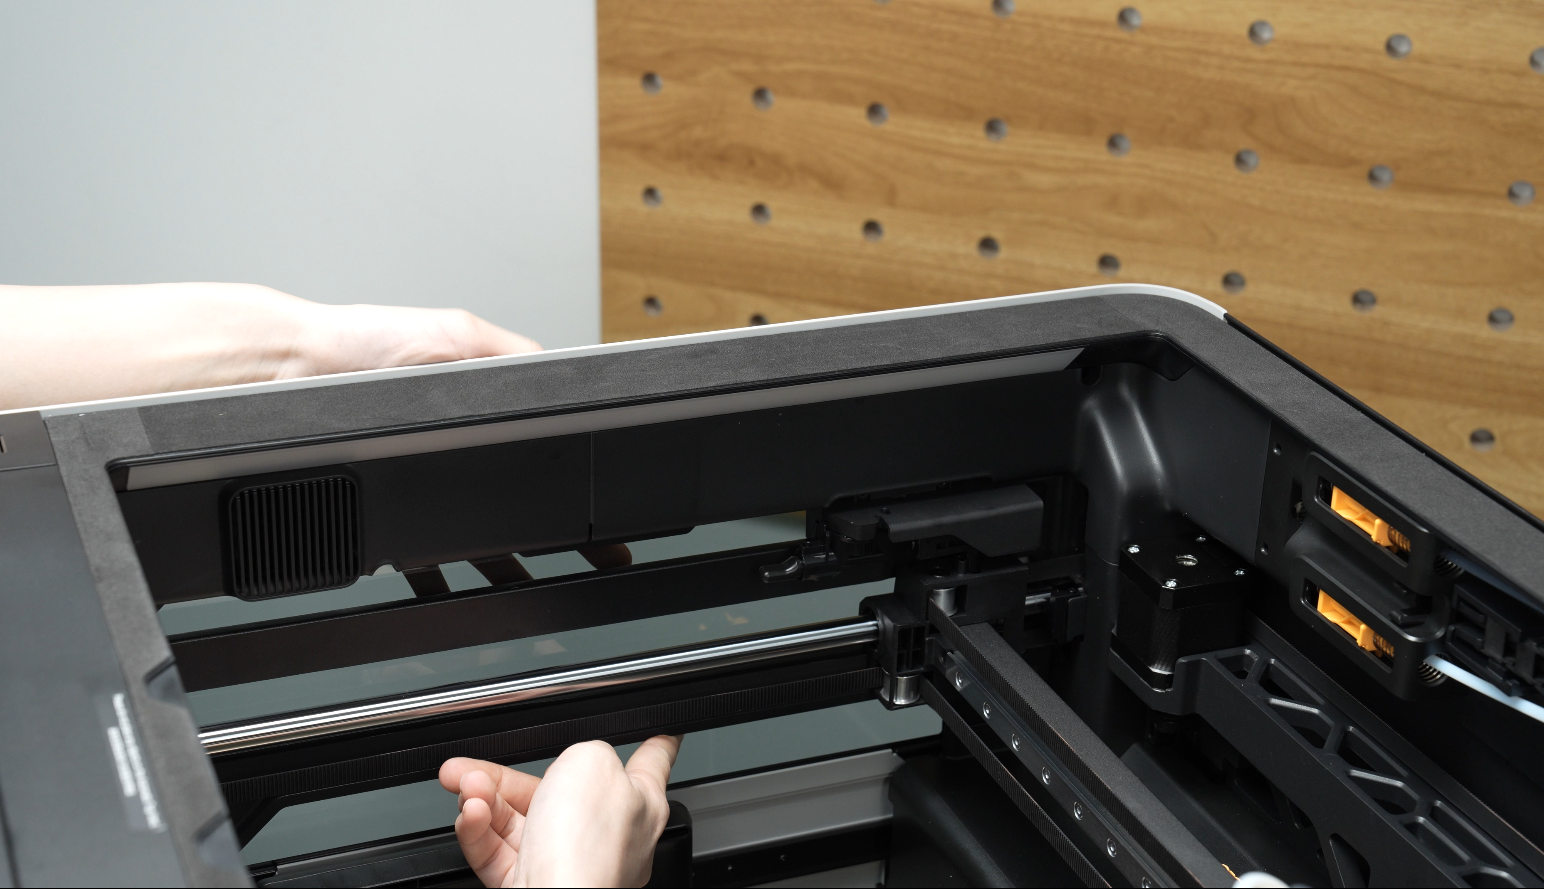
- Remove the top cover plate and store it in a safe place.
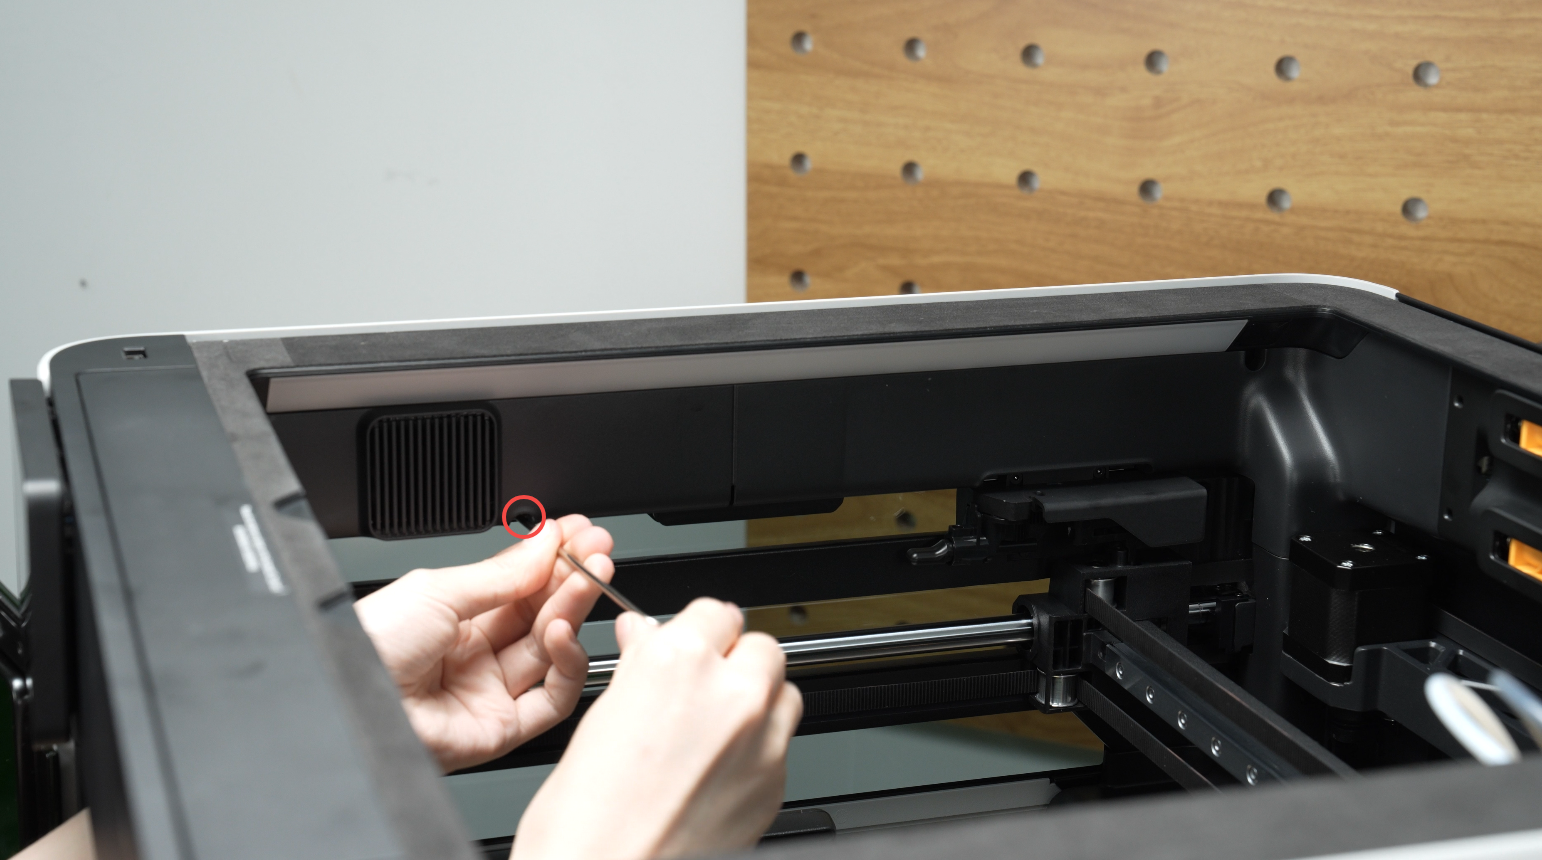
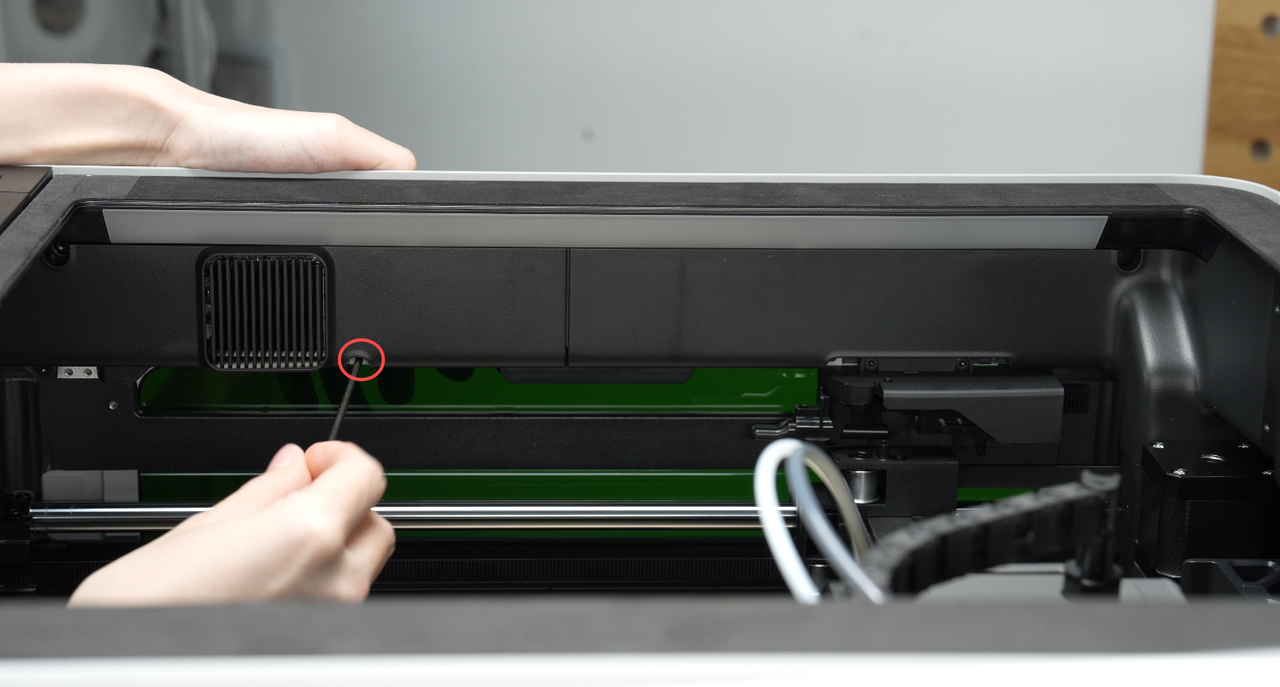
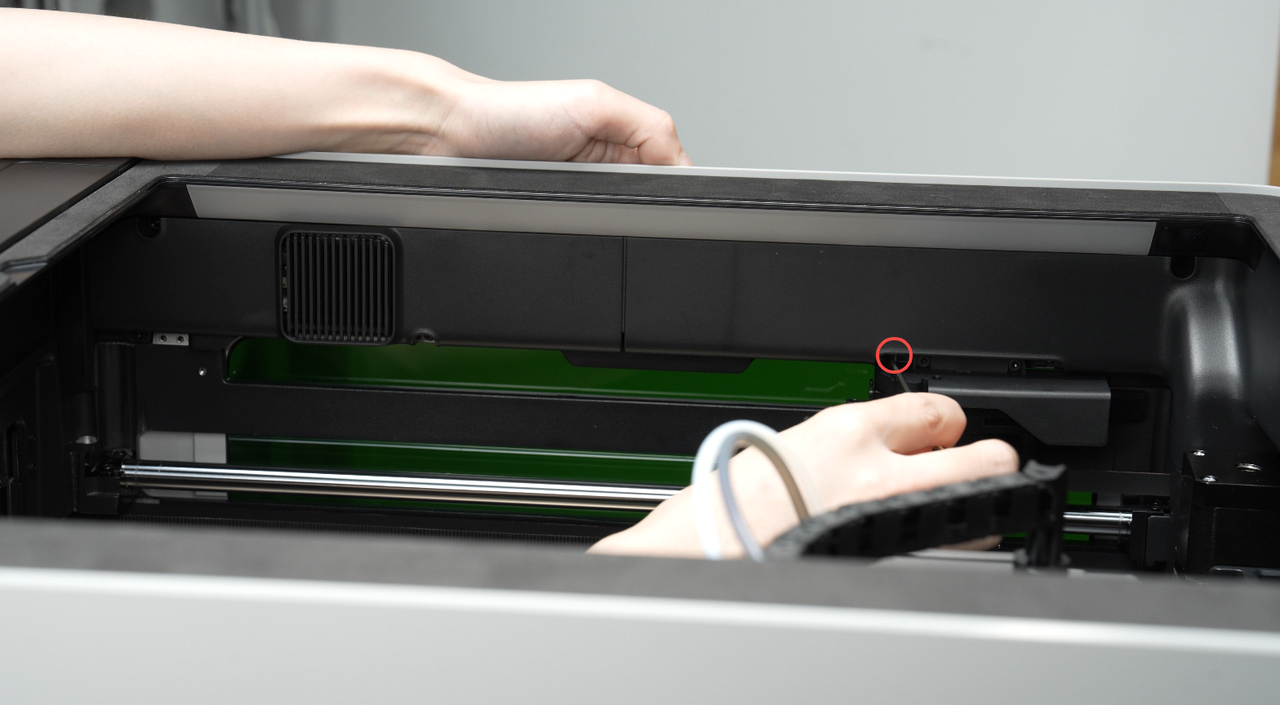
- From within the printer enclosure, remove the two screws on the top of the right side glass.
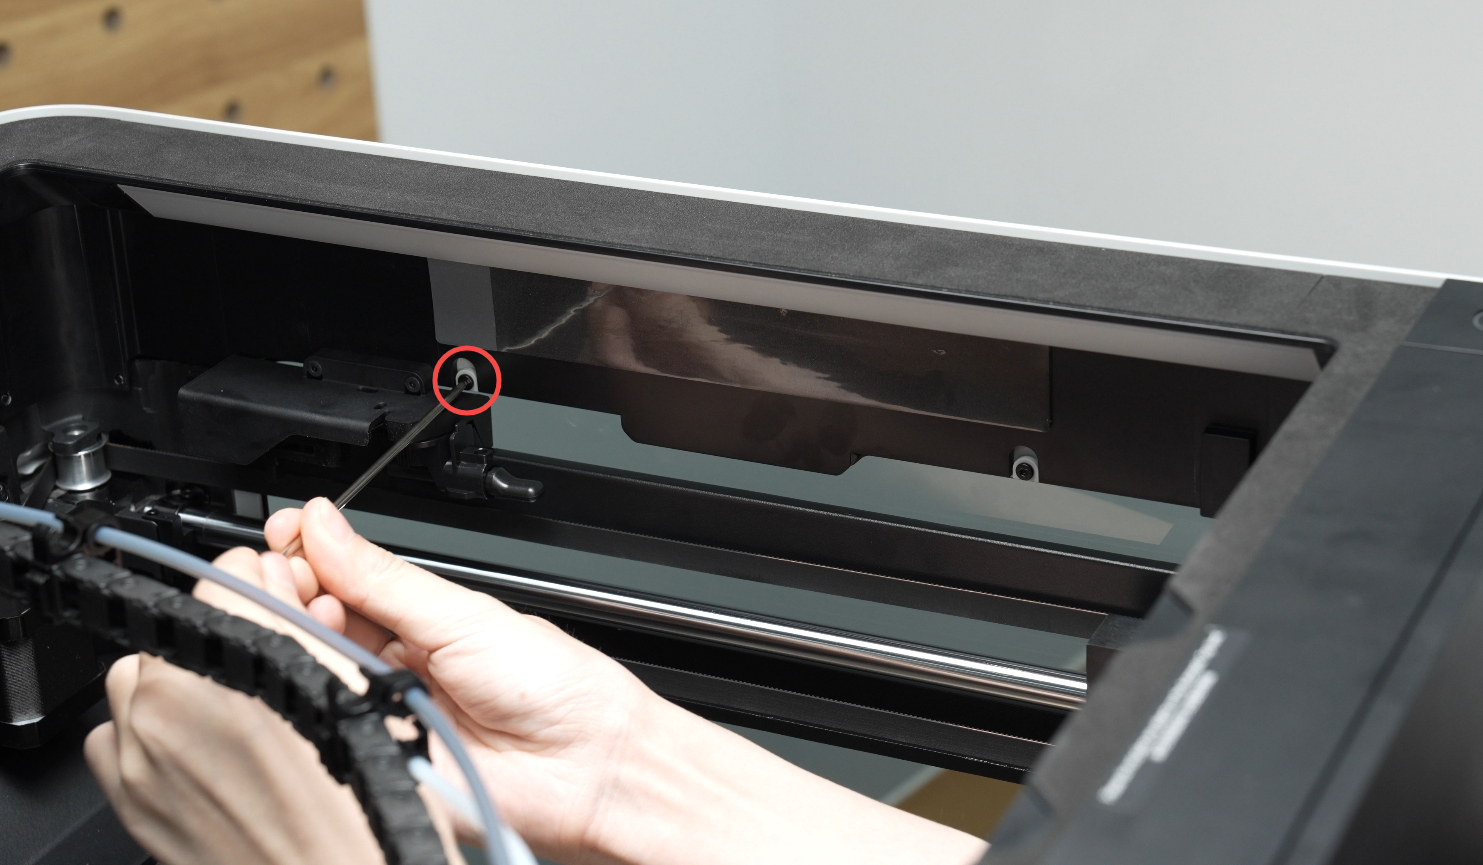
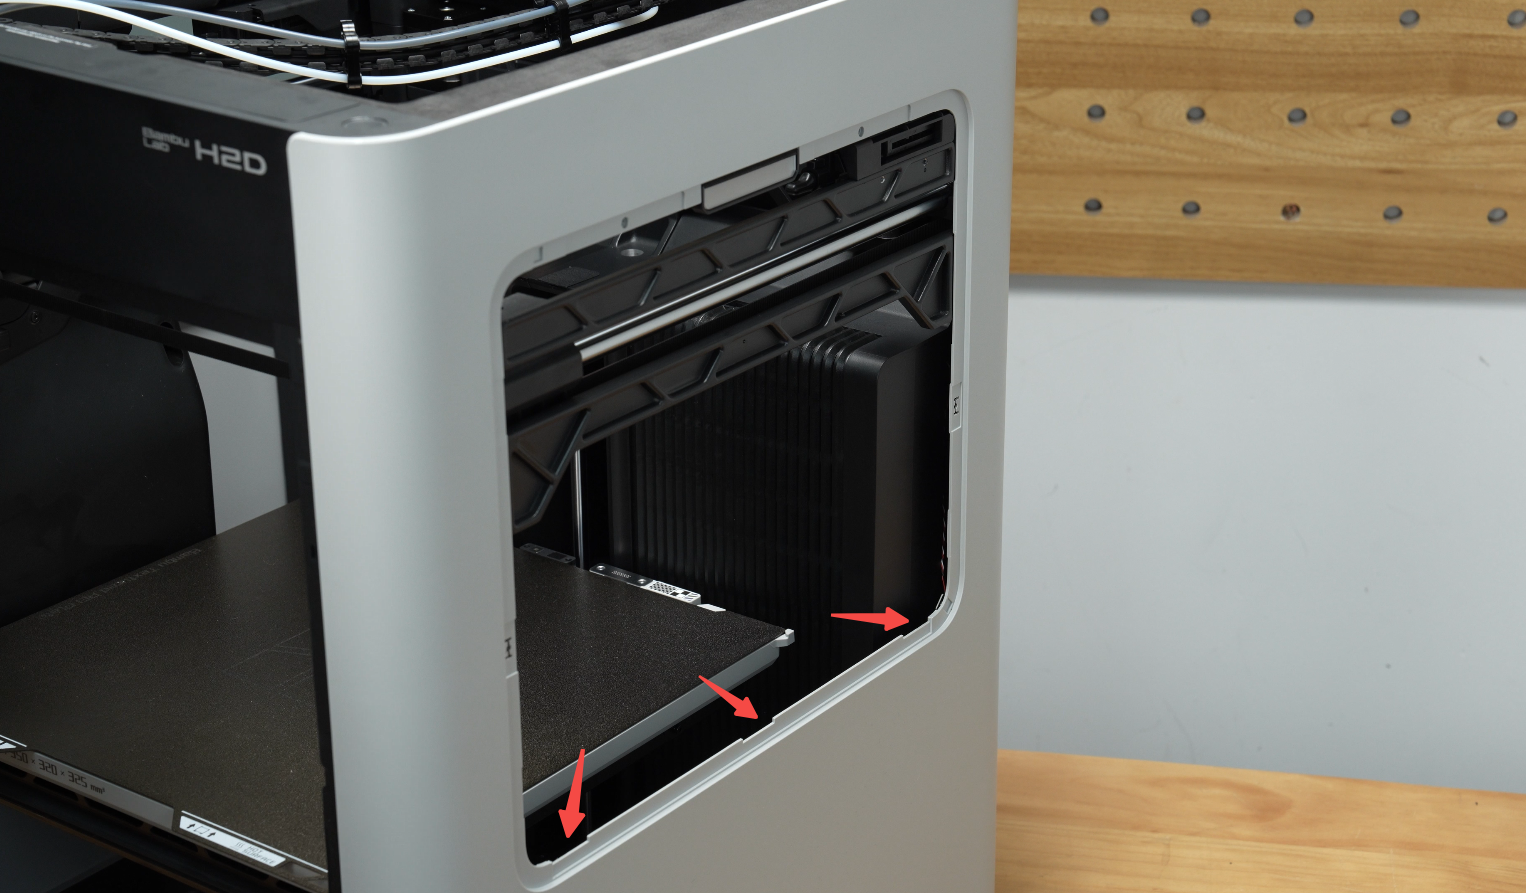
- Carefully push the right side glass out of the chamber and lift it up firmly until it comes free. Be sure to grip the glass firmly to avoid dropping it.

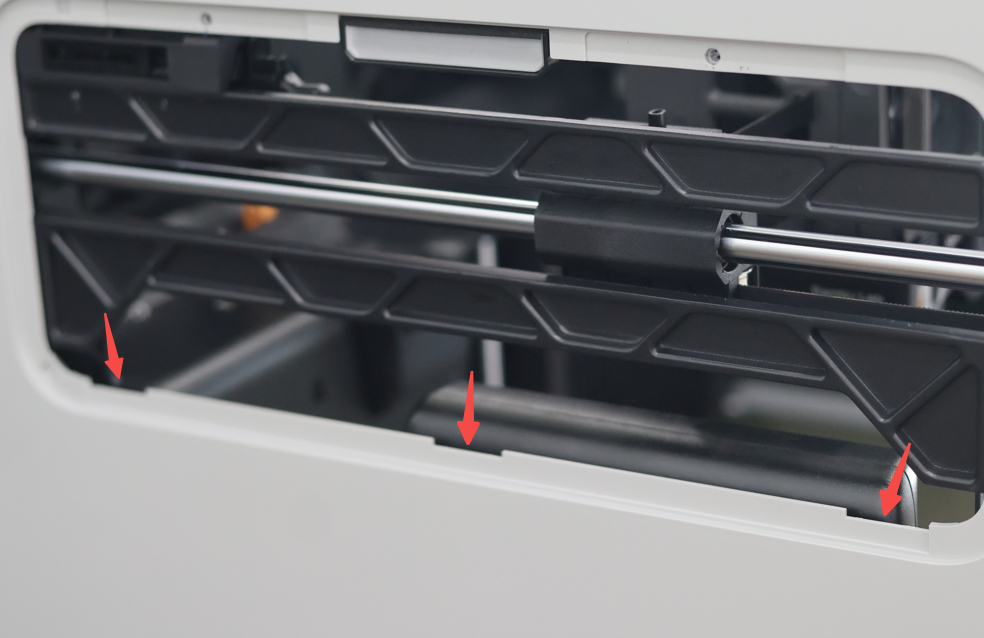
Note: The right side glass is fixed to the right side panel by three clips on the right side panel.
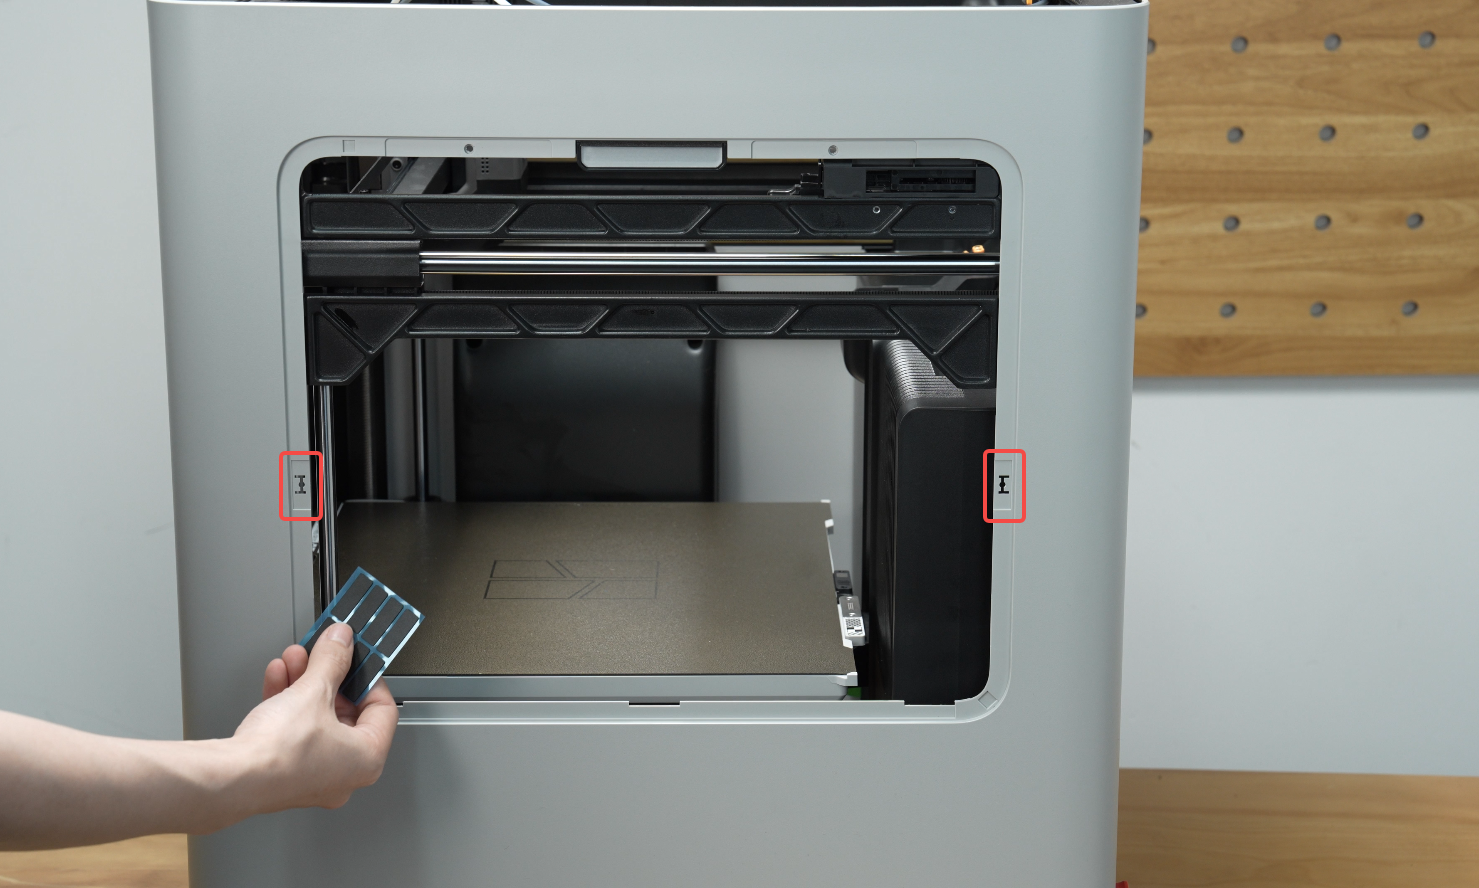
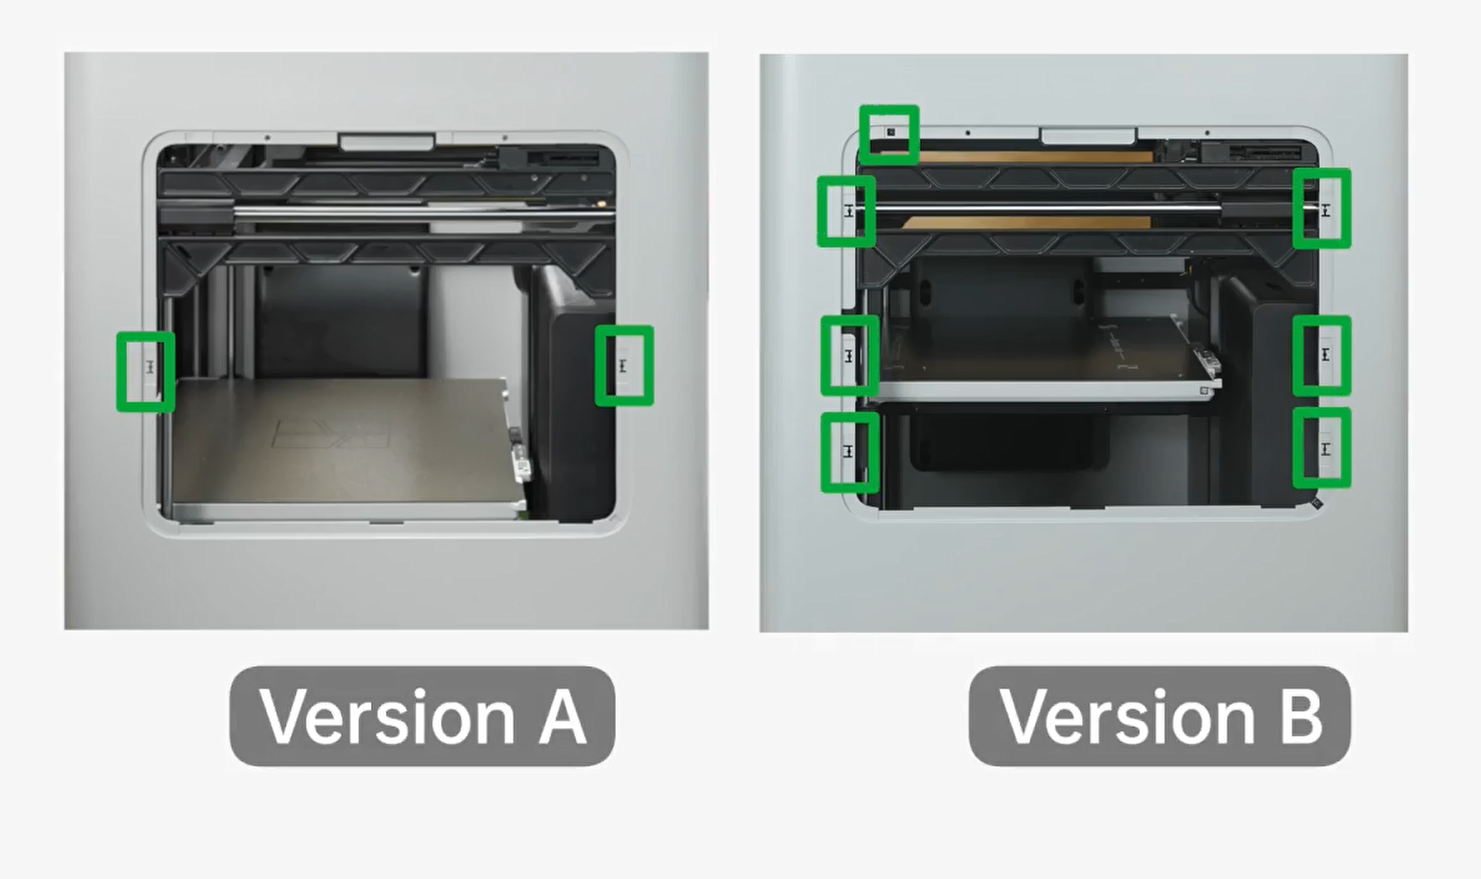
- Place one of the provided rectangular stickers over the clip positions on both sides of the right window opening.
Note: Clean the clip area of any residue or debris that may affect adhesion before sticking.

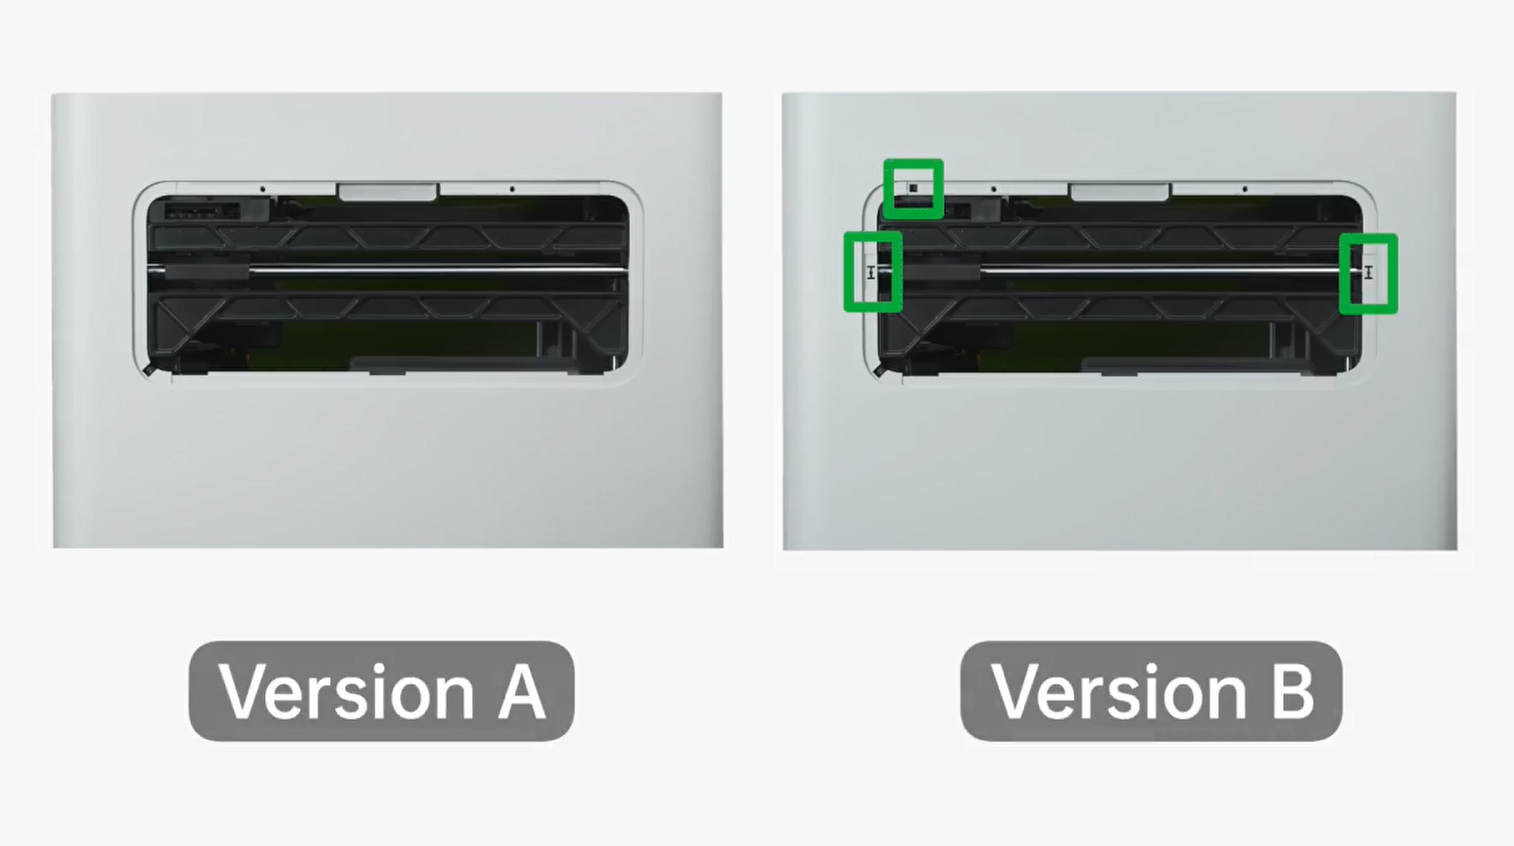
Note:
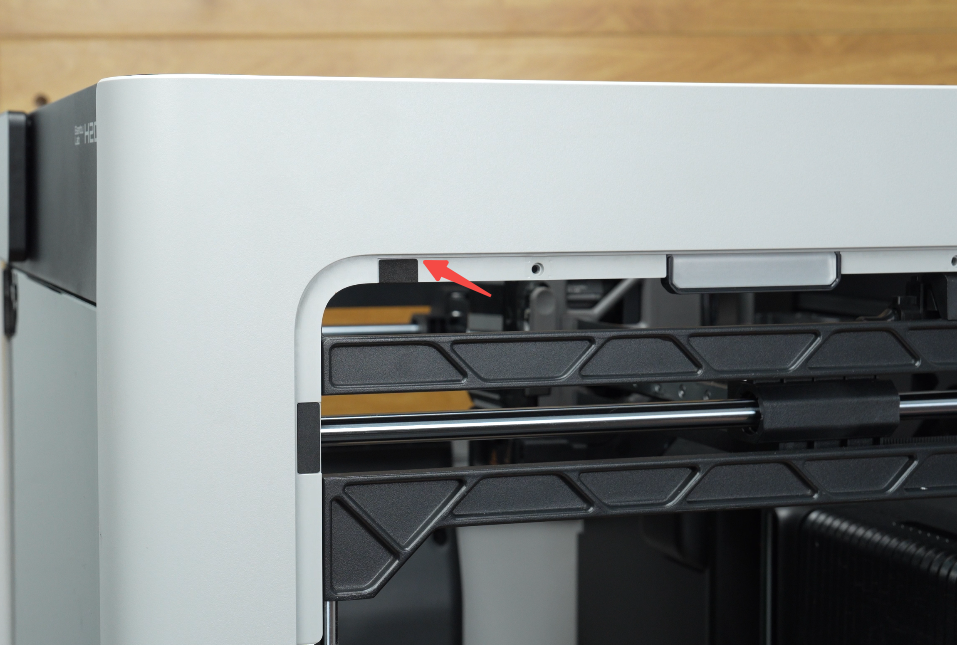
- There are two H2D variants. On the other version, there are 6 clips on the right window opening that need to be covered with rectangular stickers and a top position to be covered with a square foam sticker. Please refer to the corresponding steps according to your side panel.
- When pasting the foam sticker of version B, be careful to place the sticker below the lip of the printer panel.
¶ Remove the Left Side Glass
- From within the printer enclosure, remove the two screws on the top of the left side glass.
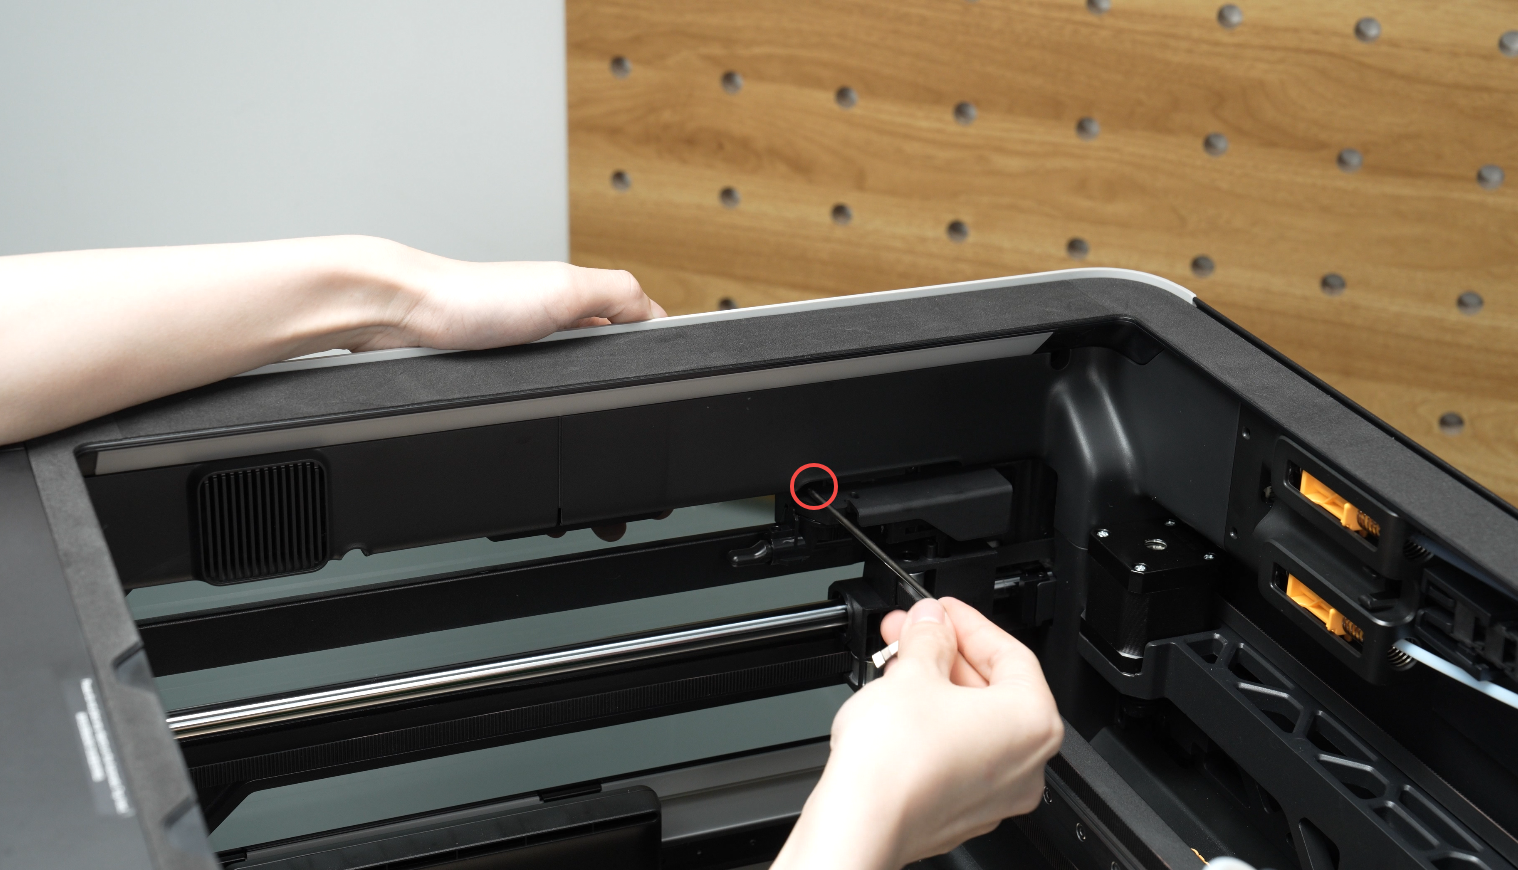
Note: The left side glass is secured by three clips at the bottom of the left glass opening.
- Carefully push the left side glass out of the chamber and lift it up firmly until it comes free. Be sure to grip the glass firmly to avoid dropping it.
Note: One version (version A) of the H2D left side panel requires no stickers. The other (version B) requires two stickers on either side and one foam sticker at the top, as pictured below.
¶ Install the Laser Safety Window
¶ Install the Right Laser Safety Window
- Remove the protective film from the right laser safety window.
- Tear off the 4 pieces of plastic covering the double-sided tape on the inside of the glass panel.
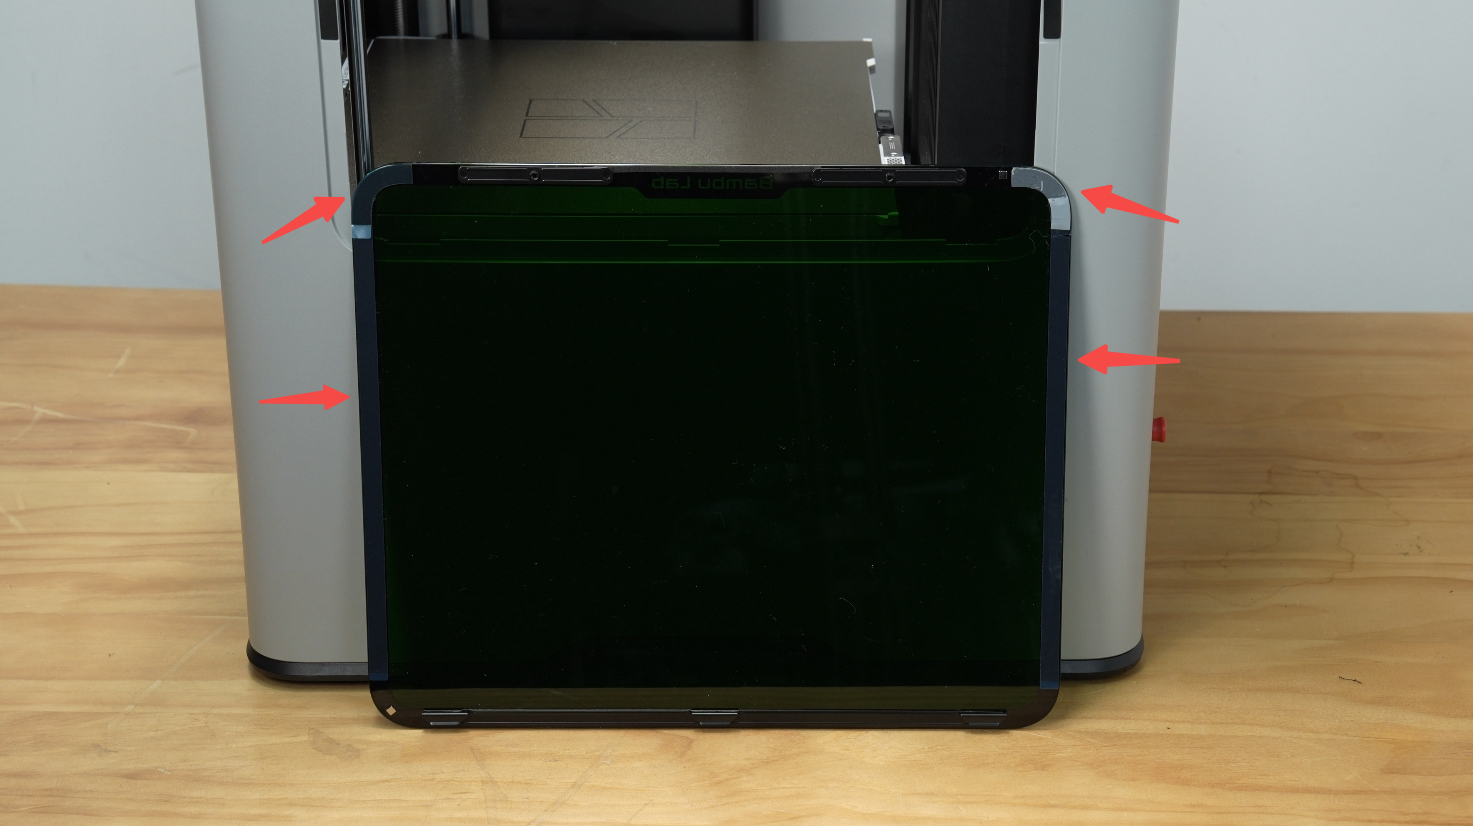
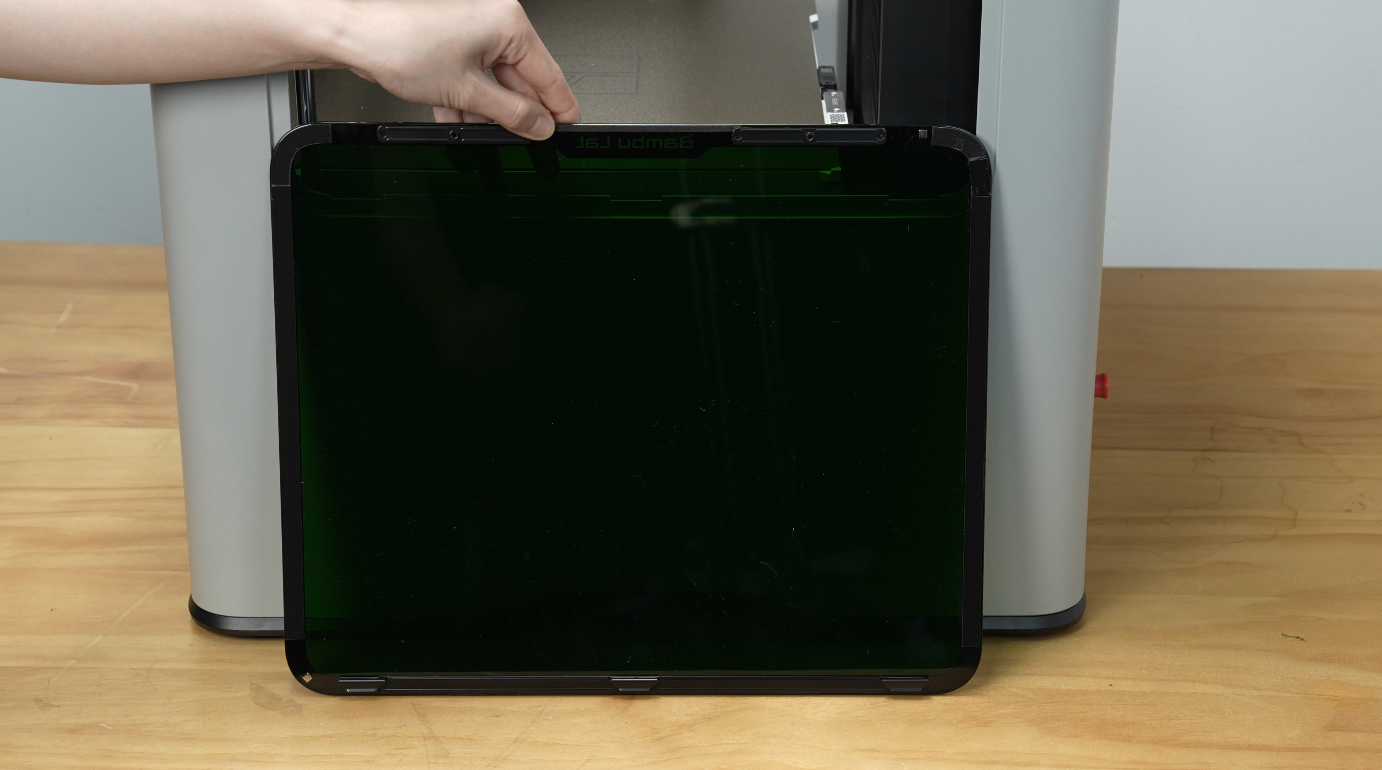
- Carefully move the glass panel toward the opening, avoiding contacting the panel opening with the adhesives until correctly lined up.
- Align the bottom clips of the right laser safety window with the 3 notches at the bottom of the opening. Carefully and gently ensure that the glass is down all the way on the clips.
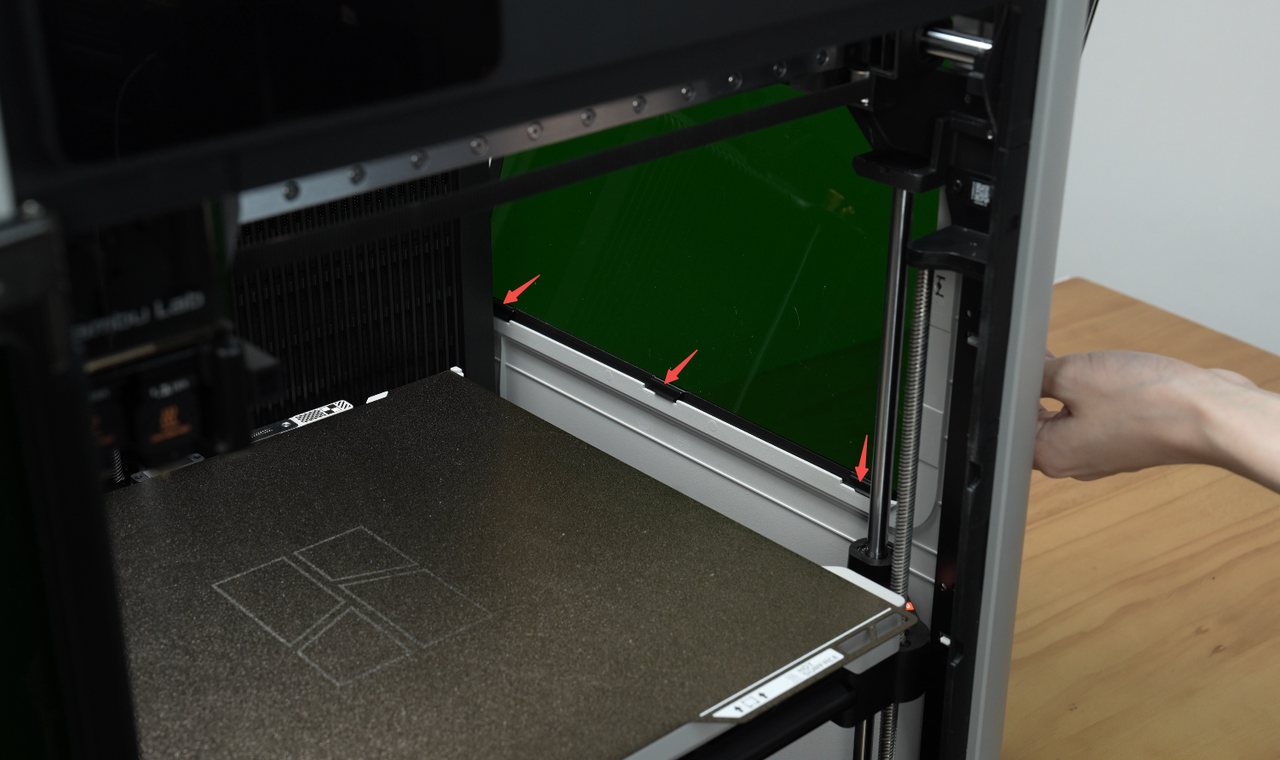
- With the window correctly aligned and fully seated in the window opening, press firmly on the top and sides of the glass to adhere the glass to the enclosure.
- Brace the outside of the glass with one hand to ensure it is not pushed out and replace the two screws at the top from within the enclosure.
¶ Install the Left Laser Safety Window
- Remove the protective film from the left laser safety window.
- Tear off the 4 pieces of plastic covering the double-sided tape on the inside of the glass panel.
- Align the window with the side panel clip at the bottom and with the glass aligned with the opening, press the top and sides of the glass to adhere it to the enclosure.
- Brace the outside of the glass with one hand and install the two screws at the top of the glass from within the enclosure.
¶ Install the Birdseye Camera
¶ Fix the Birdseye Camera
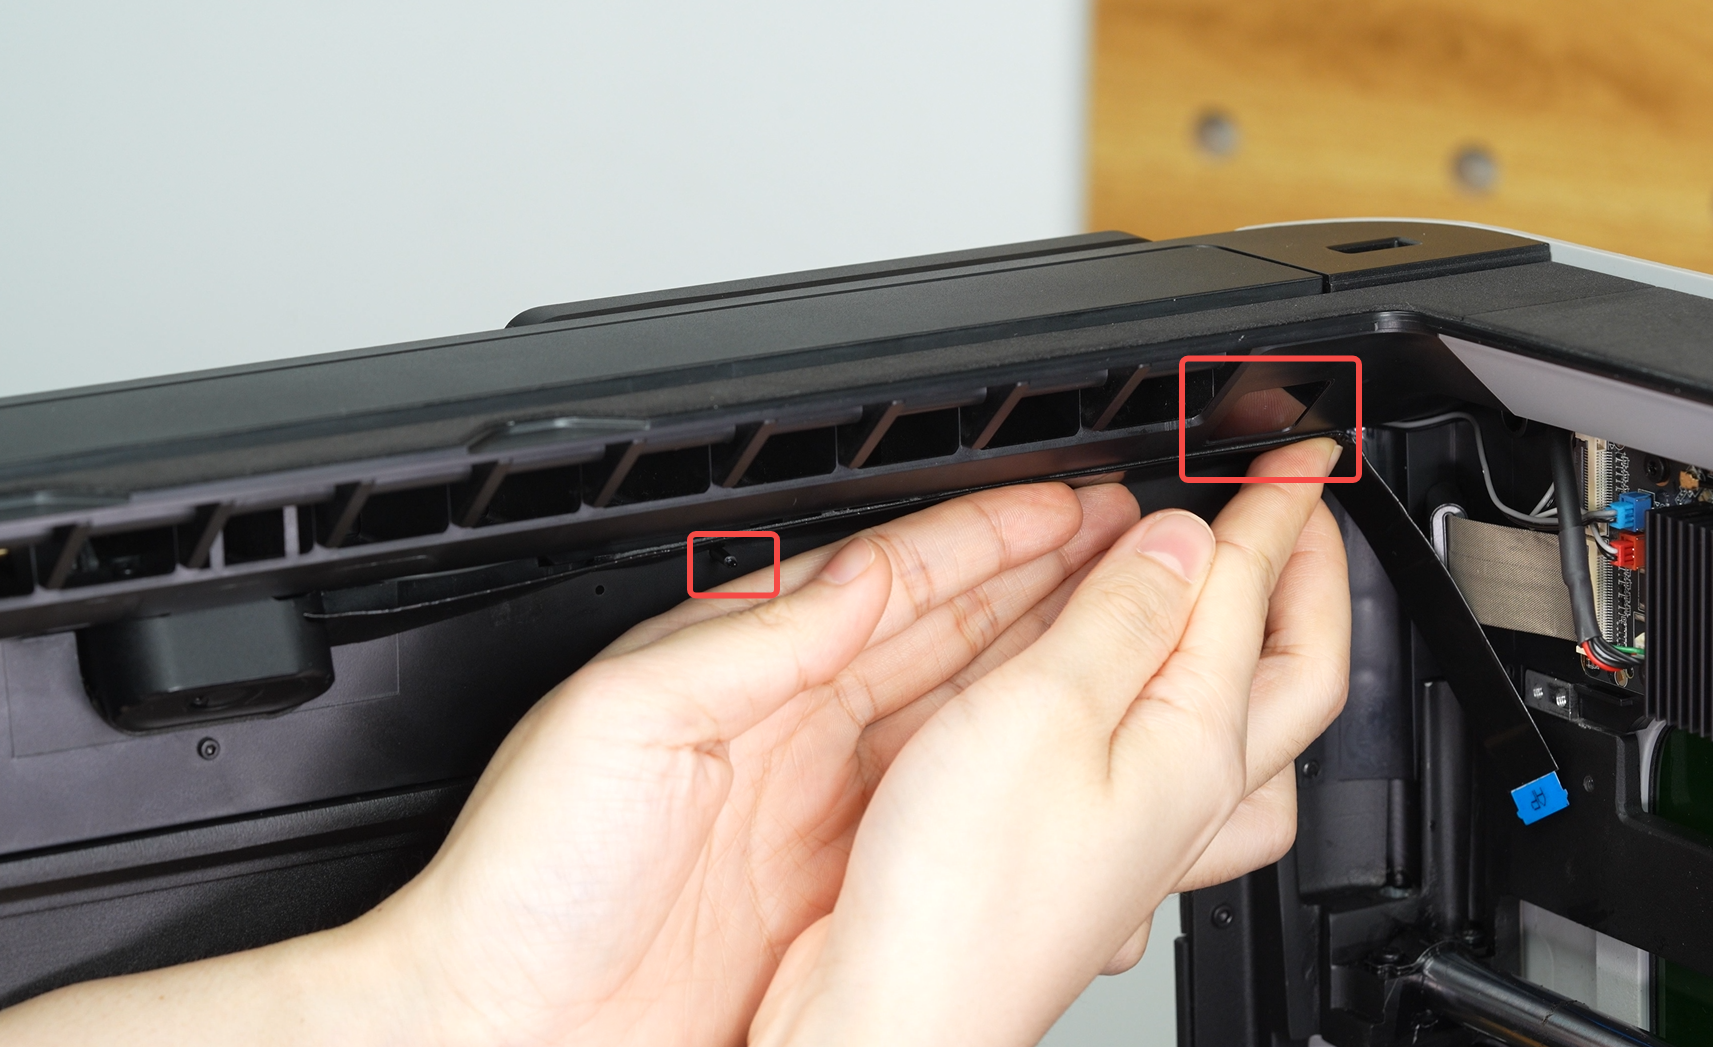
- Remove the screw from the AP board cover, as shown in the picture.
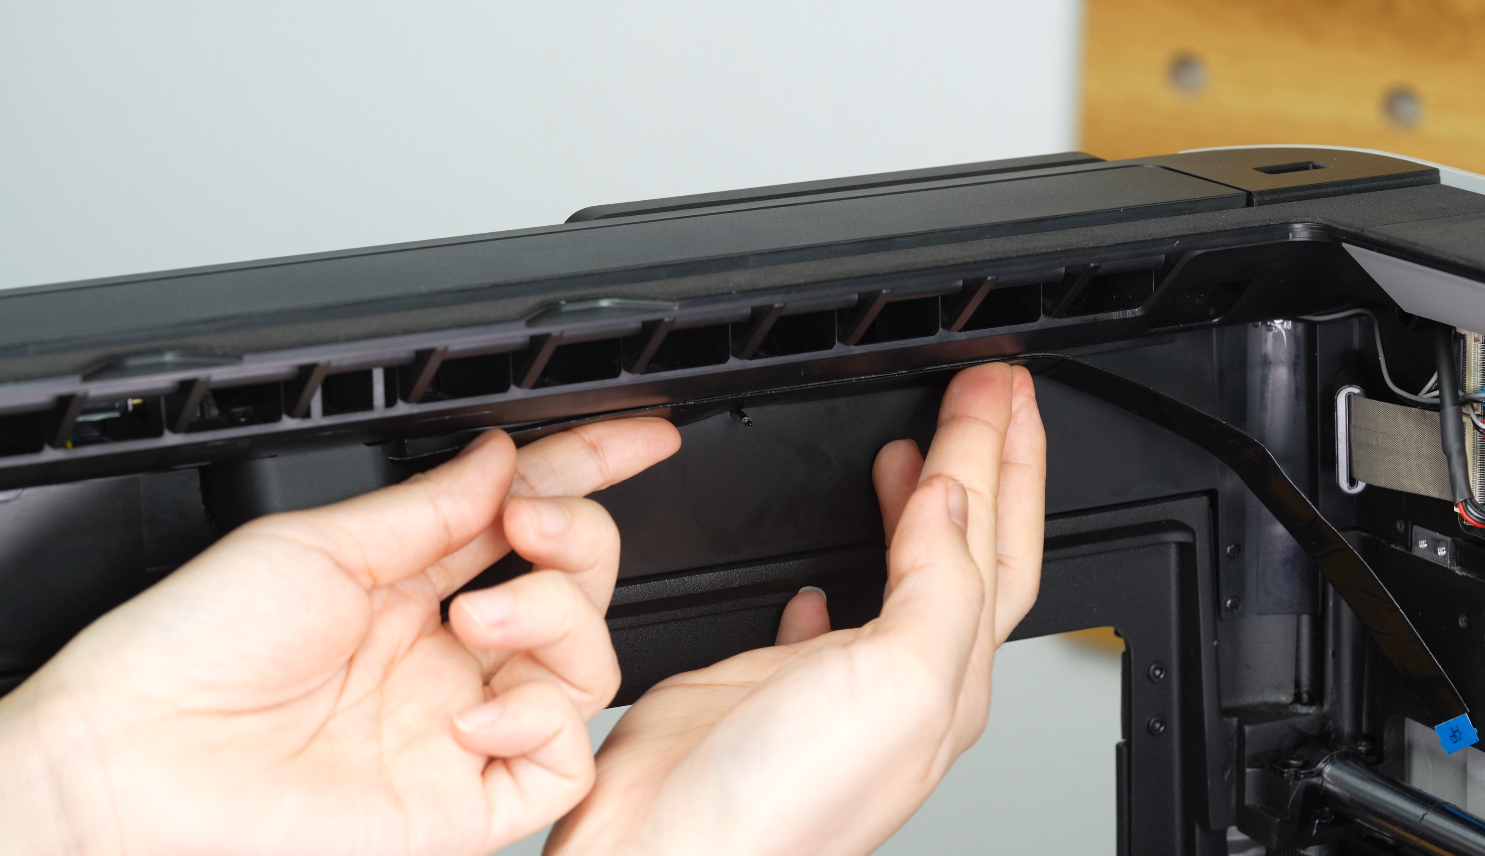
- Open the AP board cover by pulling from the bottom.
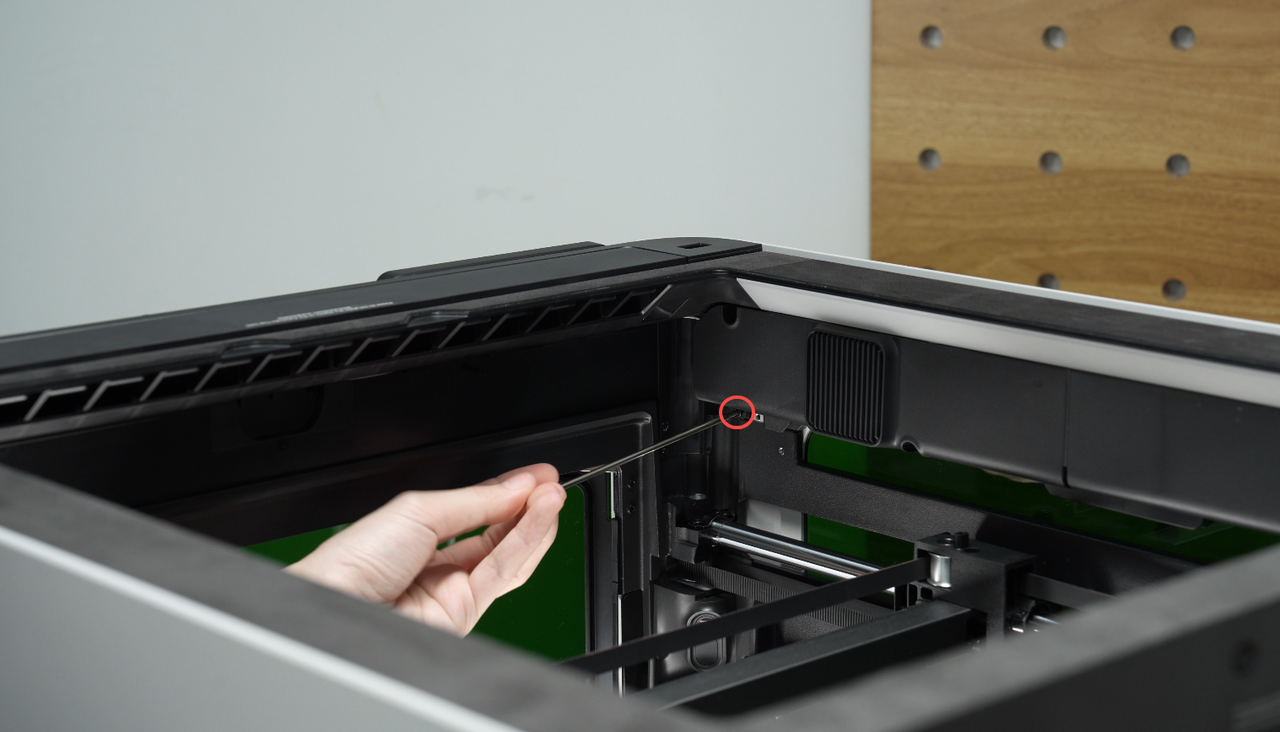
- Use an Allen key to gently push the LED cable out of the way as pictured to avoid pinching the cable when installing the birdseye camera.
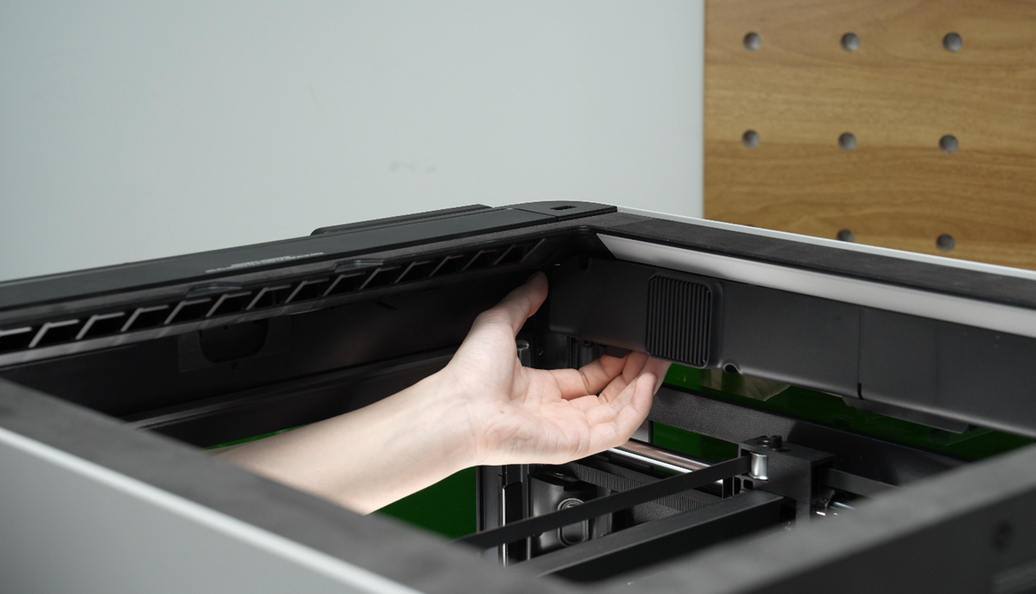
- Install the birdseye camera. Align the two side buckles on the camera housing with the two small grooves on the printer as shown.
- Gently press the camera housing upward until you hear a "click" sound, indicating it is securely installed.
- Wipe the camera lens with a microfiber cloth to remove any dust.
¶ Connect the BirdsEye Camera Cable
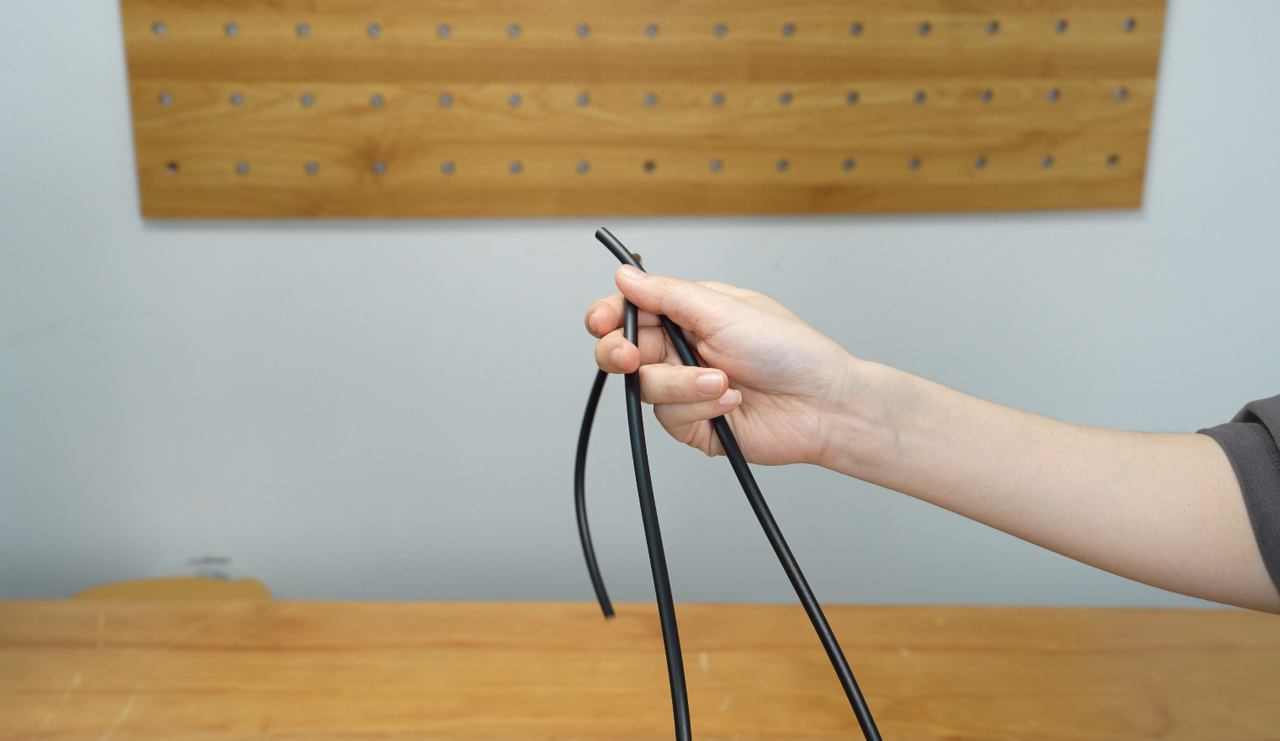
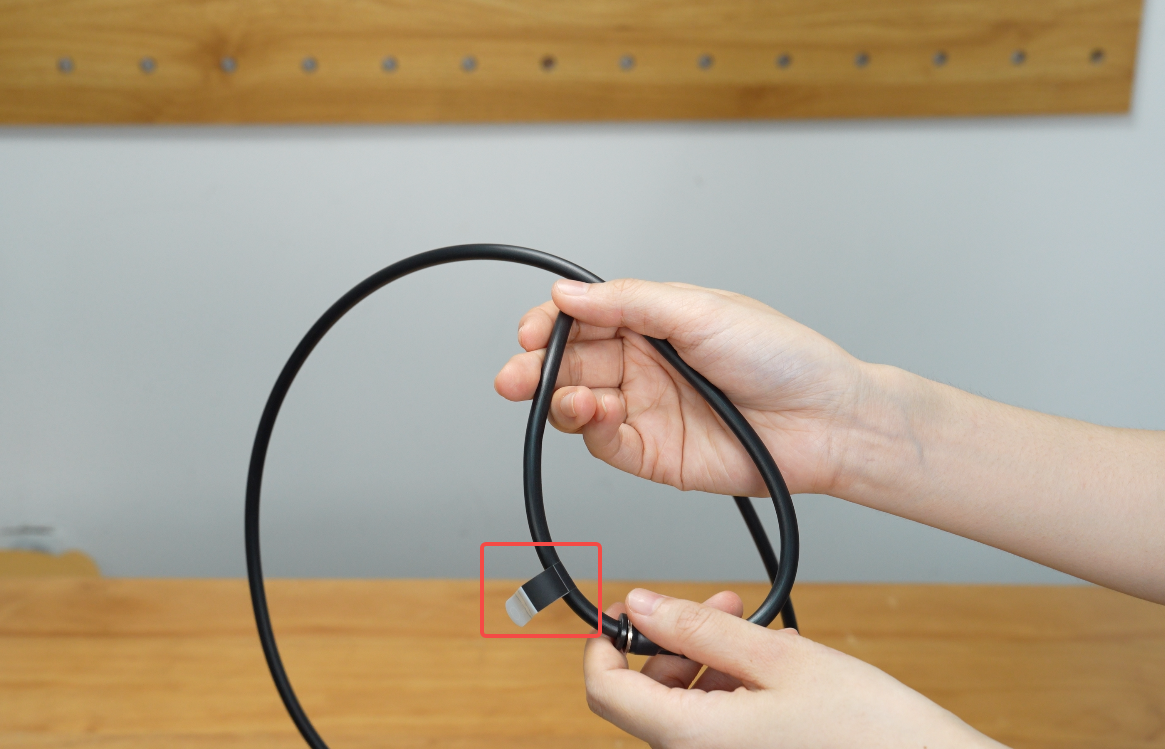
- Remove the adhesive backing of the cable.
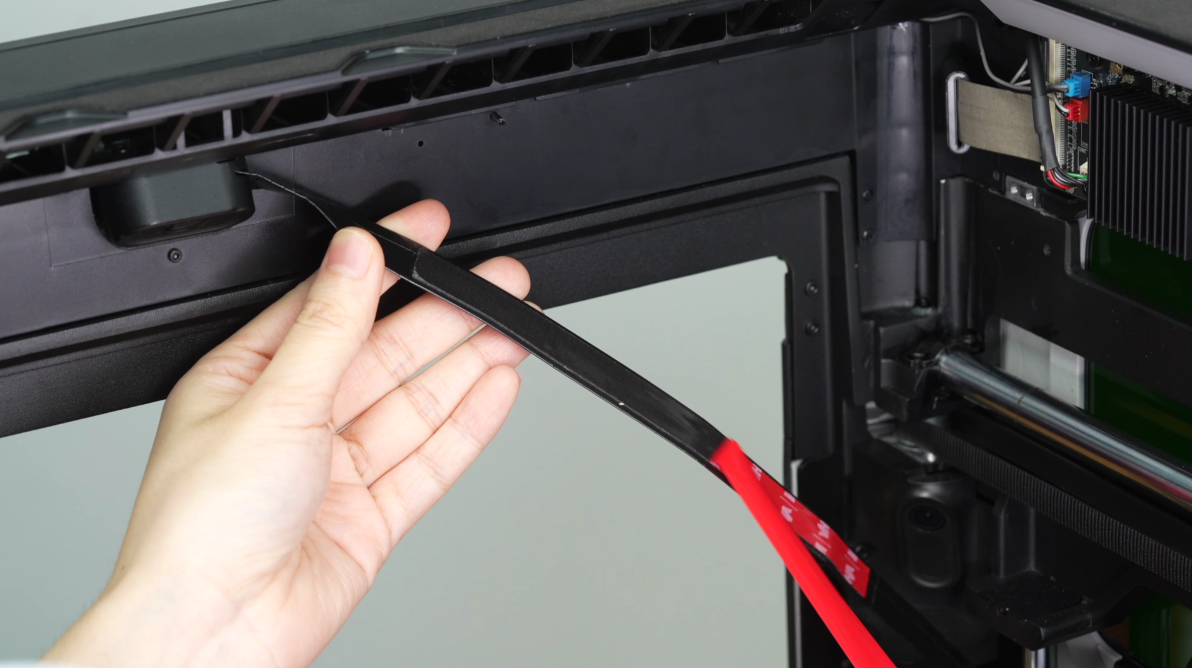
- When routing the cable, avoid blocking the chamber temperature sensor and the flame sensor which are highlighted in the image below.
Note: Apply continuous and firm pressure for about 30 seconds during attachment to ensure proper adhesion.
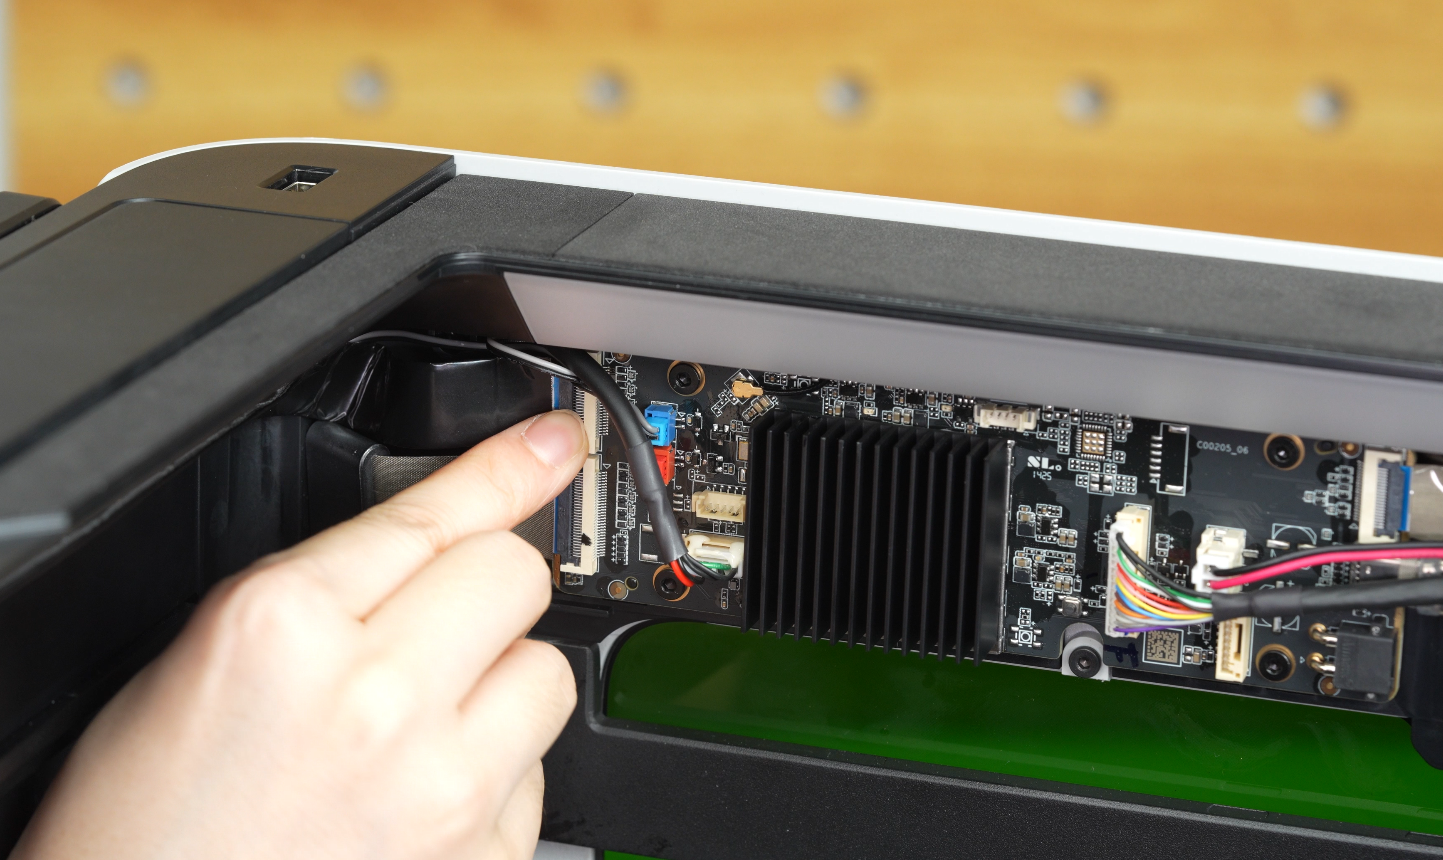
- Carefully open the thin latch in the top left corner of the AP board.
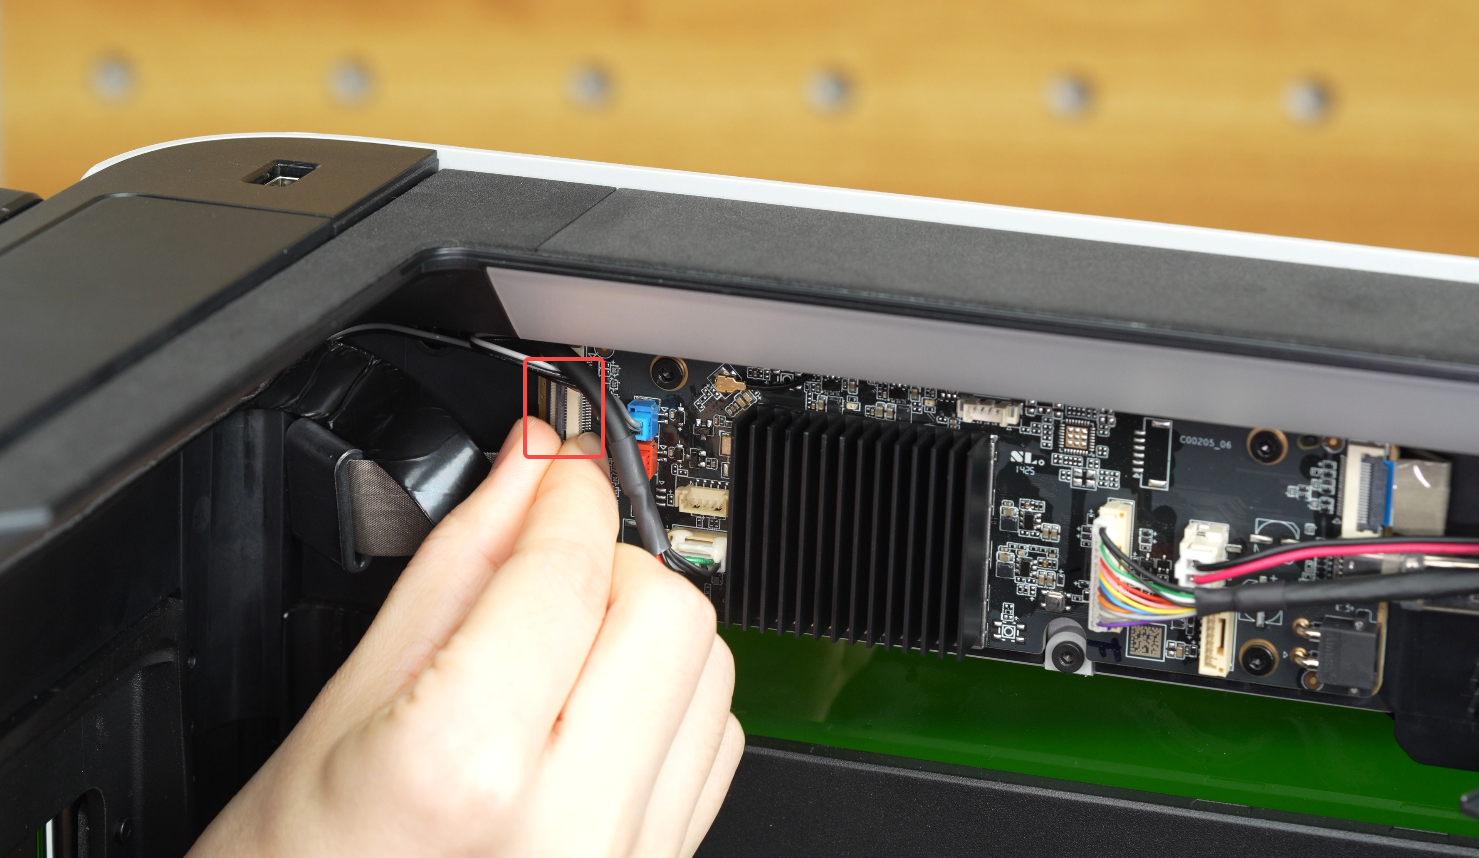
- Route the camera cable behind the other wires and connect it to the AP board to the connector with the latch just opened.
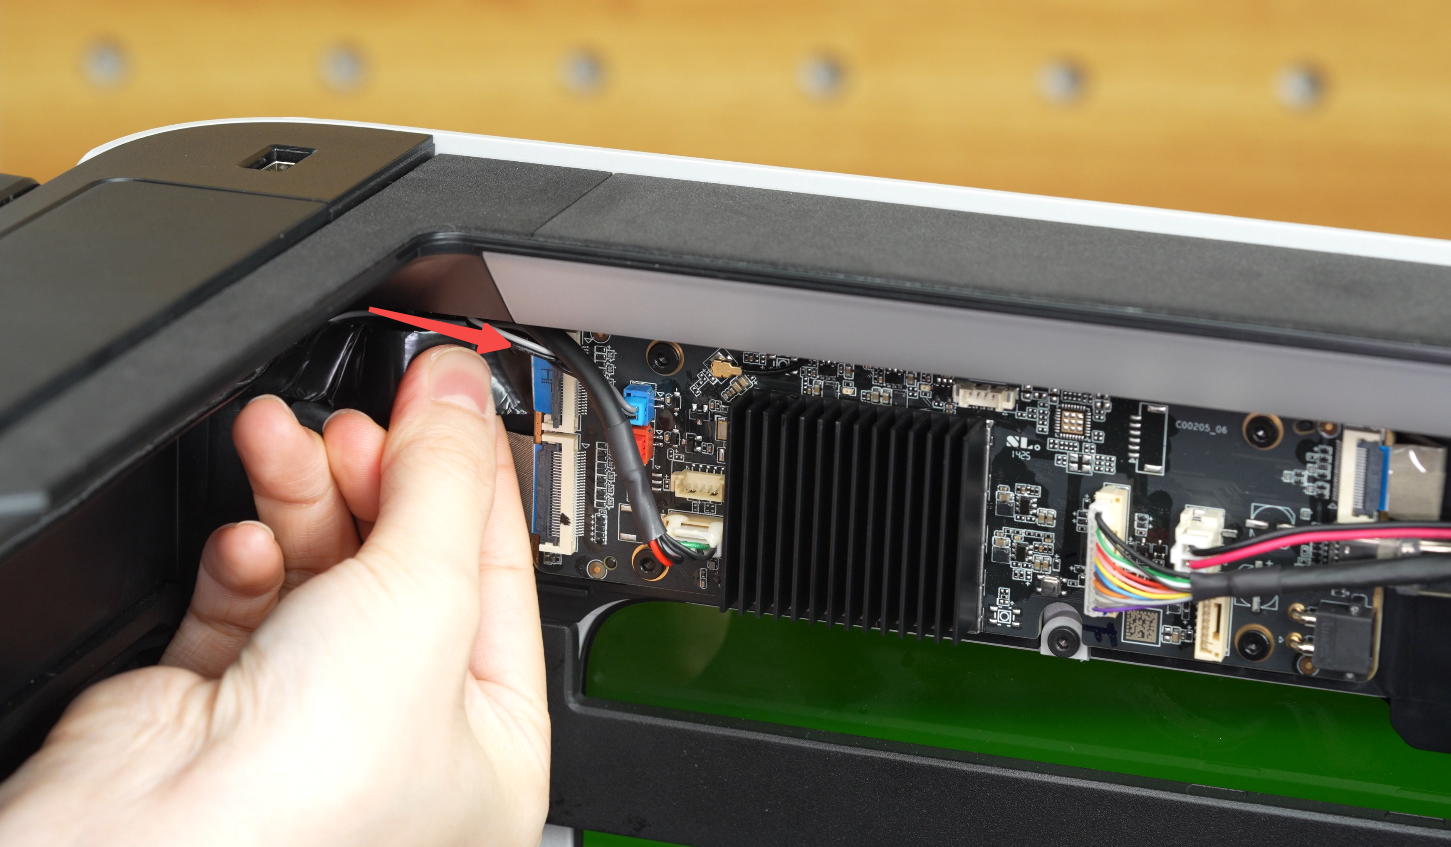
- Ensure the cable is fully seated and straight and press the latch firmly to lock it.
- Close the AP board cover.
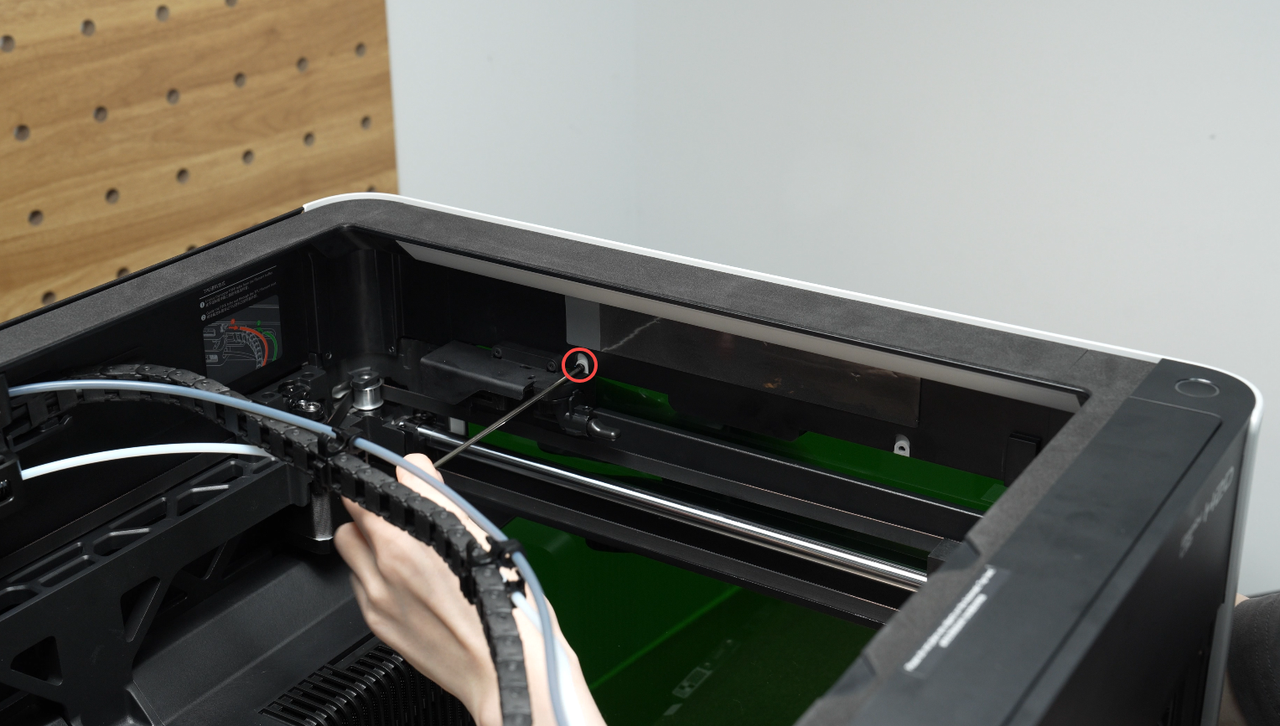
- Tighten the fixed screw.
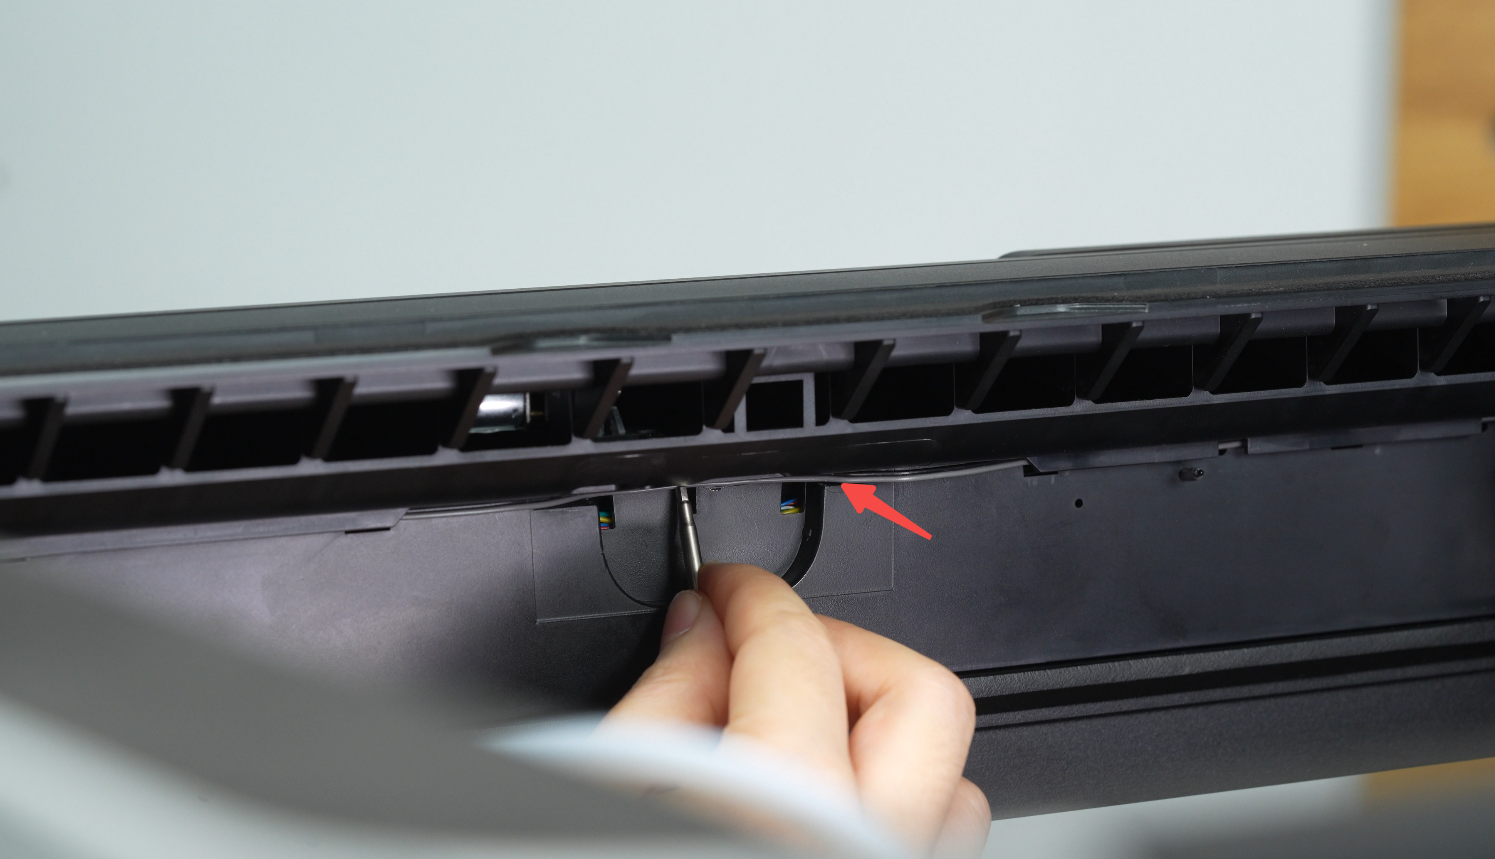
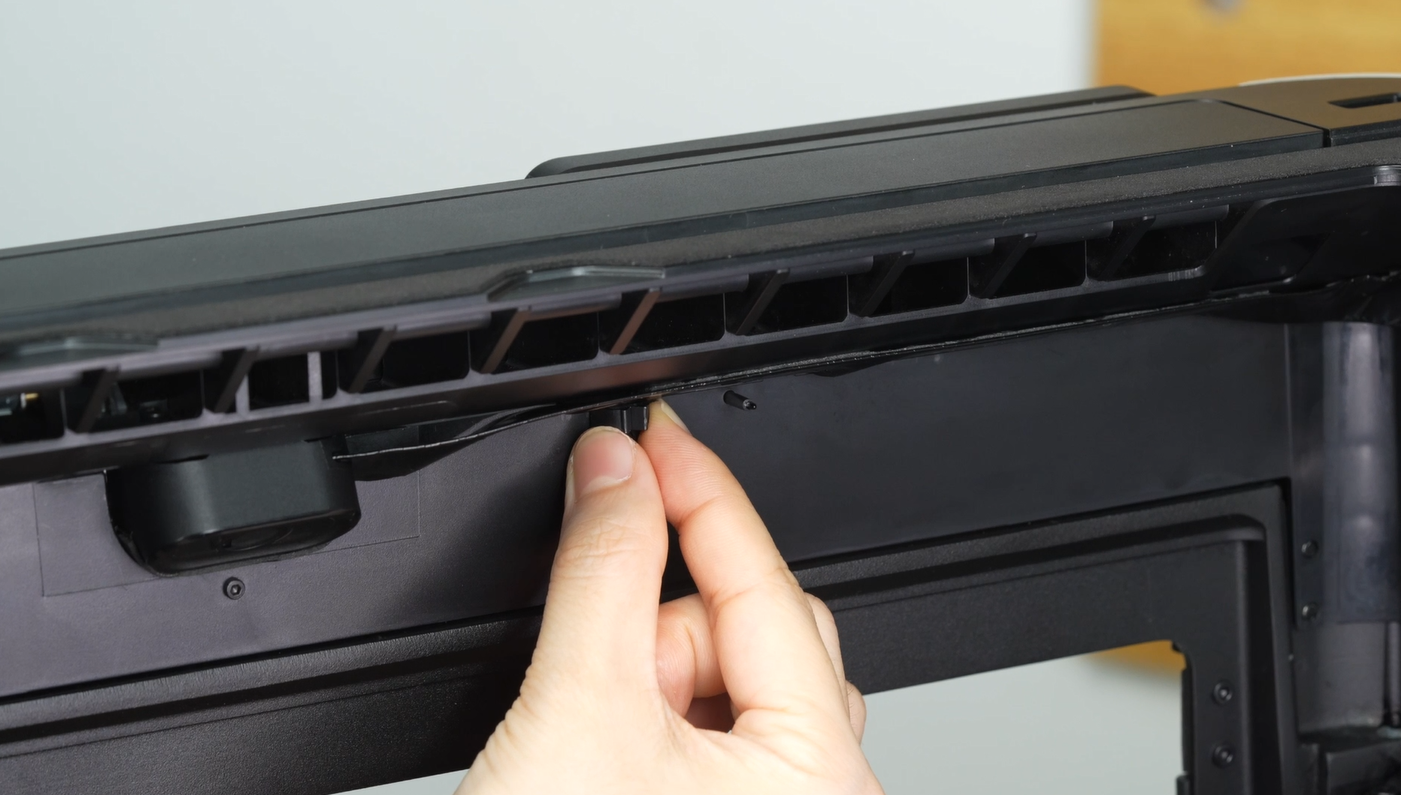
- Peel off the sticker backing from the cable buckle.
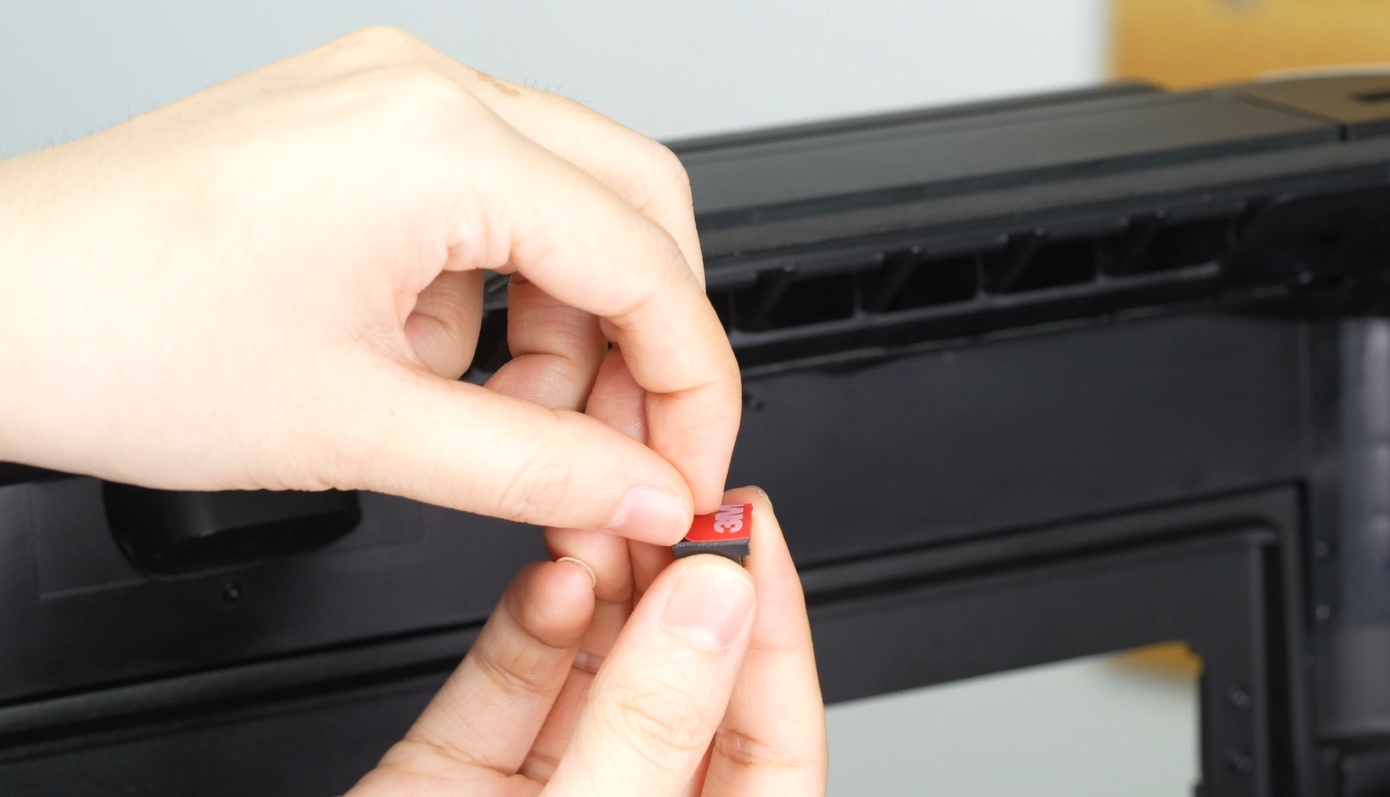
- Align the buckle with the screw hole to the right of the BirdsEye camera and stick it in place as shown below.
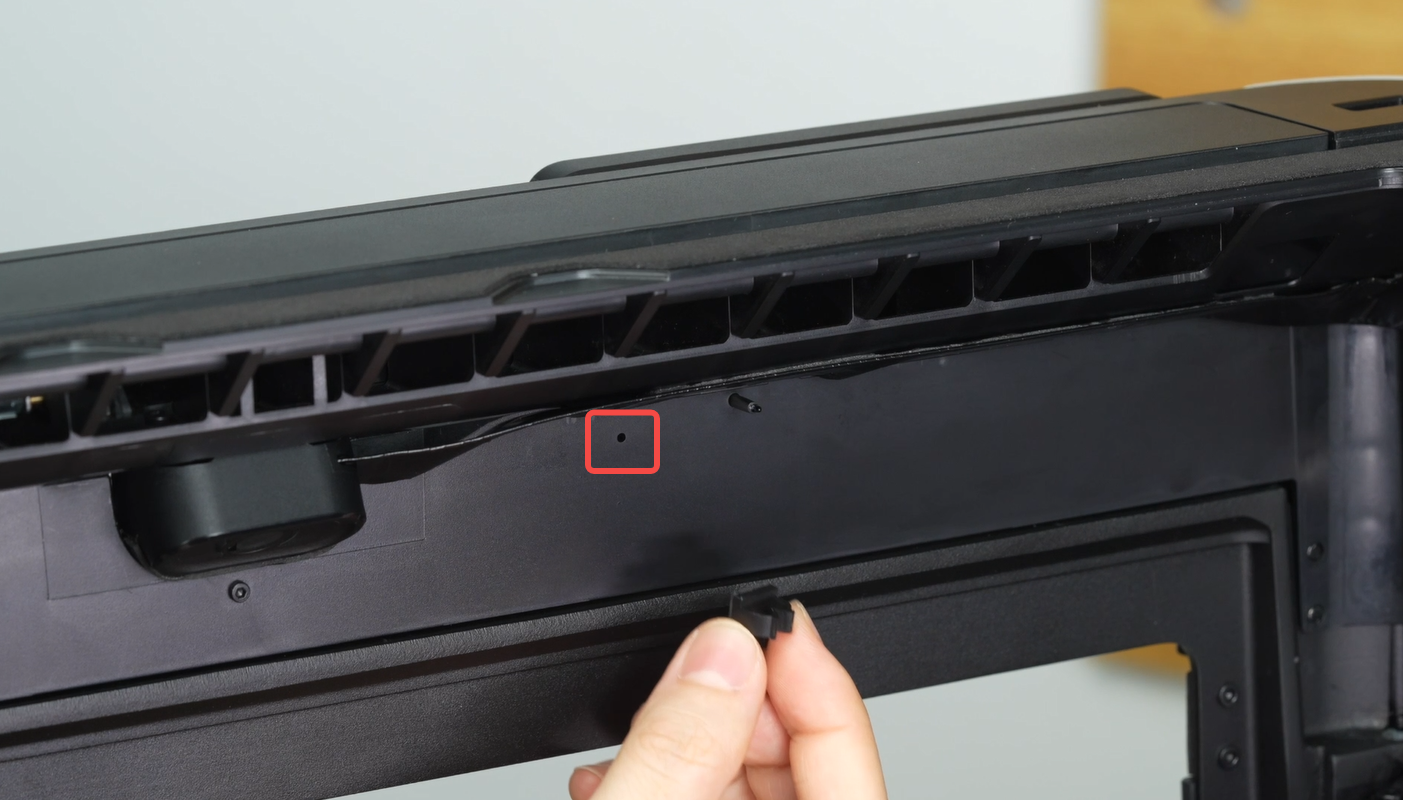
Note: Apply continuous and firm pressure for about 15 seconds during attachment to ensure secure adhesion.
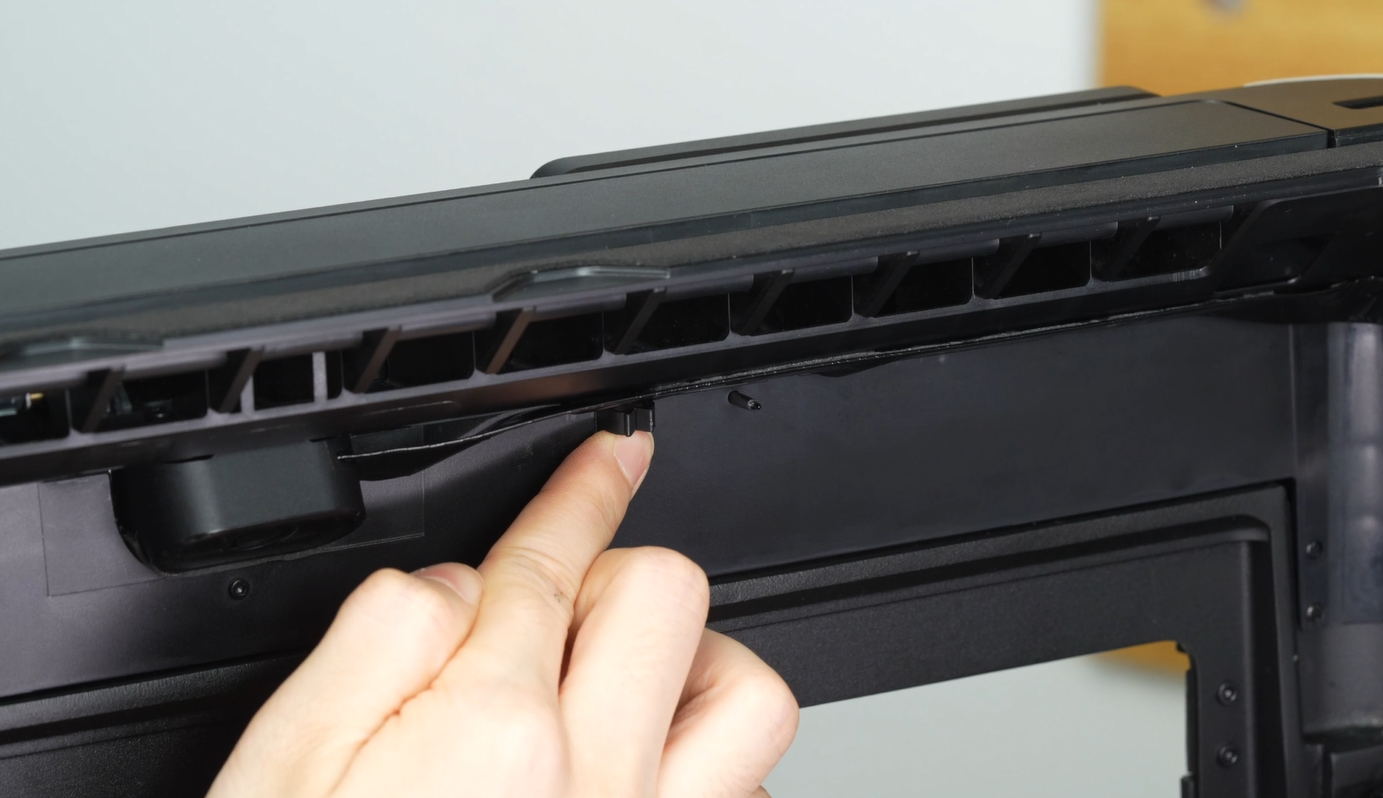
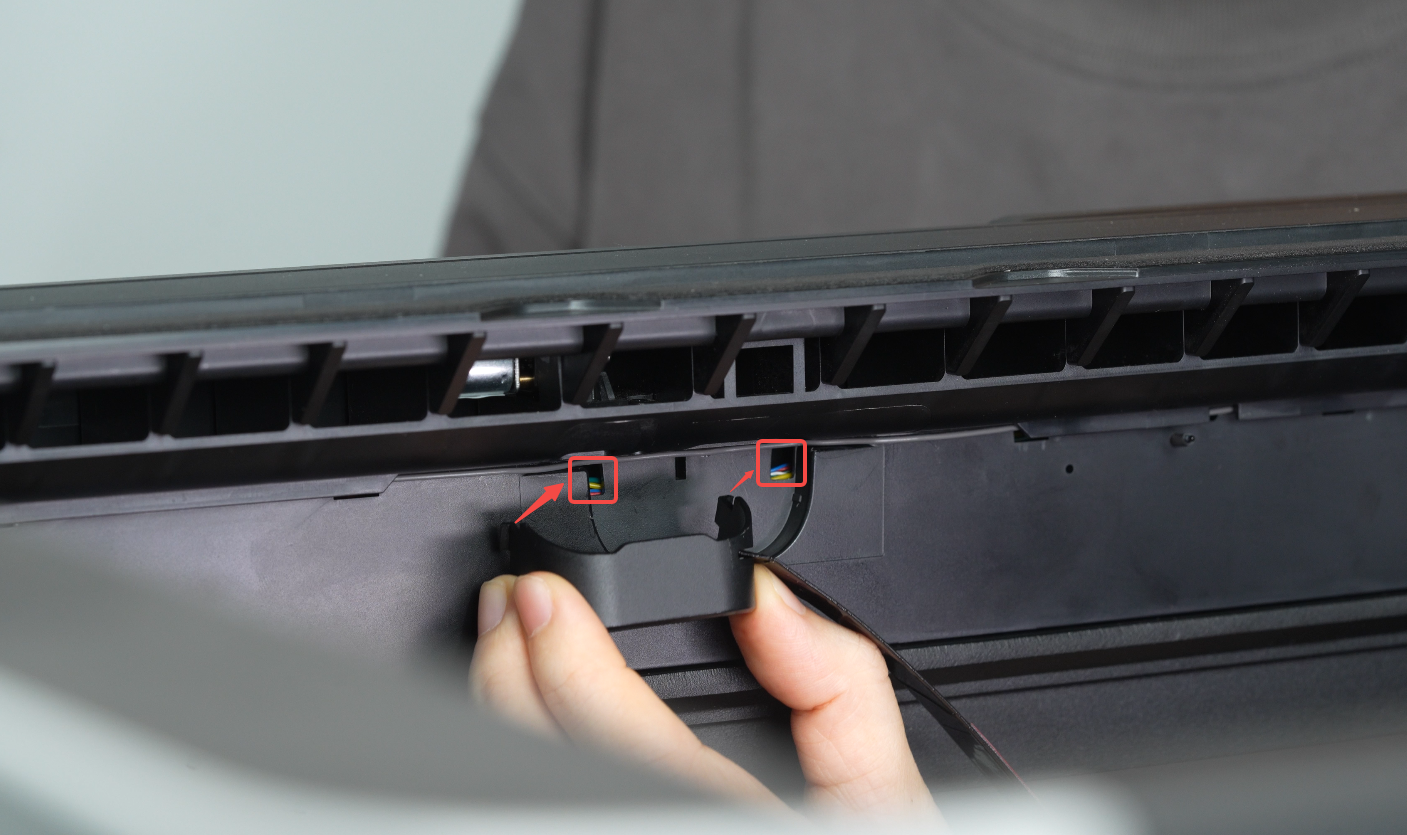
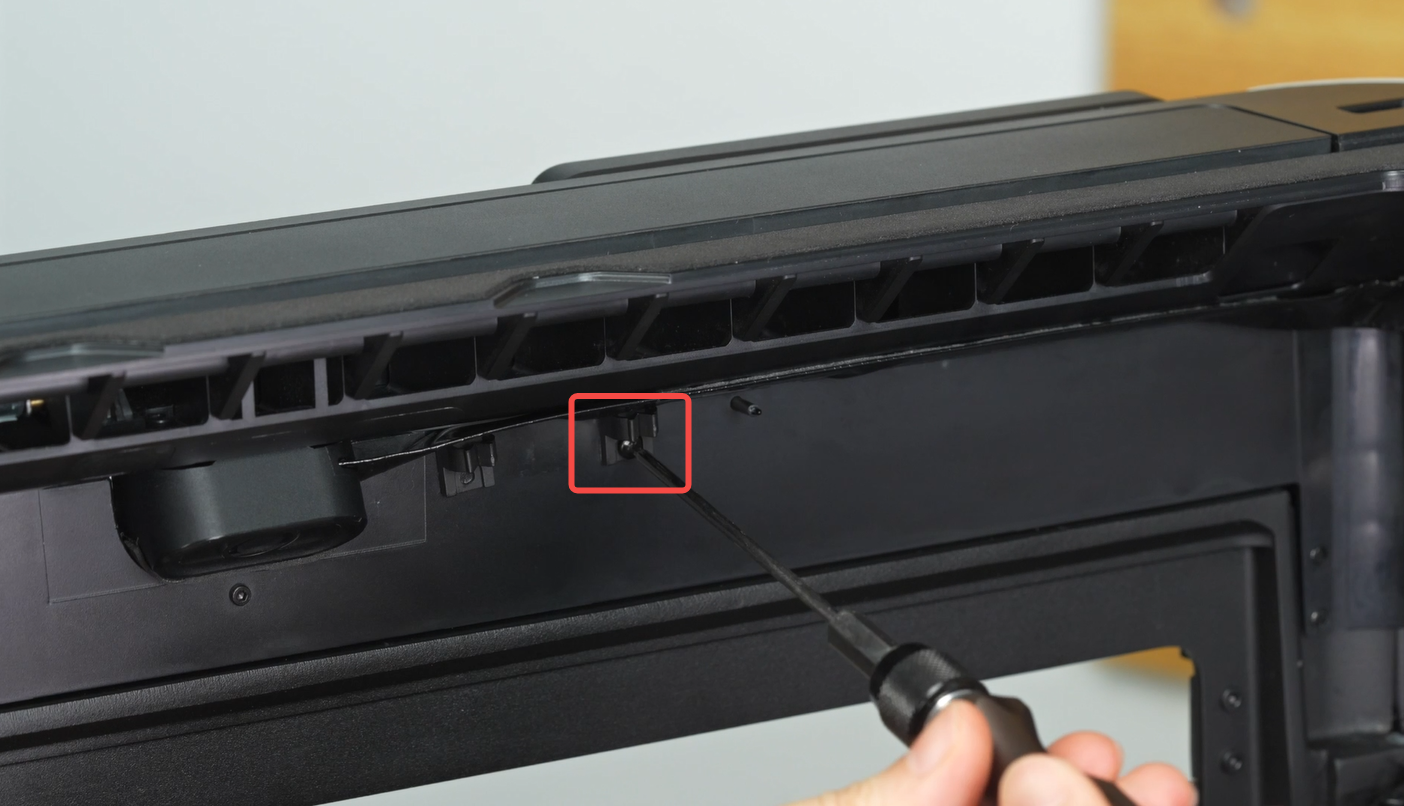
- Install the second buckle in the middle section between the BirdsEye camera and the first buckle, then press it firmly into place;

- Tighten the screw to secure the buckle.
Note: There are no reserved screw holes on some versions of the printer. You only need to glue the two clips as required.
¶ Install the Air Pump
Pay attention to the difference in length of the air assist tubes. Note the sticker on the long tube.
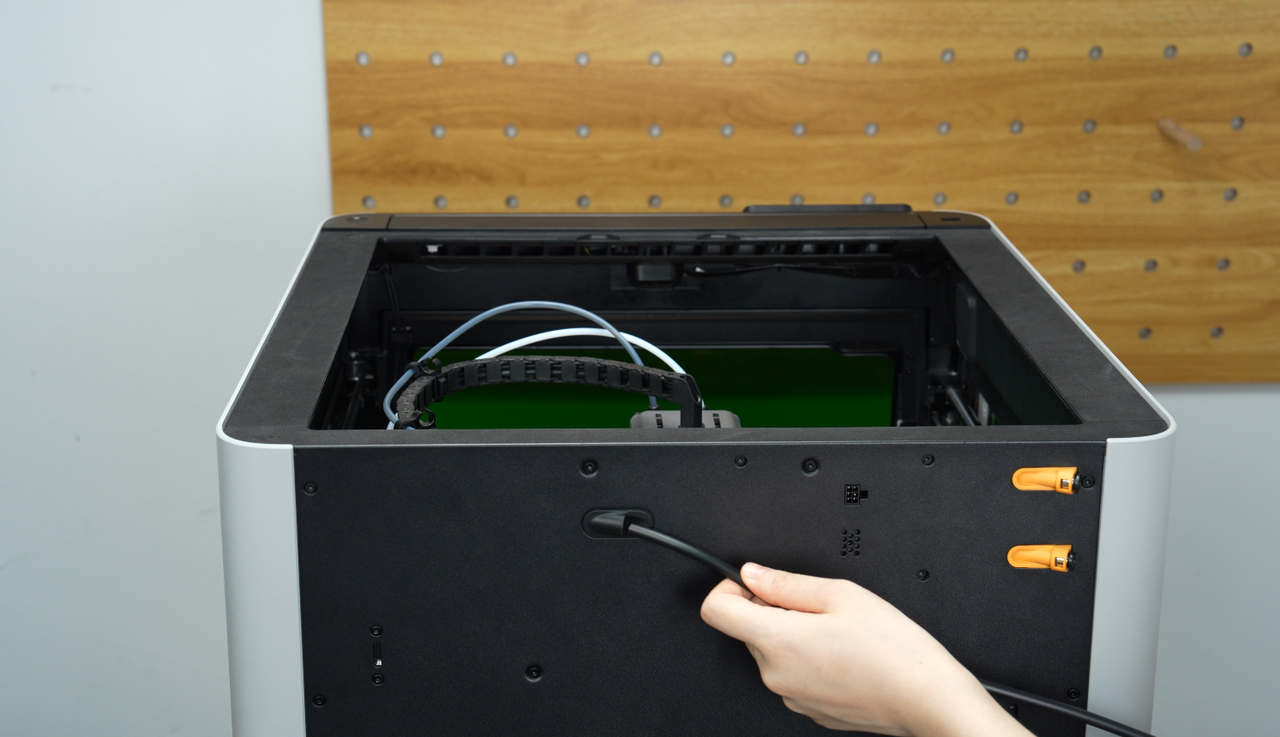
- Insert the short air assist tube into the TPU filament inlet at the back of the printer.
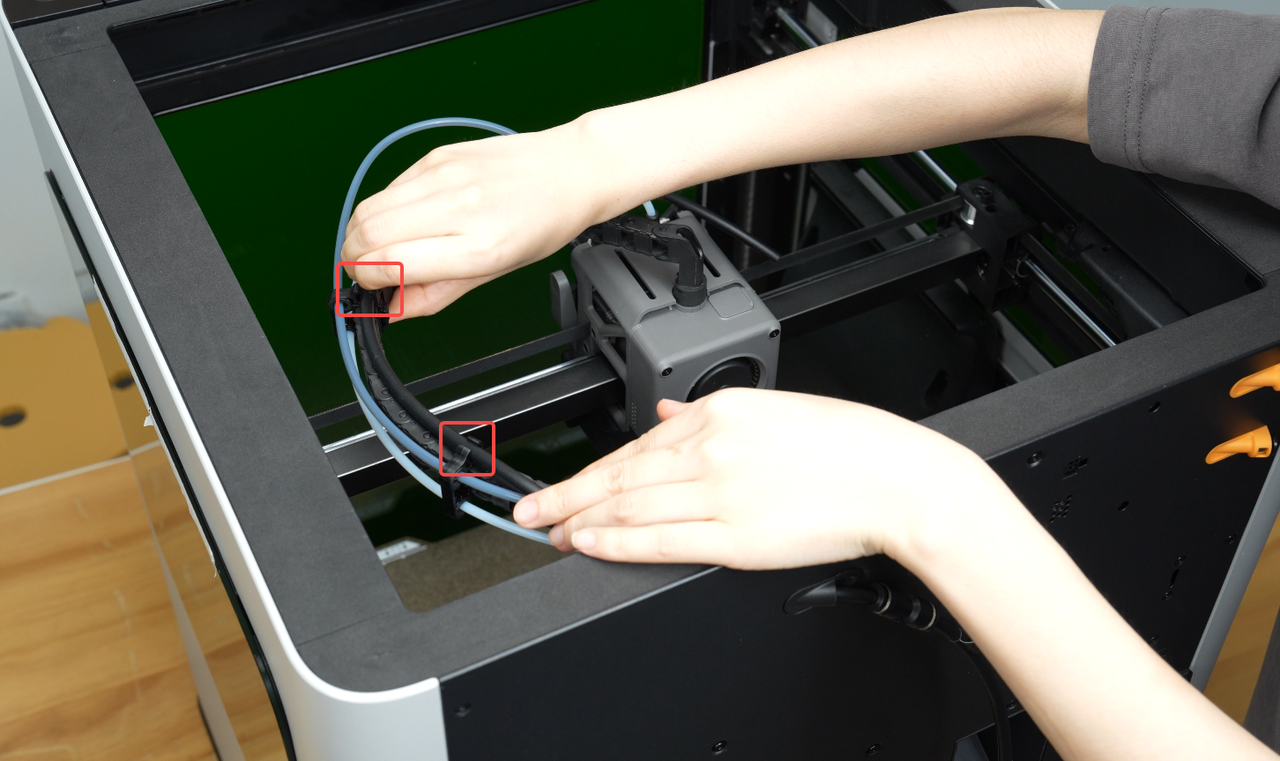
- Secure the air assist tube in the two clips along the toolhead cable chain.
- Plug the air pump cable into the air pump.
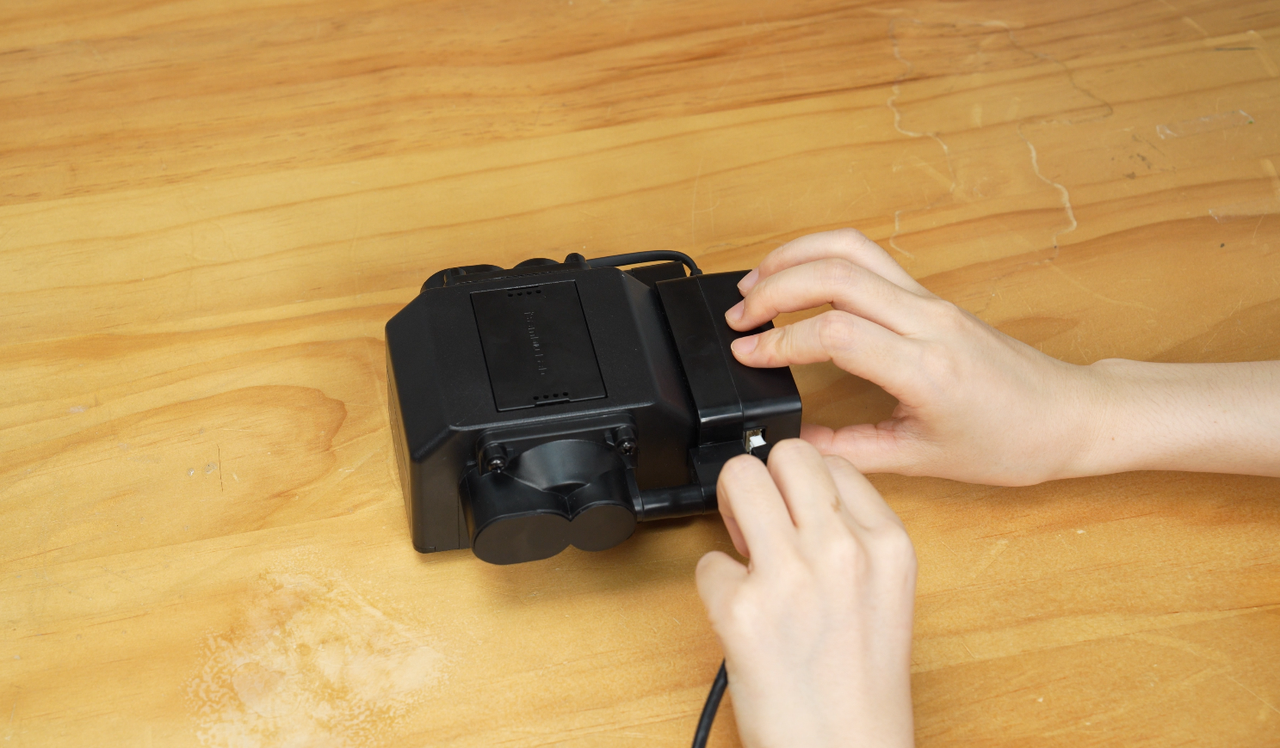
- Plug the 4-pin connector of the air pump cable into one of the 4-pin ports on the back of the printer.
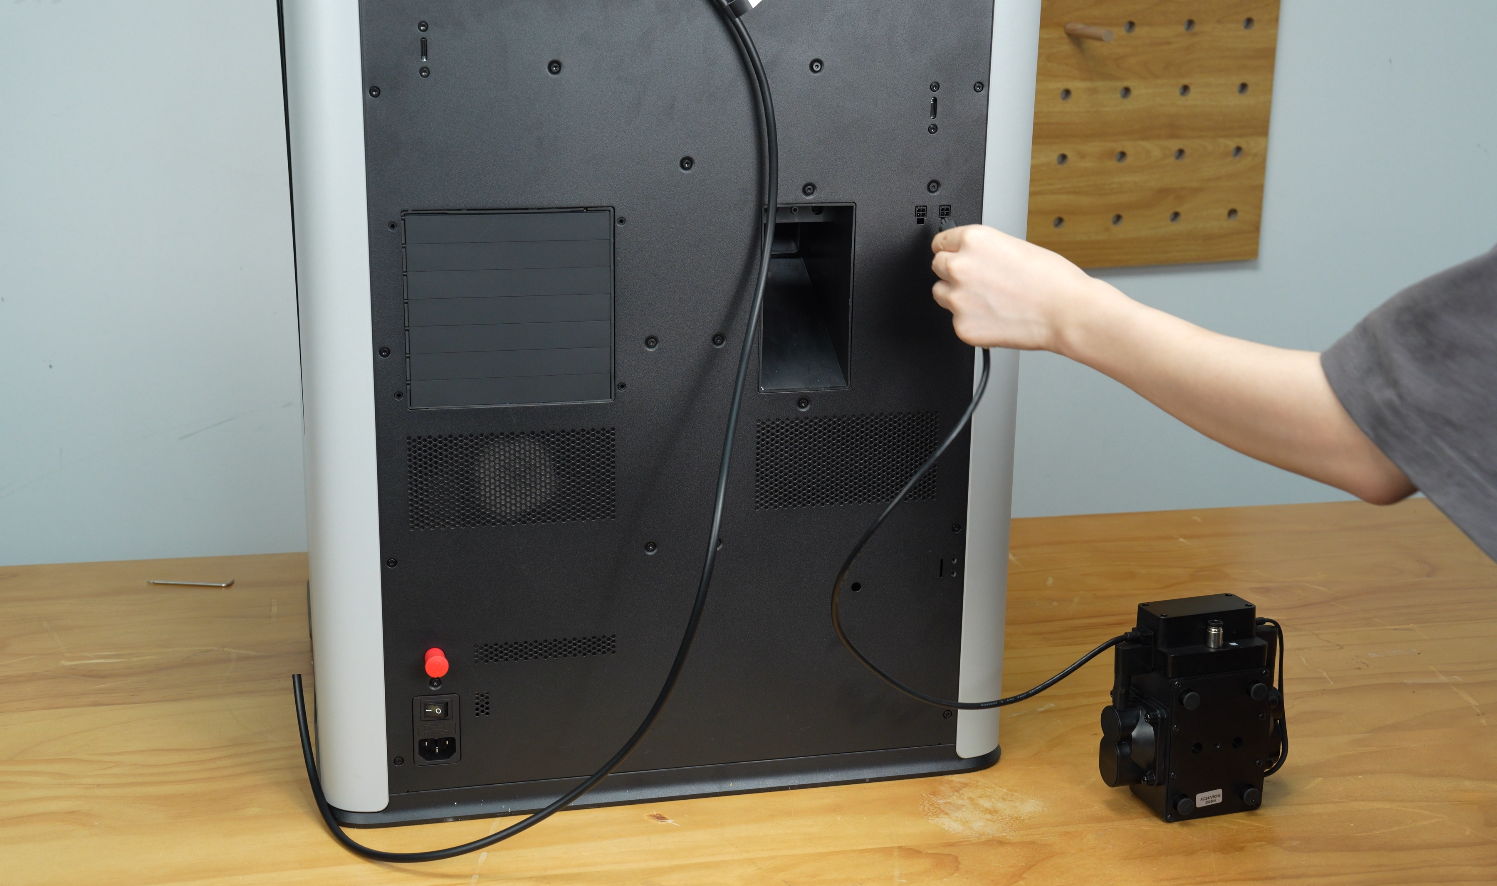
- Connect the remaining end of the air assist tube to the air pump interface.
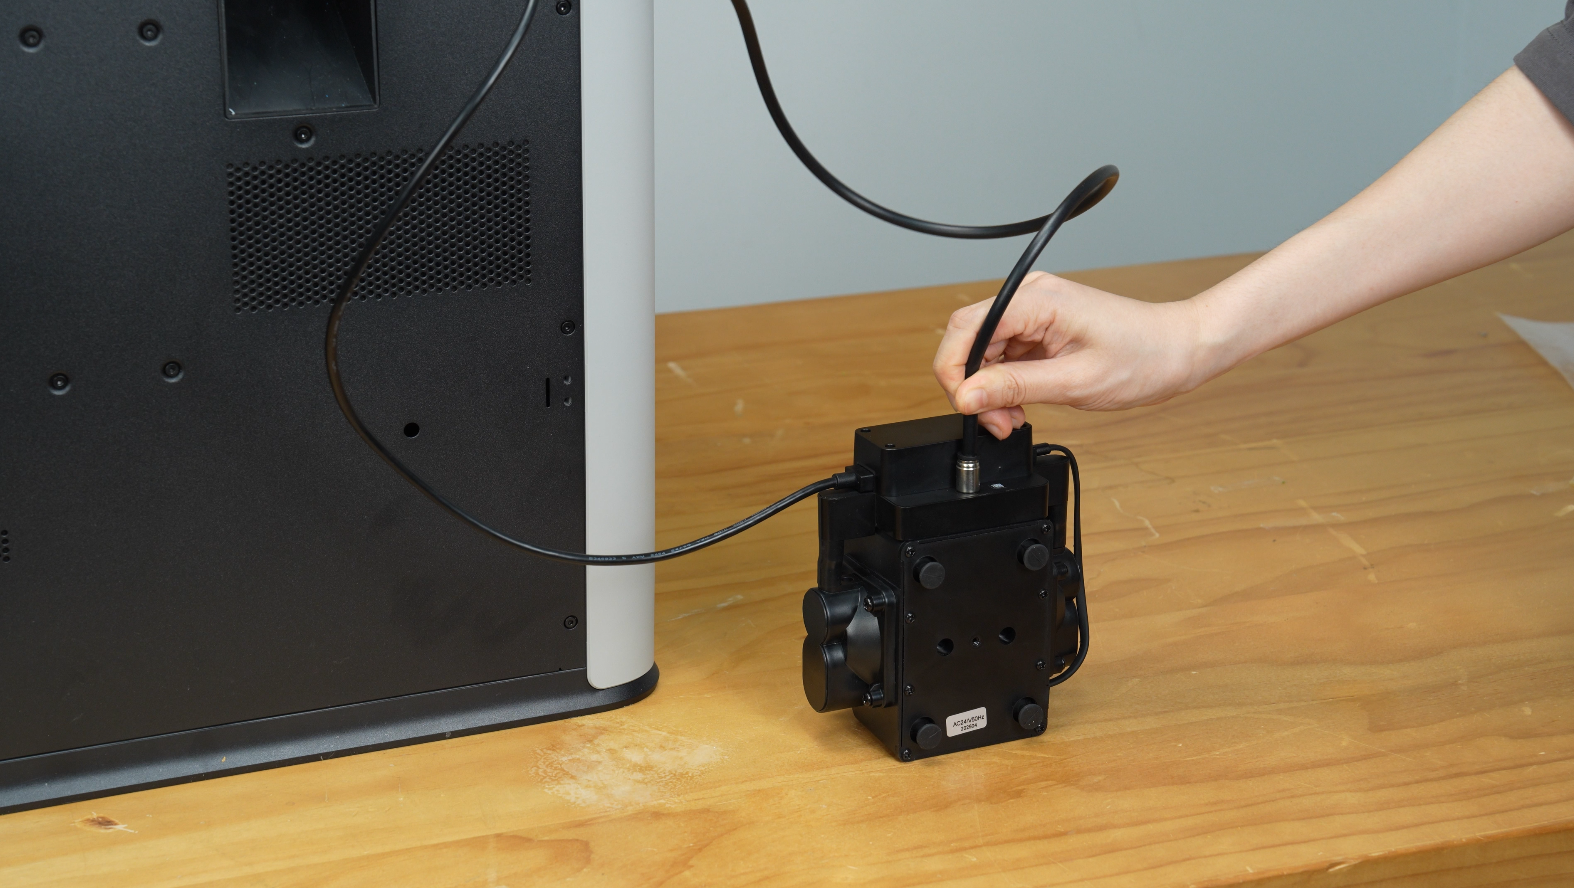
- After inserting it into place, gently wiggle the air assist tube to confirm that the tube is fully connected.
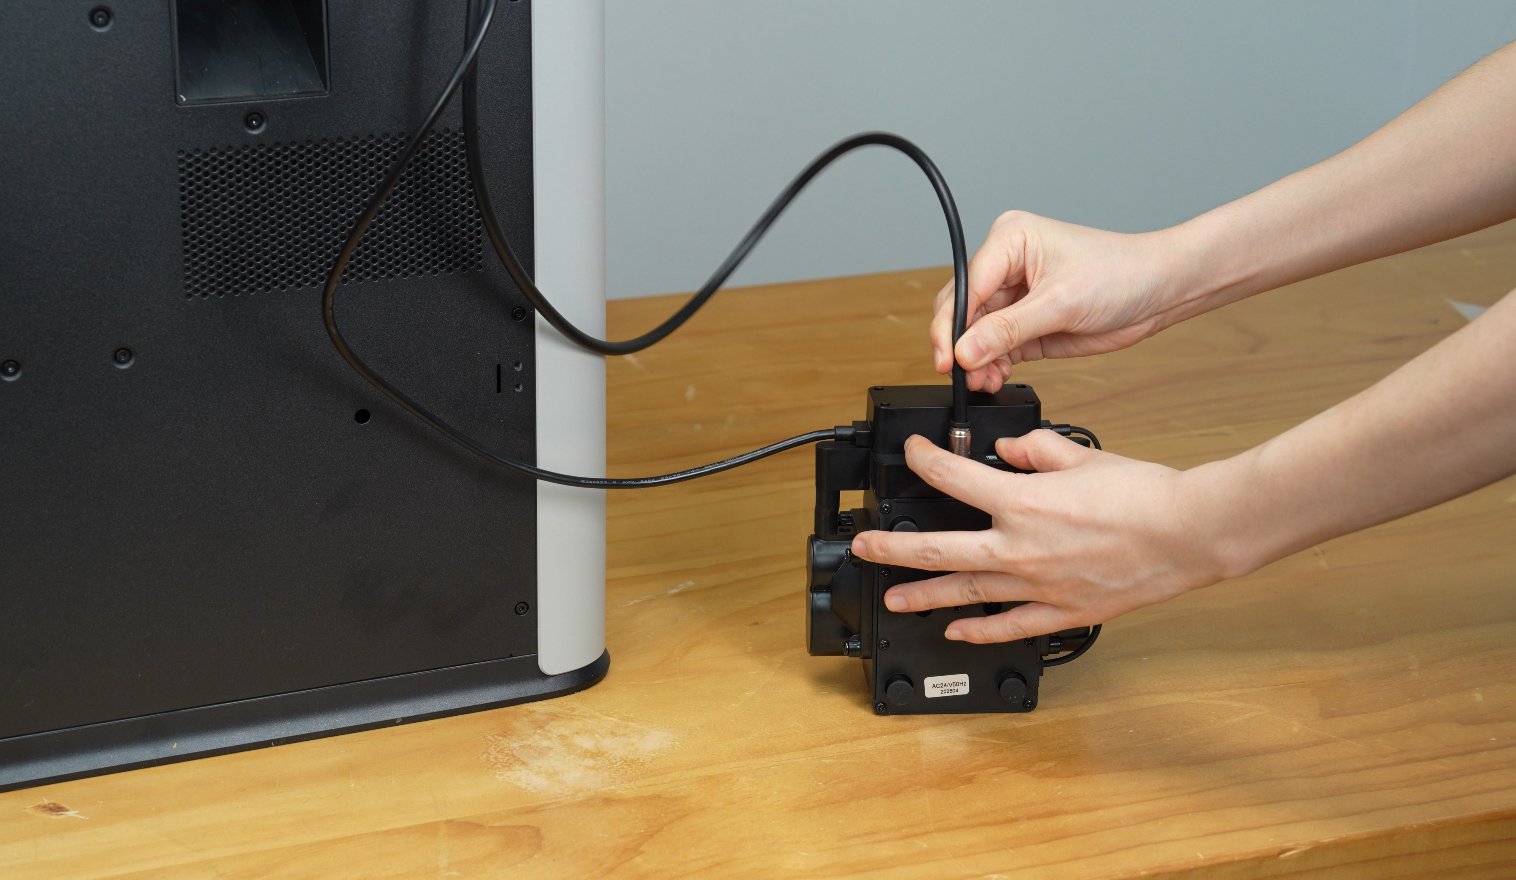
- Lay the air pump flat on the table.
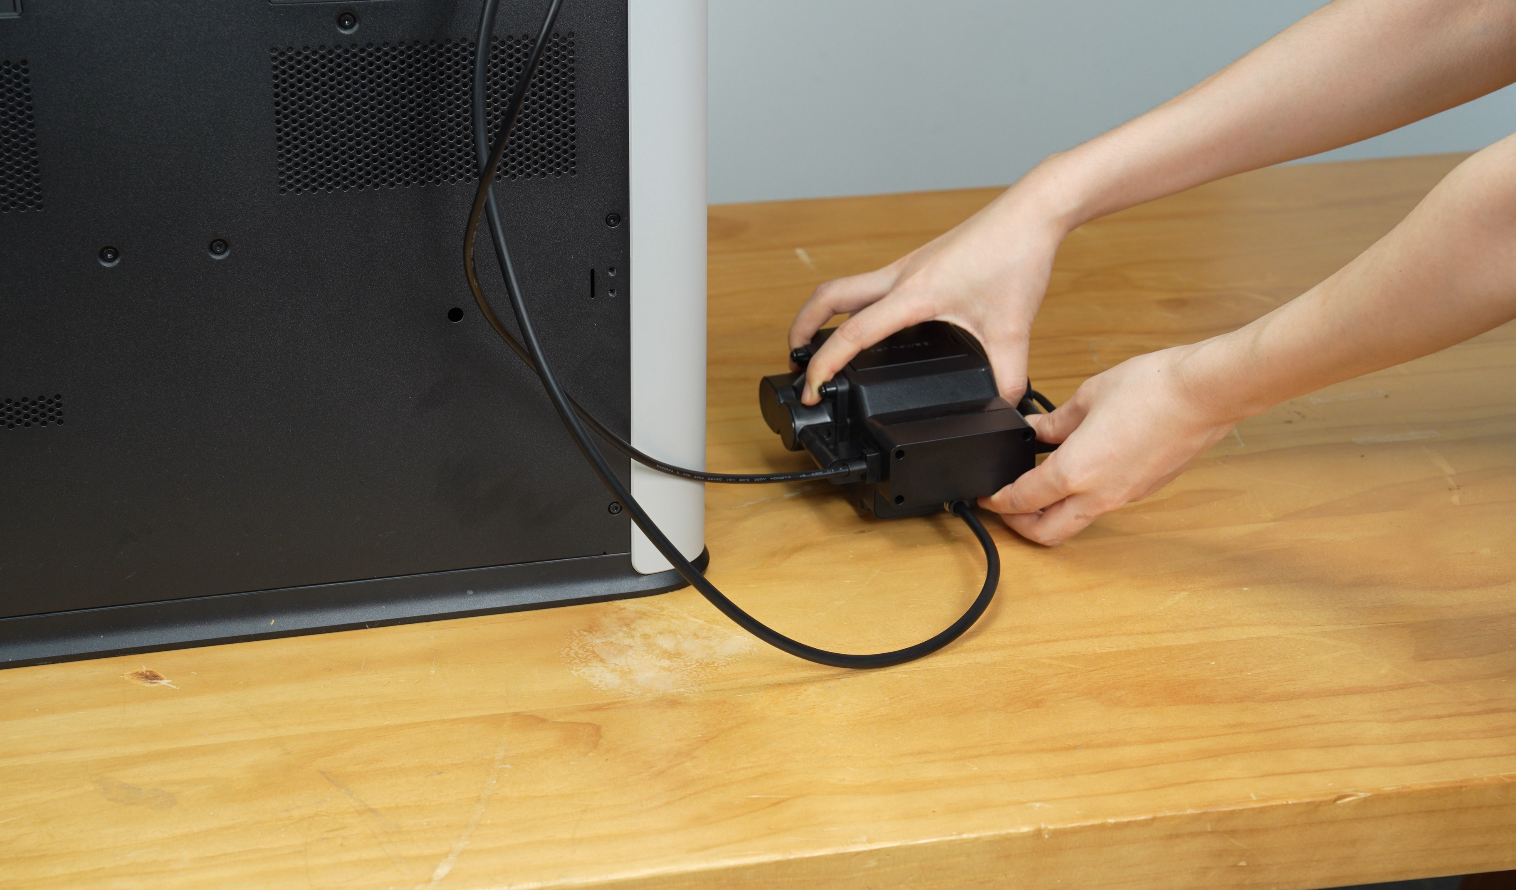
Note: The air pump might vibrate, so it is important to ensure it is placed in a safe place, so it does not fall down and get damaged.
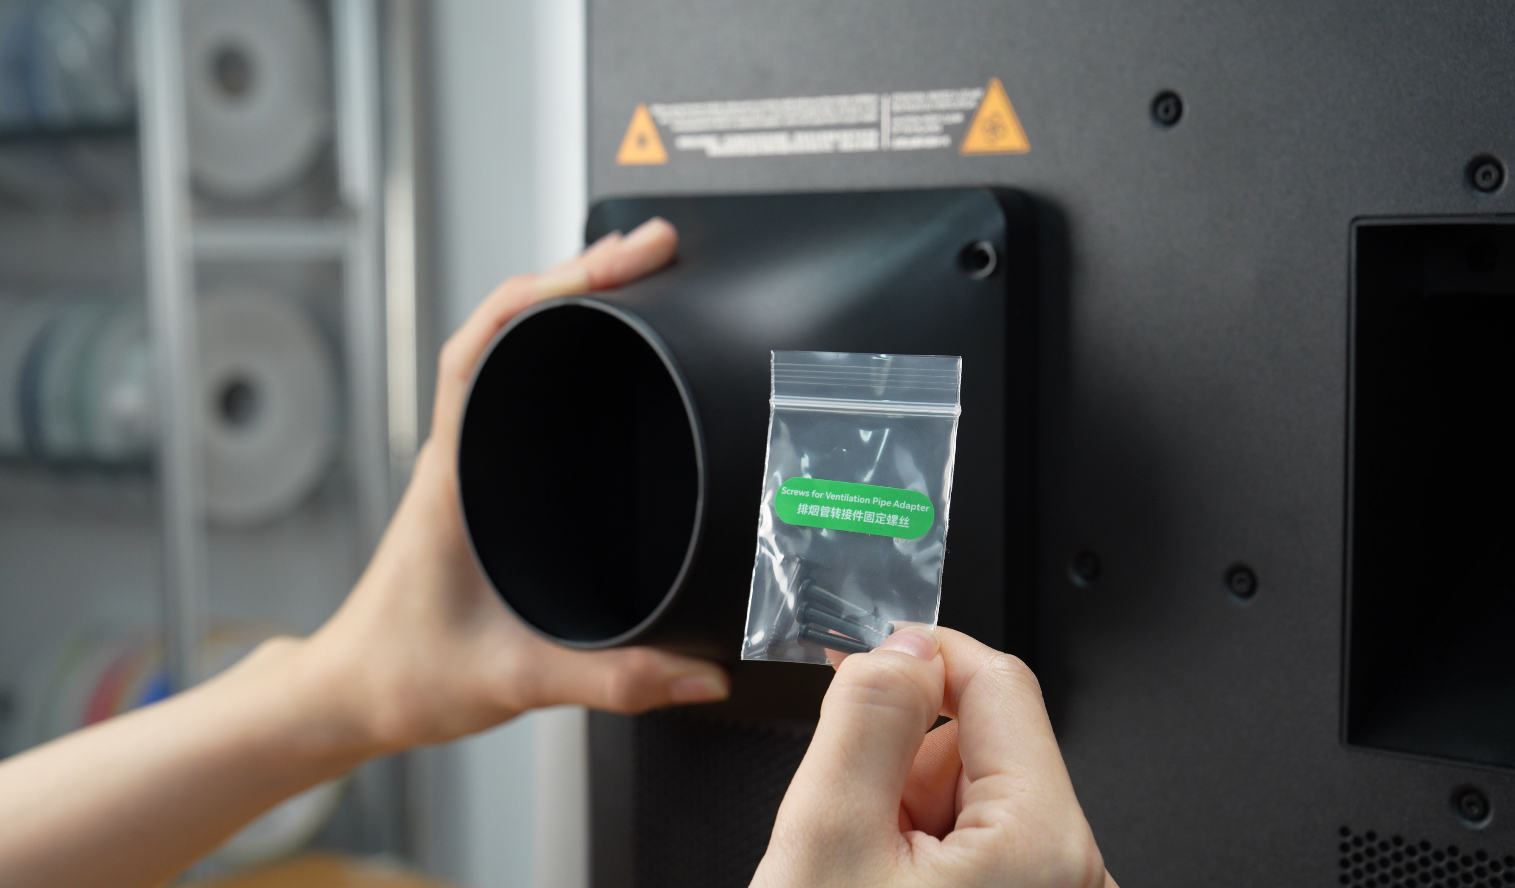
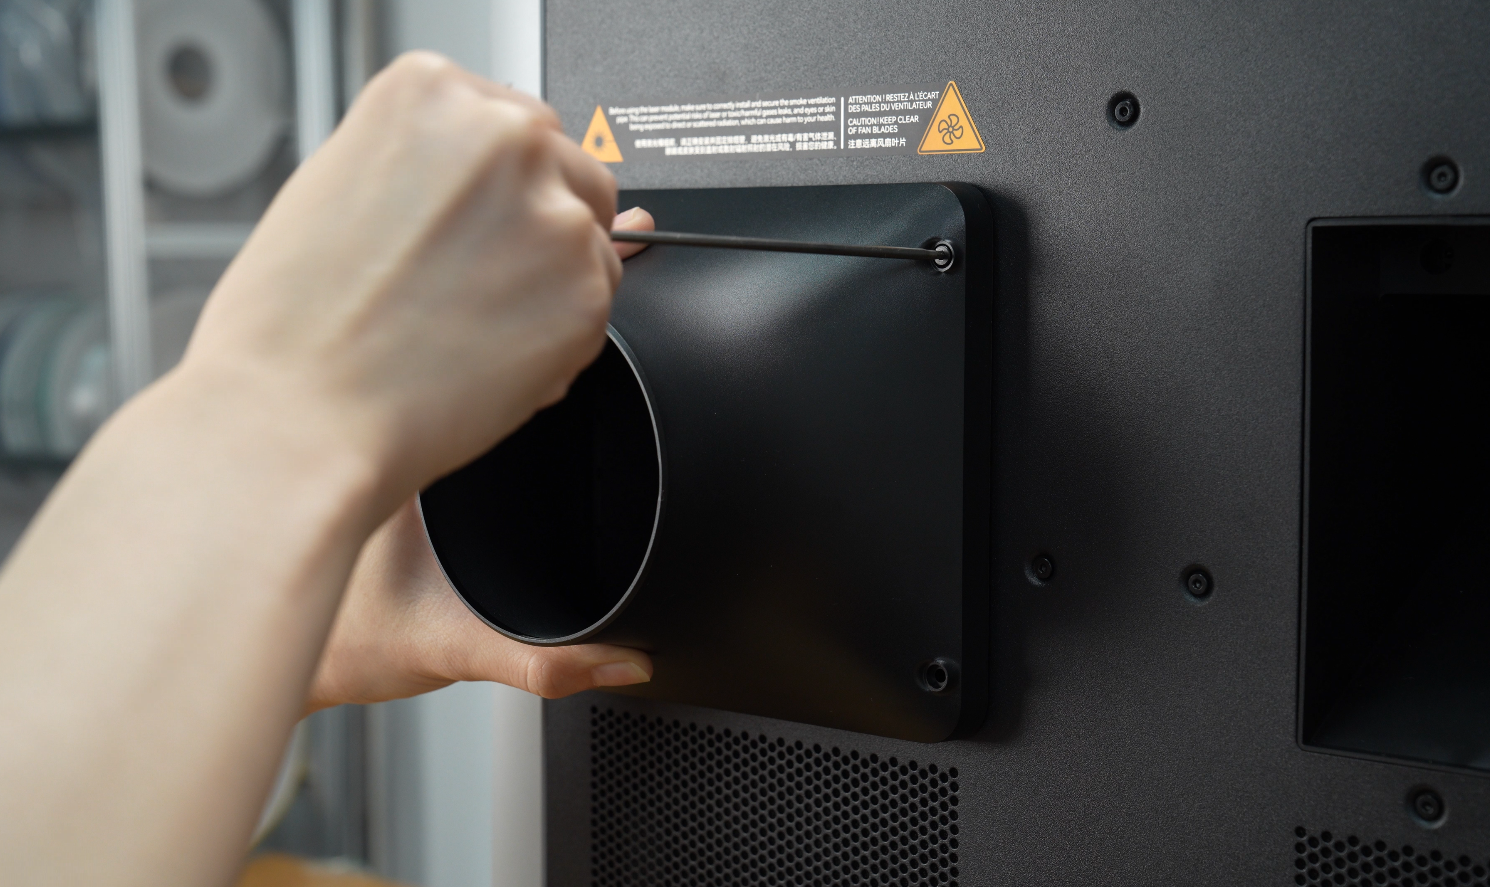
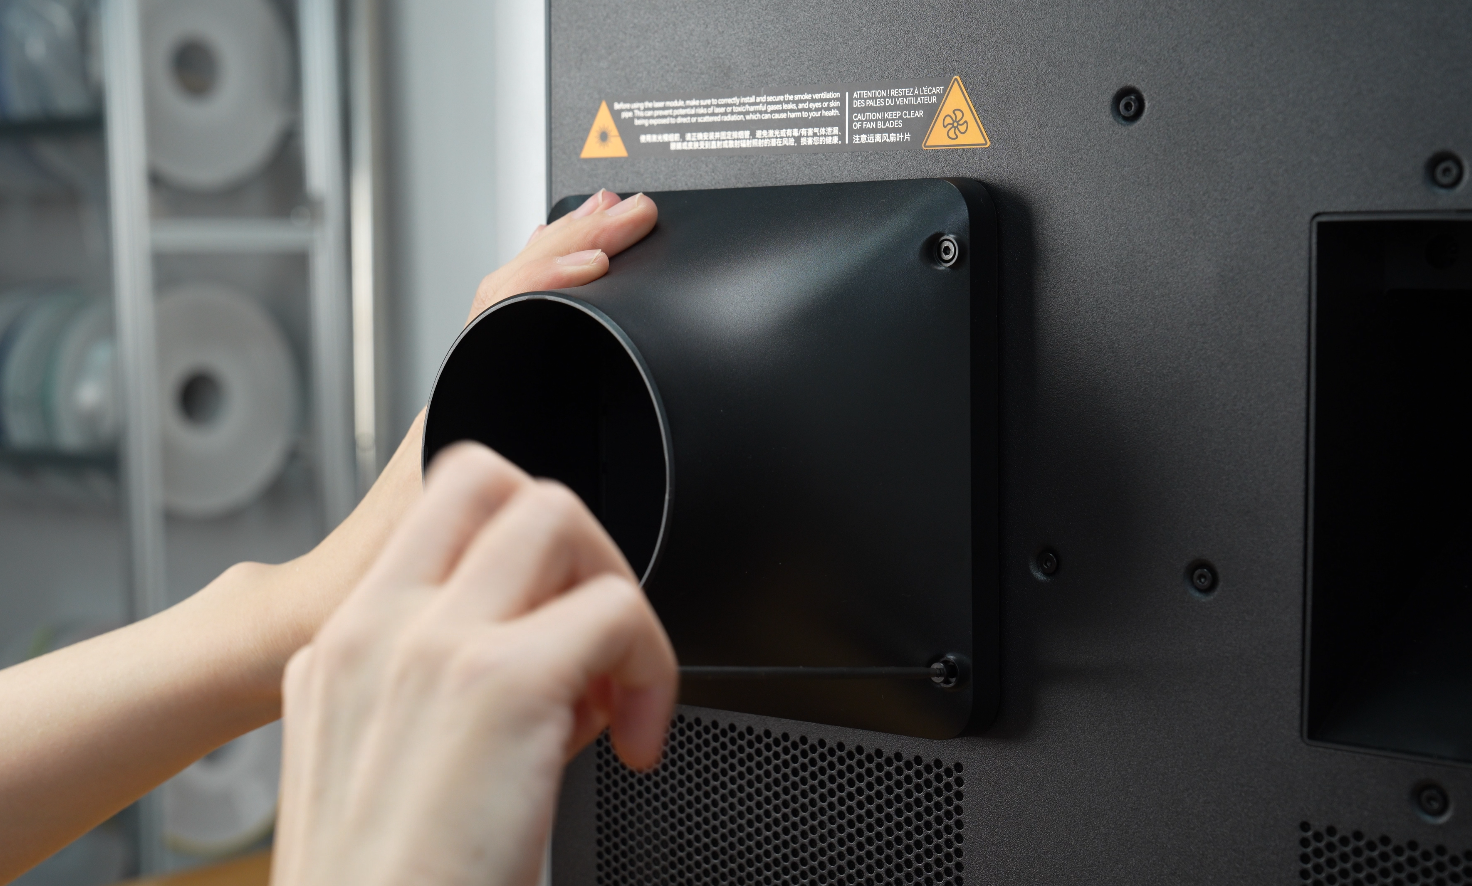
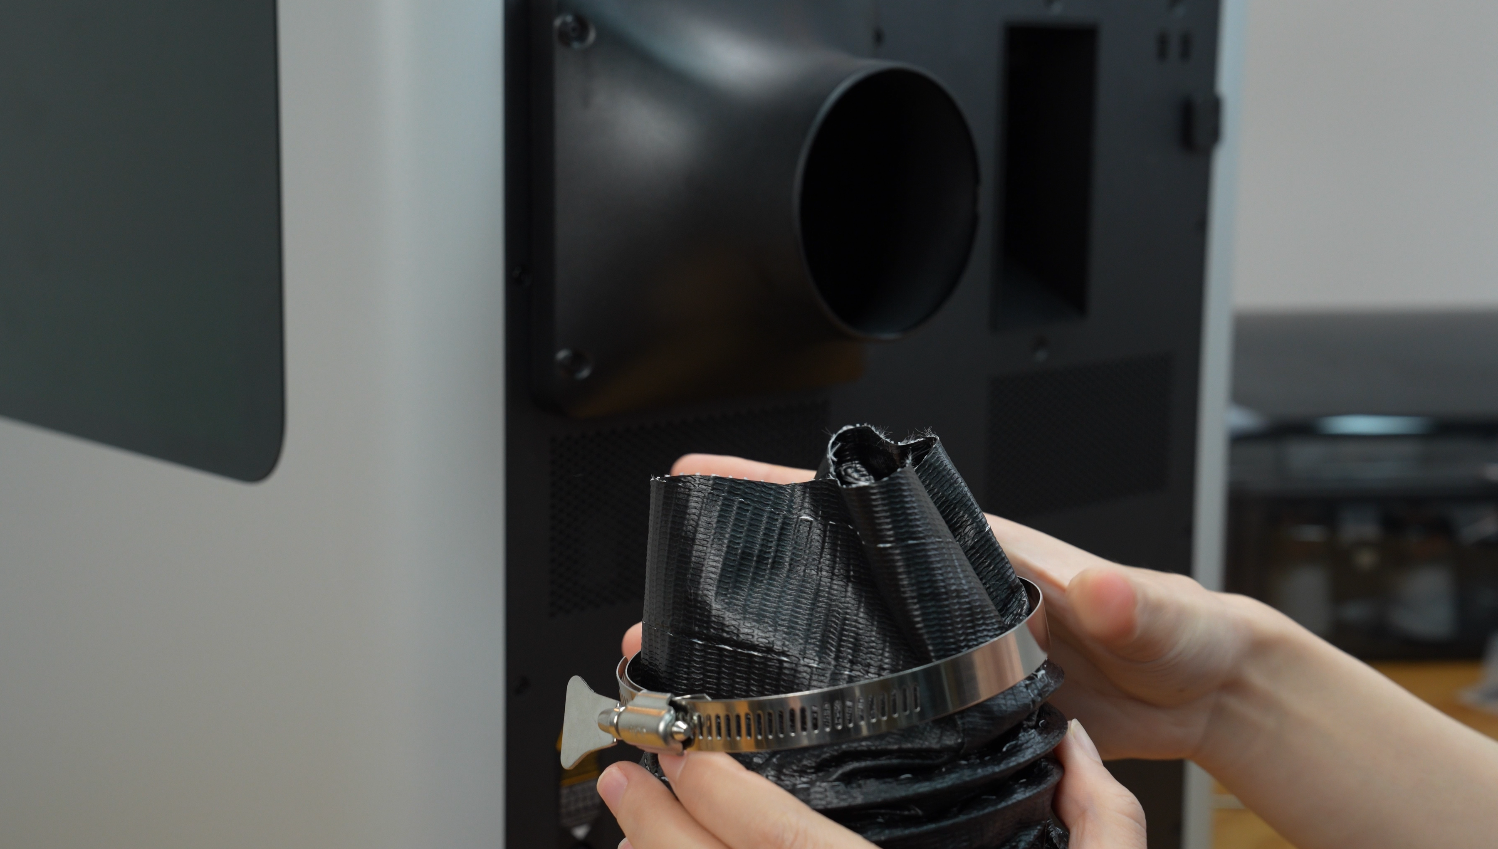
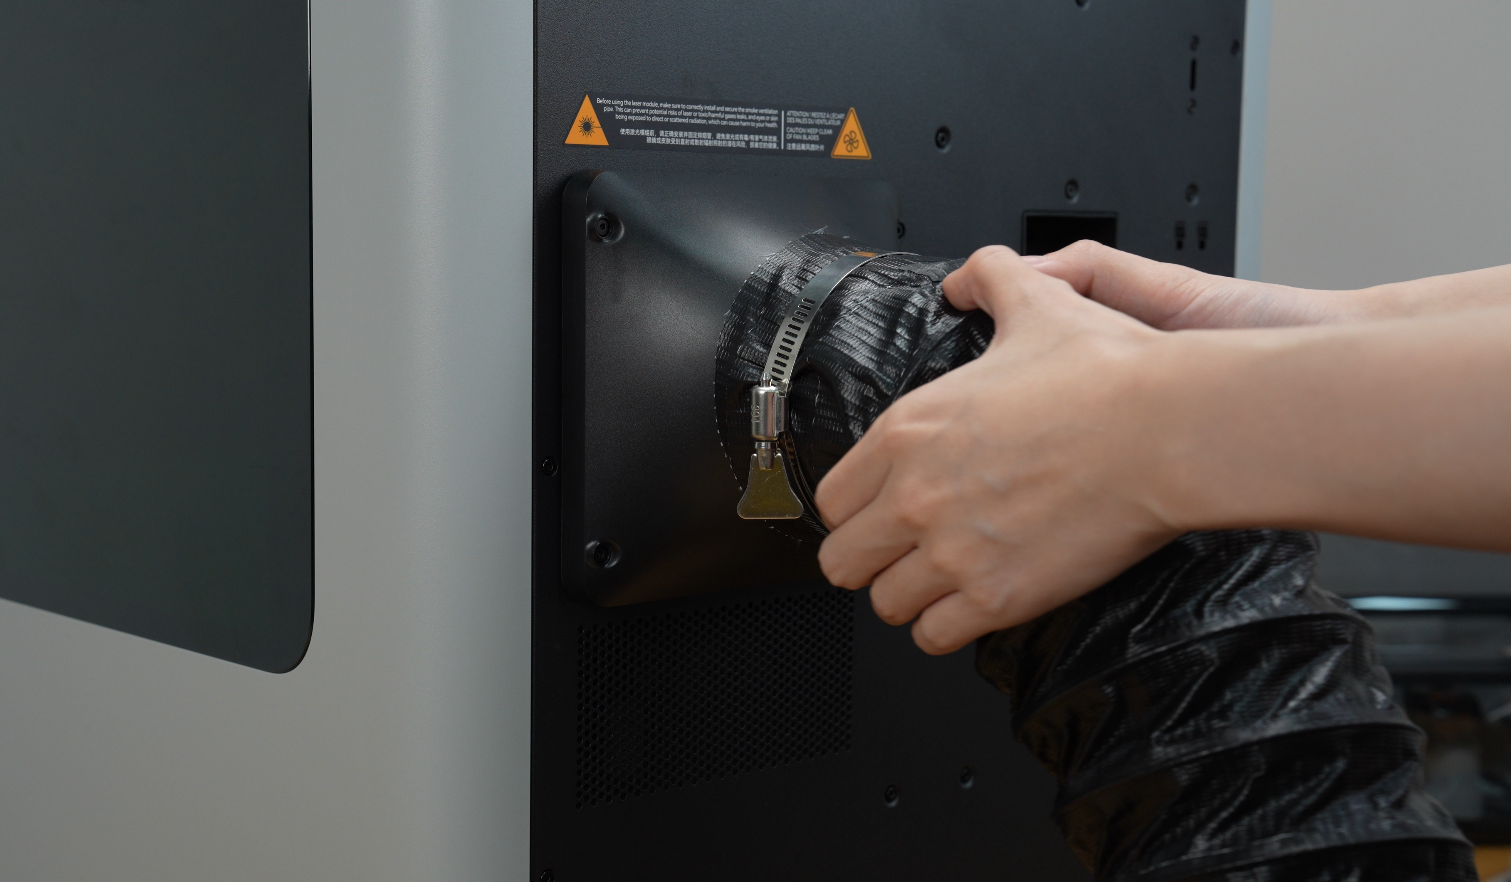
¶ Install the Smoke Ventilation Pipe
- Place the ventilation pipe adapter over the chamber exhaust fan at the back of the printer and tighten the four screws.
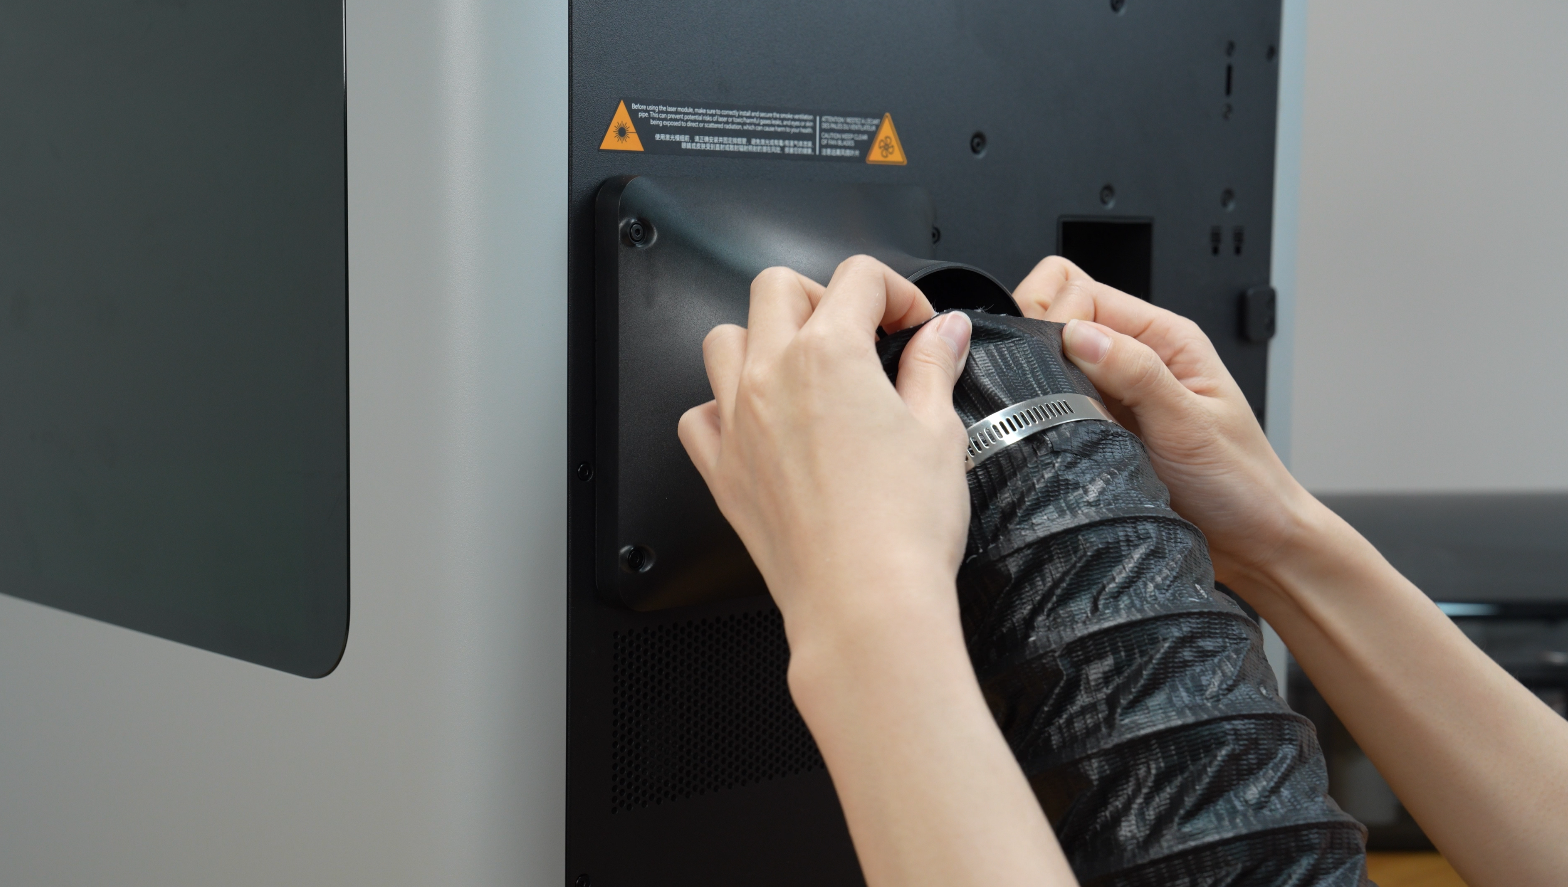
- Put the pipe clamp on one end of the smoke ventilation pipe and install the pipe over the ventilation pipe adapter so that it completely covers the adapter. Tighten the pipe clamp over the portion of the ventilation pipe which is fit over the ventilation pipe adapter until snug.
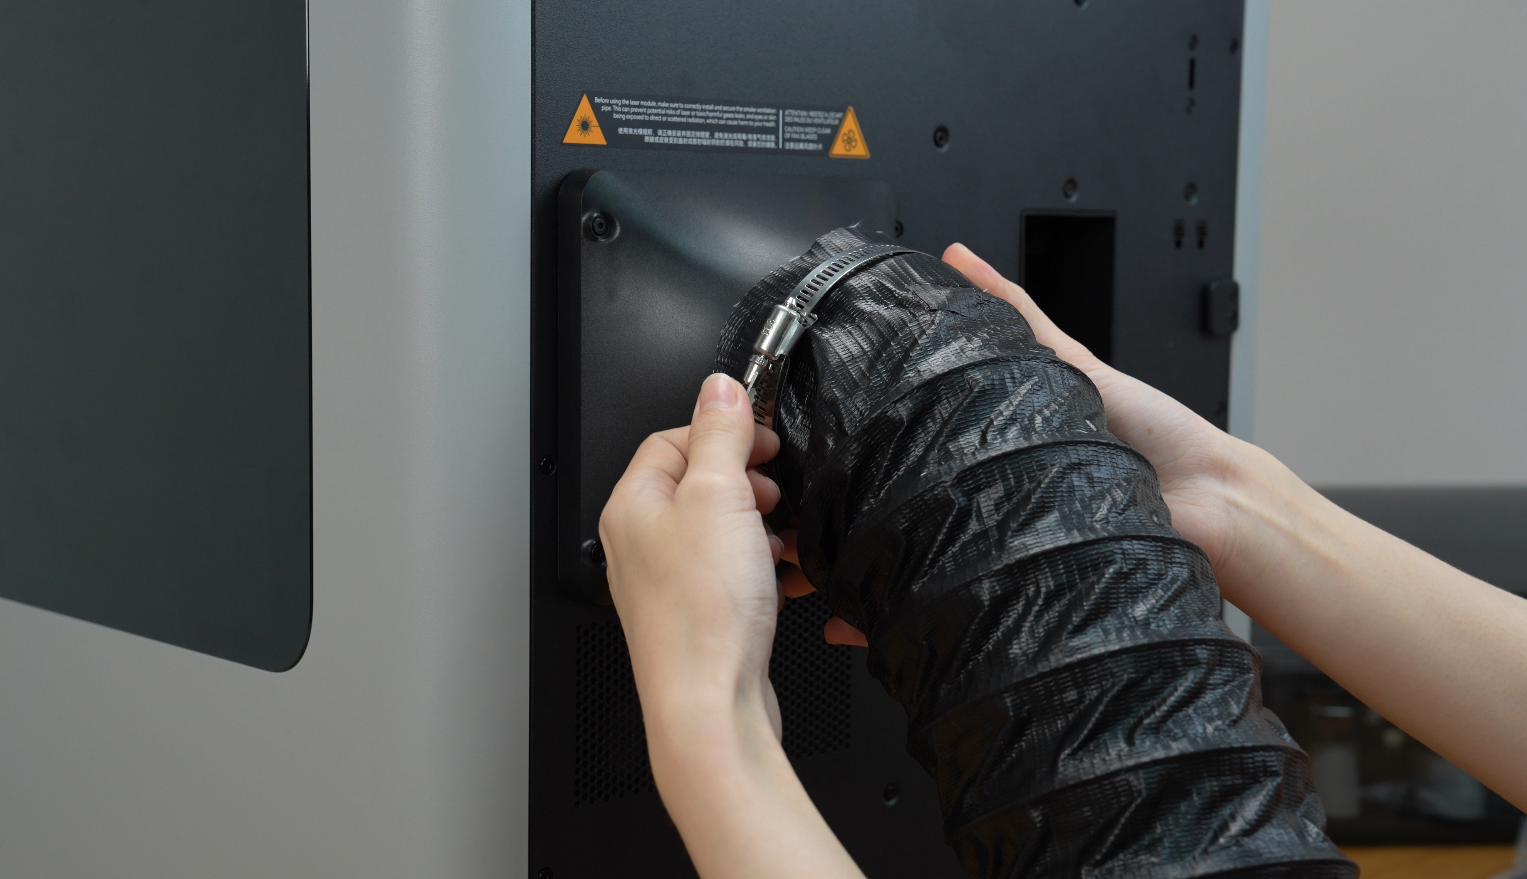
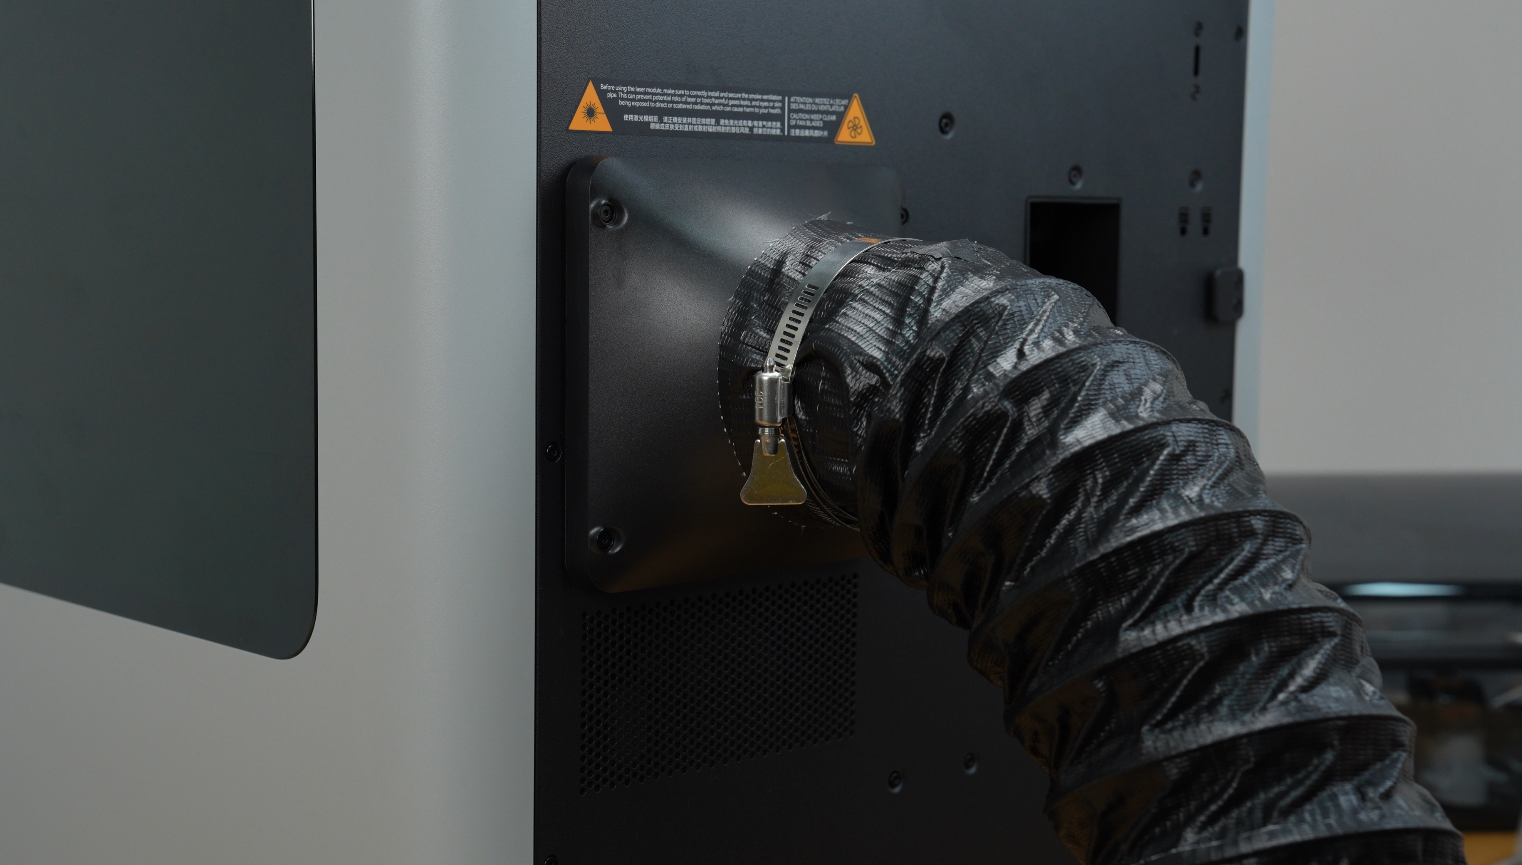
- After installation, firmly pull on the ventilation pipe to confirm that it is completely secured.
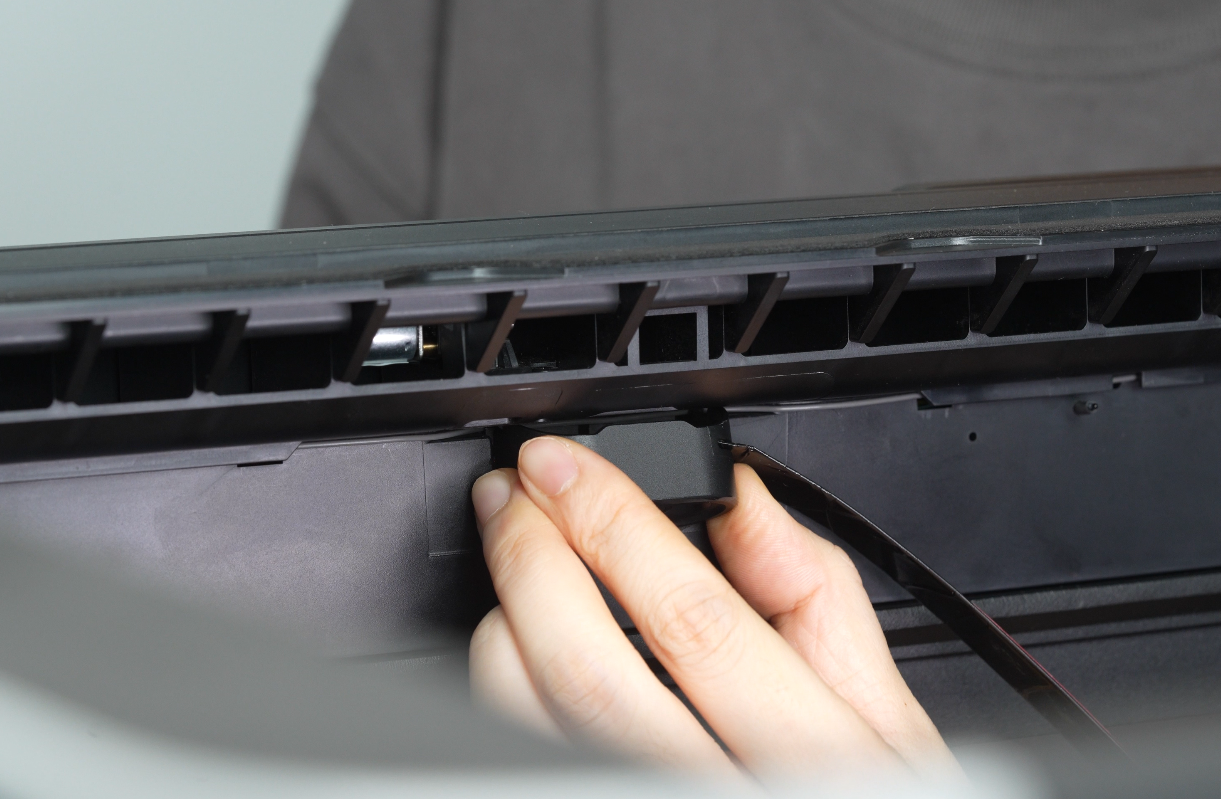
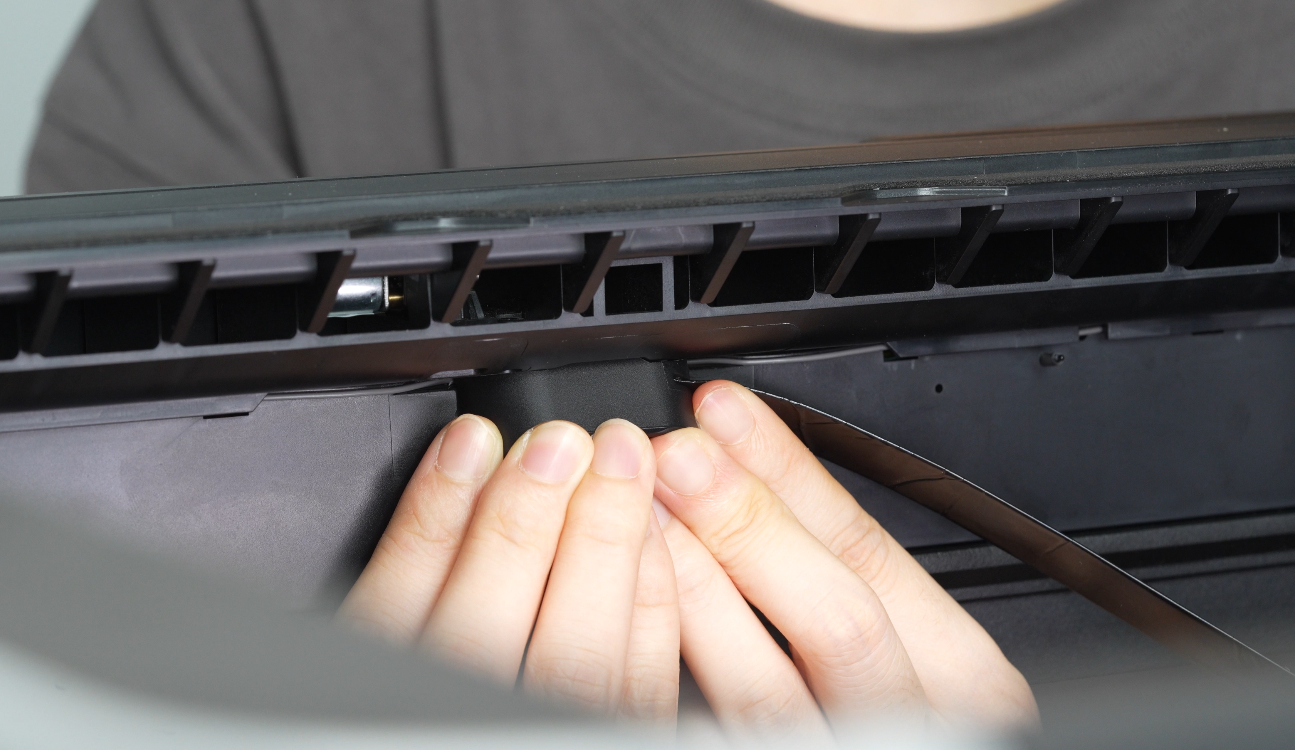
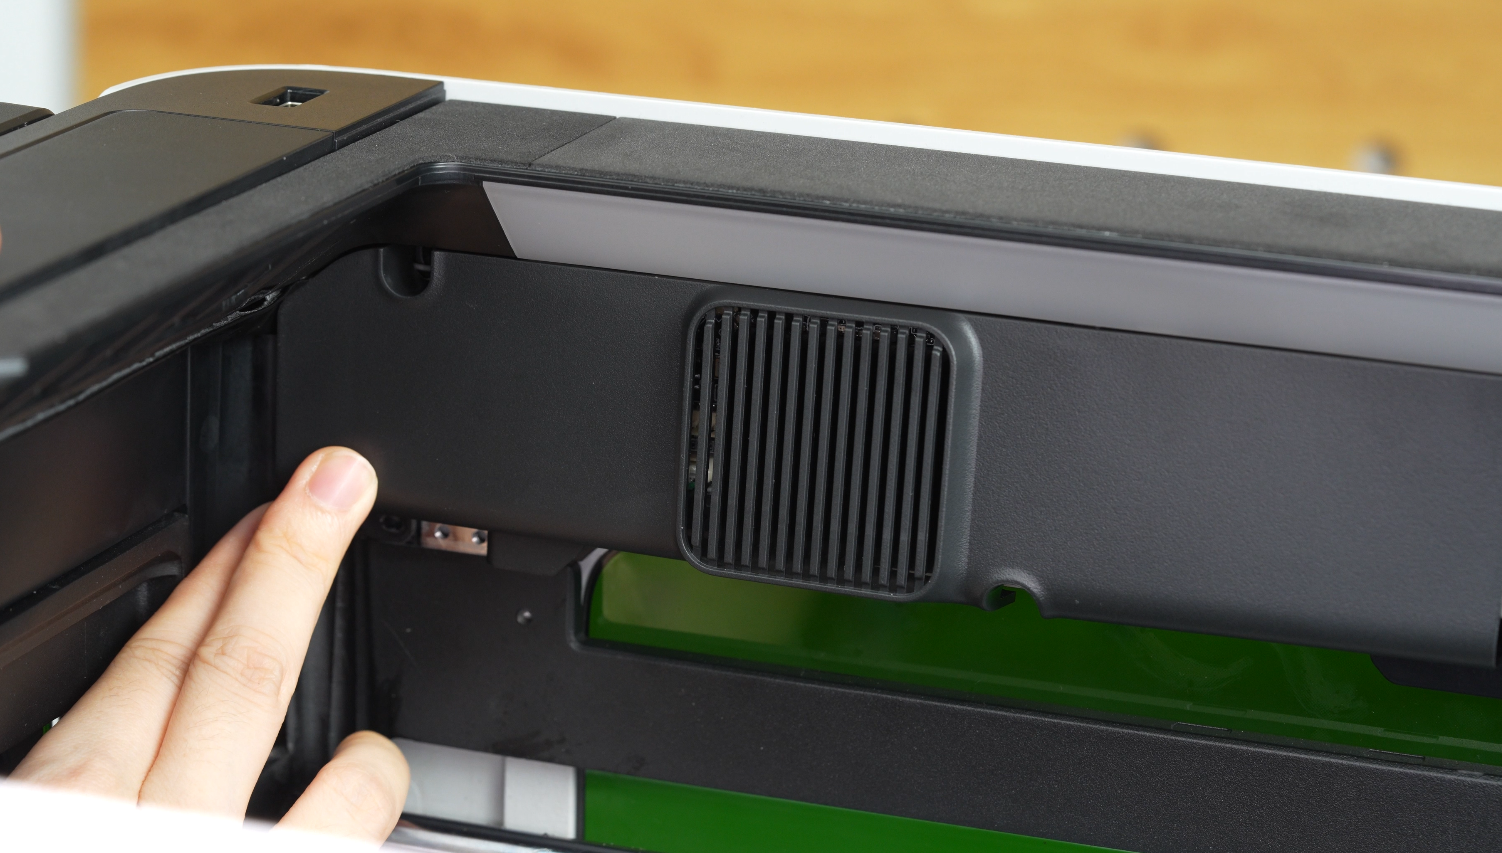
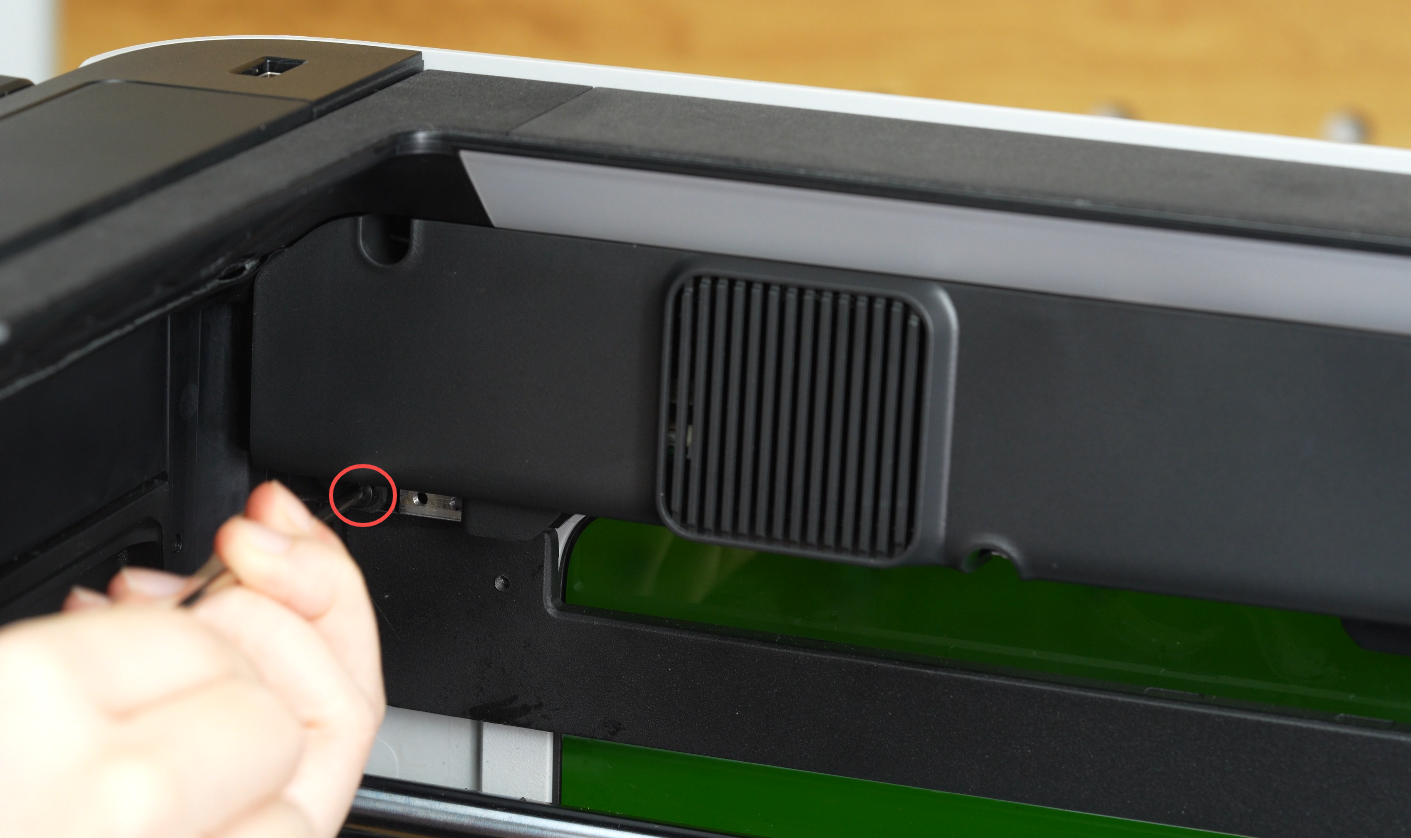
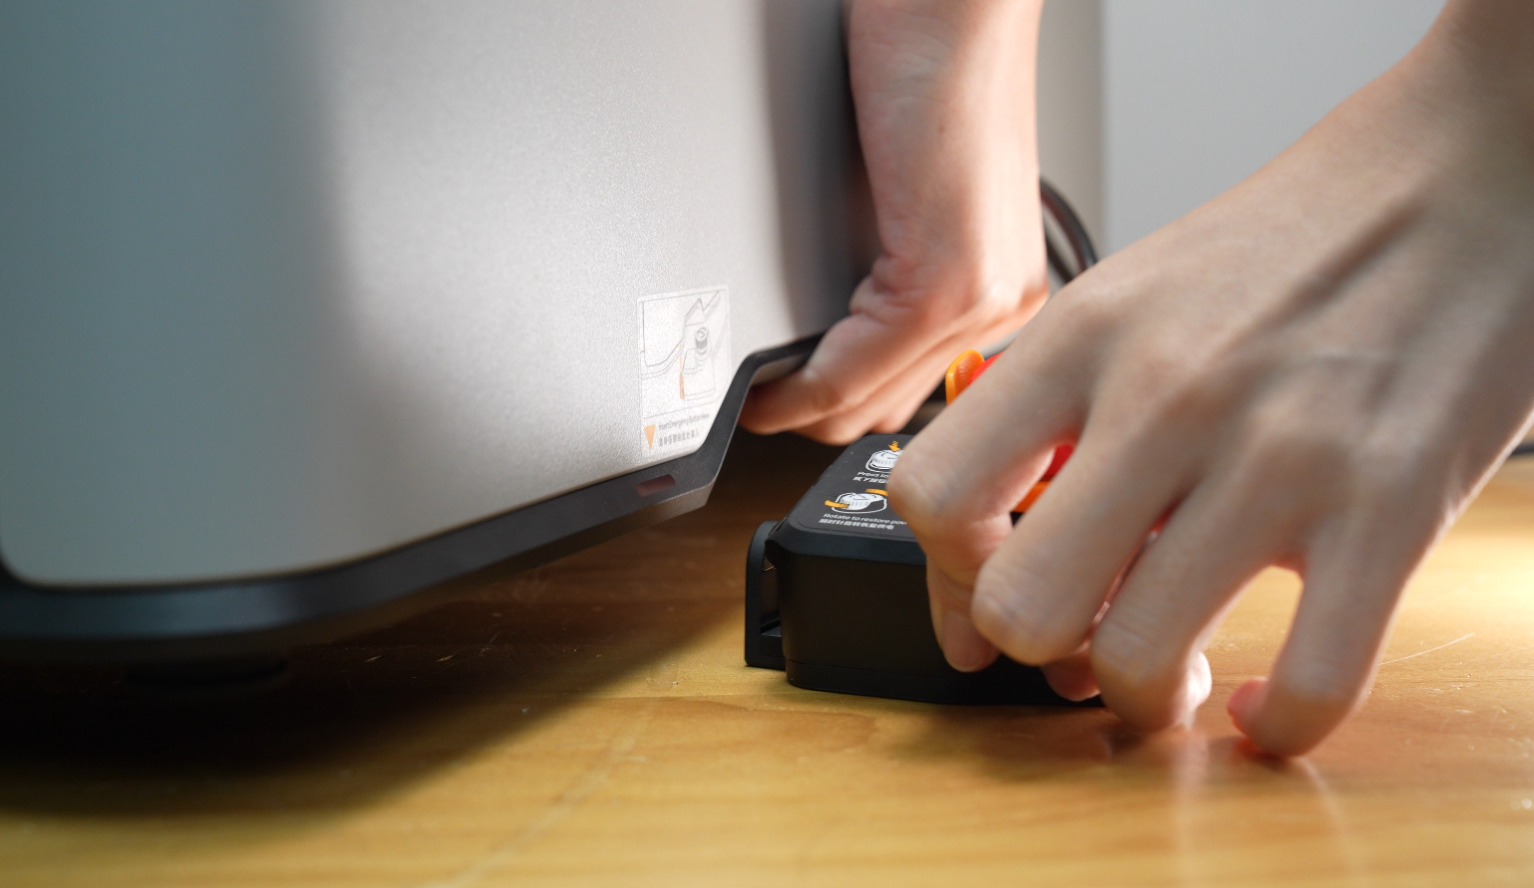
¶ Install the Emergency Stop Button
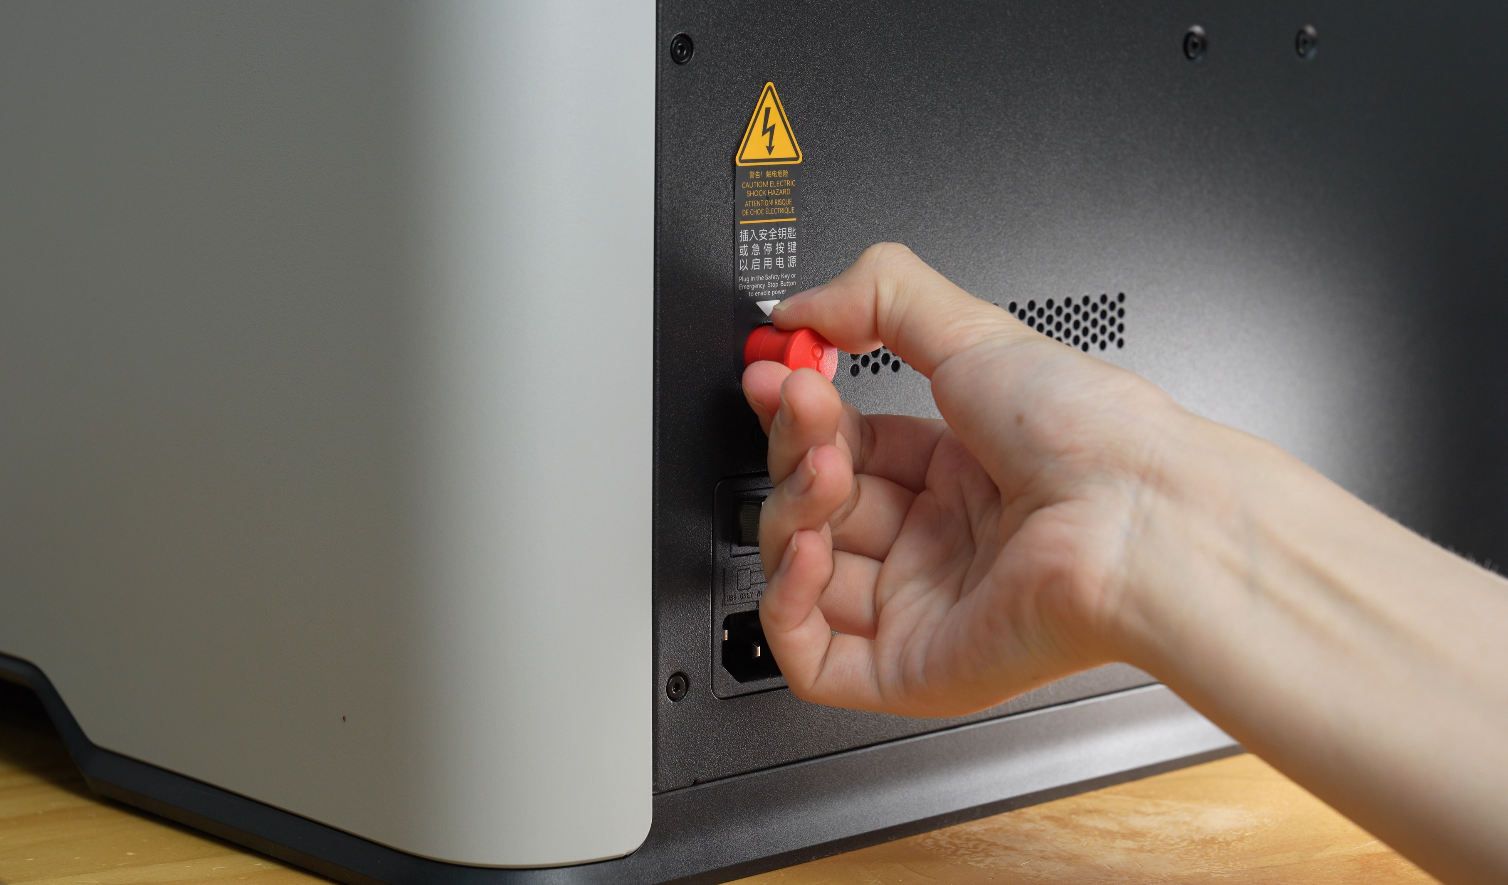
- Check that the safety key is inserted into the emergency stop button;
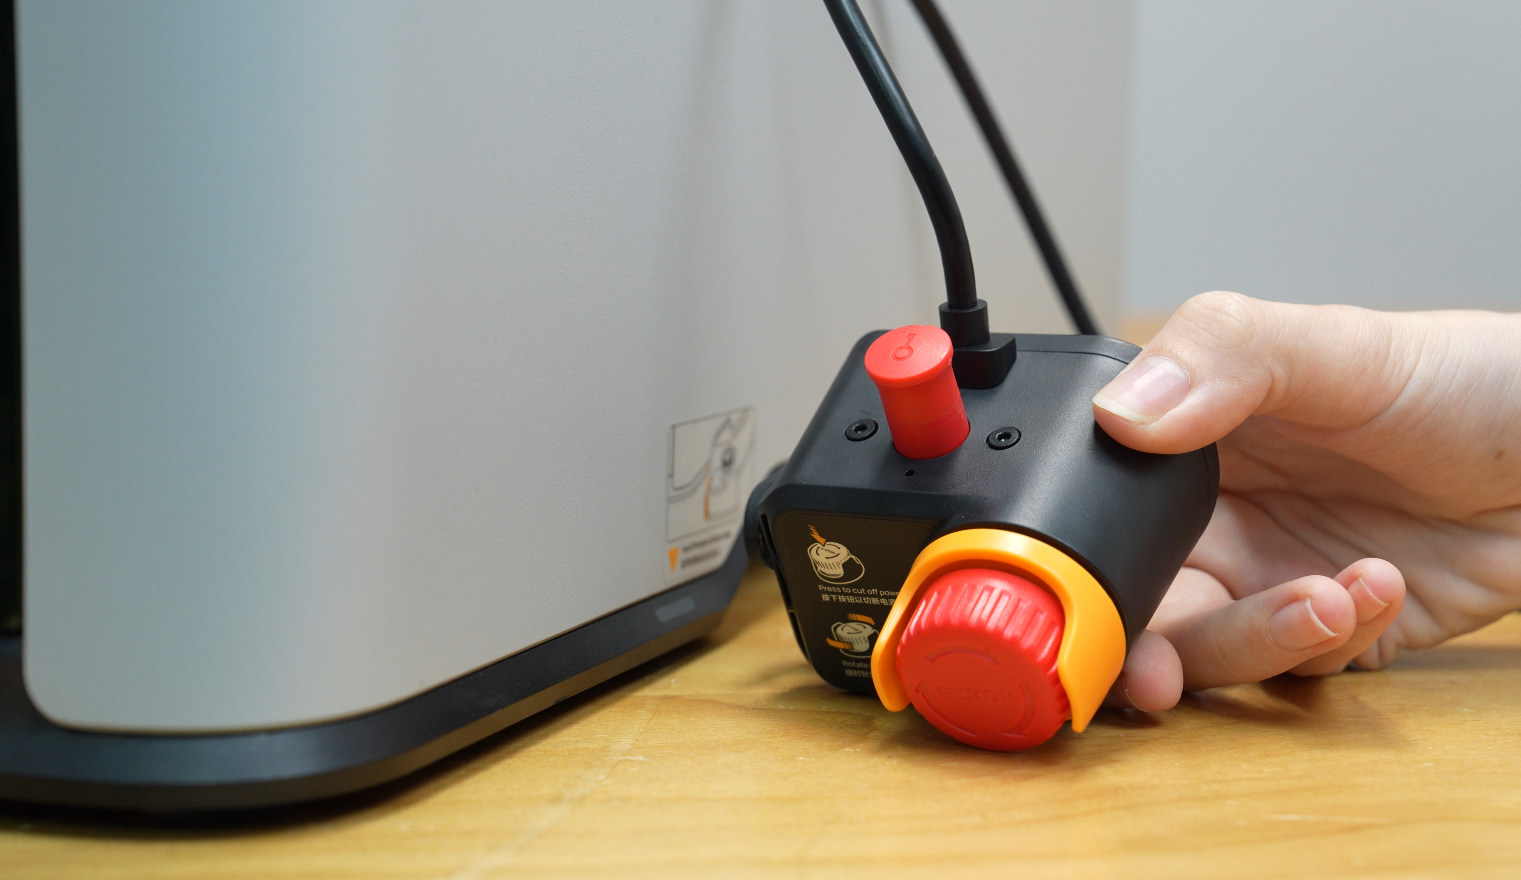
- Install the emergency stop button by lifting the printer and placing the emergency stop button clip under the lip of the printer.
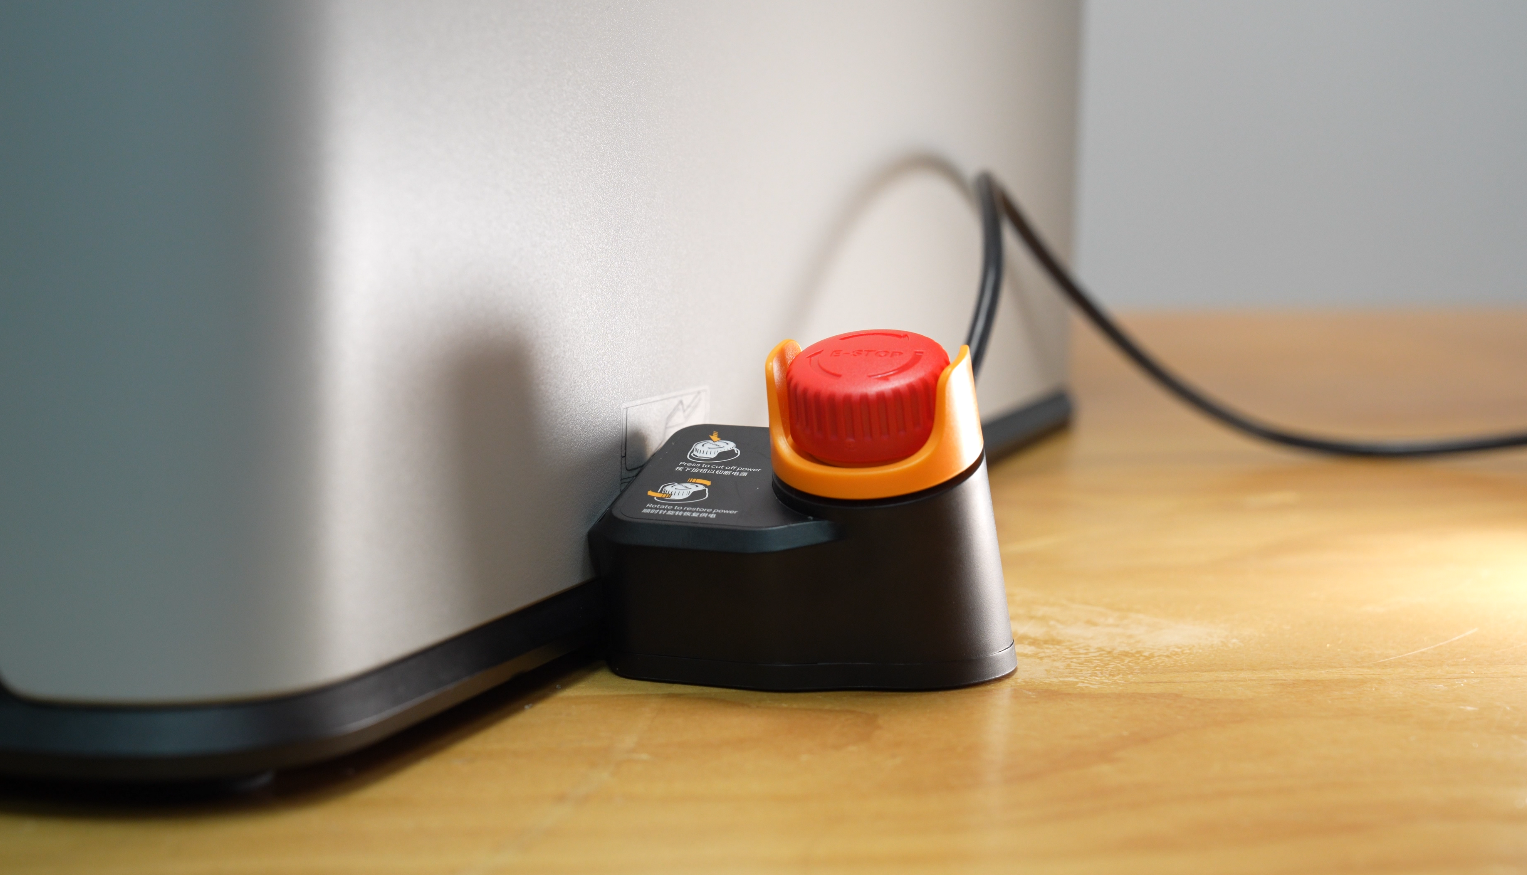
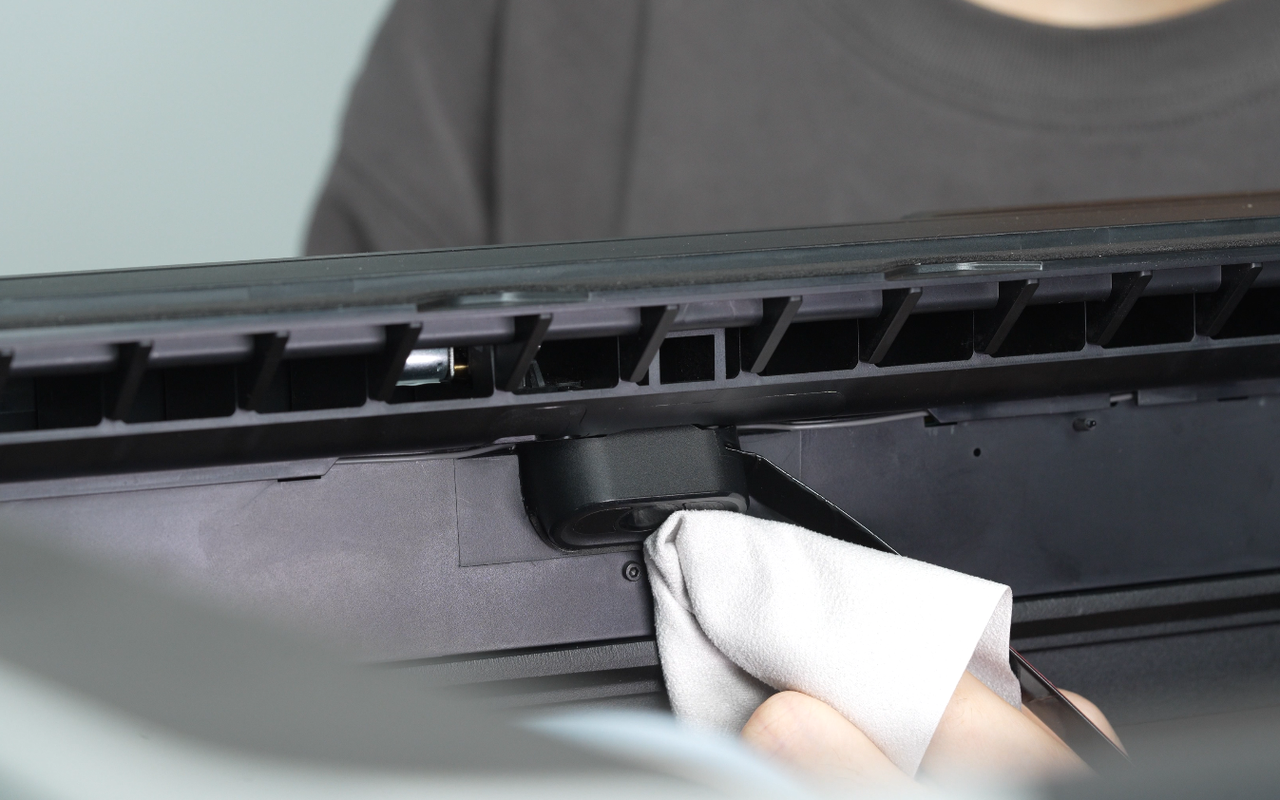
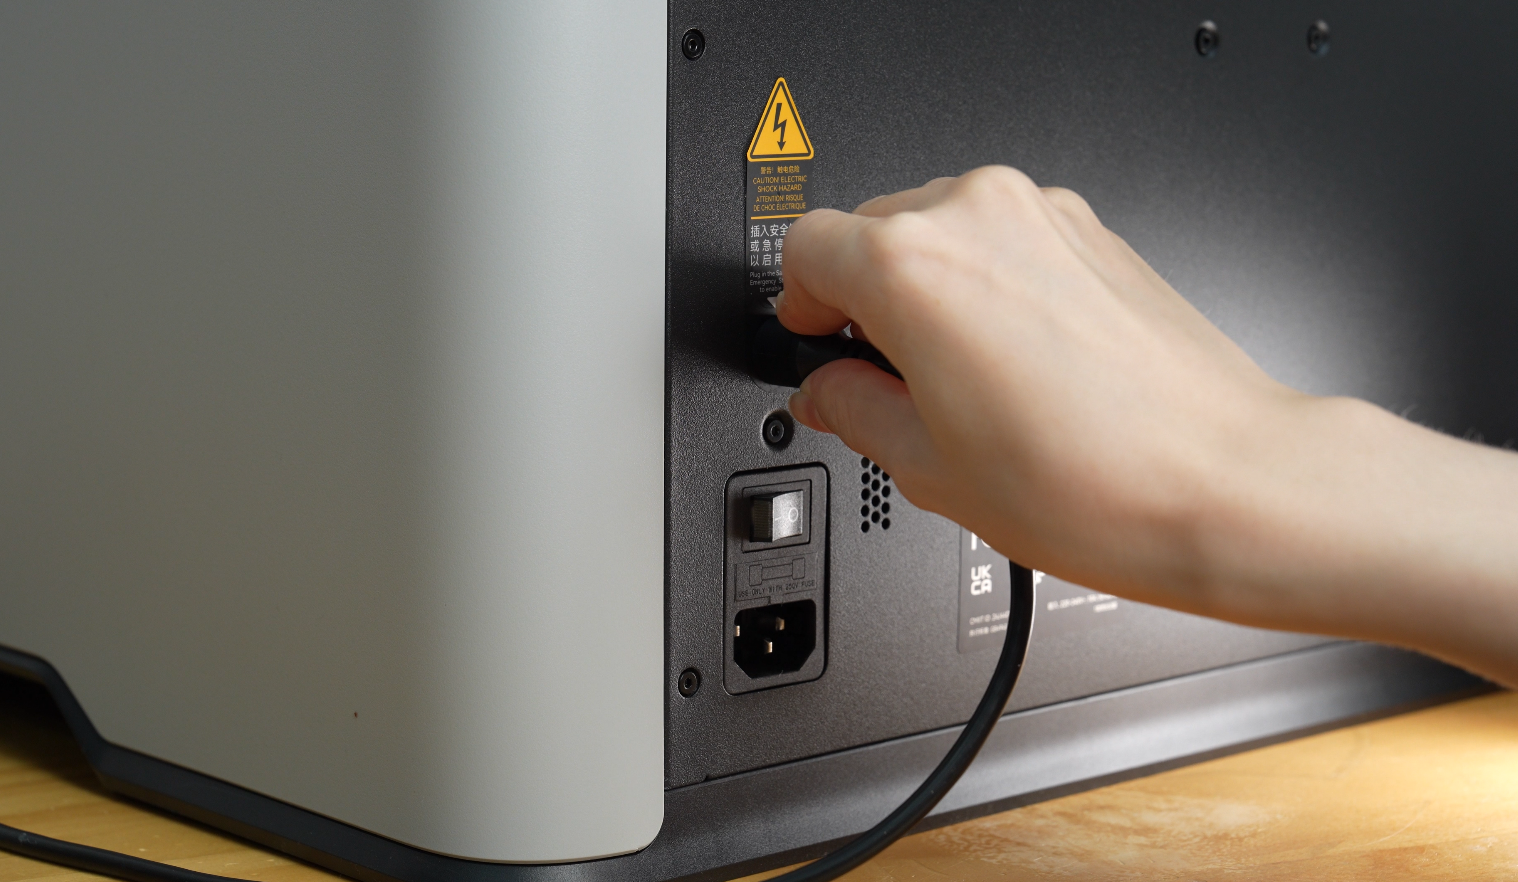
- Remove the power safety key from the back of the printer and plug in the emergency stop button cable.
¶ Unpack the Laser Module
- Open the laser module;
.png)
- Take out the quick start guide and spare laser lens;
- Pull out the left insert cards;
.png)
- Take out the laser module;
.png)
- Remove the protective cover of the laser module;
.png)
- Remove the transparent sticker on the surface.
.png)
¶ Install the Laser Module
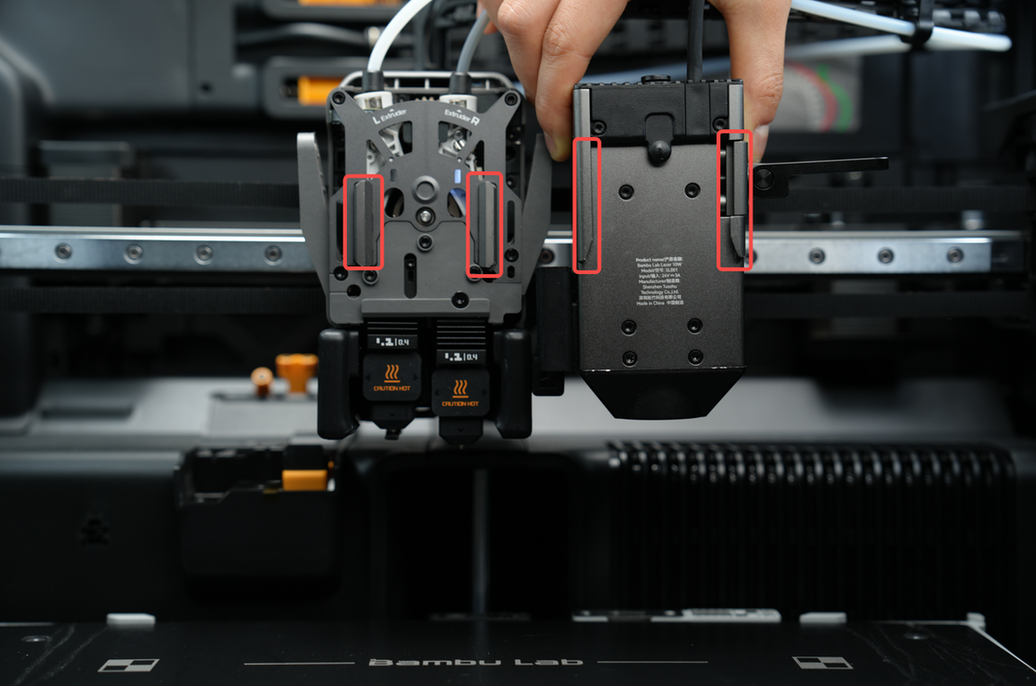
- Remove the toolhead front cover by pinching the top edges and pulling away from the toolhead.
 |
 |
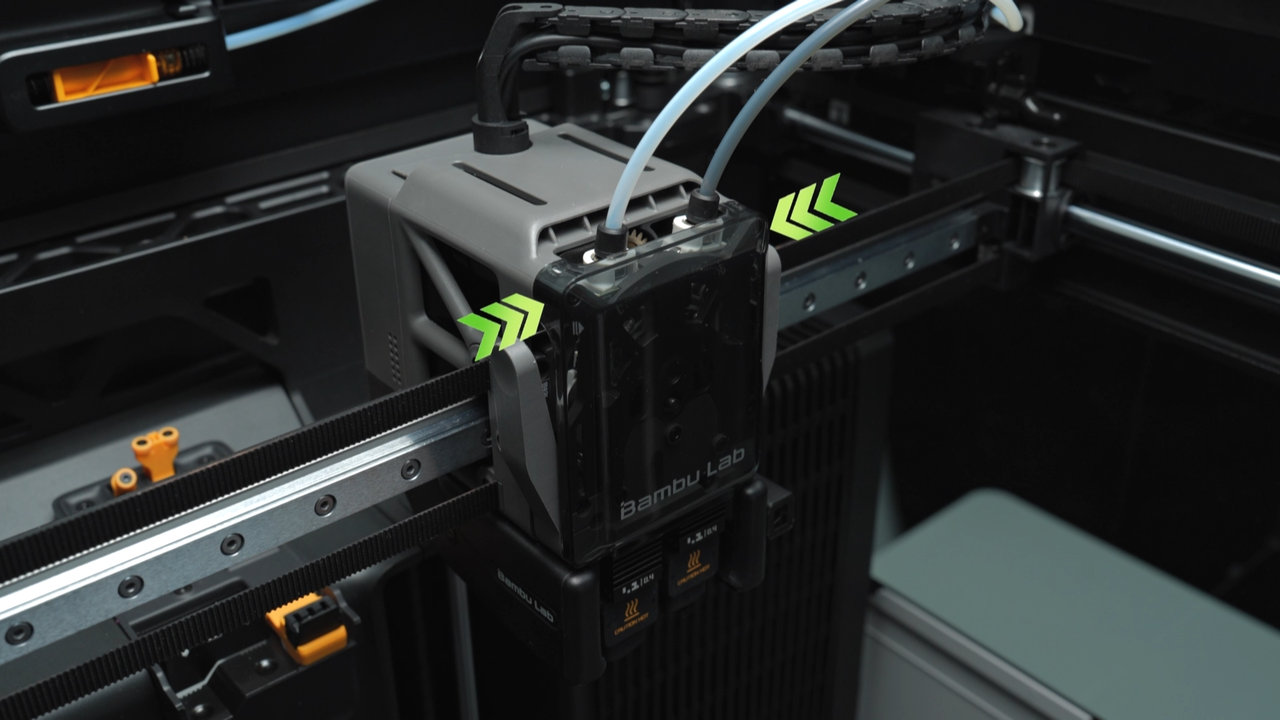
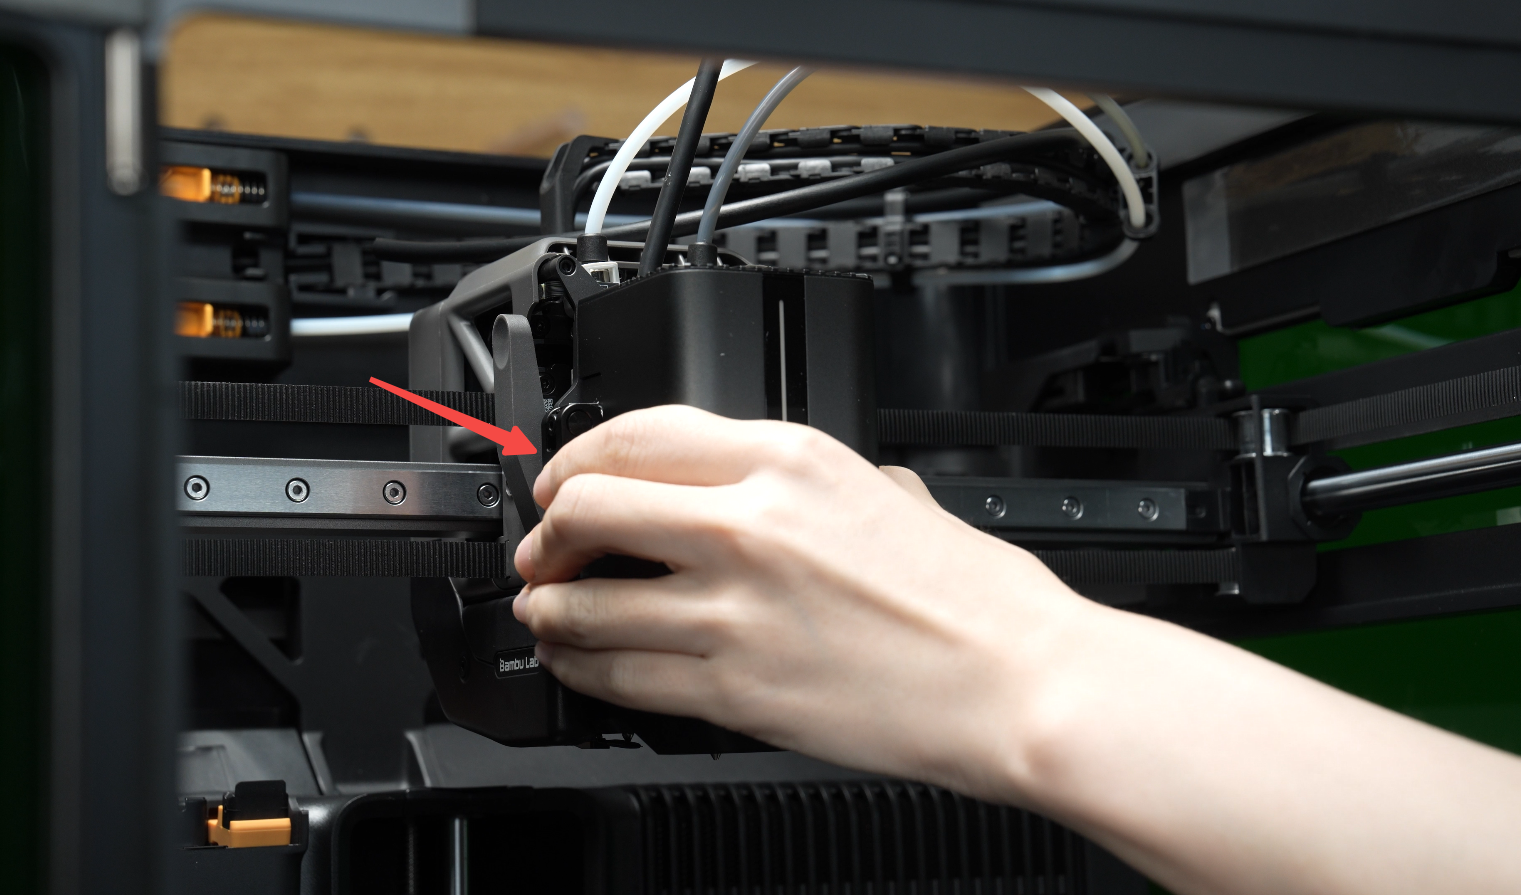
- Align the laser module to the toolhead and install it by locking the lever in place;
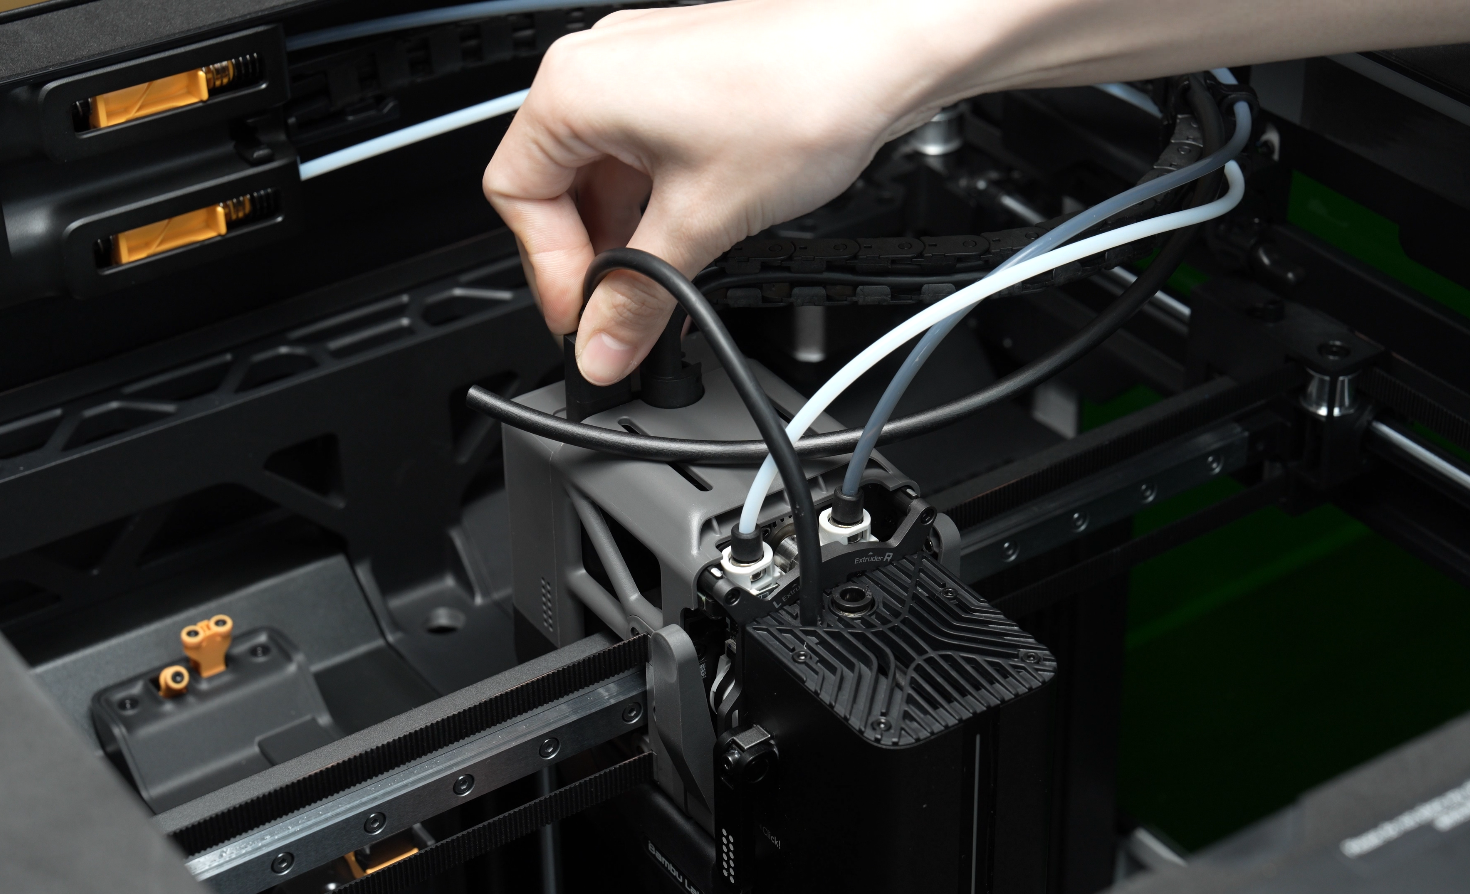
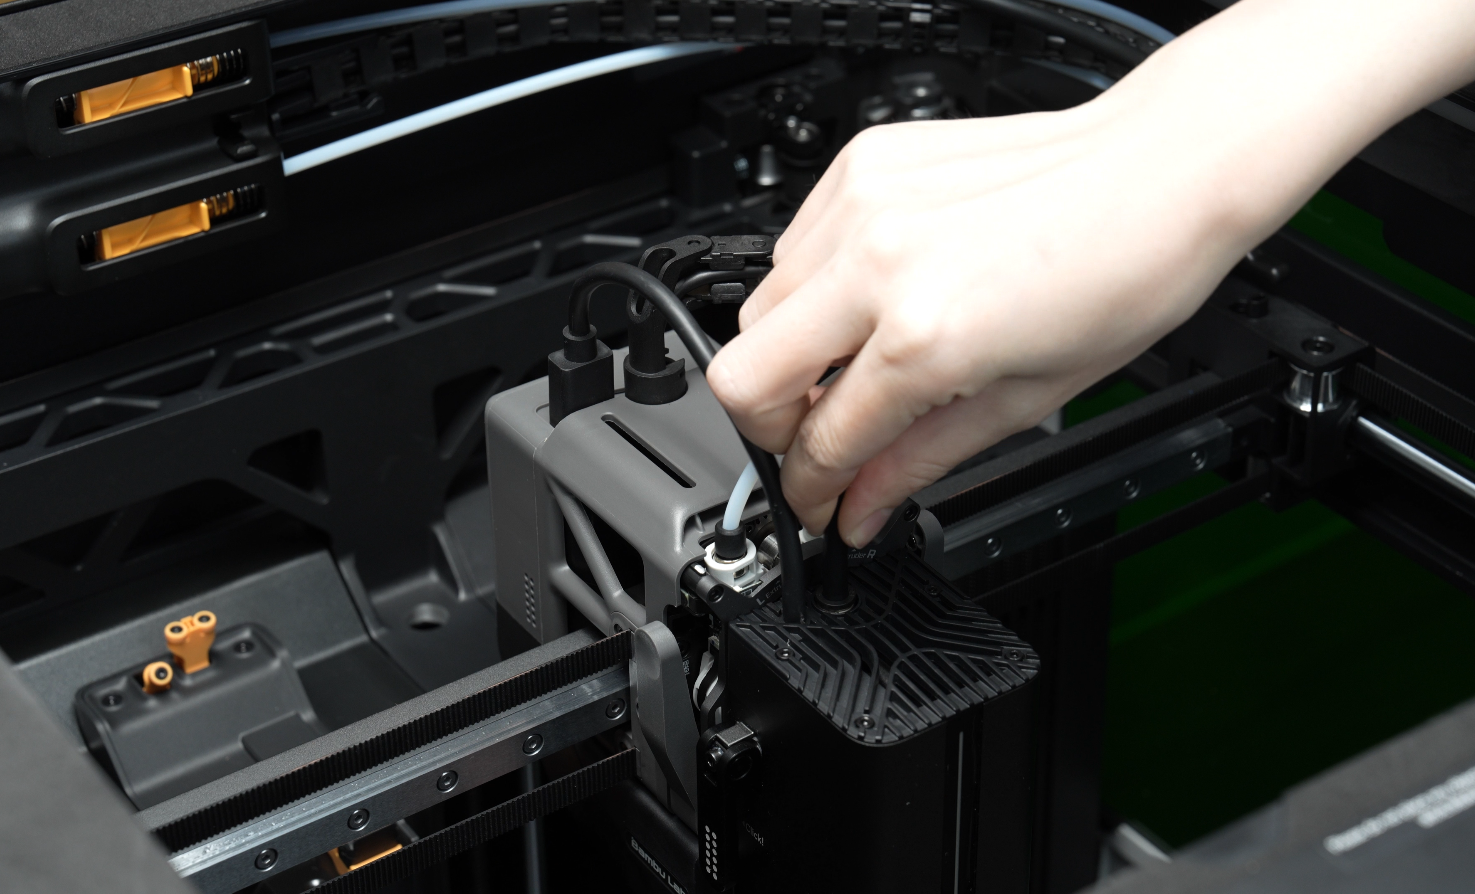
- Connect the laser module cable to the top of the toolhead and the air assist tube to the top of the laser module.
¶ Birdseye camera Setup
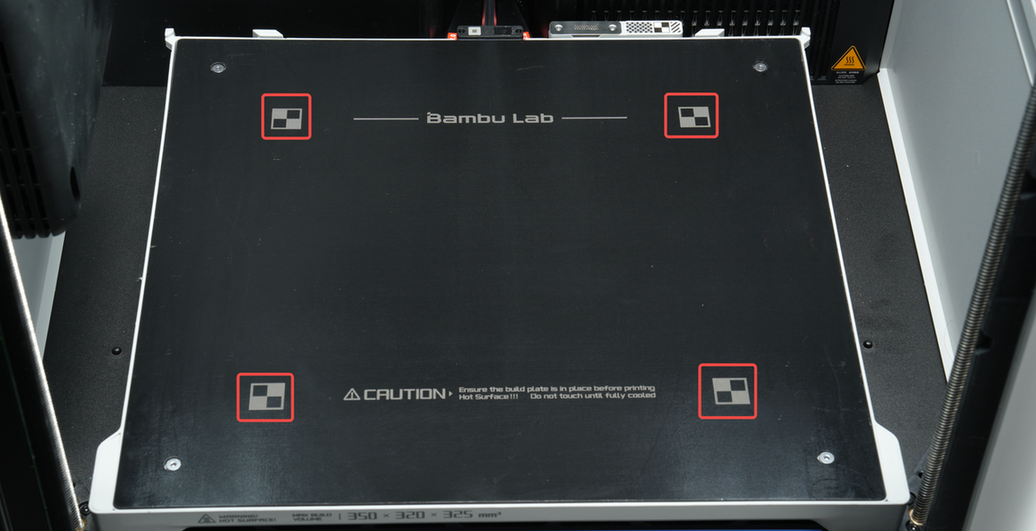
- Make sure there are no objects blocking the heatbed, especially the calibration marks highlighted in the image below.
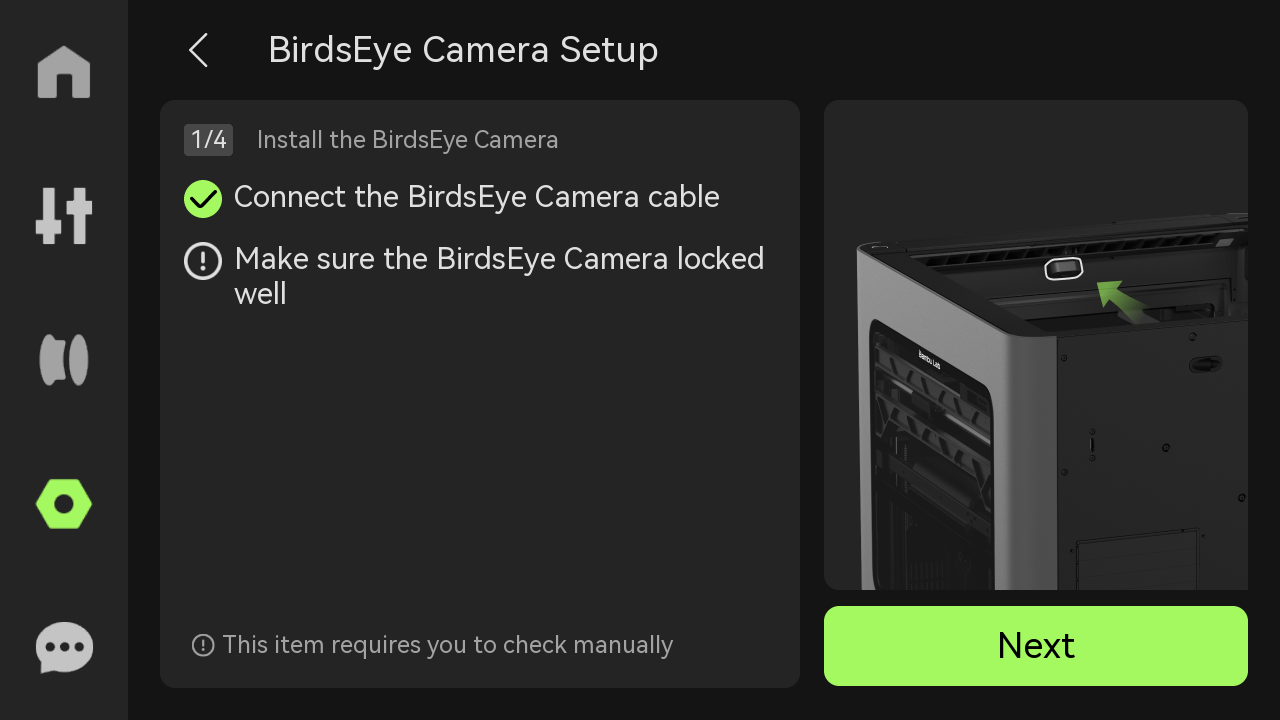
- Enter the BirdsEye Camera Setup page from the HMS page or "Settings-Toolbox";
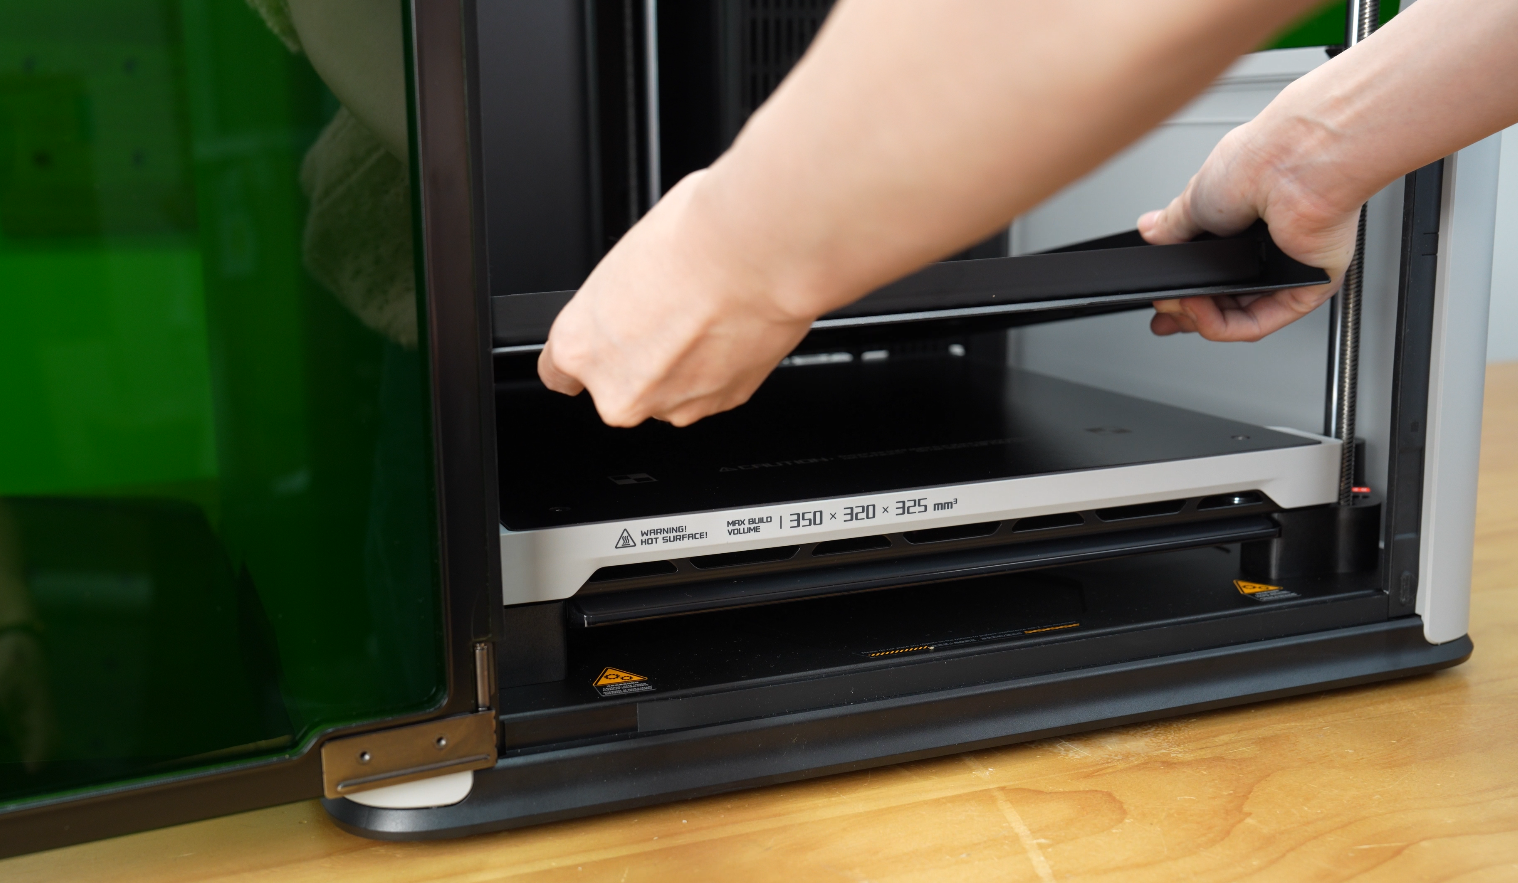
¶ Install the Laser Platform
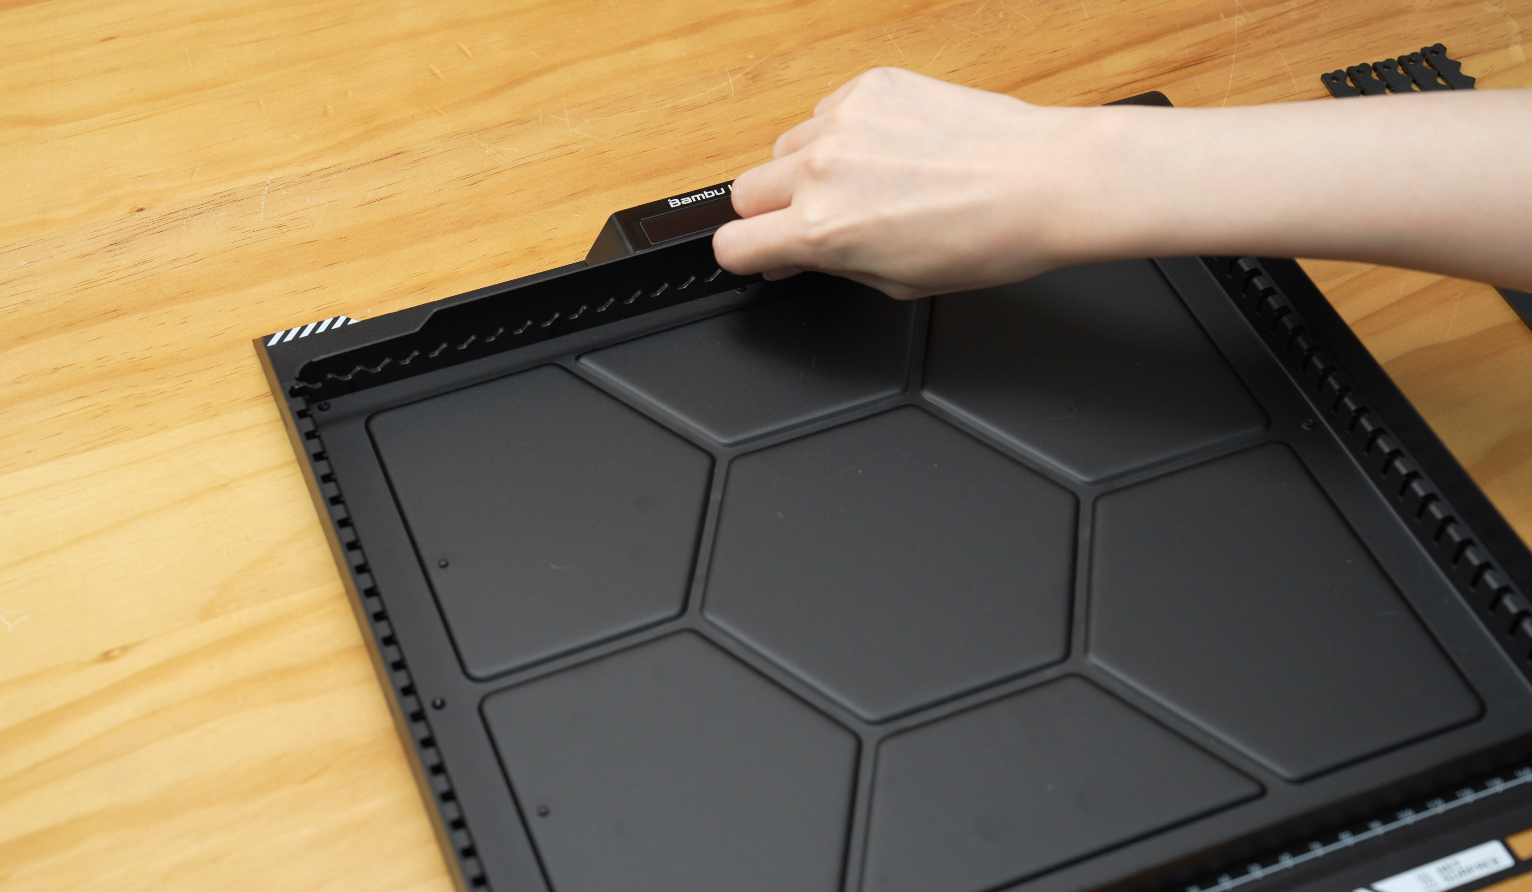
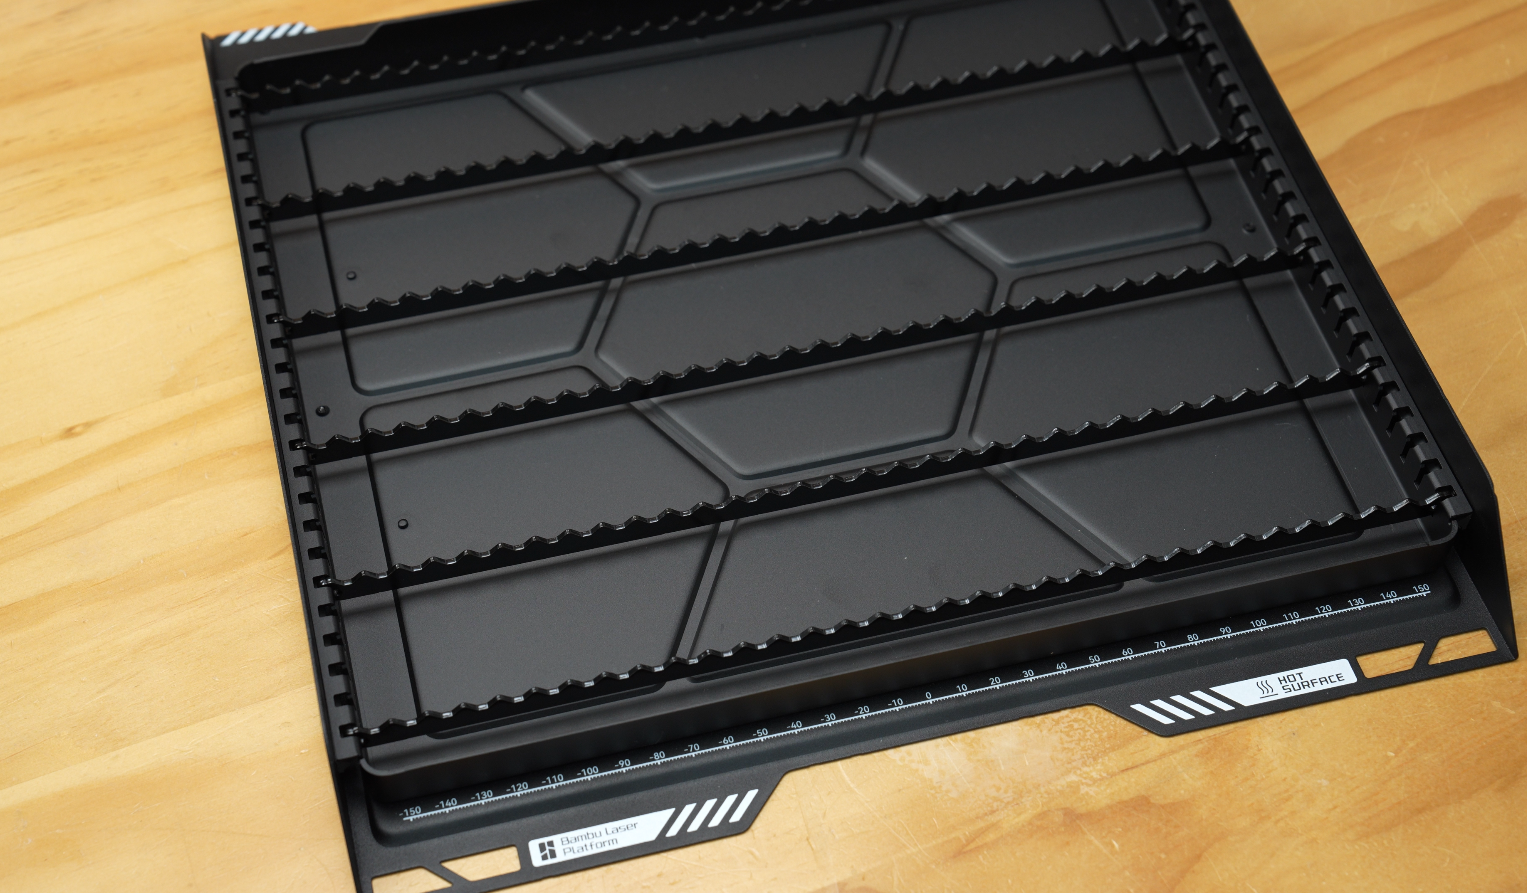
- Install the slats on the laser platform by pressing them into the slots on both sides. A "click" sound suggests that a slat is in place. Place a slat every 4 slots as shown in the picture.
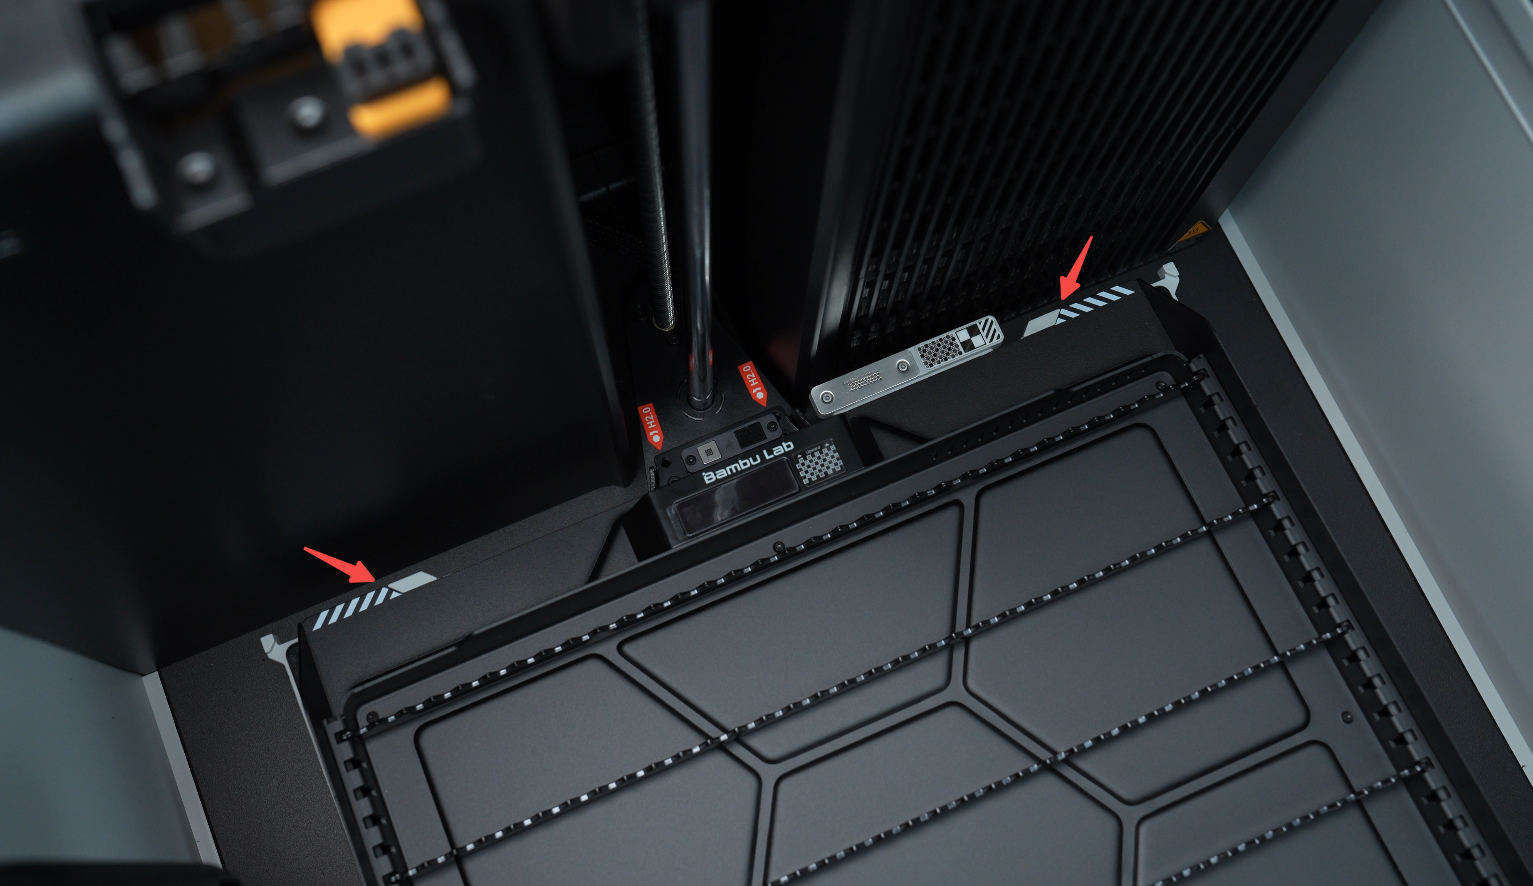
- Place the laser platform on the heatbed, and make sure to align the two markers of the laser platform and the stoppers of the heatbed.
¶ Install the Top Laser Protection Plate
- Remove the protective film from the top laser protection plate.
- Place the top laser protection plate into the recessed opening at the top of the printer.

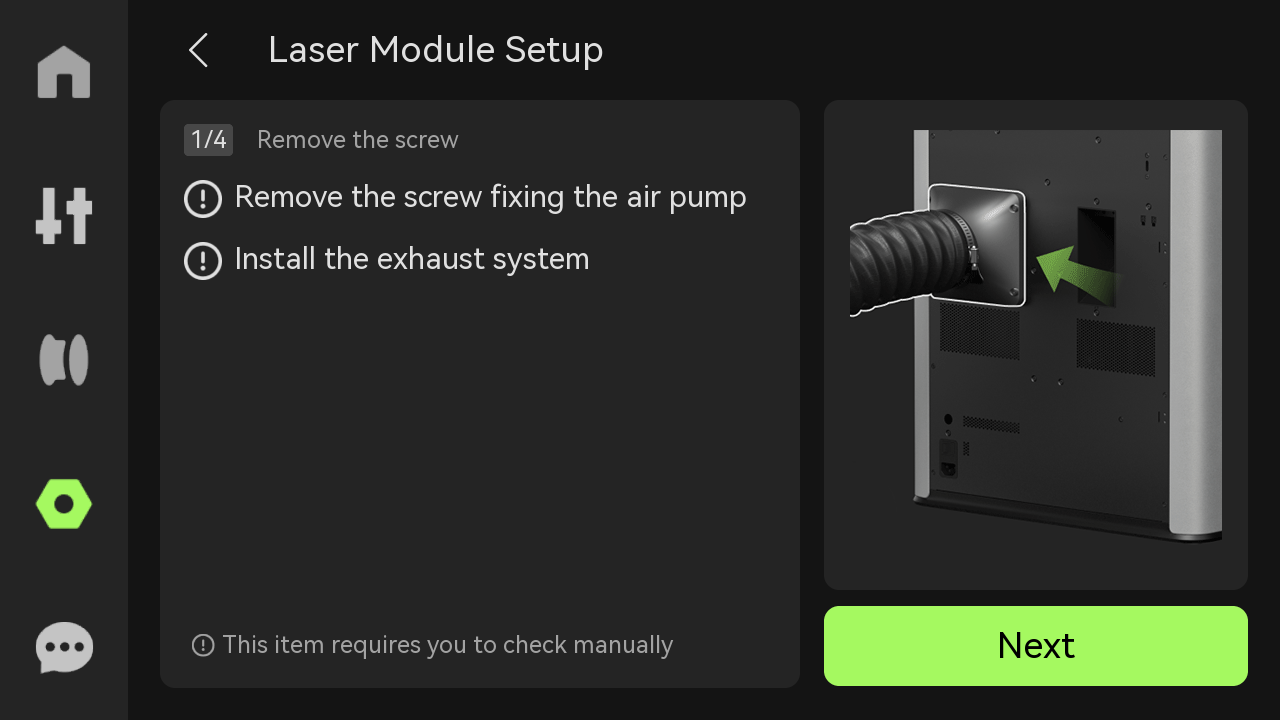
¶ Laser Module Setup
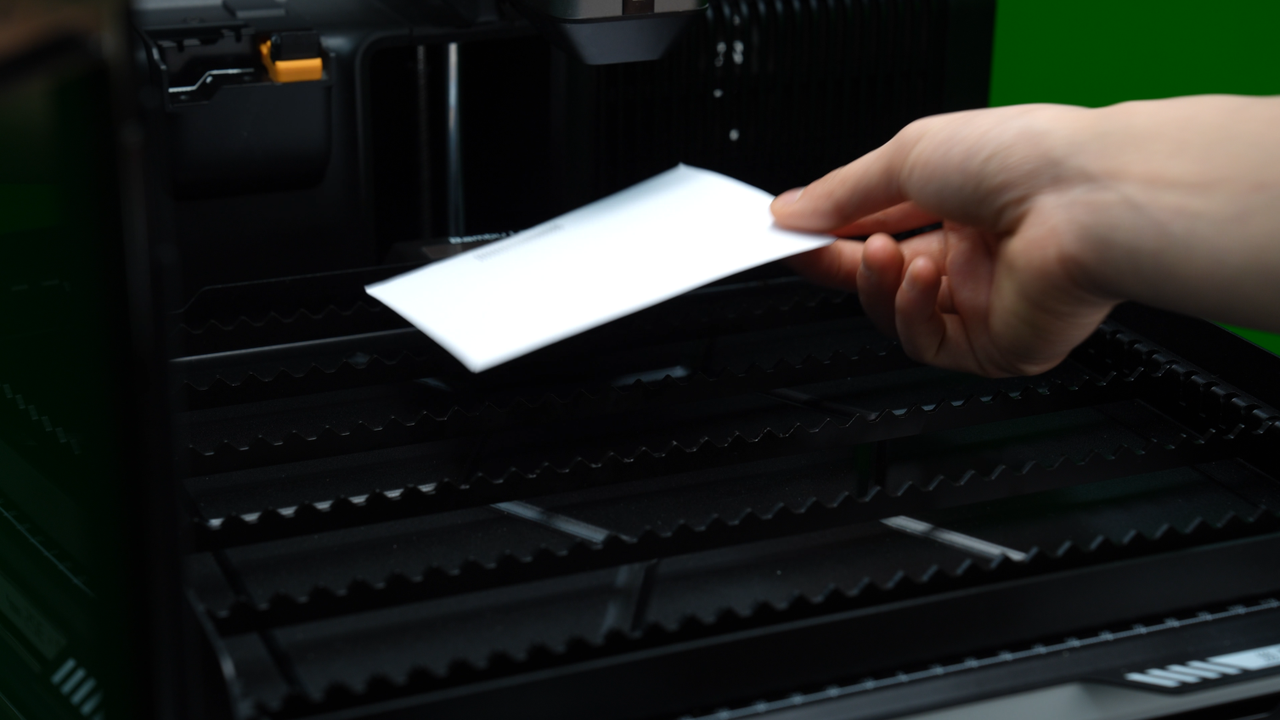
- Place the laser focus calibration card in the rearward middle position of the laser platform, as shown in the image below.
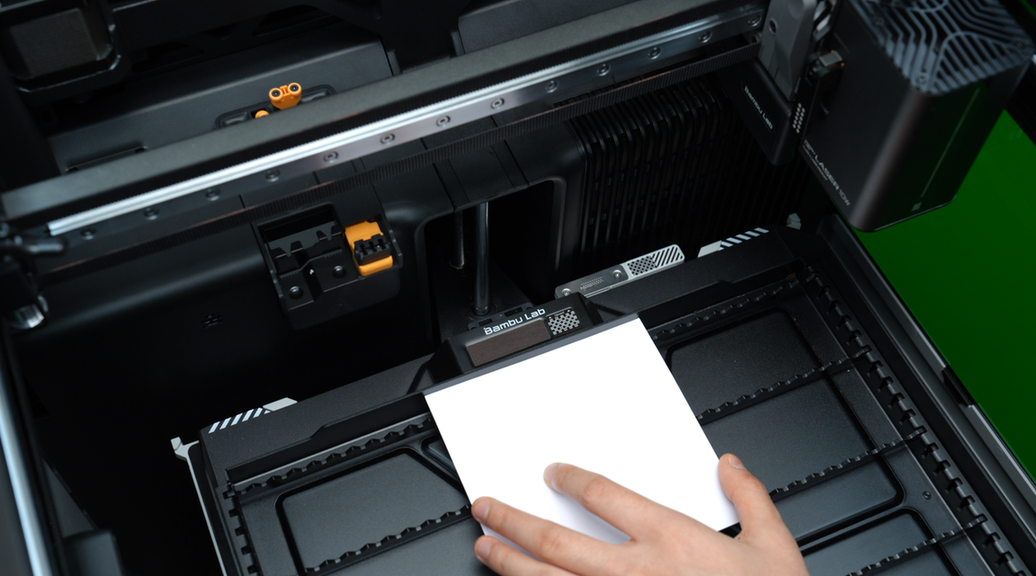
- Enter the laser module setup page from the HMS page or "Settings-Toolbox";
- After the laser module setup is completed, open the front door and remove the laser focus calibration card.
For more information about laser focus calibration, please refer to Laser Focus Calibration Introduction.
¶ Appendix
- For H2D laser upgrade FAQs, please refer to Laser Upgrade Kit FAQ.
- For laser module installation guide, please refer to Laser Module Installation Guide.
¶ End Notes
We hope the detailed guide provided has been helpful and informative.
If this guide does not solve your problem, please submit a technical ticket, we will answer your questions and provide assistance.
If you have any suggestions or feedback on this Wiki, please leave a message in the comment area. Thank you for your support and attention!