¶ The Impact of the First Layer on Print Quality
In 3D printing, the quality of the first layer significantly affects the success rate of a print. While minor first-layer imperfections usually do not noticeably impact the final model, severe first-layer issues can directly compromise the overall print quality or even lead to print failure. For high-precision 3D printers like the H2D, first-layer problems mainly fall into two categories, each posing different levels of risk.
-
Nozzle Too Close to the Heatbed (First Layer Too Low)
-
The nozzle may scrape the heatbed, potentially damaging both the nozzle and the build plate.
-
Excessive adhesion between the print and the heatbed can make removal difficult or even tear the model.
-
Insufficient first-layer extrusion may cause "clogging" (filament accumulates at the nozzle tip, blocking extrusion).
-
-
Nozzle Too Far from the Heatbed (First Layer Too High)
-
The sparse gaps between bottom-layer lines weaken the appearance and structural integrity.
-
Poor adhesion due to insufficient contact with the heatbed may cause warping, shifting, spaghetti, or clogging-like failures mid-print.
-
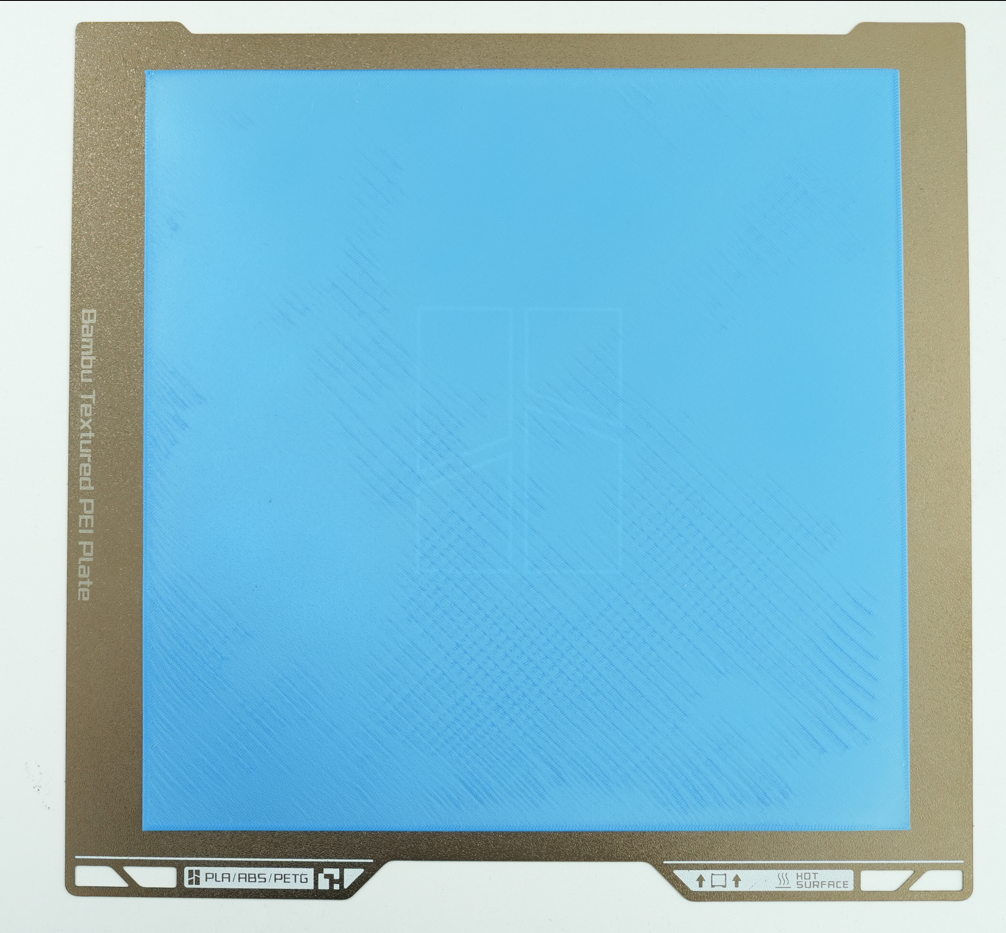
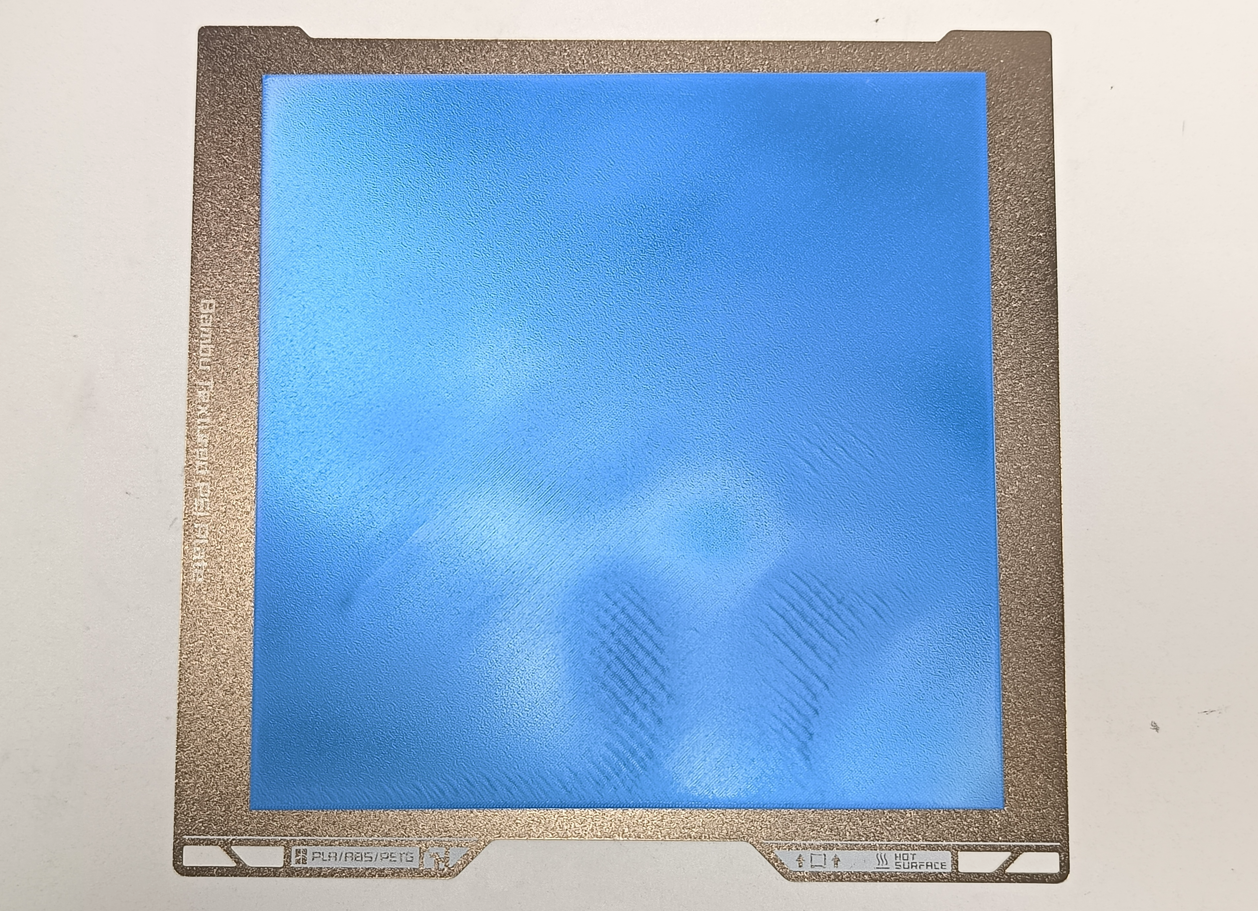
¶ Acceptable First-Layer Examples
High quality first layer:
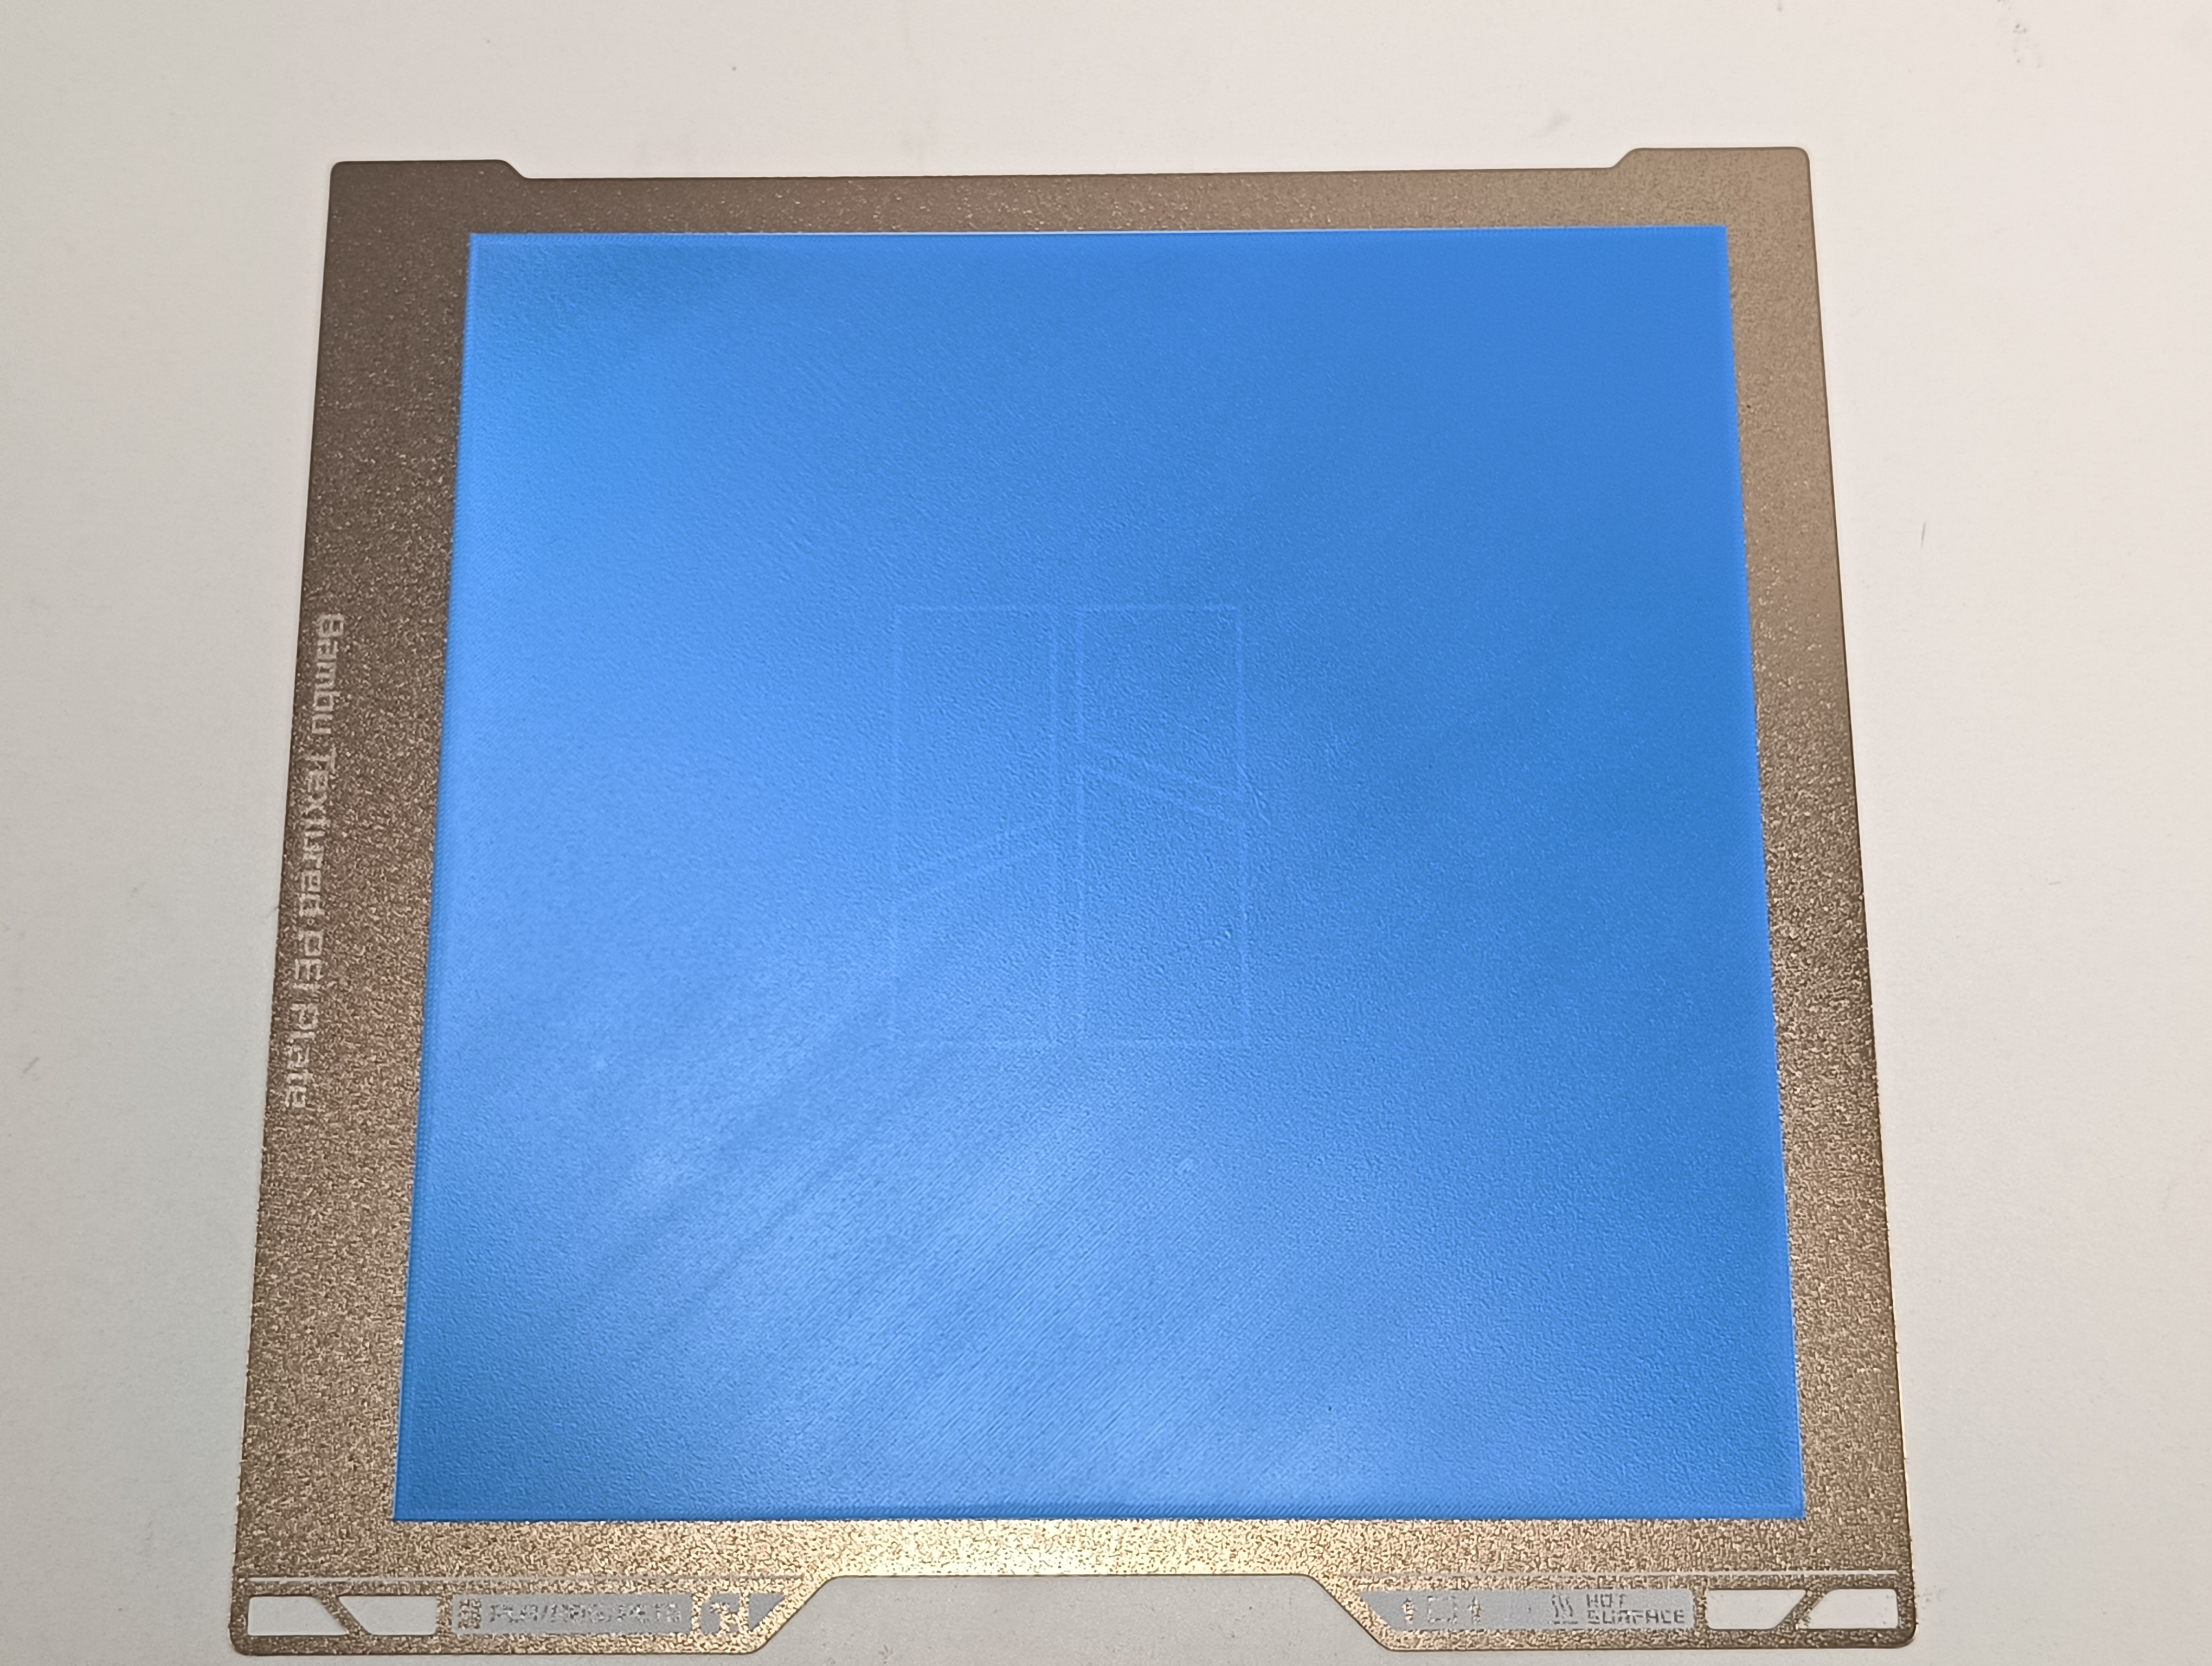
Note: Minor defects like slight line-width variations or small wrinkles (e.g., only 5% of the first layer has defects, while the remaining 95% is flat) typically do not affect the success rate of the print. As long as overall adhesion and interlayer bonding remain unaffected, such imperfections will not significantly degrade the final print quality (see the figure below).
Qualified first layer example 1:

¶ How to Achieve a High-Quality First Layer
¶ Calibration & Leveling
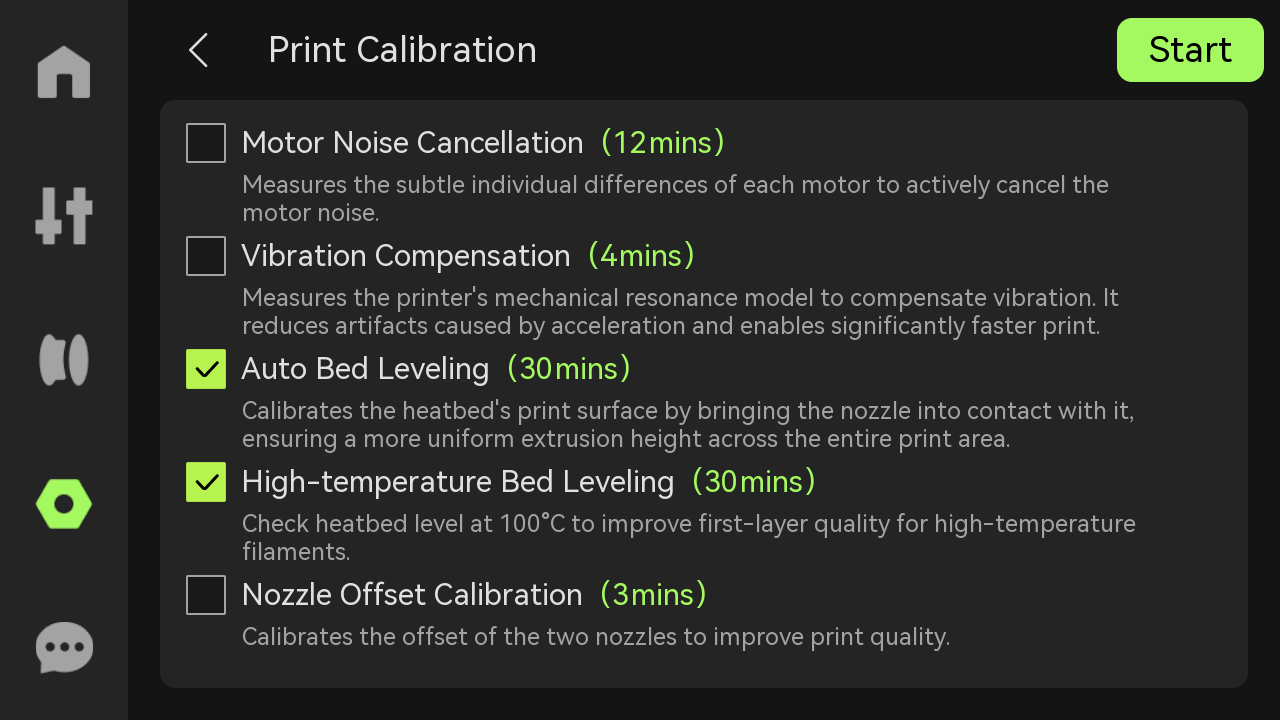
- Regardless of the first layer printing quality issues, we recommend starting with a calibration. Run the Auto Bed Leveling and High-temperature Bed Leveling in Setting > Calibration > Print Calibration. If the printer has been moved, stored for a long time, or if the heatbed has been disassembled or replaced, you must run the leveling again during calibration.
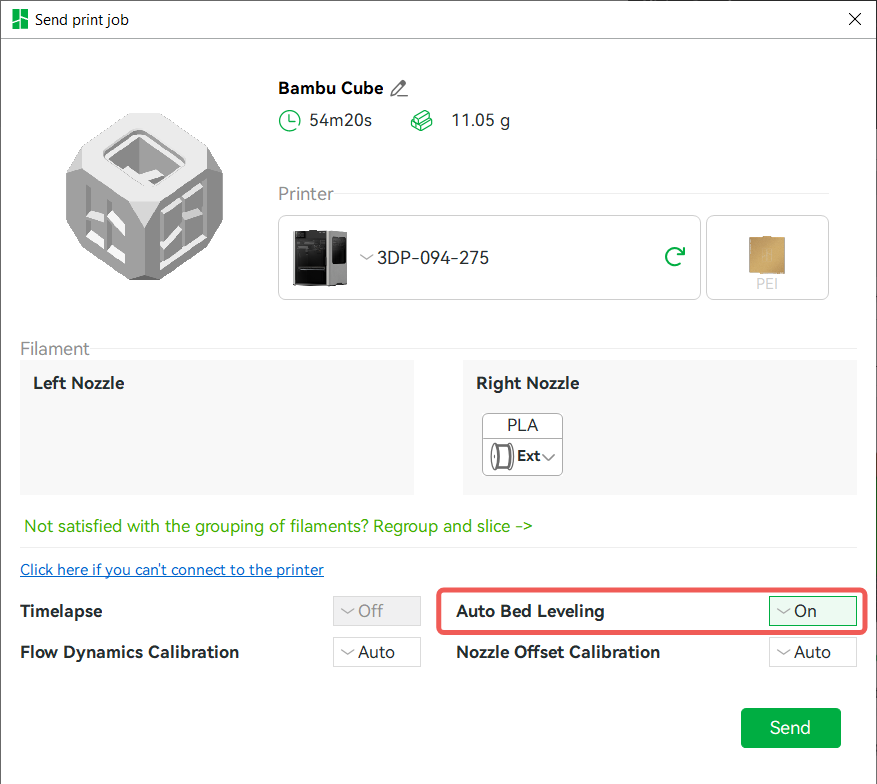
- Before printing, select "On" in "Auto Bed Leveling" in the Send print job window, and a faster leveling will be performed before each printing task starts.
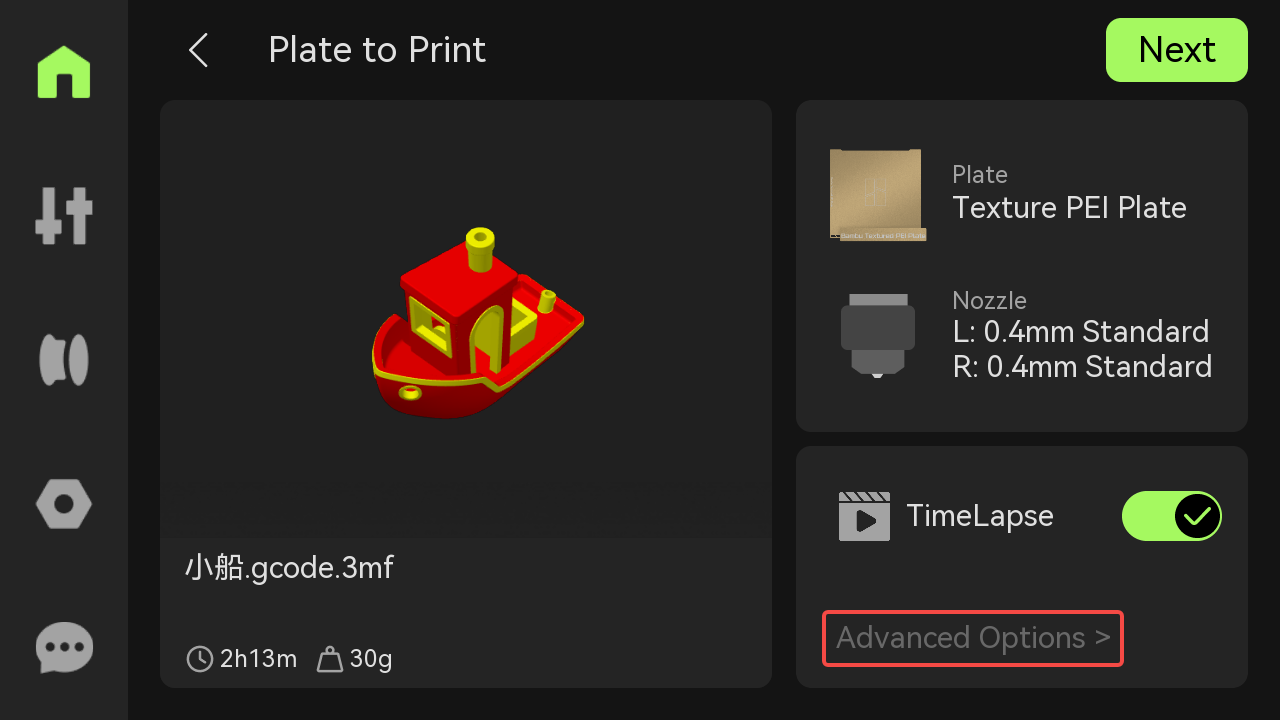
Automatic Bed Leveling can also be turned on on the printer screen: Advanced Options > Auto Bed Leveling.
 |
 |
Note: Both pre-print leveling and calibration data (including Auto/High-temperature Bed Leveling) are stored in the printer. The system automatically applies these datasets during printing.
For details, please refer to: H2D Printer FAQ
¶ First-Layer Issue Troubleshooting Guide
¶ Large-Area/Full-Plate First Layer Too Low
Solution:
- Tighten Ceramic Base Screws
-
Loosen the ceramic base screws (4 left, 3 right). If removing the left hotend heating assembly, also remove the two screws on the left cable sheet (see diagram).
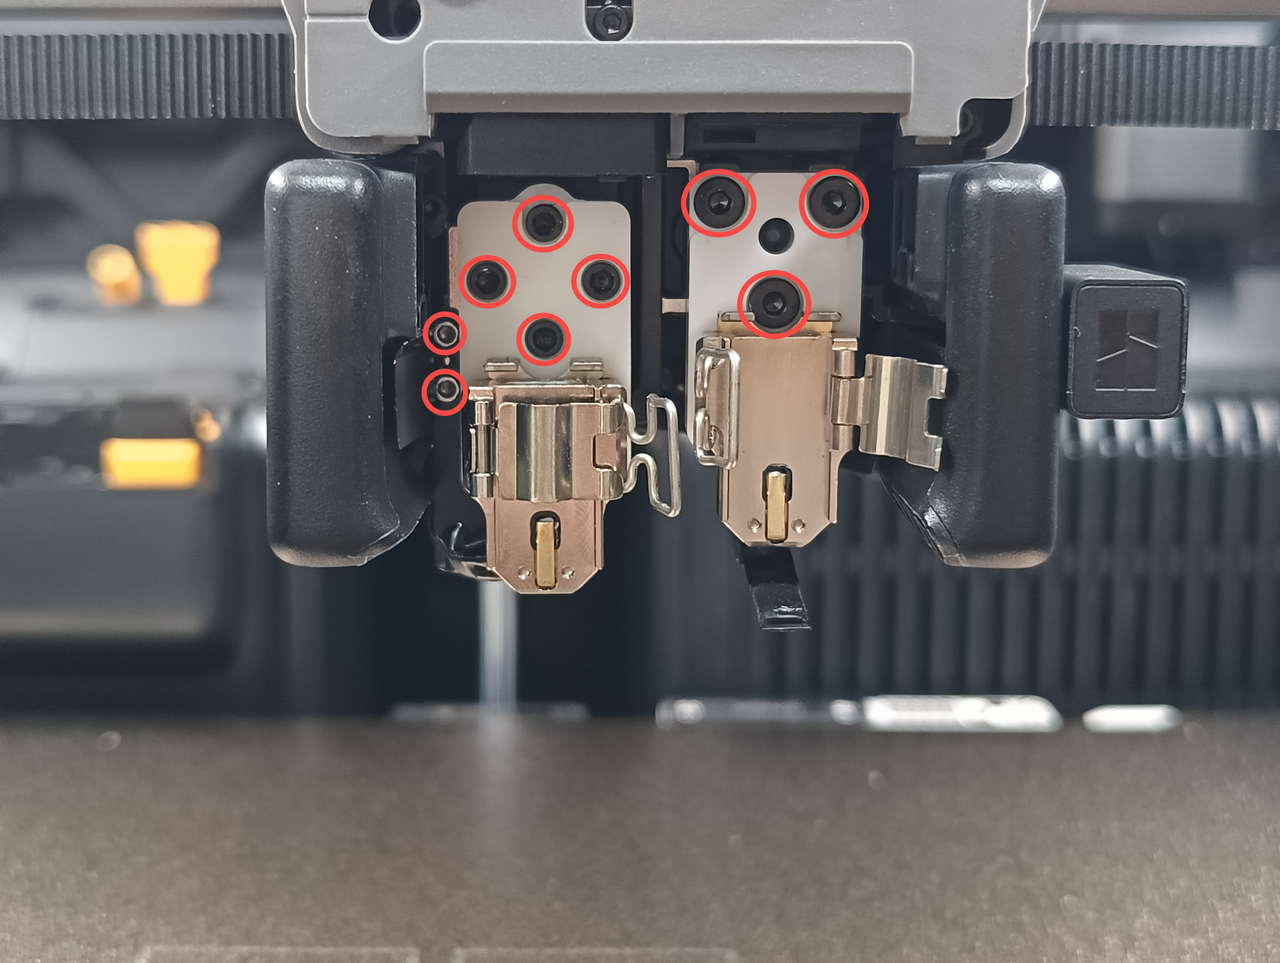
-
Gently tighten the 4 screws on the hotend heating assembly backplate (1/8 turn).
Caution: Do not overtighten if screws are already snug—this may damage the ceramic base.
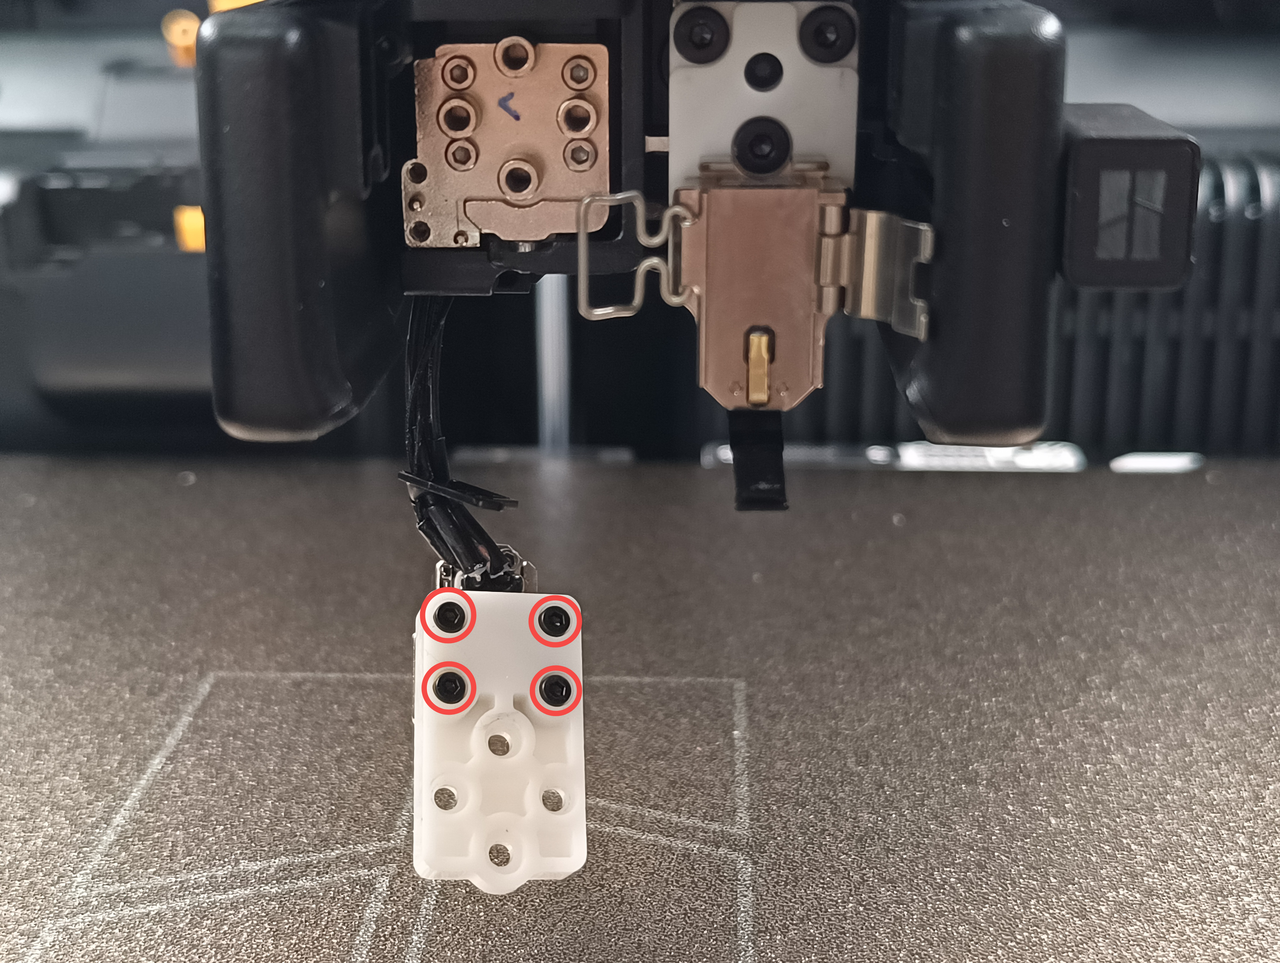 |
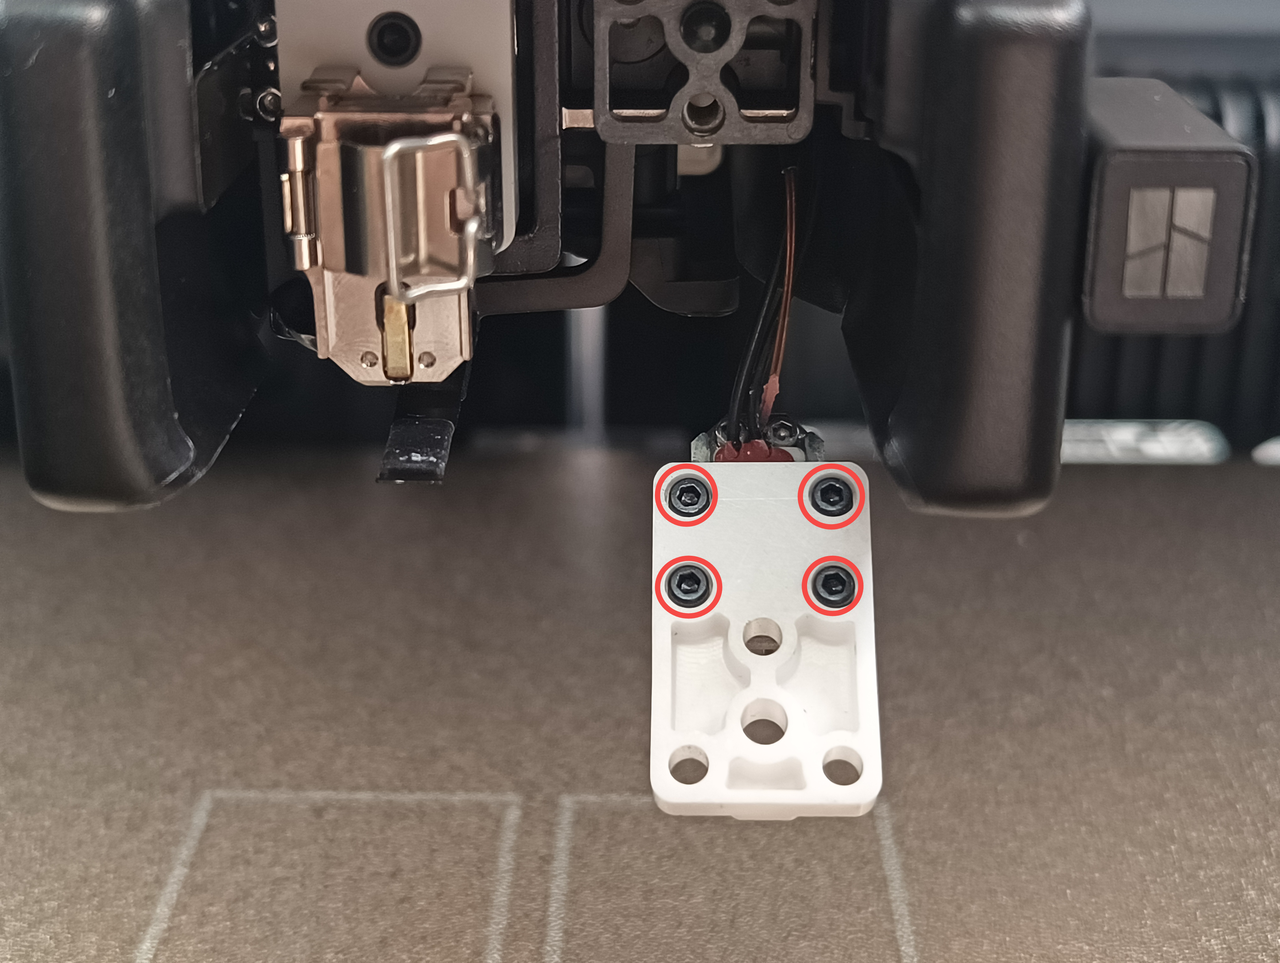 |
- Reinstall the ceramic base and secure all screws.
- Check Nozzle Installation
- Press the nozzle downward before locking the clip, ensuring proper engagement.
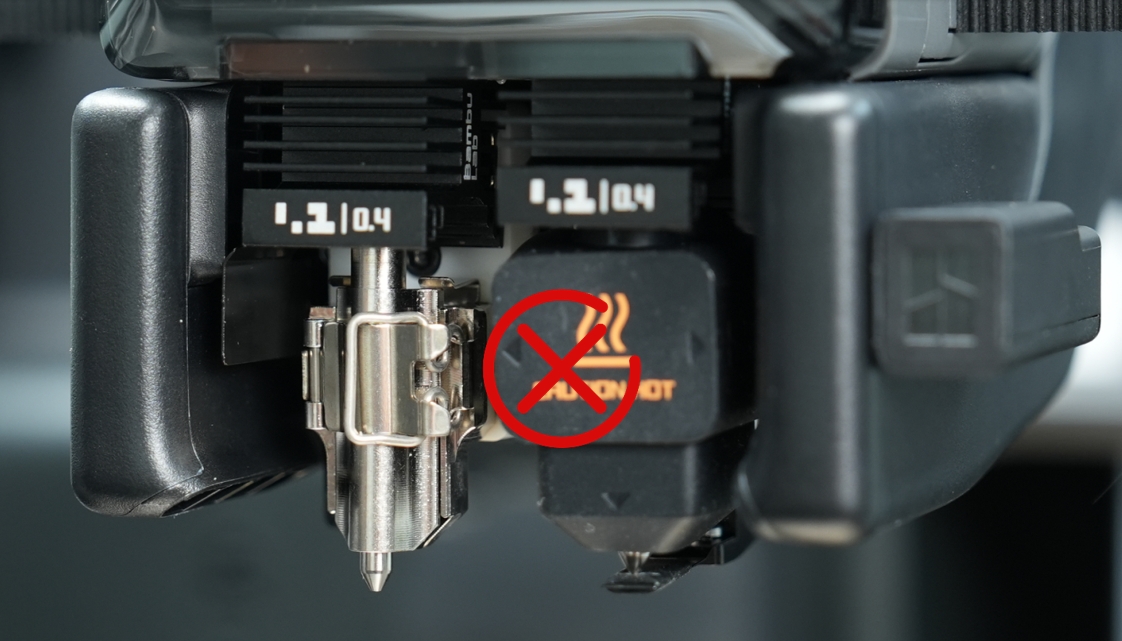 Example of hotend clip not being secured correctly |
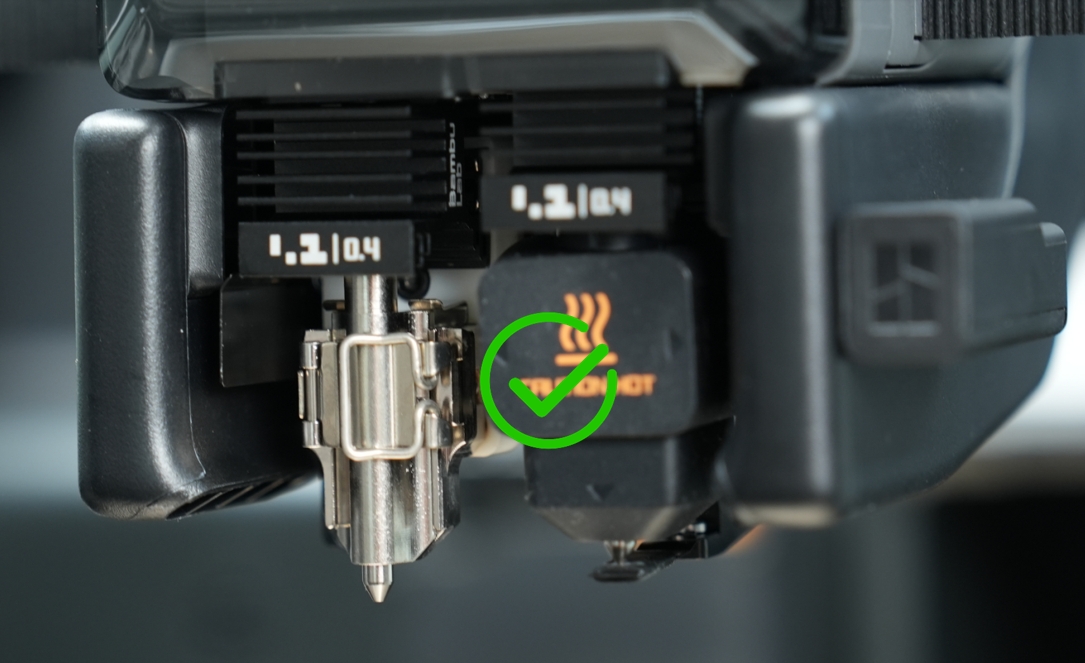 Example of hotend clip being secured correctly |
- Manually wiggle the nozzle to confirm stability. If loose, the hotend is not fully secured.
¶ Partial First Layer Too Low
The first layer of printing is partially low, usually in the area near the front door of the printer, as shown in the following figure.
Solution:
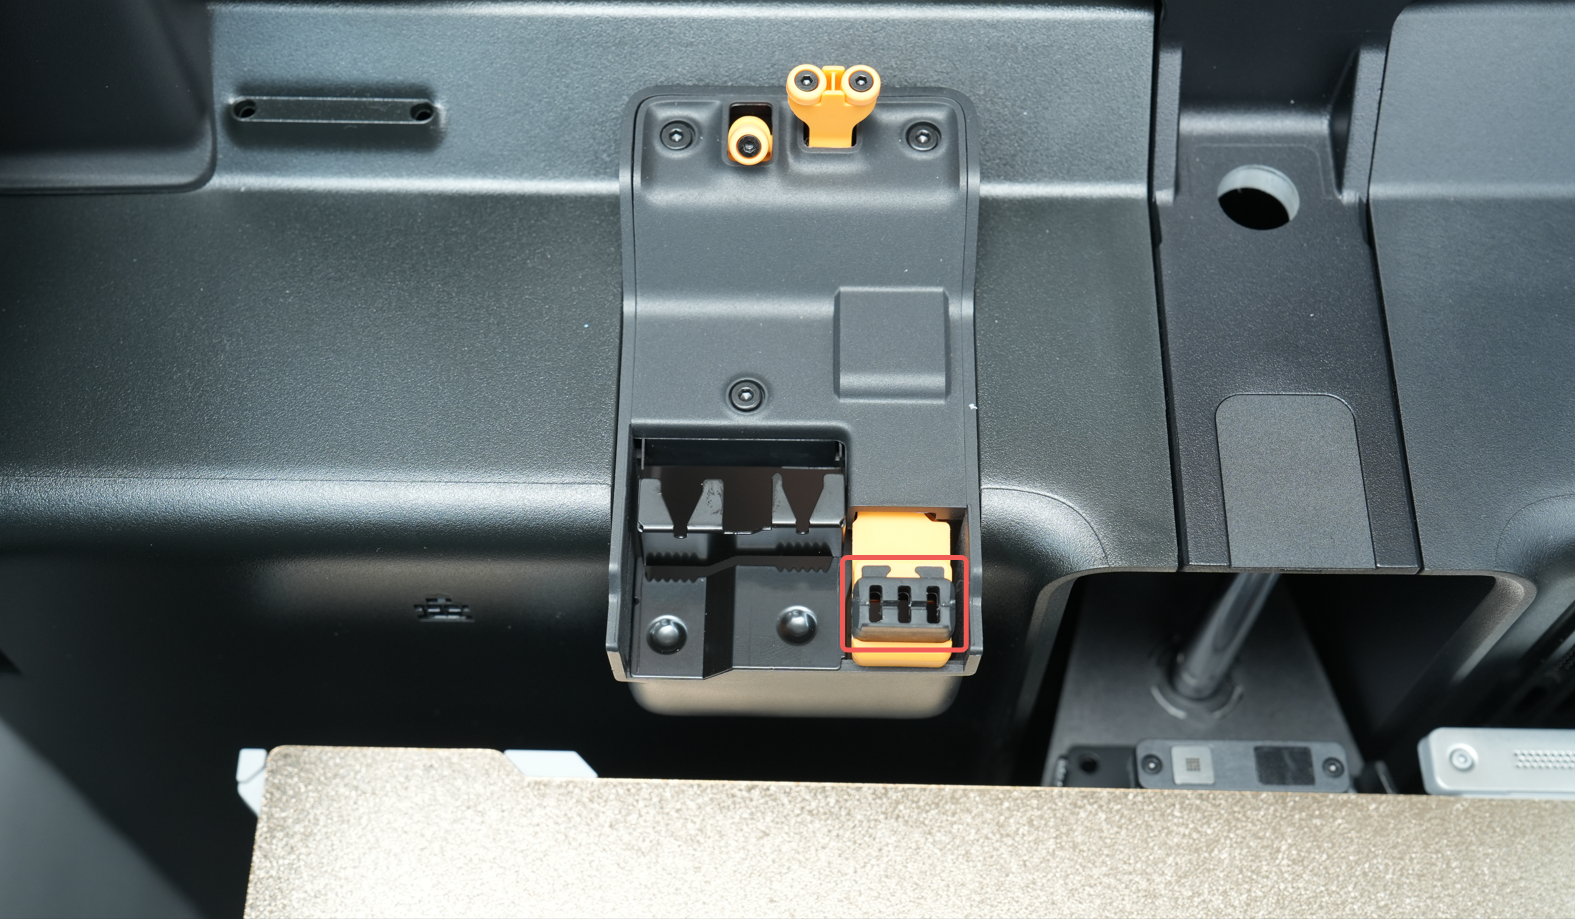
- Use a screwdriver or Allen key to loosen the black side lock screw at the bottom front of the heatbed (about 1 turn). This screw is mainly used to increase the rigidity of the heatbed during transportation, but over-tightening may cause local lowness.
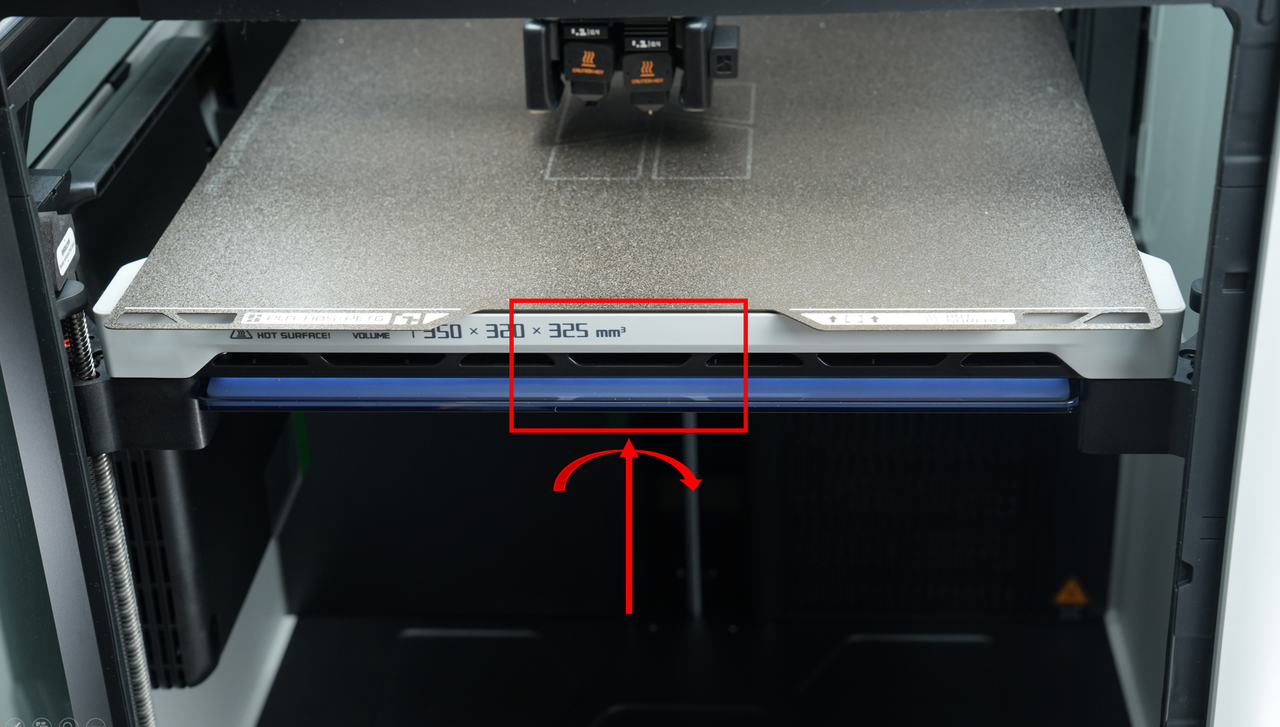 The screws are located on the lower front side of the heatbed |
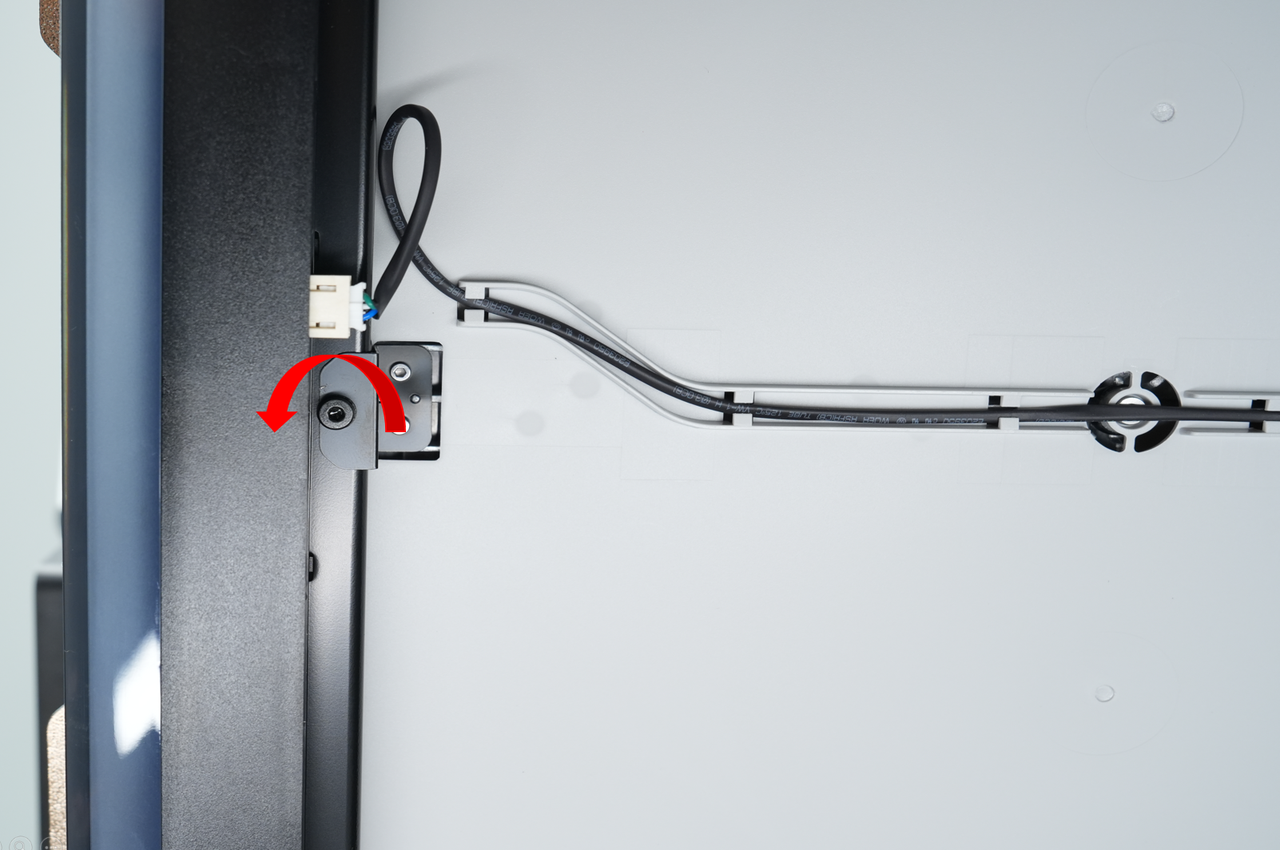 Loosen the screws in the direction of the arrow |
- Re-run calibration and verify first-layer quality.
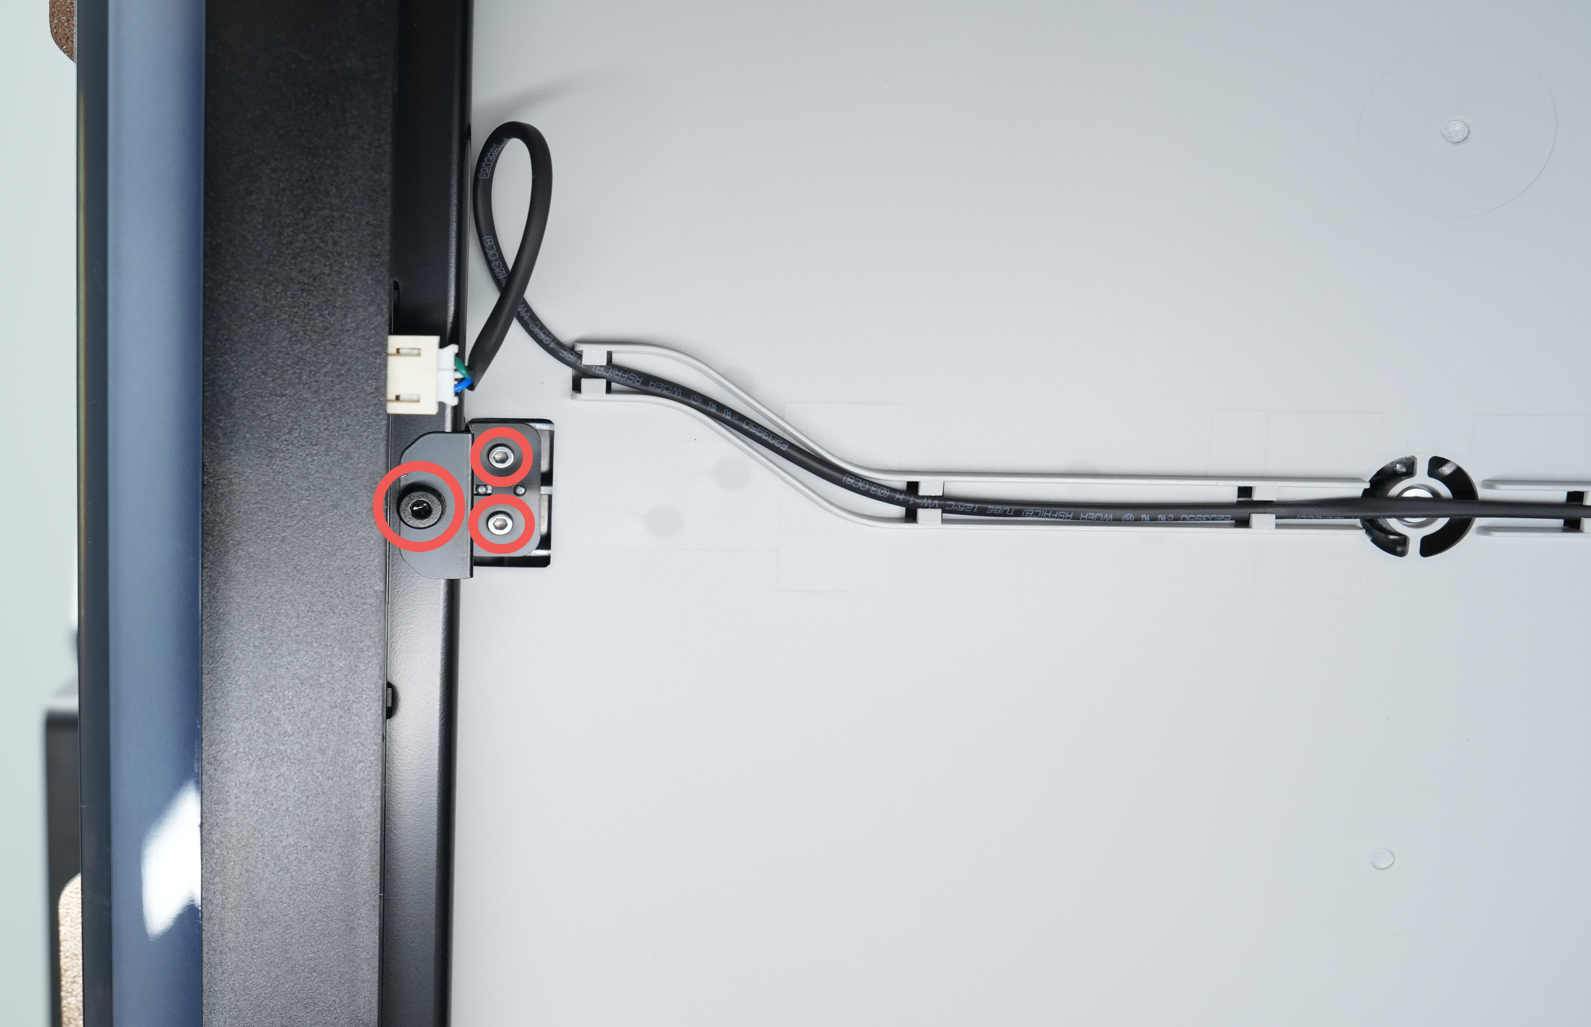
If unresolved:
- Use H2.0 and H1.5 screwdrivers or Allen keys to remove the 3 side locking screws on the heatbed (see the following figure for the location).
Note: These 3 screws are only used to enhance the impact resistance during transportation. Removing the screws during normal use will not affect the printing quality.
- After removing the screws, run the calibration procedure again and reprint the test.
¶ Large-Area First Layer Too High/Sparse
The first layer is too high, which usually manifests as sparse lines and weak adhesion. When removing the print, the lines may separate, as shown in the figure below.

Solution:
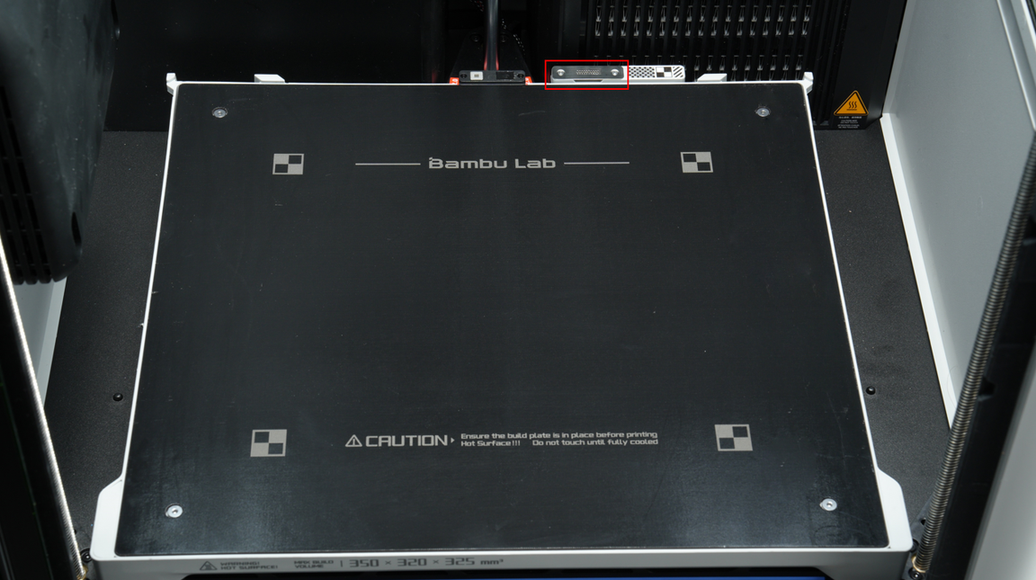
- Check whether the nozzle wiper (hard steel sheet or soft silicone brush) is clean and in place, and confirm whether the hard steel sheet is bent or deformed (if it is concave in the middle, the nozzle will not be able to contact the steel sheet when wiping the nozzle). The position is shown in the figure below;
 hard steel sheet |
 soft silicone brush |
-
Residual filaments on the nozzle before leveling may cause errors in the leveling height. Please make sure that the nozzle is clean before leveling.
¶ Advanced Adjustment
If first-layer issues persist after trying the above:
-
Preheat the heatbed to the target temperature and hold it for 10–15 minutes before printing.
-
Refer to the wiki to perform manual bed leveling and make sure it is not tilted. H2D Bed Tramming
¶ Temporary Fix: Adjust Z-Offset
Notes: This method is a temporary solution that is suitable for quickly correcting problems on the first layer, but it may introduce new local defects (for example, after correcting a locally low area on the first layer, the originally normal area may be higher).
Recommended adjustment ranges:
-
Textured plate: -0.02mm to 0mm
-
Non-textured plate: -0.01mm to 0.01mm
Methods:
-
Modify G-code
- Textured plate: Locate
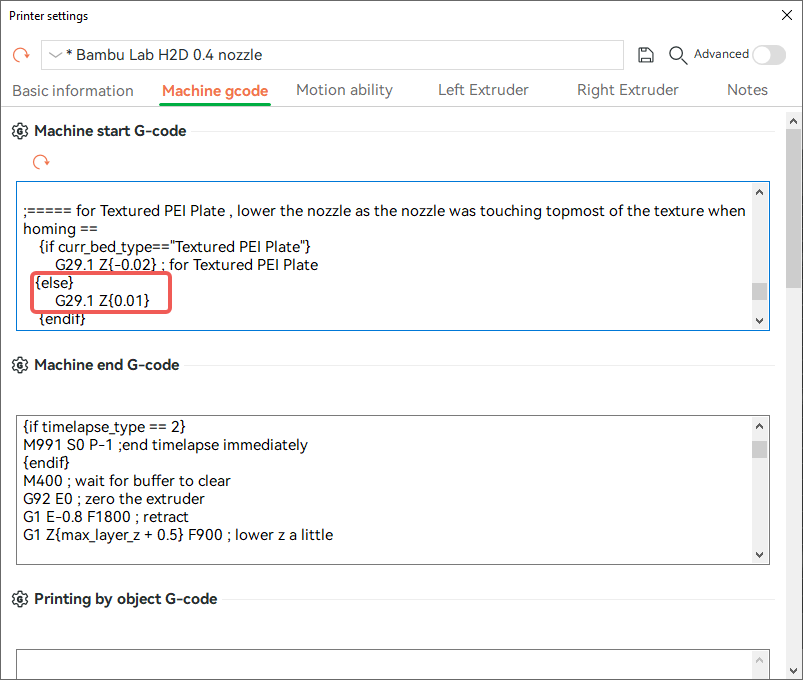
G29.1 Z{-0.02}in Printer Settings → Machine start G-code and adjust toG29.1 Z{xxx}. If the first layer is too low, you can change it toZ{0}, which is equivalent to lifting the nozzle 0.02mm higher than the default setting when printing (in order to ensure a uniform first layer, the toolhead is pressed down 0.02mm by default when using a textured plate).
- Textured plate: Locate

- Non-textured plate: For other types of build plate, such as smooth plate, add
{else} G29.1 Z{xxx},as shown in the figure below.
-
Adjustment Method
-
First layer too high → Decrease offset (e.g., -0.02 → -0.03).
-
First layer too low → Increase offset (e.g., -0.02 → -0.01).
-
¶ End Notes
We hope the detailed guide provided has been helpful and informative.
If this guide does not solve your problem, please submit a technical ticket, we will answer your questions and provide assistance.
If you have any suggestions or feedback on this Wiki, please leave a message in the comment area. Thank you for your support and attention!