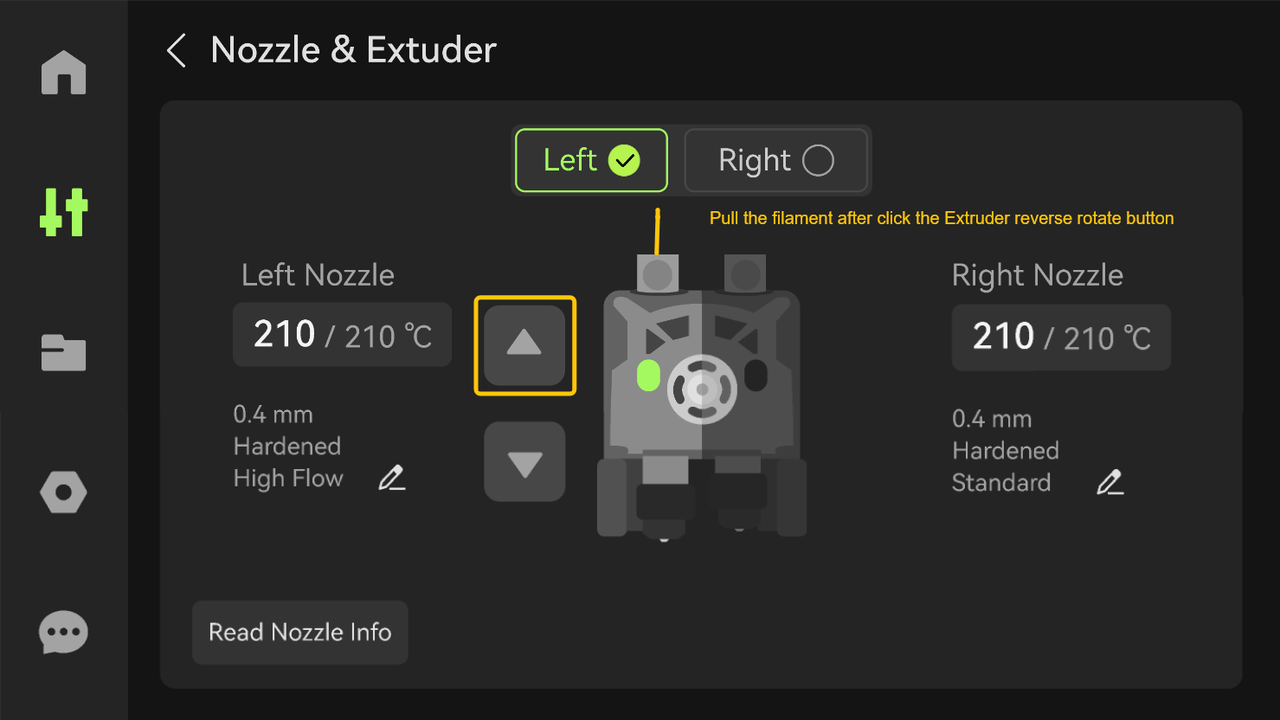
¶ Issue Description
When using TPU for printing, the system will detect the change in extrusion resistance of the extruder servo motor in real time. When abnormal extrusion resistance is detected, the printer will be in a paused state and the printing will continue after troubleshooting.
Possible causes of this issue include:
- Filament jammed inside the toolhead
- Hotend clog
- The slice is set to TPU filament, but the actual filament used is not TPU, the two do not match.
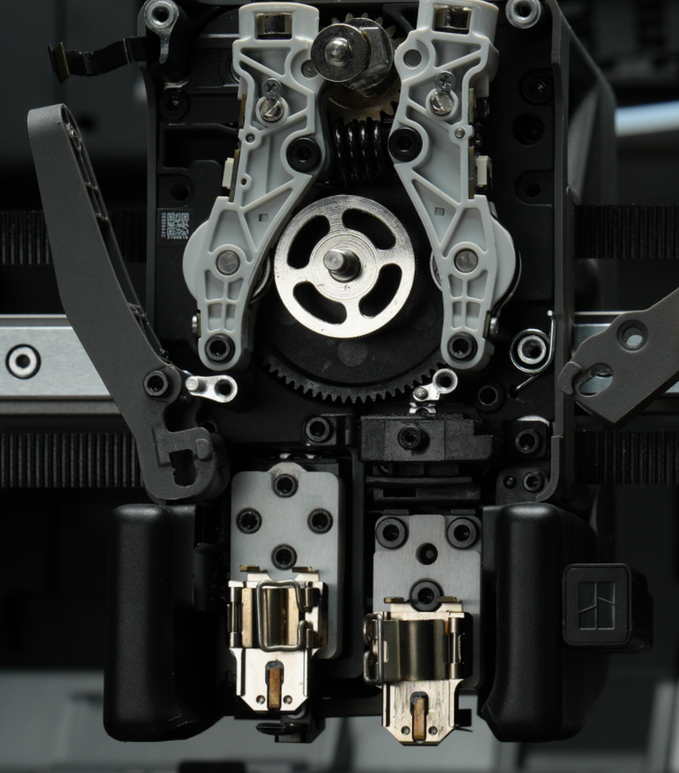
Extrusion related components:
¶ Troubleshooting
Before disassembling the toolhead, ensure the printer is powered off.
¶ Tools, Equipment and Materials
- H2.0 Allen key
- H1.5 Allen key
- Diagonal cutting pliers/scissors
- Needle-nose pliers
¶ Fault Isolation Process
Detailed steps are provided below.
¶ Solutions
Users may adjust the order of these solutions as needed.
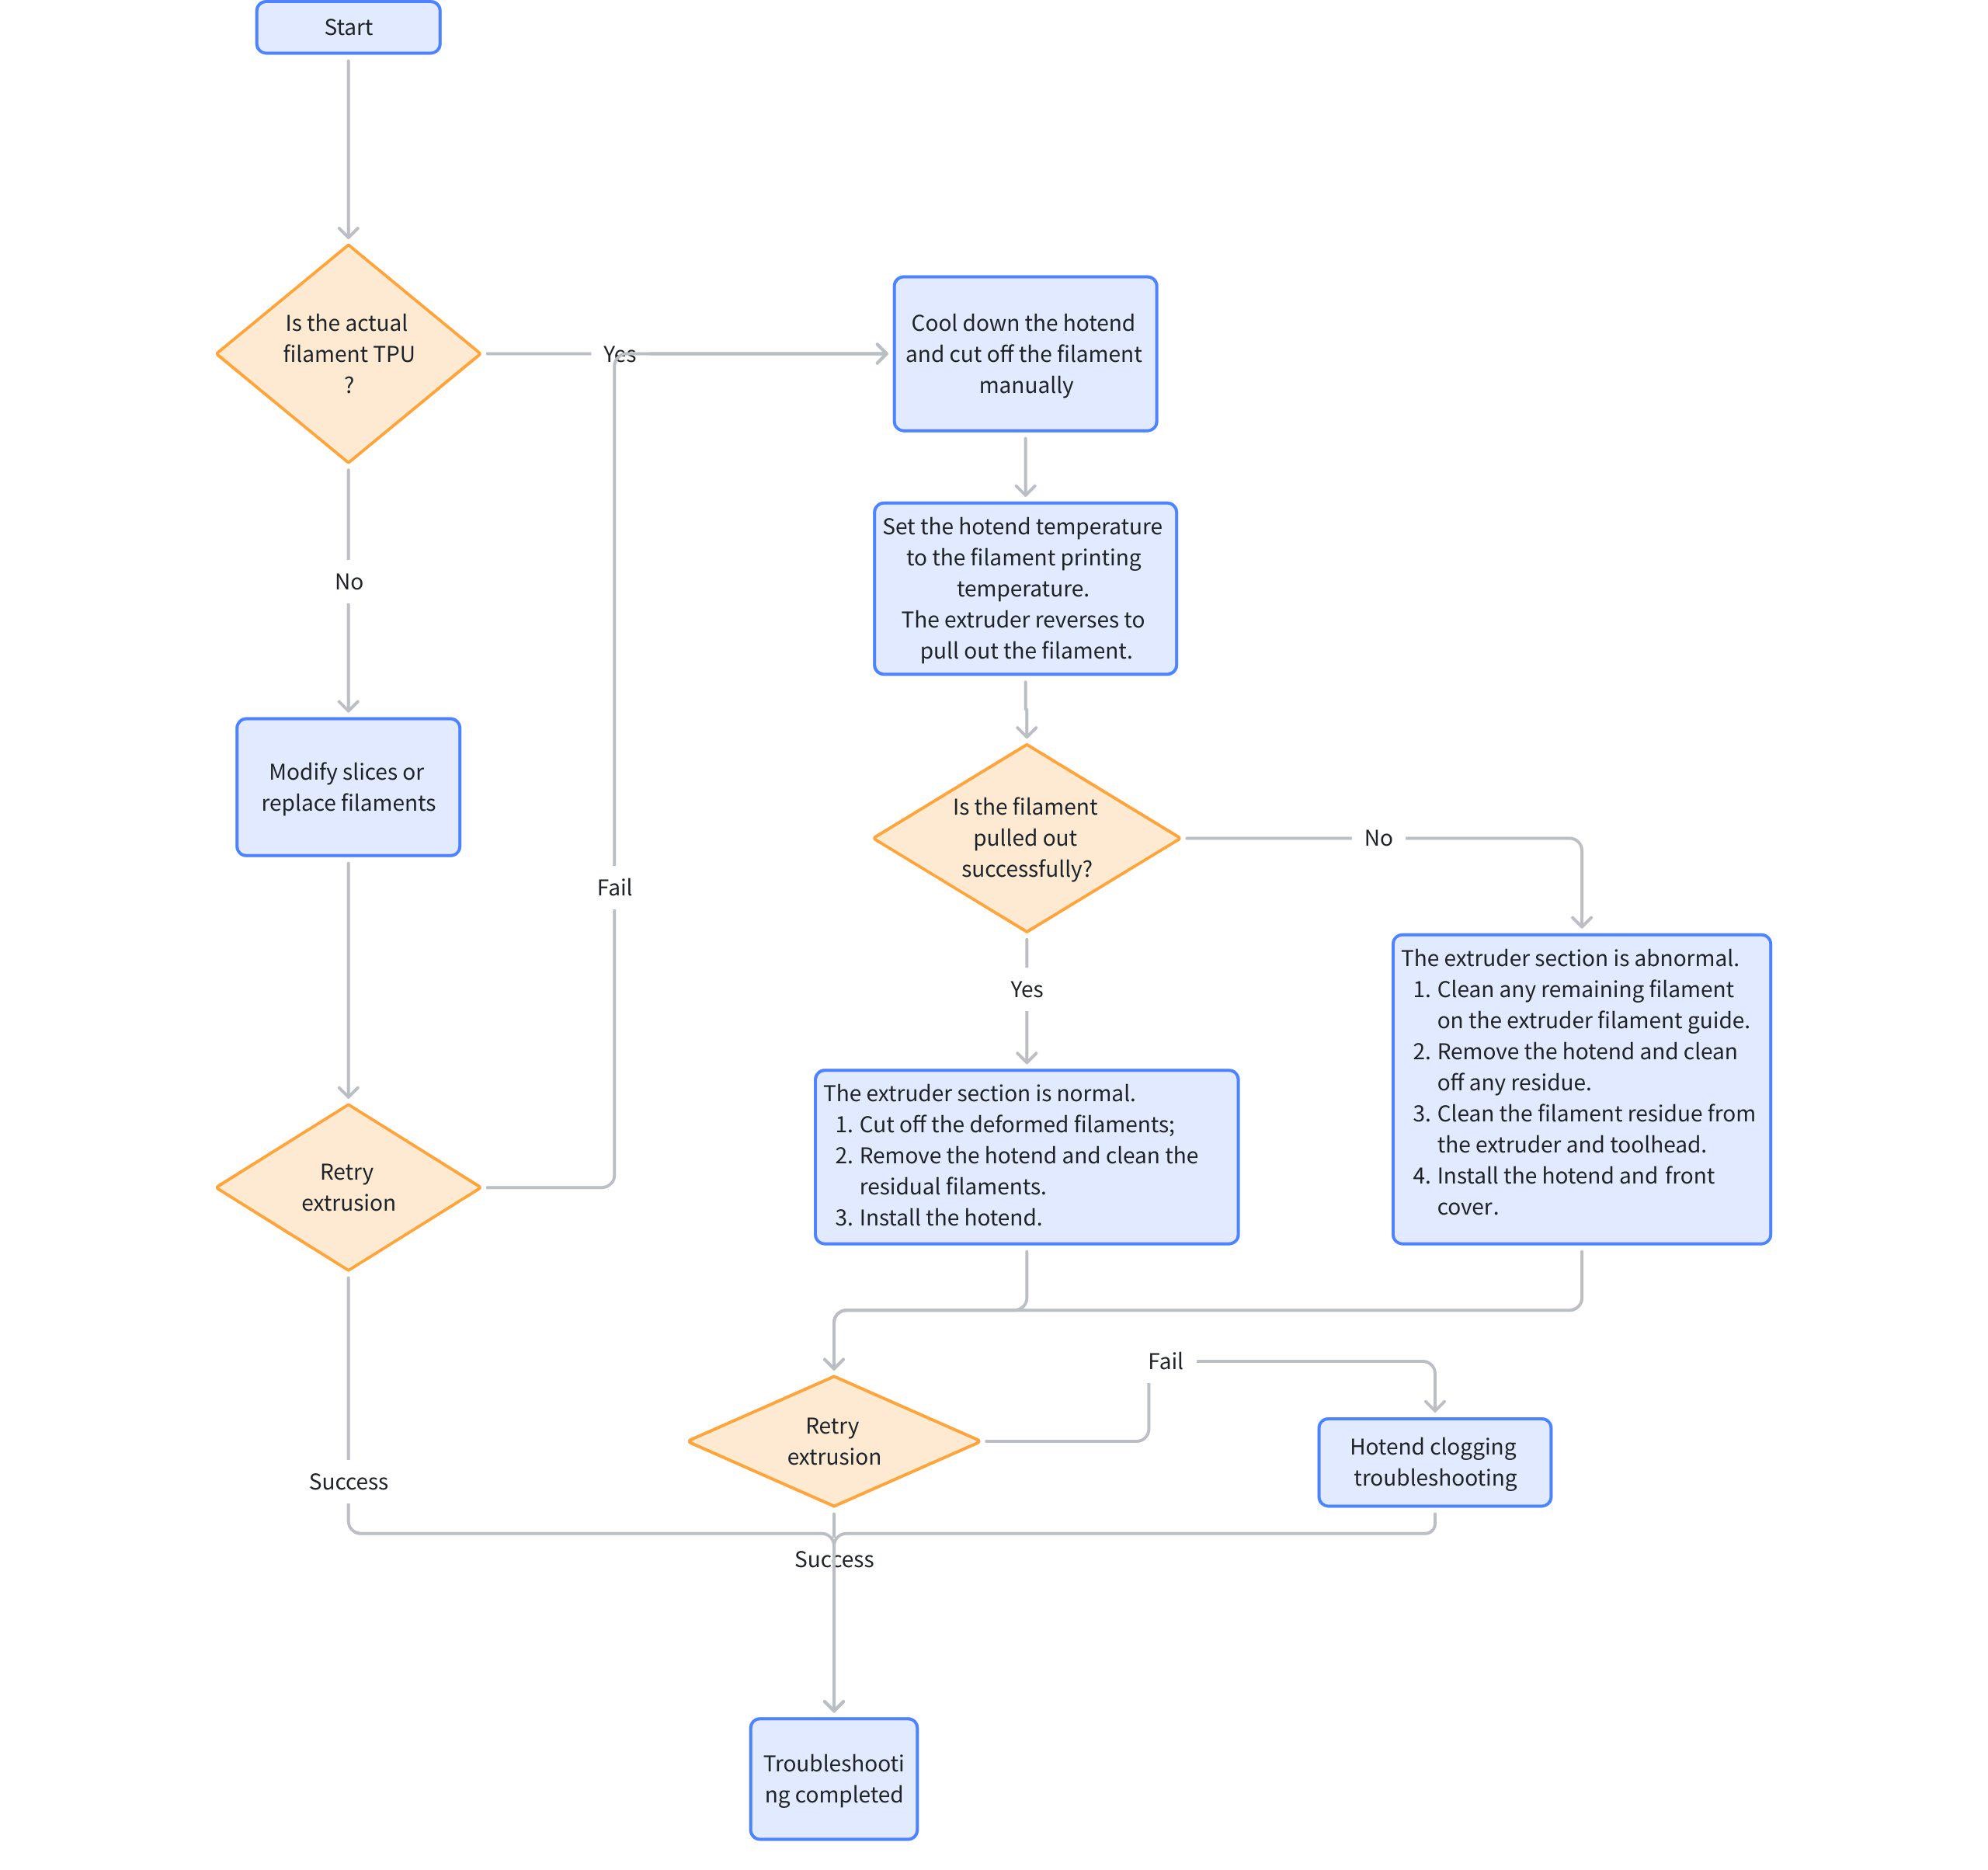
¶ Step 1. Ensure the actual filament used matches the filament in the slicer, which should both be TPU.
If the filament in the slicer does not match the actual filament, perform one of
- Modify the slicer parameters to match the current filament.
- Replace the filament to match the slicer parameters.
Attempt extrusion again. If it still fails, proceed to Step 2 for further troubleshooting.
¶ Step 2. Cool down the hotend and manually cut the filament
- Set the hotend temperature to 0°C and wait for it to cool down to room temperature.
- Press the cutter on the side with the extrusion issue to cut the filament.
¶ Step 3. Heat up the hotend and attempt to pull out the filament in reverse
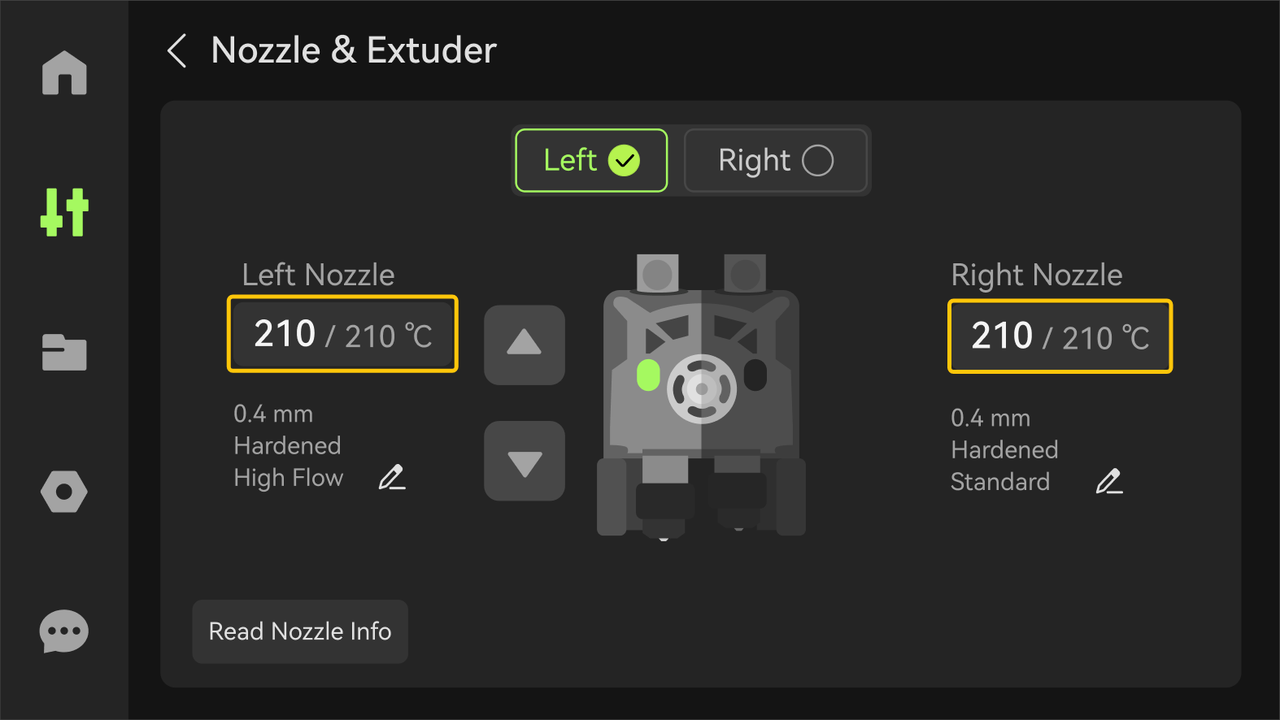
- Set the hotend temperature to the filament’s printing temperature and wait for it to heat up.
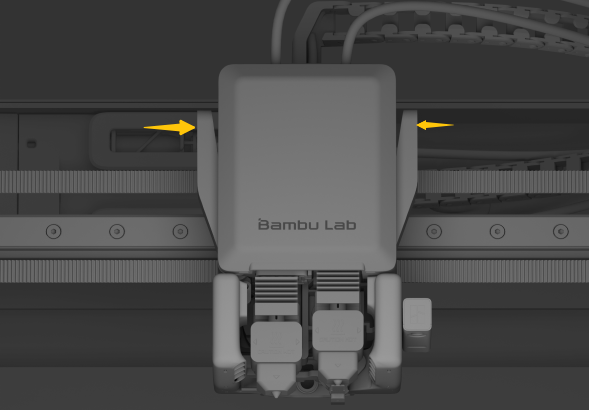
- Disconnect the PTFE tube at the top of the extruder.
- Operate the extruder to rotate in reverse while manually pulling the filament.
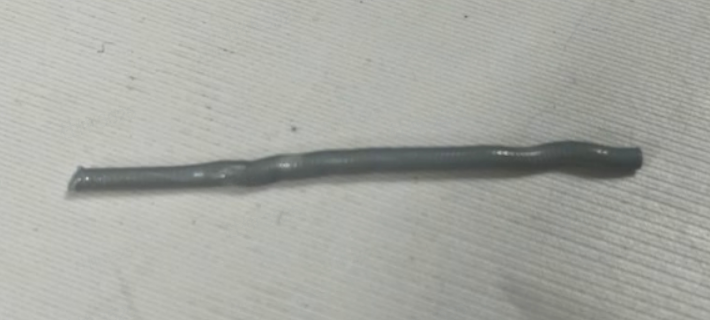
¶ Step 4-1. If the filament is successfully pulled out in Step 2, the extruder is functioning normally
- Trim the bent or expanded front end of the filament.
- Set the hotend temperature to 100°C, remove the hotend, and use needle-nose pliers to remove residual filament from the hotend entrance while it is still warm (be cautious of high temperatures; wear gloves if necessary).
¶ Step 4-2. If the filament cannot be pulled out in Step 2, the extruder may be malfunctioning
1.Check the extrude filament guide
Inspect whether the filament is stuck at the extrude filament guide entrance or inside it.
If so, clean out any jammed filament (refer to How to check which part is clogged in H2D).
2.Disassemble the extruder front cover and hotend
Refer to Steps 1–5 in the Wiki How to Disassemble and Assemble H2D Toolhead to remove the quick change tool interface and hotend.
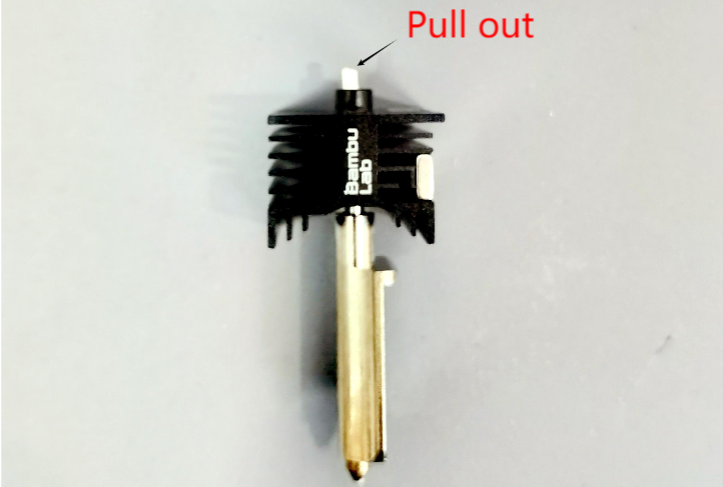
3.Remove residual filament from the hotend
While the hotend is still warm, use needle-nose pliers to pull out any remaining filament.
(be cautious of high temperatures; wear gloves if necessary).
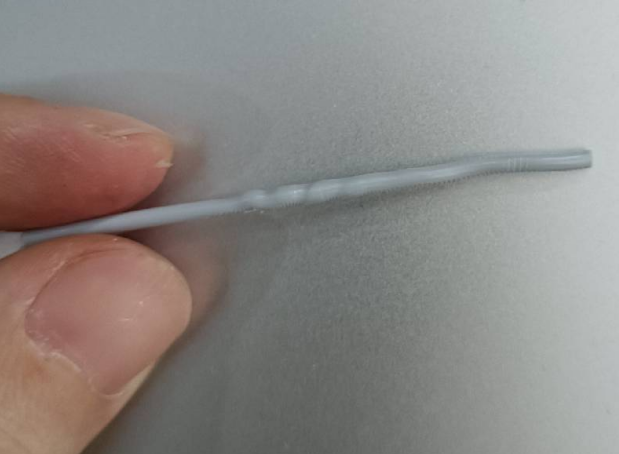
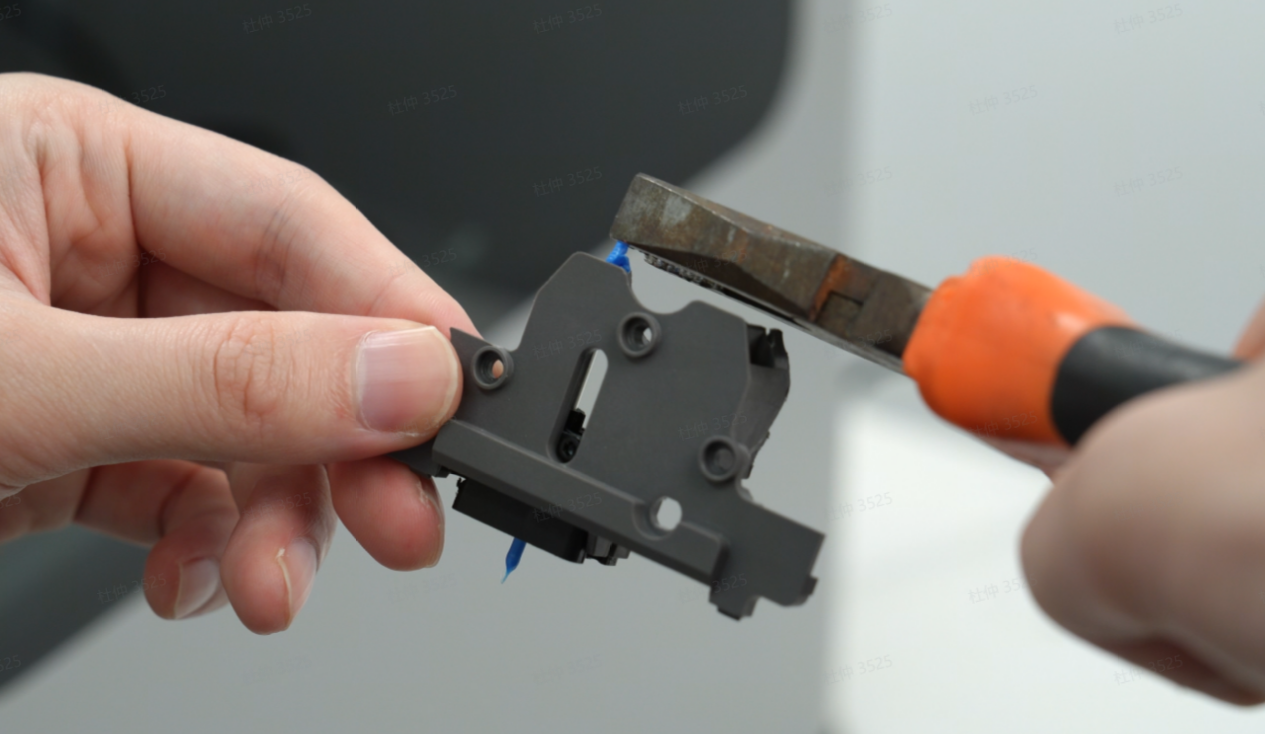
4.Trim and remove deformed filament from the toolhead
Use scissors to cut away any deformed filament inside the toolhead, disconnect the PTFE tube above the toolhead, and manually pull out the filament from inside.
![img_20250113_154035[1]_cn.jpg](/h2/troubleshooting/hmscode/0300_0900_0002_0003/img_20250113_154035%5B1%5D_cn.jpg)
¶ Step 5. Install the hotend and quick change tool interface (if applicable), then attempt extrusion
-
Install the hotend and quick change tool interface (refer to How to Disassemble and Assemble H2D Toolhead)
-
Heat the hotend to the filament’s printing temperature.
-
Insert the filament, and press the forward extrusion button on the screen to attempt extrusion.
¶ Step 6. If the extrusion test fails, troubleshoot a hotend clog (refer to Nozzle/Hotend Unclogging Procedure for X1/P1)
If the above solutions do not resolve the issue, submit a ticket and upload the printer’s log files.
¶ Tips: How to reduce the frequency of this error?
- Ensure good hotend cooling performance to prevent filament deformation and clogs inside the extruder. Open the front door and top cover during printing to improve hotend cooling.
- Avoid setting the print speed too high.
- After printing with hard and brittle filaments (e.g., PLA-CF), avoid immediately using TPU to prevent hotend clogs.
- Use high-quality filament.
¶ End Notes
We hope the detailed guide provided has been helpful and informative.
If this guide does not solve your problem, please submit a technical ticket, will answer your questions and provide assistance.
If you have any suggestions or feedback on this Wiki, please leave a message in the comment area. Thank you for your support and attention!