¶ Issue Description
The filter switch flap controls whether air circulates through the filter. This HMS alert triggers when the flap fails to open or close as expected.
¶ Troubleshooting
¶ Tools, Equipment and Materials
H2.0 Allen key
¶ Fault Isolation Process
-
If the filter switch flap cannot open/close → the filter switch flap is abnormal
-
If the filter switch flap moves freely → the filter switch flap Hall sensor or magnet is abnormal
¶ Solutions
Users may adjust the order of these solutions as needed.
-
Check if there is any foreign object stuck in the filter switch flap/the servo itself moves abnormally.
-
Check if the Hall sensor and magnet are installed properly and if the sensor cable is detached.
In different modes, the state of the Filter Switch Flap varies. Therefore, before starting troubleshooting, please first confirm whether the Filter Switch Flap is currently in the open or closed position.
The H2 series air system has three modes, and in each mode, the states of the Active Chamber Exhaust Grille and the Filter Switch Flap are as follows:
-
Cooling mode:
- When the chamber exhaust fan is on, the Active Chamber Exhaust Grille is open, and the Filter Switch Flap is positioned downward.
-
When the chamber exhaust fan is off, the Active Chamber Exhaust Grille is closed, and the Filter Switch Flap is positioned downward.
 |
|
|---|
- Heating mode: The Active Chamber Exhaust Grille is closed, and the Filter Switch Flap is positioned upward.
-
Laser mode: the Active Chamber Exhaust Grille is open, and the Filter Switch Flap is positioned downward.
¶ Troubleshooting Guide
Users can adjust the order of the troubleshooting steps as needed.
-
Check whether the Filter Switch Flap is obstructed or if the servo is moving abnormally
-
Check whether the Hall sensor and magnet are installed correctly, and whether the sensor wiring has come loose
¶ Step 1: Check whether the Filter Switch Flap is obstructed by any foreign objects
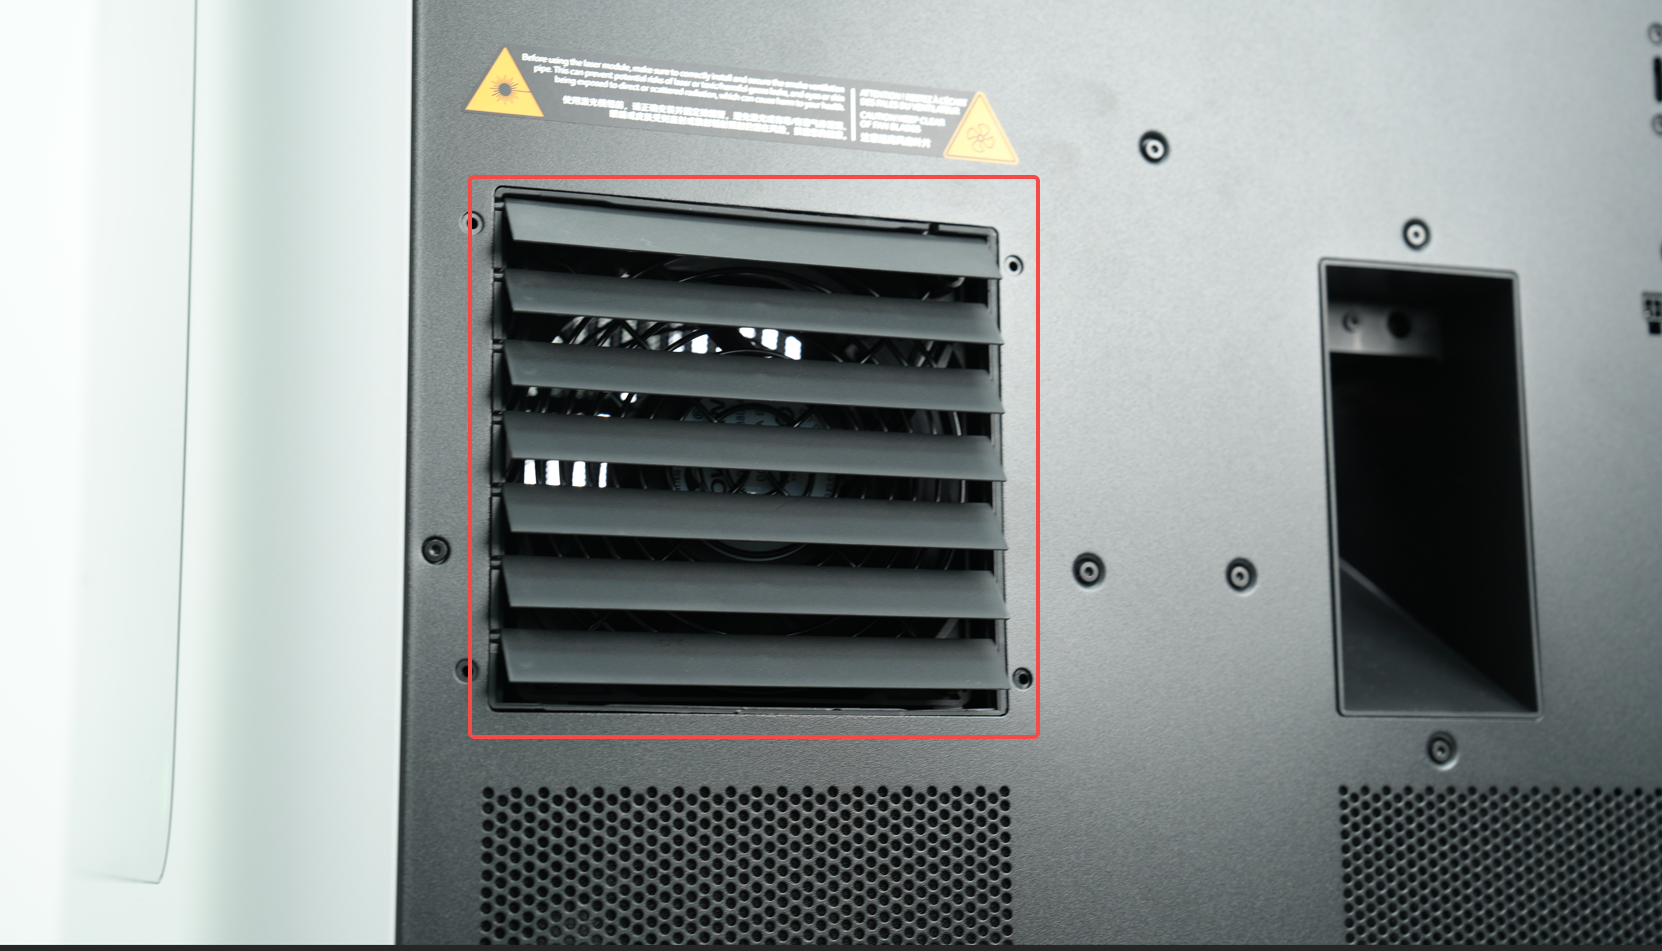
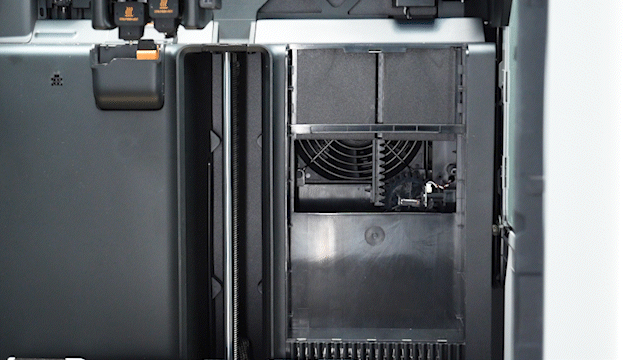
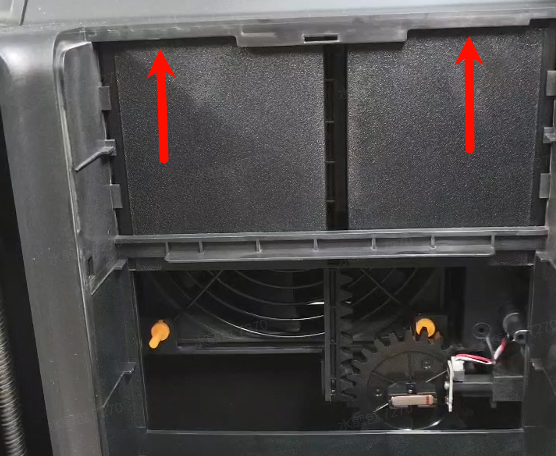
You can first refer to this Wiki to remove the activated carbon filter cover and the activated carbon filter: Replacing H2D Activated Carbon Filter Cover/Filter
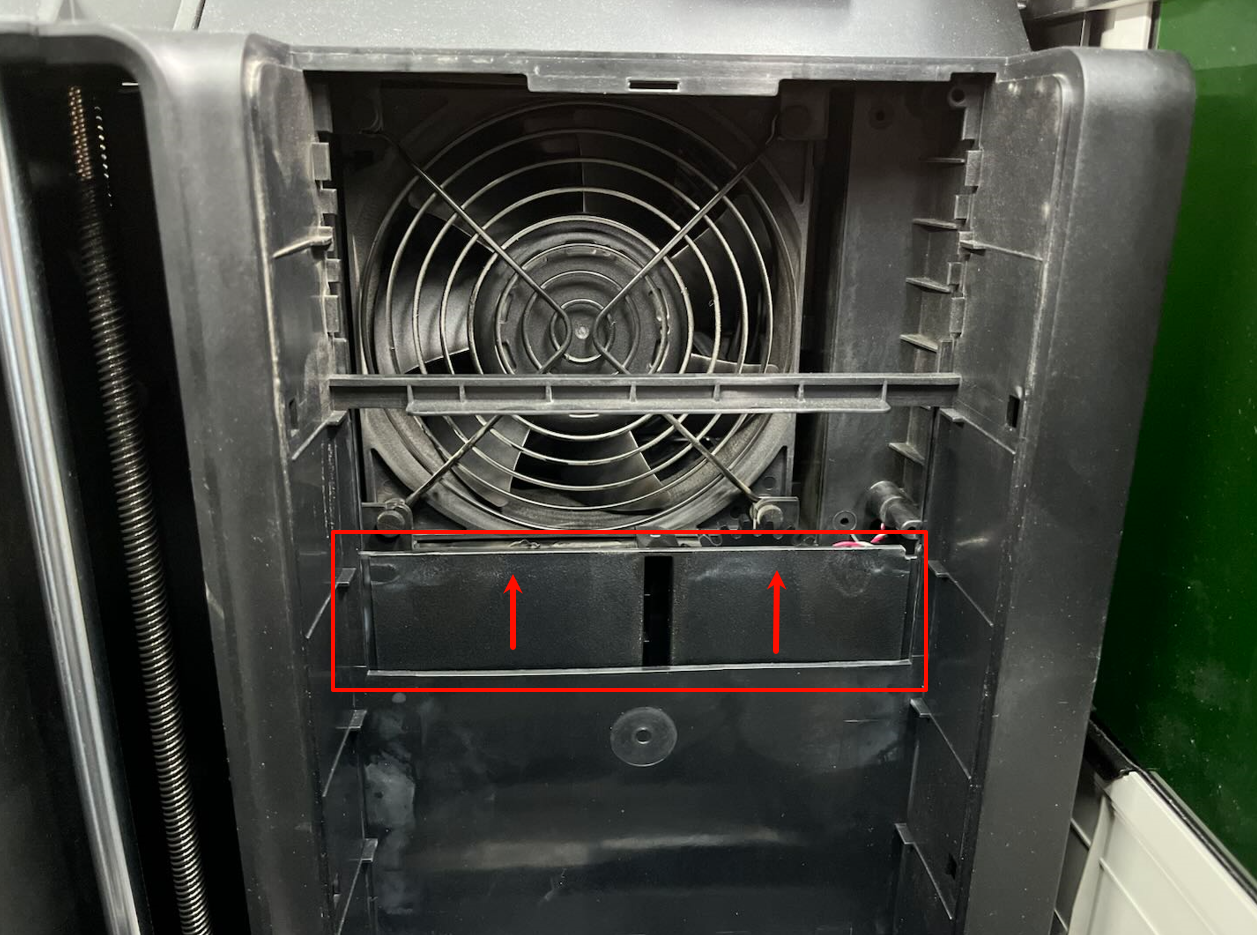
- You can check whether there are any foreign objects near the Filter Switch Flap that may prevent it from opening or closing properly. You can also try manually moving the Filter Switch Flap up and down to check if there is any abnormal resistance during the movement. If you find any foreign objects, please remove them and then try again to see if it works normally.

-
If, after removing the filter, you find that the Filter Switch Flap can automatically move up and down when the external exhaust fan and chamber temperature holding mode are activated, but its position does not match the illustration above (for example, the flap is positioned too high or too low), it may indicate that the gear position of the Filter Switch Flap is abnormal. In this case, please follow this guide to make the necessary adjustment. Calibrate Gear。
-
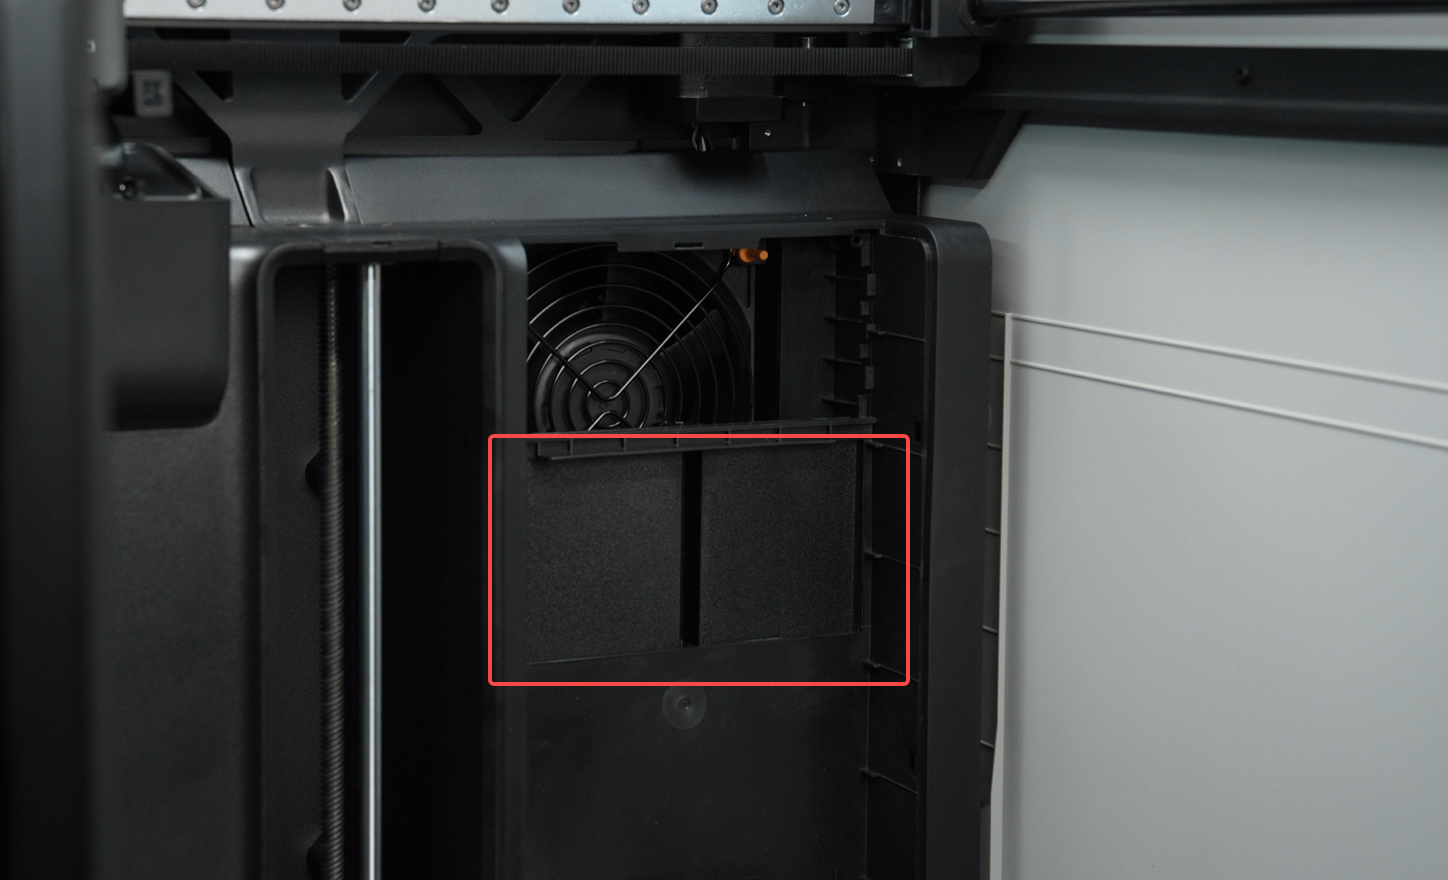
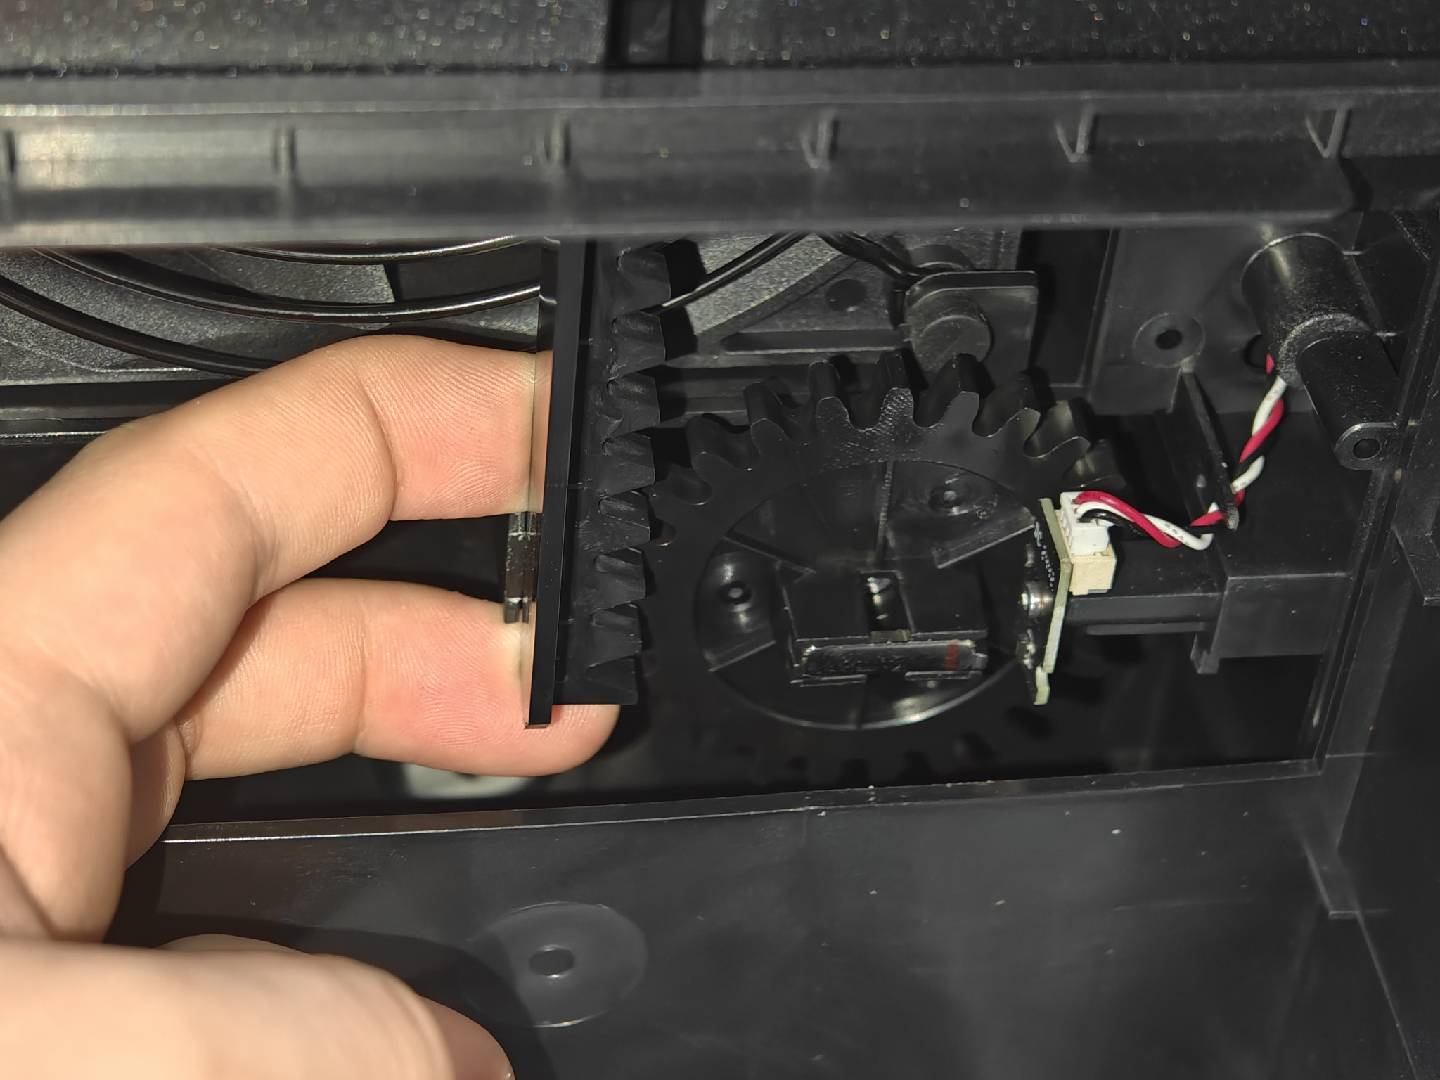
If the flap is in the special abnormal position shown in the illustration (too low), as shown below, please push it upward to manually reset it, then try enabling the external exhaust fan again to see if an error occurs.
If you feel abnormal resistance while pushing it upward, or if the Filter Switch Flap fails to lift automatically when switching to chamber temperature holding mode, the servo may be malfunctioning. Please follow the instructions at the end of this document to contact technical support, or consider replacing the servo motor。
- If the issue is caused by a damaged Filter Switch Flap, you can refer to this Wiki to replace the Filter Switch Flap: Replace H2D Right Inner Liner Upper Cover / Chamber Heater Assembly / Chamber Heating Circulation Fan
The spare parts for the chamber heating assembly include the Filter Switch Flap. If the Filter Switch Flap is damaged, it is recommended to replace the entire chamber heating assembly.
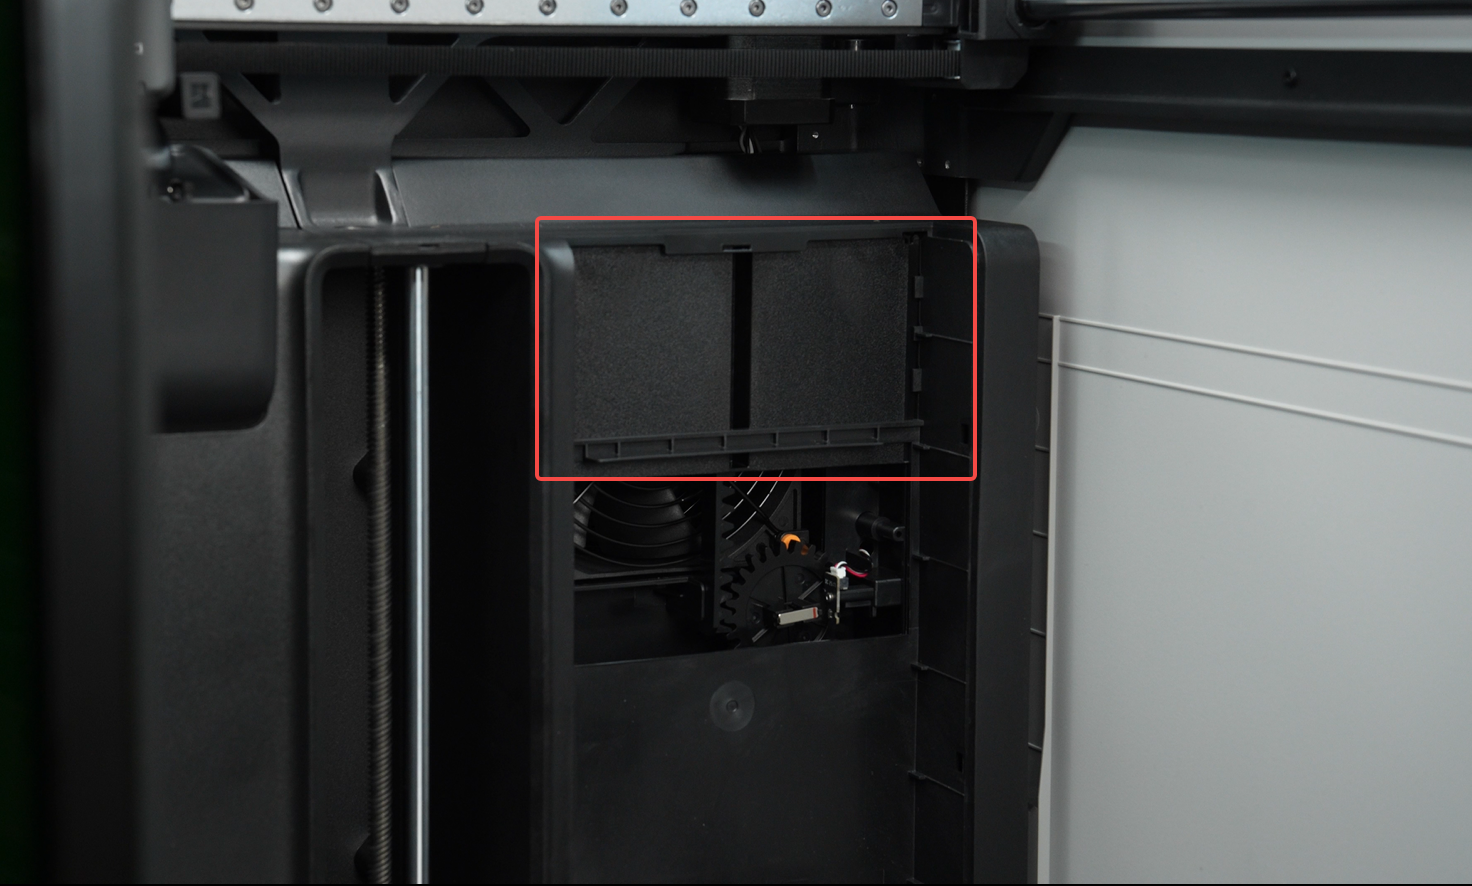
¶ Step 2: Check whether the servo, magnet, and Hall sensor board are functioning properly**
If, during the checks in Step 1, the Filter Switch Flap operates normally and manually moving the filter up and down does not encounter any abnormal resistance, yet you still experience one of the following two issues:
- The Filter Switch Flap can open and close, but an error still occurs.。
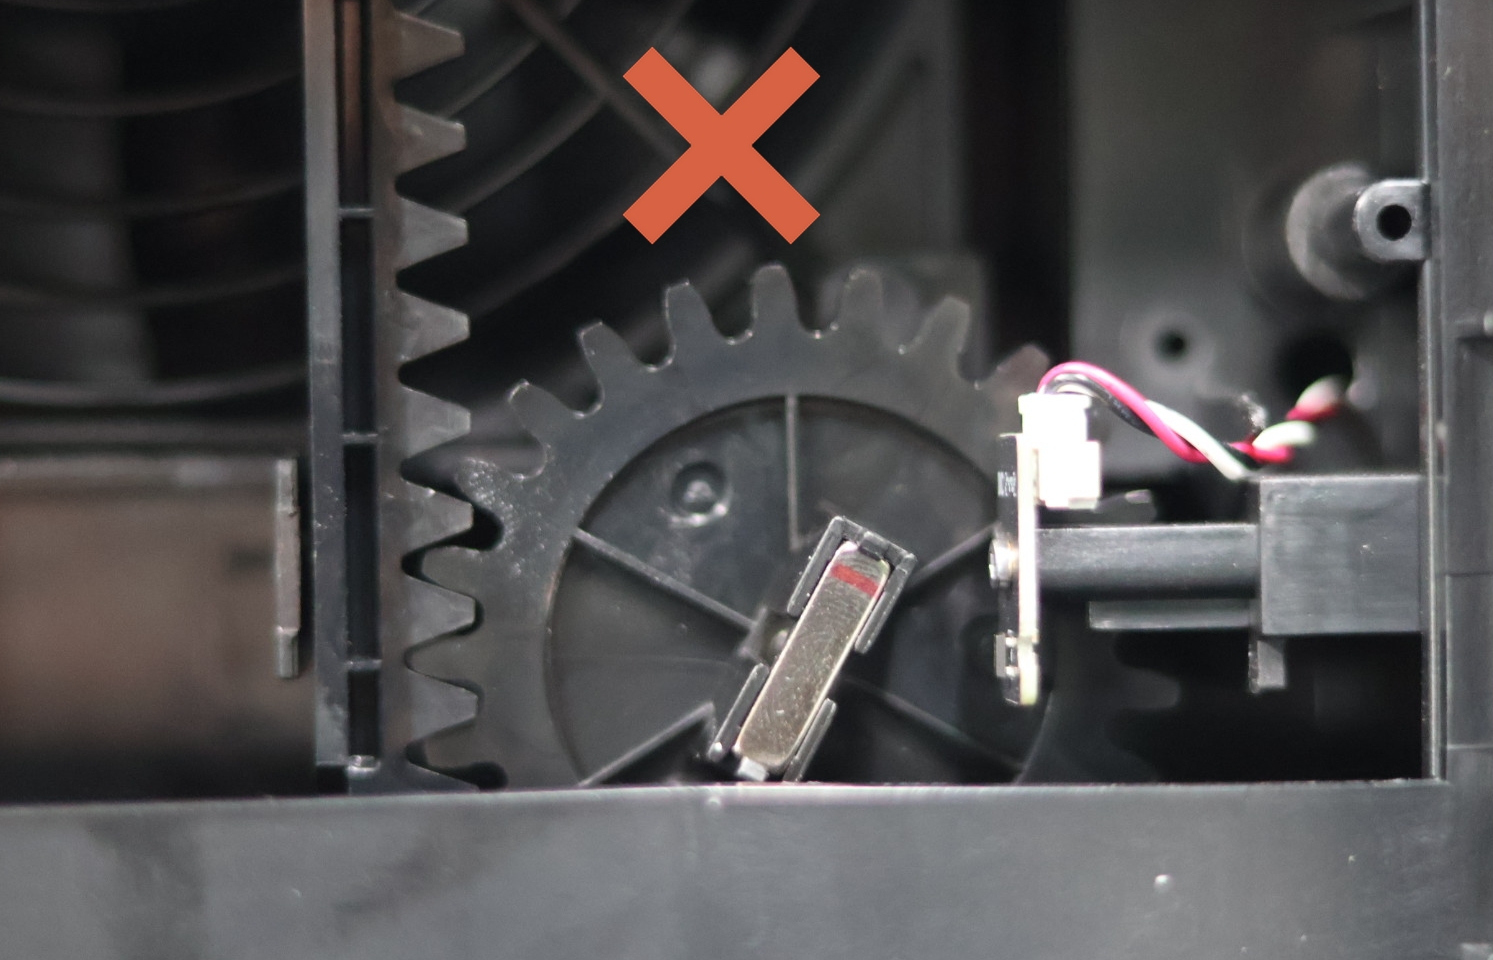
If the Filter Switch Flap can open and close but an error still occurs, the issue may be due to the magnet position or a malfunctioning Hall sensor or loose cable.
First, pay close attention to the magnet position. When the Filter Switch Flap is at the top of the right inner cover, one end of the magnet’s red-marked line should align with the position of the right-side Hall sensor board.
 |
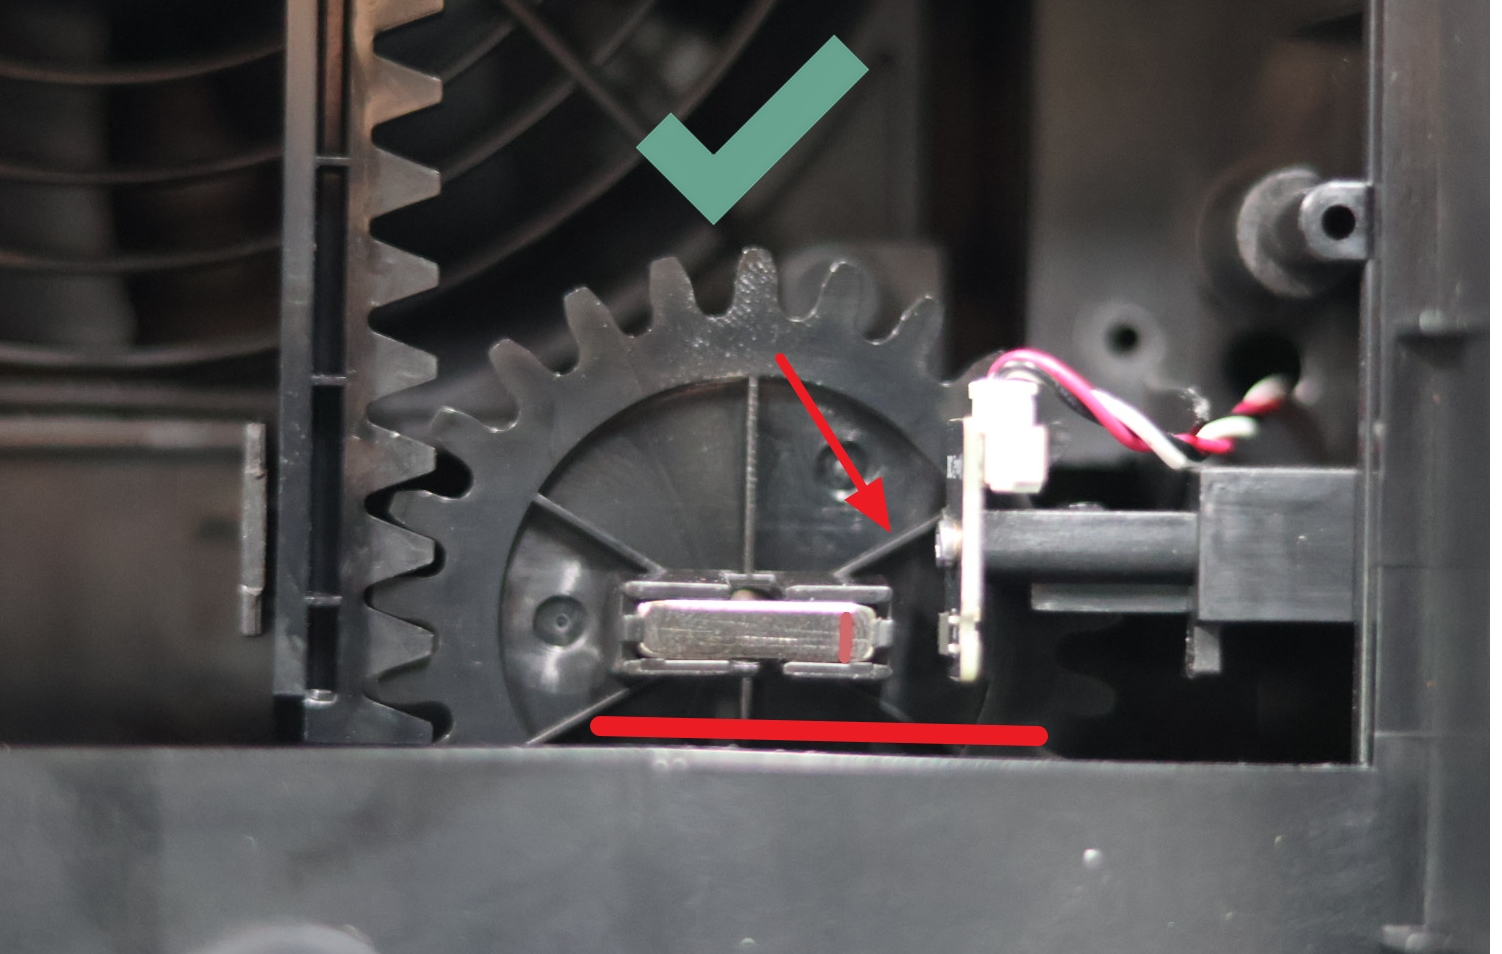 |
| Error: In Heating Mode, the magnet is not in a horizontal position. | Correct: In Heating Mode, the magnet remains horizontal with the red line facing the Hall sensor board. |
If the magnet orientation (gear position) is abnormal, you can refer to the following instructions to recalibrate the rack position.
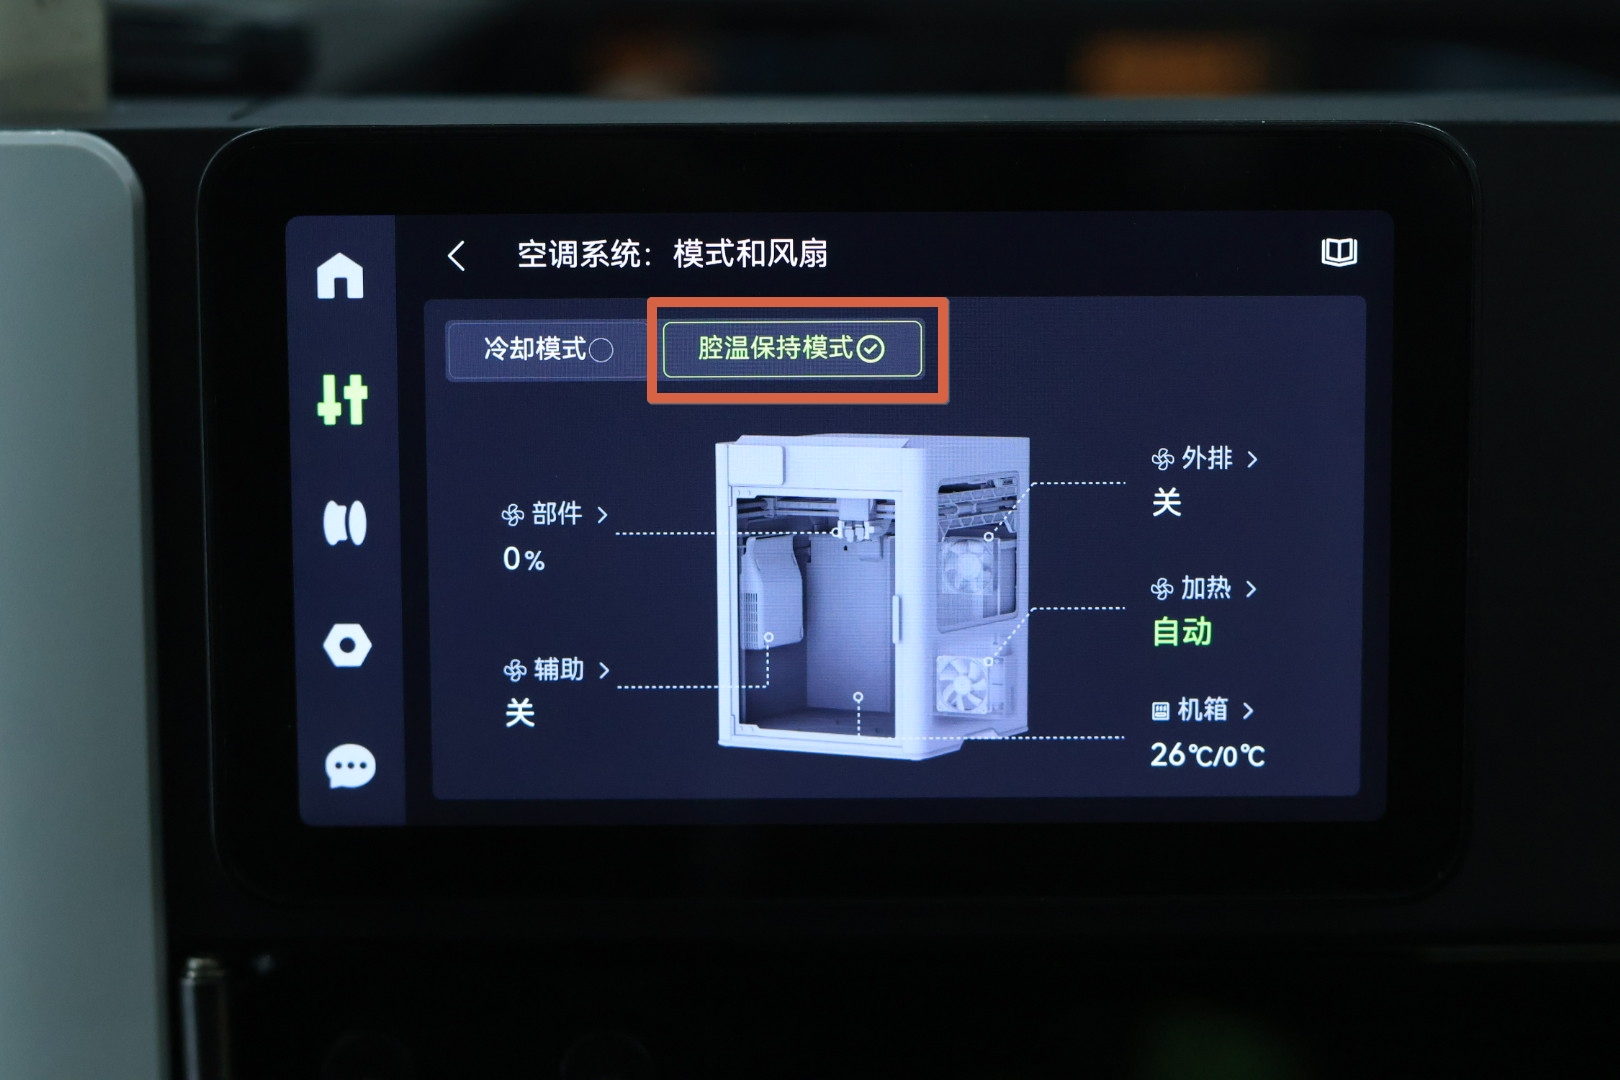
As mentioned earlier, when entering Chamber Temperature Hold Mode, the Active Chamber Exhaust Grille will close, and the Filter Switch Flap will be raised to the upward position. You can use this raised position of the flap to perform the gear calibration.
|
 |
|---|
Manually push the Filter Switch Flap to its topmost position, slightly lift the rack to disconnect the engagement between the main gear and the flap rack, then tap the screen to switch to “Chamber Heating Mode.” At this point, the servo and main gear will rotate to a specific angle, with the magnet’s red line facing right.
 |
 |
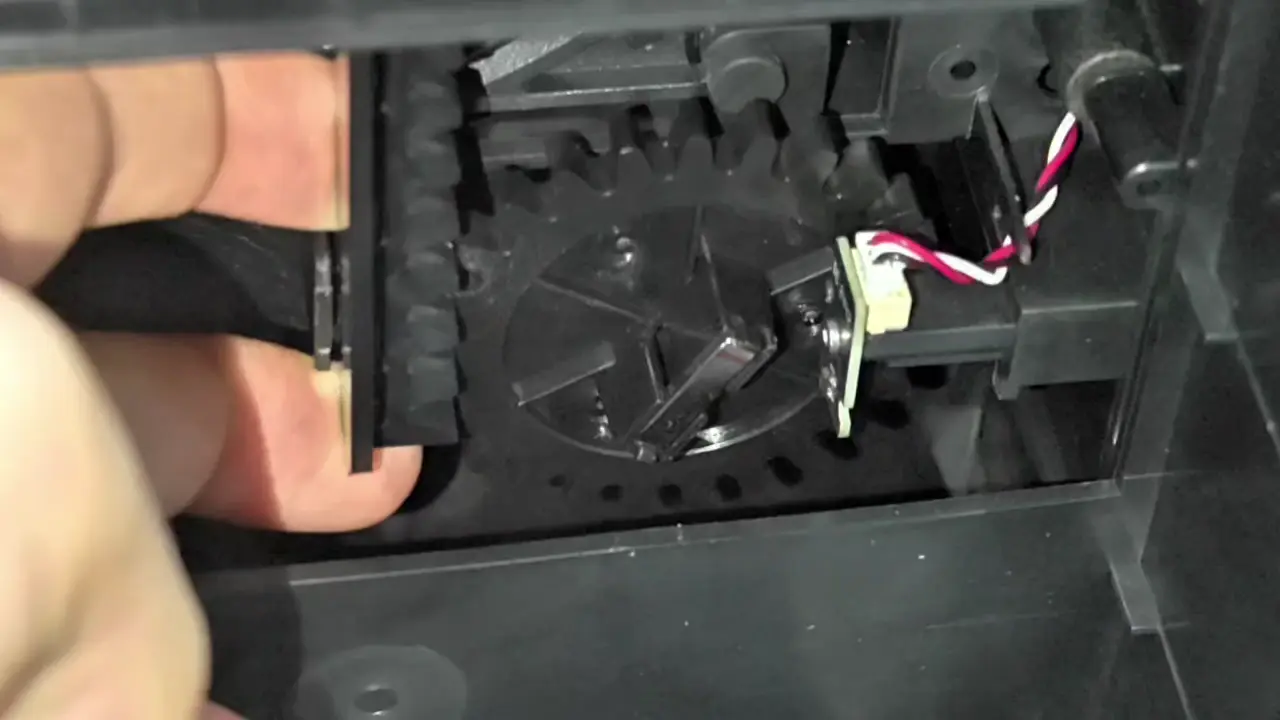
At this point, release the rack so that it fully engages with the gear to complete the calibration.
- Filter Switch Flap cannot open/close:
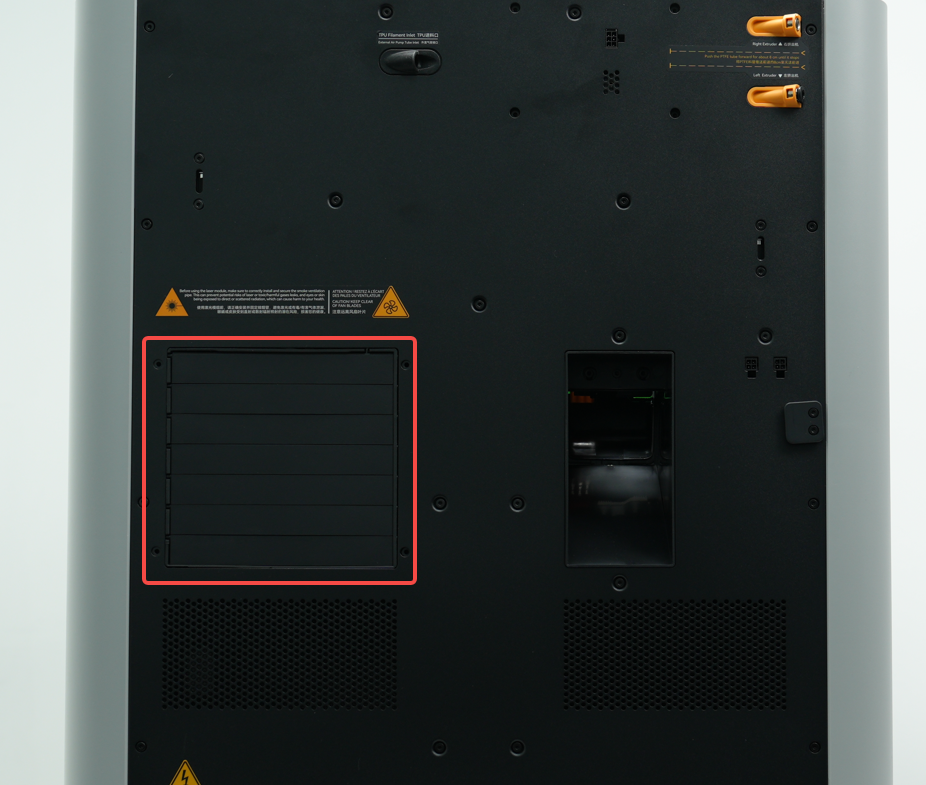
You can first refer to this Wiki to remove the printer back panel and the waste chute:
Replacing H2D Purege Chute
Then, refer to the figure below to check whether the servo connection cable is functioning properly. The servo cable and the Hall sensor cable share a single connector to the MC board. If the connection is loose, it is recommended to reconnect it firmly and try again to see if normal operation is restored:
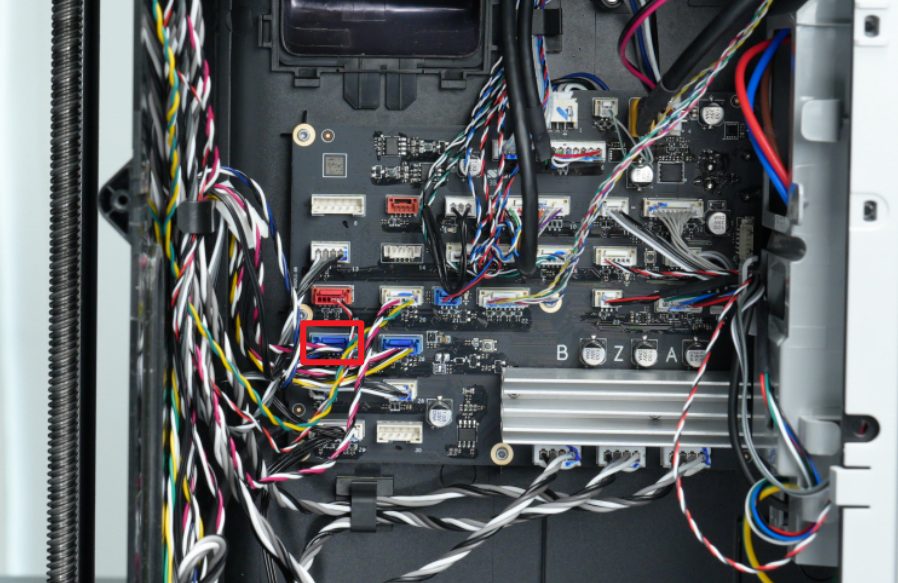
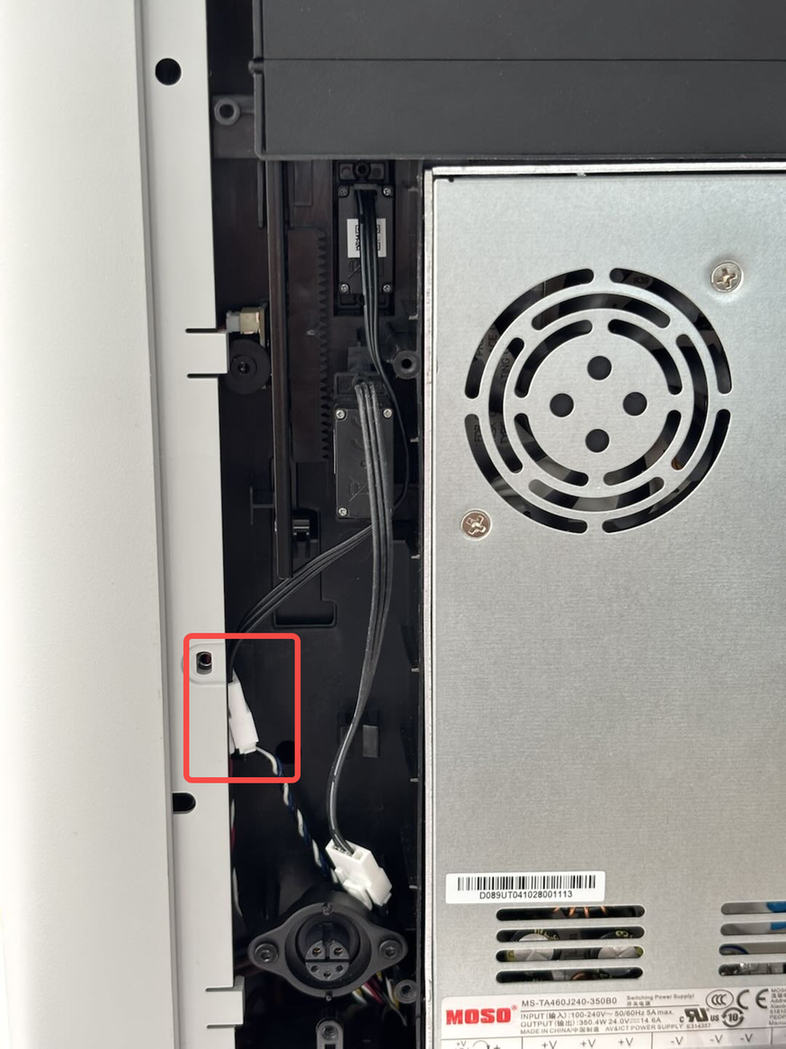
If the connection cable is firmly seated but the Filter Switch Flap still cannot open/close, the servo may be malfunctioning. You can refer to this Wiki to replace the right inner cover: Replacing H2D Right Inner Cover/Chamber Heating Assembly/Chamber Heating Circulation Fan
The spare parts for the right inner cover include the servo and Hall sensor components related to the Filter Switch Flap.
¶ End Notes
We hope the detailed guide provided has been helpful and informative.
If this guide does not solve your problem, please submit a technical ticket, will answer your questions and provide assistance.
If you have any suggestions or feedback on this Wiki, please leave a message in the comment area. Thank you for your support and attention!