¶ Issue Description
The vertical movement of the left hotend is driven by the lifting motor. During the extruder switching process, if the system detects a disconnection of the lifting motor, it will trigger an alert.

Possible causes of this issue include:
-
MC-TH cable connector is loose
-
Loose connection between the lifting motor's FPC and the TH connection board.
-
Broken FPC of the lifting motor or a faulty lifting motor.
-
Loose FPC connection on the TH connection board.
-
Faulty TH connection board.
¶ Troubleshooting
Before disassembling the toolhead, ensure the printer is powered off.
¶ Tools, Equipment, and Materials
-
H2.0 Allen key
-
Tweezers
¶ Fault Isolation Process
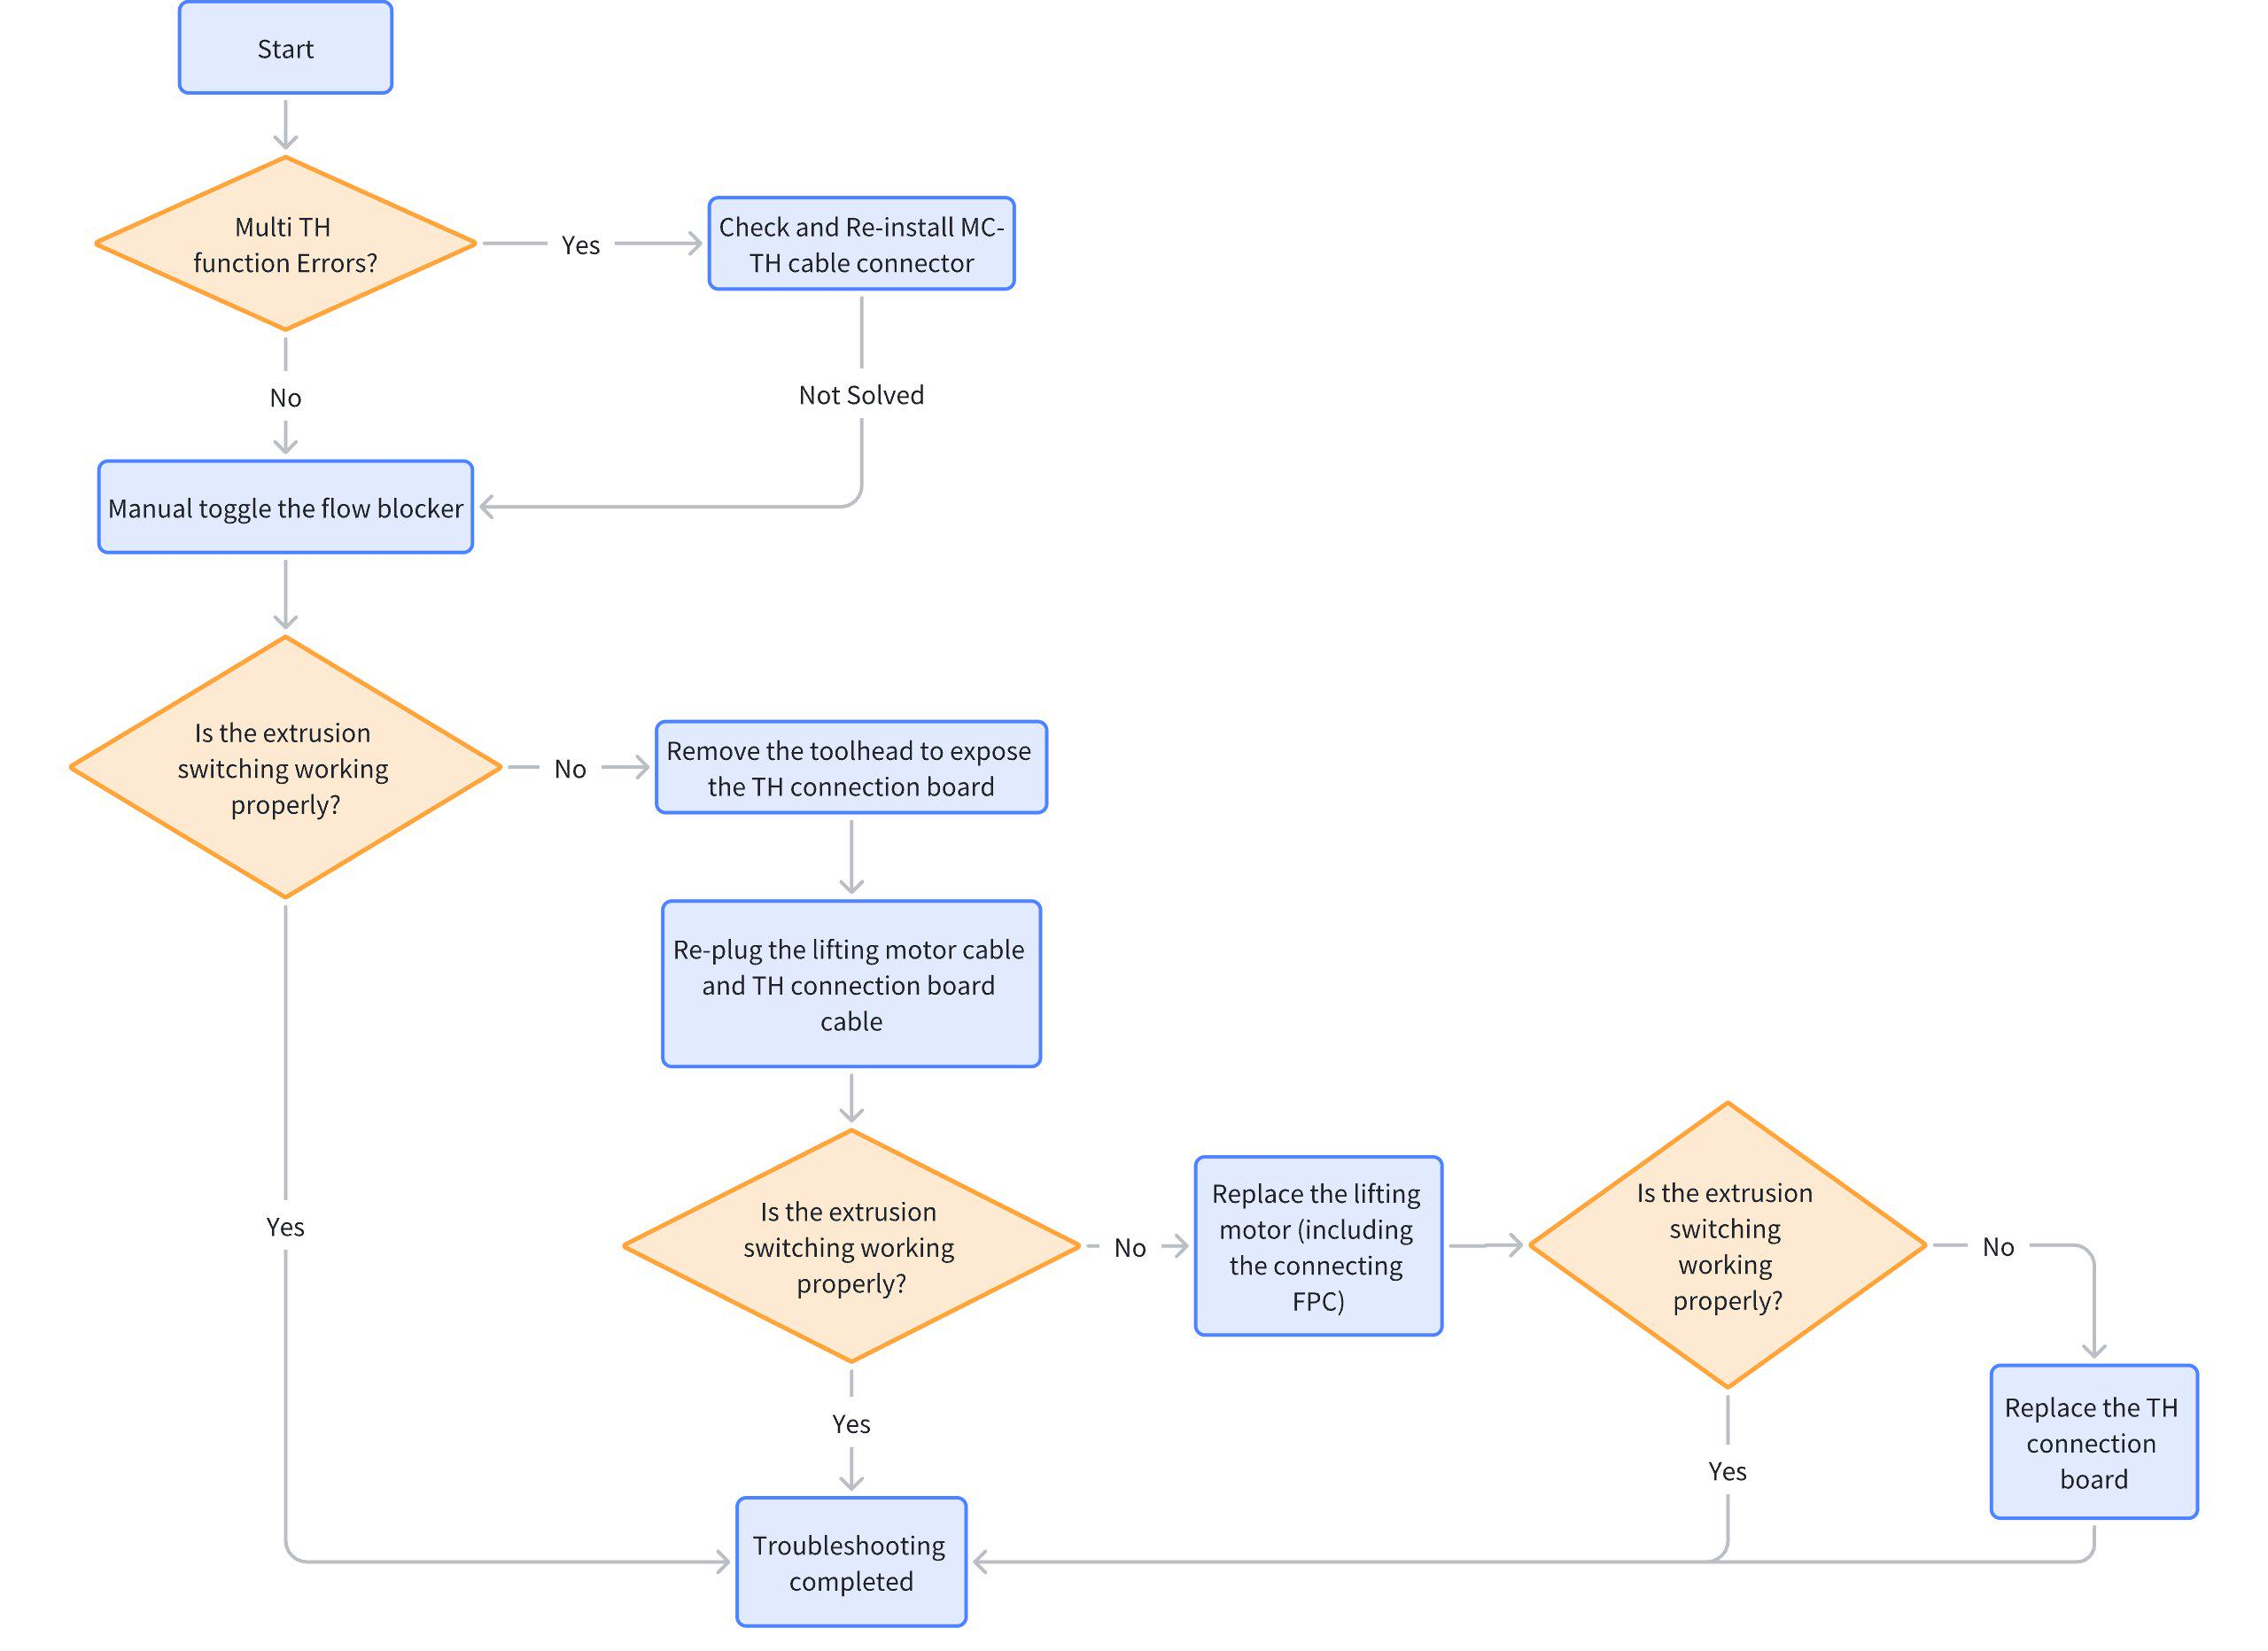
¶ Solutions
Users may adjust the order of these solutions as needed.
¶ Step 1: Check for Simultaneous Malfunctions in Multiple ToolHead Functions
Check if the following conditions occur at the same time:
- Despite a consumable being clearly inserted into the tool head, both feed detection indicator lights are off, or the feed indicator lights are flashing at a high frequency.
- HMS alarm indicating a toolhead module malfunction
If both conditions are present, it suggests that the connection cable between the MC board and the TH board may be loose or experiencing poor contact. Please refer to Step 2 for inspection.
If not, proceed to Step 3.
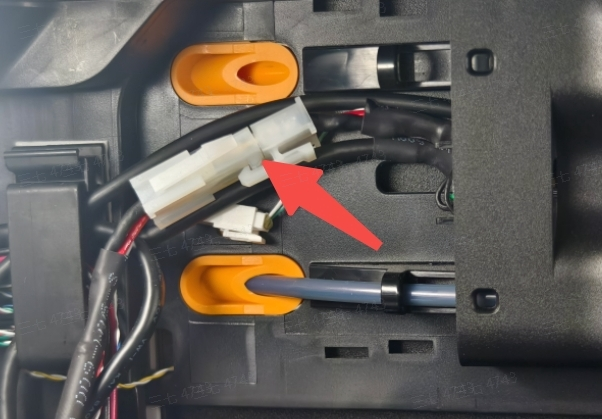
¶ Step 2: Check for Loose Connection Between the MC Board and the TH Board
Refer to Wiki - Replacing the AP Board. Remove the AP board cover and inspect the latch of the MC-TH cable connector to see if it is loose. If so, please reconnect it with the power off.
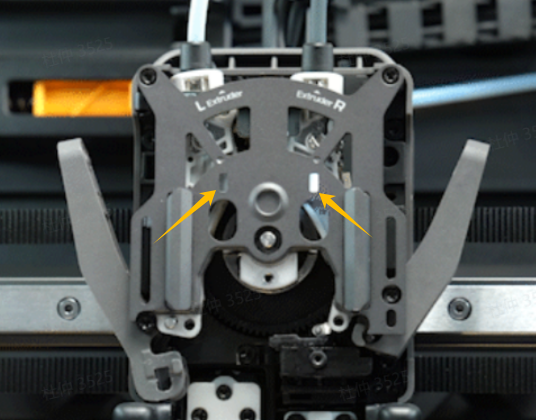
¶ Step 3. Manually adjust the flow blocker and retry extruder switching
-
Manually adjust the flow blocker to eliminate any mechanical jamming in the lifting mechanism.
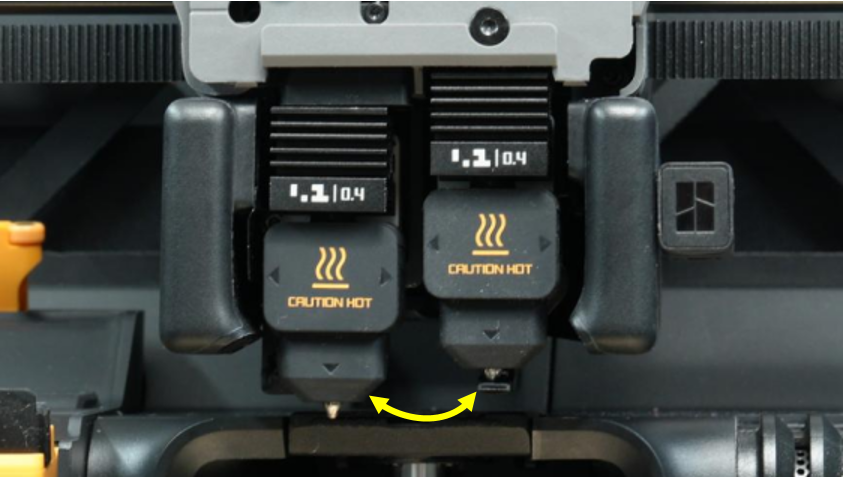
-
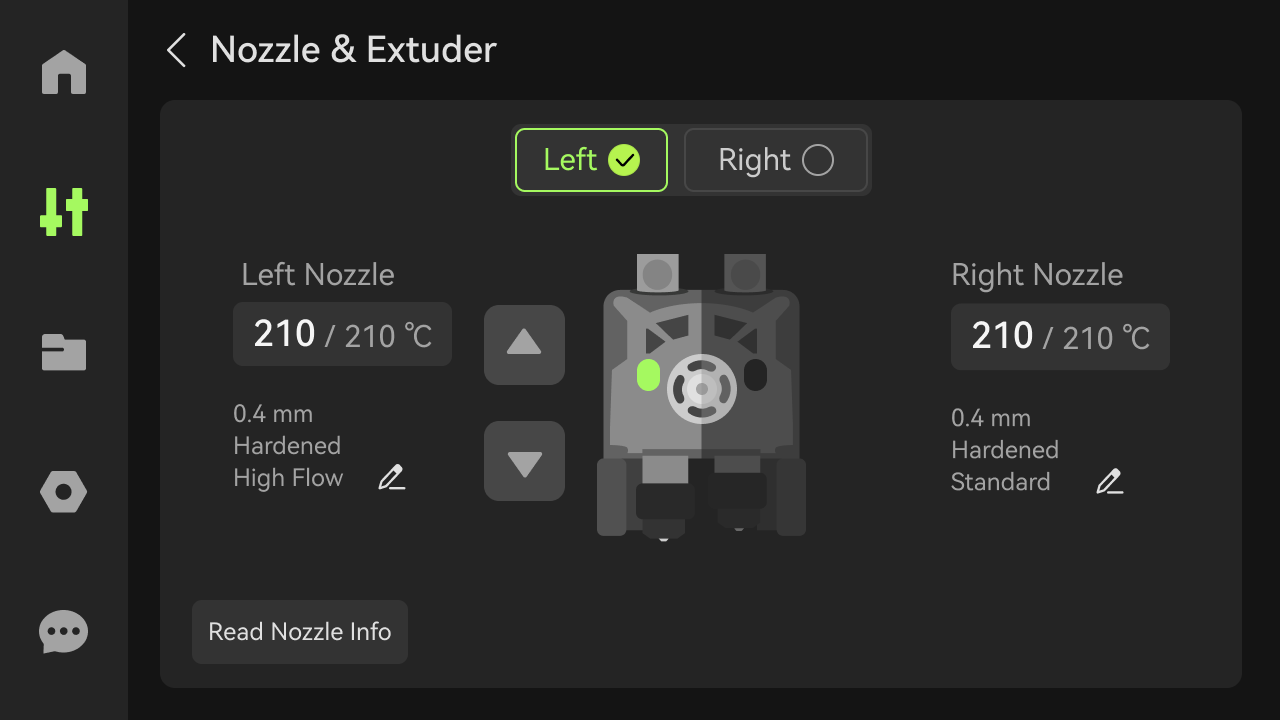
Go to the Nozzle & Extruder module on the screen, click on the left or right extruder, and retry the extruder switching.

If successful, troubleshooting ends. If the switching still fails, proceed to Step 4.
¶ Step 4. Disassemble the toolhead to expose the TH connection board
Follow Steps 1 to 4 in the Wiki * Disassemble the H2D toolhead to remove the hotend, part cooling fan, and its duct, exposing the TH connection board.
¶ Step 5. Check for loose connections
Inspect the connections between the lifting motor's FPC and the TH connection board, as well as the FPC on the TH connection board.
-
If loose, reconnect them. Proceed to Step 6.
-
If not loose, proceed to Step 7.
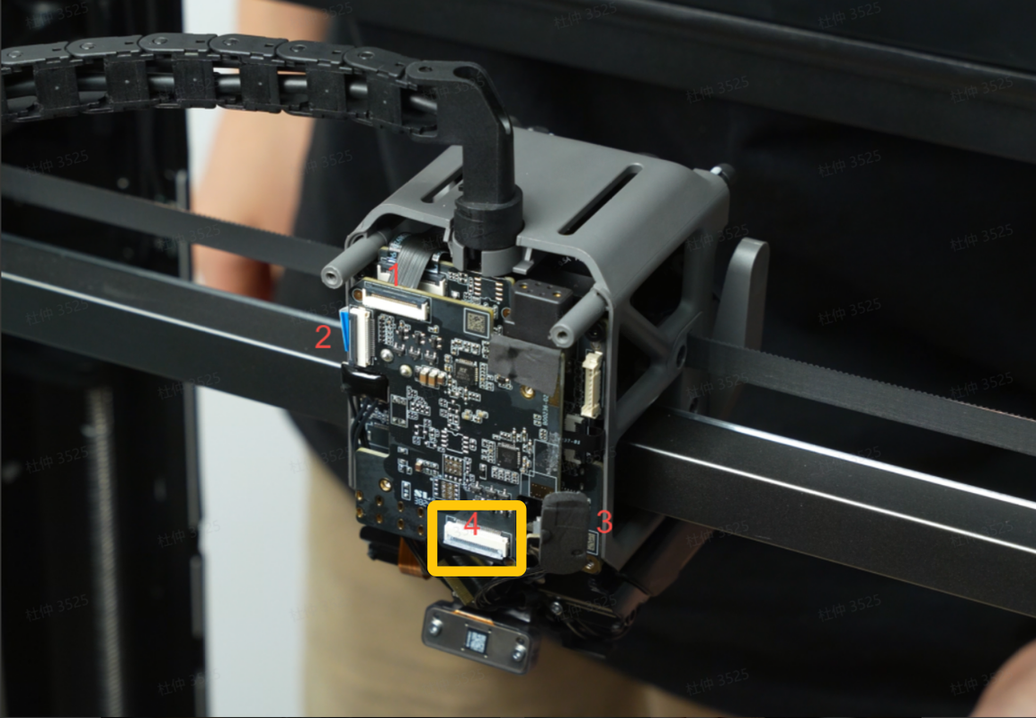
2 - TH board connector interface 4 - lifting motor signal line interface
¶ Step 6. Test extruder switching to check if the lifting servo motor functions normally
-
Power on the printer.
-
Go to the Nozzle & Extruder module on the screen, click on the left or right extruder, and retry the extruder switching.
-
If successful, troubleshooting ends. Proceed to Step 9.
-
If the switching still fails, proceed to Step 7.
-
¶ Step 7. Replace the lifting motor
-
Power off the printer.
-
Follow Steps 1 to 11 in the Wiki Disassemble the H2D toolhead to remove the lifting motor.
-
Follow Steps 27 to 34 in the Wiki Disassemble the H2D toolhead to install the lifting motor and electronic components.
-
Test if the extruder switching is normal.
-
If the test still fails, proceed to Step 8.
-
If the test is successful, proceed to Step 9.
-
Note: If the Hall sensor of the lifting motor is replaced, perform toolhead position calibration after reassembling the toolhead.
¶ Step 8. Replace the TH connection board
Follow Steps 1 to 4 in the Wiki Disassemble the H2D toolhead to replace the TH connection board.
¶ Step 9. Reassemble the toolhead
Follow Steps 35 to 37 in the Wiki Disassemble the H2D toolhead to install the remaining components of the toolhead.
If the above solutions do not resolve the issue, submit a ticket and upload the printer’s log files.
¶ Equivalent Codes
The following HMS codes represent the same type of issue.
| HMS Code | Description |
|---|---|
| 07FE-8000-0001-0001 | The toolhead lift motor works abnormally. Please check whether the connecting cable is loose. |
| 07FF-8000-0001-0001 | The toolhead lift motor works abnormally. Please check whether the connecting cable is loose. |
| 18FE-8000-0001-0001 | The toolhead lift motor works abnormally. Please check whether the connecting cable is loose. |
| 18FF-8000-0001-0001 | The toolhead lift motor works abnormally. Please check whether the connecting cable is loose. |
¶ End Notes
We hope the detailed guide provided has been helpful and informative.
If this guide does not solve your problem, please submit a technical ticket, will answer your questions and provide assistance.
If you have any suggestions or feedback on this Wiki, please leave a message in the comment area. Thank you for your support and attention!