¶ When to use?
You can follow this article if you have problems like:
- Issues with Bed Leveling consistency or failures.
- Extrusion force sensor errors or signal problems.
- Other problems related to the hotend sensors.
¶ Homing & Leveling
Printer Homing: The X, Y, and Z axes determine the zero-point coordinates of the toolhead in 3D space by detecting the limits of each axis. During the homing process, the X-axis (toolhead movement) and Y-axis rely on their respective motors to detect the load and determine if they have reached their movement boundaries. For the Z-axis homing, the toolhead descends, allowing the nozzle to touch the heatbed, and the eddy current sensor detects if the nozzle has made contact with the heatbed.
Printer Leveling: Leveling compensates for distance fluctuations between the nozzle and the heatbed caused by an uneven heatbed or misalignment during assembly, ensuring that the distance between the nozzle and the heatbed is as consistent as possible across different positions on the heatbed for better first-layer print quality.
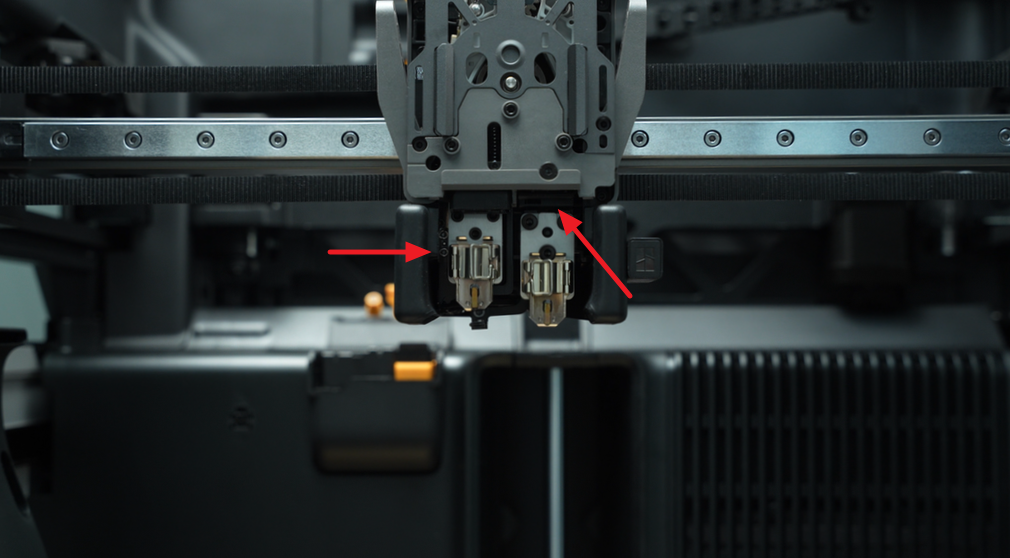
The homing and leveling functions of the printer primarily rely on two eddy current sensors: the left eddy current sensor is located behind the heating component, and the right eddy current sensor is positioned above the heating component.
¶ Problem Phenomena
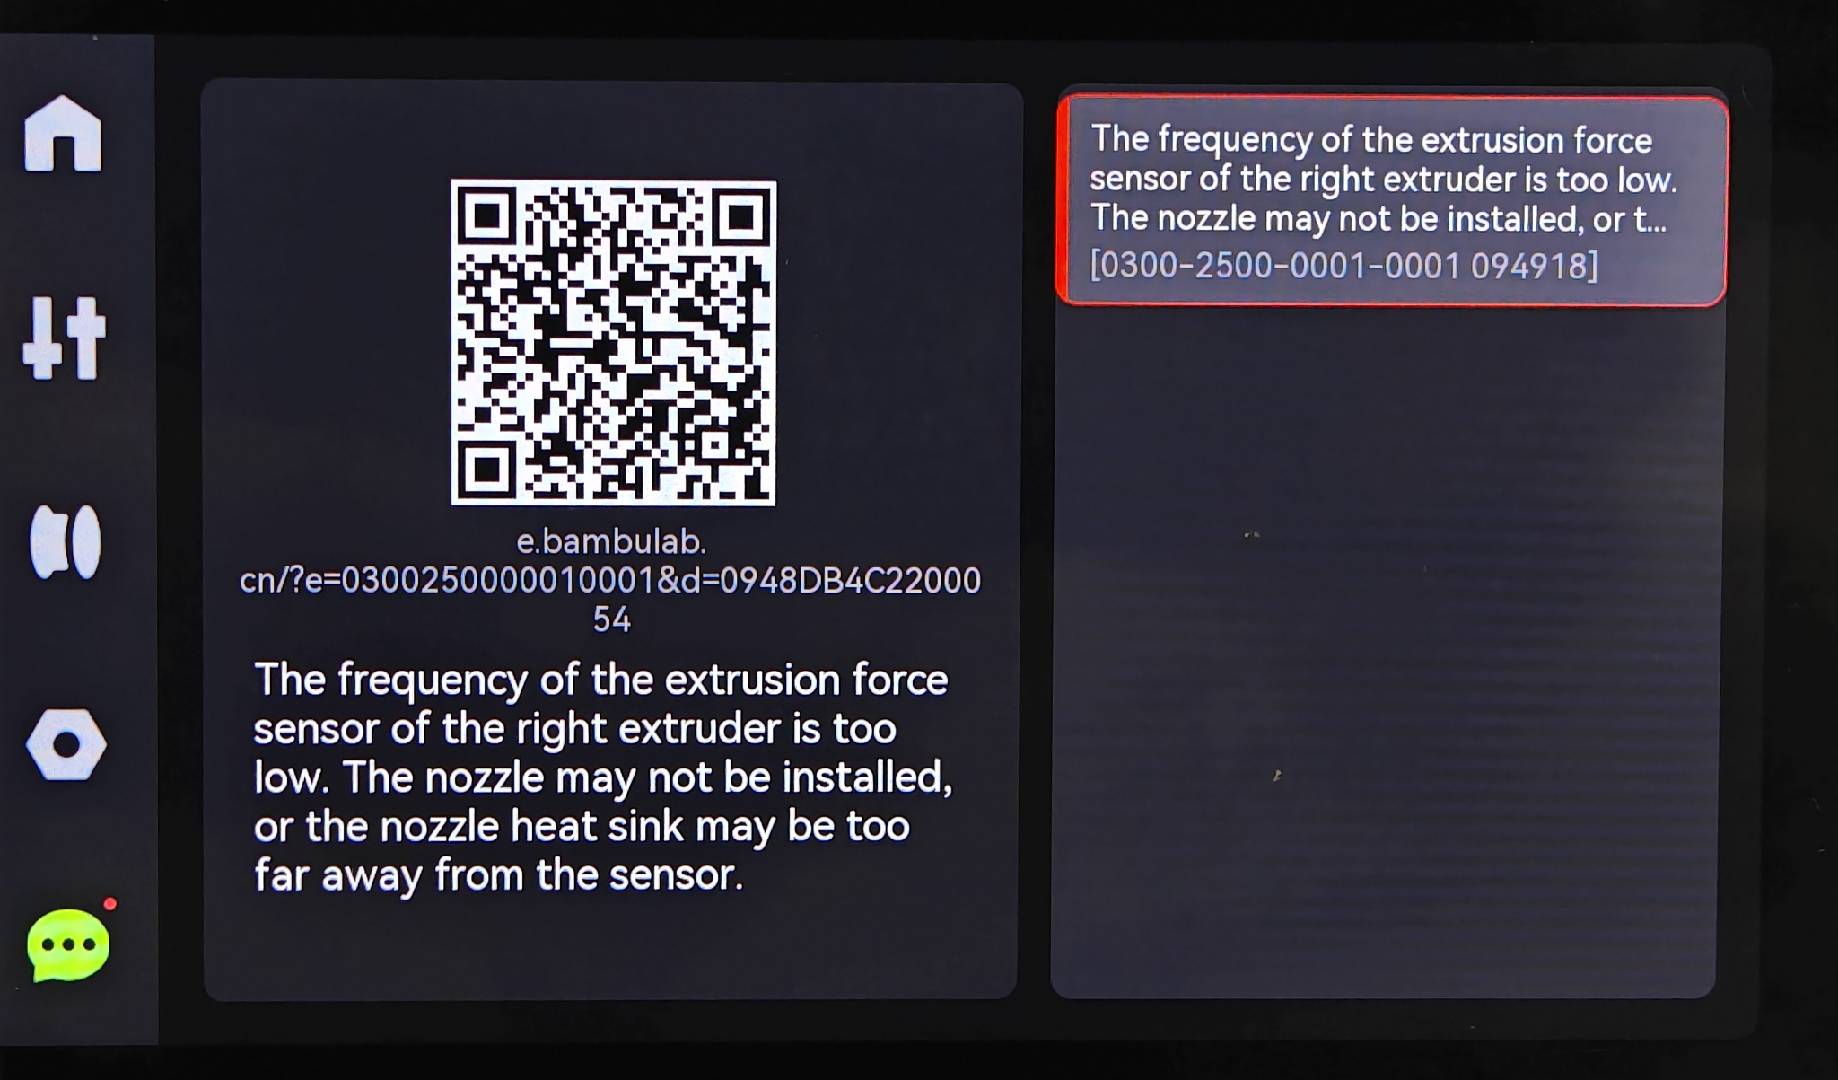
Common homing error messages include "Extrusion Force Sensor Frequency Too Low" or "Frequency Too High", which typically indicate abnormal nozzle position or sensor position.
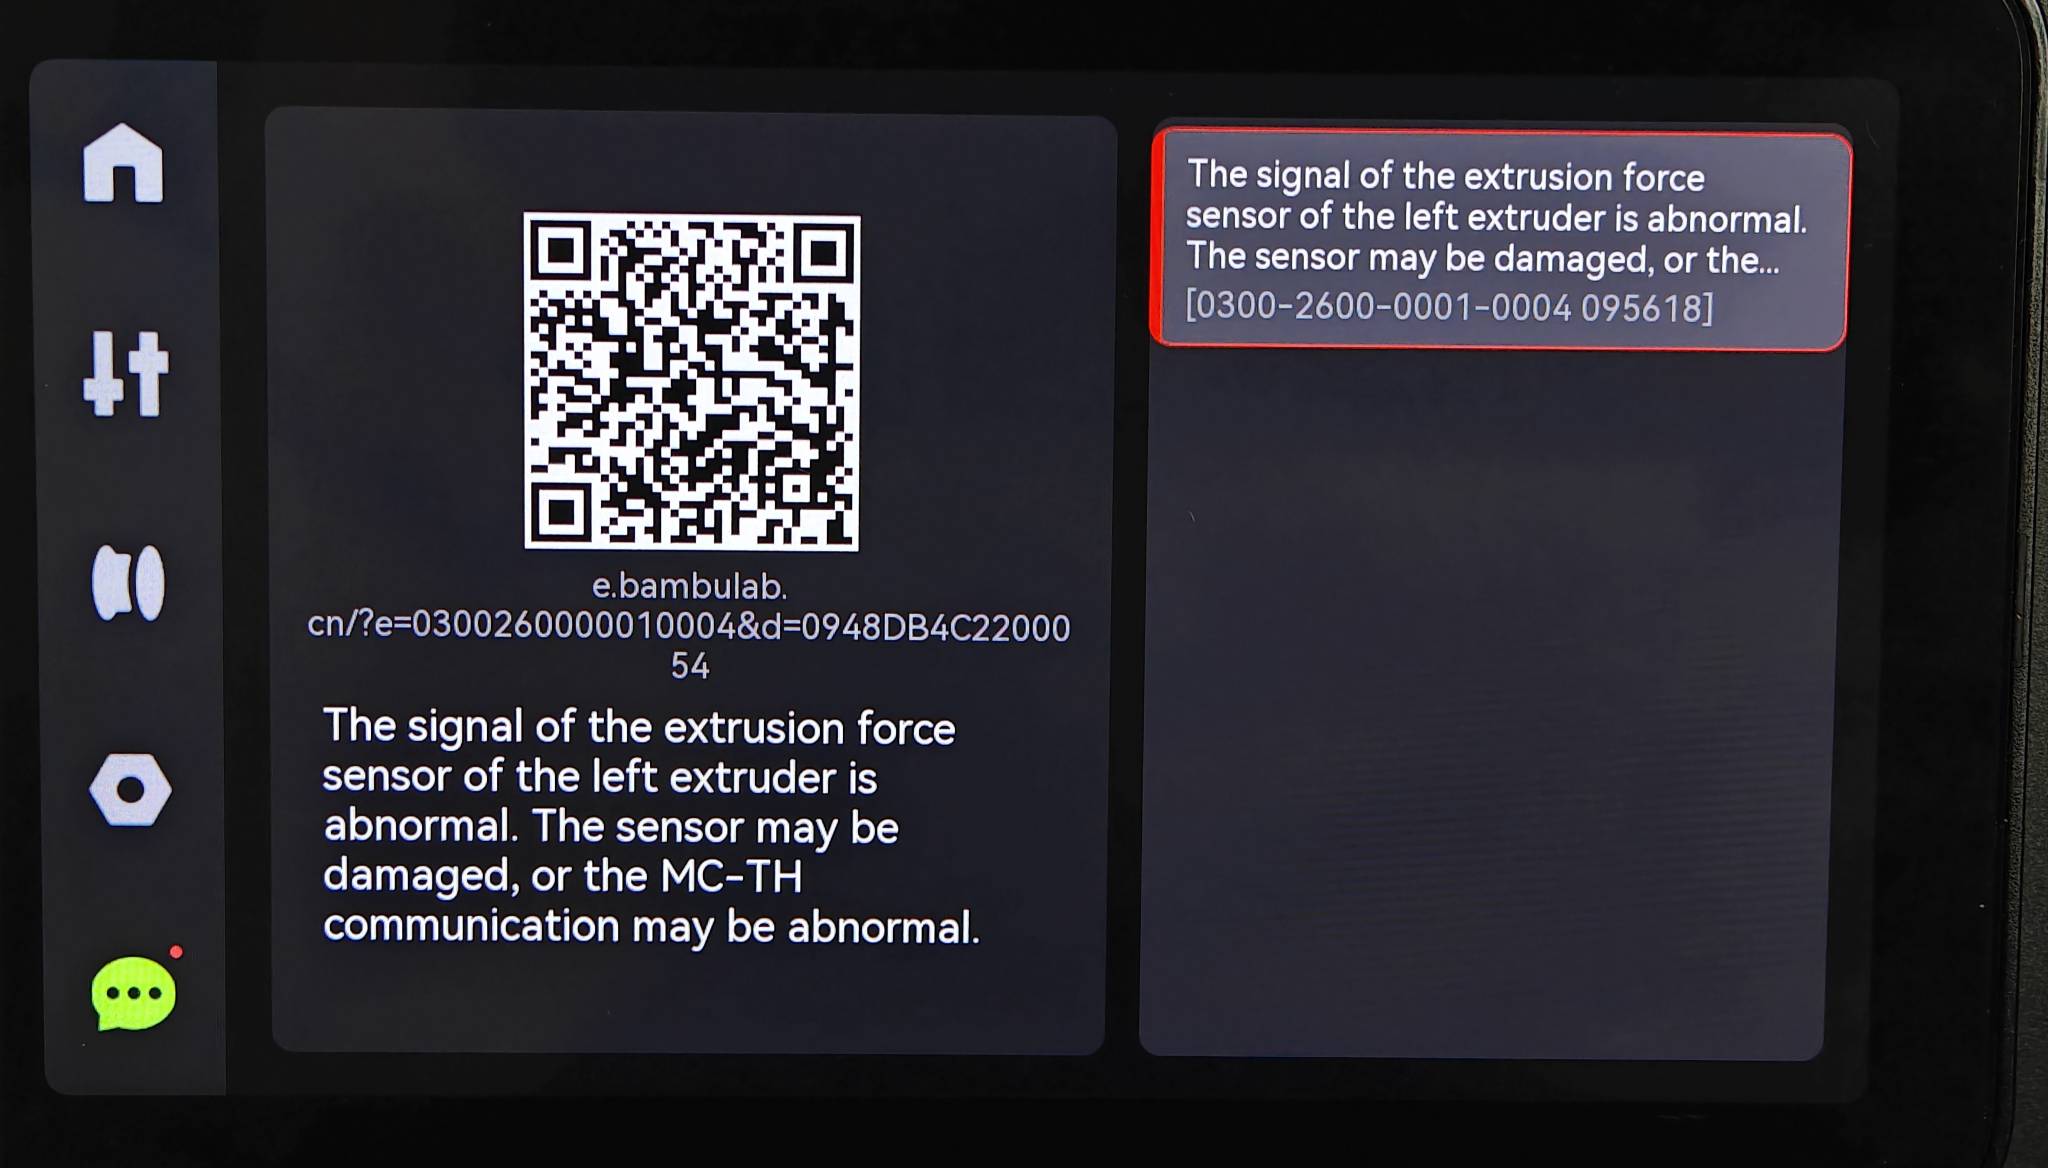
When the error message "Abnormal Extruder Force Sensor Signal" appears, it may be due to poor connector contact or a damaged eddy current sensor.
If both the left and right nozzles fail to home properly, it is more likely caused by abnormal MC-TH communication.If both the left and right
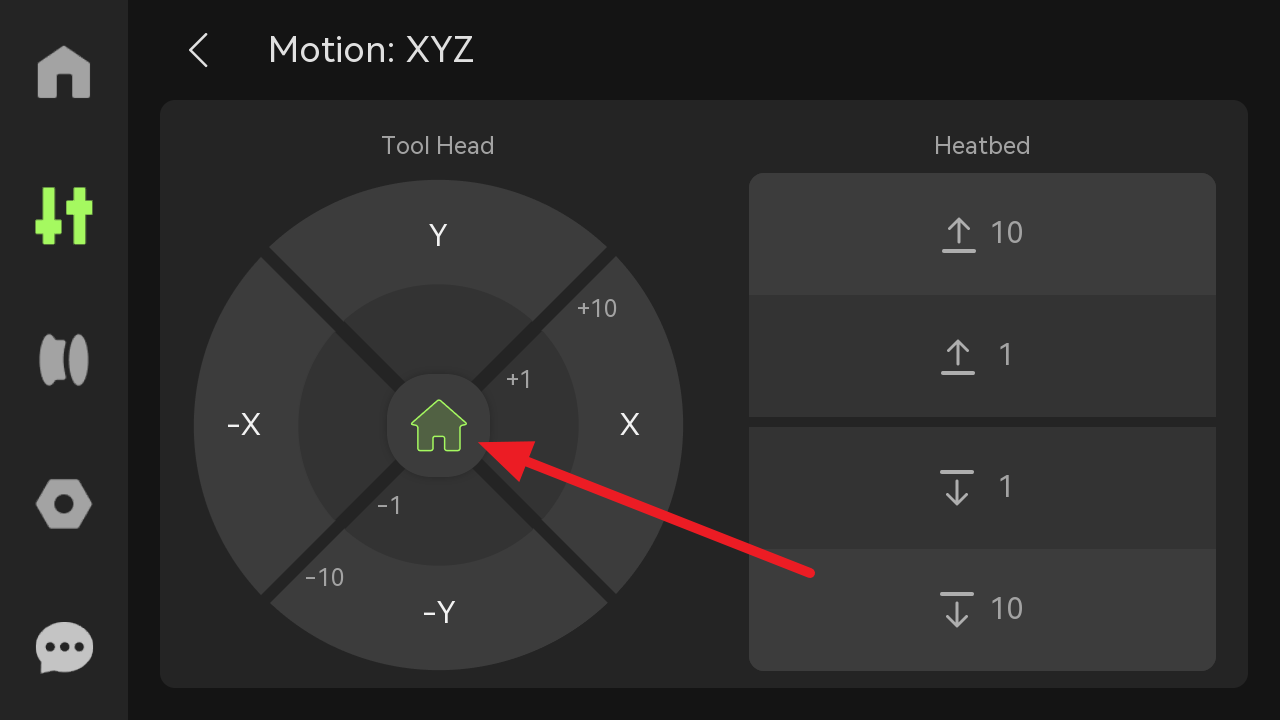
Note: When executing a homing operation on the screen, Bambu Studio, or Handy, the nozzle temperature must not exceed 140°C. If the nozzle temperature is high, the printer will prioritize XY-axis homing. After the nozzle temperature drops to 140°C, it will descend the nozzle to touch the heatbed for Z-axis homing.
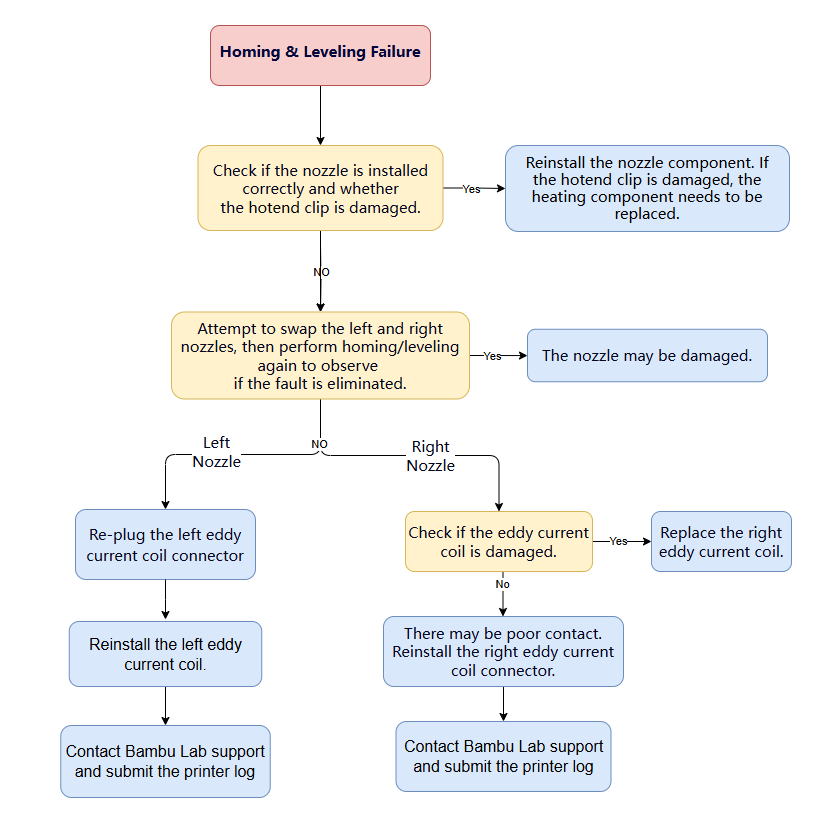
¶ Troubleshooting Process
¶ Detailed Troubleshooting Steps
¶ Check Nozzle Installation Status
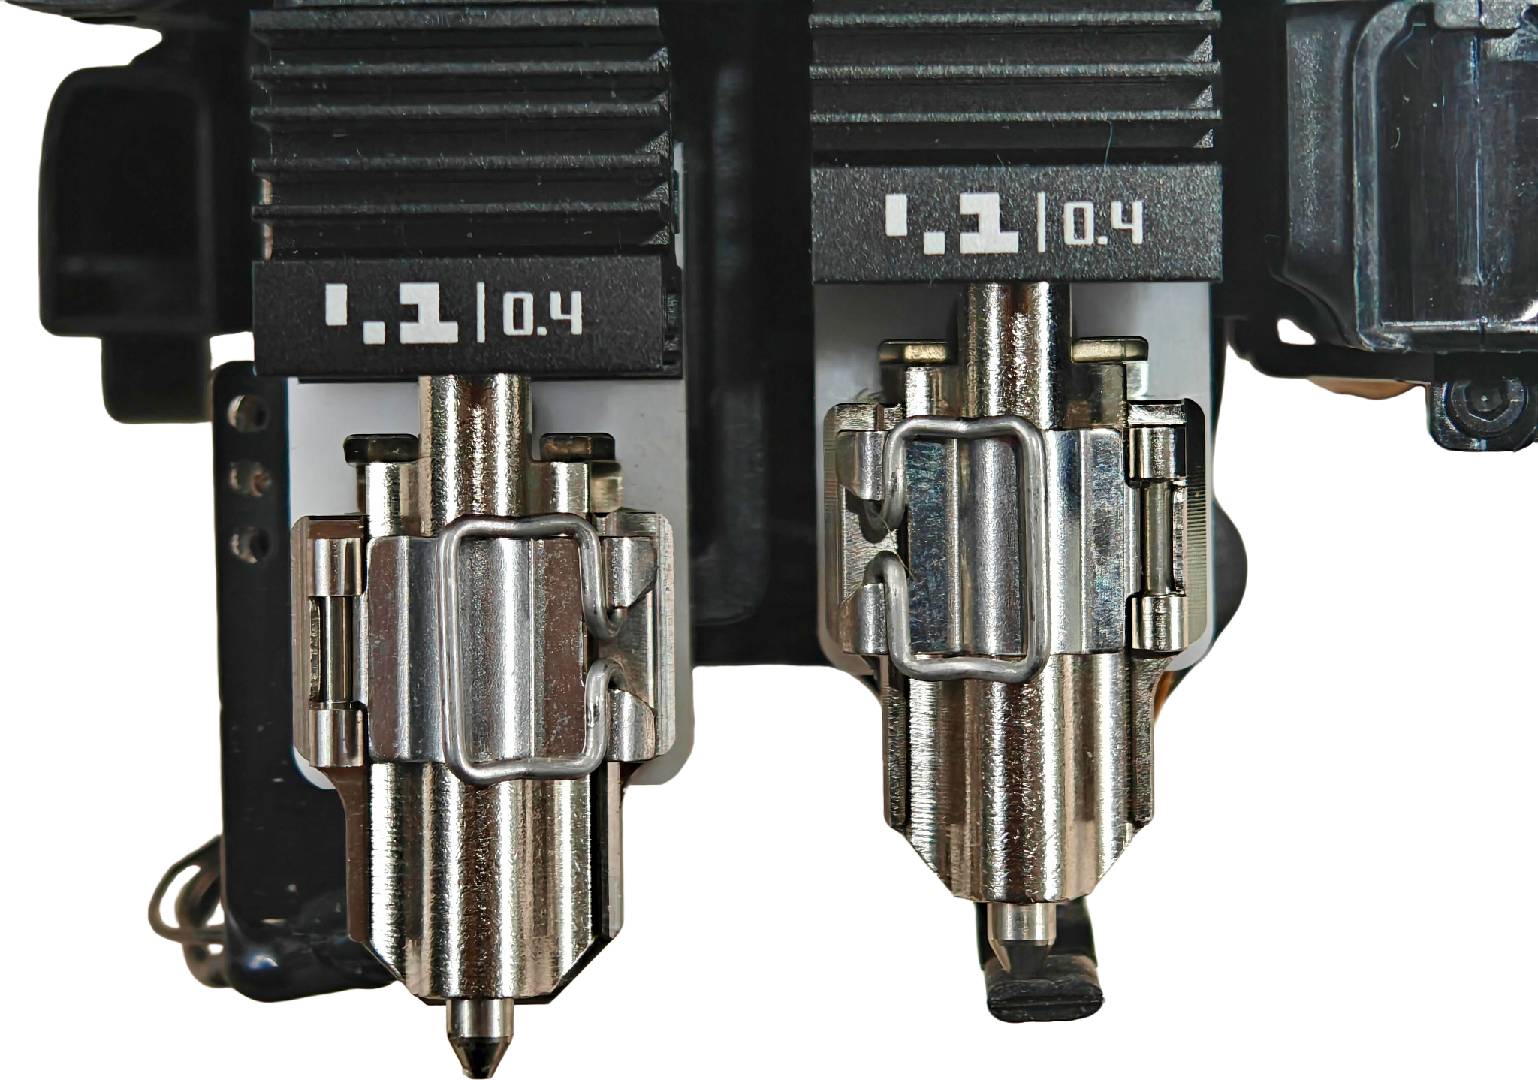
Please ensure that the nozzle is tightly fitted with the heater block and that the hotend clip is secured to prevent any looseness in the hotend.
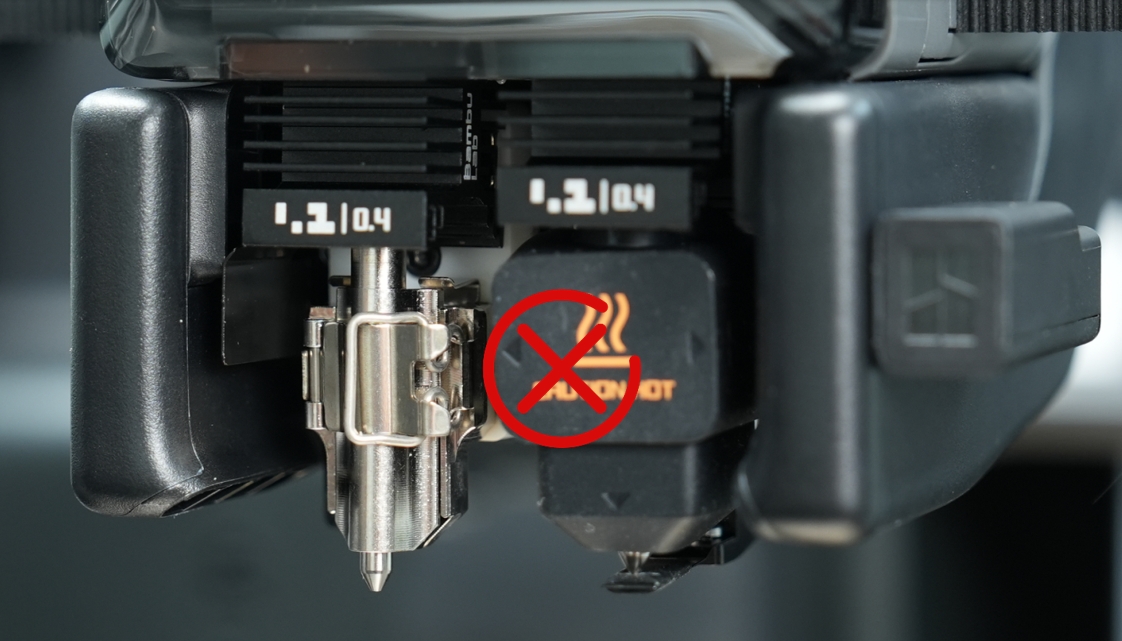 Hotend clip incorrectly locks the nozzle. |
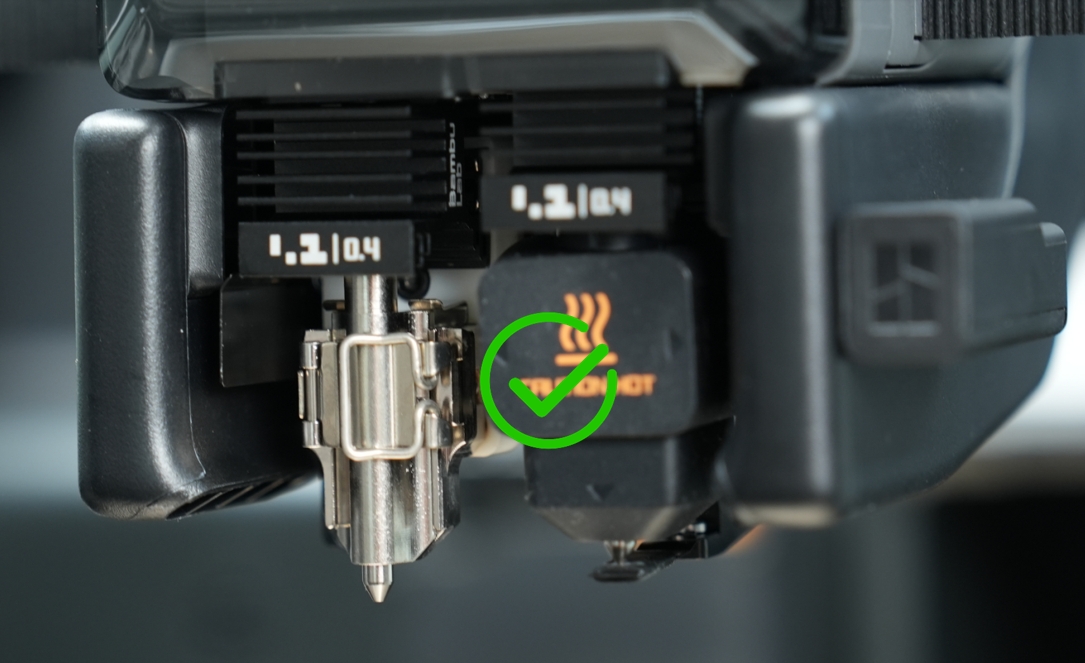 Hotend clip correctly locks the nozzle. |
Also, please confirm that the nozzle hotend clip is not broken or deformed.
¶ Swap Nozzle Components
If the nozzle component installation has been confirmed to be normal, we recommend swapping the left and right nozzles and performing a homing operation again to observe if the error still occurs.
Detailed replacement steps can be referred to in the H2D Hotend Replacement Guide.
If the homing test passes, you need to focus on checking if the original nozzle is damaged and consider replacing it with a new nozzle component. If the homing test still fails, it may be a sensor fault. Please continue troubleshooting according to the following steps.
Tip: Given the different installation positions of the left and right eddy current sensors, the troubleshooting methods also vary. If your issue is with the left nozzle, you can quickly jump to the corresponding section by clicking this link.
¶ Right Nozzle Eddy Current Sensor Fault Troubleshooting
Check Eddy Current Sensor Appearance
After removing the nozzle component, you will see the eddy current sensor covered by a layer of black acetate tape. Please check if the coil is exposed or damaged. If the coil is damaged, it needs to be replaced.
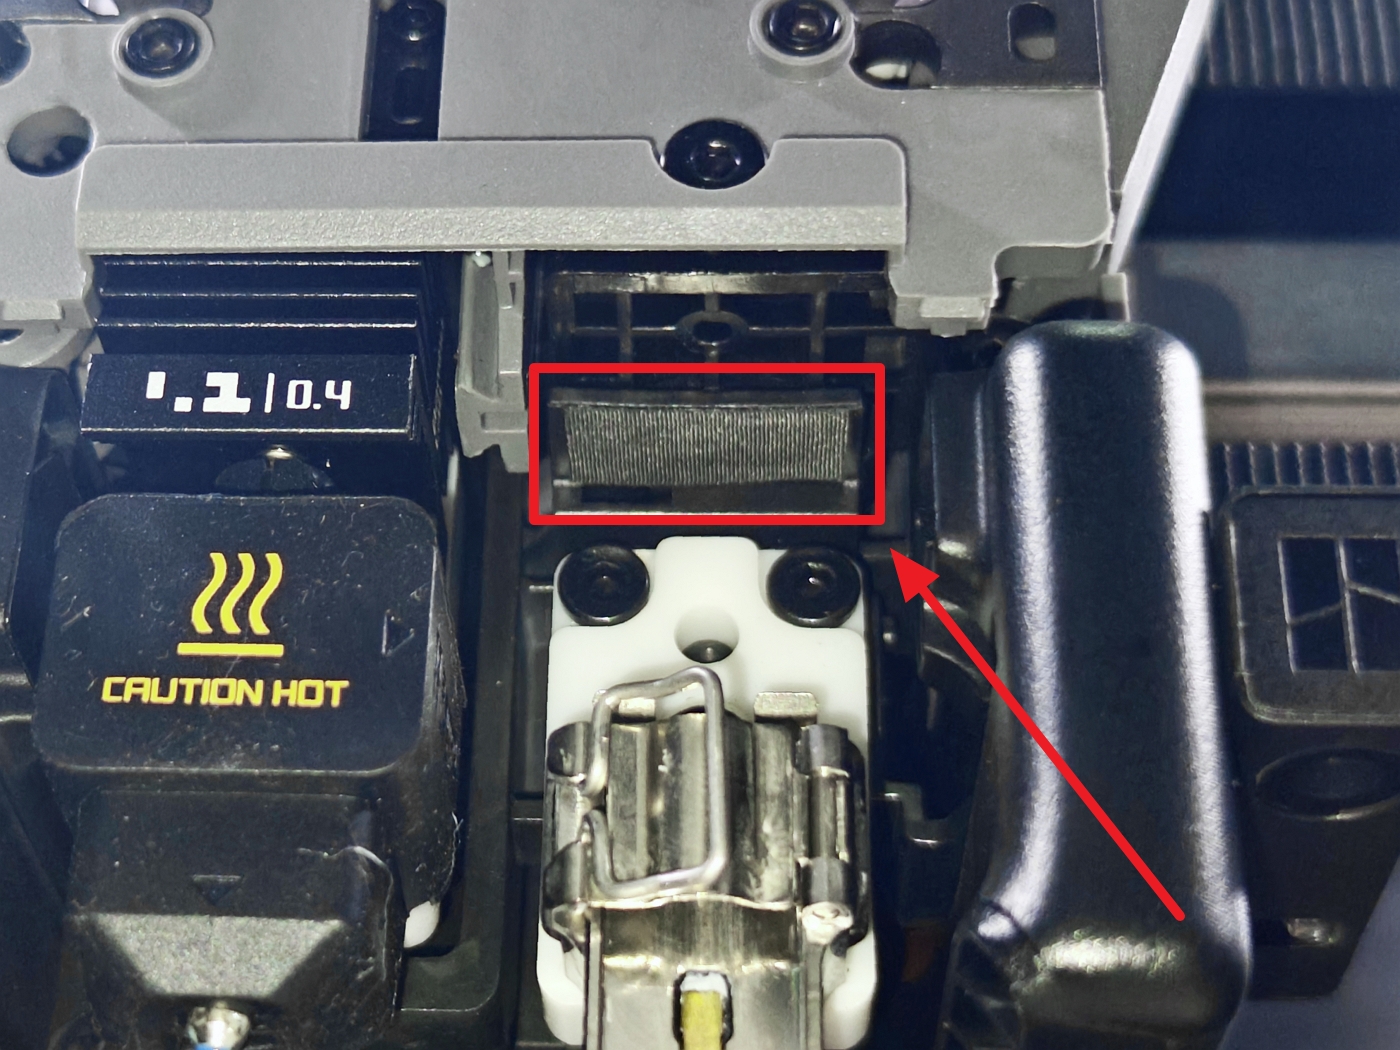
Note: Do not peel off the black acetate tape to avoid coil breakage.
Re-plug the Right Eddy Current Sensor
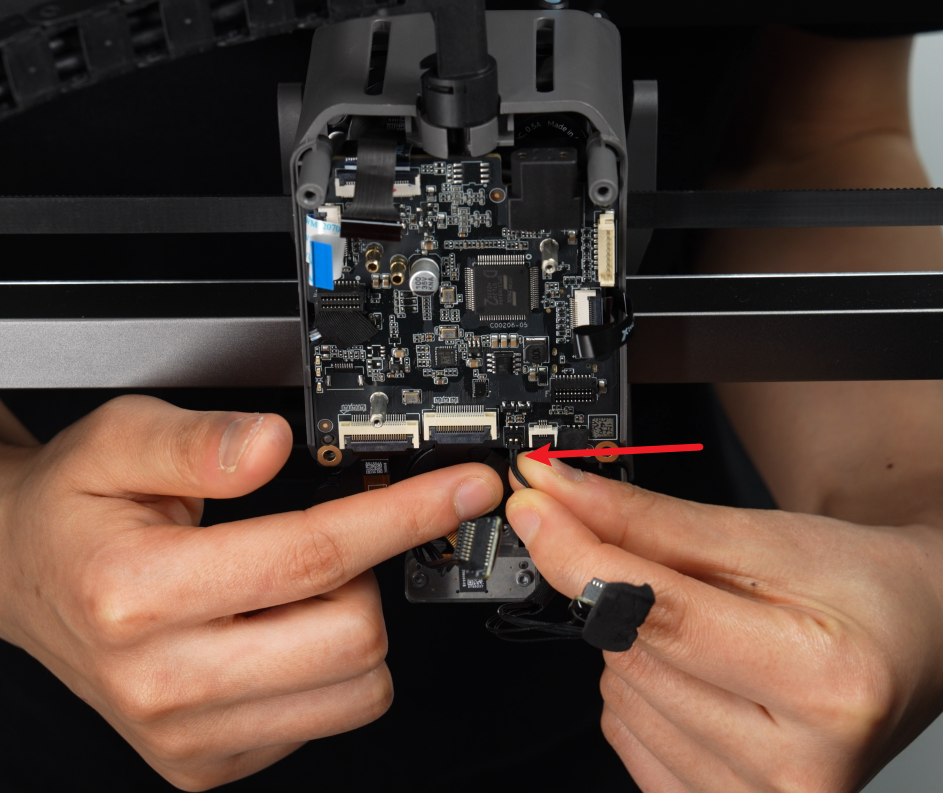
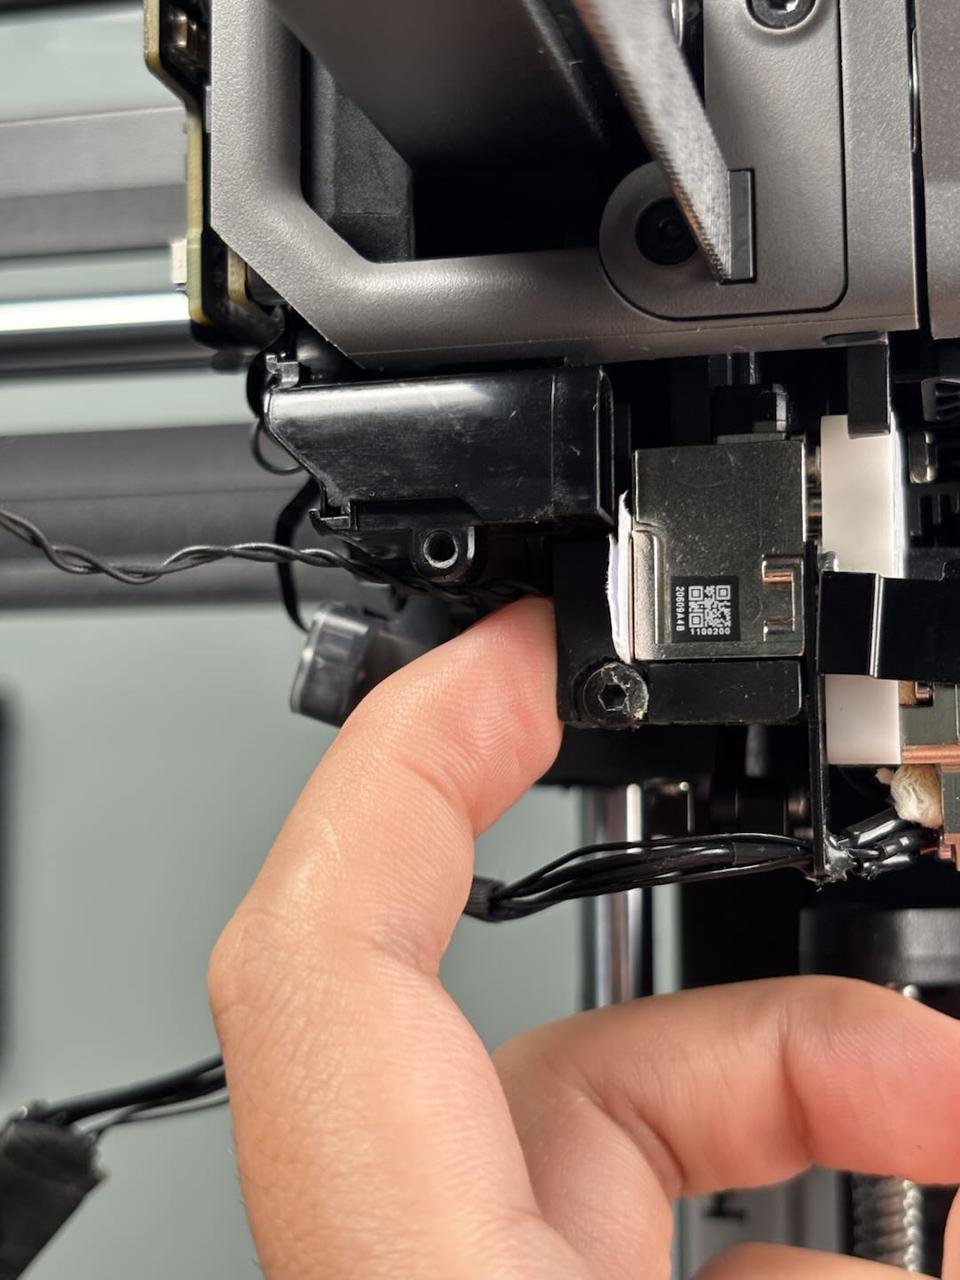
The eddy current sensor connector on the H2D extruder board uses this small connector design. When pulling out the connector, please hold the root of the connector with your hand and lift it perpendicular to the PCB surface to unlock the connector. Do not apply force along the direction of the cable to avoid damaging the plug.
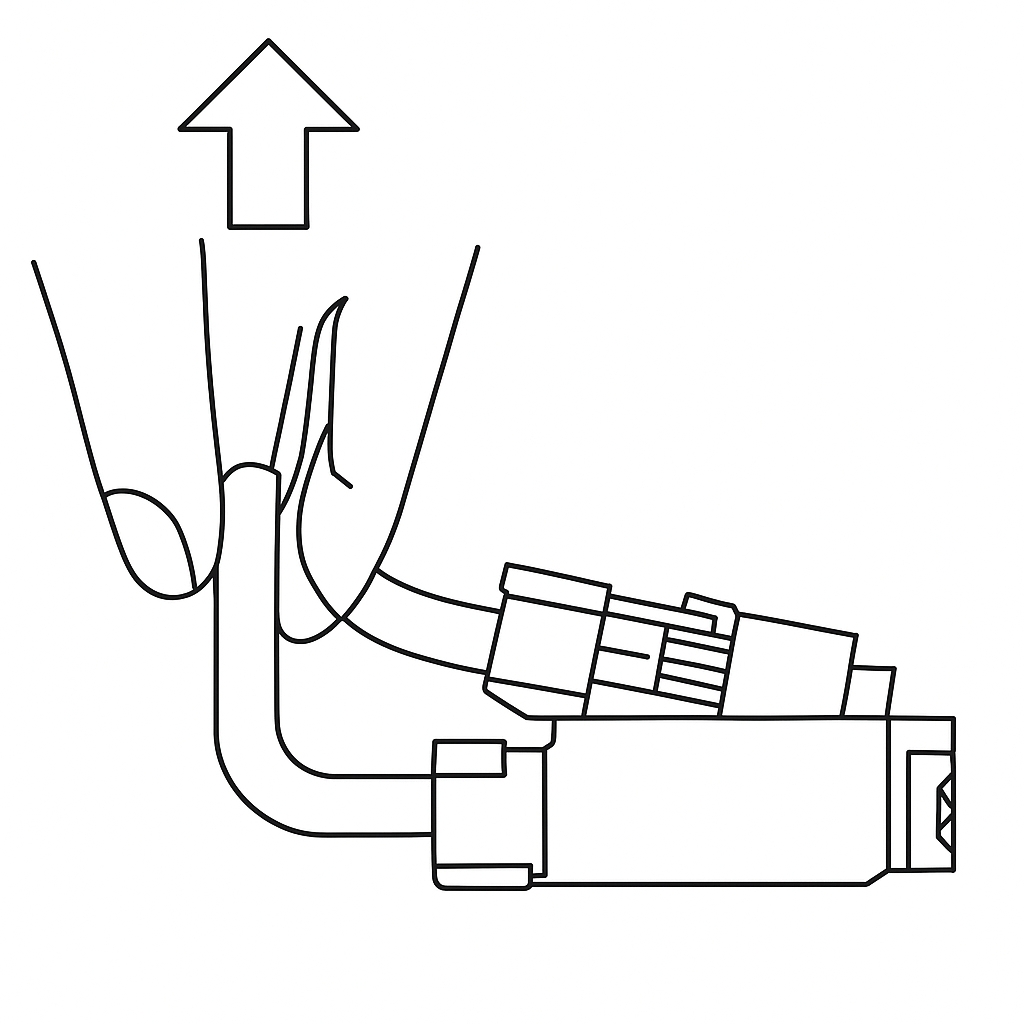
If the appearance of the eddy current sensor is normal, it may be due to a loose or poorly connected eddy current sensor connector. In this case, you need to re-plug the connection line of the eddy current sensor.
To re-plug the connector, you need to remove the components: the part cooling fan and the extruder connection board. For detailed re-plugging steps, please refer to the H2D Left and Right Eddy Current Sensor Replacement Guide.
¶ Part cooling fan vido guide
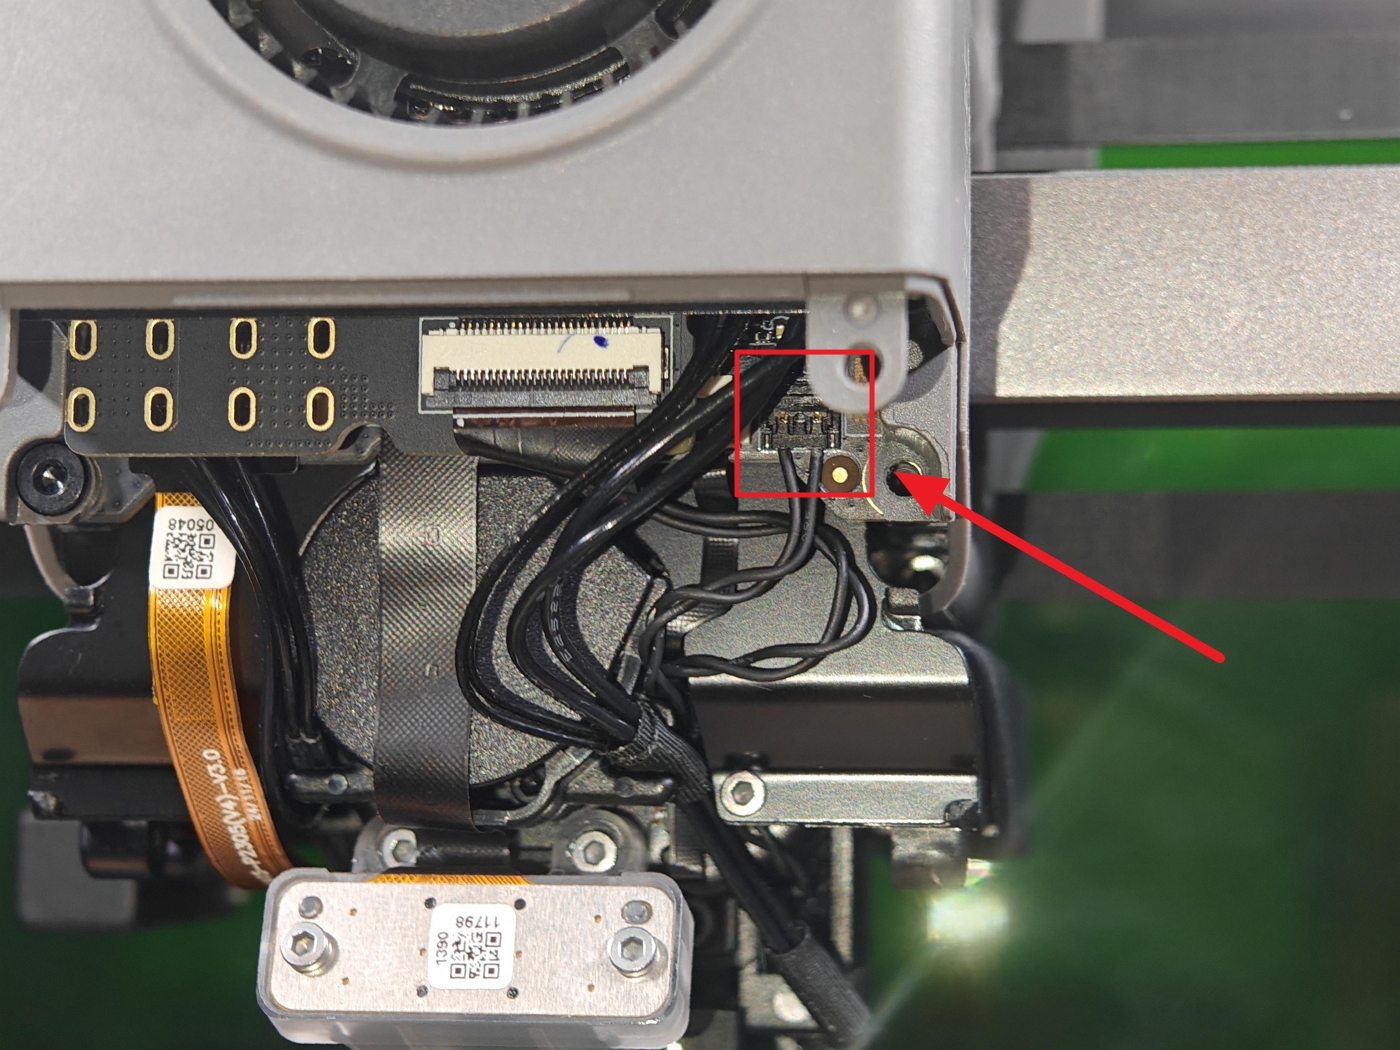
After removing the part cooling fan and the extruder connection board, peel off the tape stuck on the right eddy current sensor connector, then push the right eddy current sensor connection line outwards along the plane where the connector is located, and reinstall it.
After completion, you can perform a homing test again. If the fault still exists, it is recommended to contact Bambu Lab Support and submit the recent logs of the printer.
¶ Left Eddy Current Sensor Fault Troubleshooting
The left eddy current sensor is located inside the toolhead and is usually not prone to breakage or fracture. However, there may be position deviations or poor connector contact.
First, you can try re-plugging the left eddy current sensor connector. Removing the part cooling duct allows you to re-plug the left eddy current sensor.
Note: Re-plugging the connector must be done with the power off.
The eddy current sensor connector on the H2D extruder board uses this small connector design. When pulling out the connector, please hold the root of the connector with your hand and lift it perpendicular to the PCB surface to unlock the connector. Do not apply force along the direction of the cable to avoid damaging the plug.
After re-plugging, you can perform a homing test again on the left nozzle. If the issue still persists, it may be due to a position deviation of the eddy current sensor. It is recommended to reinstall the left eddy current sensor.
Reinstall the Left Eddy Current Sensor
The ideal distance between the left eddy current sensor and the lifting slider is approximately 0.2mm. Before reinstalling, you need to prepare a small piece of folded A4 paper, whose thickness after folding is approximately 0.2mm.
Detailed disassembly and assembly steps can be referred to in the H2D Left and Right Eddy Current Sensor Replacement Guide.
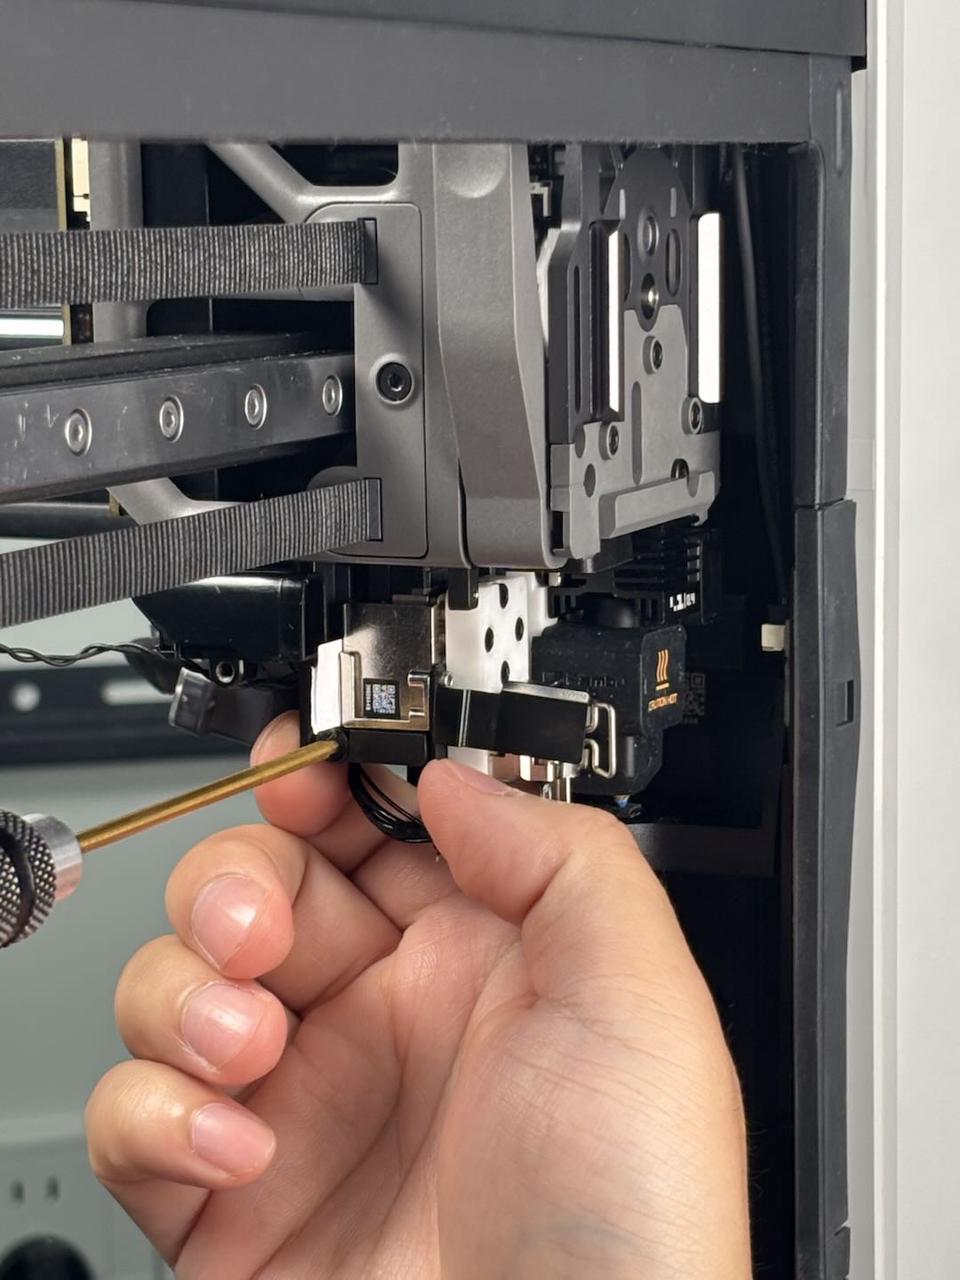
Insert the folded A4 paper between the left eddy current sensor and the lifting slider, hold the left eddy current sensor with your hand, then pull the A4 paper to check if it can slide smoothly (with slight resistance but easy to remove). If it can slide smoothly, use an H2.0 hex wrench to tighten the fixing screw.
While tightening the screw, please keep your hand holding the left eddy current sensor stable to avoid position changes. After the screw is tightened, remove the A4 paper.
 |
 |
After reinstallation, please perform a homing test again to check if the error has been resolved. If the fault still exists, it is recommended to contact Bambu Lab Support and submit the recent logs of the printer.
¶ End Notes
We hope the detailed guide provided has been helpful and informative.
If this guide does not solve your problem, please submit a technical ticket, we will answer your questions and provide assistance.
If you have any suggestions or feedback on this Wiki, please leave a message in the comment area. Thank you for your support and attention!