¶ AP Board
Important Note: After confirming that the replacement is completed, it is necessary to update the SN. To do this, please contact the service team and provide the new and old SN to complete the SN replacement process. Please refer to this wiki: Activate New Serial Number-How to find SN.
The AP board is a circuit board that controls the printer and provides the required Wi-Fi connectivity and processing power.
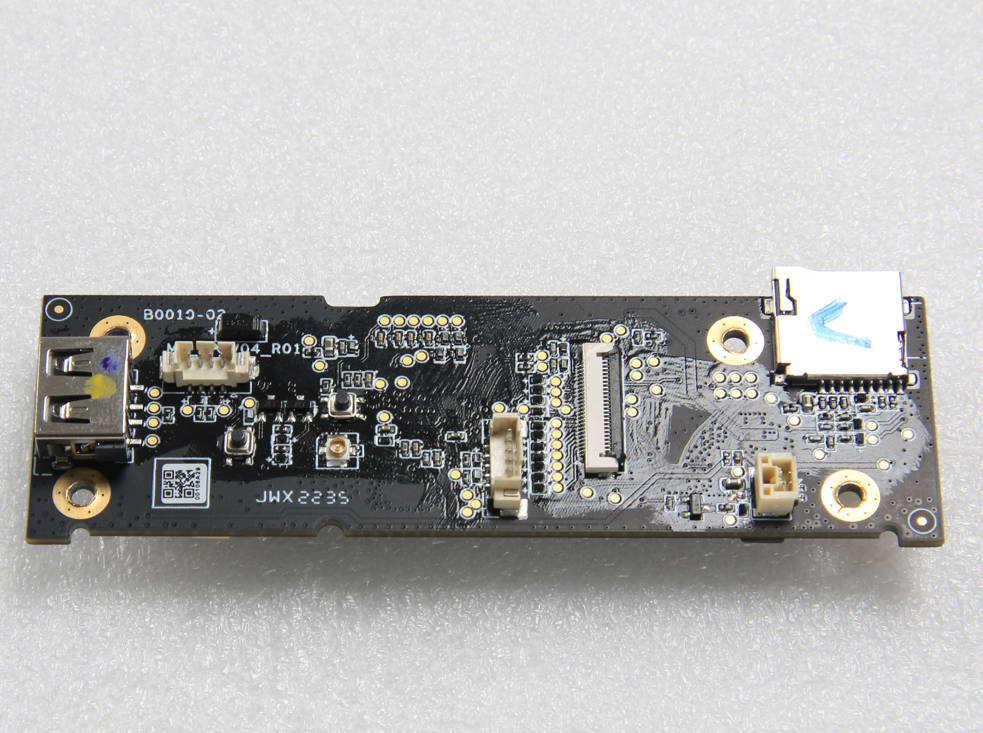
Friendly reminder: The AP boards for P1S and P1P have the same appearance and installation method, but these two boards are not compatible. In other words, P1P can only use the AP board specifically designed for P1P, while P1S can only use the AP board specifically designed for P1S.
¶ Information for the AP Board replacement
Please note that replacing the AP board will require help from our Customer Support team. Each AP board has a serial number which will need to be bound to the original SN of the printer.
The following information is required to be provided in your ticket, so the new board can be activated:
- Picture of the new SN displayed on the printer screen after the new AP board is installed
- Picture of the QR code located on the printer frame
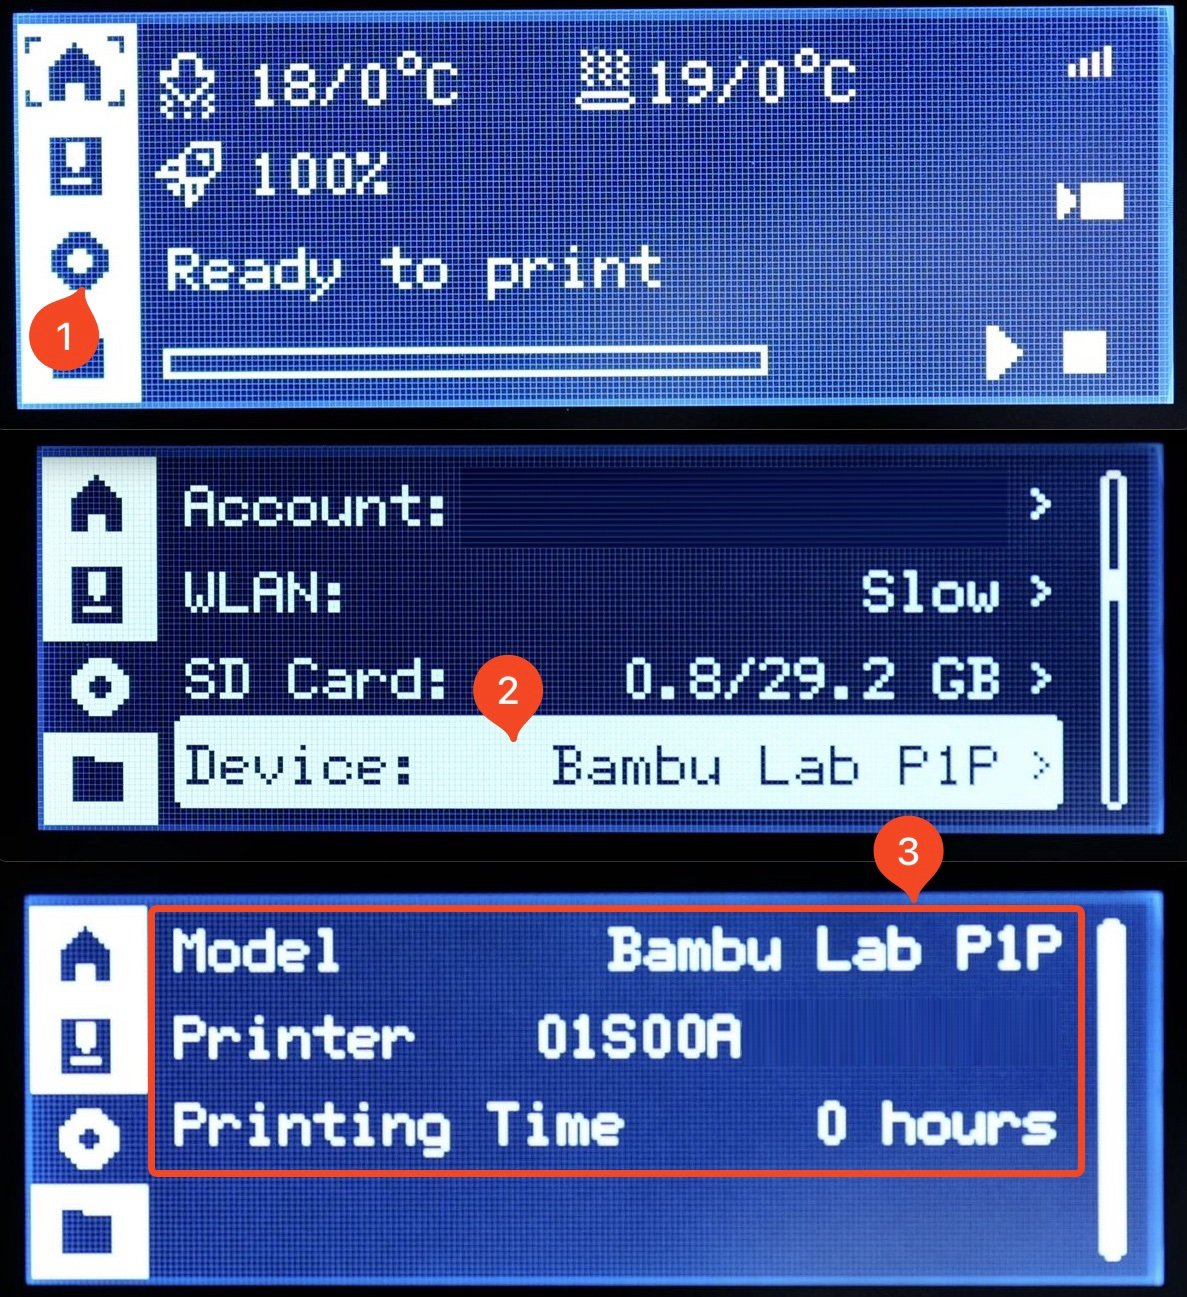
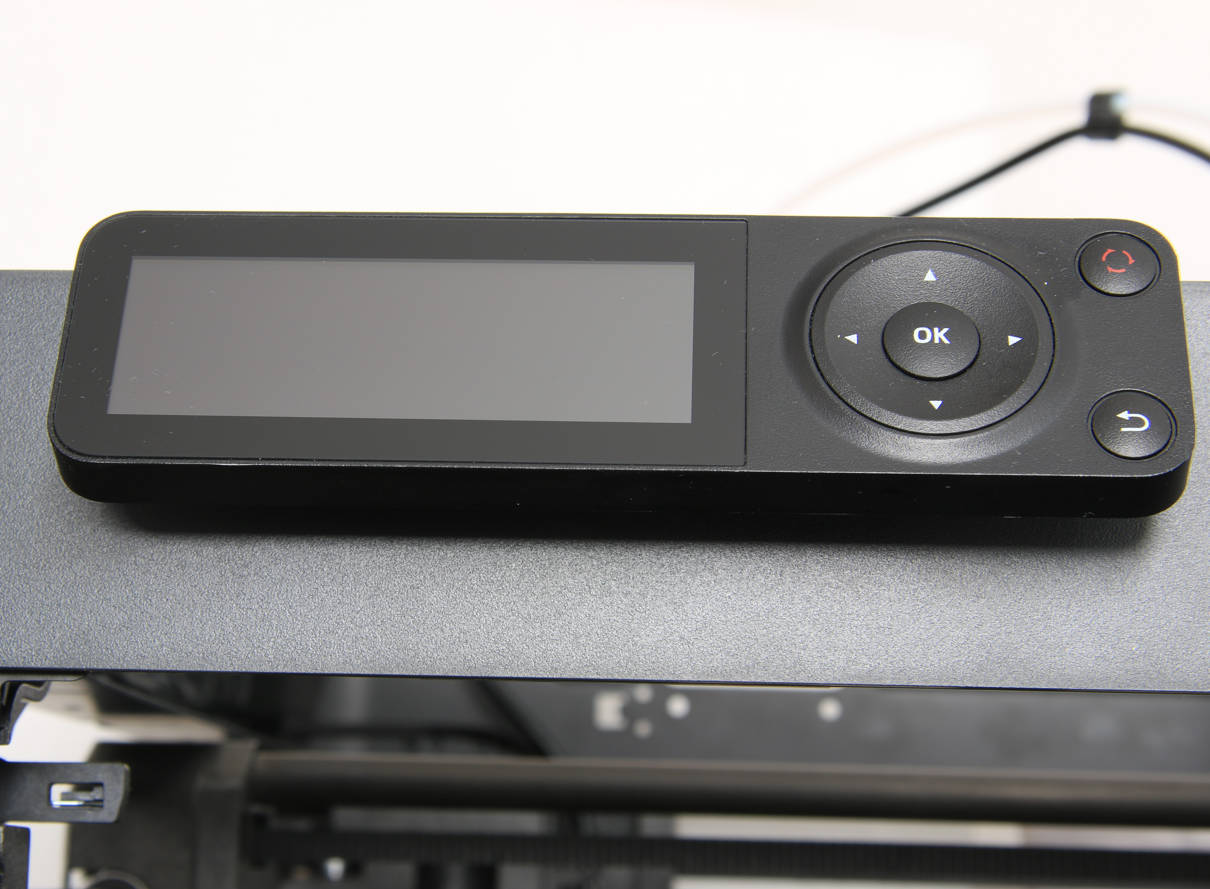
The new SN of the AP board is displayed on the P1 printer screen under Settings→ Device as shown in the image below** *
*
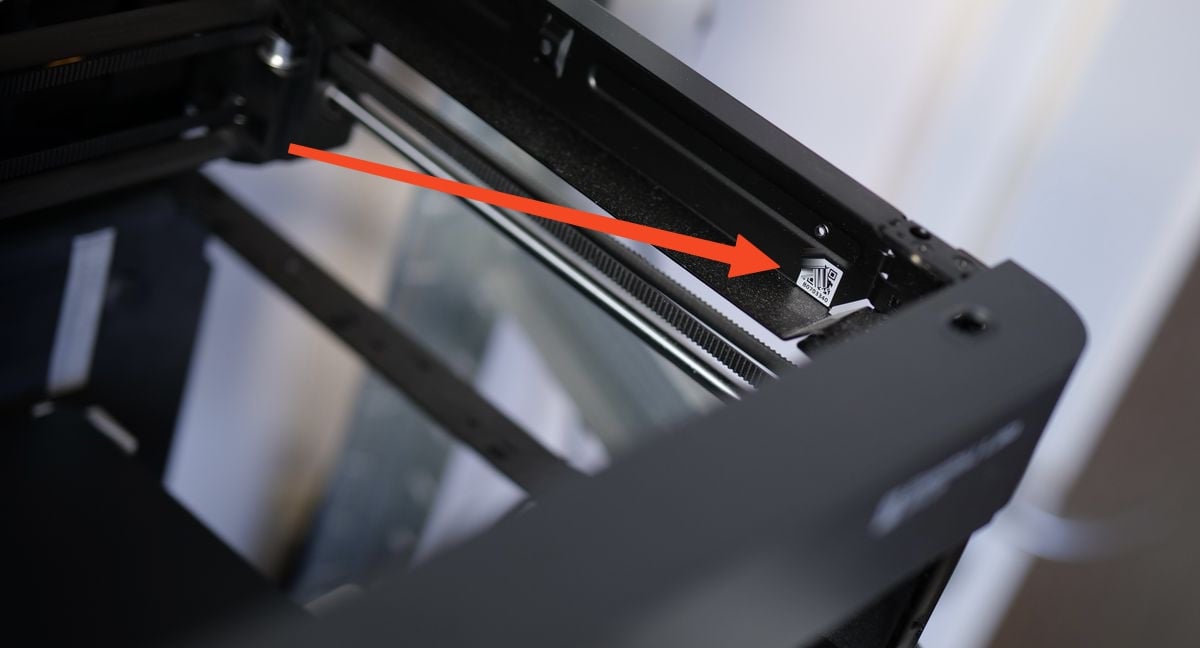
The QR code containing the SN of the printer can be located on the top right side of the printer.
This is a sticker applied on the internal top frame of the unit, as shown in the image below:
Please note that the printer cannot be bound to your account until the mentioned operation is completed.
¶ Tools
- H2.0 hex key
- Tweezers
¶ Preparation
To prepare for the next steps, shut down the printer and safely remove the SD card.
¶ Disassembly
¶ Step 1 - Remove the screen and the front cover
For P1P, please refer to the related content of the Screen and Front cover to remove the screen and front cover.
For P1S, please refer to the related content of the Screen and Front cover to remove the screen and front cover.
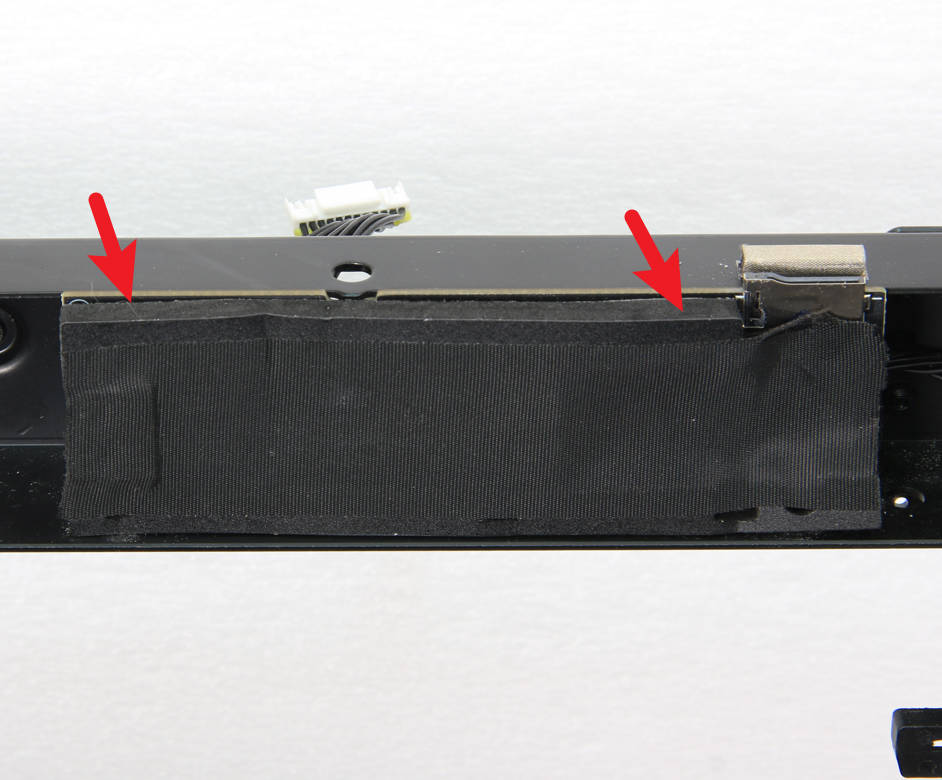
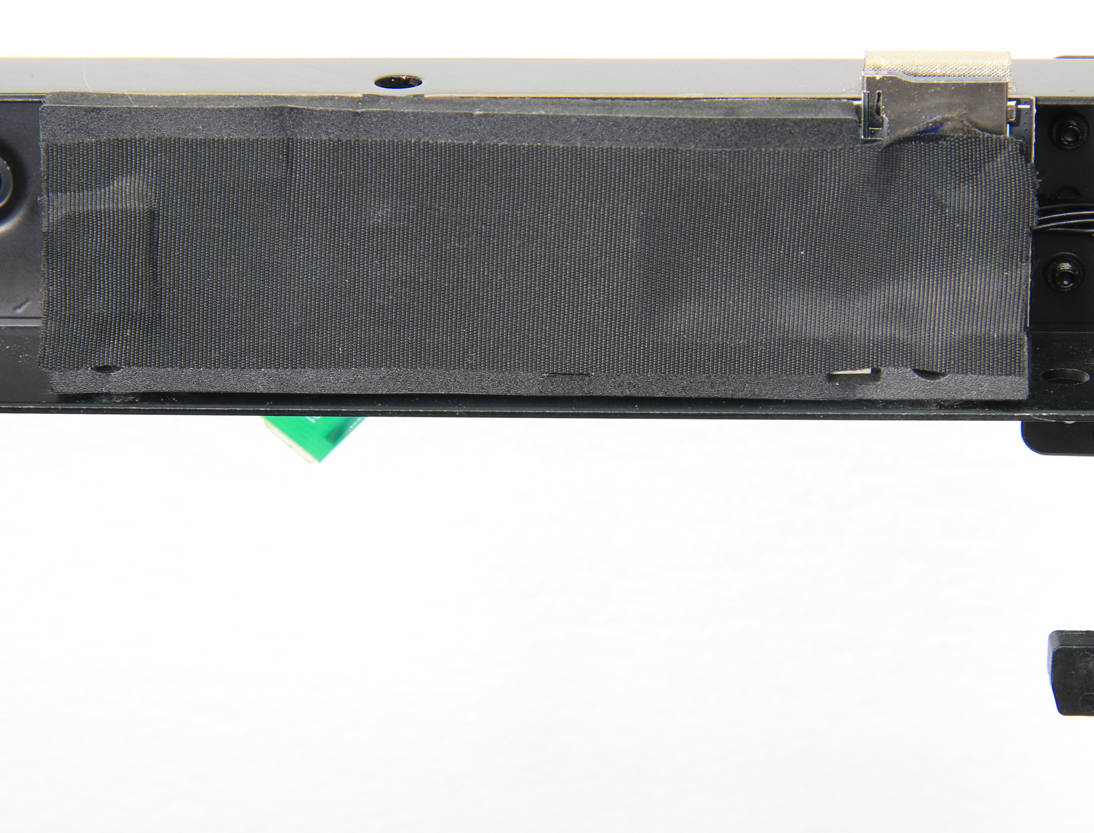
¶ Step 2 - Remove the sealing foam
Remove the sealing foam by hand.
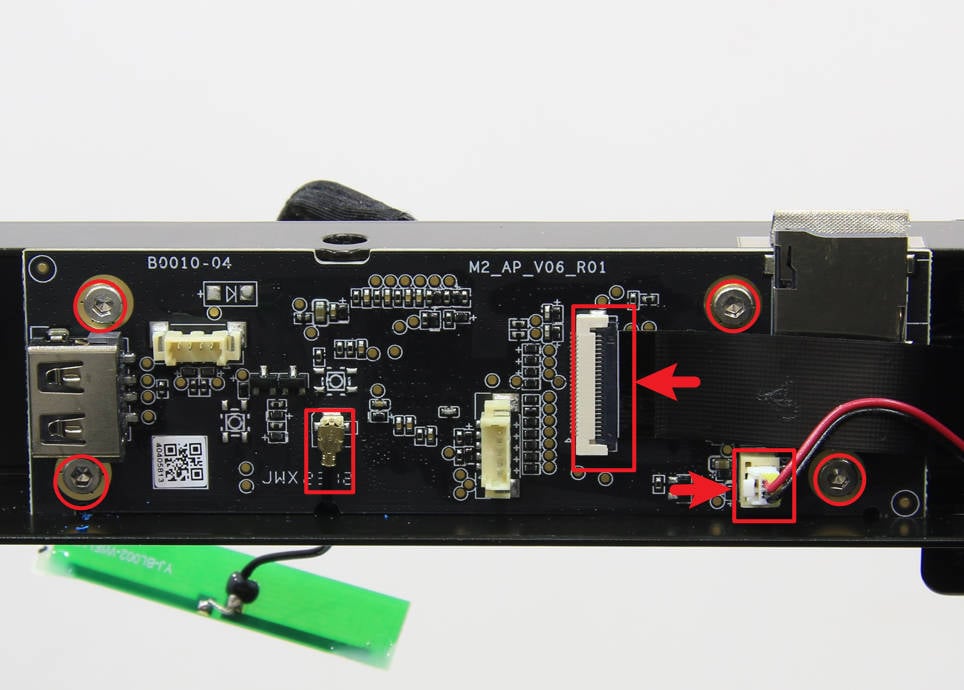
¶ Step 3 - Remove 4 screws
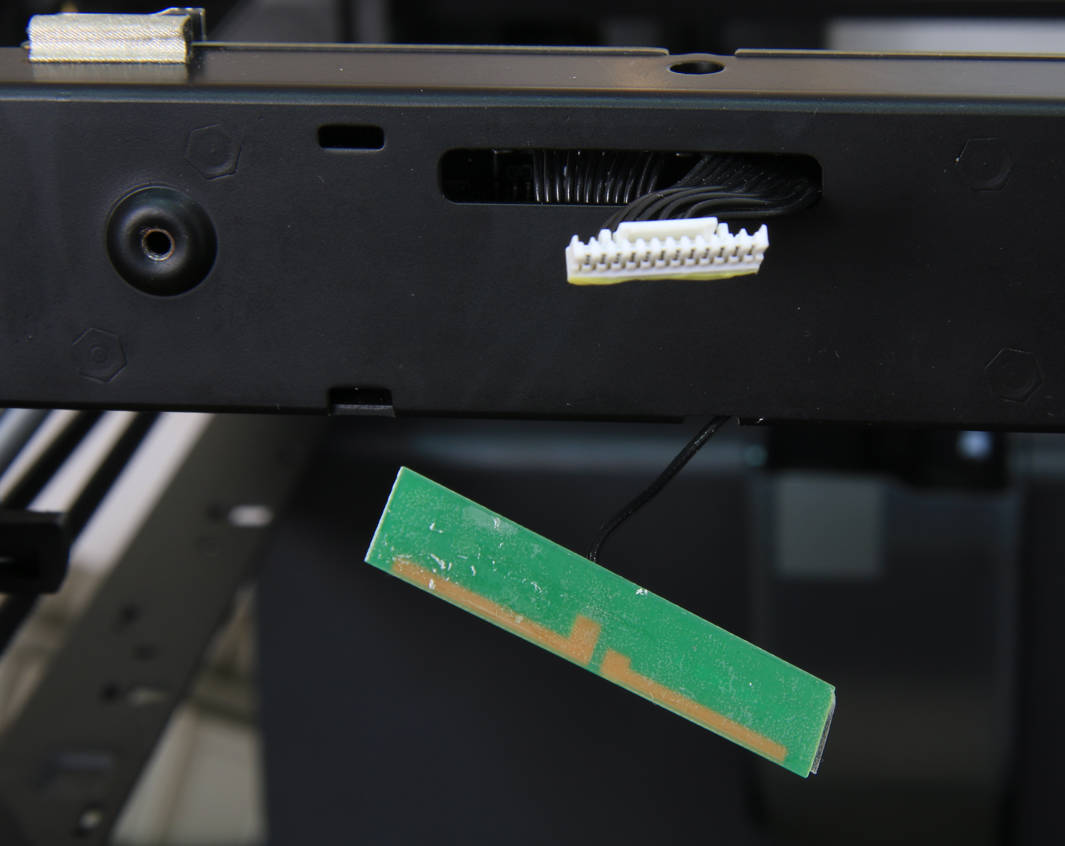
Using tweezers, carefully disconnect the camera FPC, LED fill light cable, and the WIFI antenna cable. Then, using the H2.0 hex key, remove the four screws that hold the AP board in place.
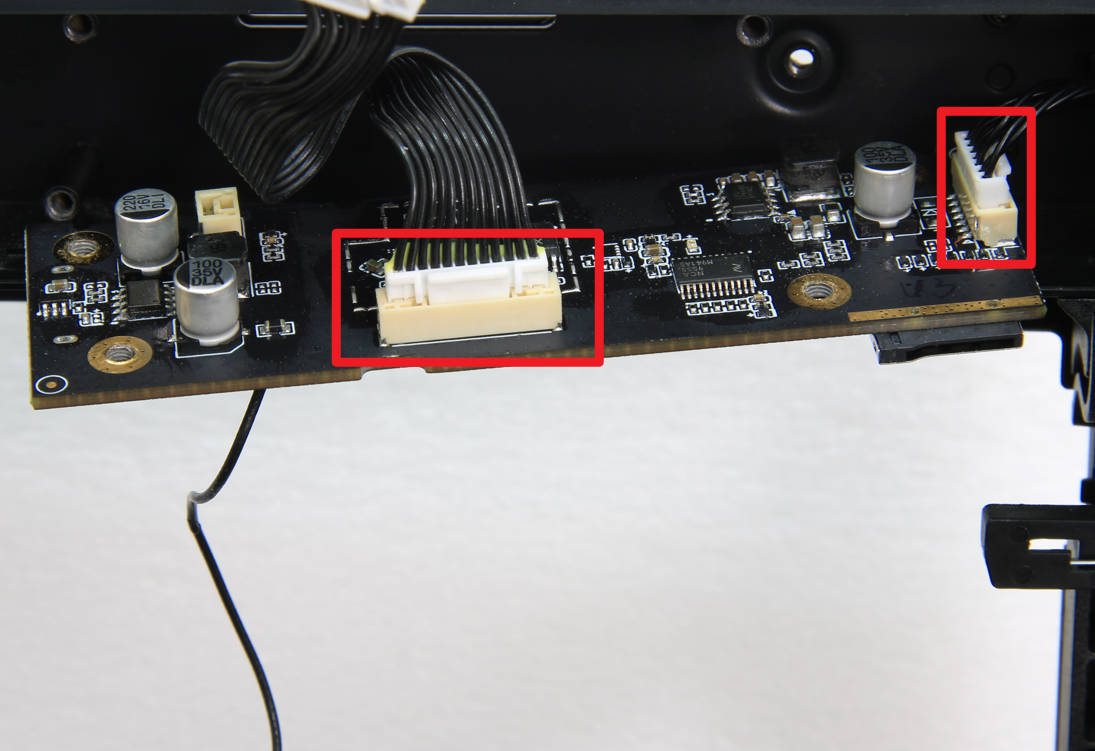
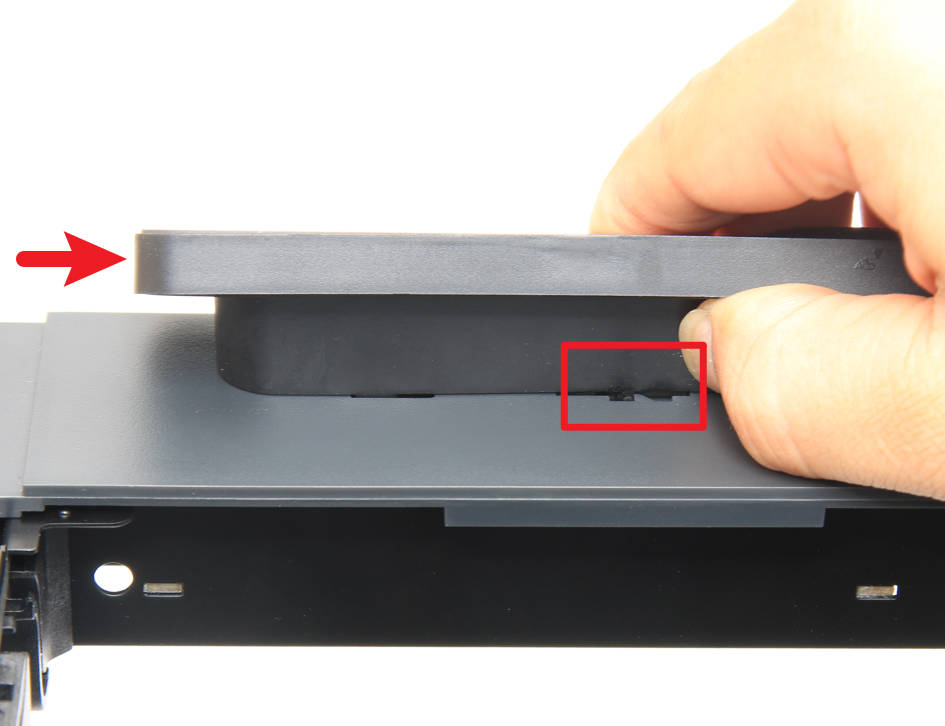
¶ Step 4 - Remove the AP board
To remove the AP main board from the frame, first, pull the top cover up a little, and disconnect the screen cable and the MC board cable attached to it. Then carefully lift the AP board off the frame.
¶ Assembly
¶ Step 1 - Connect the Cables
To correctly install the new AP board, carefully align it with the connectors on the frame. Then, using the appropriate cables, connect the MC-AP cable and the screen cable to the connectors on the AP board.
¶ Step 2 - Install the AP board
To prepare for the next steps, carefully guide the screen cable through the cable hole, taking care not to damage the WIFI cable in the process. Once the screen cable is in place, carefully install the AP board onto the frame, aligning it with the notches to ensure that it is correctly positioned.
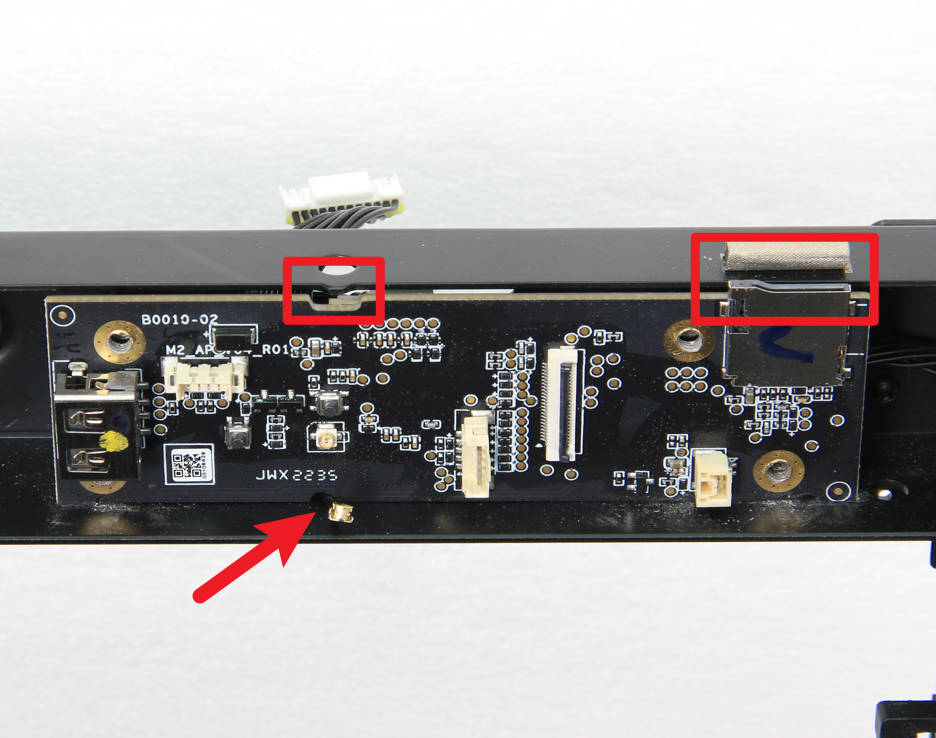
¶ Step 3 - Lock screws
After installing the AP board, use the appropriate screws to secure it in place. Then, carefully connect the camera FPC, the LED fill light cable, and the WIFI antenna cable to the AP board using the appropriate connectors.
¶ Step 4 - Attach the sealing foam
To complete the installation process, apply the sealing foam to the surface of the AP board as shown in the image below.
¶ Step 5 - Install the front cover and the screen
Refer to the related content of the Front cover and Screen to install the screen and front cover.
¶ To verify completion/success
¶ Check the indicator lights on the control board
Normal State: the AP board has a green indicator light that blinks once per second. Users must first unlock the screen according to this method to locate this indicator LED.
Before tightening all screws, you may temporarily install or leave the cover off (be cautious of electrical safety and operate with the power disconnected). Then power on to check whether the indicator lights are functioning normally. If the lights are normal, fasten the screws to avoid rework.
Press the buckle below the screen to unlock it, then push the screen to the right to release the screen.
https://public-cdn.bblmw.com/wiki/video/P1-AP.mp4
Printer Circuit Failure Troubleshooting - P1 Series
¶ Connect the power cable and turn on the power. Initiate a device self-check process and check if there is an error.
Precautions:
- When replacing the AP board, be sure to skip the step of binding the machine when turning it on for the first time.
- After confirming that the replacement is completed, it is necessary to update the SN. To do this, please contact the service team and provide the new and old SN to complete the SN replacement process. (The printer SN of P1P is begins with 01S) Please refer to this wiki: Activate New Serial Number-How to find SN.
1. After completing the installation process, turn on the printer and verify that the screen is functioning properly and that the keys are responsive.
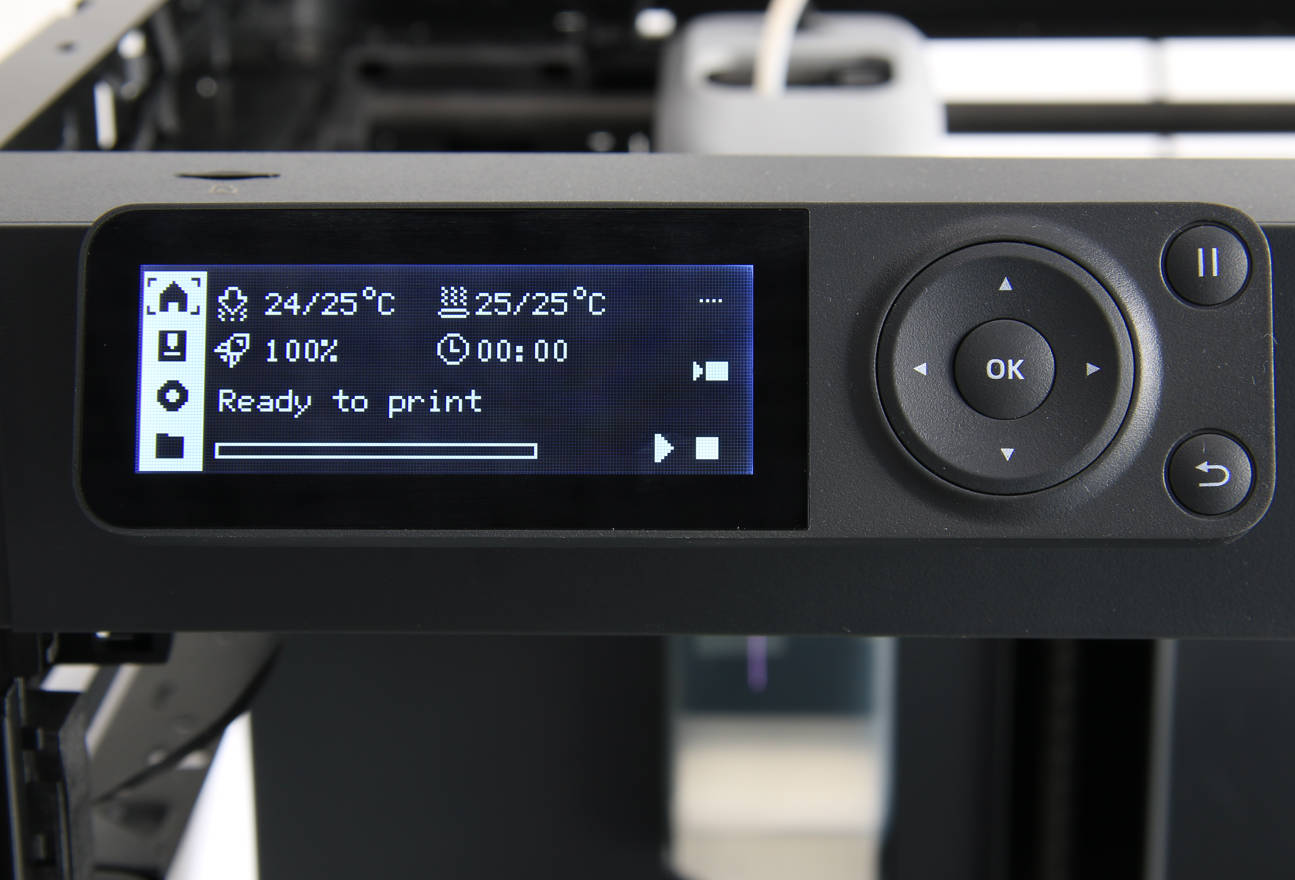
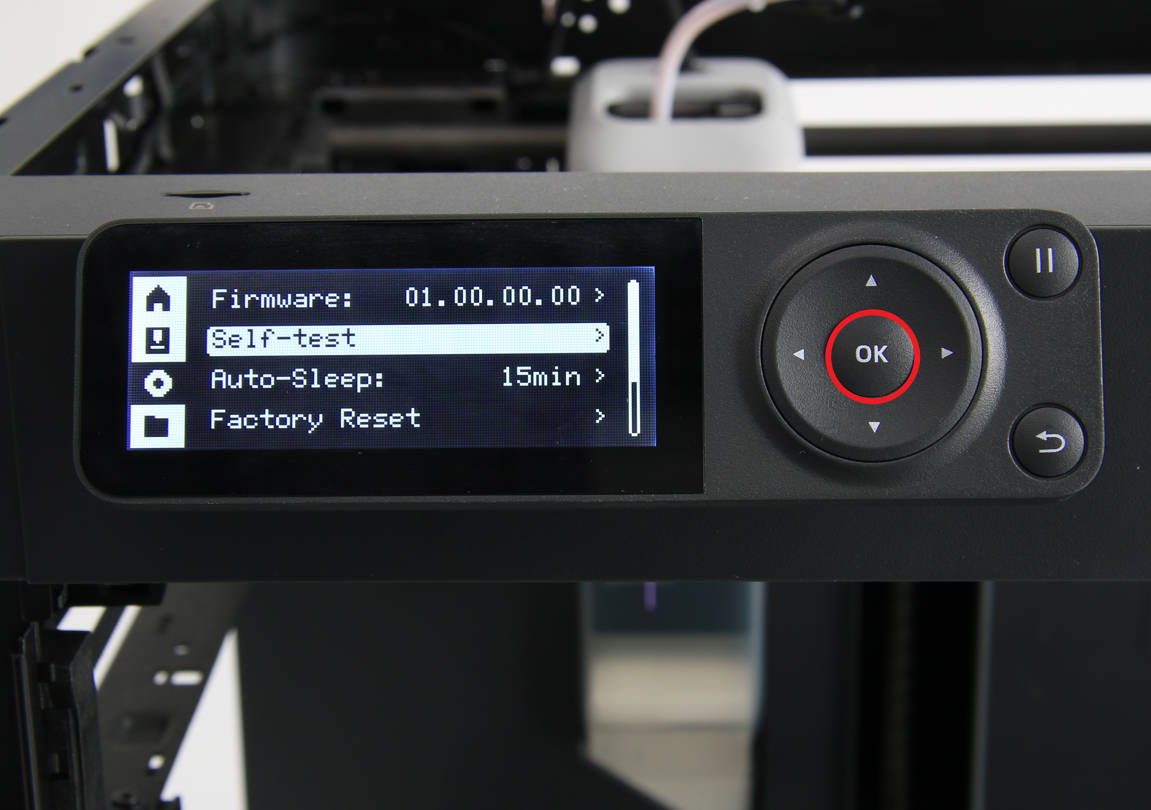
2. To confirm that the installation was successful, run the device self-check process. If the self-check process passes, the operation is successful.
¶ End Notes
We hope the detailed guide provided has been helpful and informative.
To ensure a safe and effective execution, if you have any concerns or questions about the process described in this article, we recommend submitting a Technical ticket regarding your issue. Please include a picture or video illustrating the problem, as well as any additional information related to your inquiry.