¶ What is the heat bed signal cable(V2 heat bed)
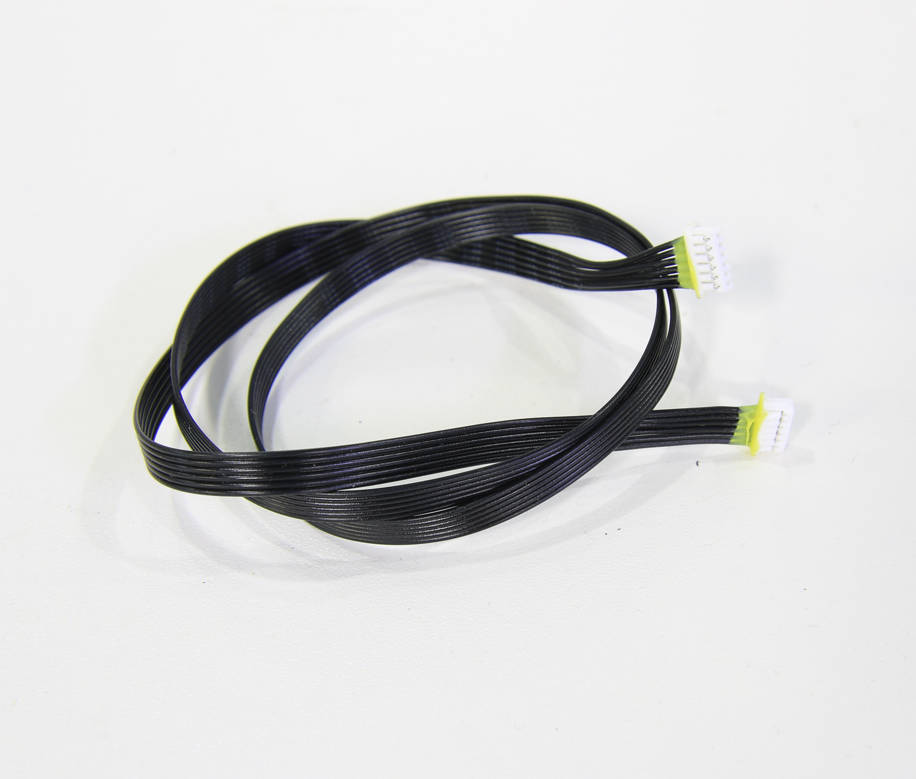
The heat bed signal cable is a 6pin cable connecting the heat bed and the MC board.
Click here to see replacement guide for P1 series.
¶ When to use
1. The temperature of the heat bed is abnormal, and it has been checked to confirm that the connectors are normal;
2. The temperature of the heat bed is lost during the heat bed movement or printing;
3. Visible damage on the cable or the connector;
4. After the confirmation of the after-sales team, the signal cable needs to be replaced.
¶ Tools and materials needed
- New heat bed signal cable(6pin)
- H1.5/H2.0 hex key
- Tweezers
- Hair dryer
- 3 Z-axis slider fixing screws (if reserved after unpacking)
- Some necessary tape and glue

¶ Safety warning and Machine state before starting operation
Prior to commencing with the process in this guide, please make sure the machine is switched off.
¶ Operation guide
¶ Step 1 - Remove the heat bed from the Printer
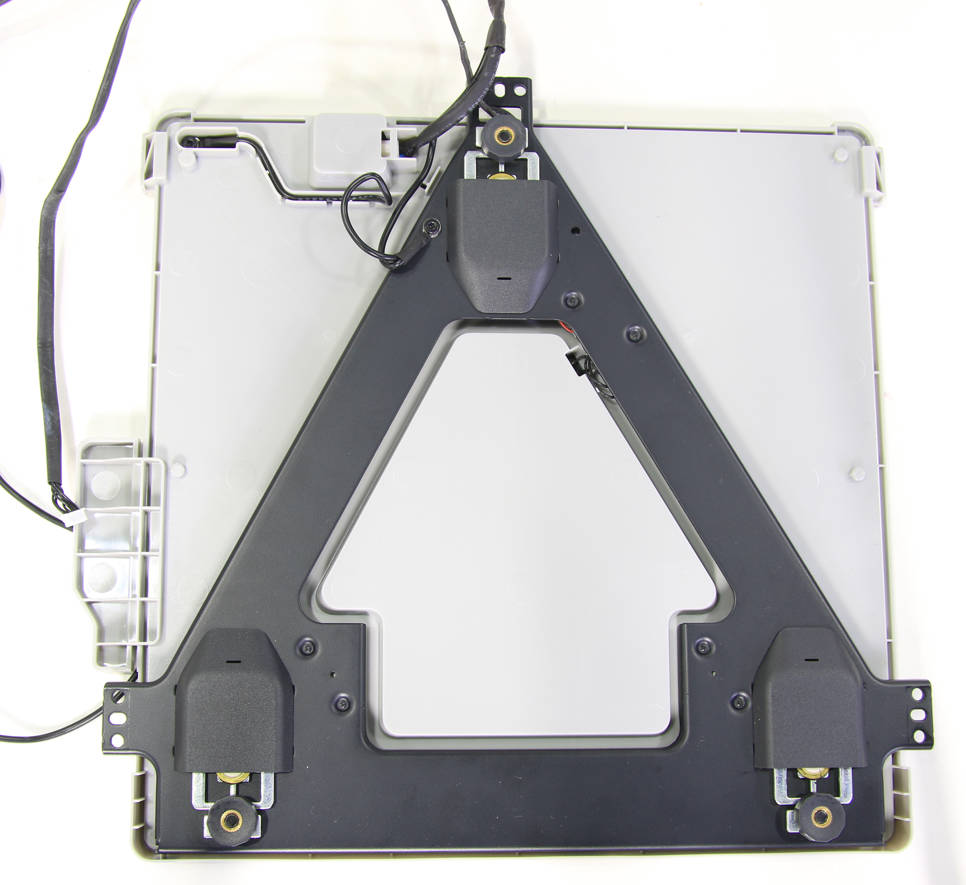
Refer to steps 1~12 in Replacing the heat bed to disassemble the printer and remove the heat bed from the printer.
¶ Step 2 - Remove leveling nuts
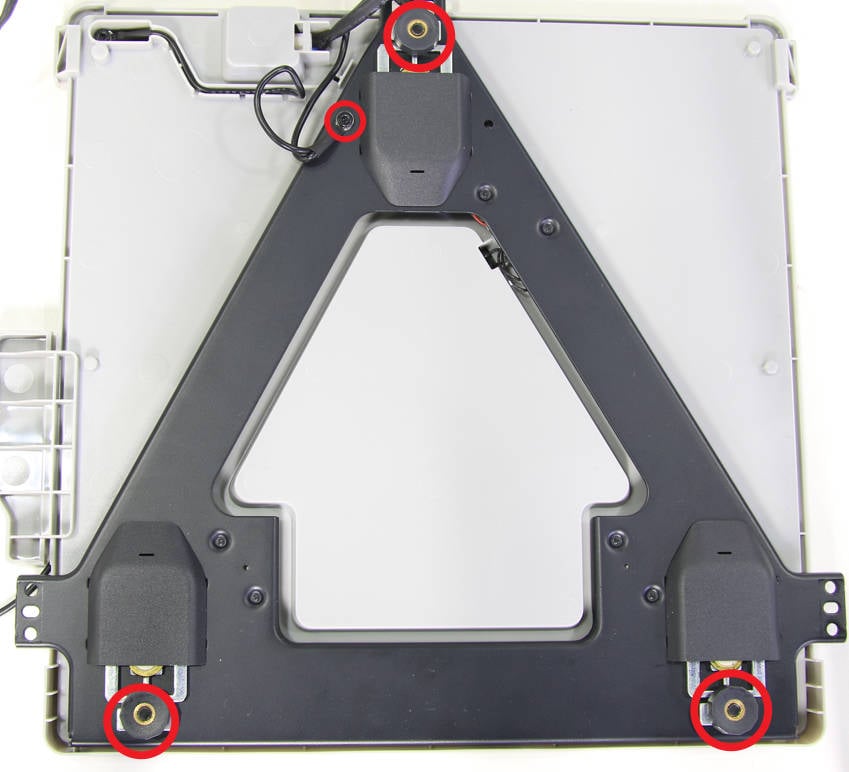
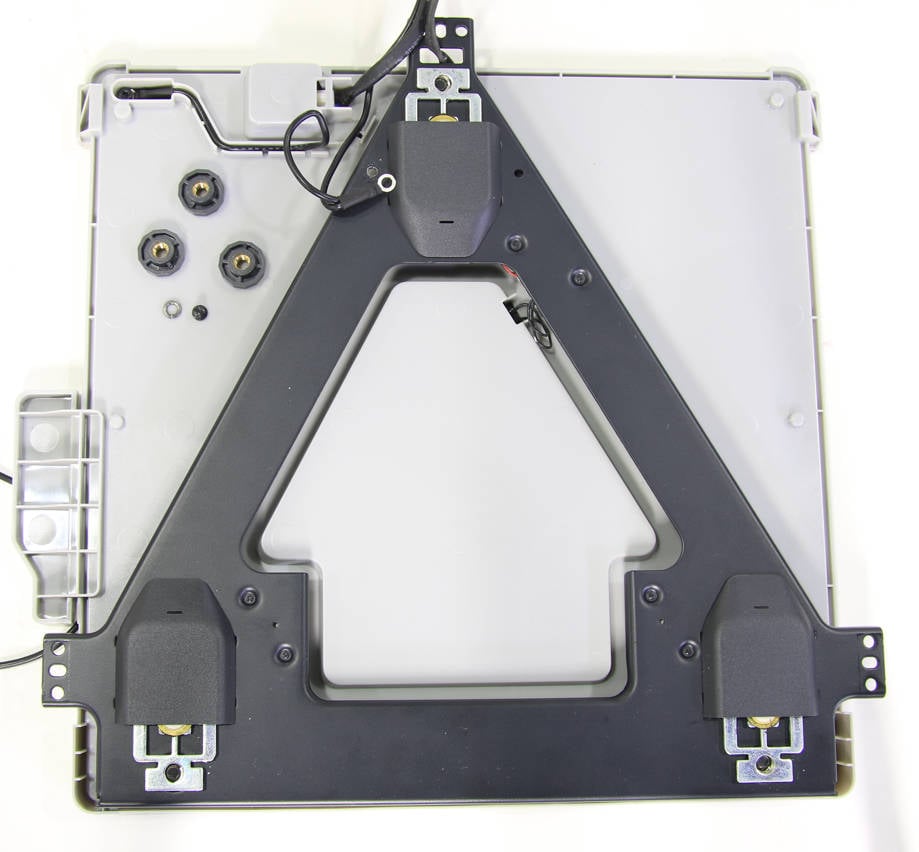
Remove the ground cable fixing screw and washer with an H2.0 hex key, then unscrew the 3 heat bed leveling nuts (with rubber rings) by hand.
 |
 |
¶ Step 3 - Remove the heat bed bracket
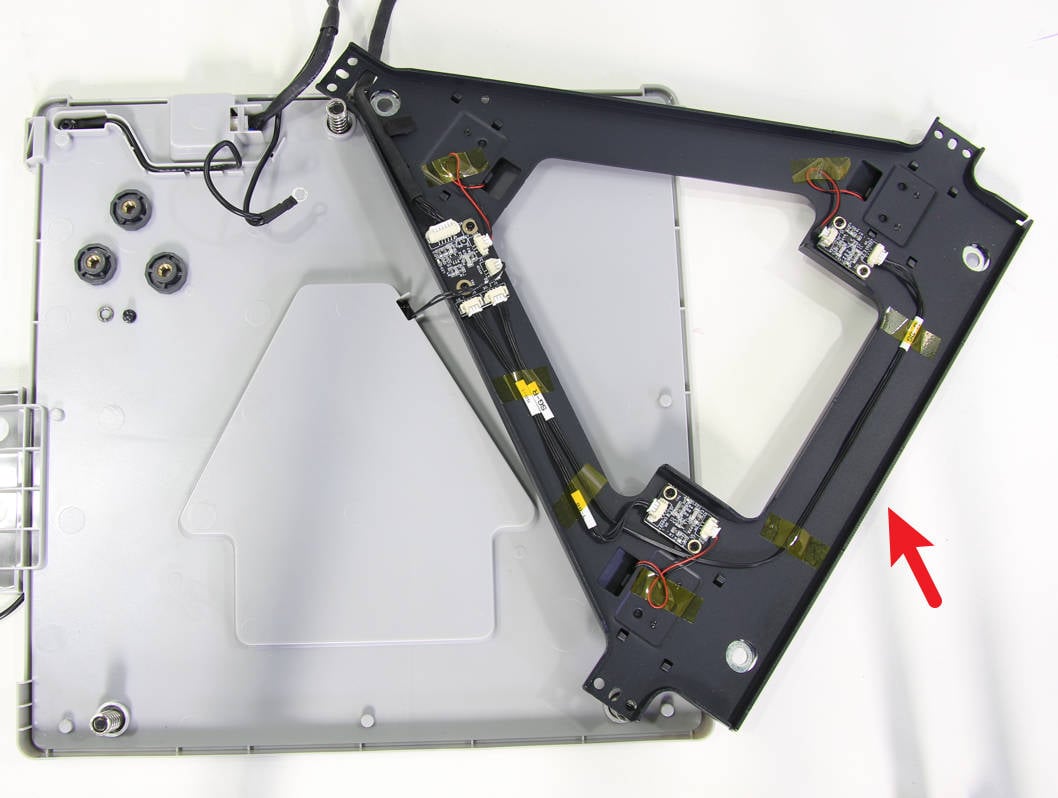
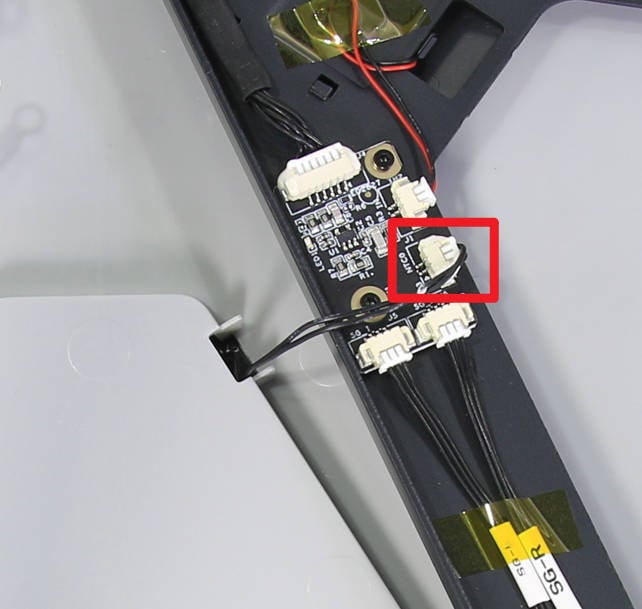
Flip to open the heat bed bracket, as the NTC cable remains connected, be careful not to damage the NTC cable.
 |
 |
¶ Step 4 - Remove the old signal cable
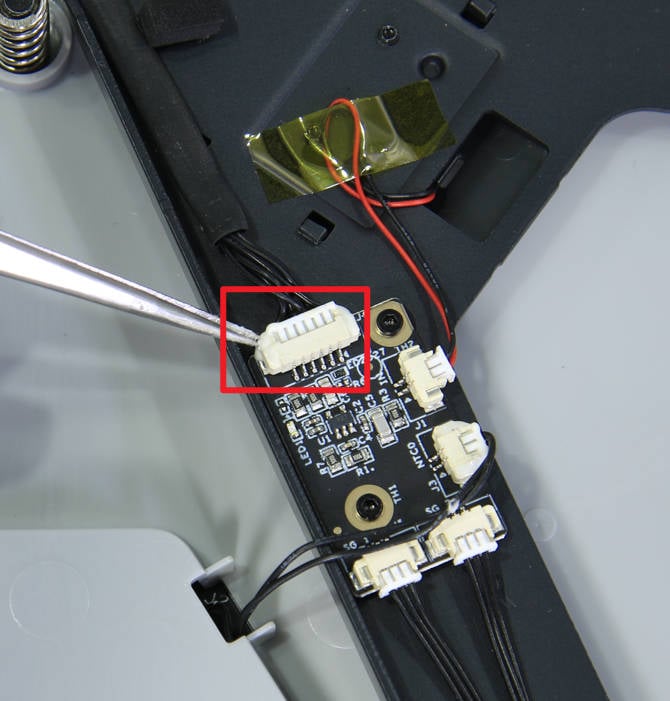
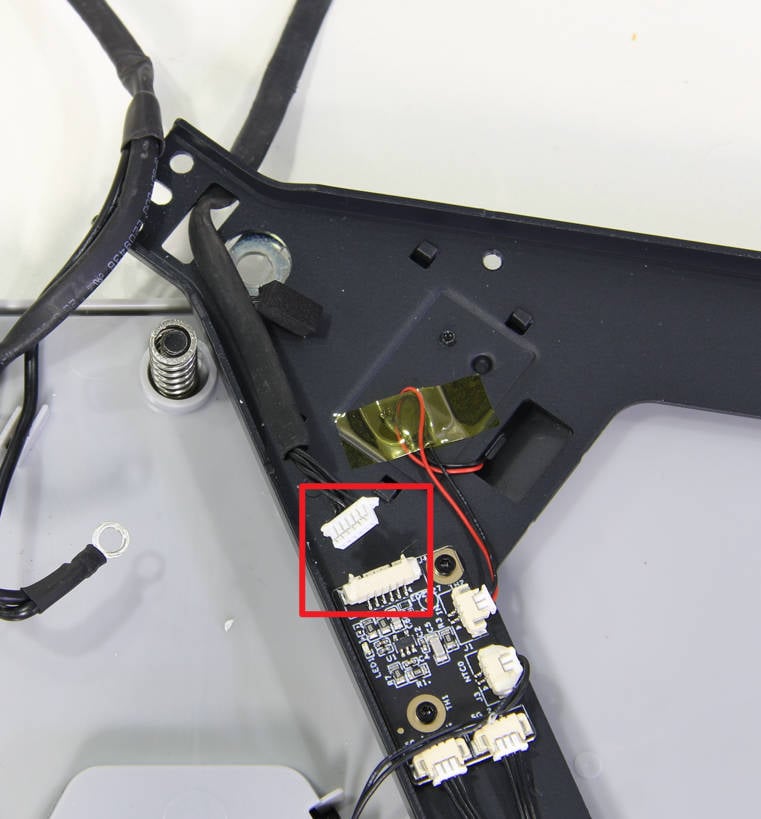
Use a hair dryer to heat the white silicone gel on the connector to soften the silicone gel, and then use tweezers to remove part of the silicone gel, then disconnect and remove the old signal cable.
 |
 |
¶ Step 5 - Install the new signal cable
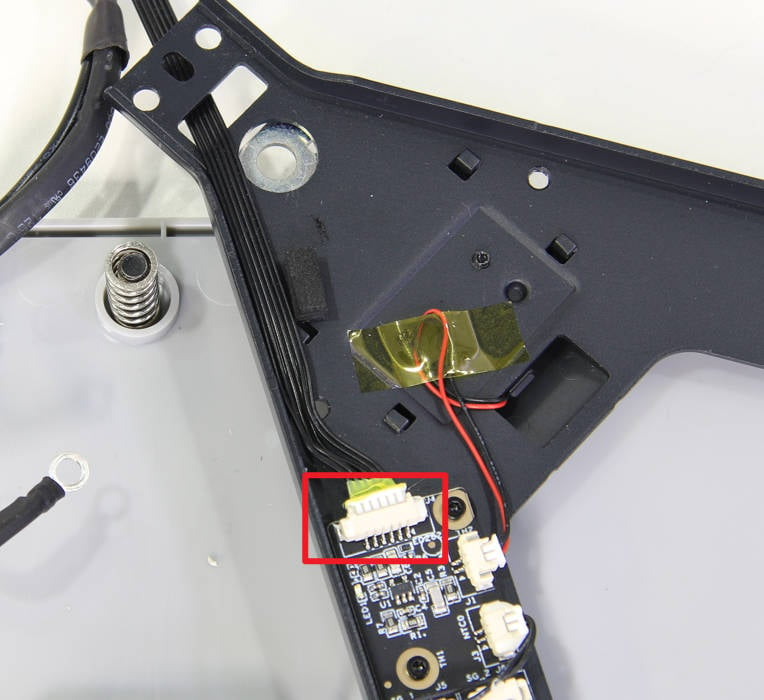
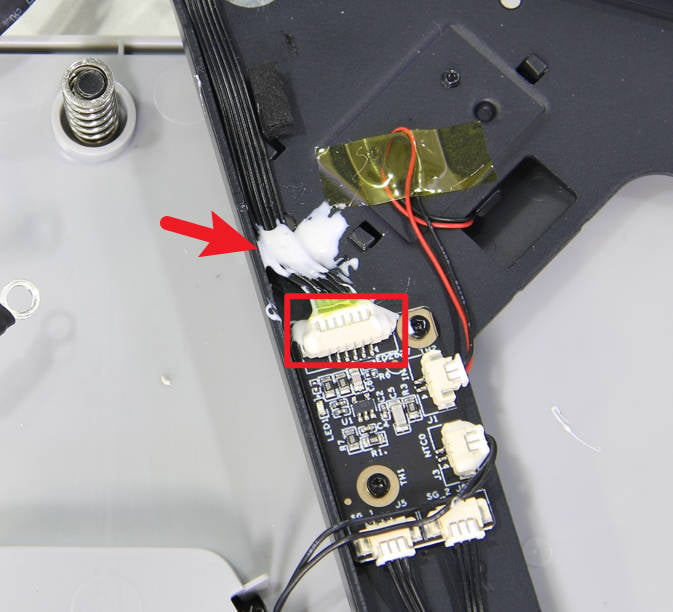
Pass the new heat bed signal cable through the cable hole on the heat bed sbracket, connect it to the connector on the board, apply the silicone glue to reinforced connector and fix the signal cable. Then wait for about 30 minutes (wait for the glue to cure).
 |
 |
¶ Step 6 - Install the heat bed bracket
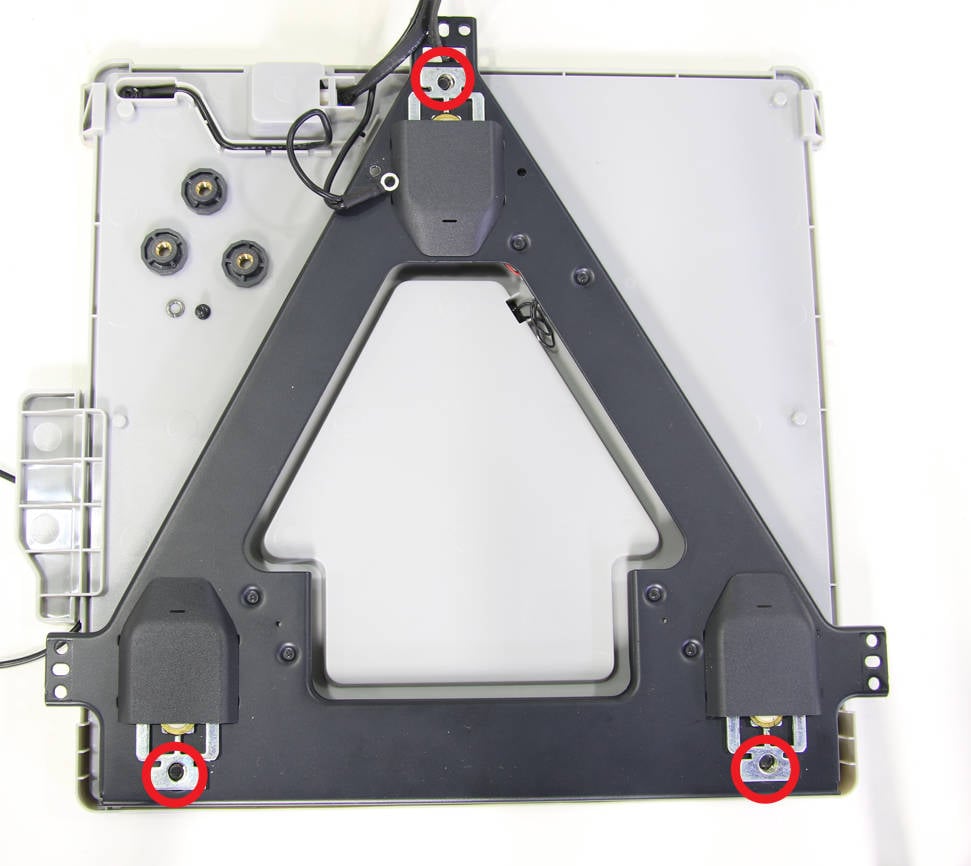
Assemble the bracket back to the heat bed, aligning the studs and through holes.
 |
 |
¶ Step 7 - Install leveling nuts
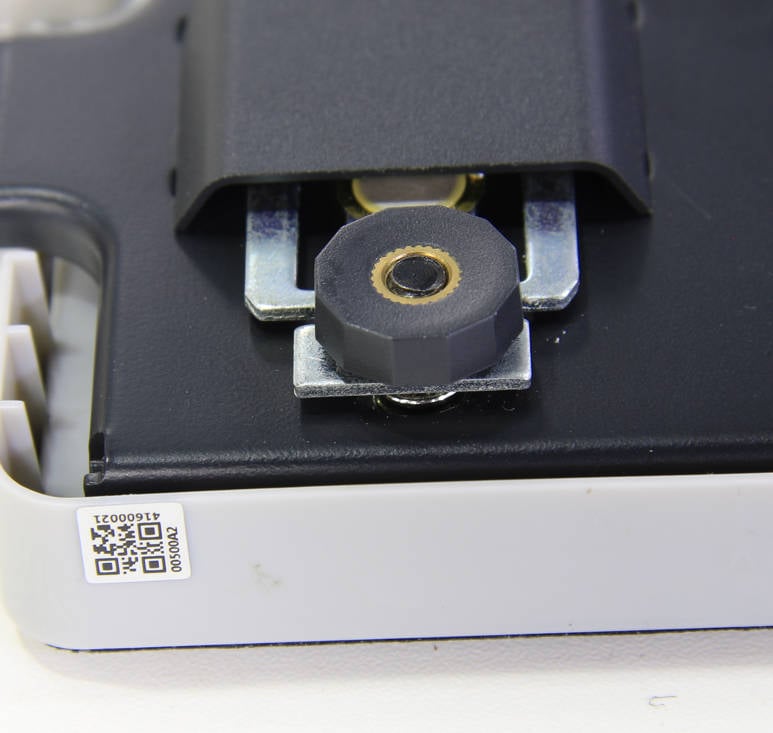
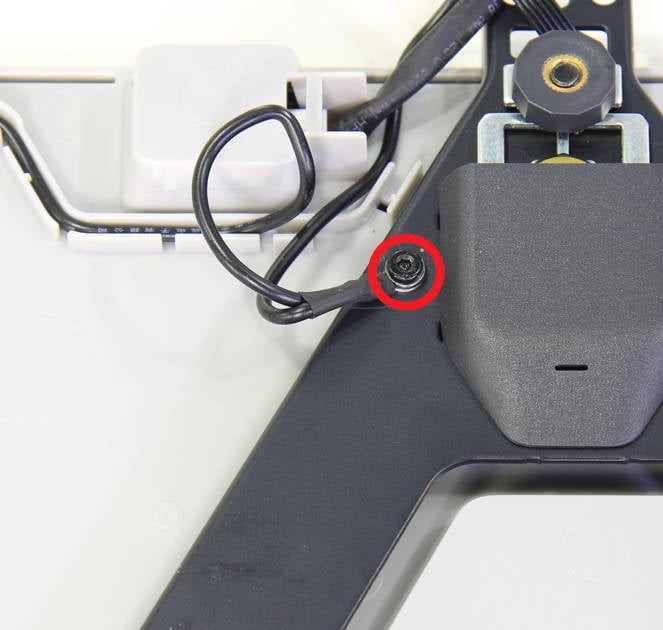
Install 3 leveling nuts (with rubber rings), the studs should be just flush with the nuts, and then fix the ground cable with the screw.
 |
 |
¶ Step 8 - Install the heat bed and assemble the printer
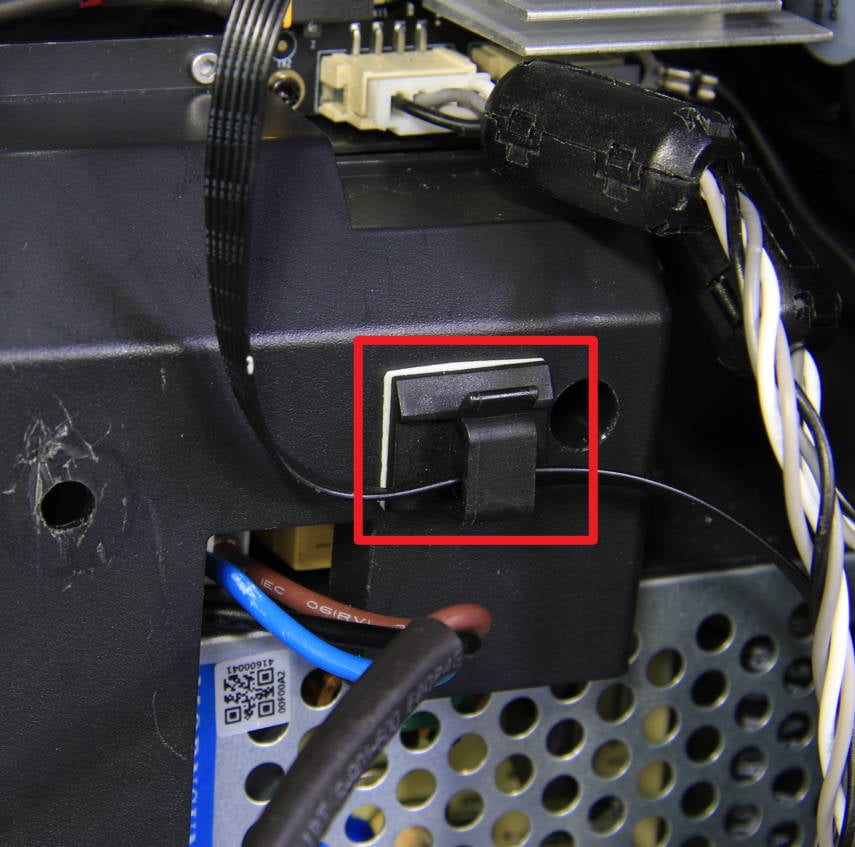
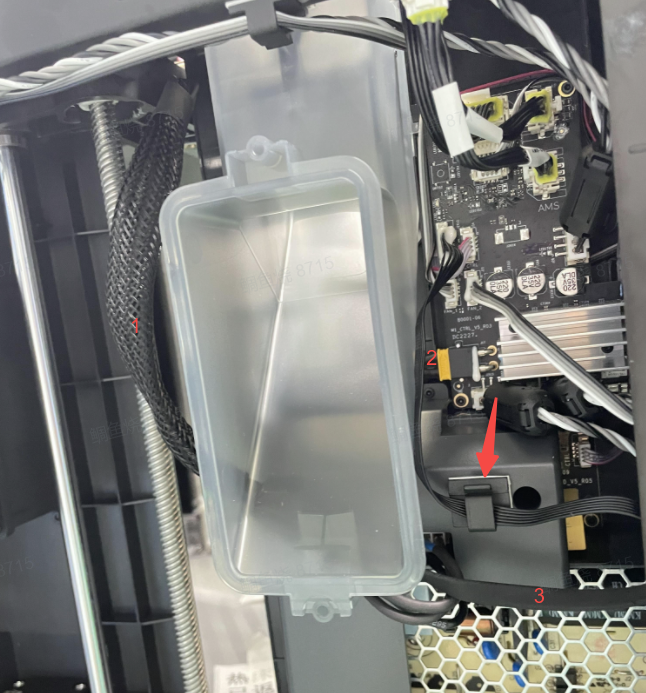
Refer to steps 13~25 in Replacing the heat bed to install the heat bed and assemble the printer. Due to the optimization of the product structure, the routing of the heat bed signal cable has changed, please refer to the figures below.
 |
 |
¶ How to verify completion/success
1. Connect the power cord and turn on the power.
2. Following the steps in Manual bed leveling to make a manual heat bed leveling.
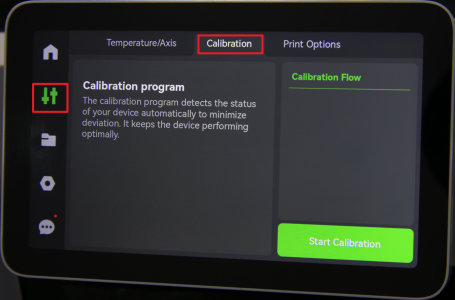
3. Go to the settings menu on the screen, then select Calibration and press “Start Calibration”.
Should you come across any issues, first retrace your steps and check all connections to try again. If problems persist, contact the service team for further assistance.