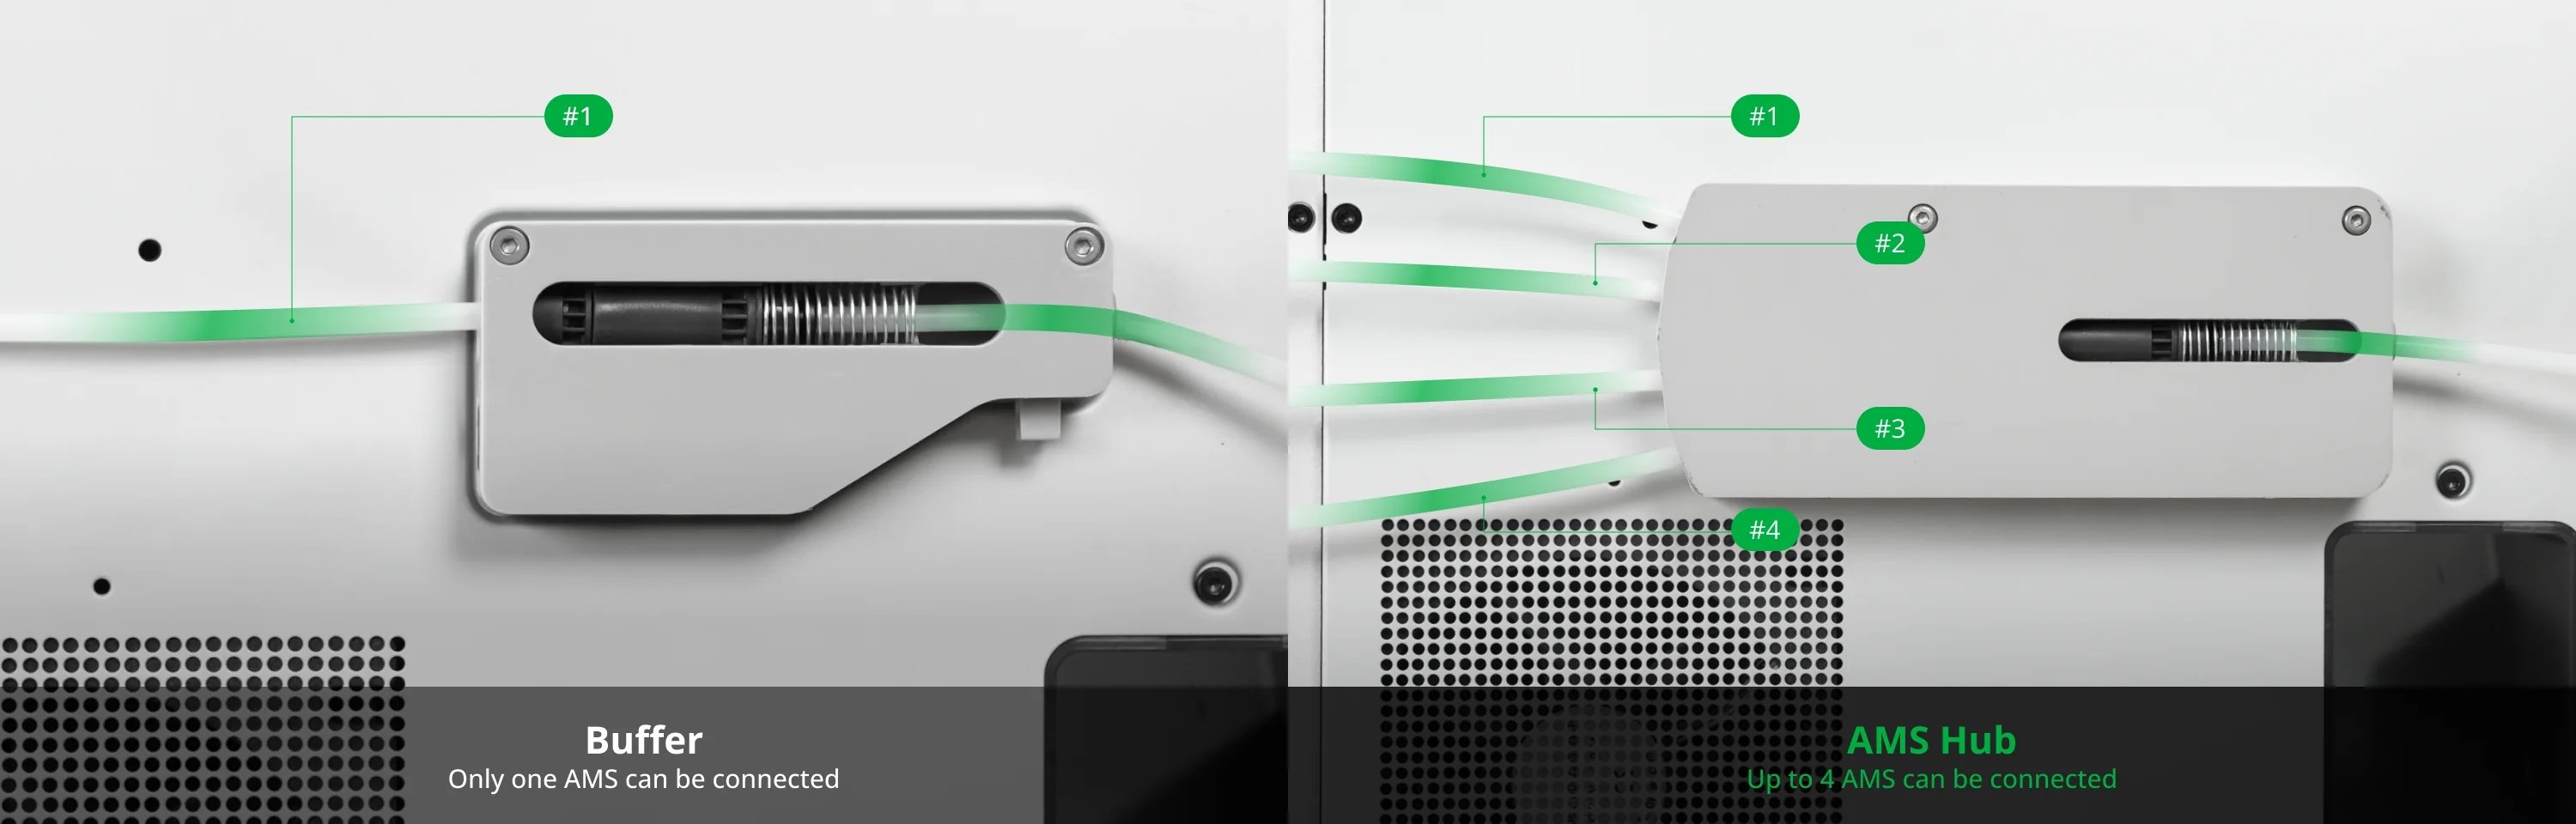
¶ Filament Buffer and AMS Hub
The built-in Filament Buffer of the printer can only be connected to 1 AMS. When replaced with AMS Hub, the printer will be able to connect up to 4 AMS.
You can purchase them at our store here:
Filament Buffer
Bambu Lab AMS Hub
¶ Connect AMS Hub and multi-AMS
Please review the AMS introduction and read the Notes for AMS in advance for important information.
¶ Video tutorial
¶ Connecting the AMS Hub to the printer
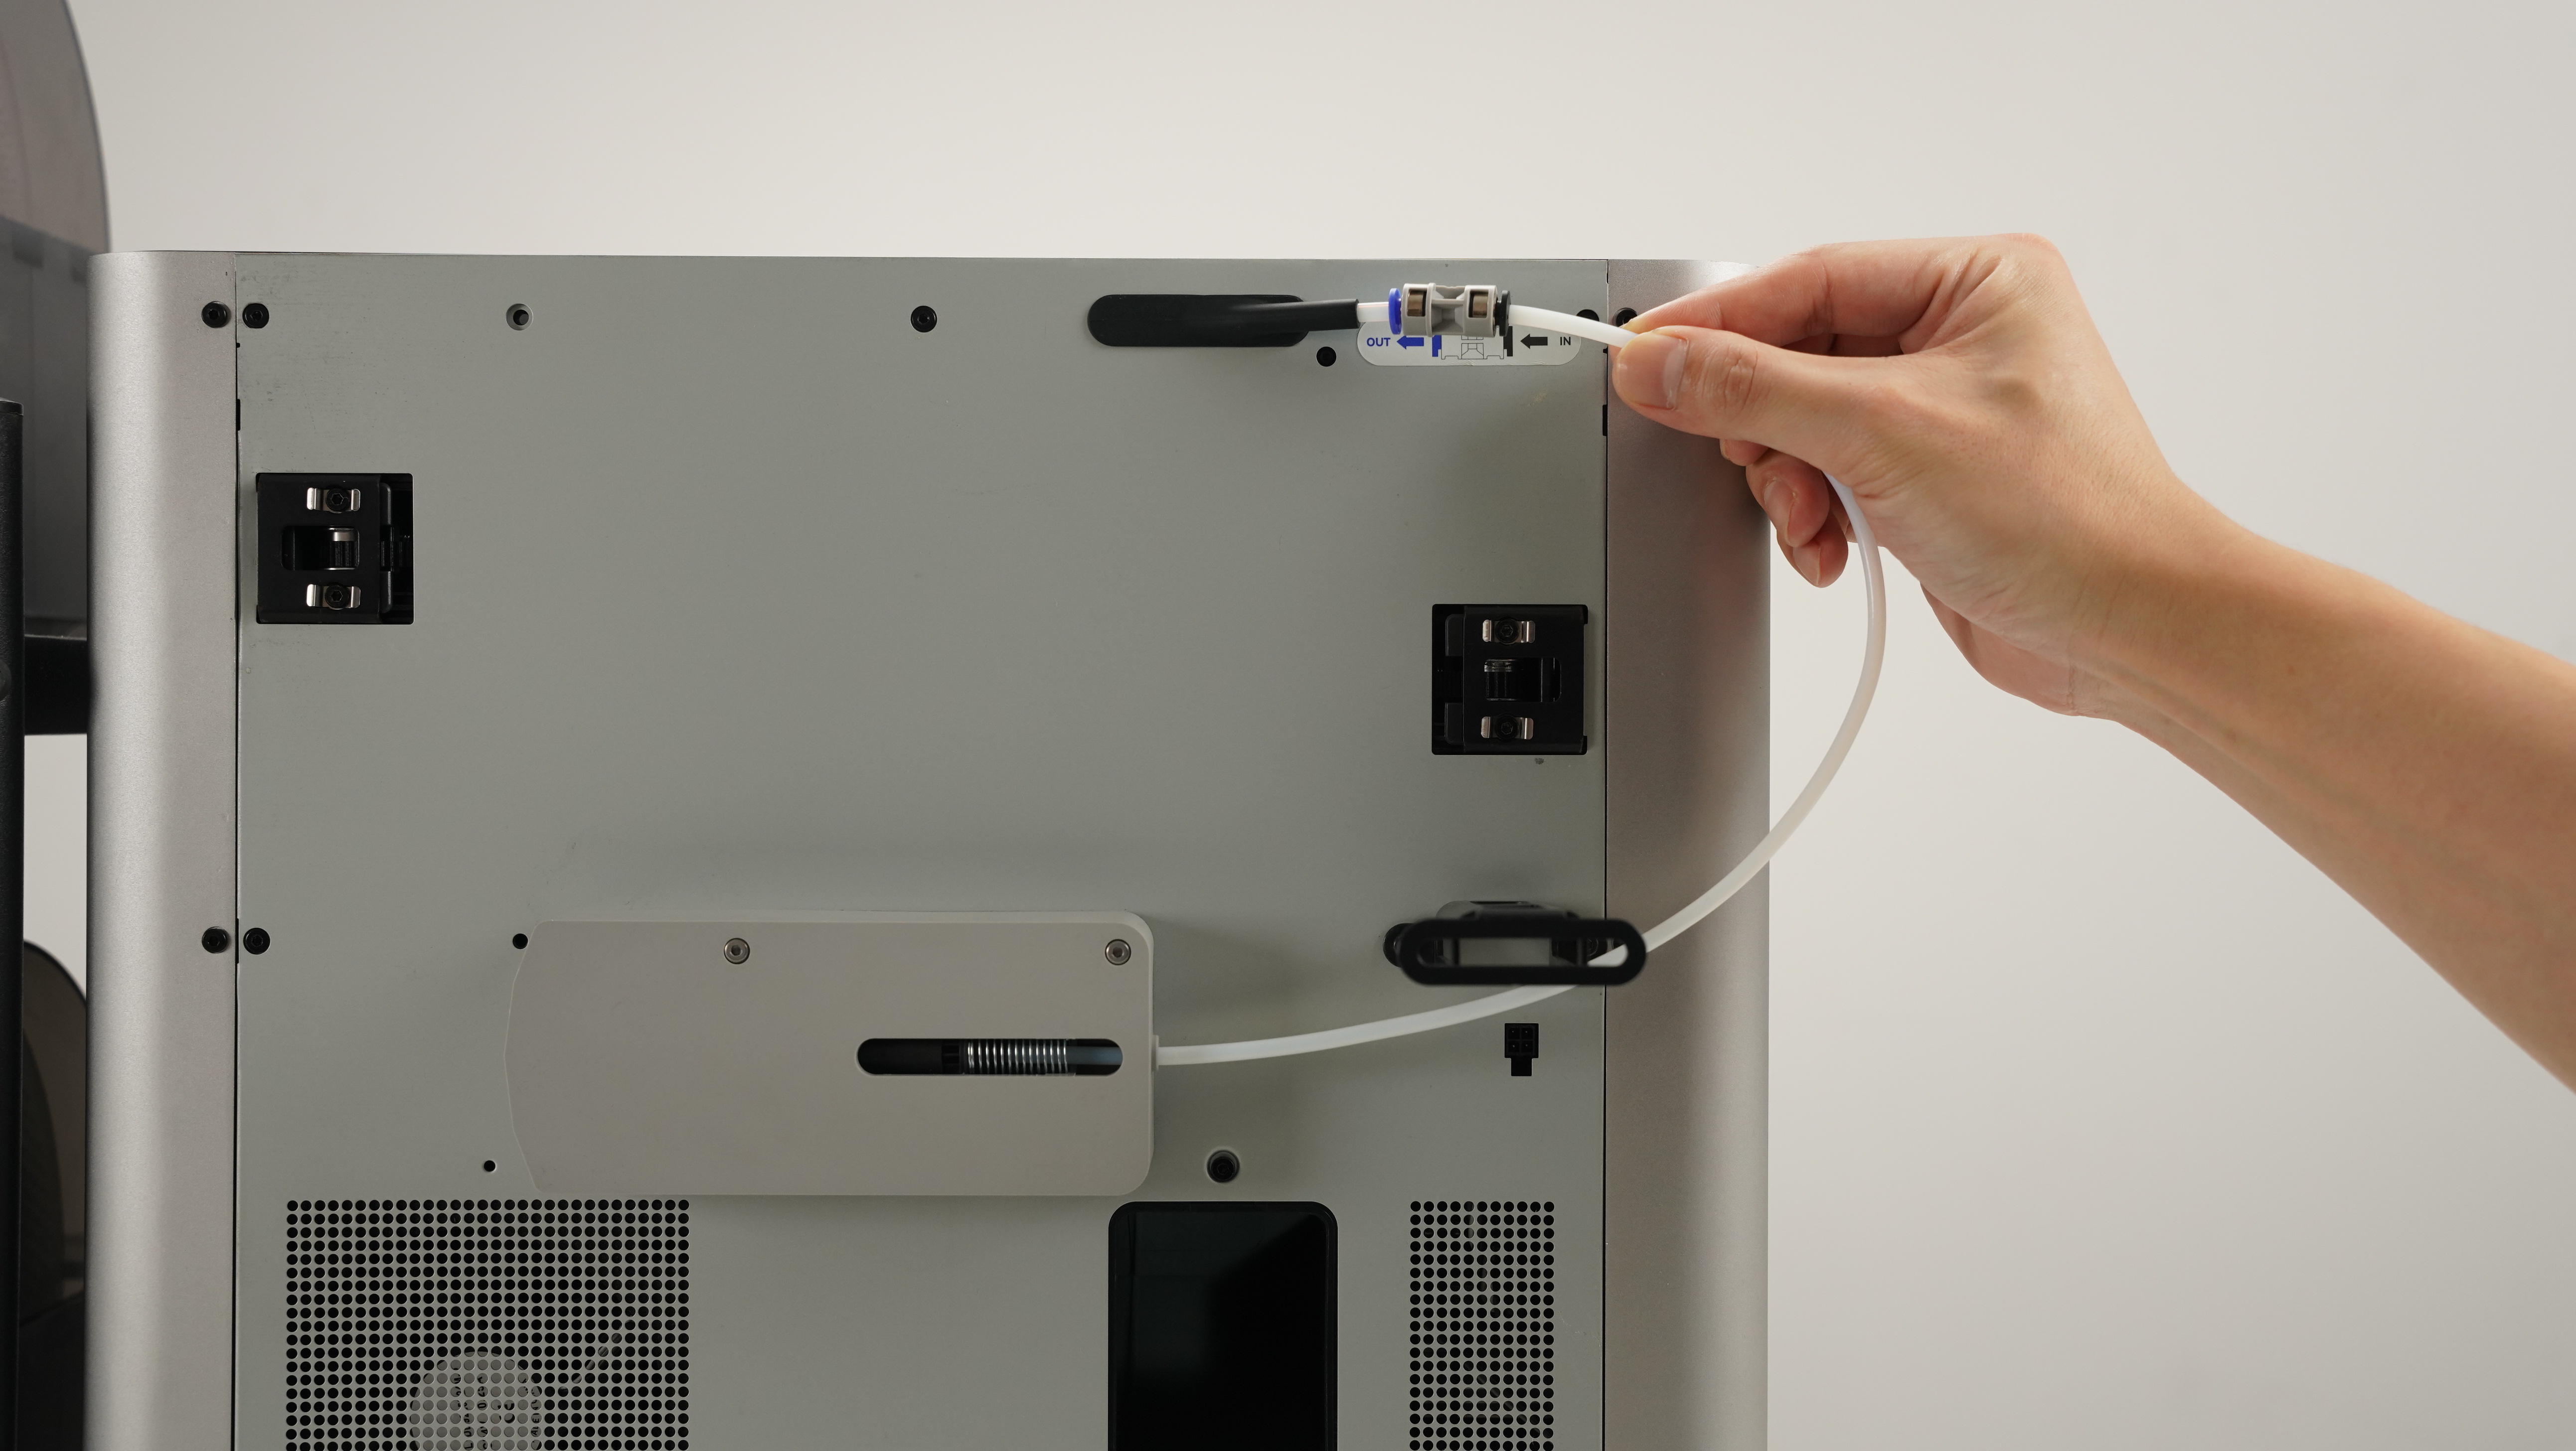
Please remove the buffer from the back of the printer (if applicable) and install the AMS Hub, as shown in the image below. Once the AMS Hub has been installed, proceed to connect the PTFE tube from the Hub to the PTFE coupler.
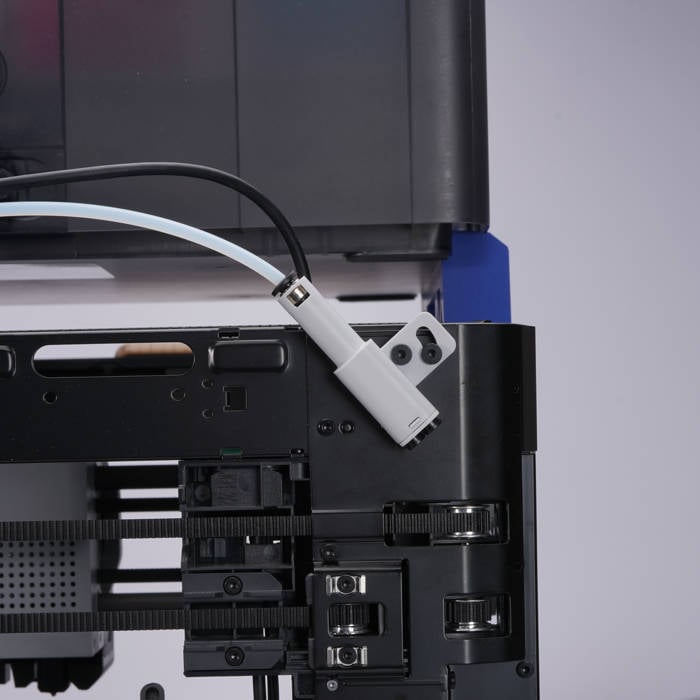
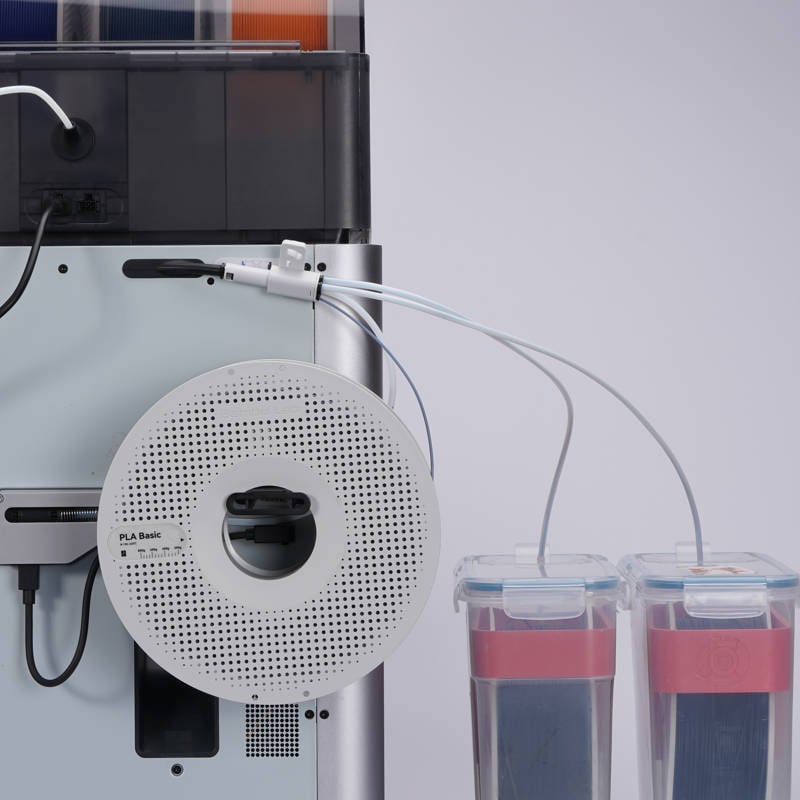
In addition, if you are using the Bambu 4-in-1 PTFE Adapter, you can connect four filaments from different modules to the printer simultaneously. The installation method is shown in the diagram below. For more related information, please refer to this Wiki: Bambu 4-in-1 PTFE Adapter
|
|
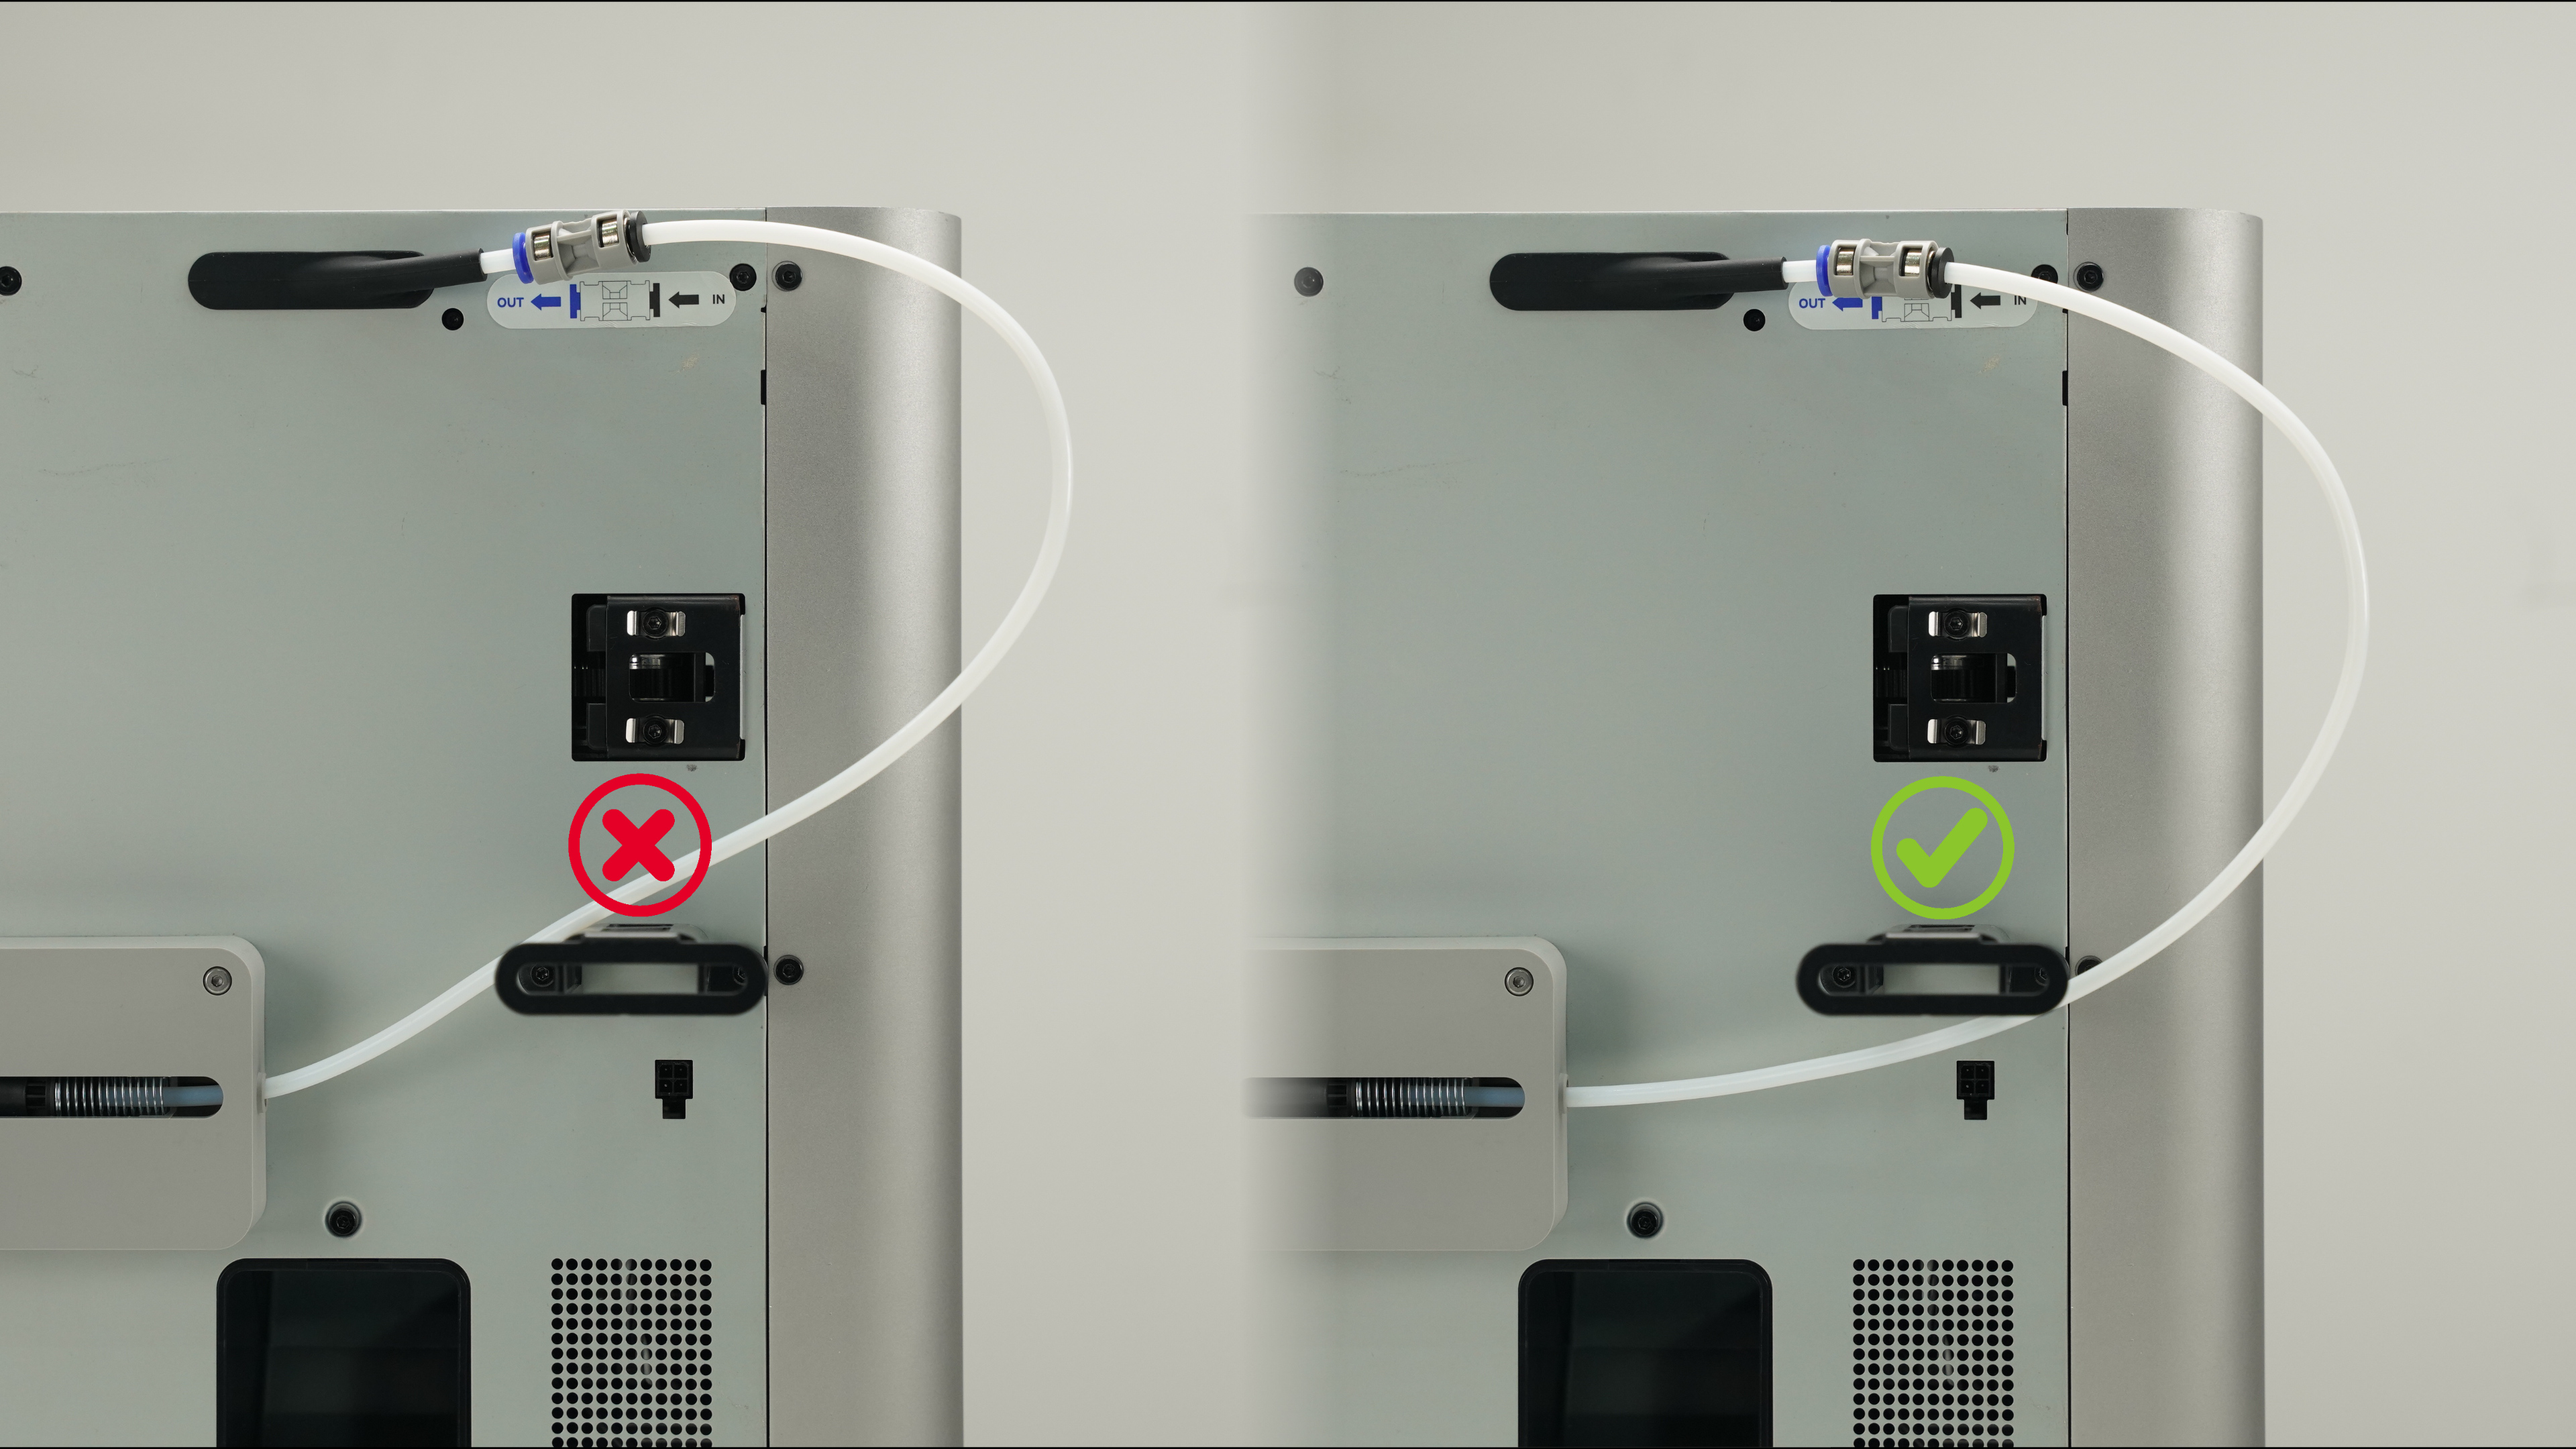
Please ensure that the PTFE tube runs under the spool holder and not over, as shown in the image below.
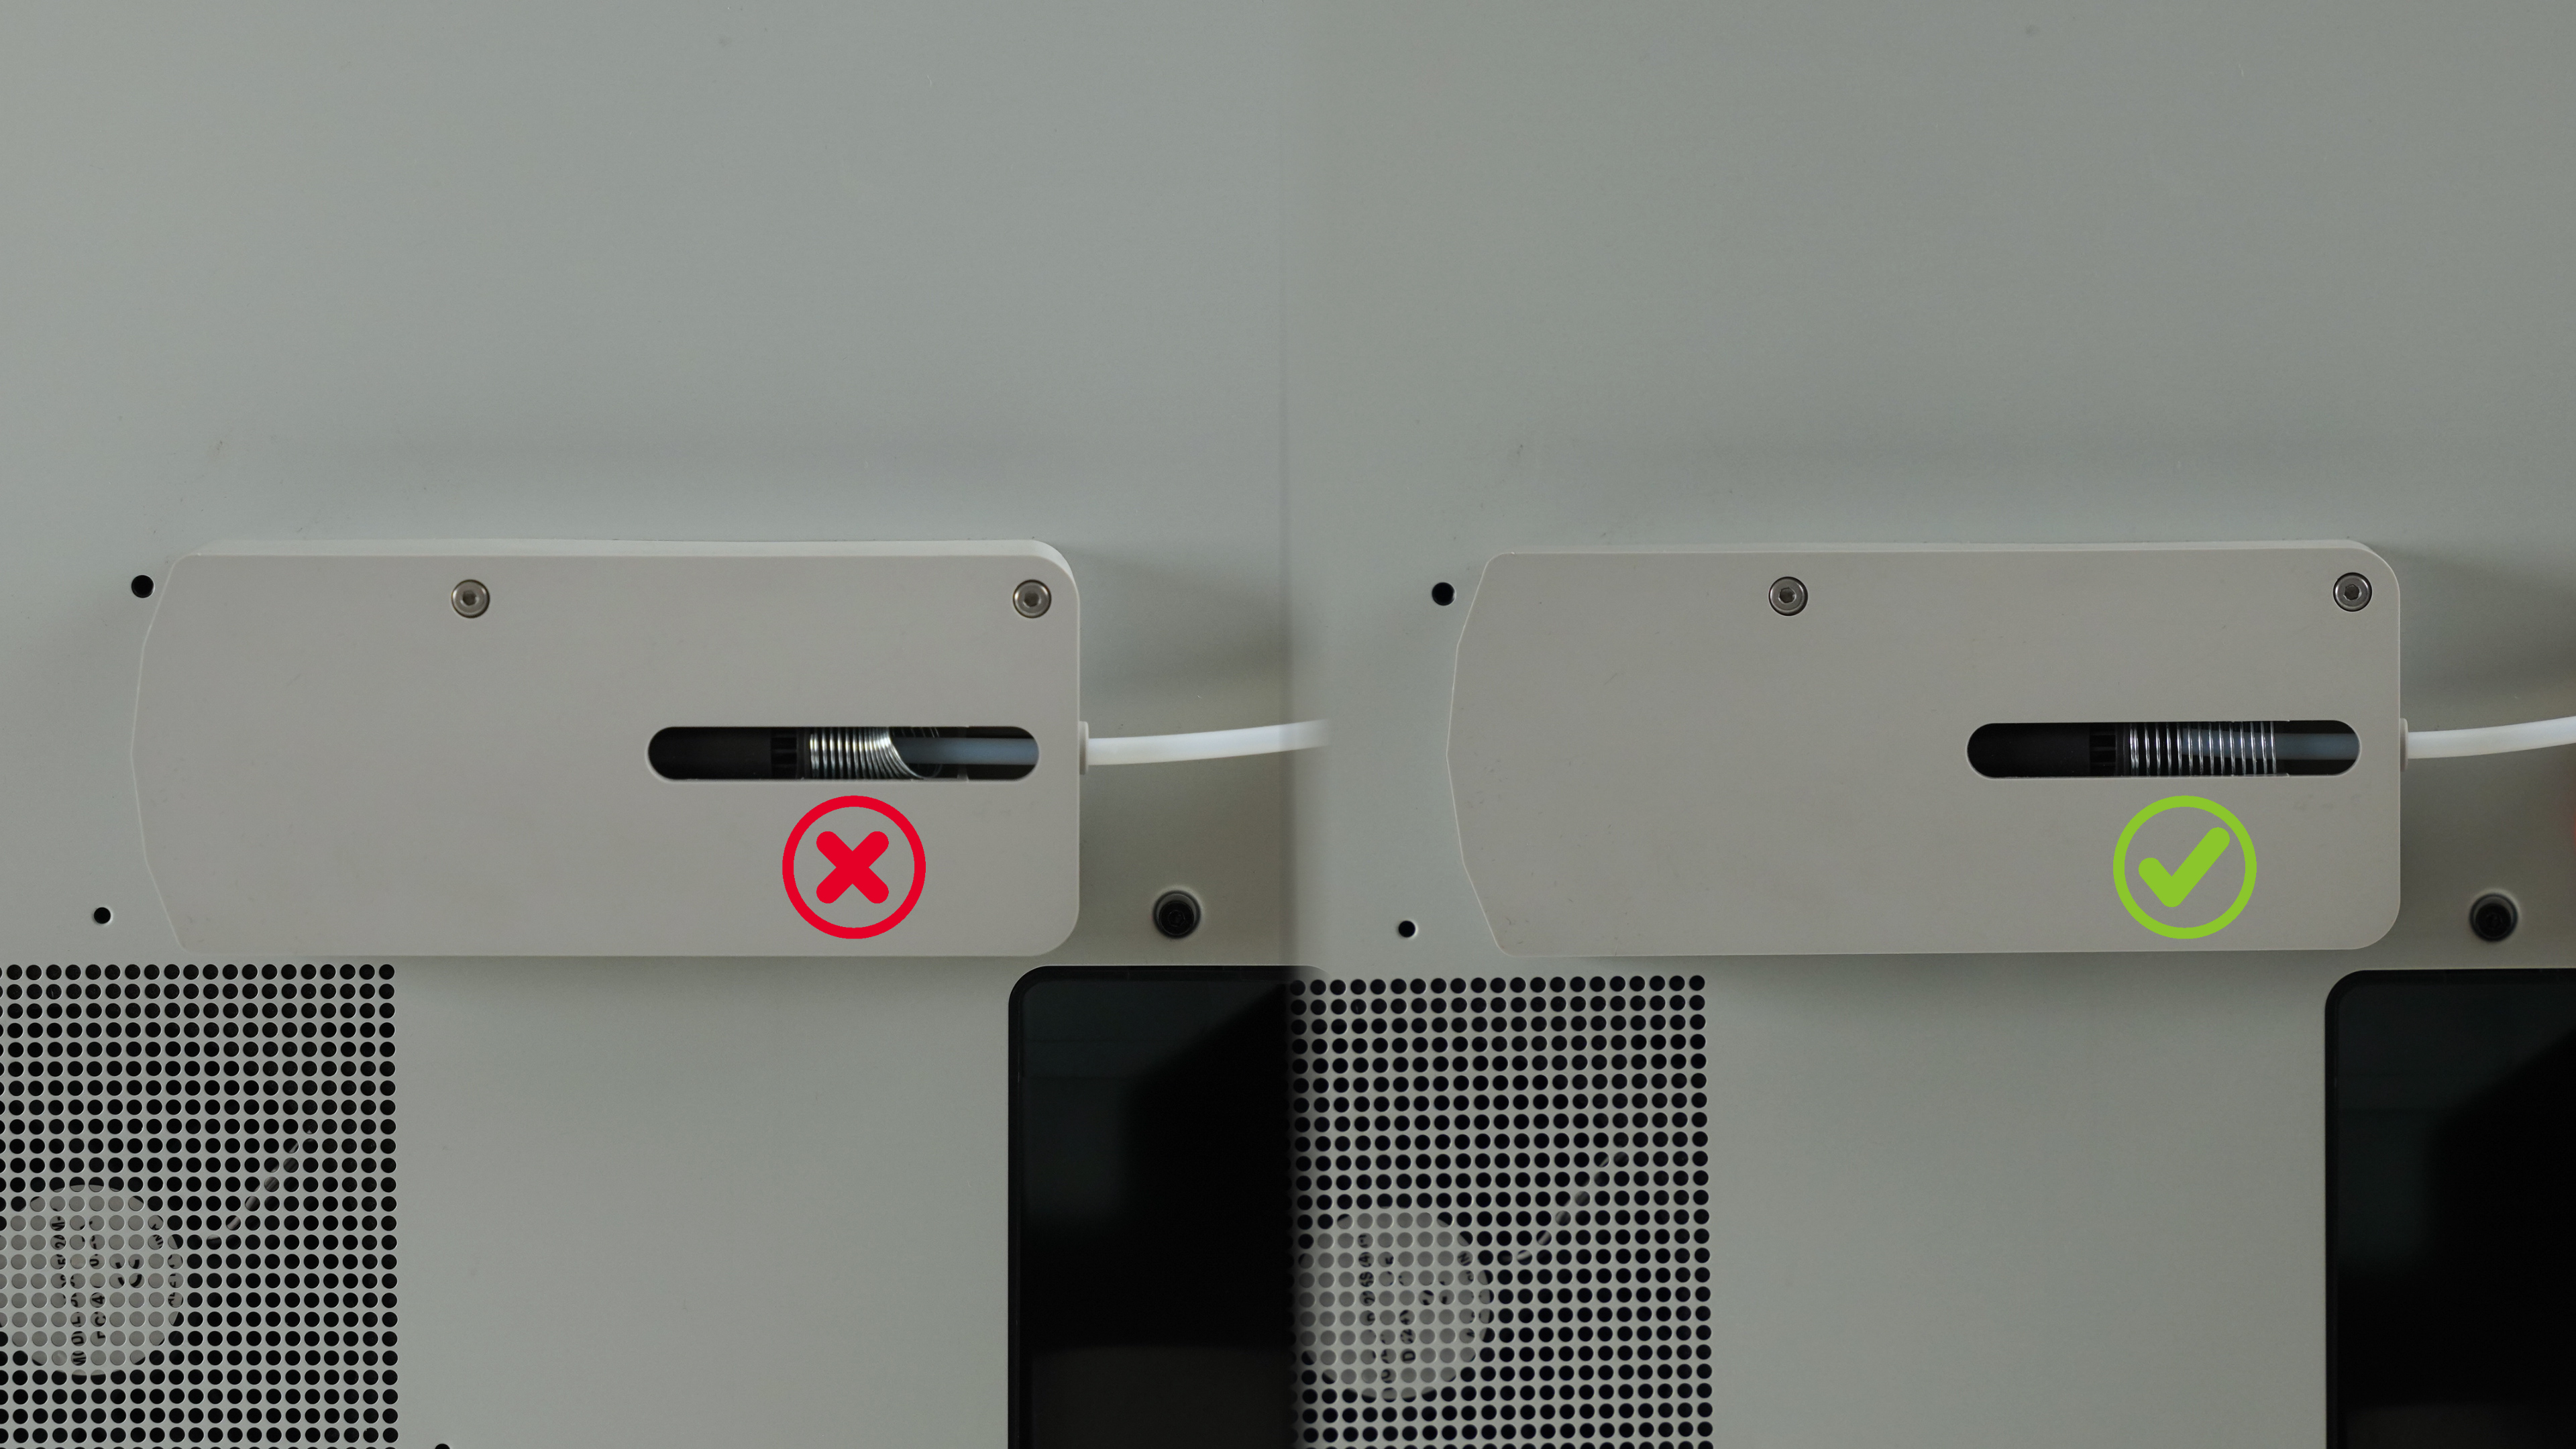
The spring within the AMS Hub should not be stuck/compressed. Please ensure that it moves freely within the AMS Hub.
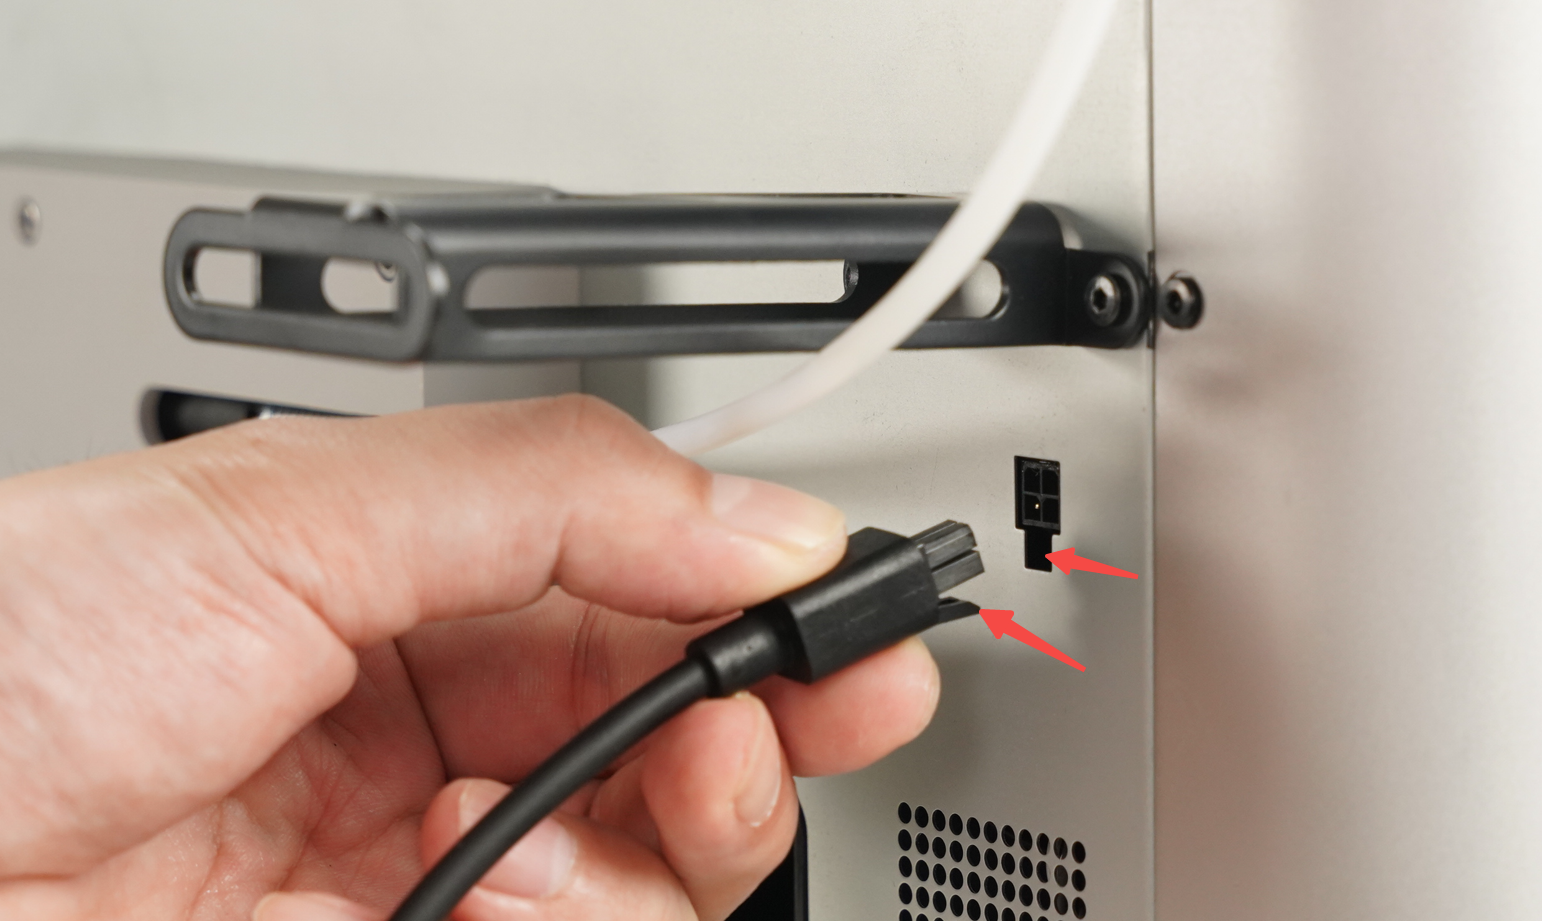
Connect the AMS Hub to the printer with the Bambu Bus Cable 4 pin.
You can purchase Bus Cables at our store here: Bambu Bus Cable
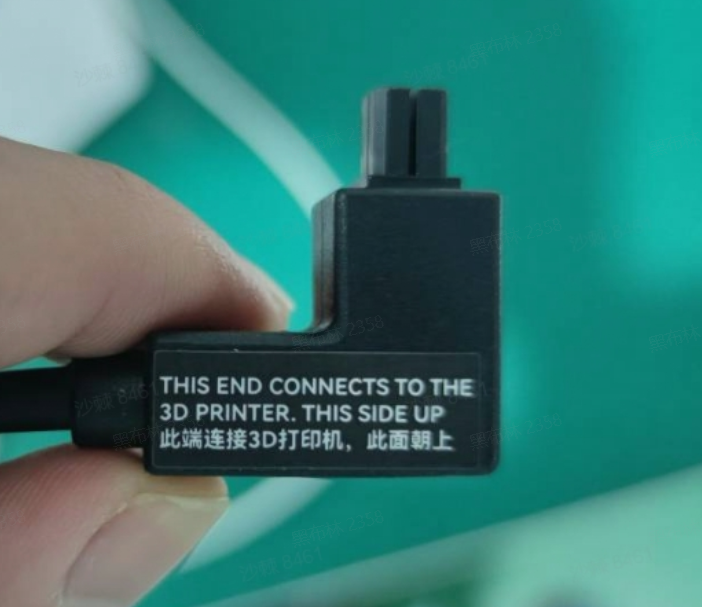
Note: When connecting the 4 pin cable, make sure it is in the correct orientation. If you are using an L-shaped plug cable, pay attention to its text prompts. If you insert the 4 pin cable in the wrong direction, it may cause the printer and AMS mainboard to burn down.
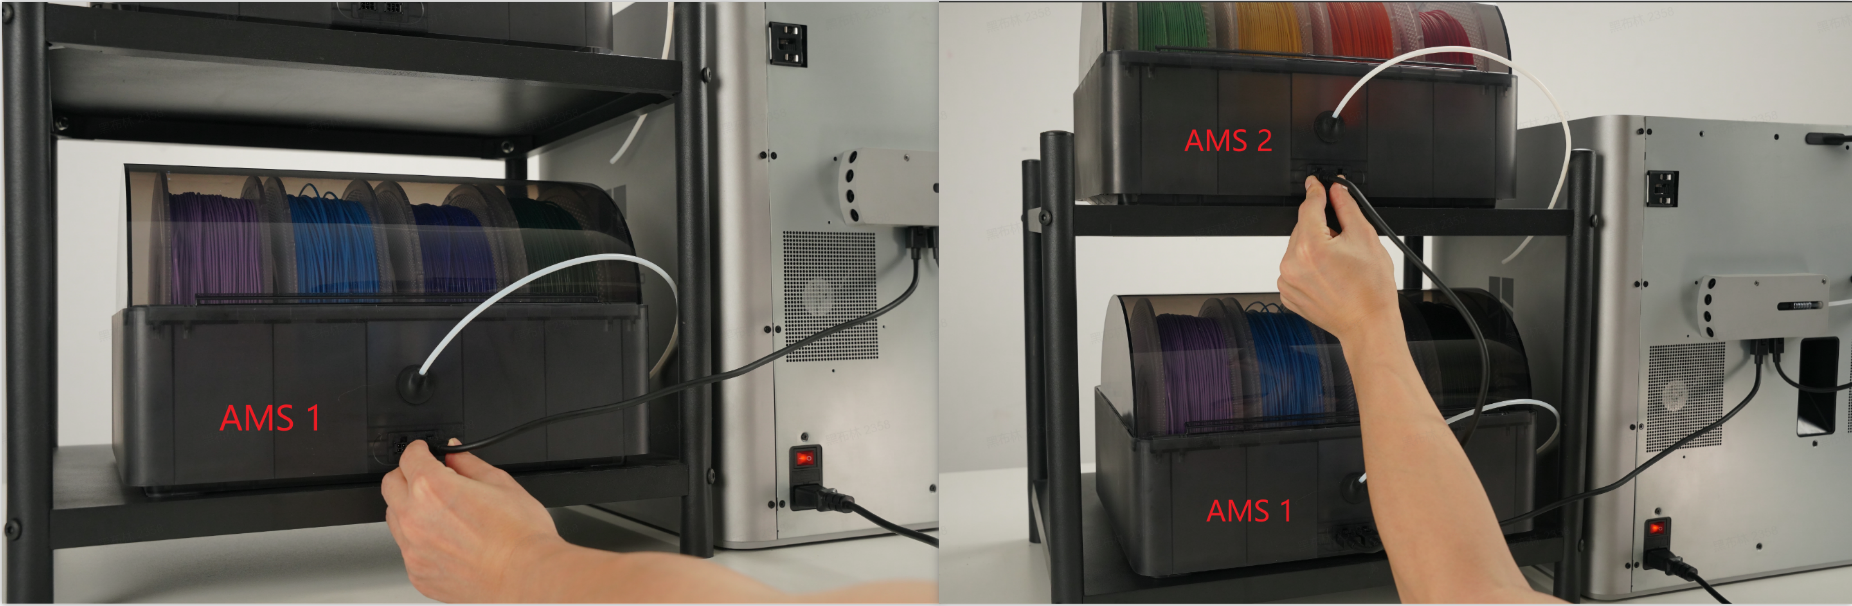
¶ Connect AMS to the AMS hub
¶ Connect the cables
Connect the most frequently used AMS to the AMS Hub and power on the printer. Then, connect the remaining AMS to the other Bus Cable 6 pin port of the previous AMS.
Kind reminder:
Our store offers two types of 6-pin bus cables: 510 mm and 1500 mm in length. The 510 mm cable is commonly used for connecting the buffer and AMS, while the 1500 mm cable is widely used for connecting the AMS Hub and AMS.
If you need a longer Bus Cable 6 pin, please purchase it at our store Bambu Bus Cable.
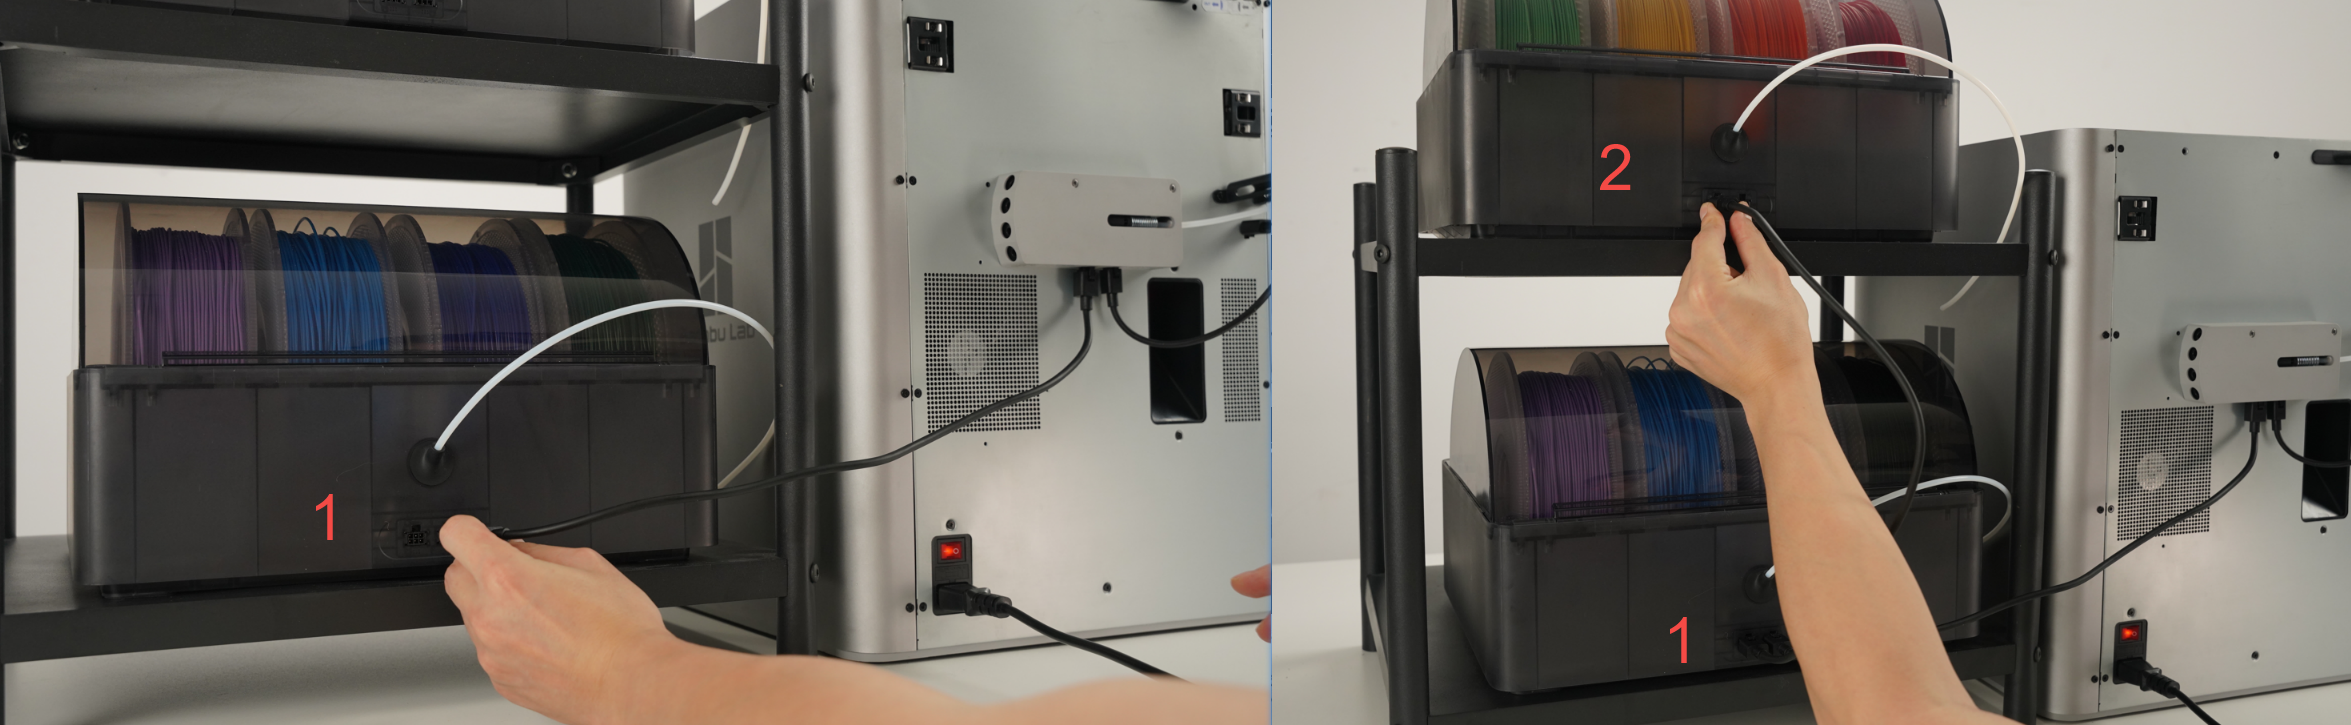
¶ Connect the PTFE tube of AMS to AMS Hub
Having the correct PTFE Tube length is important. We recommend keeping it as short as possible while avoiding excessive bending. This helps minimize AMS feed resistance and reduces the time required for filament loading and unloading.
Note: When connecting multiple AMS to the AMS Hub, it is advised to keep the longest PTFE tube length within 3.5 meters. Excessive length in the feeding path can result in increased resistance, potentially affecting the smooth loading and unloading of filament. Additionally, avoid excessive bending of the PTFE tube to minimize resistance.
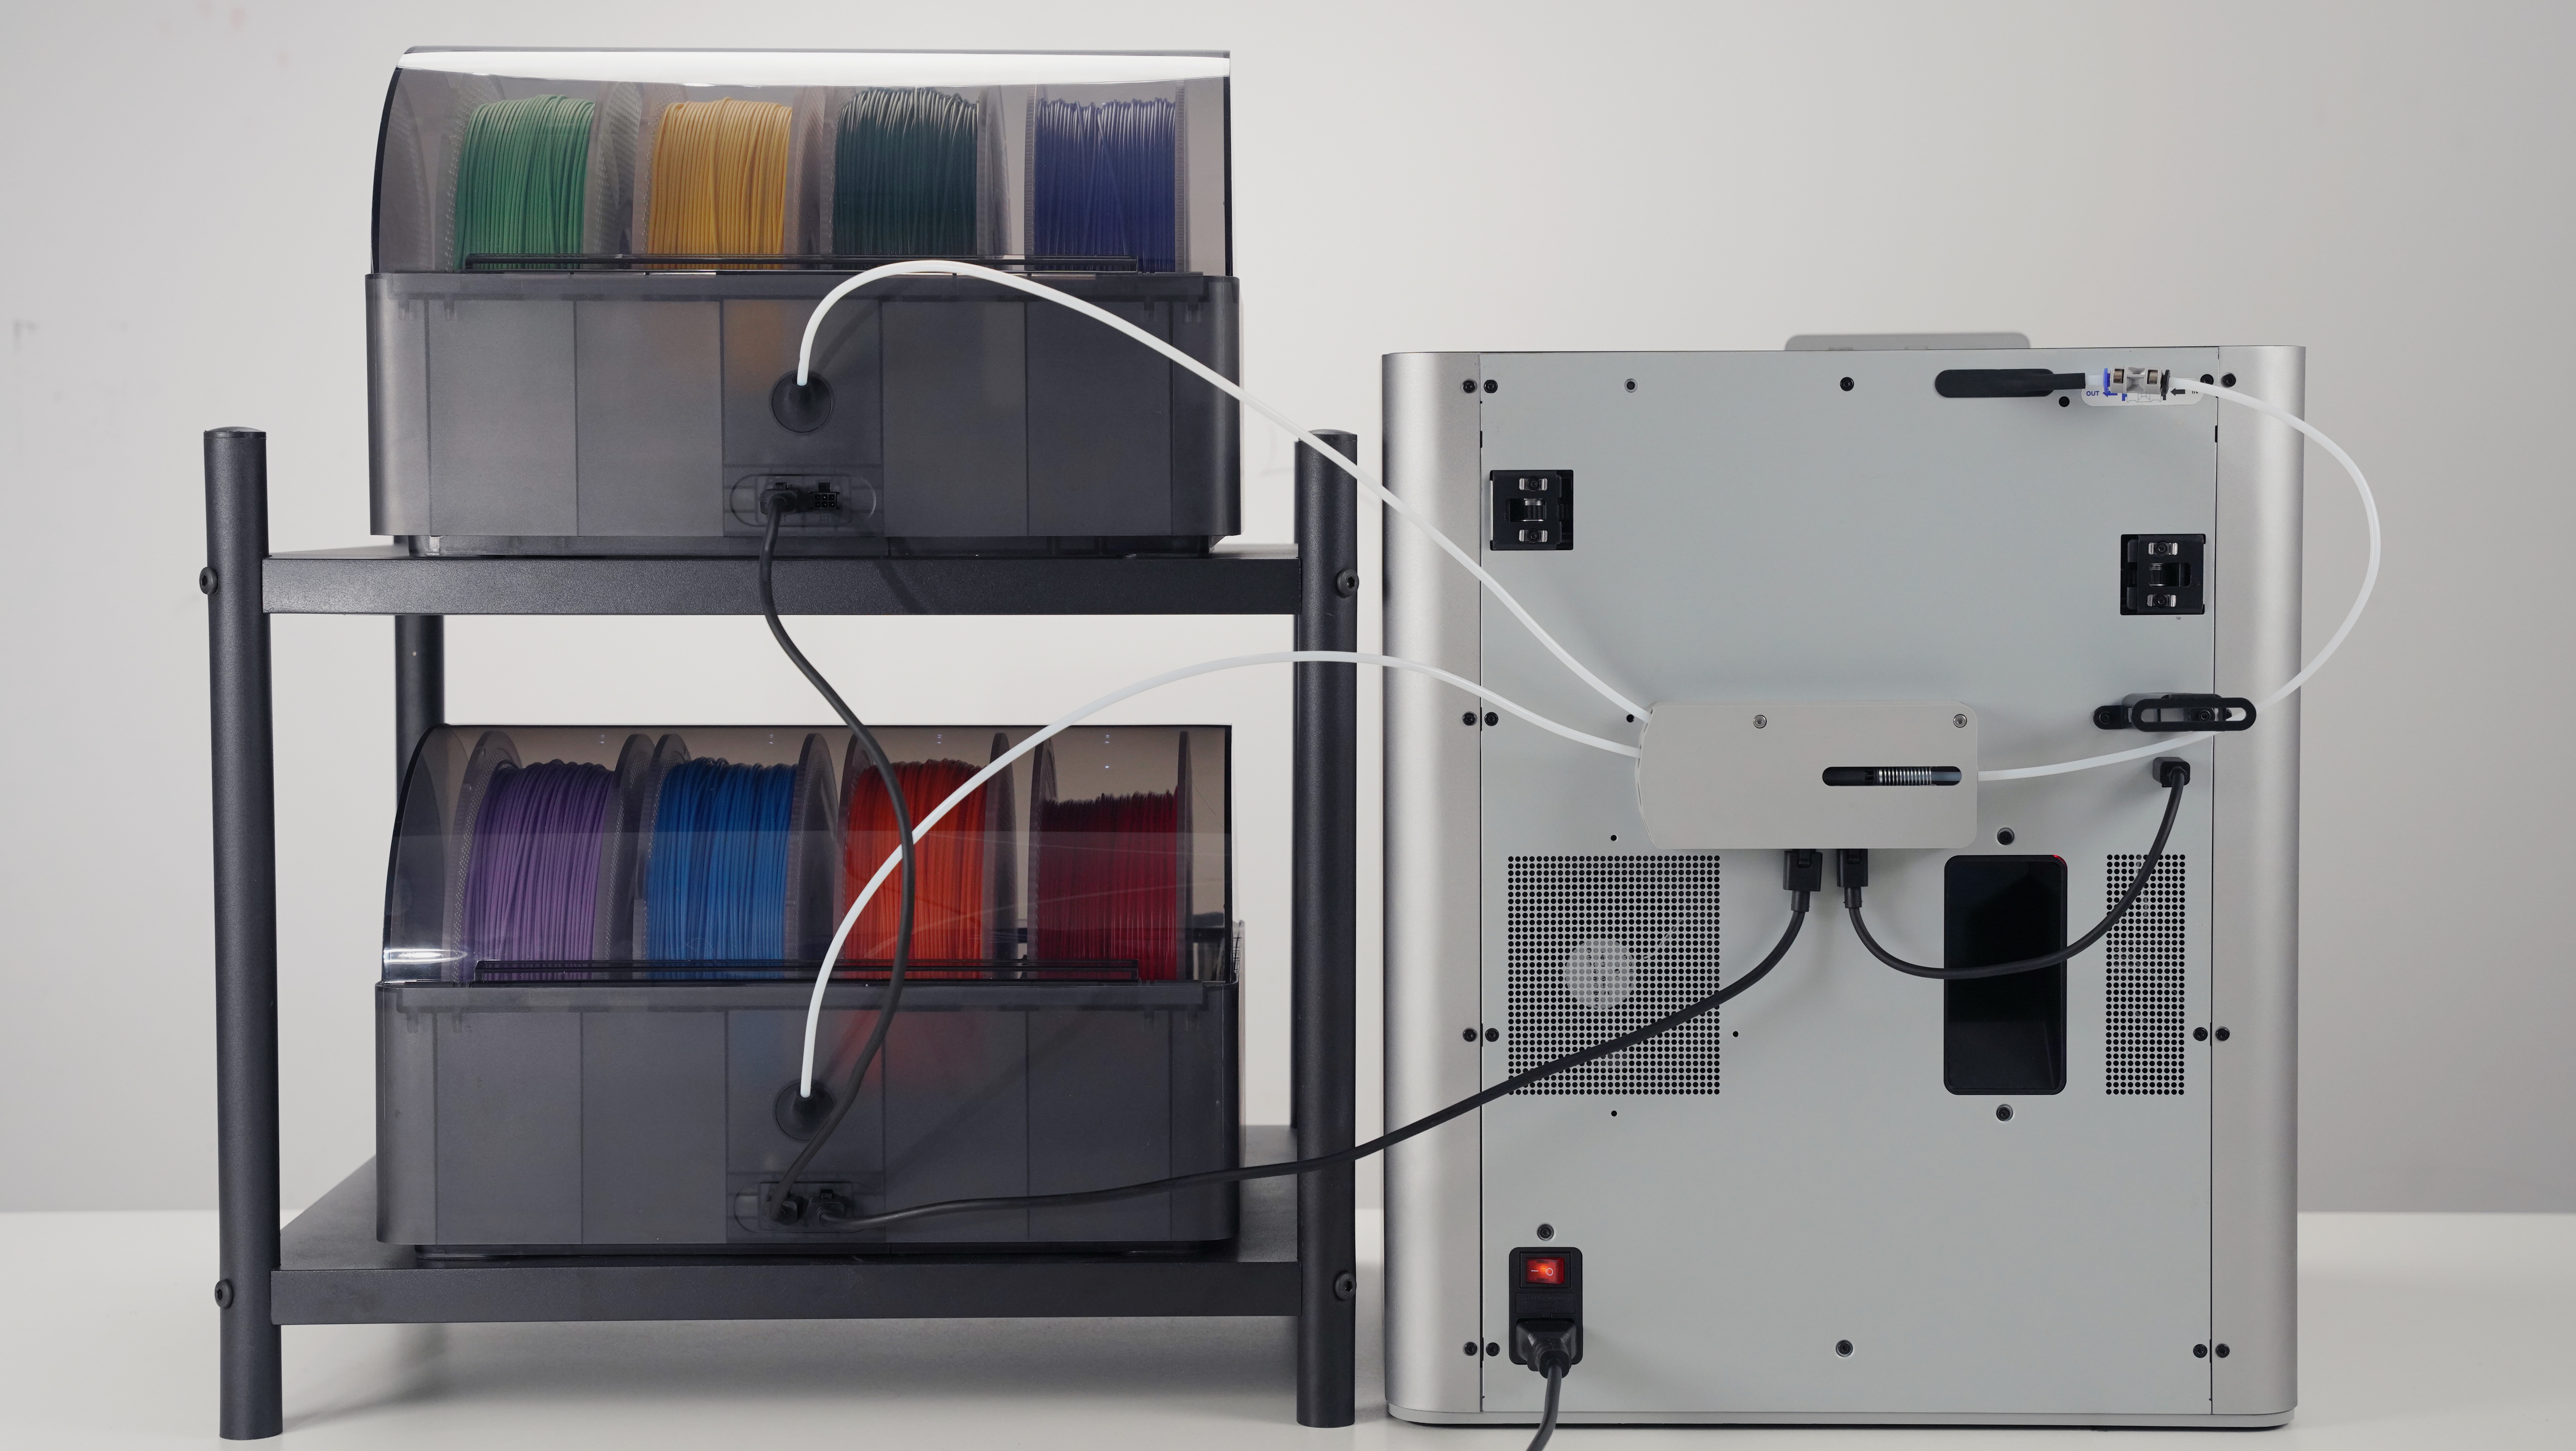
¶ Check if the connection is successful
Please check your printer to ensure the correct installation of the AMS Hub and additional AMS units. Refer to the provided image for a successful setup.
You can refer to this wiki to start multi-color printing: Multi-color printing operation guide
¶ Tips
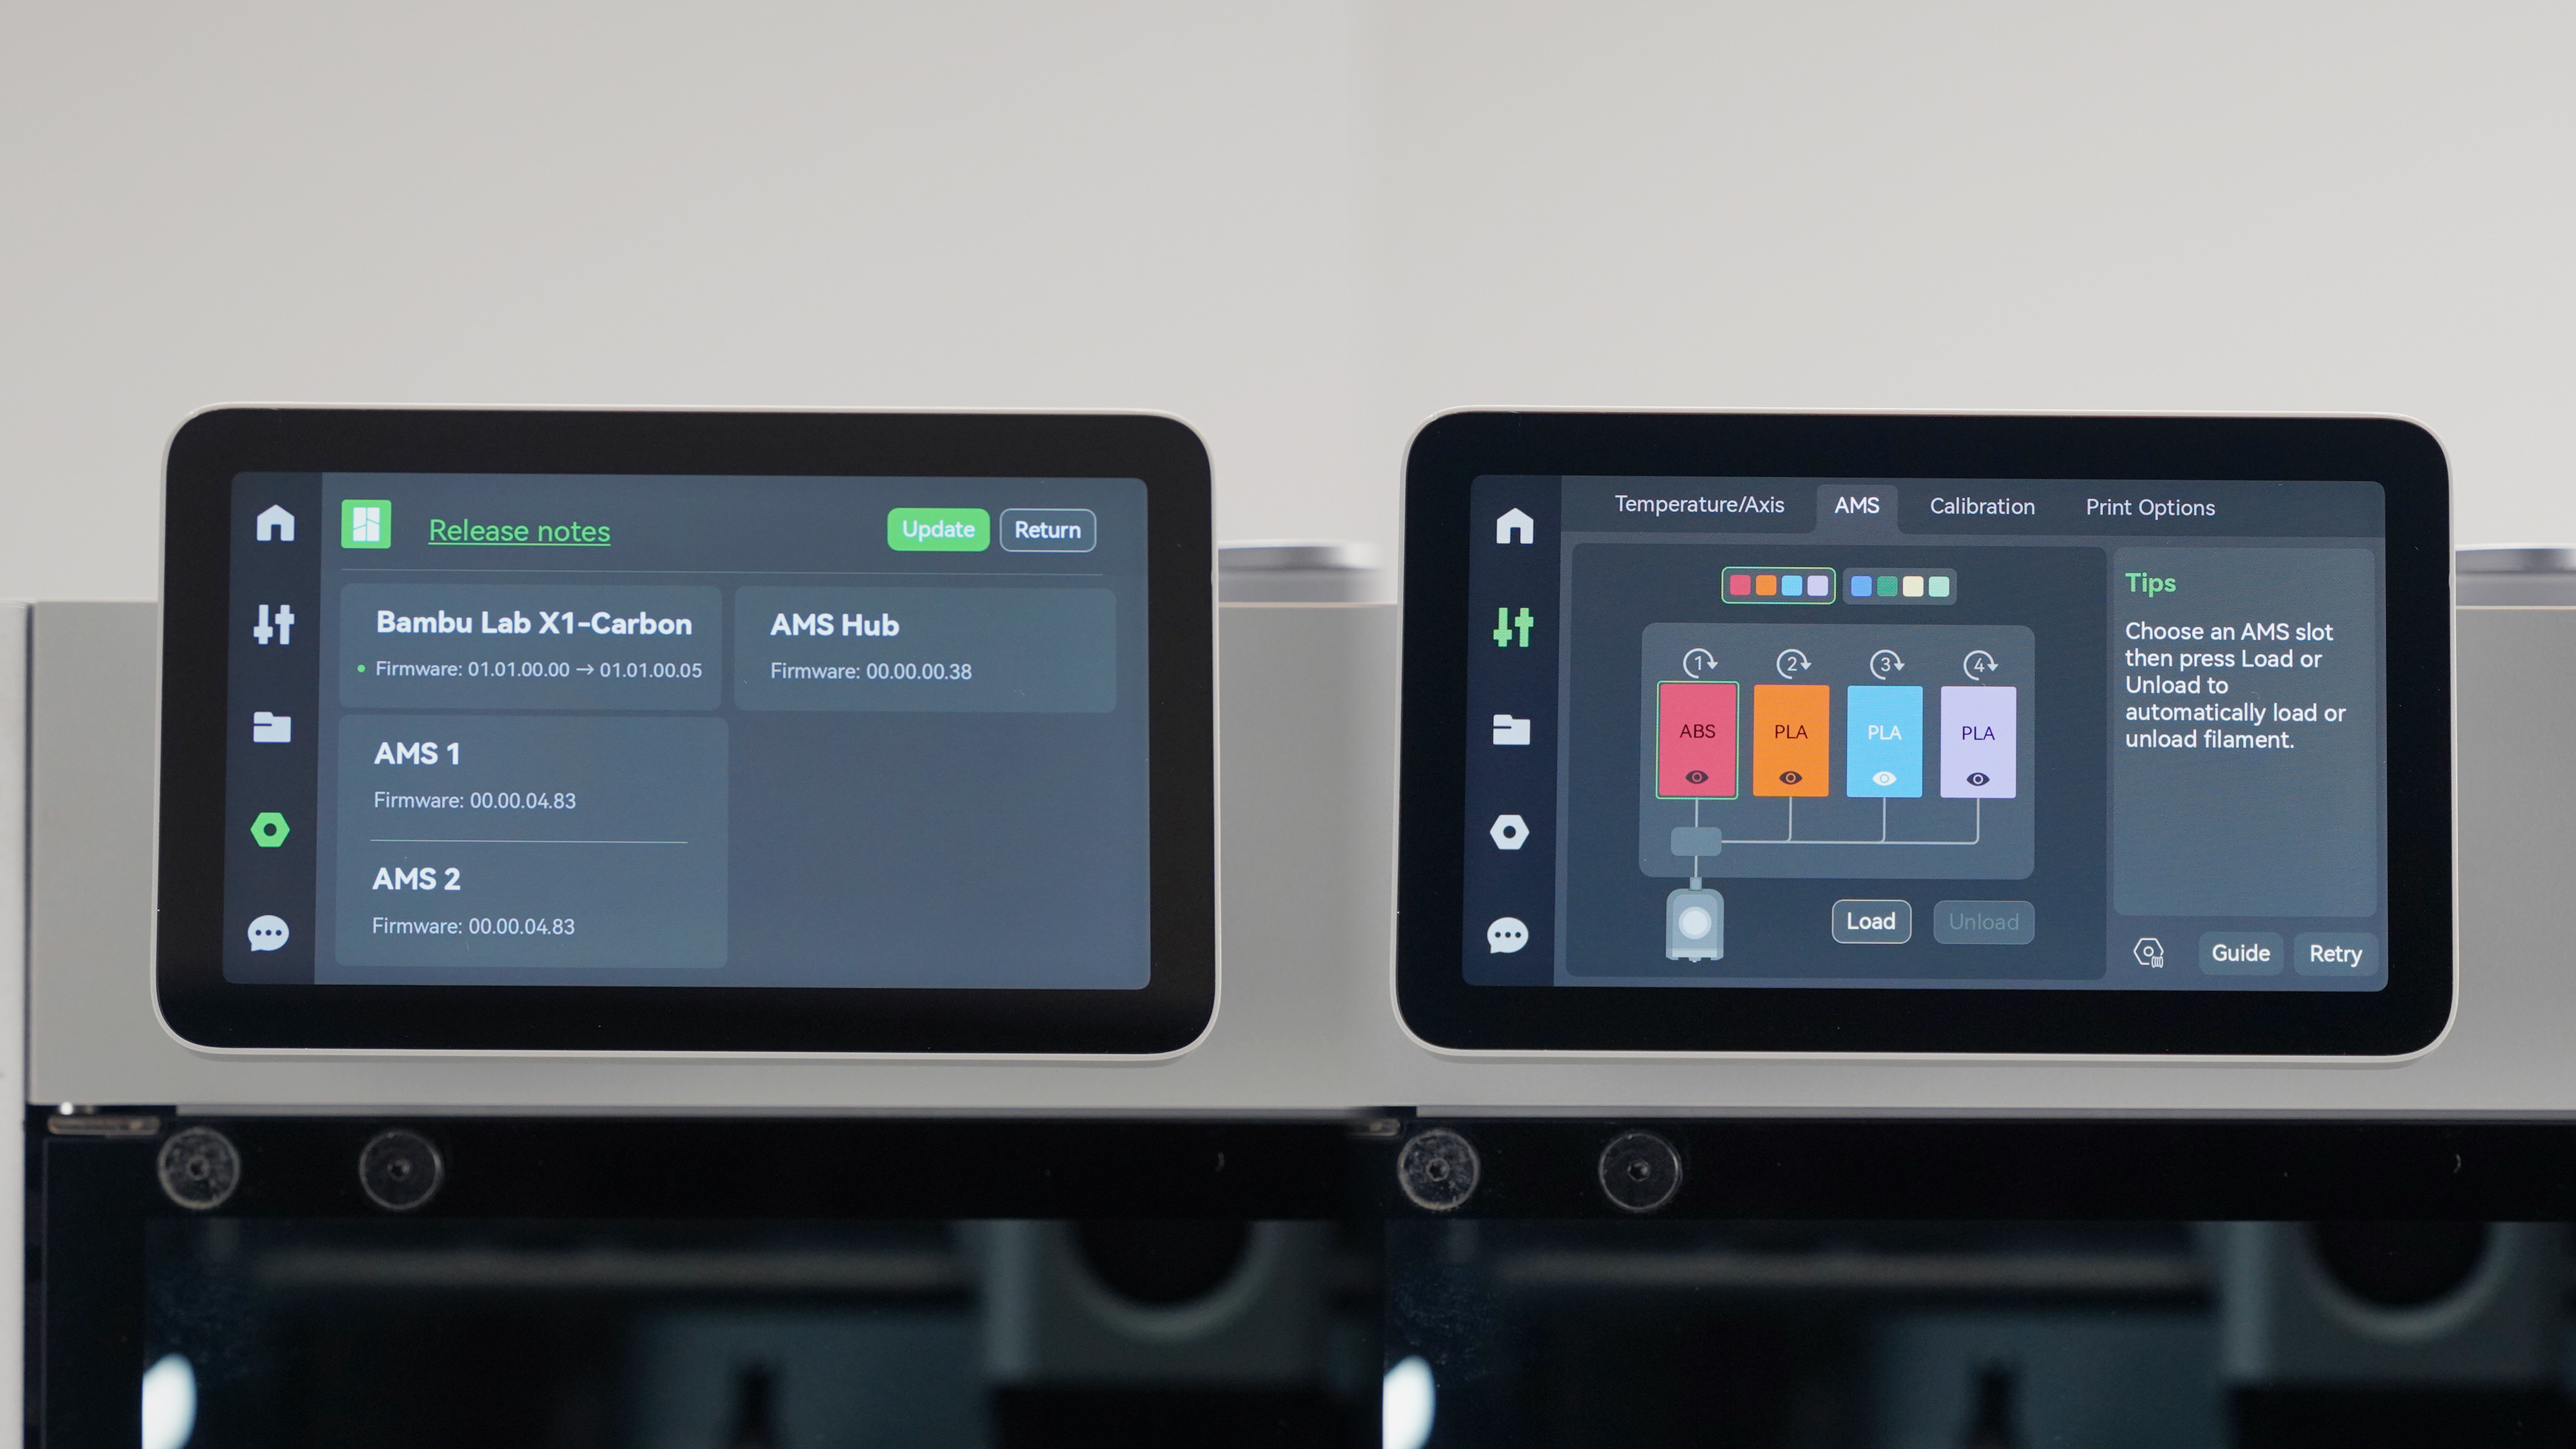
¶ 1. AMS ID assignment
Each AMS is assigned an ID, which is displayed on the screen. The logic for assigning AMS ID is to easily identify the connection between them, e.g., AMS1 is directly connected to the AMS Hub, AMS2 is connected to AMS1, and so on.
Please note that you should connect them individually to be able to assign the ID in order. Keep the printer powered on during this process.
However, if you connect multiple AMS units in advance and then connect to the AMS Hub at the end, or you connect all AMS to the hub before powering on the printer, it will randomly assign IDs to these AMS.
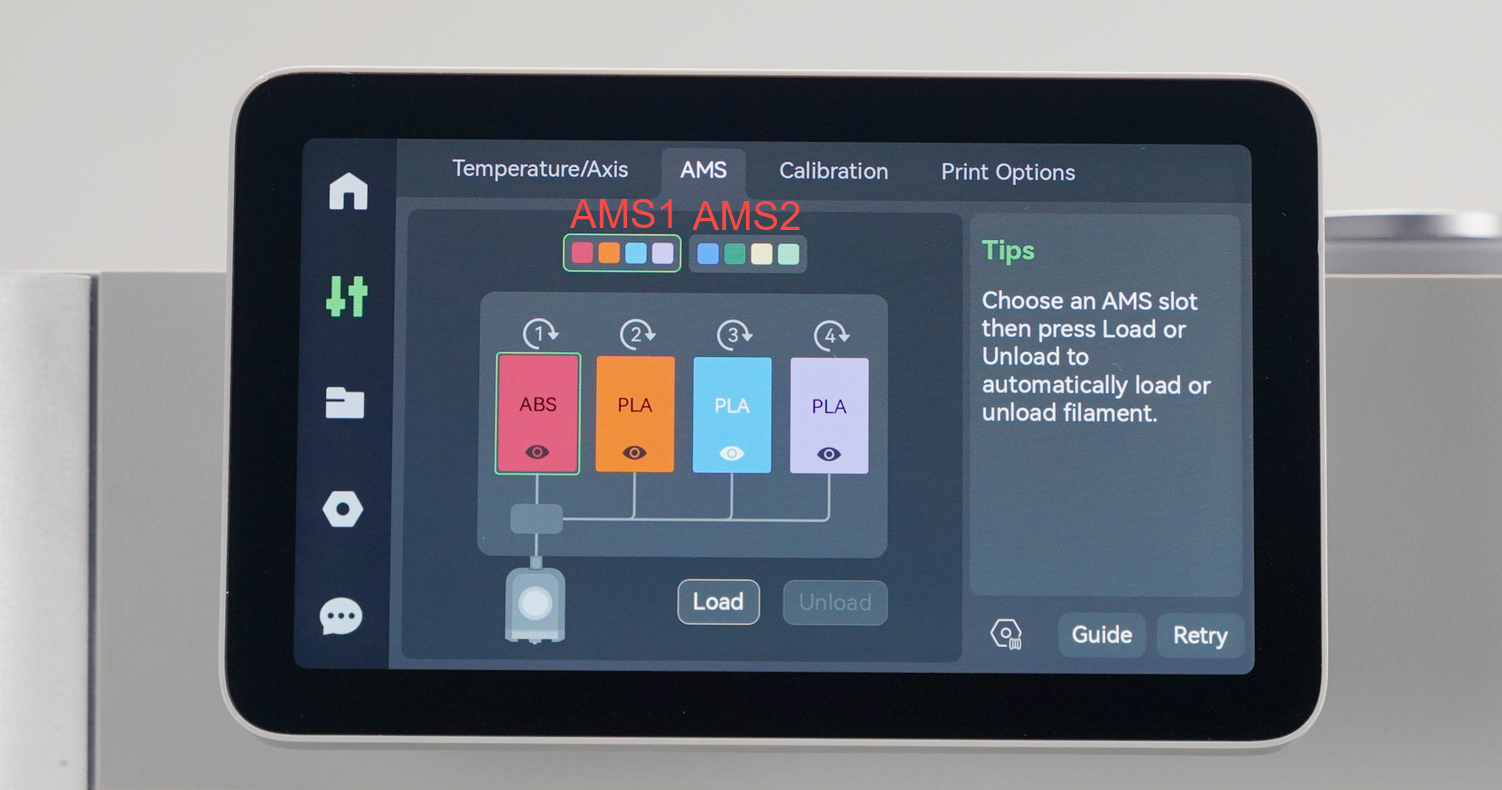
The AMS has a “mapping” function (refer to Multi-color printing operation guide), so the ID of AMS will not affect the new printing, but the built-in model will be affected. Please refer to Tip 2.
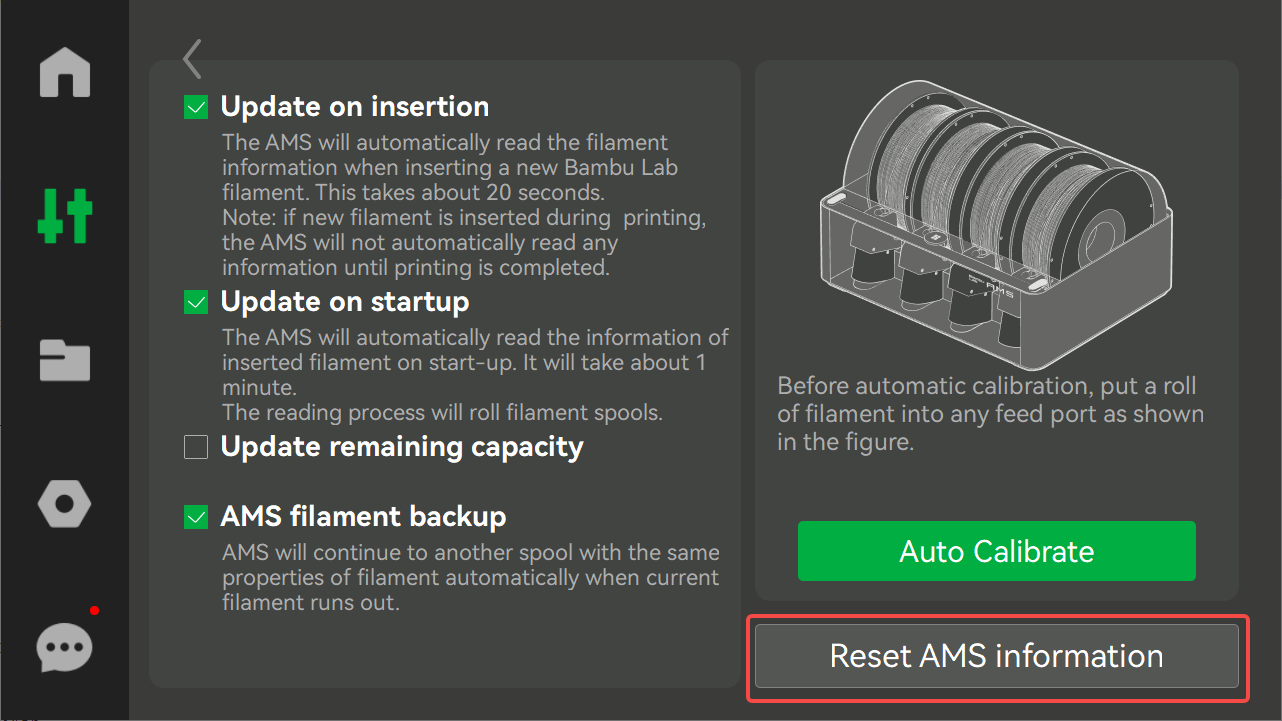
¶ 1.1 How to reassign the AMS ID
The AMS ID will be saved and not cleared even if the machine is turned off. You can reset the AMS ID as shown below, please disconnect the AMS cable after clicking this button.
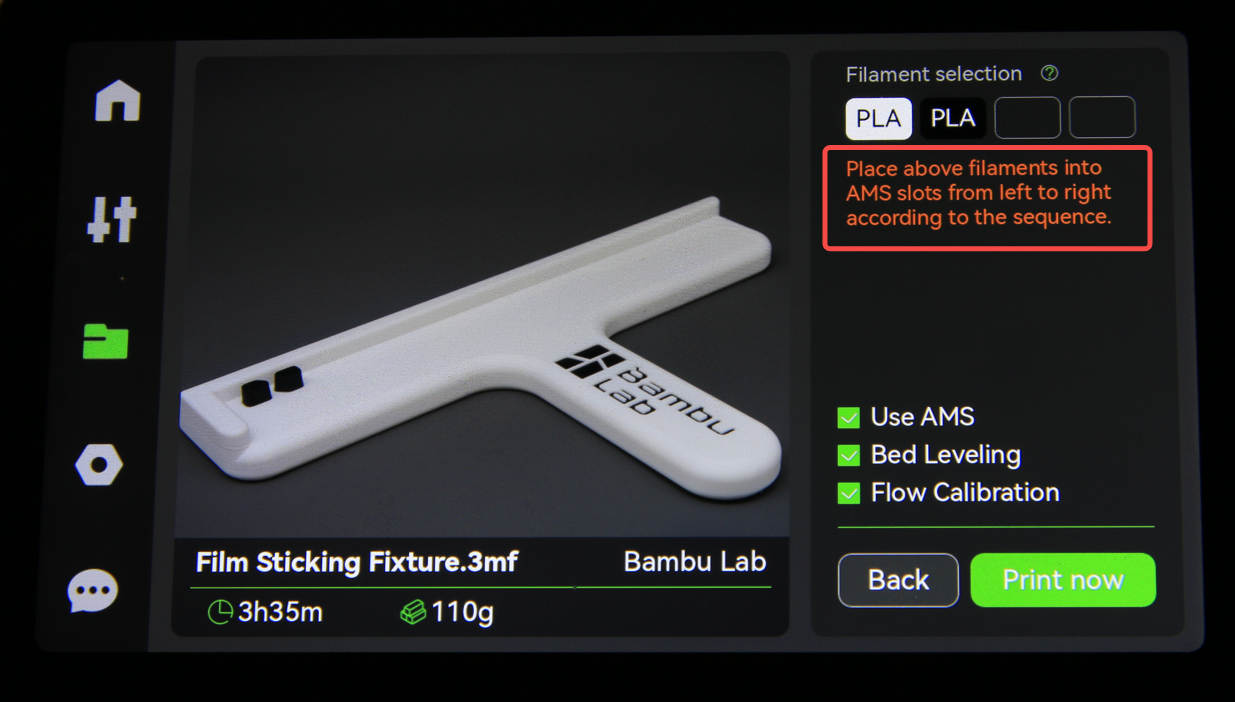
¶ 2. Printing the built-in model
Currently, printing the built-in models only supports printing starting from slot 1 of AMS1, with no support for mapping to other slots. You will need to place the filaments into the AMS slots from left to right according to the prompt on the print launch page:
If you want to clean the AMS Hub, please refer to How to clean the AMS hub | Bambu Lab Wiki