¶ A1 mini Maintenance Guidelines
Regular maintenance can minimize wear and extend the printer's lifespan while also lowering the risk of a print failure. To help ease your purchasing decision, we have listed all the commonly needed maintenance parts and offered tiered discounts. You can find the purchase link on Spare Parts Page.
¶ Tools you may need
| Tools | Pic. | Tools | Pic. |
| Clean cloth | 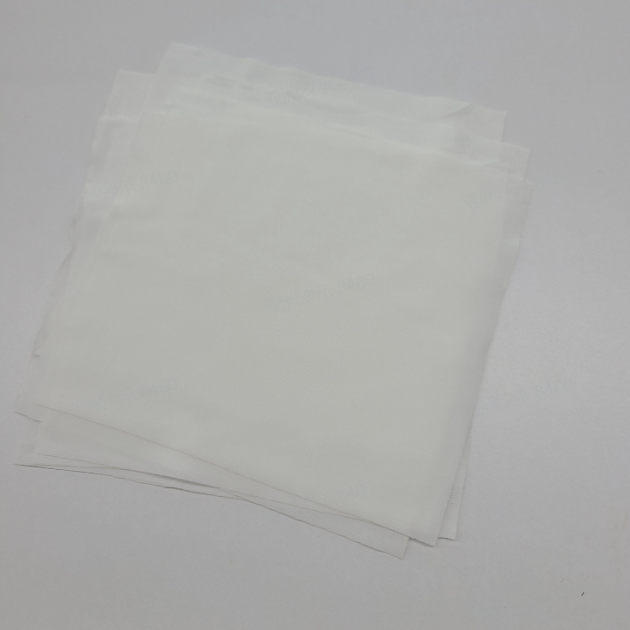 |
Lubricant Grease | |
| Lubricant oil | NA | Lubricant oil |  |
| Allen keys | 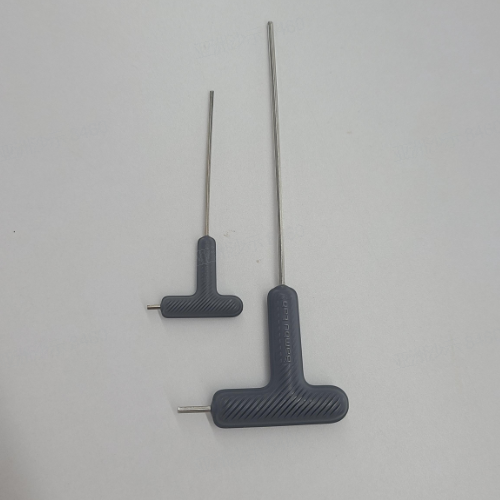 |
Tweezer | 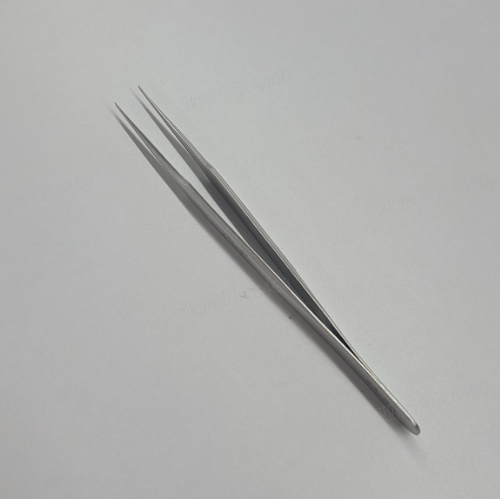 |
| Heat resistant gloves | 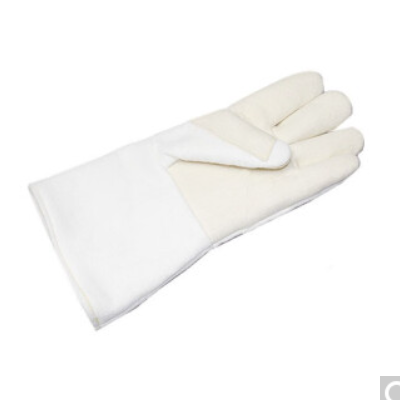 |
Air blower | 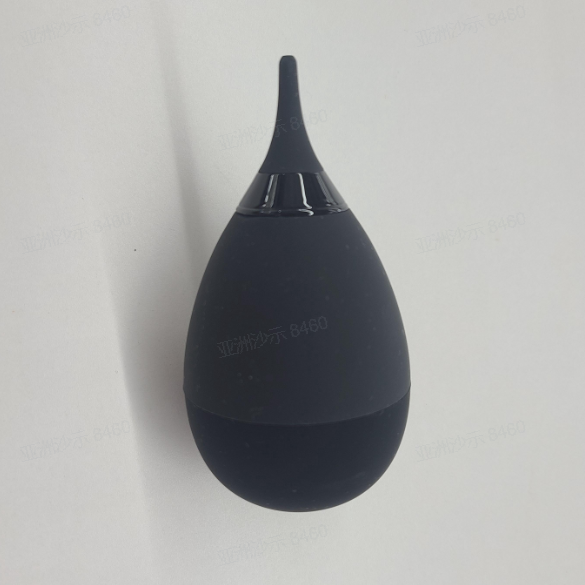 |
¶ Moving parts
Refers to the components that undergo mechanical movement during the printing process, including screw rods, guide rails, sliders, couplings, belts, fans, etc. The main maintenance measures are cleaning and lubrication. Metal parts need to be rust-proofed. Rubber parts need to be checked for aging (including deformation), wear, etc., and replaced when necessary.
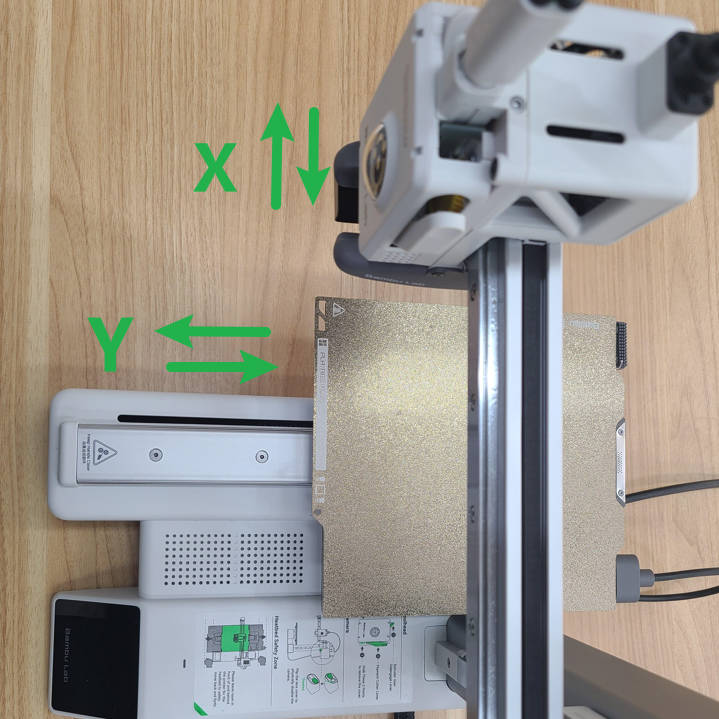
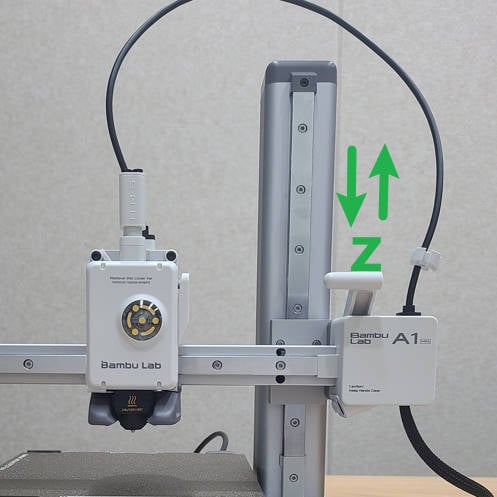
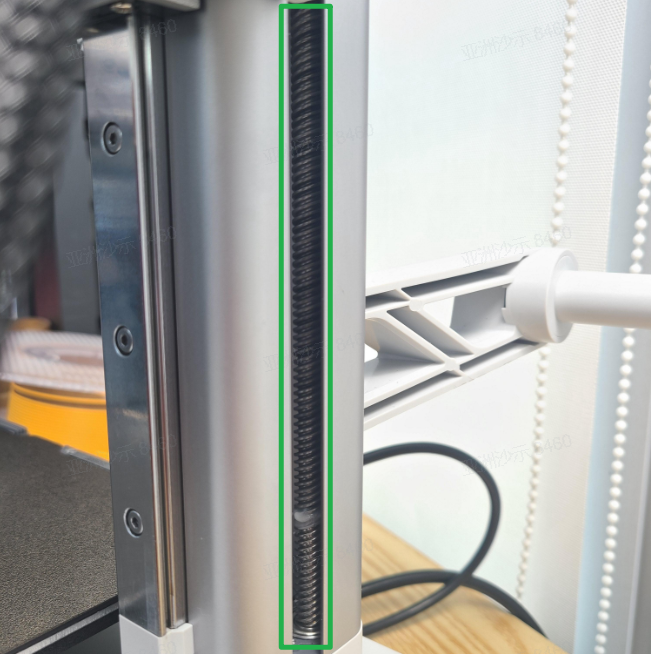
¶ Guide rail system

We spent extra to bring you the most reliable All-metal rails and cover-protected drive system. This rail system ensures that you do not need to frequently adjust the moving components of the A1 mini, but requires regular lubrication and cleaning to reduce wear and noise, ensure the accuracy and lifespan of the printer, and effectively prevent the guide rails from rusting.
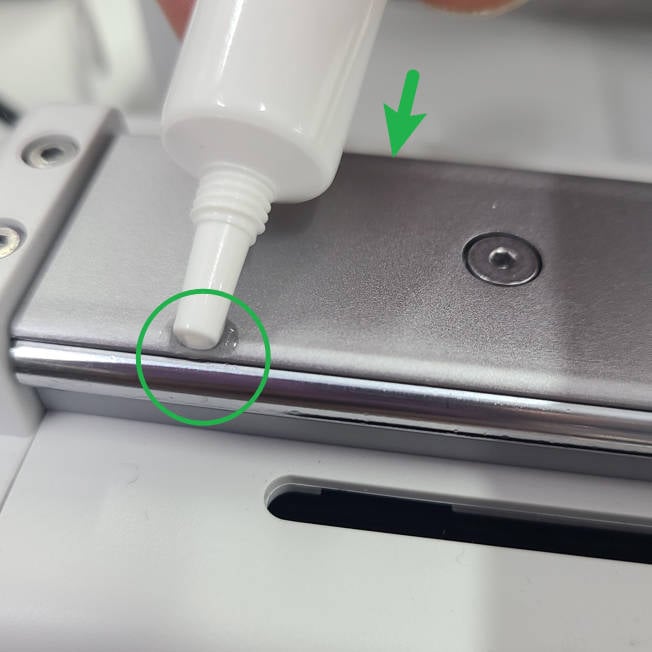
| X rail | When: Every month Materials & tools: Cloth,Tweezers,Lubricant oil Solution: Cleaning, Lubricate How to do: Use tweezers to clean the lumpy and filamentous foreign objects on the guide rail, and wipe the granular foreign objects and stains with a dust-free cloth; re-lubricate the X track, and slide the tool head back and forth after lubricating to ensure that the lubricant lubricates the entire linear rail. |
| Z rail | When: Every month Materials & tools: Cloth,Tweezers,Lubricant oil Solution: Cleaning, Lubricate How to do: Use tweezers to clean the lumpy and filamentous foreign matter on the guide rail, and wipe the granular foreign matter and stains with a dust-free cloth; re-lubricate the Z rail, and the oil filling hole in the middle of the slider can also be lubricated. Pay attention to cleaning up foreign matter in the groove of the linear rail. After applying oil, turn on the printer and control the Z-axis to move up and down to ensure that the lubricant oil lubricates the entire linear rail. |
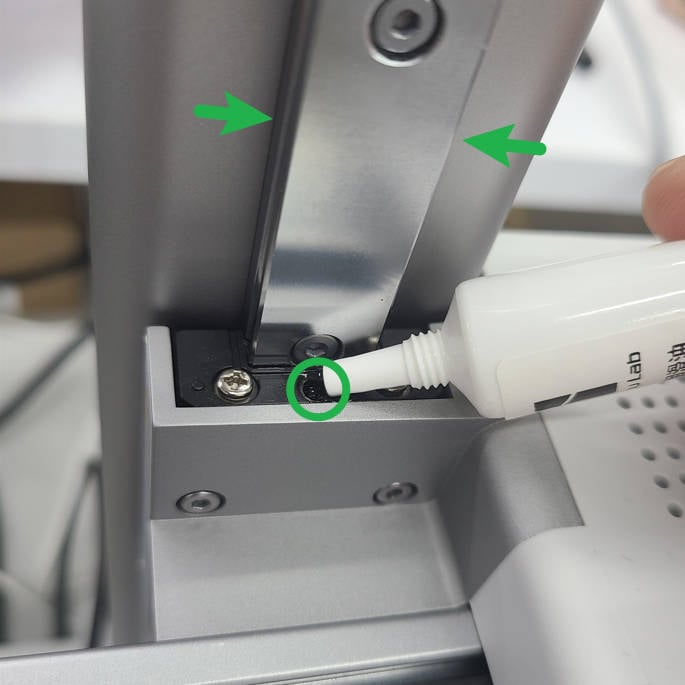
| Y rail | When: Every month Materials & tools: Cloth,Tweezers,Lubricant oil Solution: Cleaning, Lubricate How to do: Use tweezers to clean the lumpy and filamentous foreign objects on the guide rail, and wipe the granular foreign objects and stains with a dust-free cloth; re-lubricate the Y rails on both sides, and slide the heatbed back and forth after lubricating to ensure that the lubricant lubricates the entire Y rail. |
Video guide for lubricating the X-axis:
https://public-cdn.bblmw.com/wiki/A1-mini/x_guide_rail_lubrication.mp4
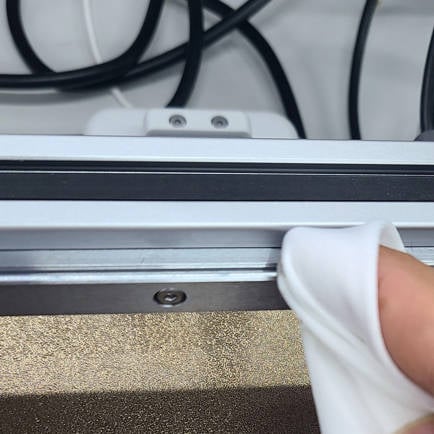 Clean the rail |
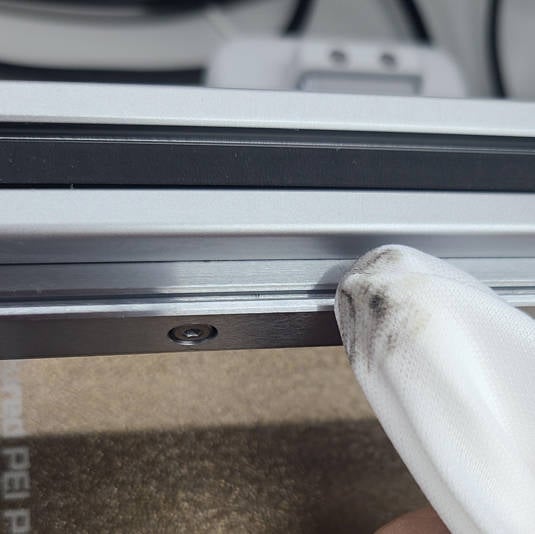 Clean the rail |
 Lubricate the X rail |
 Lubricate the X rail |
 Move the toolhead(Power OFF) |
Video guide for lubricating the Y-axis:
 Lubricate the Y rail |
 Lubricate the Y rail |
Move the heatbed (Power OFF) |
Video guide for lubricating the Z-axis:
https://public-cdn.bblmw.com/wiki/A1-mini/z_guide_rail_lubrication.mp4
 |
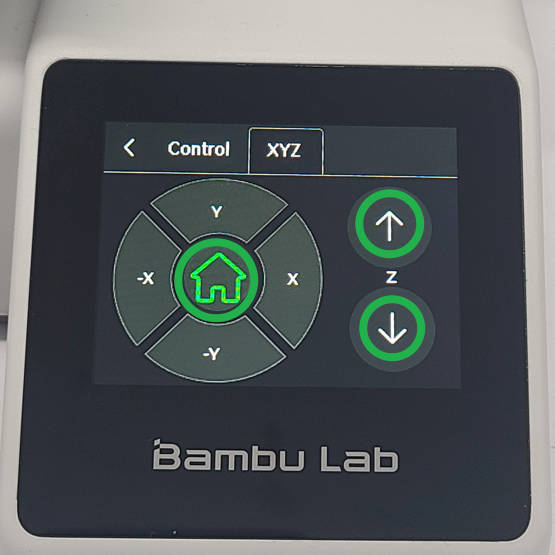 Contrl the Z axis (Homing first) |
 Move the X axis (Power ON) |
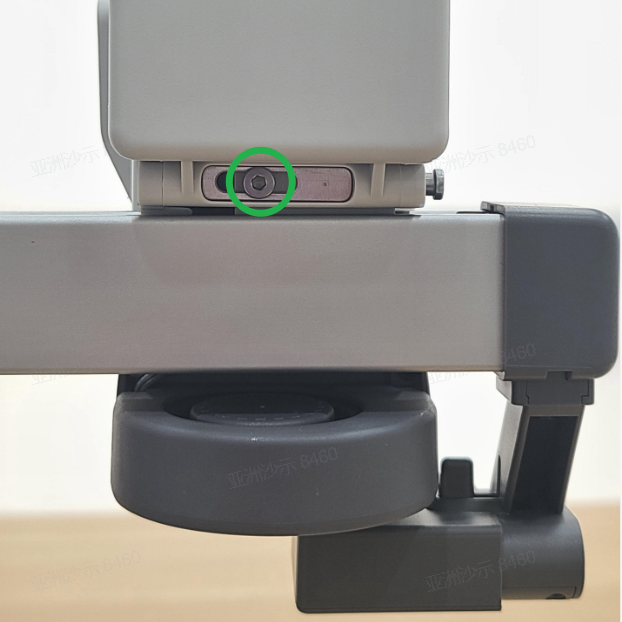
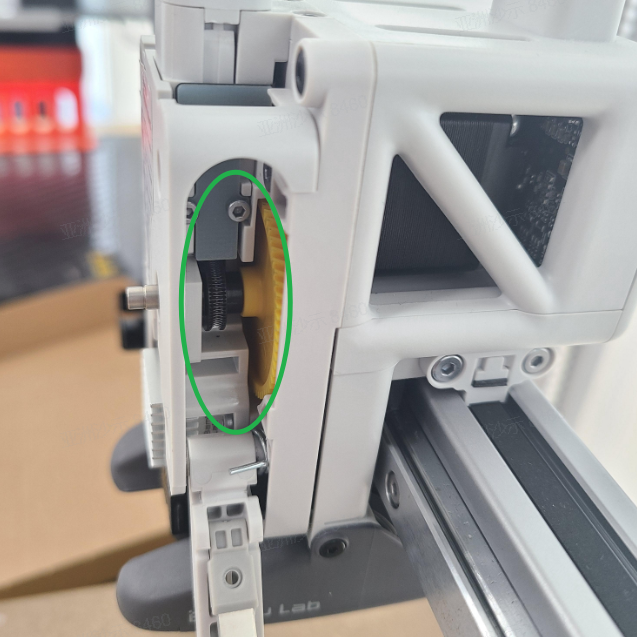
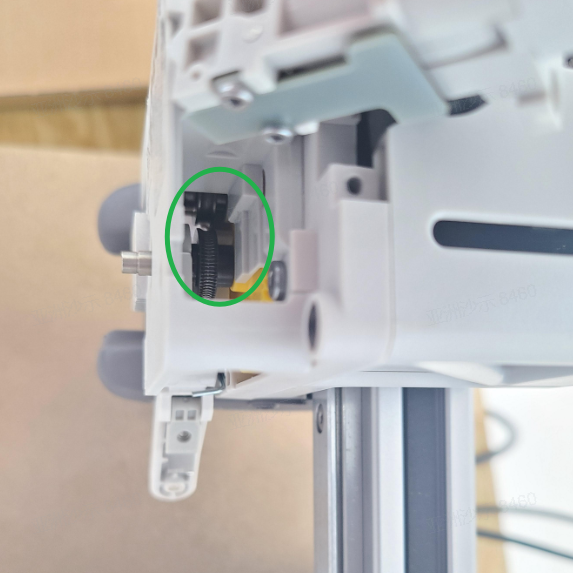
¶ X Y timing belts
A1 mini can check the belt tension automatically through the vibration frequency calibration. If the belt is loose, the HMS system will notify you to use the auto belt tensioner to set the belt to the right tension.
| X Belt | When: HMS prompts Materials & tools: H2 Allen key Solution: Re-tension How to do: Loosen the tensioning screw behind the tool head, move the toolhead along the X rail, and re-tighten the tightening screw. |
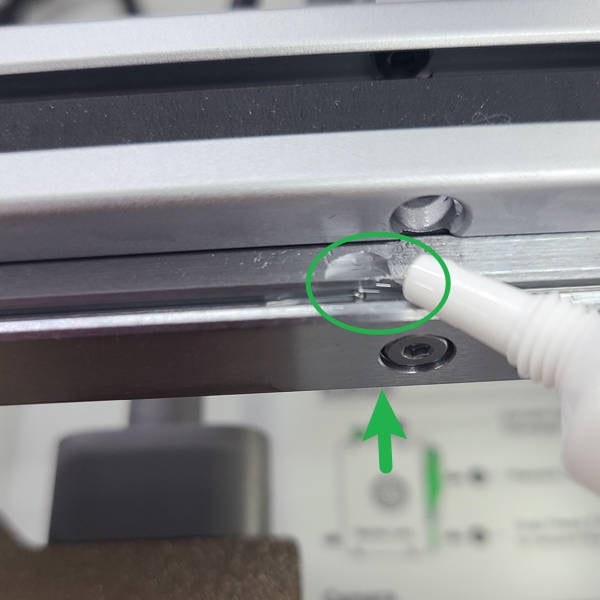
| Y Belt | When: HMS prompts Materials & tools: H2 Allen key Solution: Re-tension How to do: After removing the Y-axis rear cover, loosen the tensioning screw, push the Y-axis tensioning slider forcefully along the Y-axis 2 to 3 times to ensure that it is not stuck, and then re-tighten the tightening screw. |
Loosen the tensioning screw
 Remove the Y-axis rear cover |
 Loosen the tensioning screw (the one in the green circle below) |
 Push the Y tensioning block and re-lock the tensioning screw |
If after long-term use, the timing belt has shown obvious wear and affects the print quality, please refer to the relevant maintenance guide page to replace the timing belt.
X-axis installation installation tutorial
A1 mini Y-axis & Z-axis Assembly Installation Tutorial
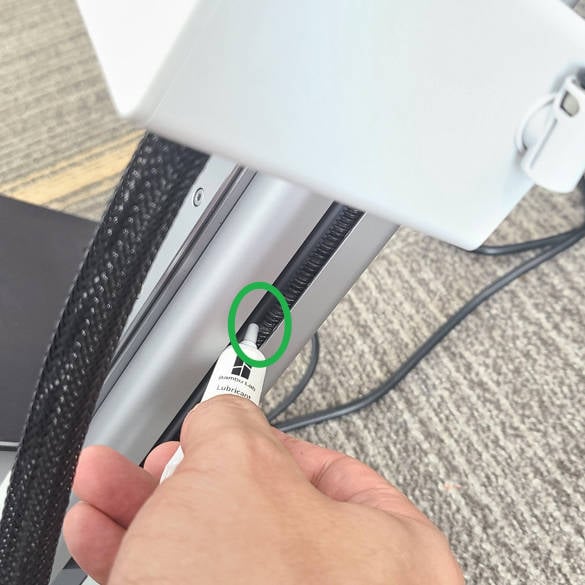
¶ Lead screw
There is only one lead screw in the A1 mini. Through the lead screw, the Z-axis motor can drive the X-axis to move up and down along the Z-axis direction. Proper lubrication will ensure the smooth operation of the X-axis along the Z direction, and can effectively reduce the noise caused by the movement of the screw.
Unlike linear rails, lead screws do not necessarily require lubricant oil. You can use either lubricant oil or lubricant grease. If you have access to lubricant grease, we recommend using it because lubricant grease is less likely to evaporate.
| Lead Screw | When: Every 3 months Materials & tools: Lubricant grease or oil Solution: Lubricate How to do: Apply grease to the working area and the bottom bearing, turn on the printer, and control the printer to move the X-axis up and down along the Z direction to ensure that the entire lead screw working area is coated with grease. |
Video guide for lubricating the lead screws:
https://public-cdn.bblmw.com/wiki/A1-mini/lead_screw_maintenance.mp4
|
 |
If necessary, you can tilt the printer slightly and then apply lubricant oil to the lead screw.
 |
 |
¶ Idler pulley
This mainly refers to the idler pulley of the X-axis. Regular maintenance of the idler pulley can effectively prevent abnormal noise and abnormal resistance.
| Idler pulley | When: Every 3 months Materials & tools: Lubricant oil, Allen key Solution: Lubricate How to do: Near the X-axis end cover, drop an appropriate amount of clear oil between the belt and the idler pulley. |

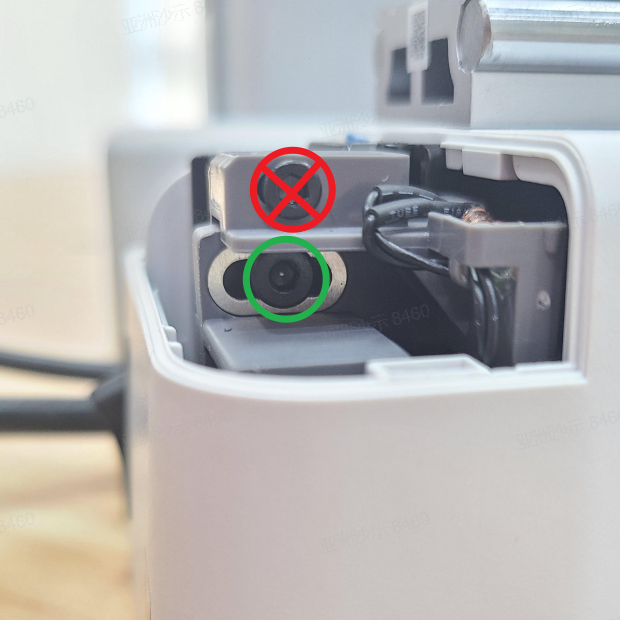
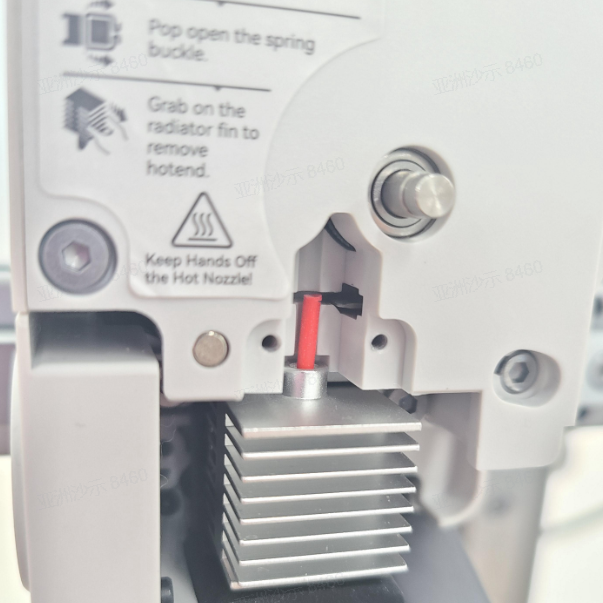
¶ Filament Sensor
There are several Hall sensors on the filament sensor board. The attachment of foreign matter such as material fragments and dust will cause abnormal Hall values and cause false alarms. Cleaning the filament sensor board in time can effectively solve the problem of false alarms and improve the printing experience.
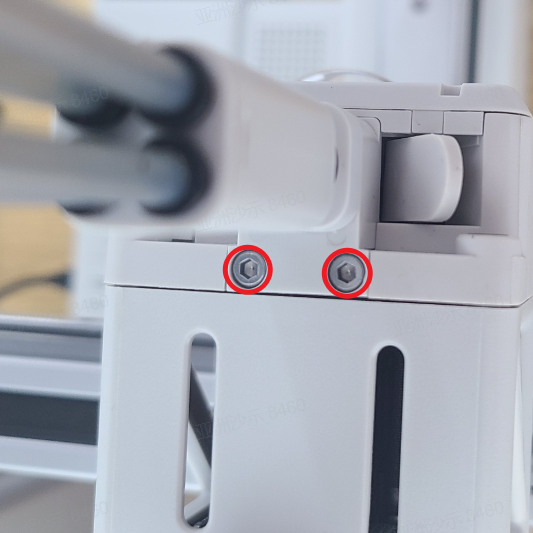
| Filament sensor | When: False alarm Materials & tools: Allen key, Air blower Solution: Cleaning How to do: Unscrew the 2 screws, carefully pull out the entire bottom bracket assembly, remove the 2 screws that lock the filament sensor, and clean with a blower. |
Video guide for cleaning the filament sensor board:
https://public-cdn.bblmw.com/wiki/A1-mini/filament_sensor_maintenance.mp4
 |
 |
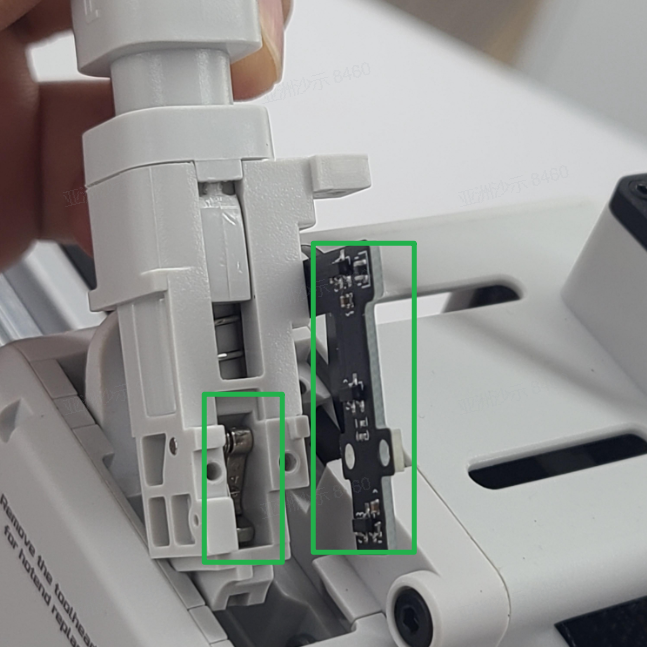 |
Note: When disassembling, do not pull out the connecting cable too much to avoid damage and abnormal installation.
¶ Extruder
After using the printer for a long time, filament debris and dust may remain inside the extruder, which can easily cause the extrusion gear to become stuck or even unable to rotate during operation. In order to ensure the normal printing of the printer, the extruder needs to be cleaned of foreign materials in time.
| Extruder unit | When: Under-extrusion, Extruder clog Materials & tools: Tweezers, Allen key, Air blower Solution: Cleaning How to do: Remove the filament pressure block, loosen the cutter lever, use tweezers to clean the internal filamentous foreign materials, use a blower to blow off the residue and dust, if necessary, take out the filament hub assembly and clean it. |
Video guide for cleaning the extruder:
https://public-cdn.bblmw.com/wiki/A1-mini/extruder_clean.mp4
 |
 |
 |
Extruder module installation installation tutorial
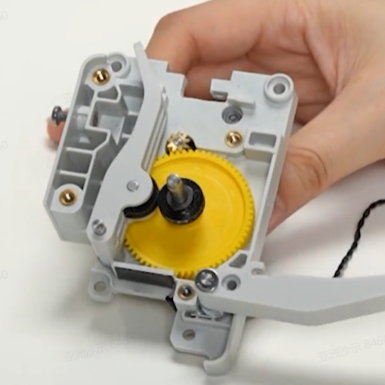
¶ Extruder Gear Assembly
When cleaning the extruder according to the above steps fails to achieve satisfactory results, you can disassemble the extruder and remove the extrusion wheel assembly for cleaning. Under normal circumstances, for printing non-carbon fiber filaments like PLA and PETG, it is advisable to clean the extruder gear every 5 spools. When printing with carbon fiber filaments, clean the extruder gear every 2 spools. If you find that the extruder gear is obviously worn, and cleaning the nozzle does not improve the extrusion, you can replace the gear assembly.
| Extruder Gear Assembly | When: Under-extrusion, Extruder clog Materials & tools: Tweezers, Allen key, Air blower Solution: Cleaning How to do: When cleaning the extruder, if you find foreign materials that cannot be removed, you need to remove the extrusion front cover and take out the extrusion wheel assembly for cleaning. For specific disassembly and assembly methods, please refer to the relevant maintenance guide page. |
Extruder module installation installation tutorial
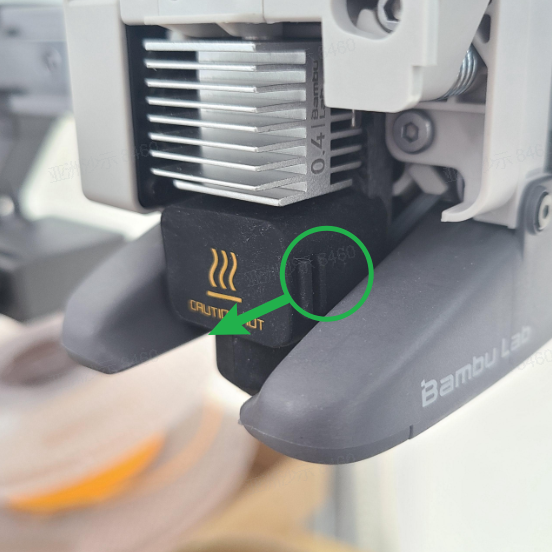
¶ Purge Wiper
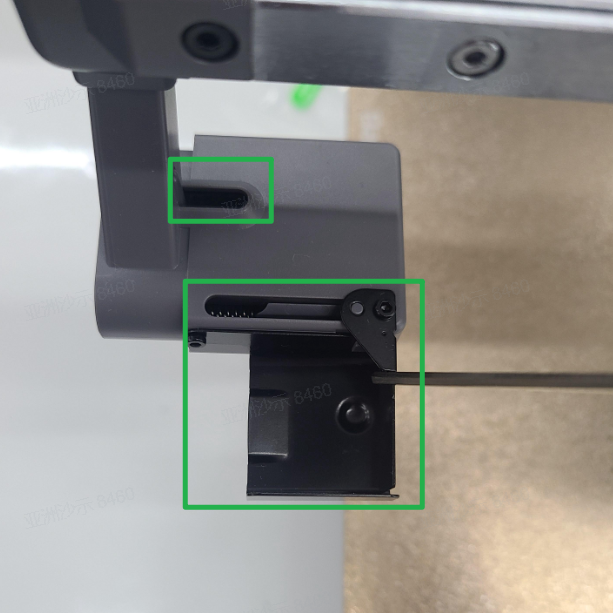
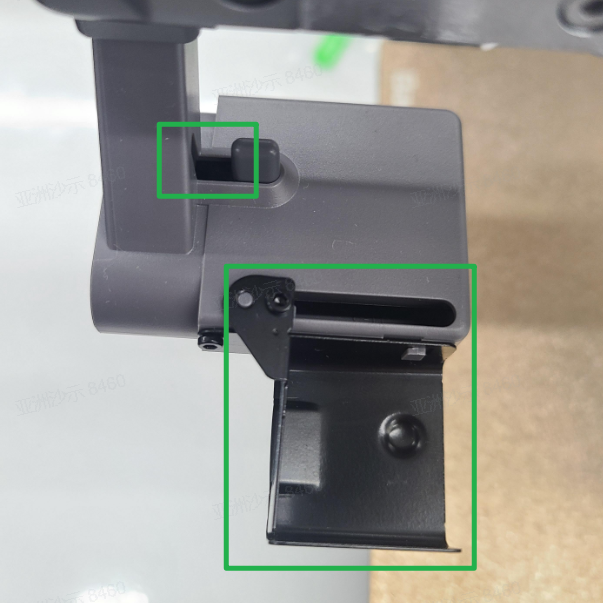
The A1 mini's purge wiper is used to efficiently process the waste material ejected from the nozzle to ensure a continuous and smooth printing process. When the movement of the purge wiper is blocked by foreign objects or the action mechanism is deformed, the purge wiper may become stuck, causing abnormal discharging or causing the printer to lose steps. Therefore, it is necessary to promptly clean up foreign objects and replace the deformed purge wiper to improve the success rate of filament exchange and enhance the printing experience.
| Purge Wiper | When: Excess accumulation or purge wiper deformation Materials & tools: Tweezers, Allen key, Air blower Solution: Cleaning, Replacement How to do: Remove the tool head from the purge wiper , use tweezers to remove excess waste, and use a blower to blow off residue and dust. |
 |
 |
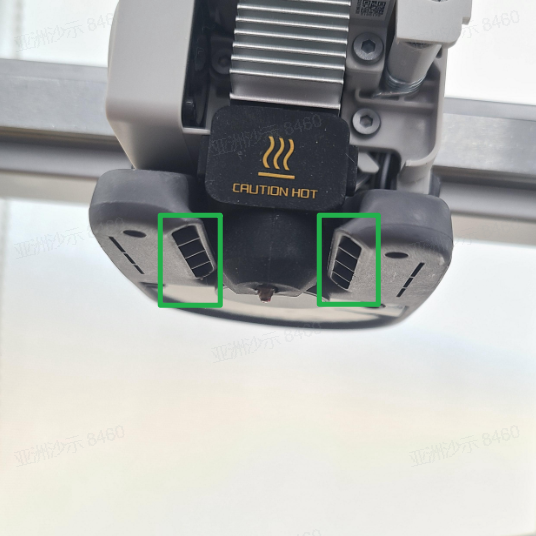
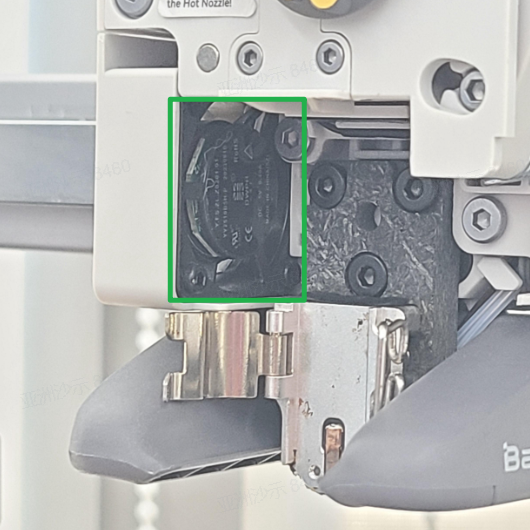
¶ Fans
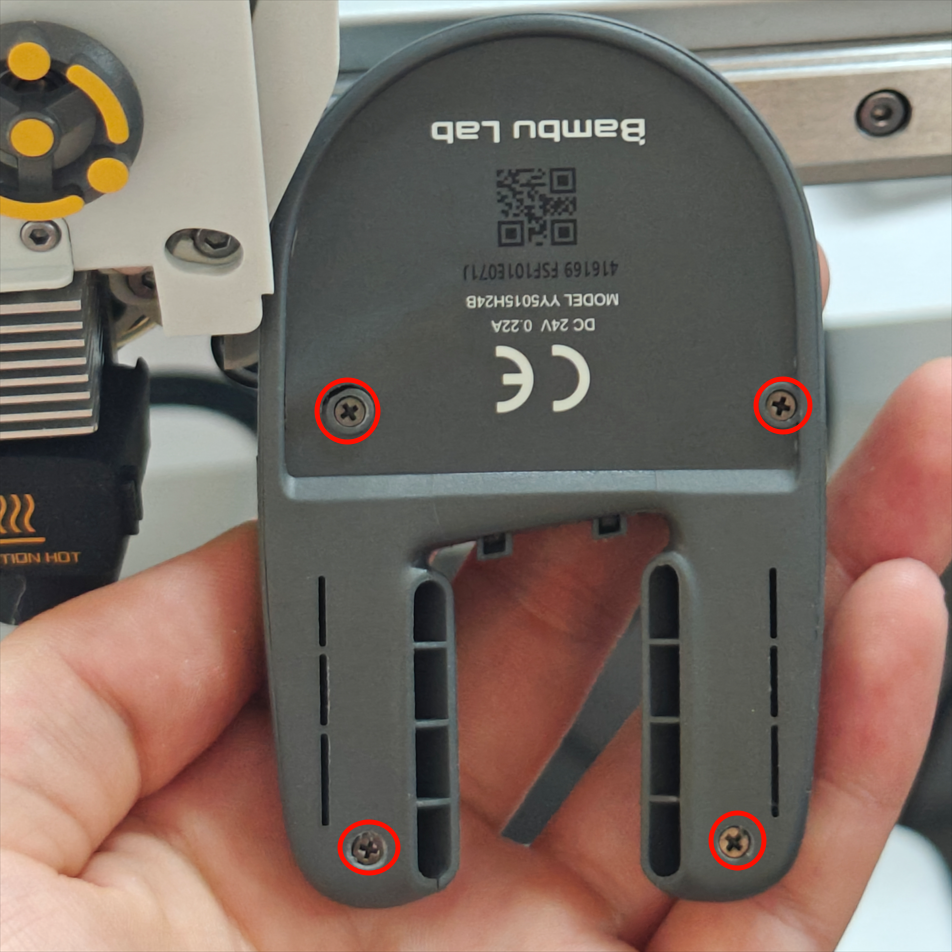
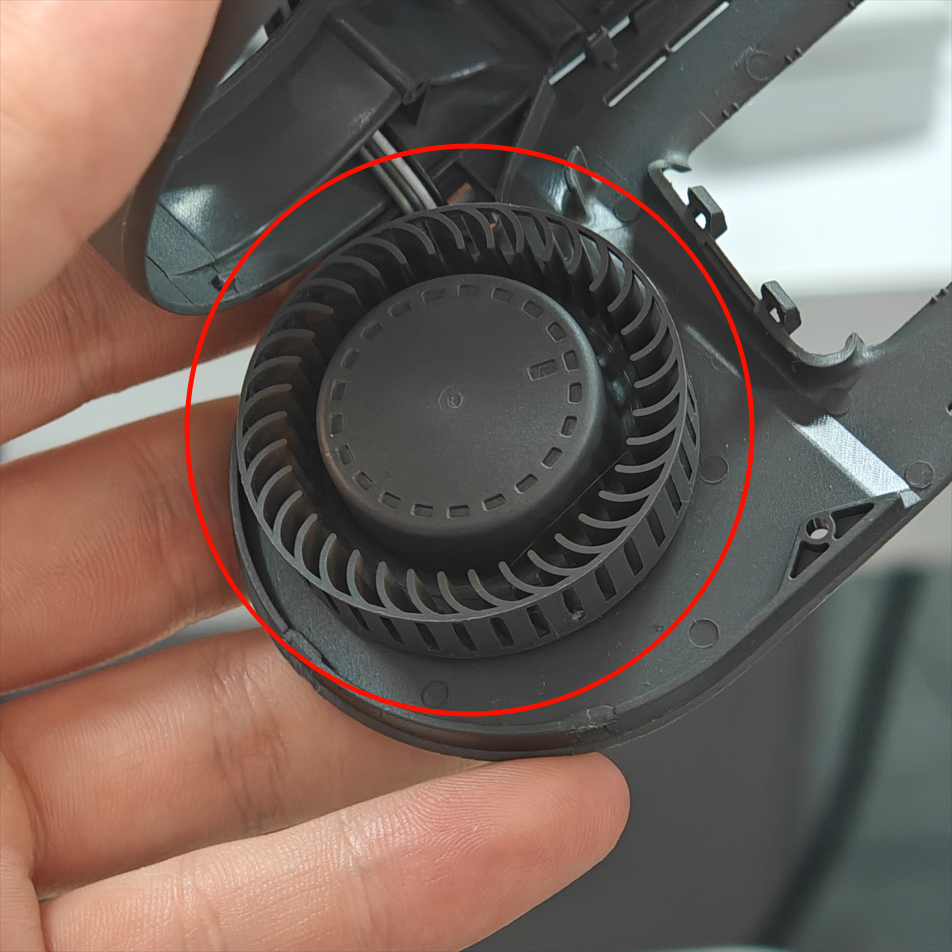
A1 mini is equipped with 3 fans, namely hotend cooling fan, part cooling fan and mainboard cooling fan. In order to ensure that the machine has a good cooling effect, it is necessary to check the status of the fan regularly and remove foreign objects in a timely manner.
| Part cooling fan | When: Every week Materials & tools: Cloth,Tweezers Solution: Cleaning How to do: Check whether there is foreign objects or dust accumulation in the air duct and clean it. |
| Hotend cooling fan | When: Every week Materials & tools: Cloth,Tweezers Solution: Cleaning How to do: Remove the hotend, check whether there is foreign objects or dust accumulation in the air duct and clean it. |
| Mainboard cooling fan | When: HMS prompts Materials & tools: Compressed air (or high-pressure air gun), Cloth, Tweezers Solution: Cleaning How to do: Use compressed air jets to remove accumulated dust, or disassemble the base plate and wipe the fan clean. |
After prolonged use, the part cooling fan may accumulate a significant amount of dust inside. You can remove the component cooling fan, loosen the four screws on the back, open the lower housing, and use a brush to clean it.
 |
 |
Video guide for cleaning the fans:
https://public-cdn.bblmw.com/wiki/A1-mini/fans_clean.mp4
 |
 |
 |
¶ Consumables
Refers to product parts or components that need to be replaced due to wear or consumption during normal operation of the product, such as PTFE tubes, hot ends, etc.
Such vulnerable parts need to be proactively cleaned and inspected to detect abnormalities and replace them promptly to avoid affecting normal printing.
¶ Silicone Sock for Hotend
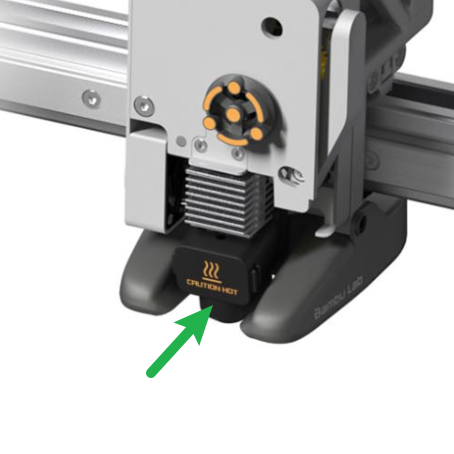
The silicone sock for hotend helps maintain the stability of the hotend temperature. If there are signs of damage on the silicone sock, or the silicone sock cannot be fixed well on the hotend, the silicone sock should be replaced to avoid some print quality caused by temperature differences.
| Silicone Sock for Hotend | When: Damaged or unable to be installed Materials & tools: Silicone Sock for Hotend Solution: Replacement How to do: When the hotend temperature is below 60 degrees, refer to the hotend replacement guide attached to the extruder for replacement. |
Note: Please be sure to install the silicone sock for hotend, or it will cause some hotend temperature warning.
 |
 |
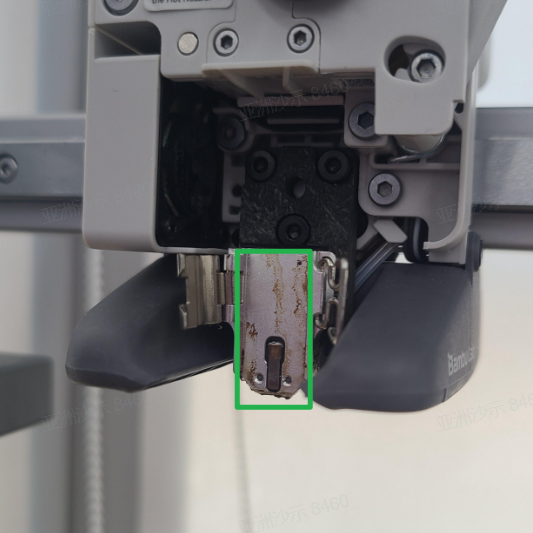
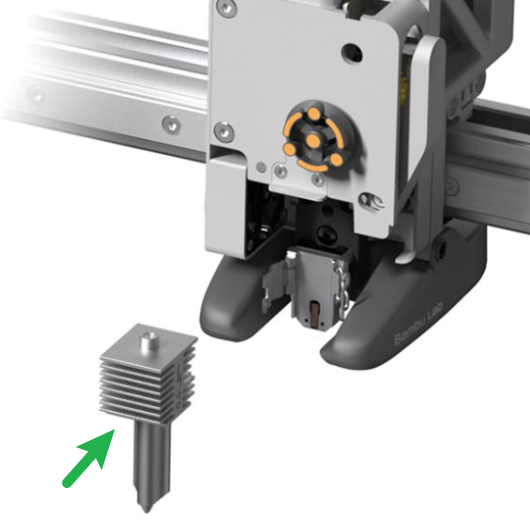
¶ Hotend
The A1 mini hot end adopts a quick-release buckle design. In order to ensure the normal function of the hot end quick-release, and to promptly remove the residue on the surface of the hot end and the heating assembly to ensure the accuracy of the hotend temperature measurement, it needs to be removed regularly. and clean the surface of the heating element. Under normal circumstances, for printing non-carbon fiber filaments like PLA and PETG, it is advisable to clean the nozzle every 5 spools. When printing with carbon fiber filaments, clean the nozzle every 2 spools. If you find that the nozzle is obviously worn causing material leakage, and cleaning the nozzle does not improve the extrusion, please replace it with a new spare hot end.
| Hotend Heating Assembly | When: Every month Materials & tools: Glooves,Cloth,Tweezers Solution: Cleaning How to do: After removing the silicone sock, clean the attachments on the hot end, then remove the hot end, use tweezers to roll up a lint-free cloth dipped in absolute alcohol, and wipe the surface of the heating assembly clean. When: Broken structure or cable, or heating failure due to print failure or disassembling parts Materials & tools: New hotend heating assembly Solution: Replacement How to do: Refer to Hotend Heating Assembly Replacement Guide. |
| Hotend | When: Wear and leakage Materials & tools: Hotend Solution: Replacement How to do: Refer to the hotend replacement instructions attached to the extruder for replacement. |
Note:
1. If there is residual material attached to the hotend and the hotend cannot be removed normally, you need to set the temperature to 80 degrees to soften the residue before removing it;
2. Please be sure to install the hotend silicone sock after the cleaning, or it will cause some hotend temperature warning.
Hotend Replacement Video Guide:
/n1/p-maintenance/nozzle_replacement_english.mp4
 |
 |
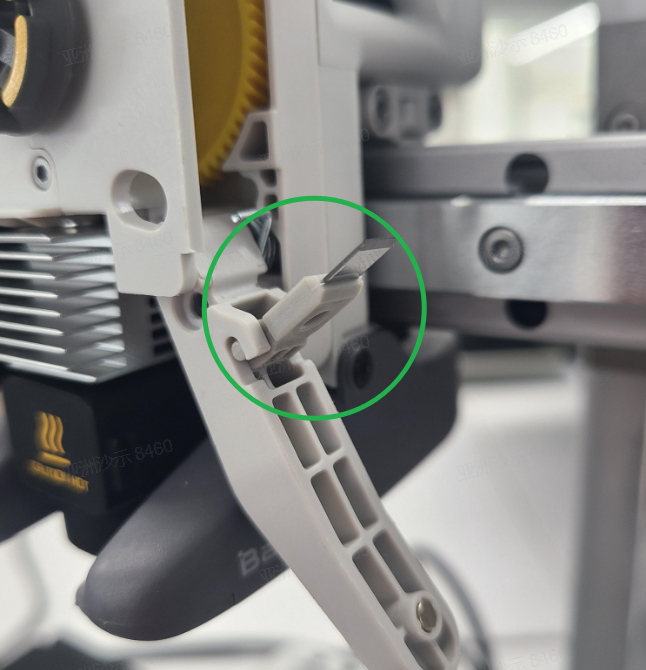
¶ Filament Cutter
Like the X-series printers, the A1 mini is also equipped with a cutter to achieve automatic filament changing. If you use multi-color printing, the cutter blade will become dull or even chipped after printing multiple rolls of filaments. Therefore, it is recommended to check regularly to ensure that the blade is still sharp and intact to avoid losing steps due to high cutting resistance and improve printing success rate. If you find that the cutter is worn out and unable to cut the filaments smoothly, please replace it with a new cutter.
| Filament cutter | When: Check the blade once every 3 rolls of PLA\ABS\PETG Materials & tools: Allen key Solution: Replacement How to do: Disassemble the filament pressing block and check whether the blade is missing. If there is any abnormality, release the cutter handle and replace it with a new cutter. |
Video guide for filament cutter maintenance and replacement:
https://public-cdn.bblmw.com/wiki/A1-mini/filament_cutter_replace.mp4
 |
 |
We also have a detailed Filament Cutter Replacement Guide available for this procedure.
¶ PTFE Tube
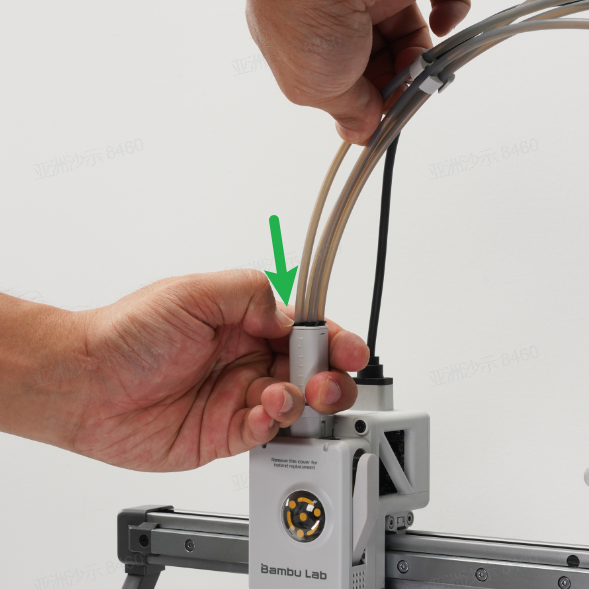
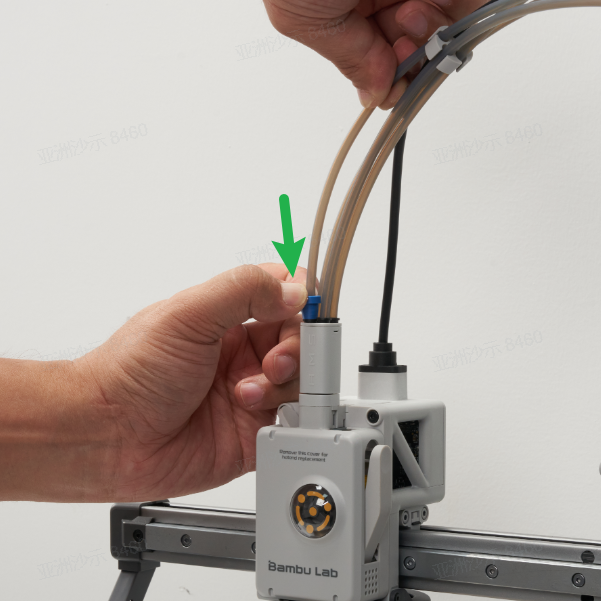
We send the filament from the AMS lite (or Spool Holder) to the filament hub through a PTFE tube. After long-term friction with the filaments, the PTFE tube will wear to varying degrees and increase the filament supply resistance. In order to avoid abnormal filament transportation caused by wear of the PTFE tube, the PTFE tube should be replaced when there are obvious signs of wear.
| PTFE Tube | When: PLA and other non-carbon fiber materials, every 6 rolls; carbon fiber materials or ploywood and other high friction materials, every 2 rolls Materials & tools: With hands or with the help of auxiliary tools Solution: Replacement How to do: Press the filament hub's connector and pull the material tube upward; if it is difficult to press it with bare hands, you can use tools such as printed models or tweezers. ptfe_tool.3mf |
 |
 |
Note: The specifications of the PTFE tube used by A1 mini are 4mm outer diameter and 2.5mm inner diameter.
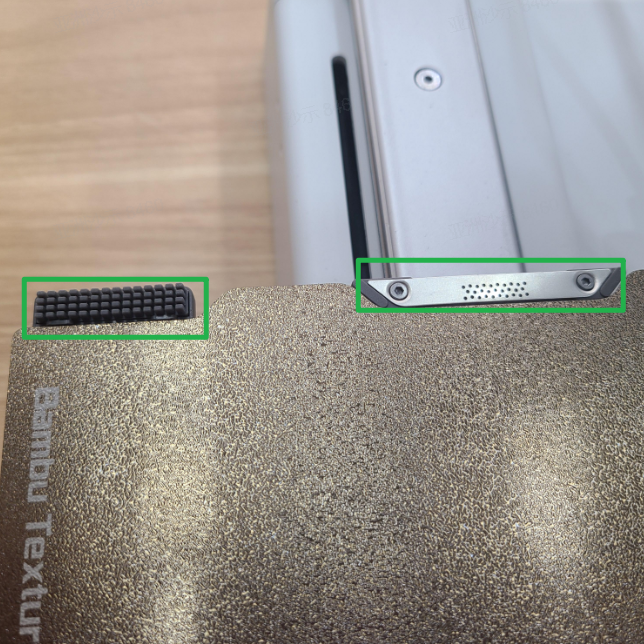
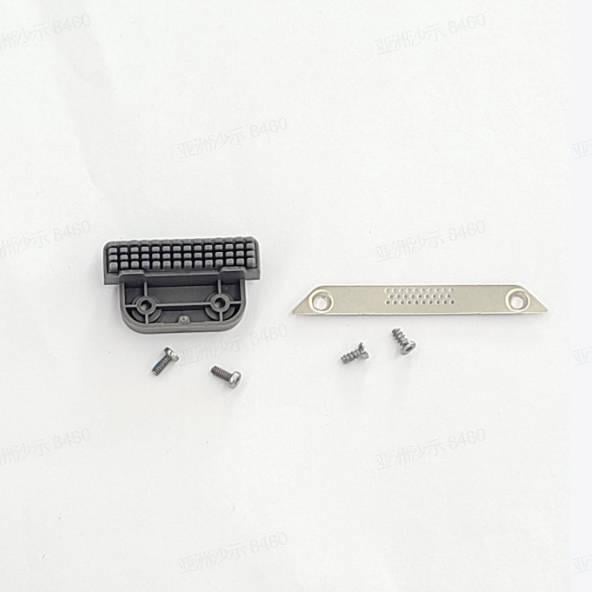
¶ Heatbed Nozzle Wiper
The A1 mini nozzle wiper assembly actually includes two accessories, a silicone nozzle wiper and a metal plate wiper. The silicone wiper is used to clean the residual waste on the nozzle, and the metal plate wiper is used to clean the nozzle end surface to ensure it is smooth. If the nozzle wiper assembly is damaged or deformed, it can result in incomplete cleaning of residual material on the nozzle, thereby affecting print quality. You will need to replace it to ensure the nozzle cleaning effect.
| Heatbed Nozzle Wiper | When: The silicone wiper is damaged/the stainless steel wiper is deformed Materials & tools: Allen key Solution: Replacement How to do: The silicone wiper is replaced together with the base, and the metal wiper only needs to be replaced separately. |
 |
 |
We also have a detailed Nozzle Wiper Replacement Guide available for this procedure.
¶ PEI Build Plate
A1 mini along with a textured PEI plate, which is made of PEI material sprayed on a stainless steel plate. It can be used to print various materials such as PLA/PETG without using any adhesive. In order to maintain optimal adhesion, it is recommended to clean the printing plate regularly. and please avoid direct contact of fingers with the surface of the printing plate to prevent skin oils from adhering to the surface of the printing plate and affecting the adhesion effect. Please refer to the following link for how to clean the PEI printing plate: