¶ Startup
¶ Switch the A1 mini on
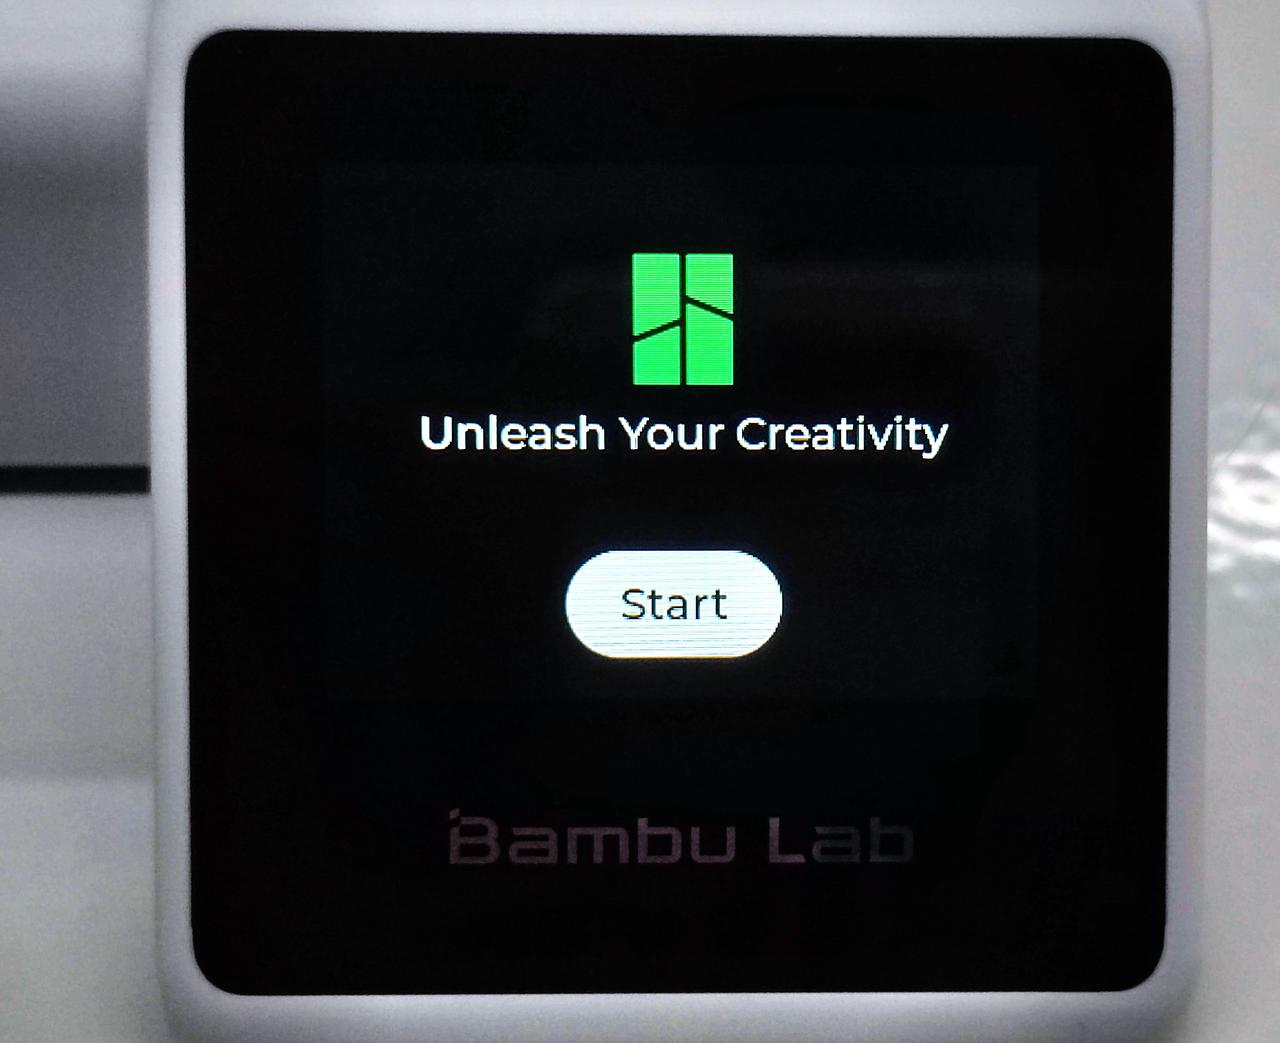
- After your printer has been unpacked and installed according to the instructions, connect the power and switch on the button at the back of the printer. Once the Bambu Lab logo shows up, please follow the instructions on the screen to set up the language, region, and wireless network connection.
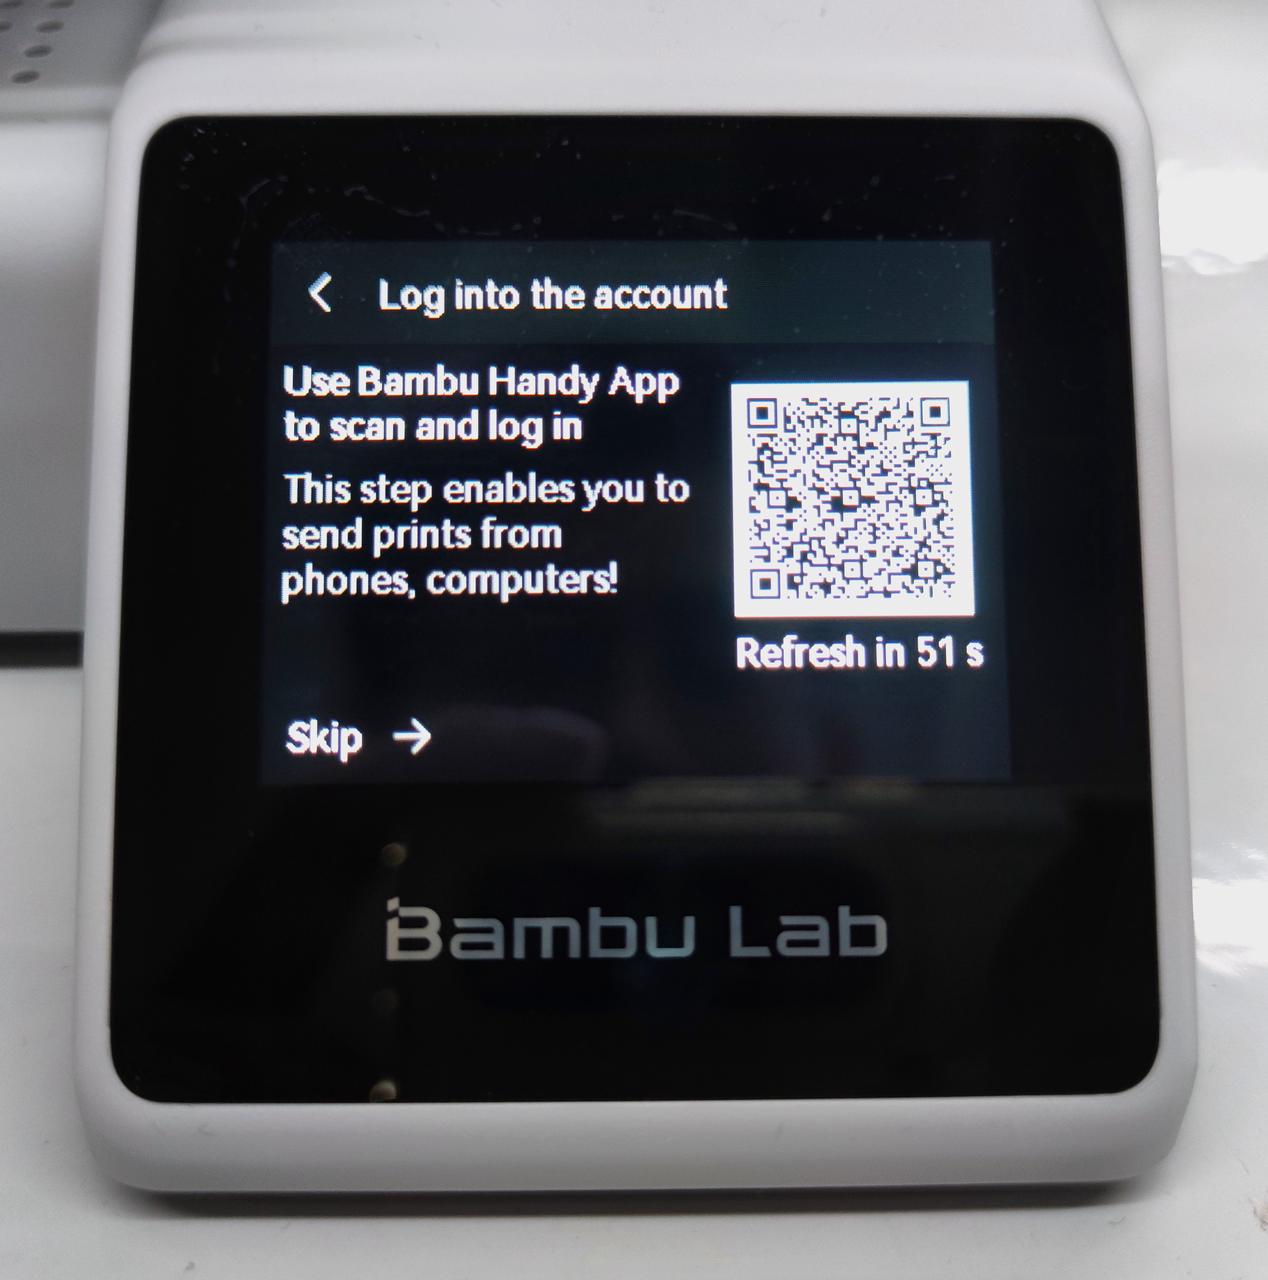
¶ Use Bambu Handy to scan the QR code on the screen, and bind your printer with Bambu Lab Account
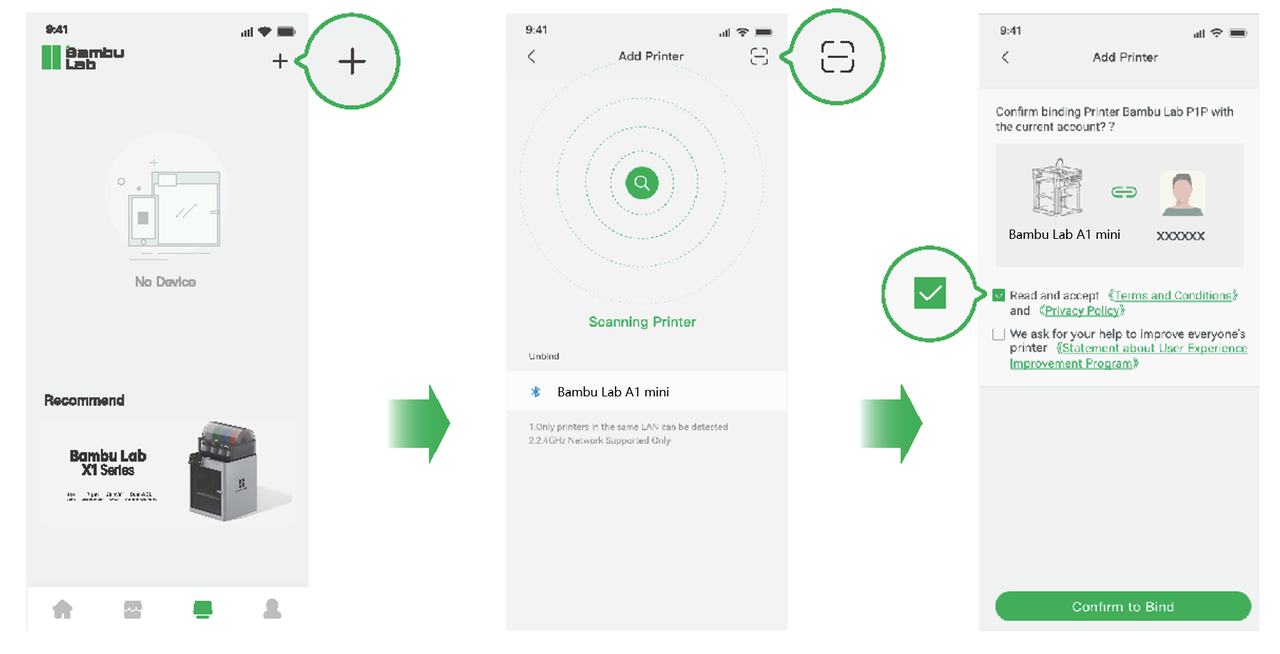
- You can sign in to Bambu Lab Handy mobile App through your Bambu Lab account. Once logged in, your printing settings will be synchronized with Bambu Studio on your desktop. Additionally, through this step, you can directly send print jobs from your phone or computer. Please note that the printer needs to be connected to Wi-Fi in this step.
 |
|---|
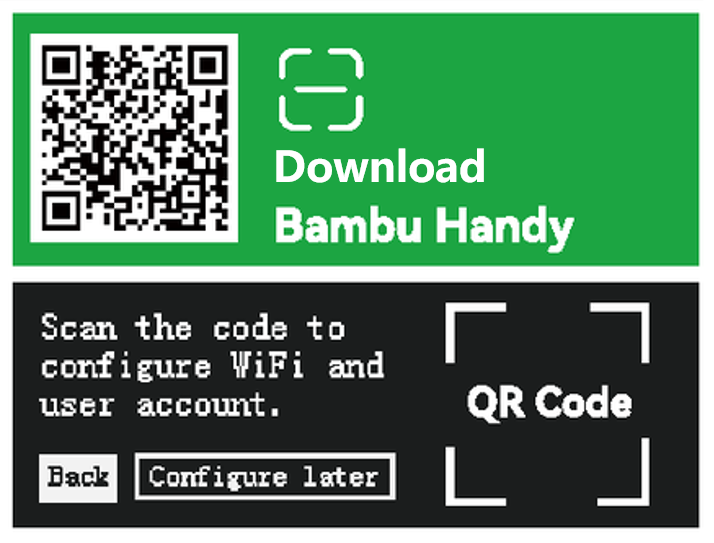
| Scan the QR code to download the Bambu Handy mobile app |
- To skip this step, just click "Skip" on the screen. Later, after all the setup is complete, you can also log in to your Bambu Lab account from the 'Main Menu - Settings - Account'.
¶ Calibration
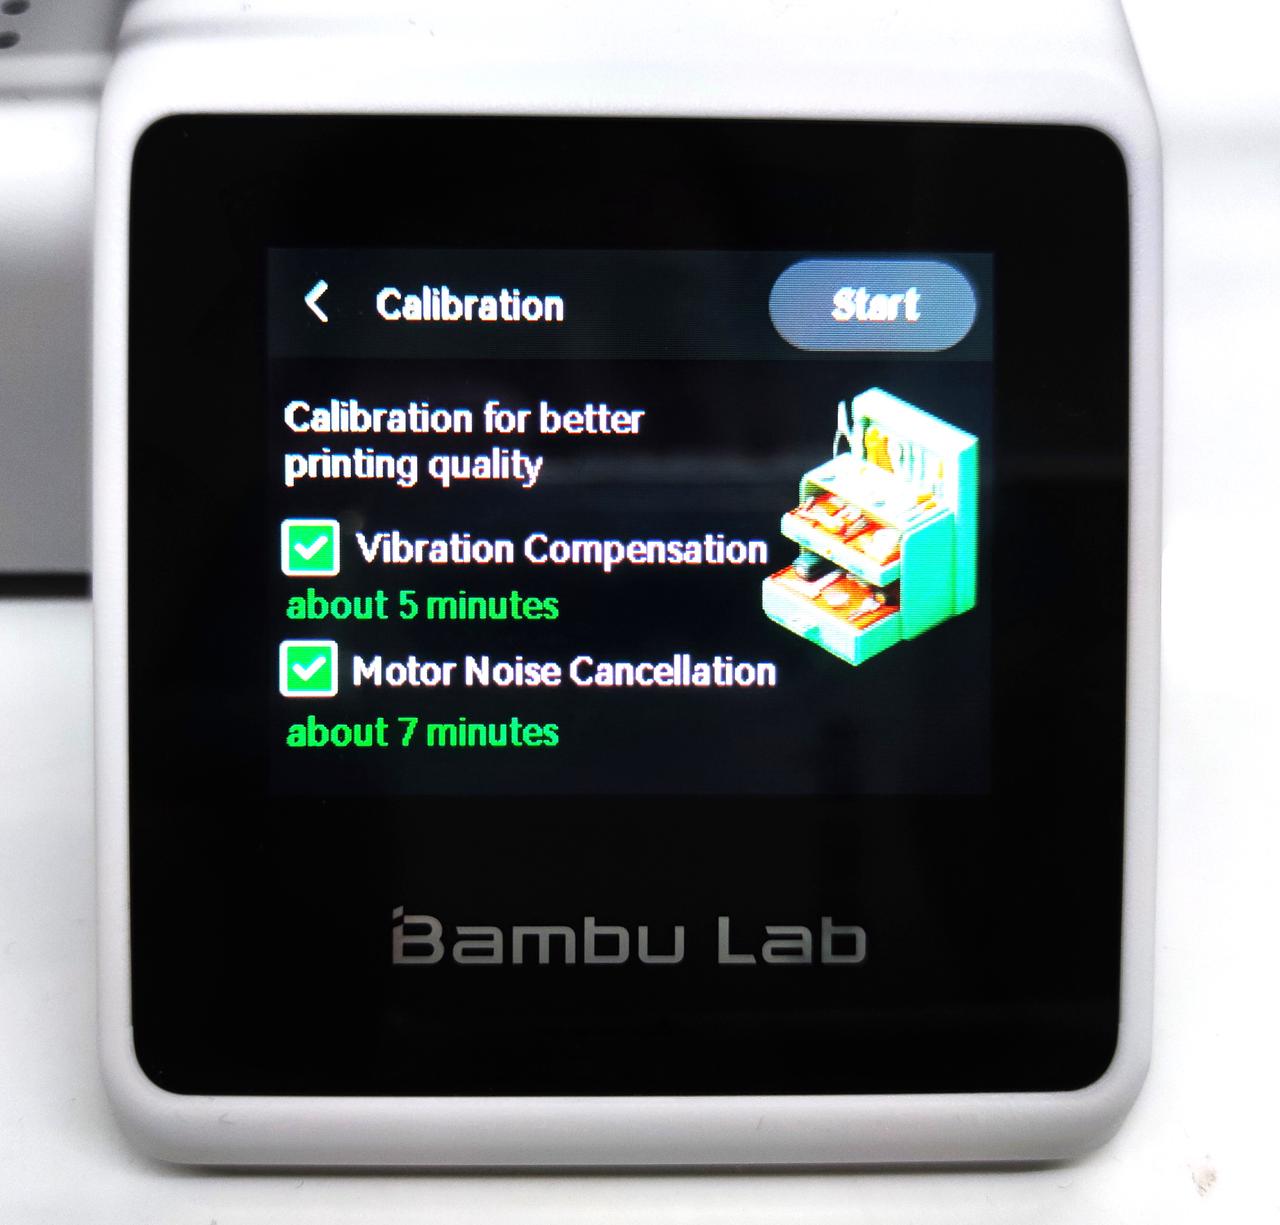
- Before finishing the setup, we highly recommend calibrating the printer to ensure the quality of your first prints. Please check the boxes for 'Vibration Compensation' and ‘Motor Noise Cancellation’, and then tap 'Start' to begin the calibration process. The entire process usually take approximately 12 minutes. During calibration, you may experience some vibration and noise, which is a normal occurrence.
¶ 1. Motor Noise Cancellation
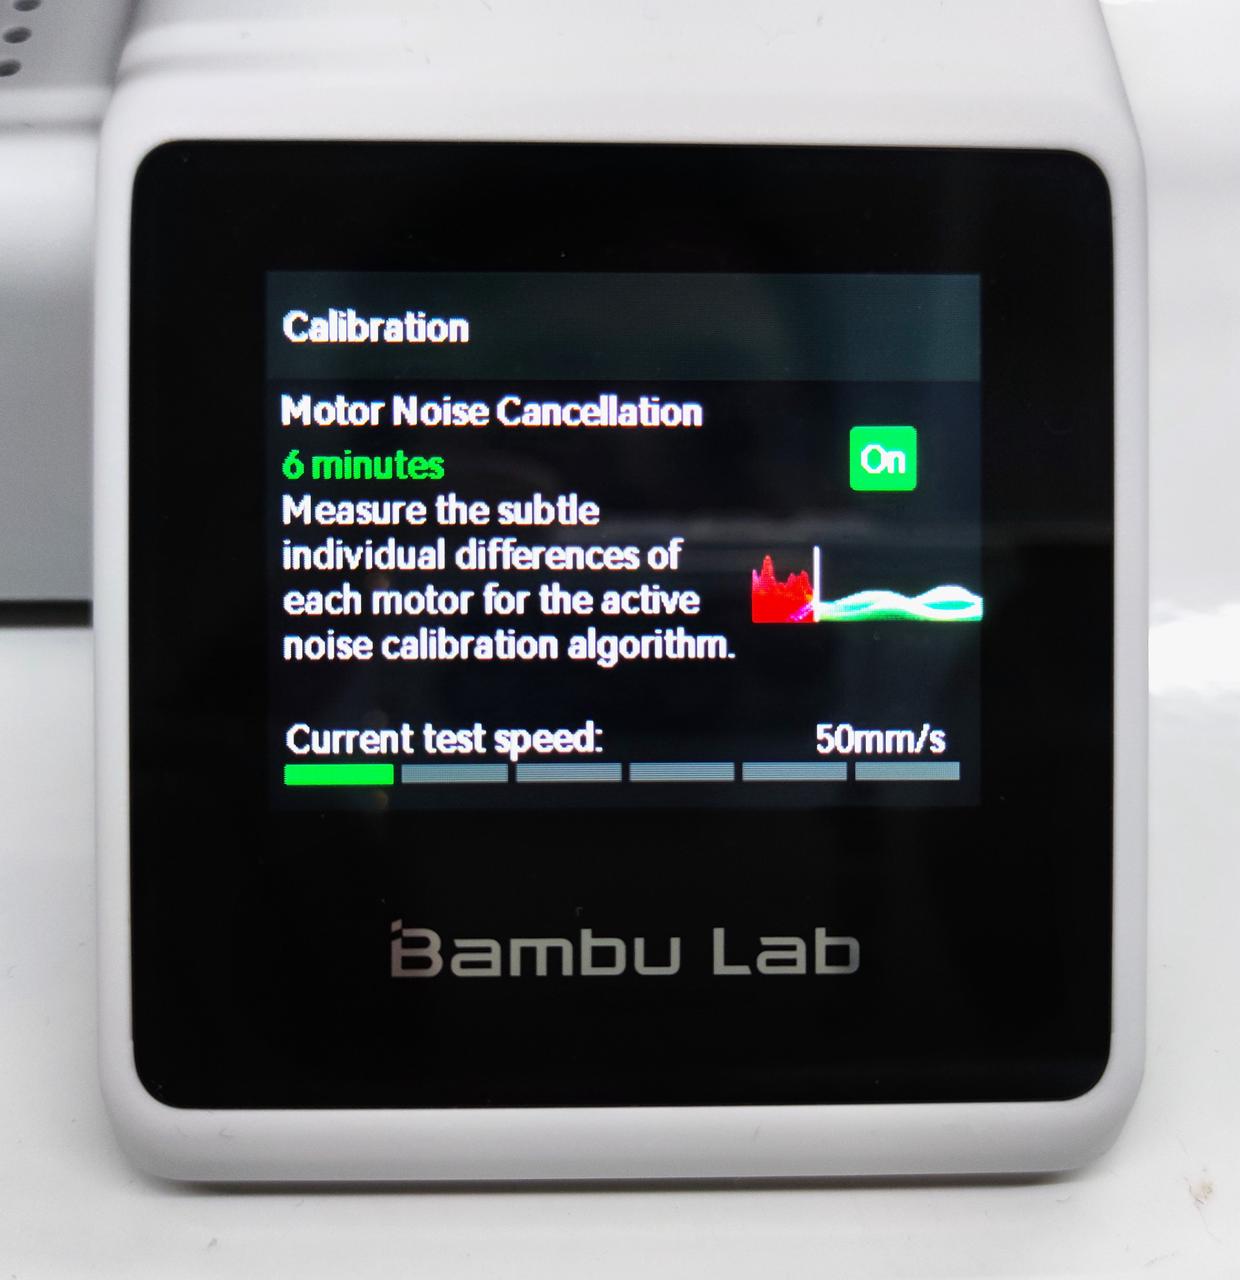
- Motor noise is typically caused by mechanical vibrations, motor driving, fan operation, or extruder movement in a 3D printer. These noises can not only be disruptive to the operator but also affect the comfort of the surrounding environment. The motor noise suppression function aims to reduce the overall printing noise by suppressing the noise generated by the motors during the printing process.
- Motor noise reduction is achieved by measuring the undesirable characteristics within the motor and calculating the compensation amount in real time based on the motor's current operating state during printing. This compensation is then applied to the motor, generating reverse vibrations within the motor to counteract the vibrations caused by the motor's imperfections. Motor noise calibration is available in the calibration menu, allowing users to recalibrate the motor noise as needed.
¶ 2. Vibration Compensation
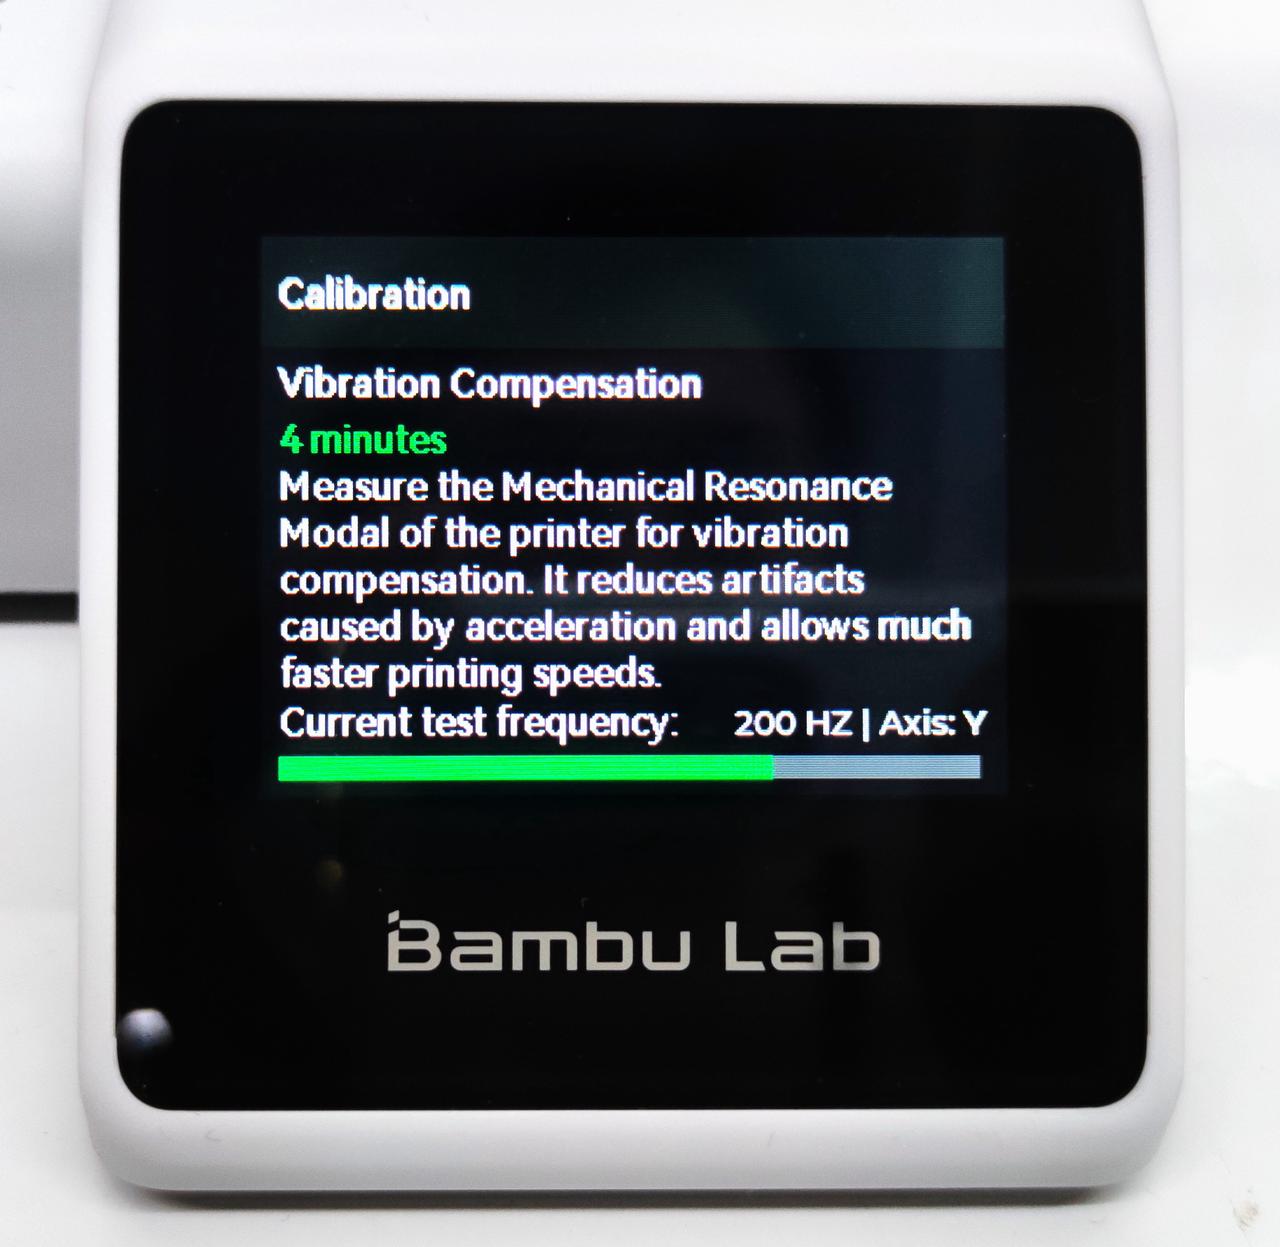
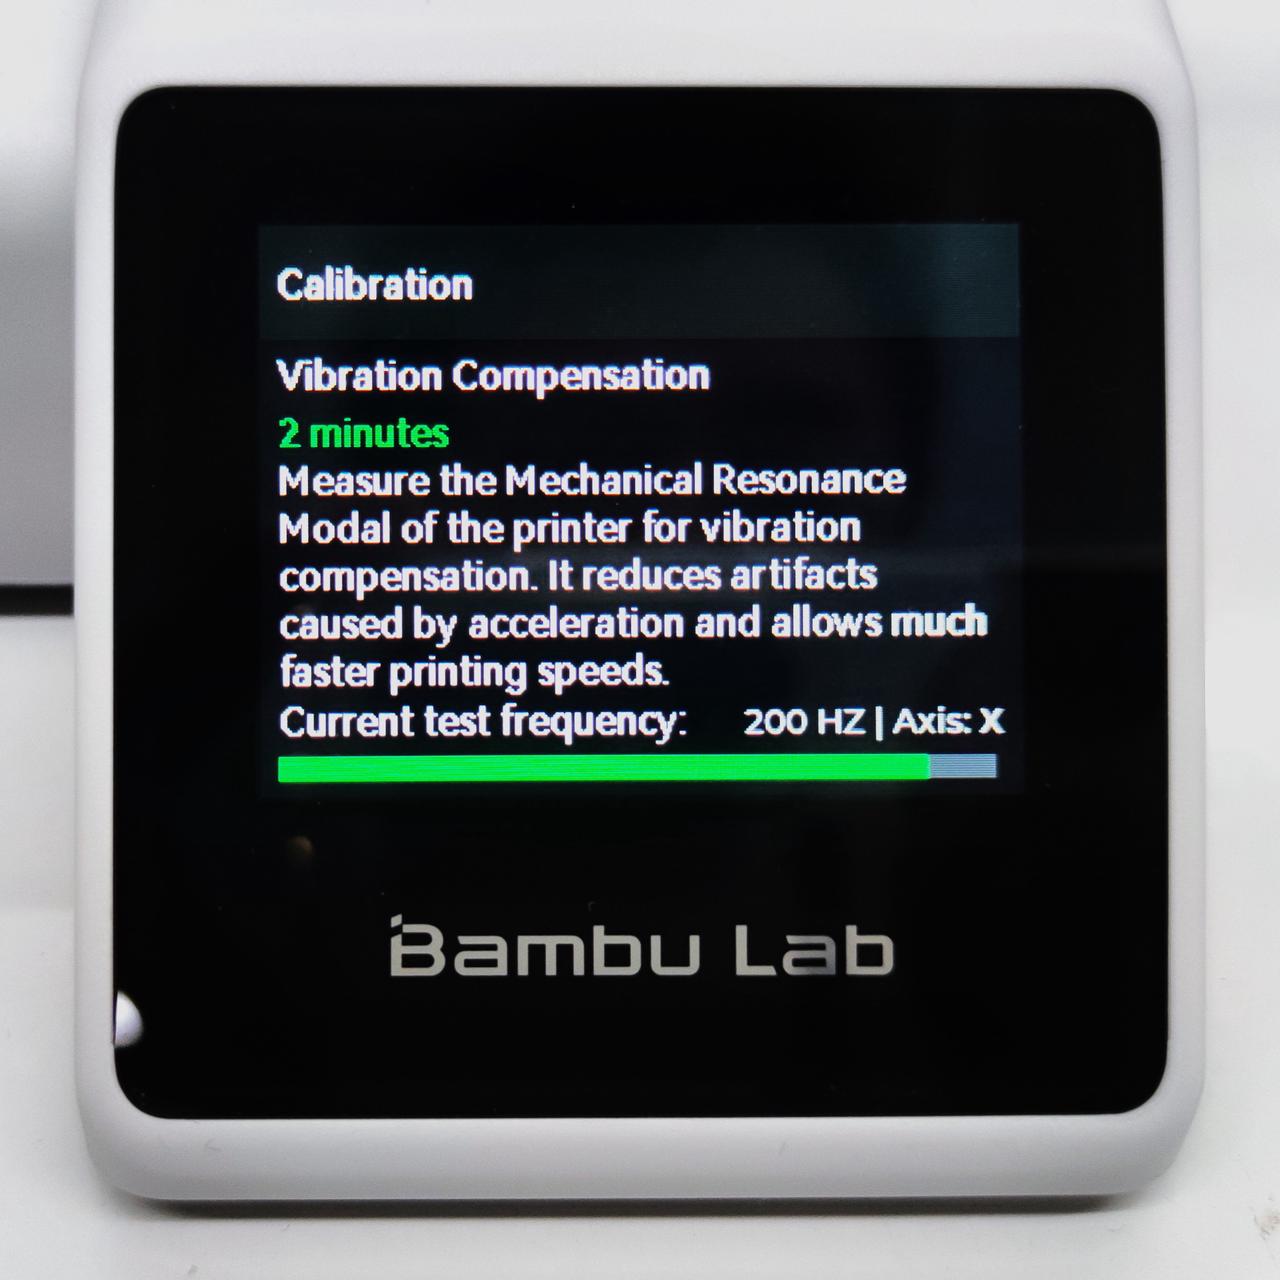
- Resonance compensation aims to mitigate or eliminate instability and quality issues caused by mechanical vibrations or resonance during printing.
- During the operation of a 3D printer, every acceleration and deceleration excites the resonant modes of the printer itself, resulting in subtle oscillations. These vibrations can have a negative impact on print quality, such as ripples, vibration patterns, or distortion on the surface of printed parts. The resonance detection process is performed by the printer during operation to determine the resonance frequency and enable vibration compensation adjustments. The purpose of this process is to reduce potential print quality issues during printing and significantly improve printing speed.
 |
 |
|---|
¶ Major Screen
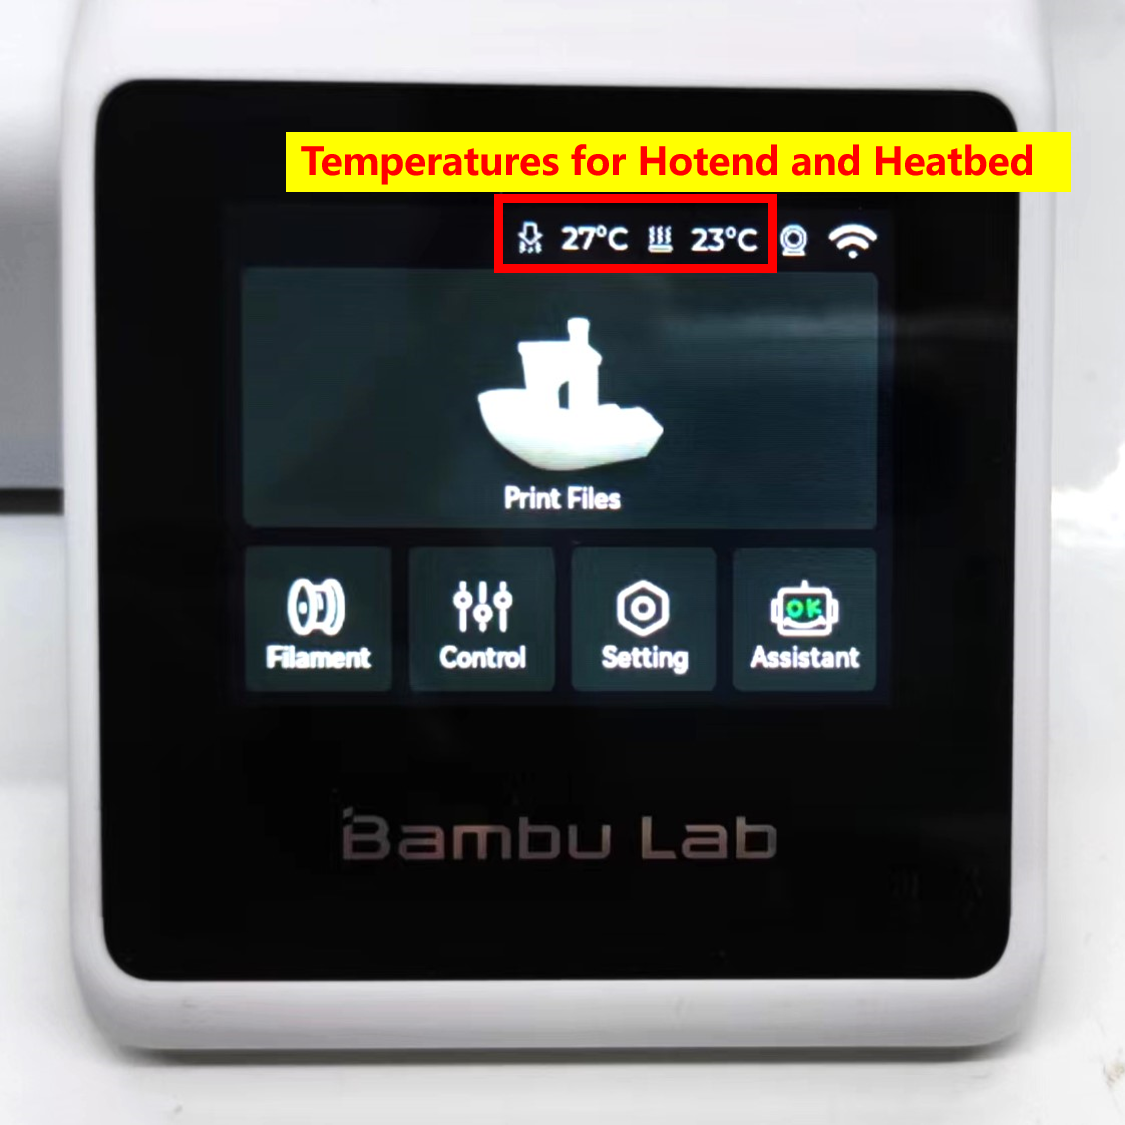
- After the printer completes the automatic calibration, the initial setup is complete. The major screen of the printer is shown in the figure below. From the main interface, you can access printing files, check the remaining amount of filament and the status of the AMS (Automatic Material Supply), control the printer's movements, and adjust printer settings. The status bar at the top of the interface displays the current hotend temperature, bed temperature, camera connection status, and wireless network connection status from left to right.
¶ Printing files
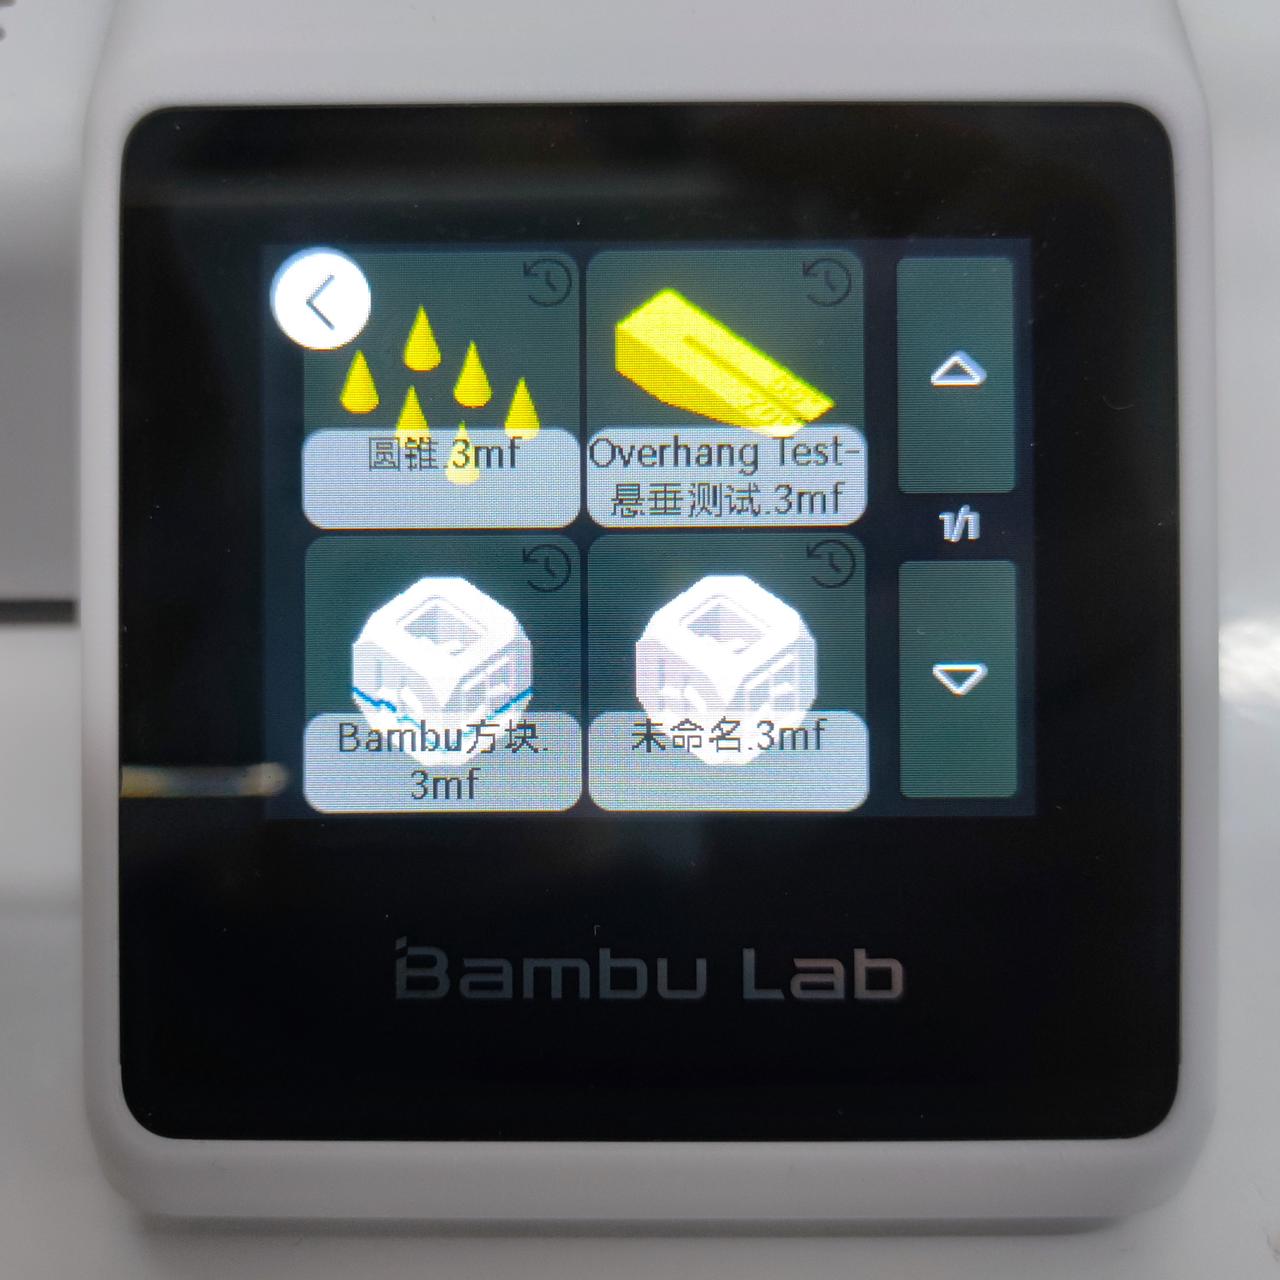
- On the main interface, tap 'Print Files' to enter the print preparation page. As shown in the figure below, the printer will read all the sliced model files from the SD card, including previously printed files and those sent to the printer via Wi-Fi. All these files will be displayed here.
 |
|---|
| File Browser |
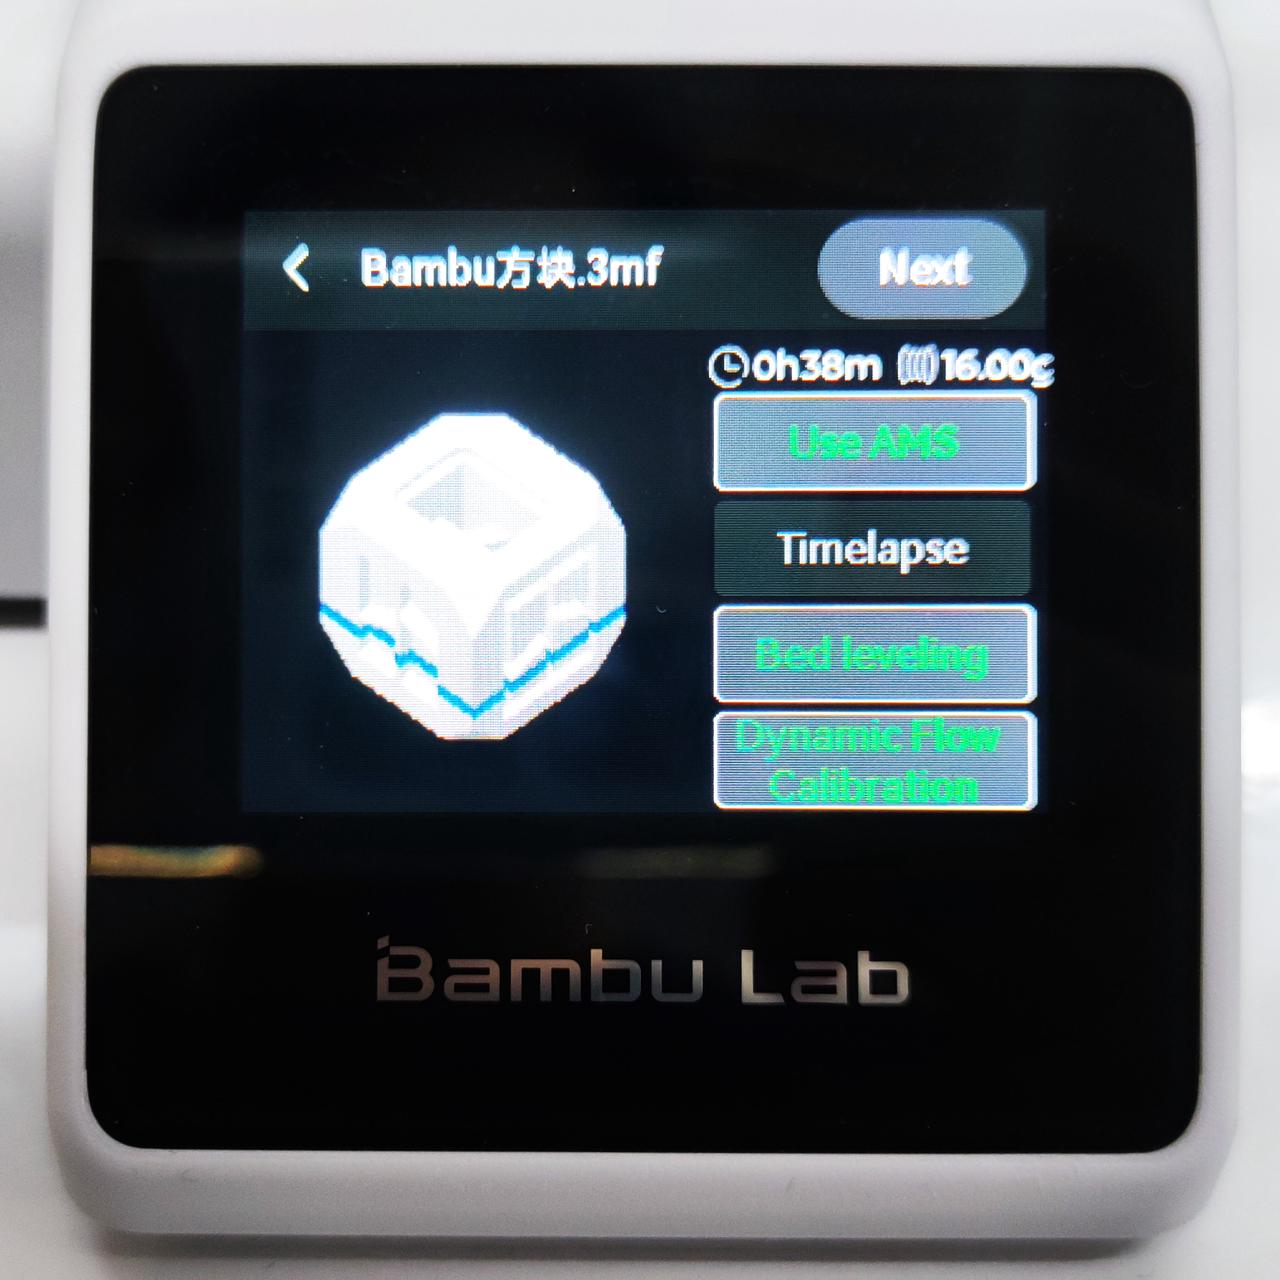
- Clicking on the icon of the model you want to print, various printer features can be enabled here, including AMS (Automatic Material Supply), time-lapse photography, automatic bed leveling, and dynamic flow calibration. Check the functions you would like to enable during the printing process and click 'Next' (We recommend keeping the bed leveling and dynamic flow calibration enabled for optimal print quality).
 |
|---|
| Printing Preview Setup |
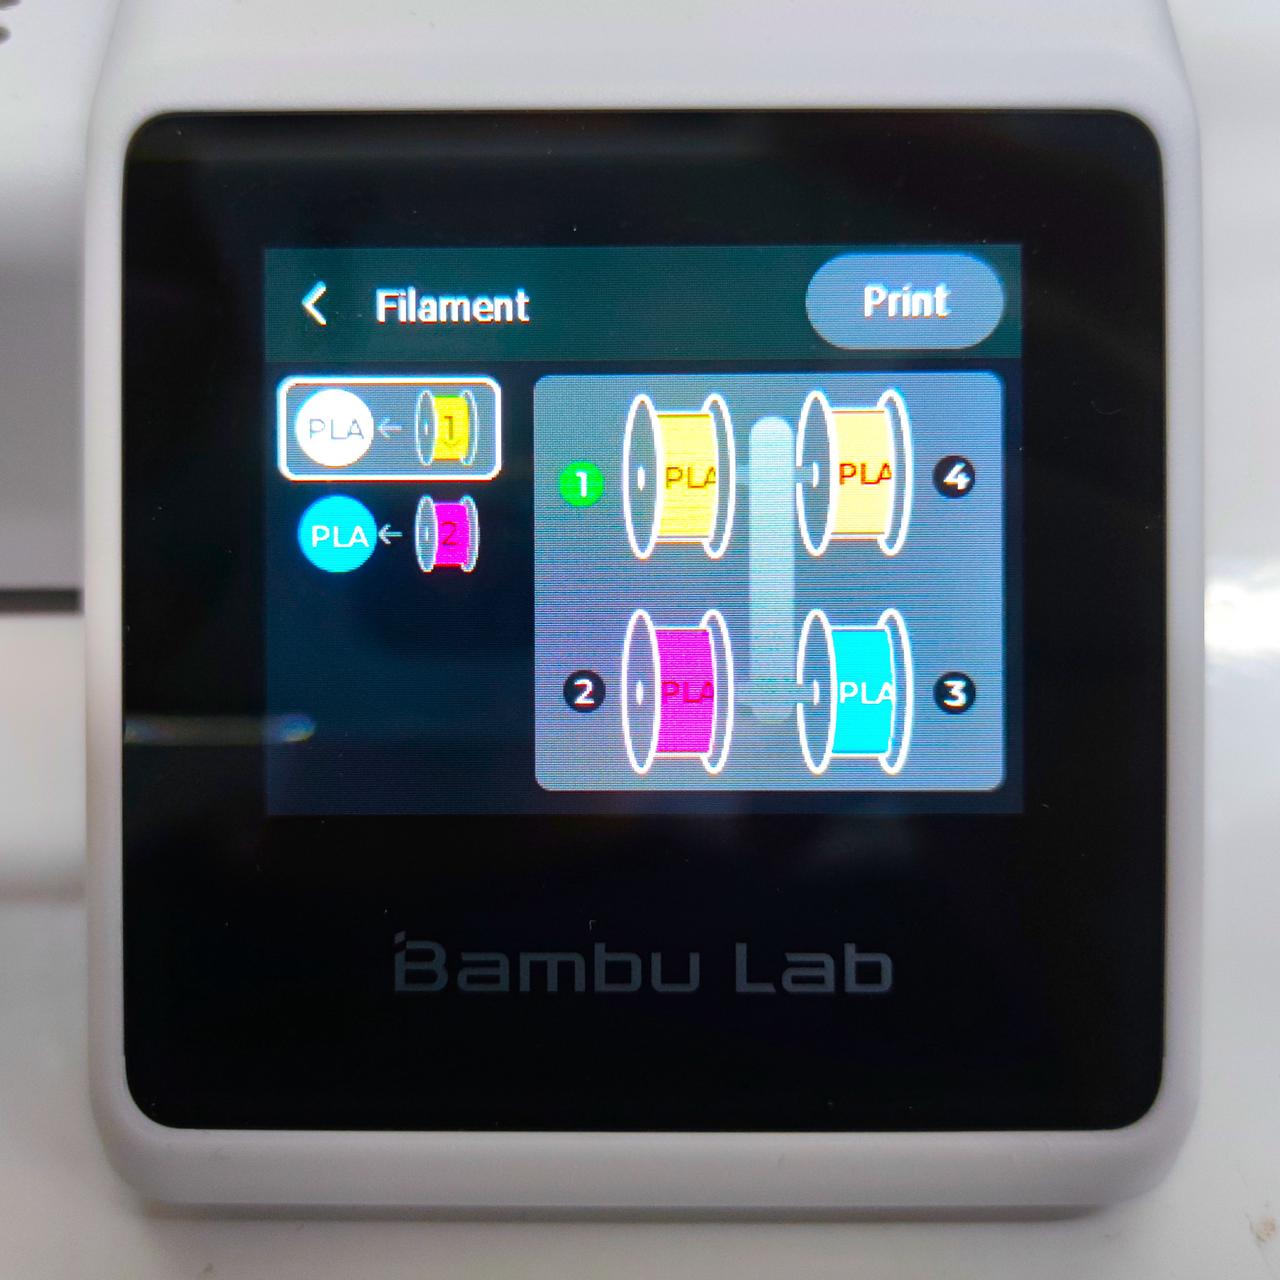
- Entering the filament interface, you will see all the filament currently connected to the printer, along with their mapping relationships. On this page, you can manually select the filament mapping targets.
 |
|---|
| Filament Setup |
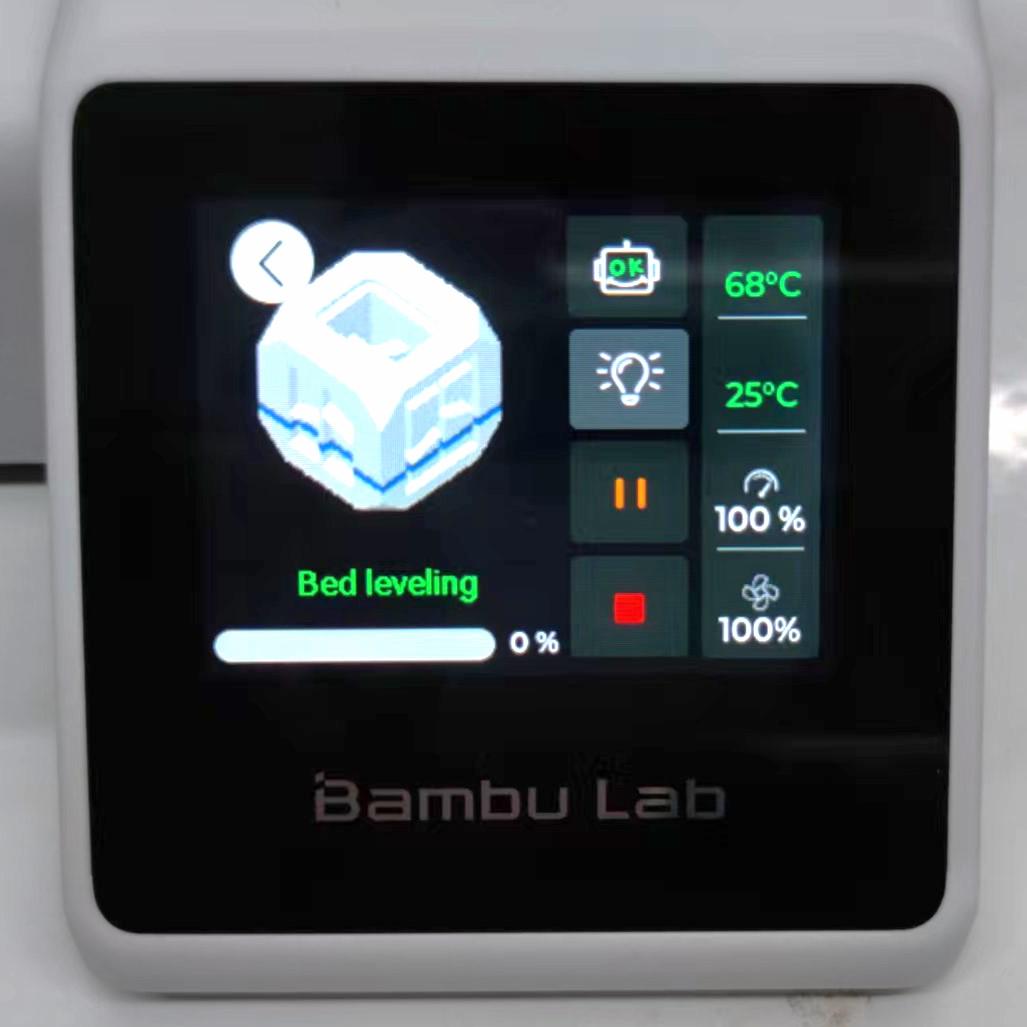
- Once everything is ready, the printer will start the pre-printing preparations, which include preheating the bed and hotend, bed leveling, and flow calibration (if selected).
 |
|---|
| Preparation |
¶ Printing Process
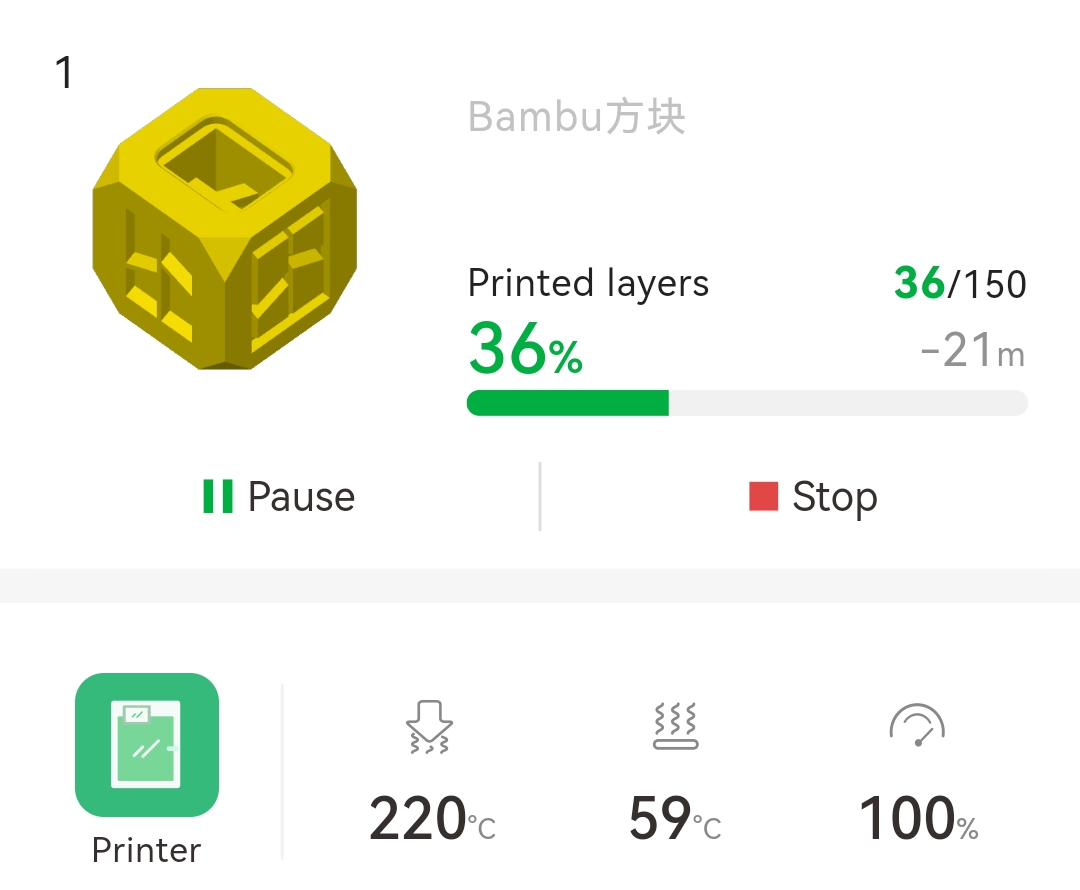
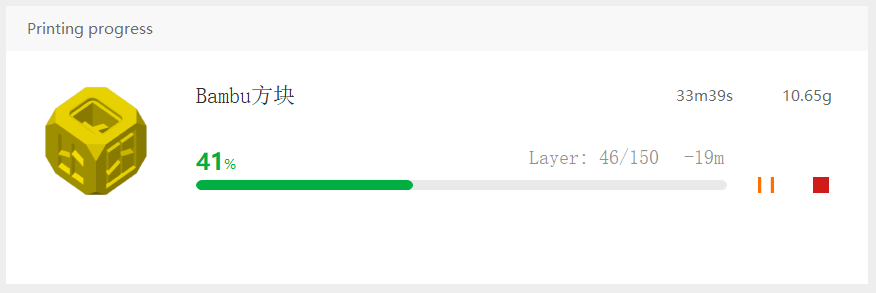
- During the printing process, if you have logged into your Bambu Lab account on the printer, the real-time print progress can be viewed in both Bambu Studio and the Bambu Handy App.
 Bambu Handy APP |
 Bambu Studio |
|---|
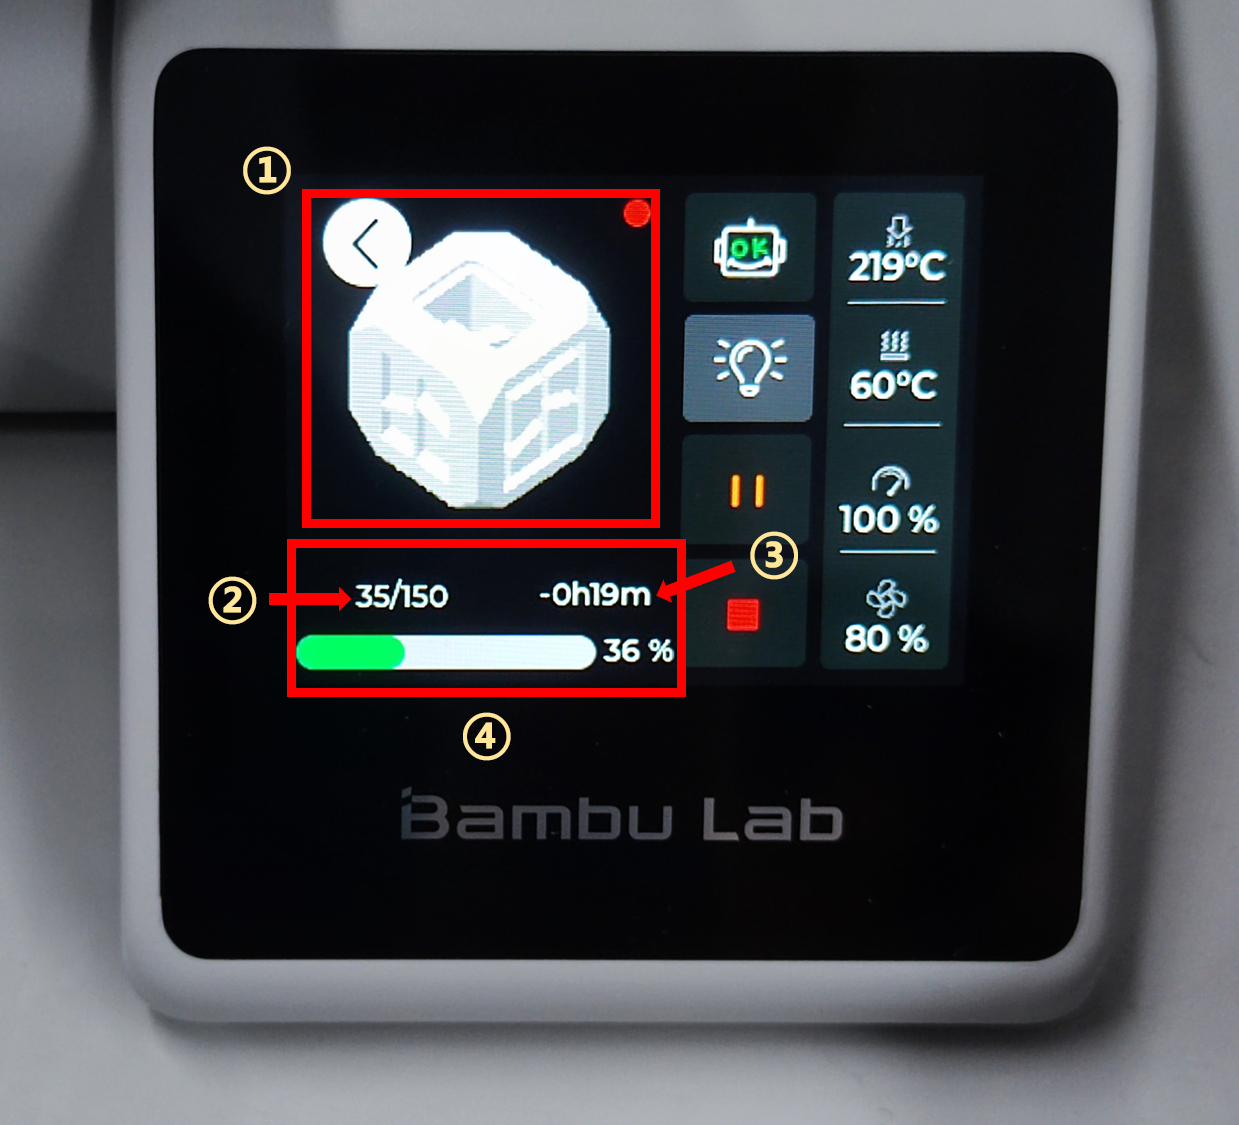
- The printing progress panel can be divided into three columns: the left column is the printing status tracking panel, the middle one is the control panel, and on the right it is the device monitoring panel.
¶ 1. Printing status tracking panel
 |
No. | Description |
|---|---|---|
| ① | Preview of the model | |
| ② | Number of layers being printed/ Total layer numbers | |
| ③ | Estimated printing time | |
| ④ | Printing progress |
¶ 2. Control panel
- The switch of the LED fill light next to the camera can be controlled. Also, you can pause and resume printing at any time, or stop printing ahead of schedule.
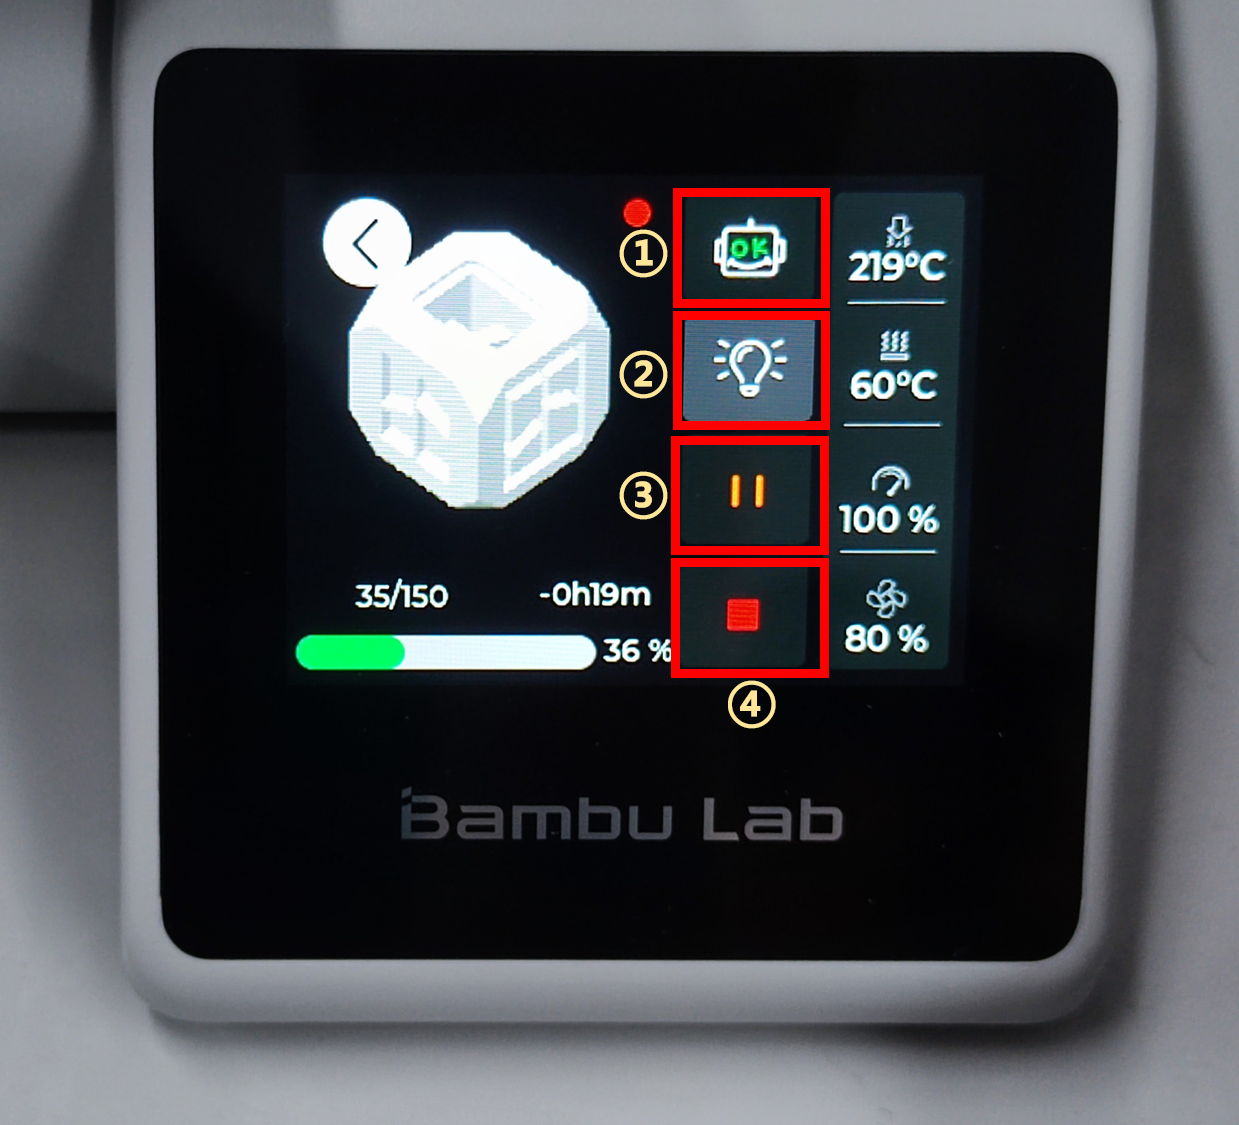 |
No. | Description |
|---|---|---|
| ① | Assistant | |
| ② | LED fill light switch | |
| ③ | Pause printing | |
| ④ | Abandon printing |
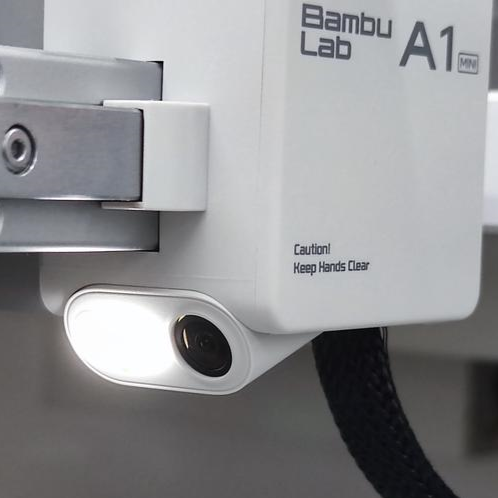 LED fill light on |
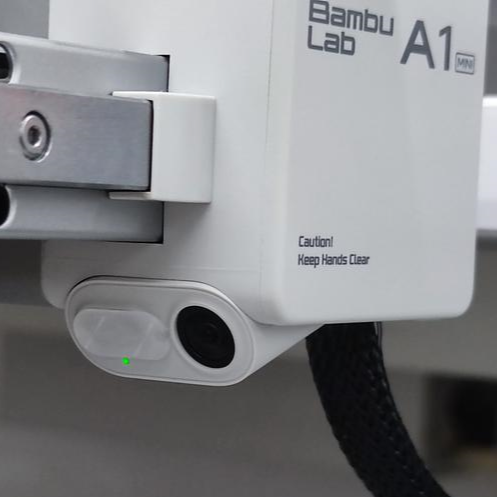 LED fill light off |
|---|
- The assistant will collect any warnings or errors encountered during printing and list them for you. For example, if there is an issue with AMS material depletion, the assistant will display the error on the list.
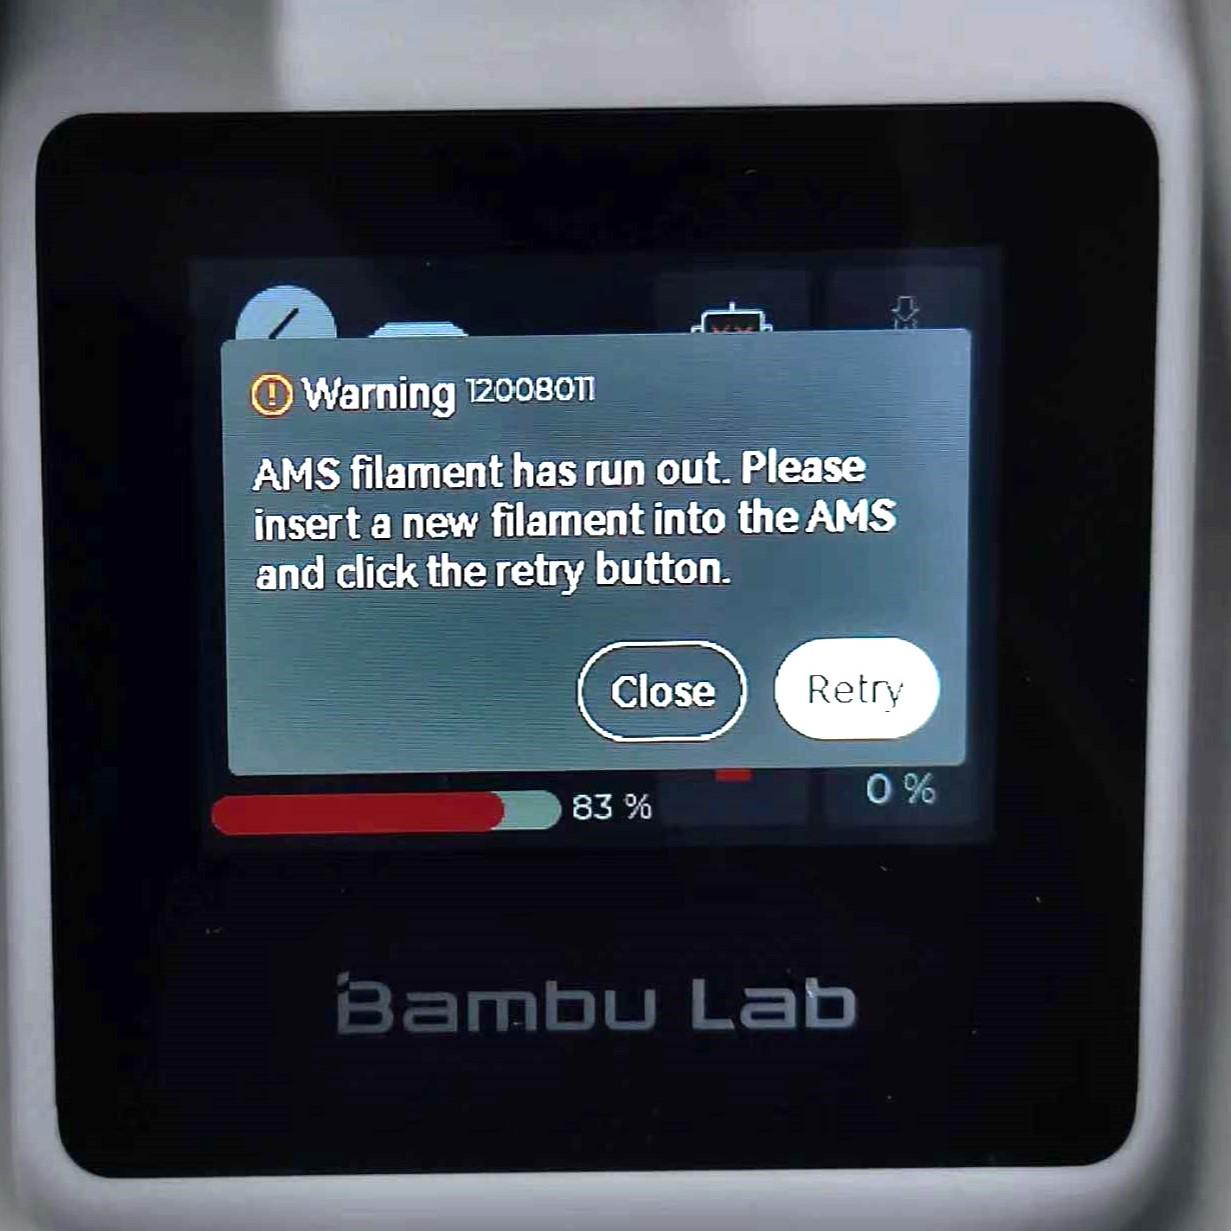 AMS filament depletion error |
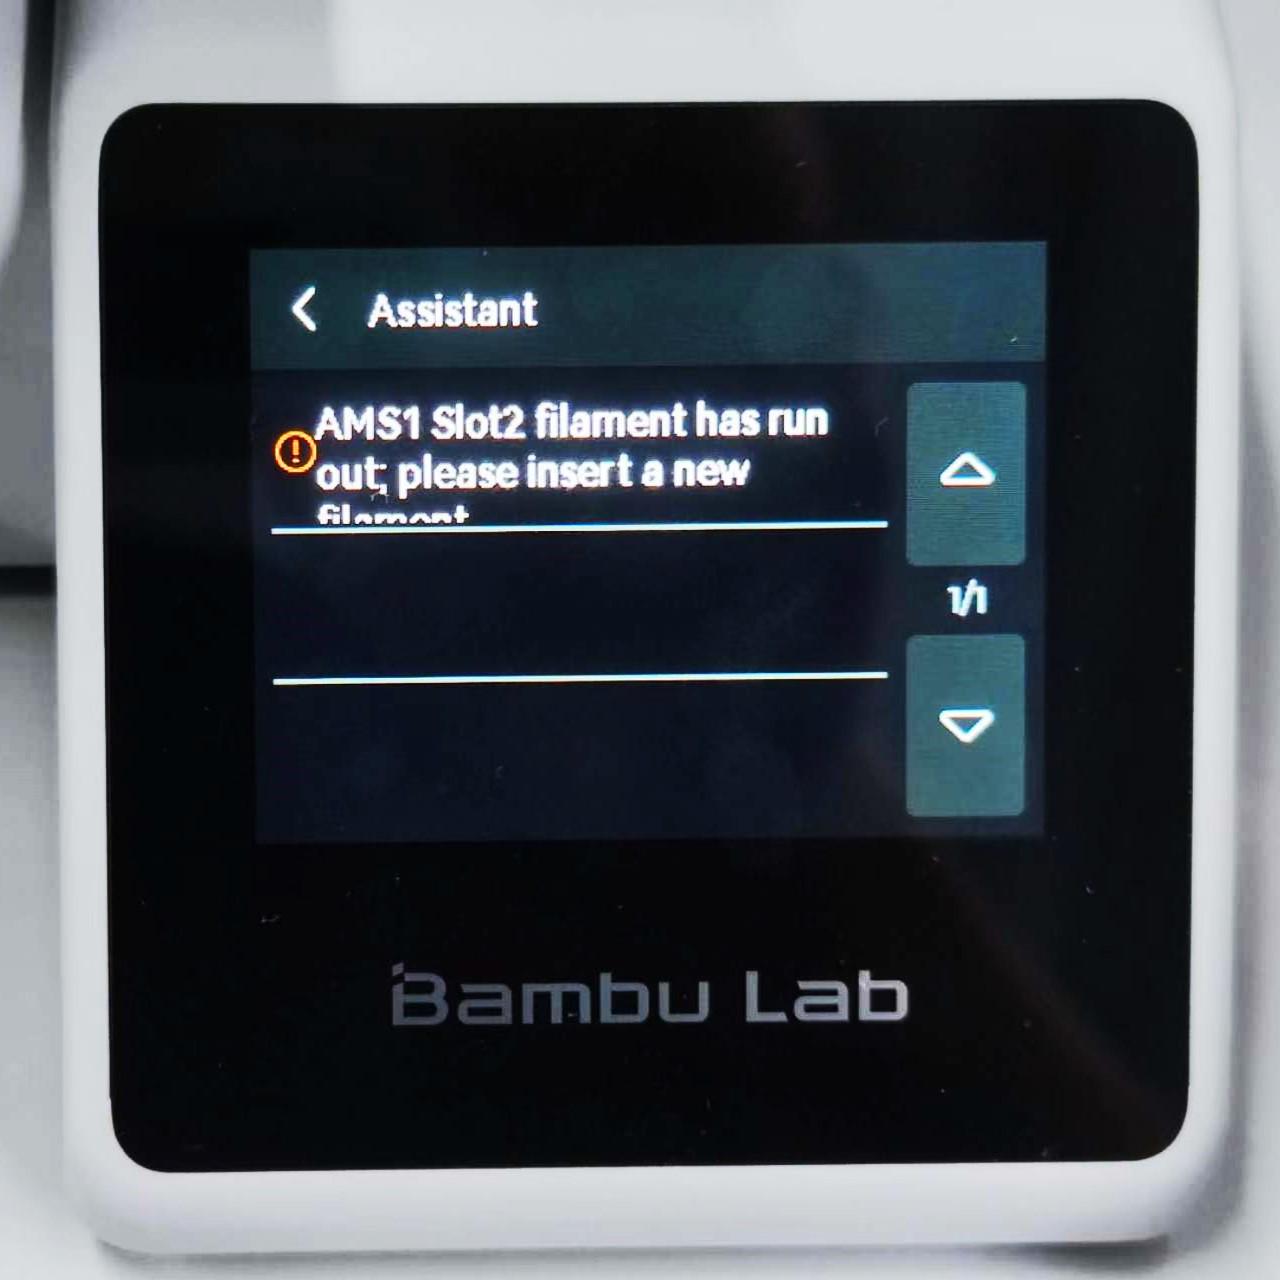 Information from Assistant |
|---|
¶ 3. Device monitoring panel
- In the device monitoring panel, some real-time values can be monitored, such as hotend temperature, heatbed temperature, print speed and fan speed. By clicking on any of the status icons, you can enter the control page to adjust the device settings.
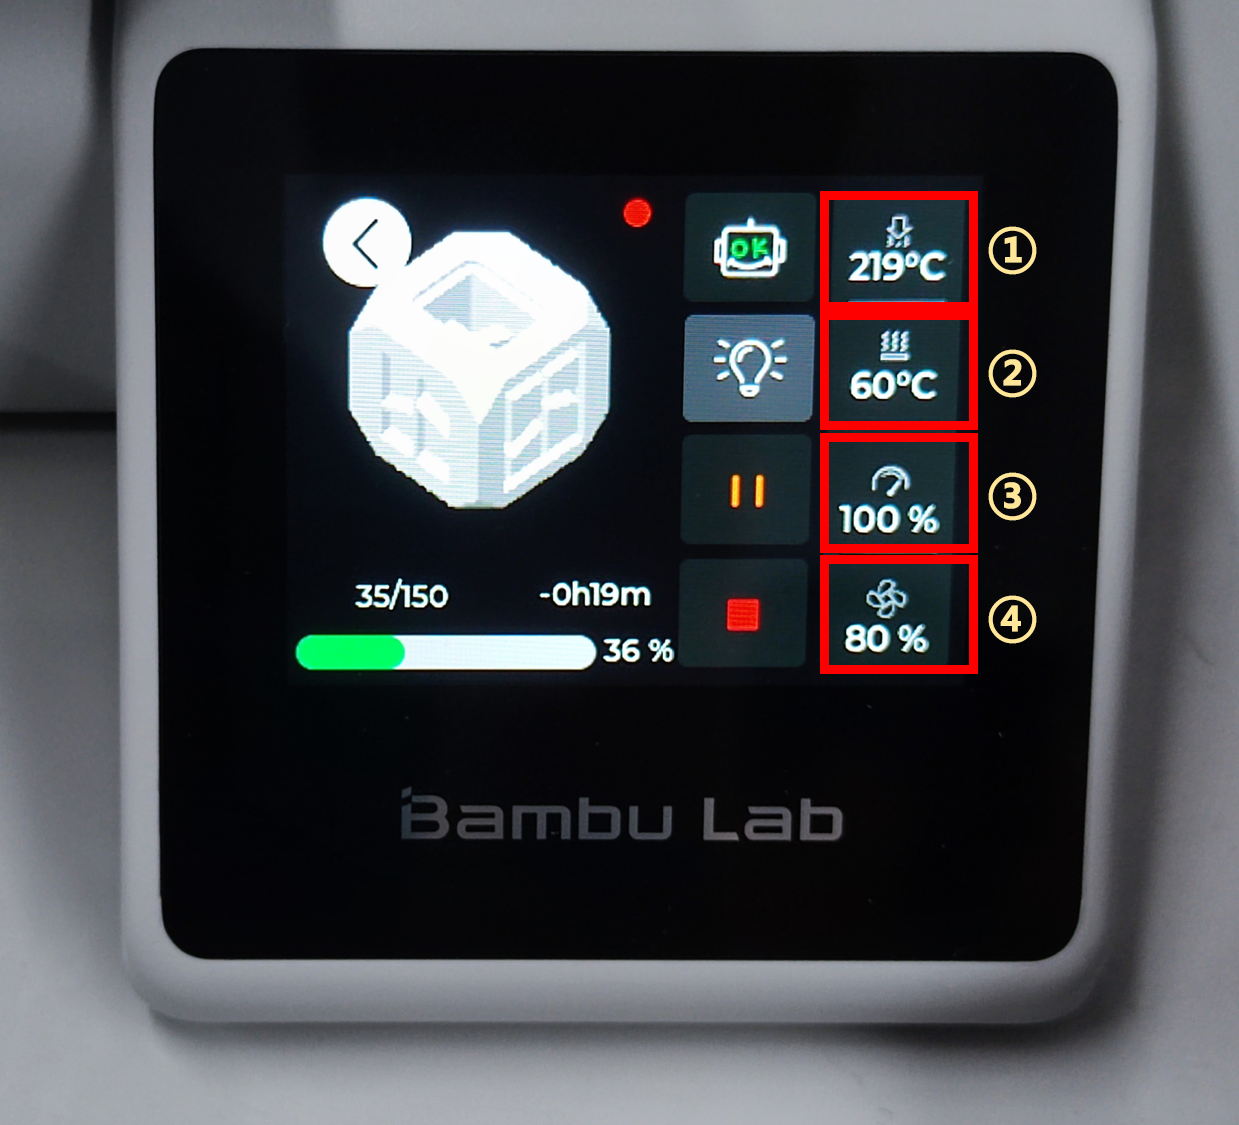 |
No. | Description |
|---|---|---|
| ① | Hotend temperature | |
| ② | Heatbed temperature | |
| ③ | Speed of printing | |
| ④ | Speed of fan |
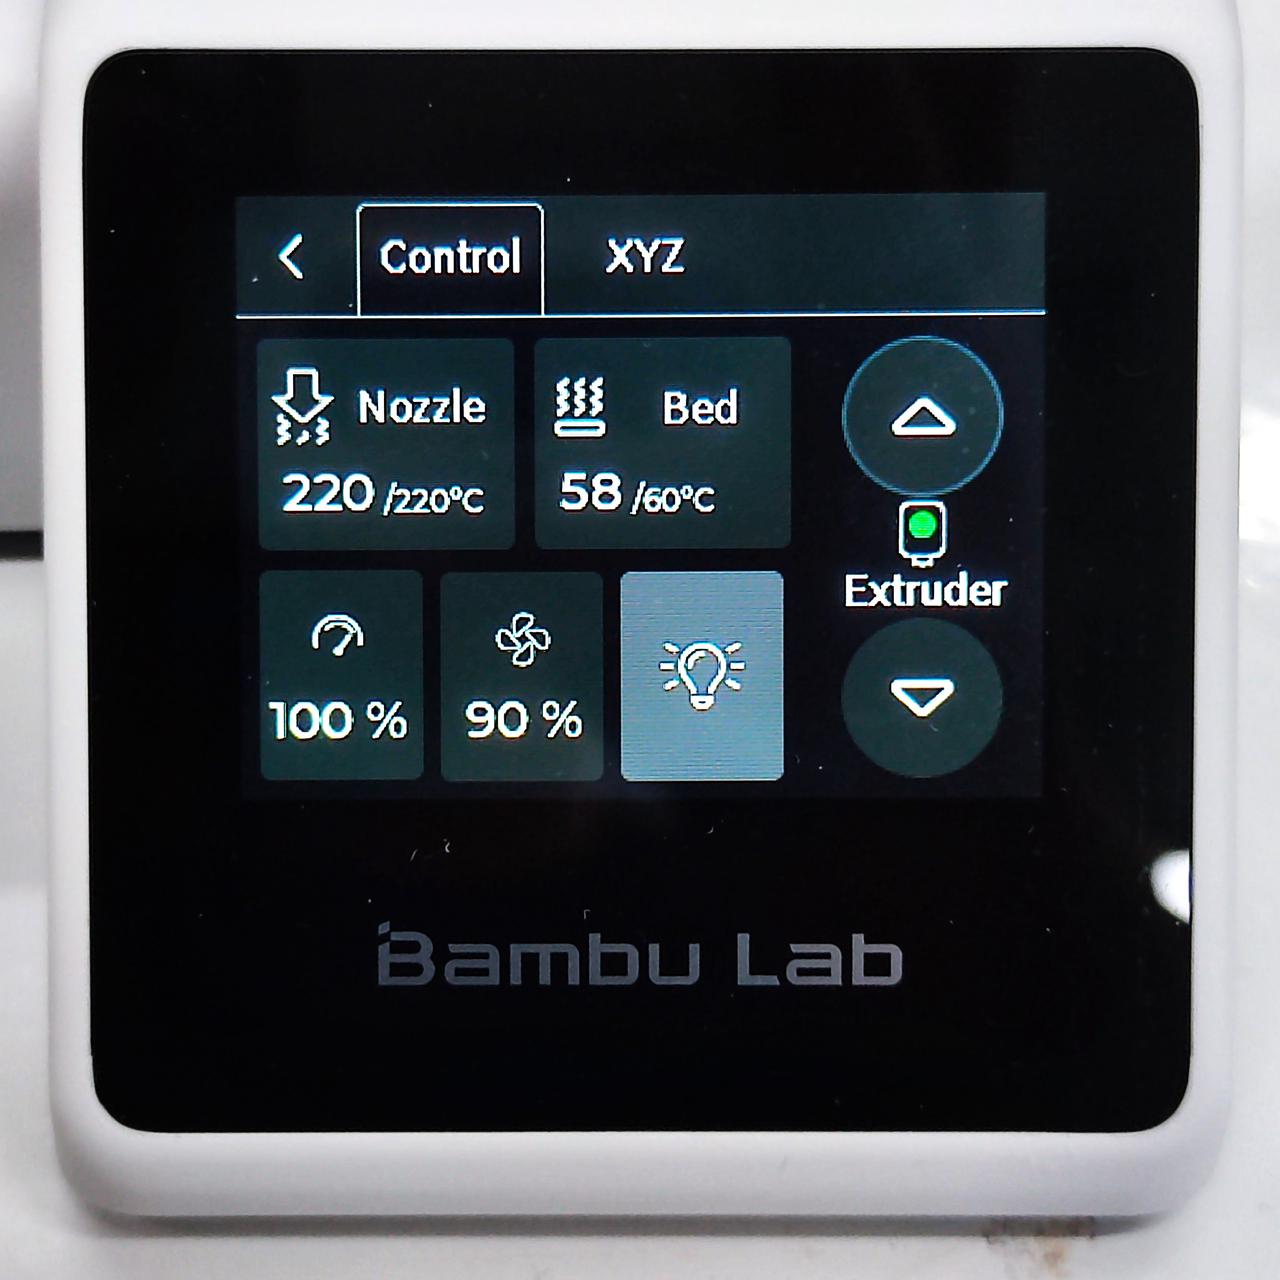 Control Panel |
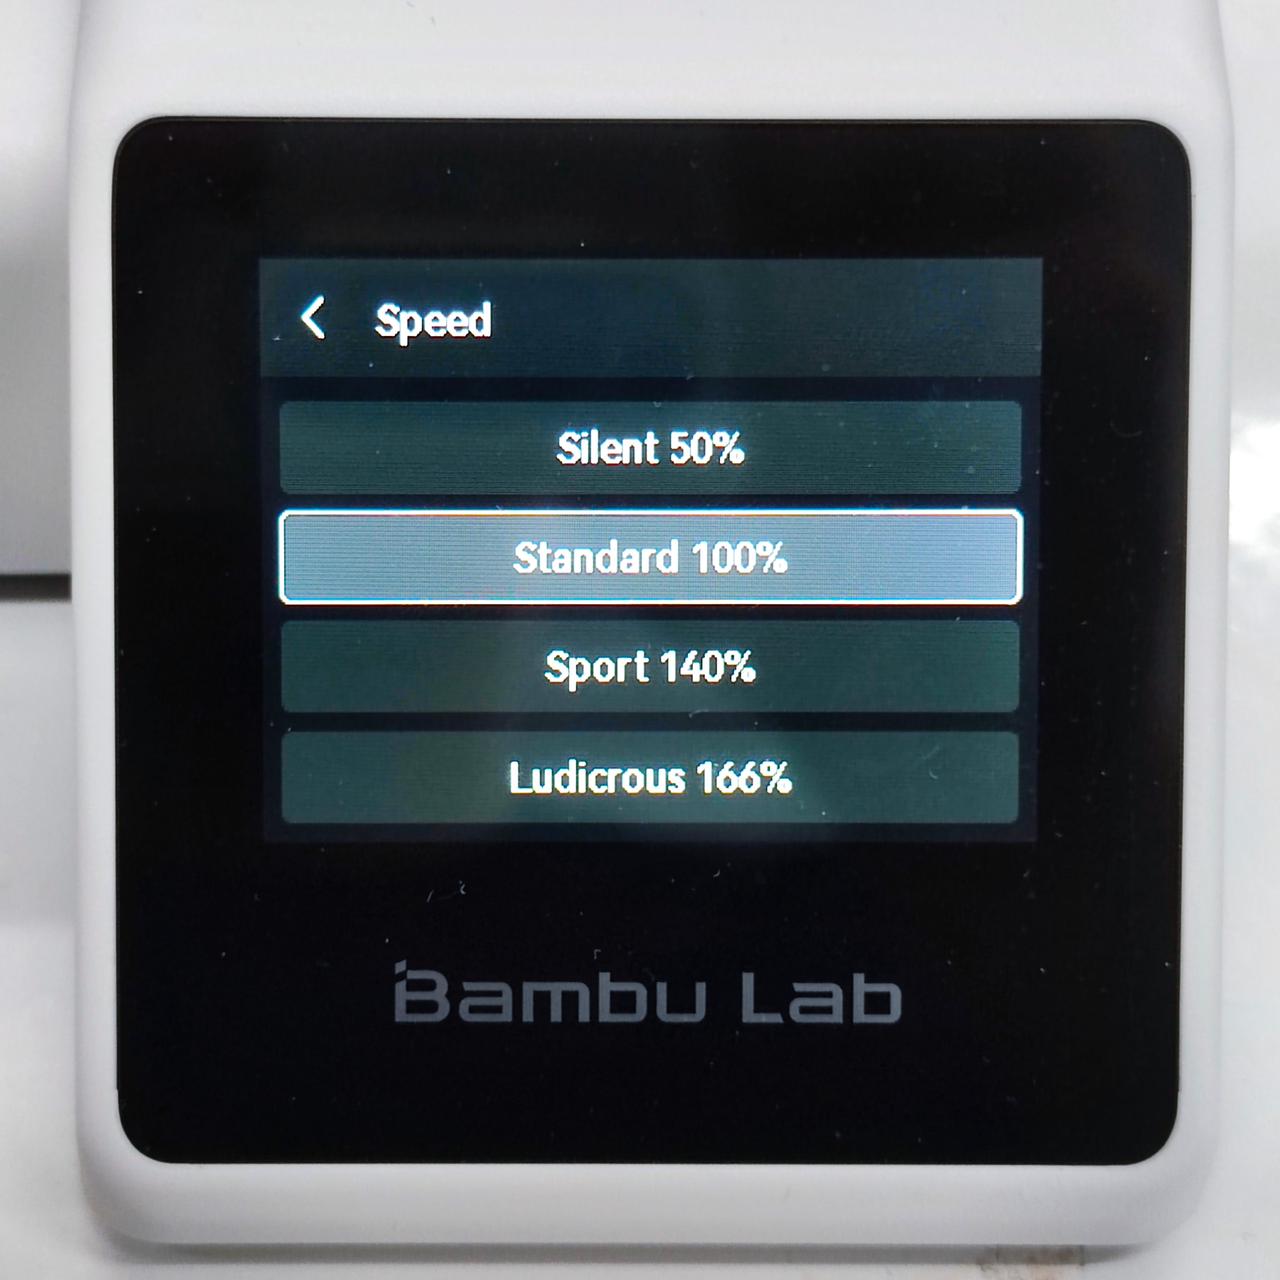 Manual Control |
|---|
¶ Filament and AMS
¶ External Spool
- In 'Major Screen - Filament', the currently loaded filament can be viewed. Additionally, you can directly operate the printer to feed or retract filament. Once the feeding process is complete, the Hall sensor indicator will light up in green, indicating that the Hall switch has detected the arrival of the printing material to the extruder.
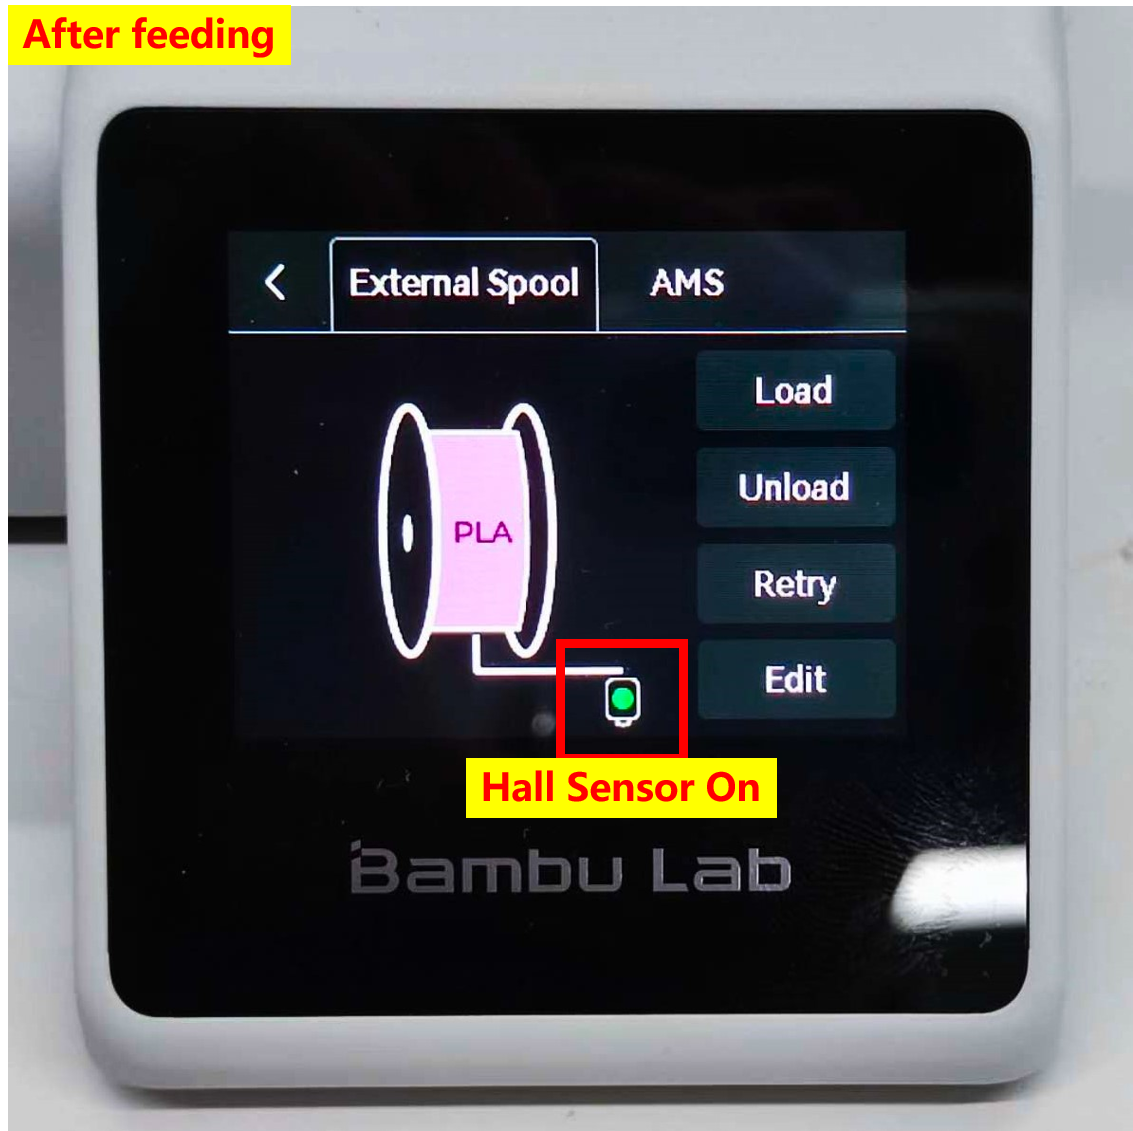 Hall sensor lights up when filament is detected |
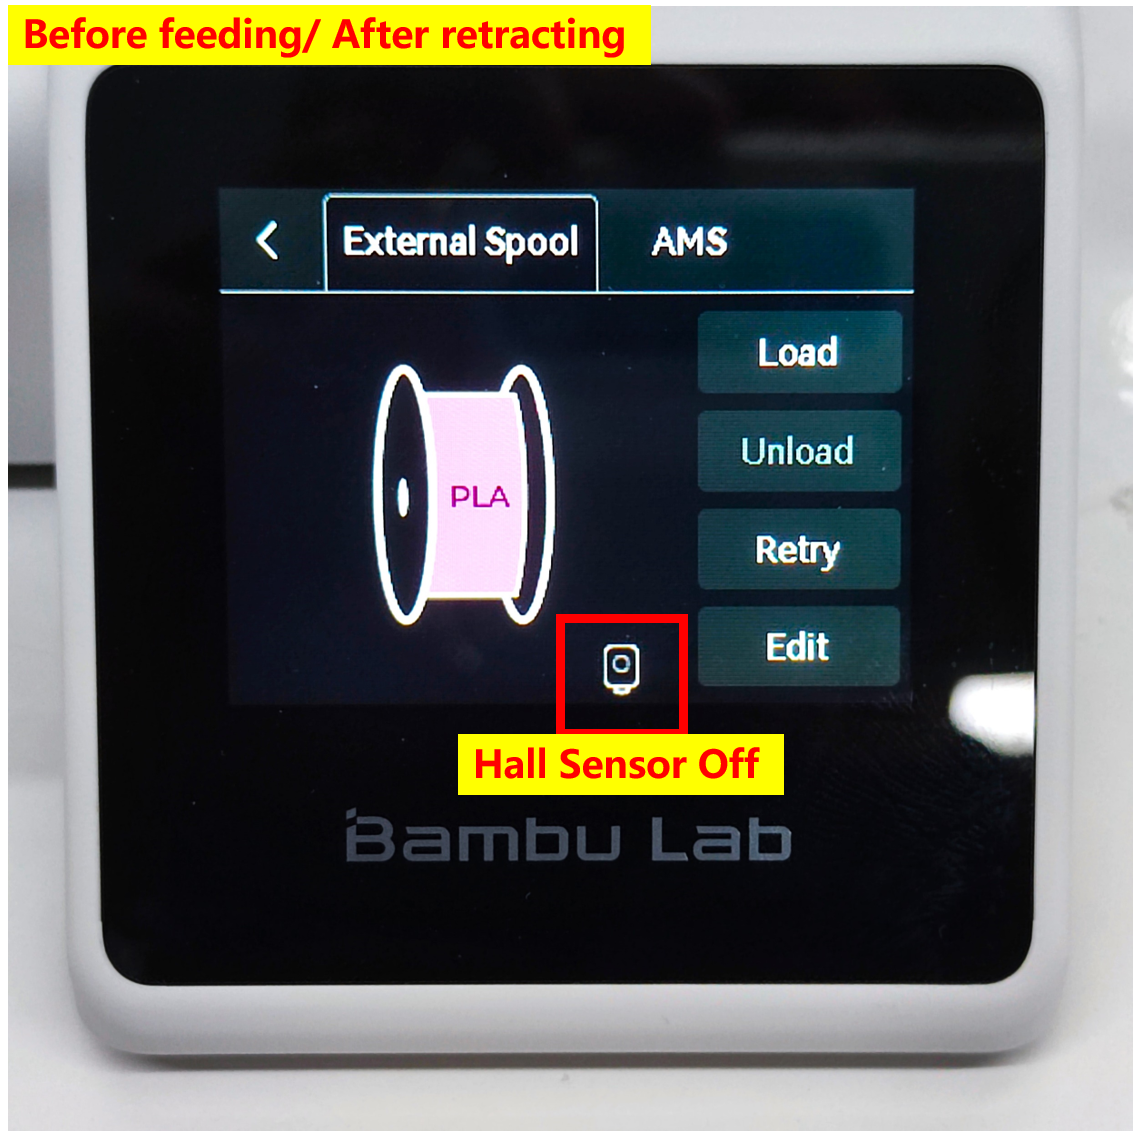 Hall sensor off |
|---|
- The 'Retry' button is primarily used when encountering warnings. For example, when using an external filament spool, if the toolhead fails to detect the filament, you will need to manually feed the filament into the toolhead and then click 'Retry' to complete the feeding process.
- For third-party filament, you can manually set the parameters in "Edit".
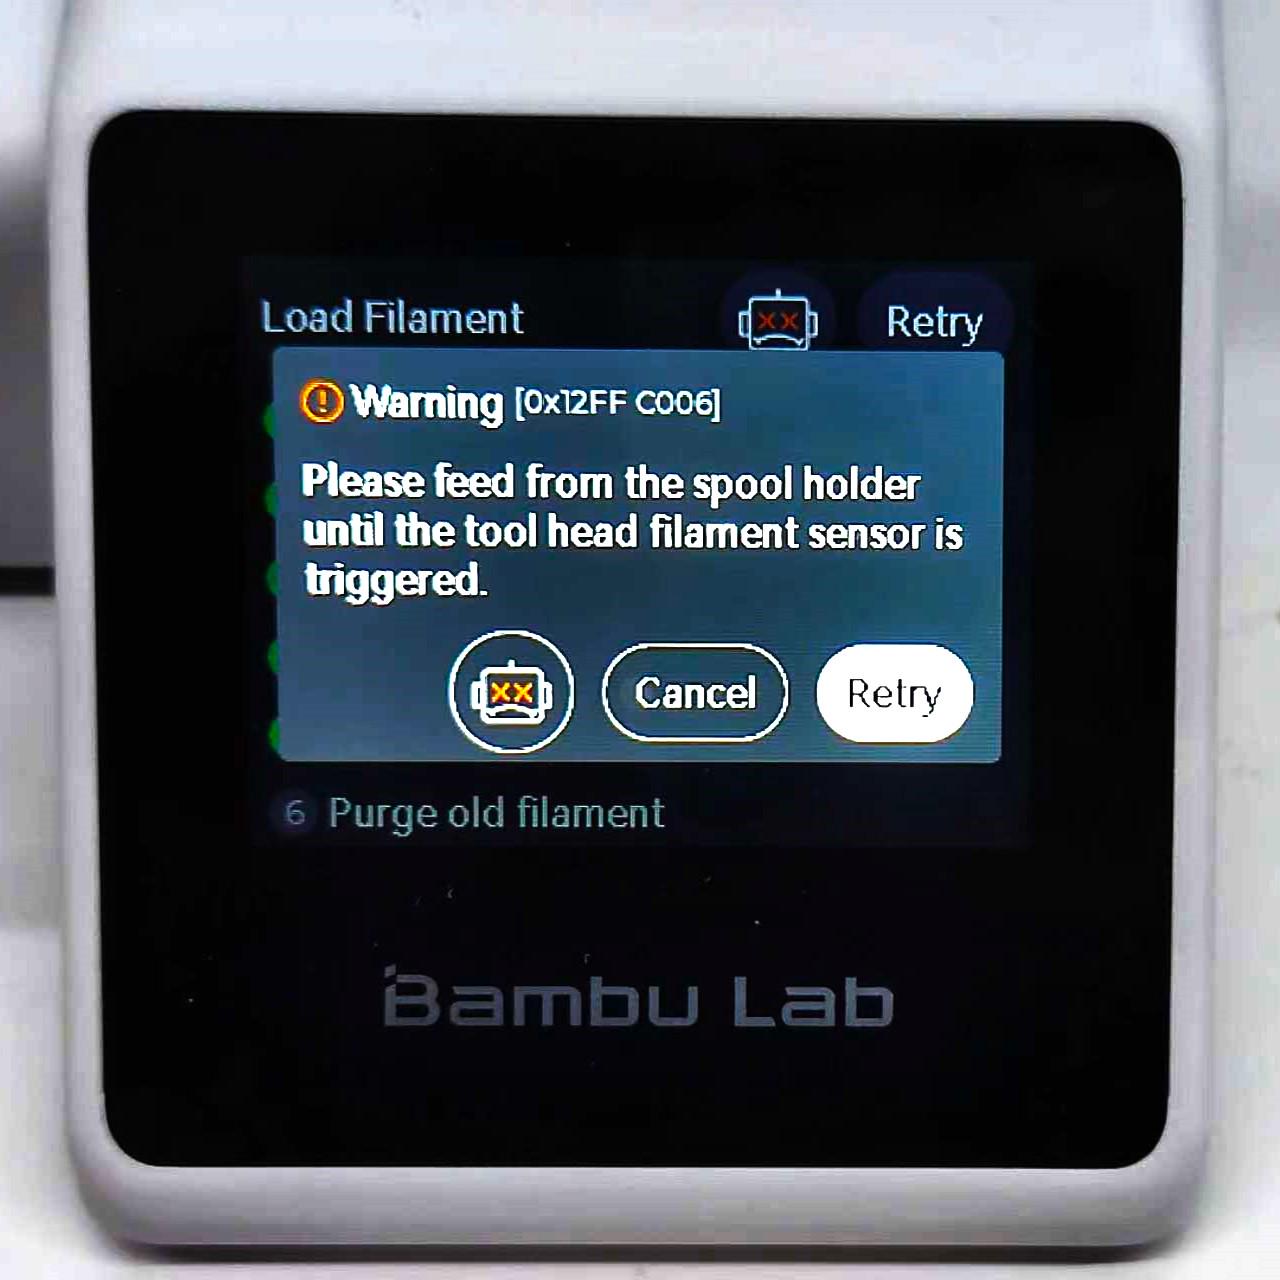 Retry |
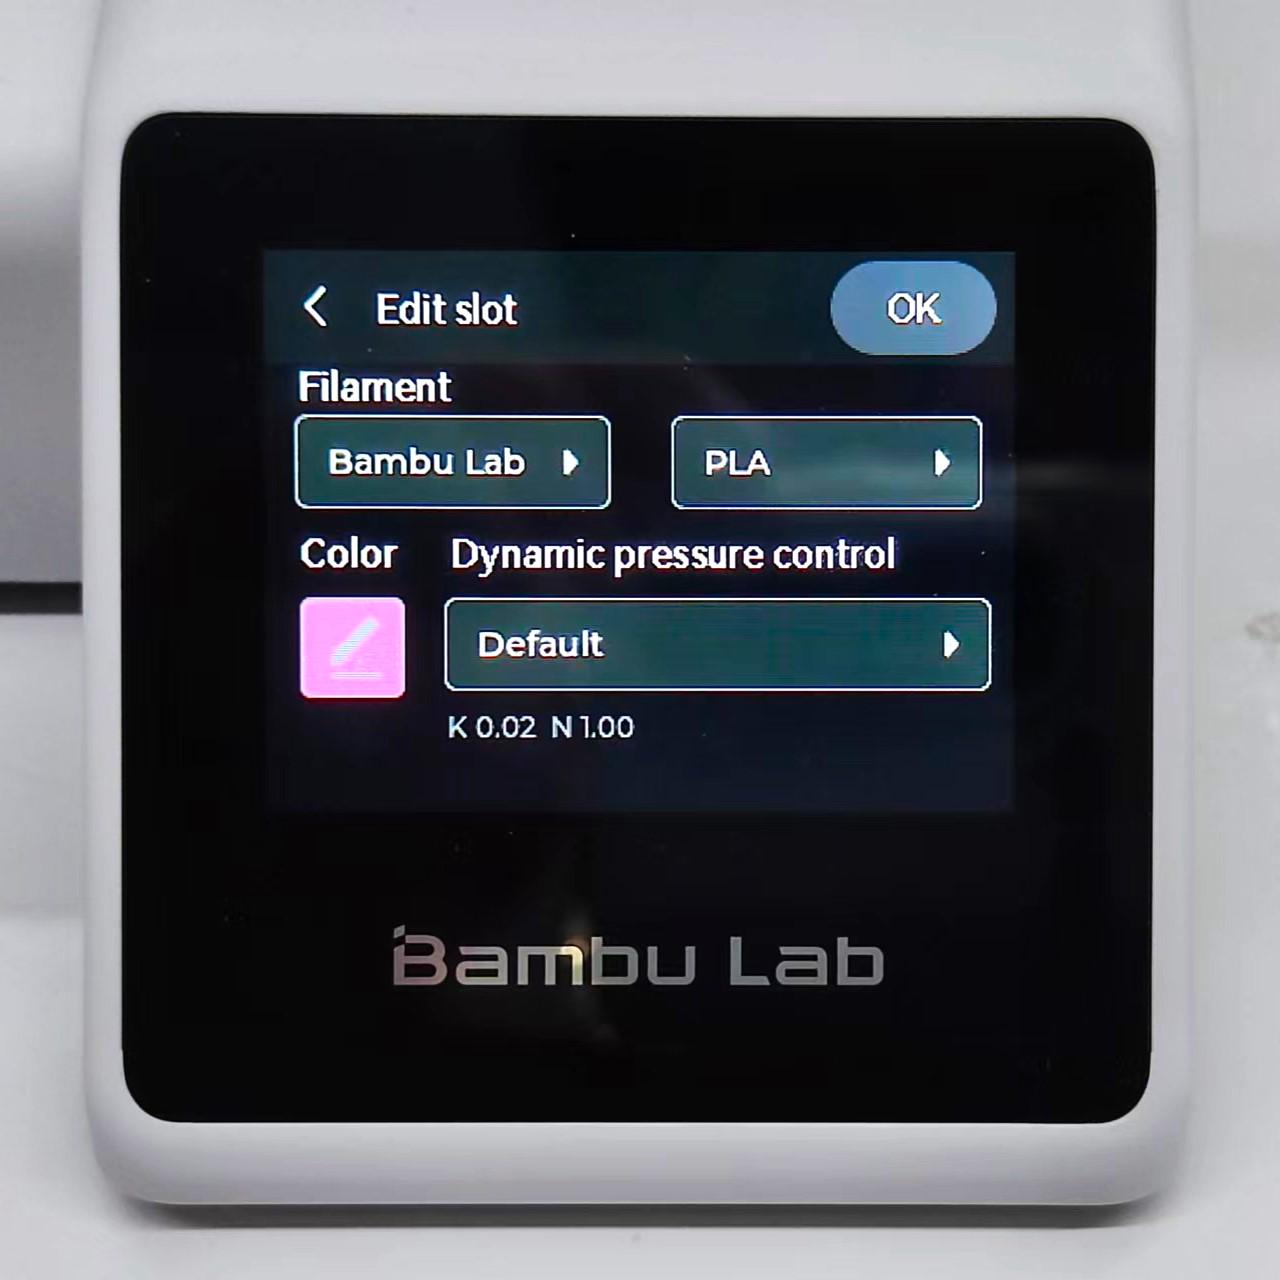 Edit Slot |
|---|
¶ AMS
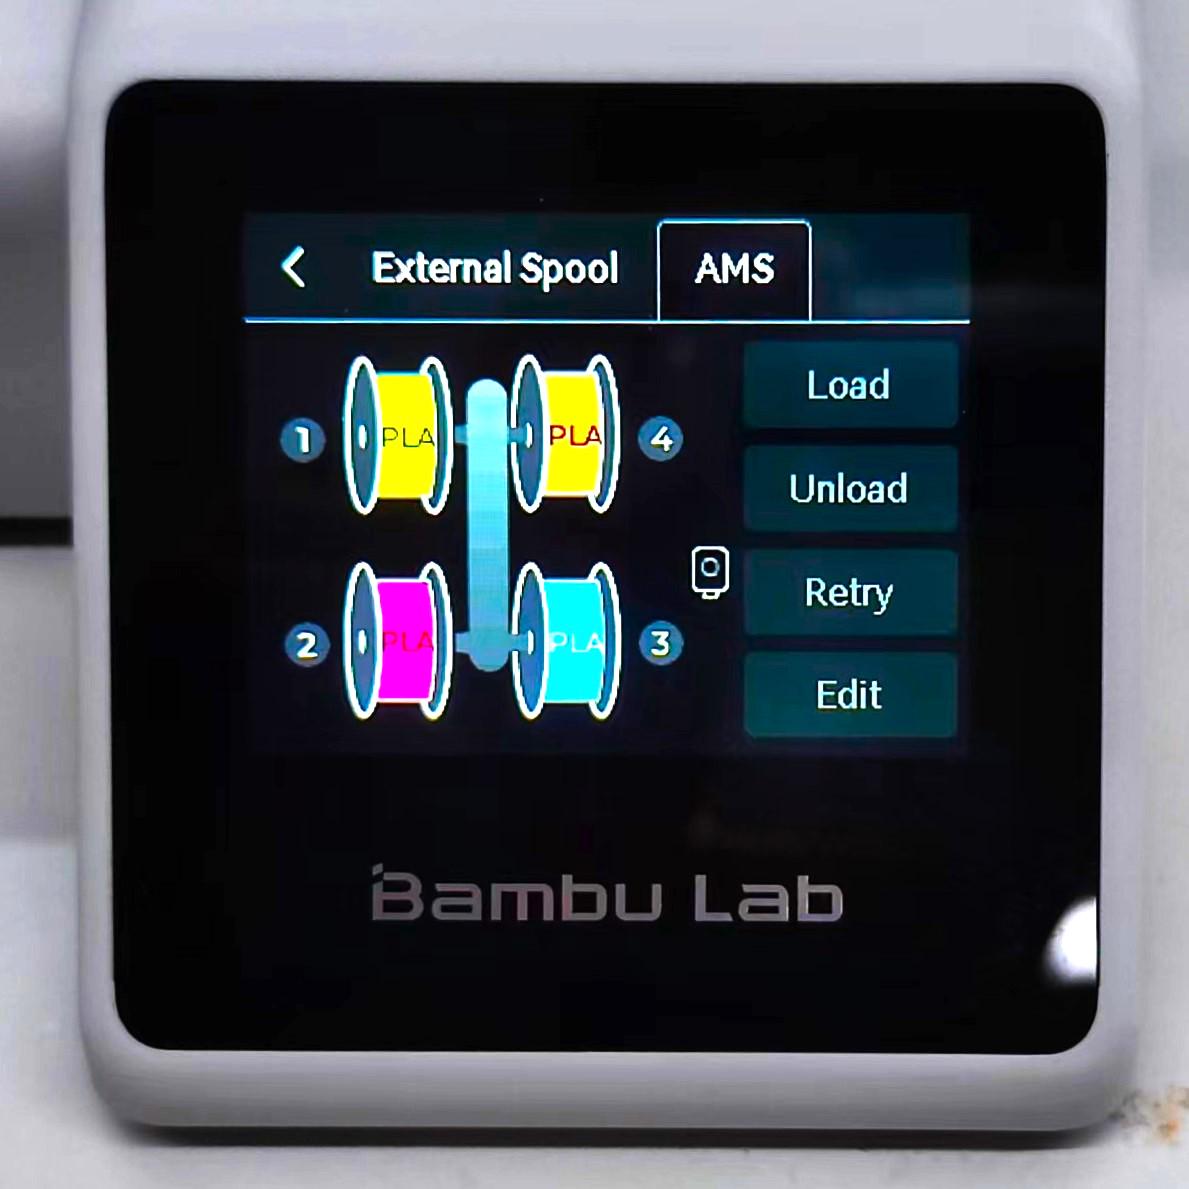
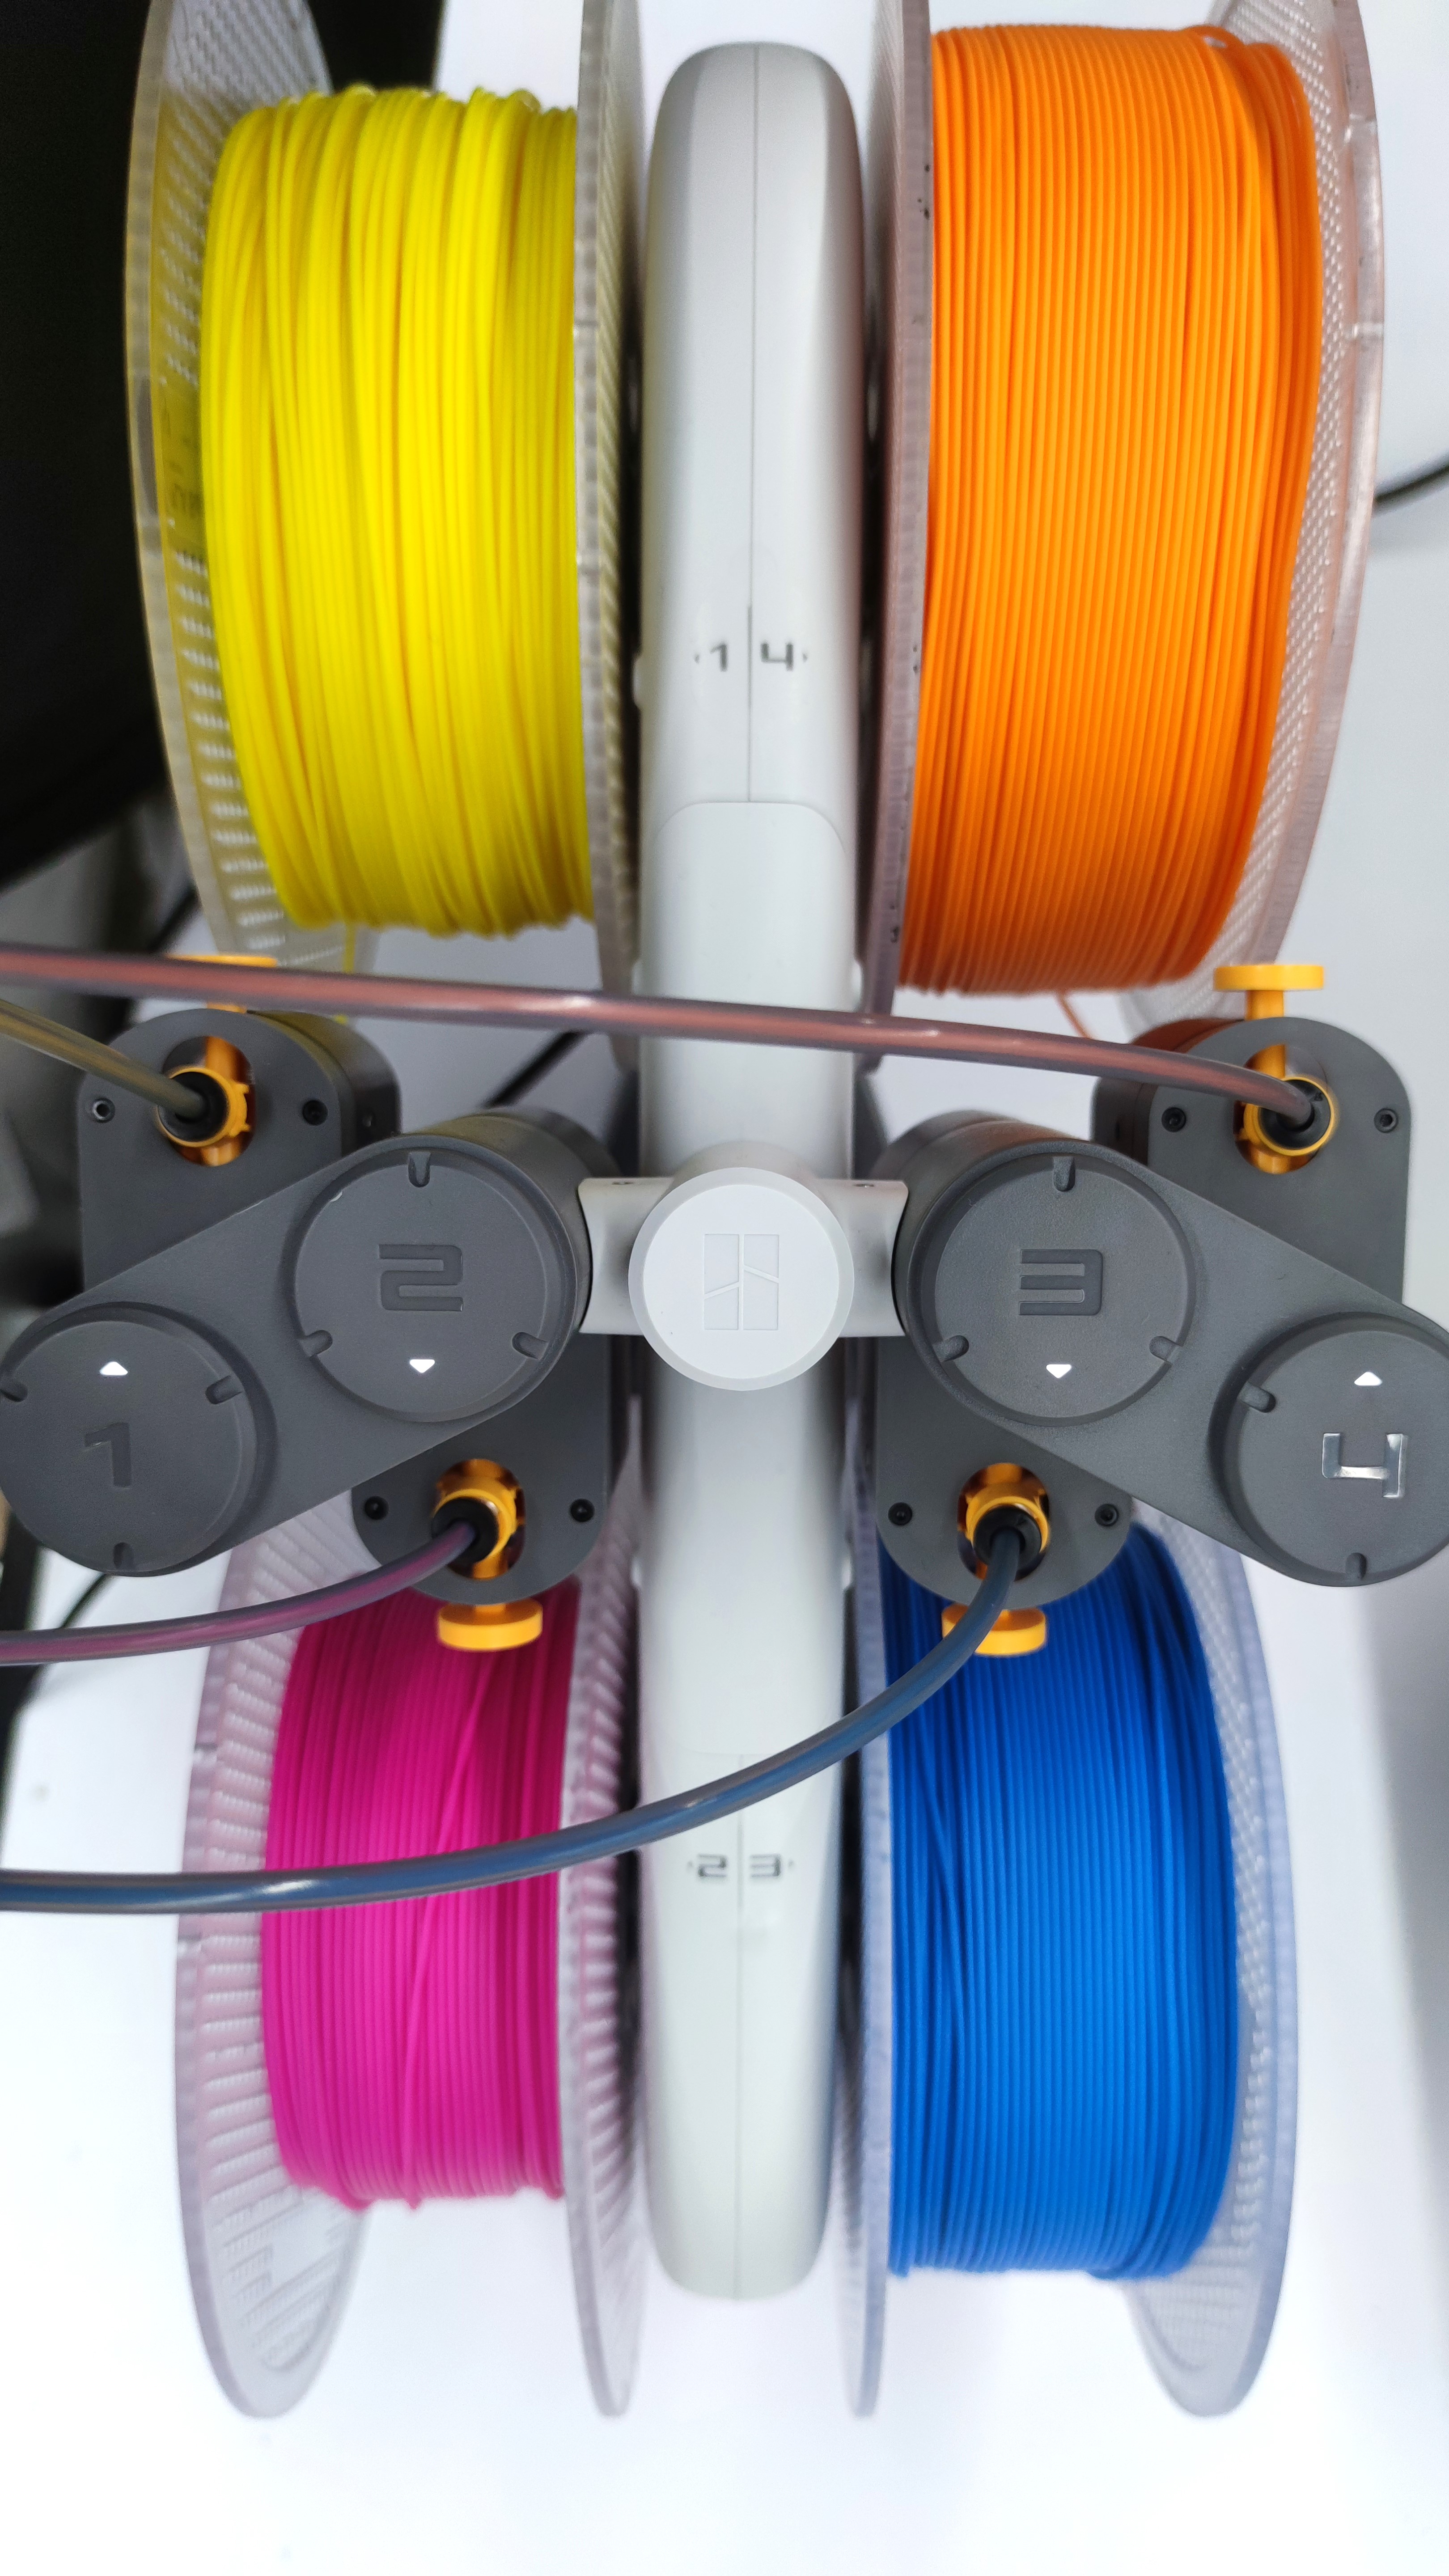
- If your machine is equipped with AMS Lite, an "AMS" button will show up next to the "External Spool". The printer will automatically detect the filament loaded on AMS Lite. The operation on this page is similar to "External Spool", simply click on the filament icon to perform operations on it.
 |
|---|
| Managing your AMS Lite |
 |
|---|
| Correspond to slots on AMS Lite |
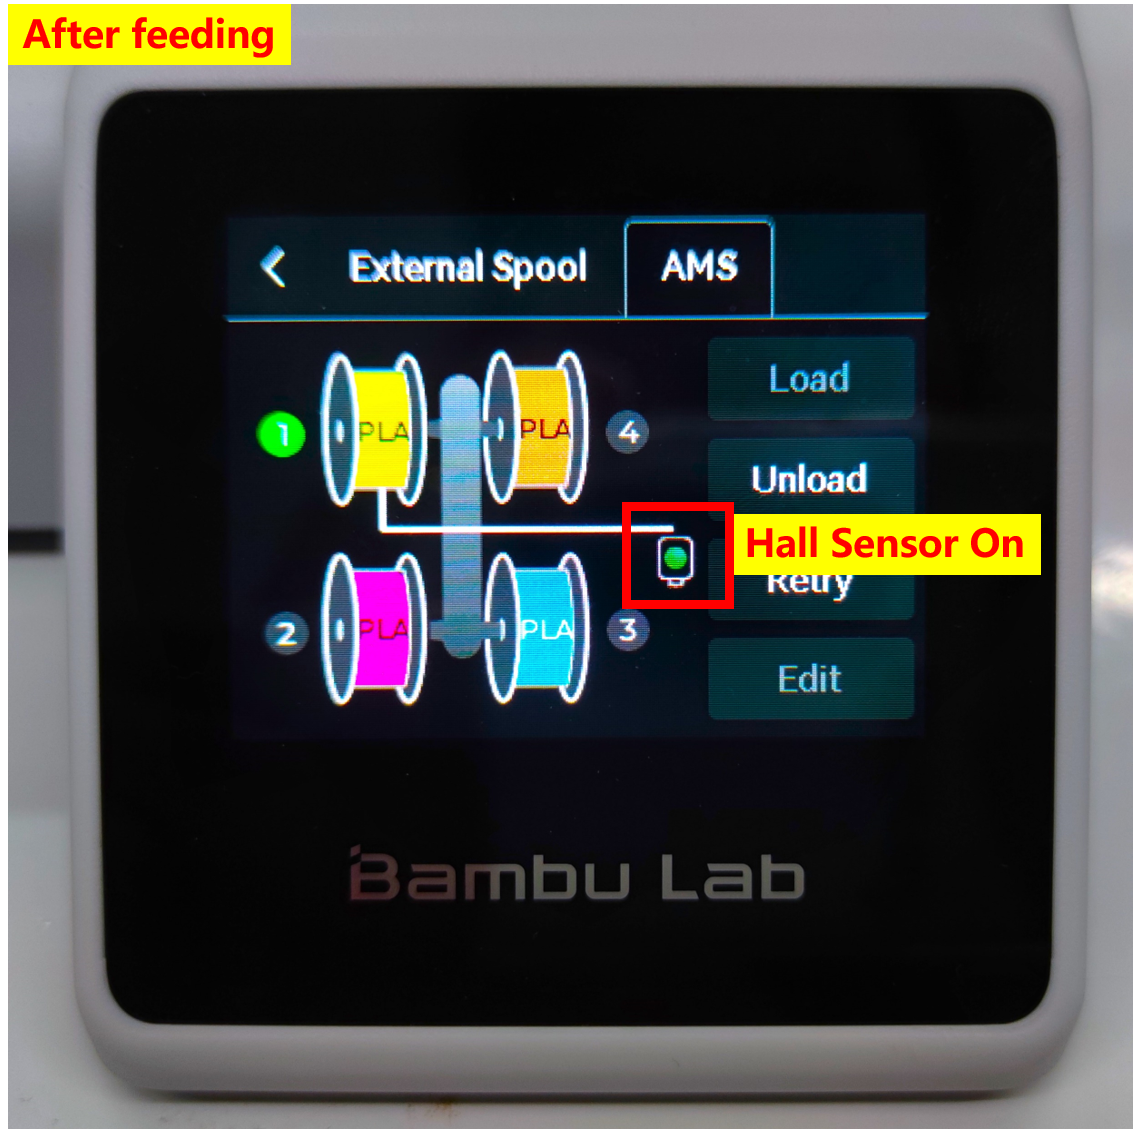
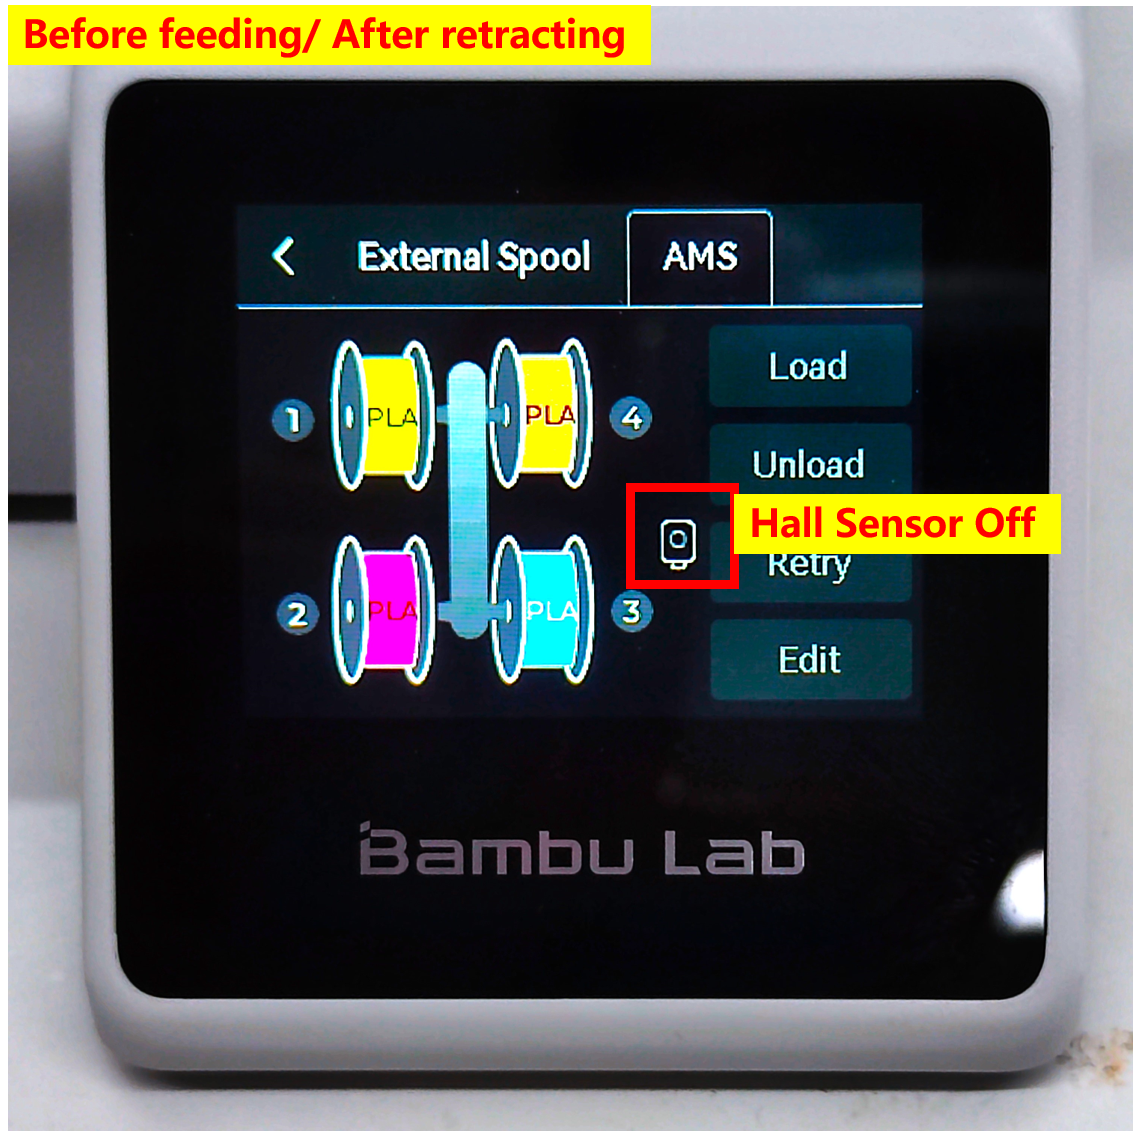
- With AMS Lite installed, the filament feeding and retracting processes will be performed automatically by the printer. Manual intervention for filament feeding and retracting is no longer required (if 'AMS Automatic Material Supply' switch is enabled in "Setting"). Once the feeding process is complete, the Hall sensor indicator will light up in green.
 |
 |
|---|
¶ Control
¶ Control
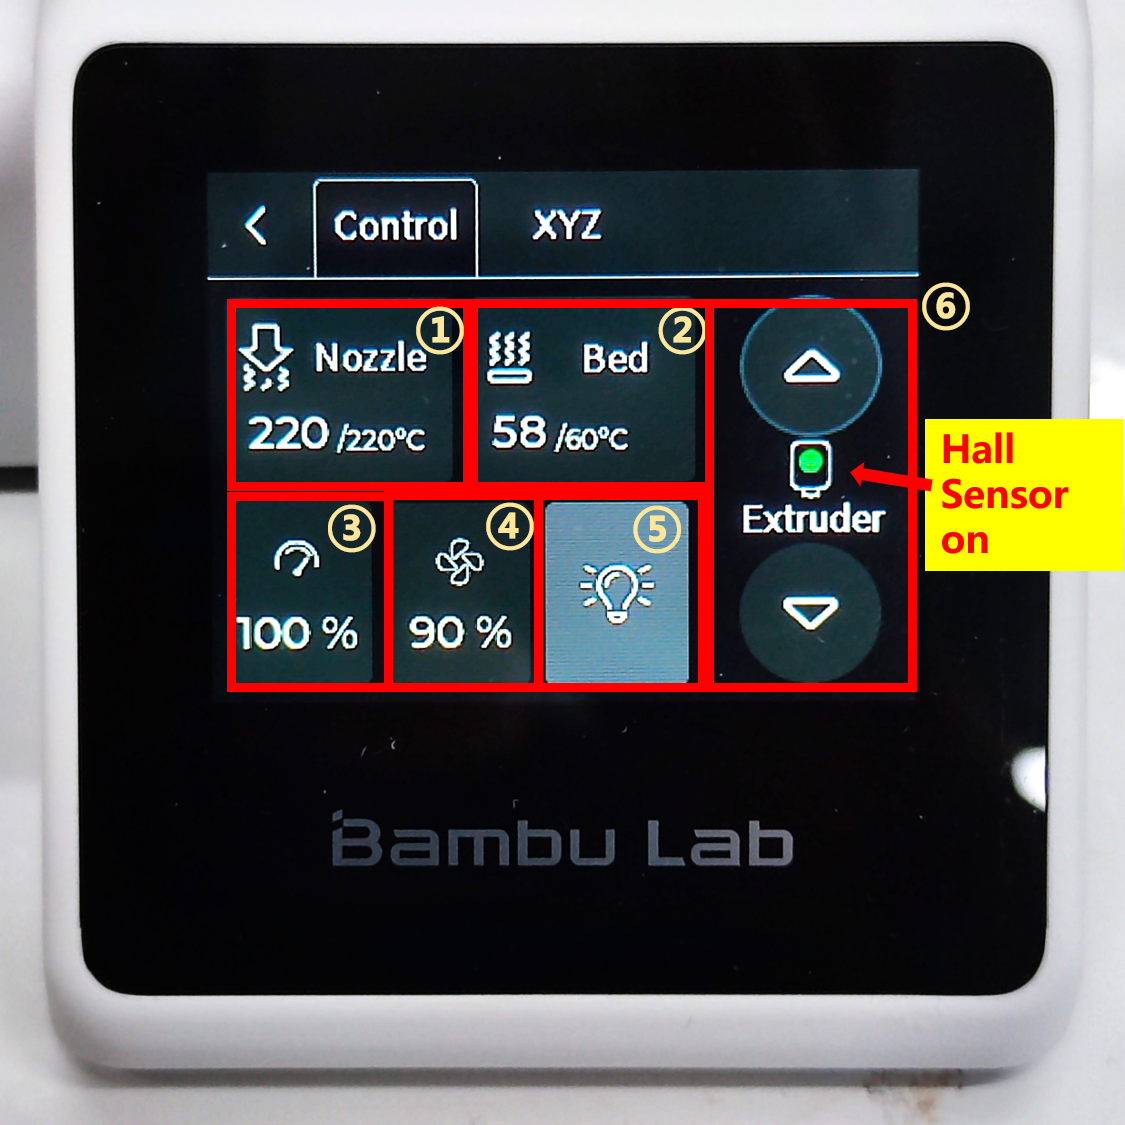 |
No. | Description |
|---|---|---|
| ① | Nozzle temperature | |
| ② | Heatbed temperature | |
| ③ | Speed of printing | |
| ④ | Speed of fan | |
| ⑤ | LED fill light switch | |
| ⑥ | Control of extruder |
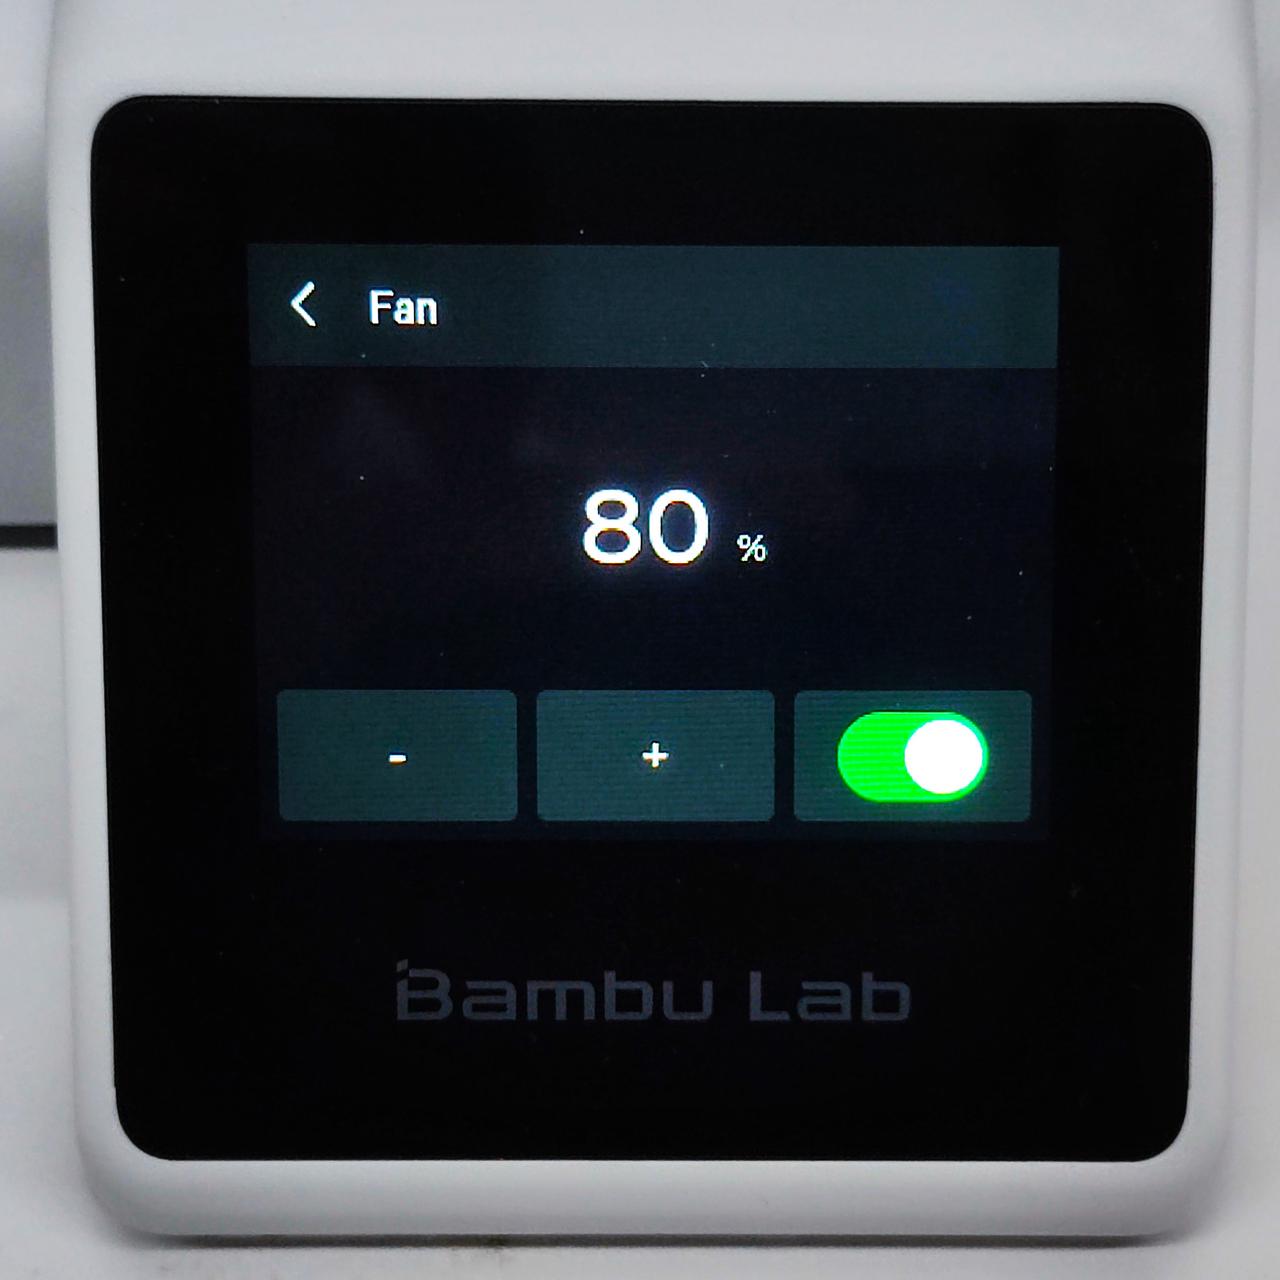
- You can control the nozzle, bed temperature, print speed, fan speed, and LED fill light switch manually by simply clicking on them.
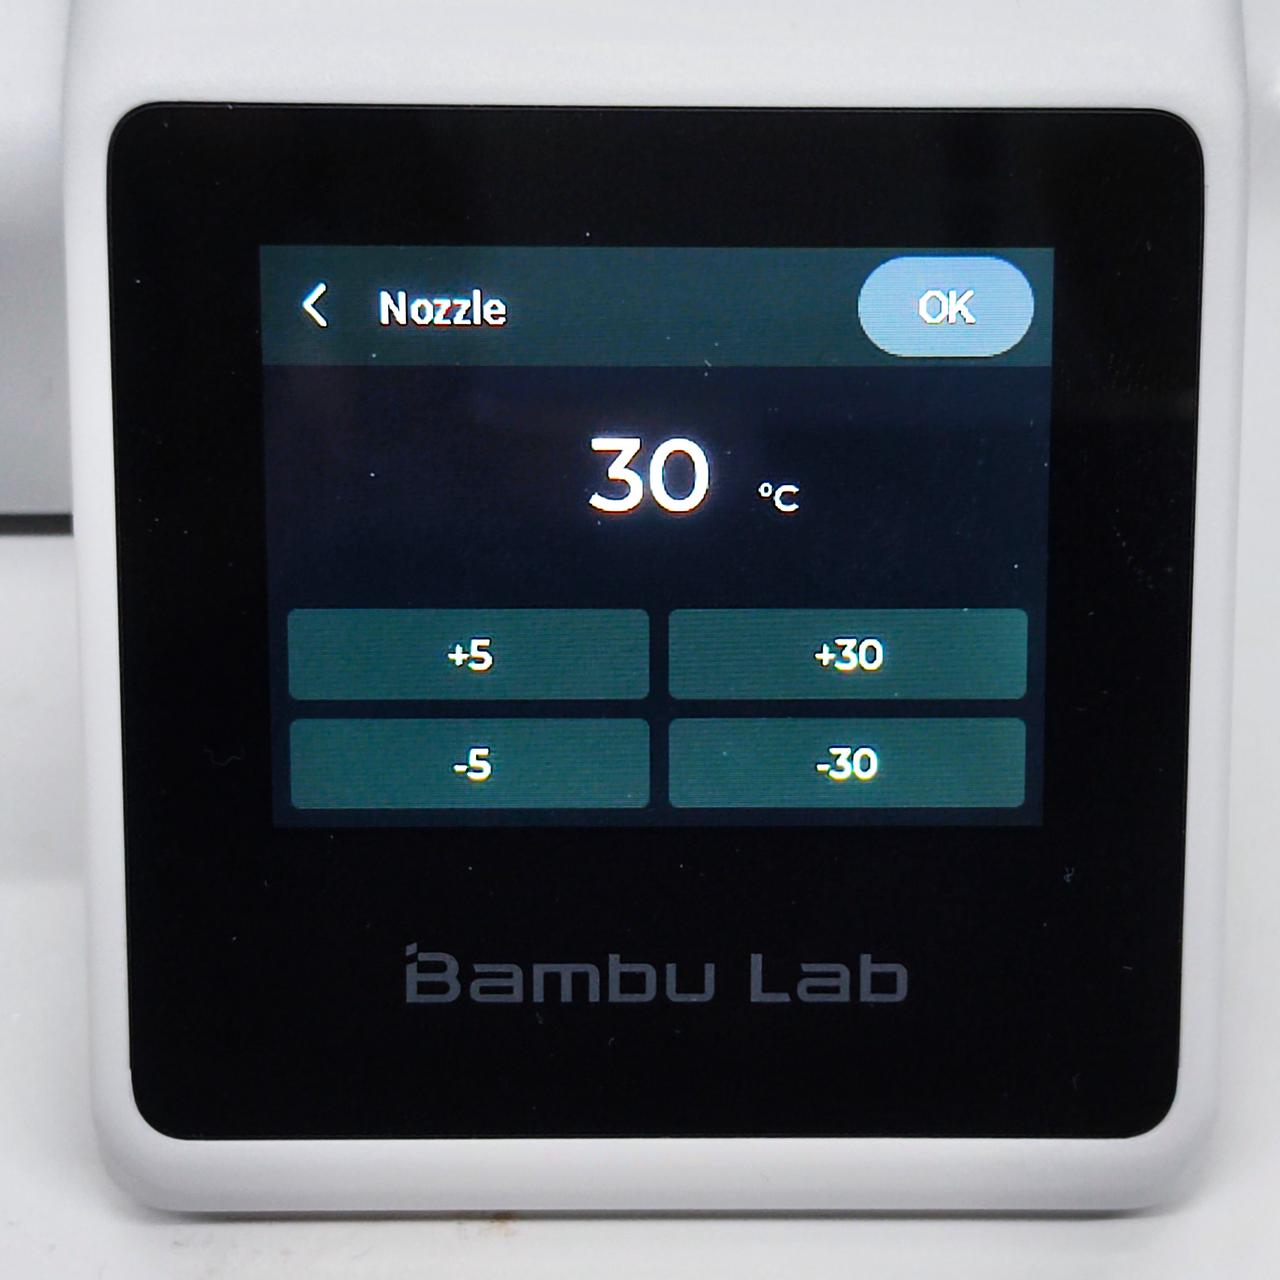 Manually control nozzle temperature |
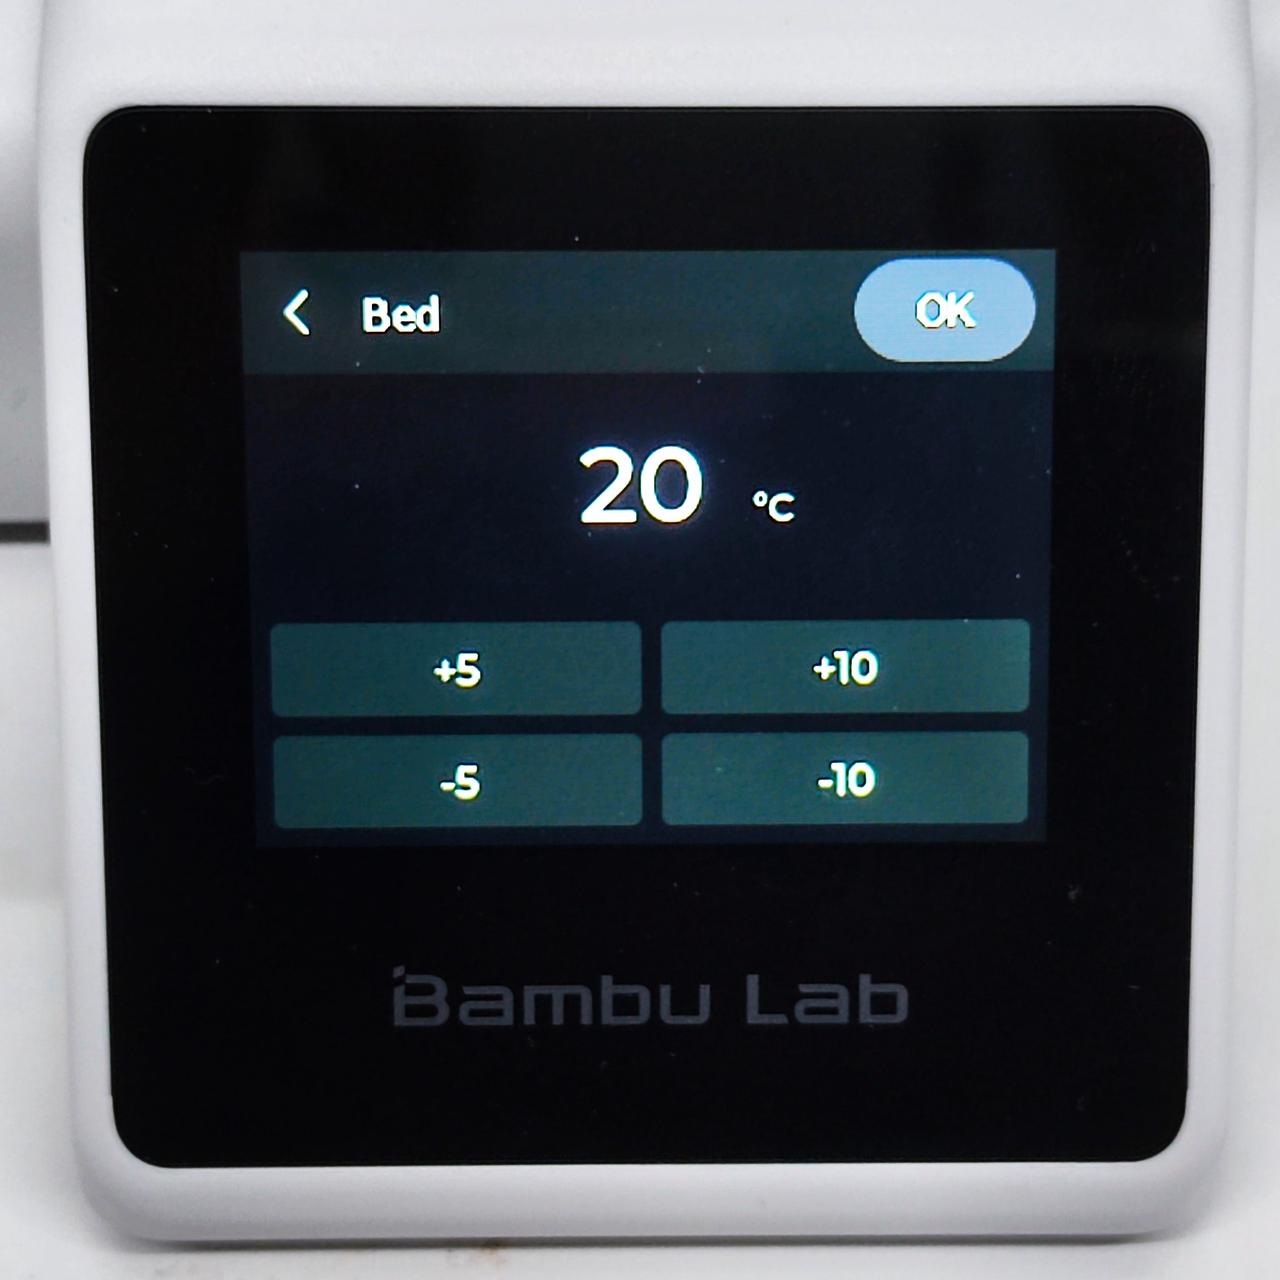 Manually control heatbed temperature |
|---|
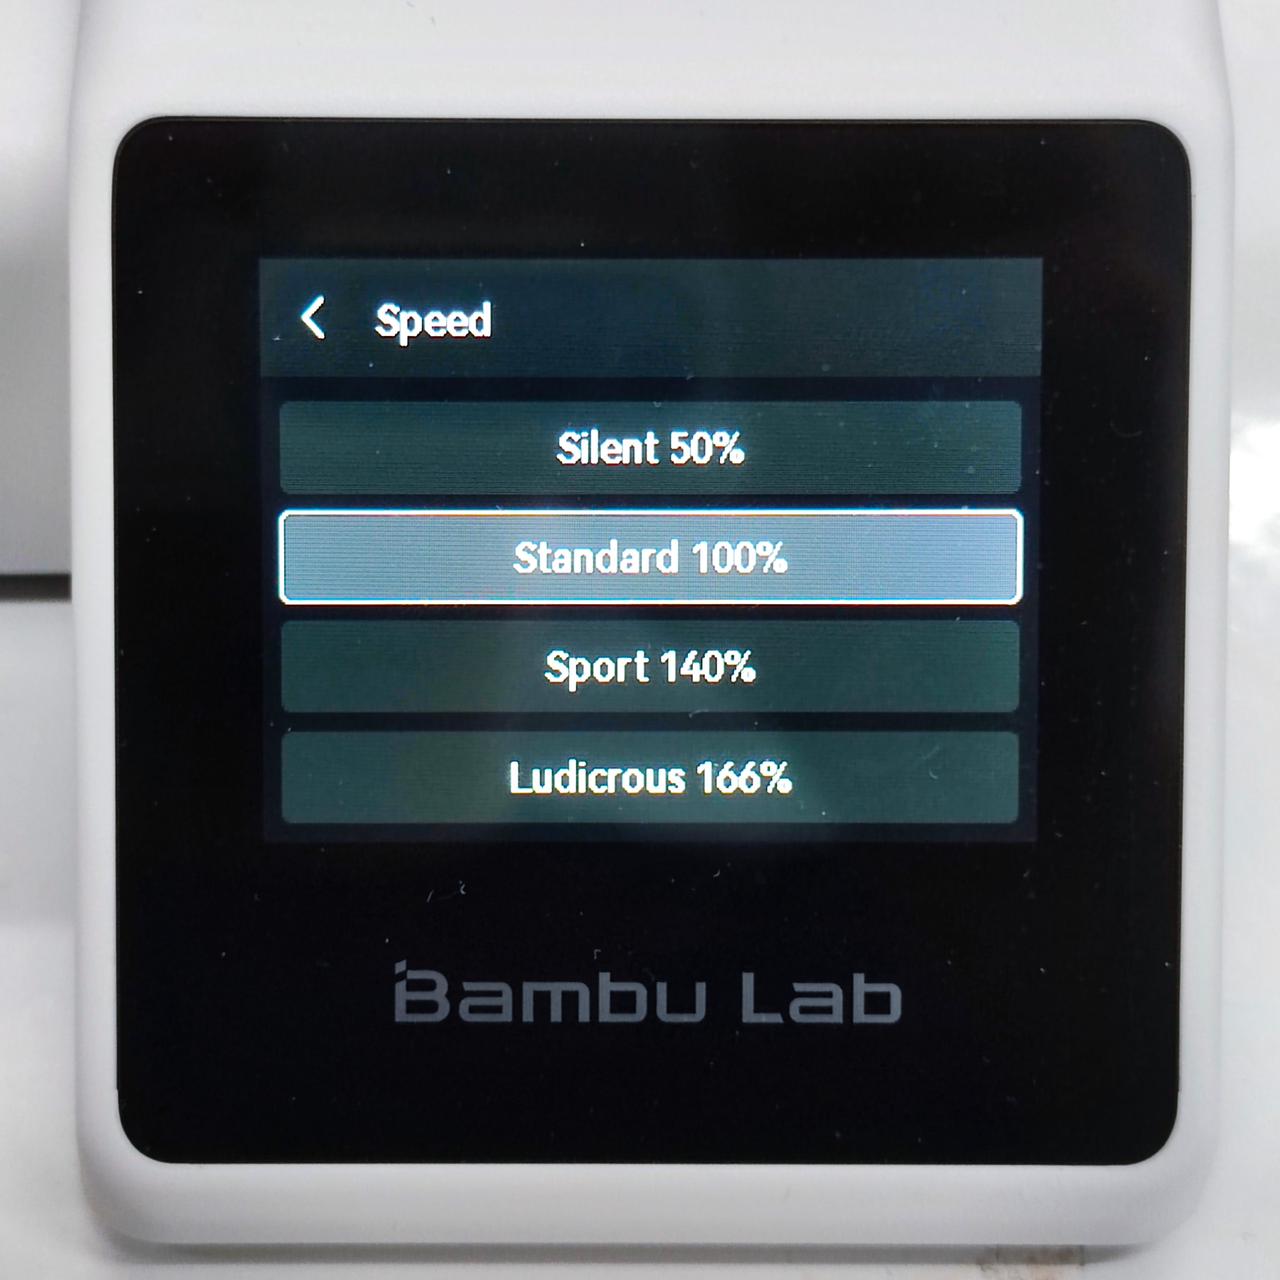 Manually control speed of printing |
 Manually control speed of fan |
|---|
 LED fill light on |
 LED fill light off |
|---|
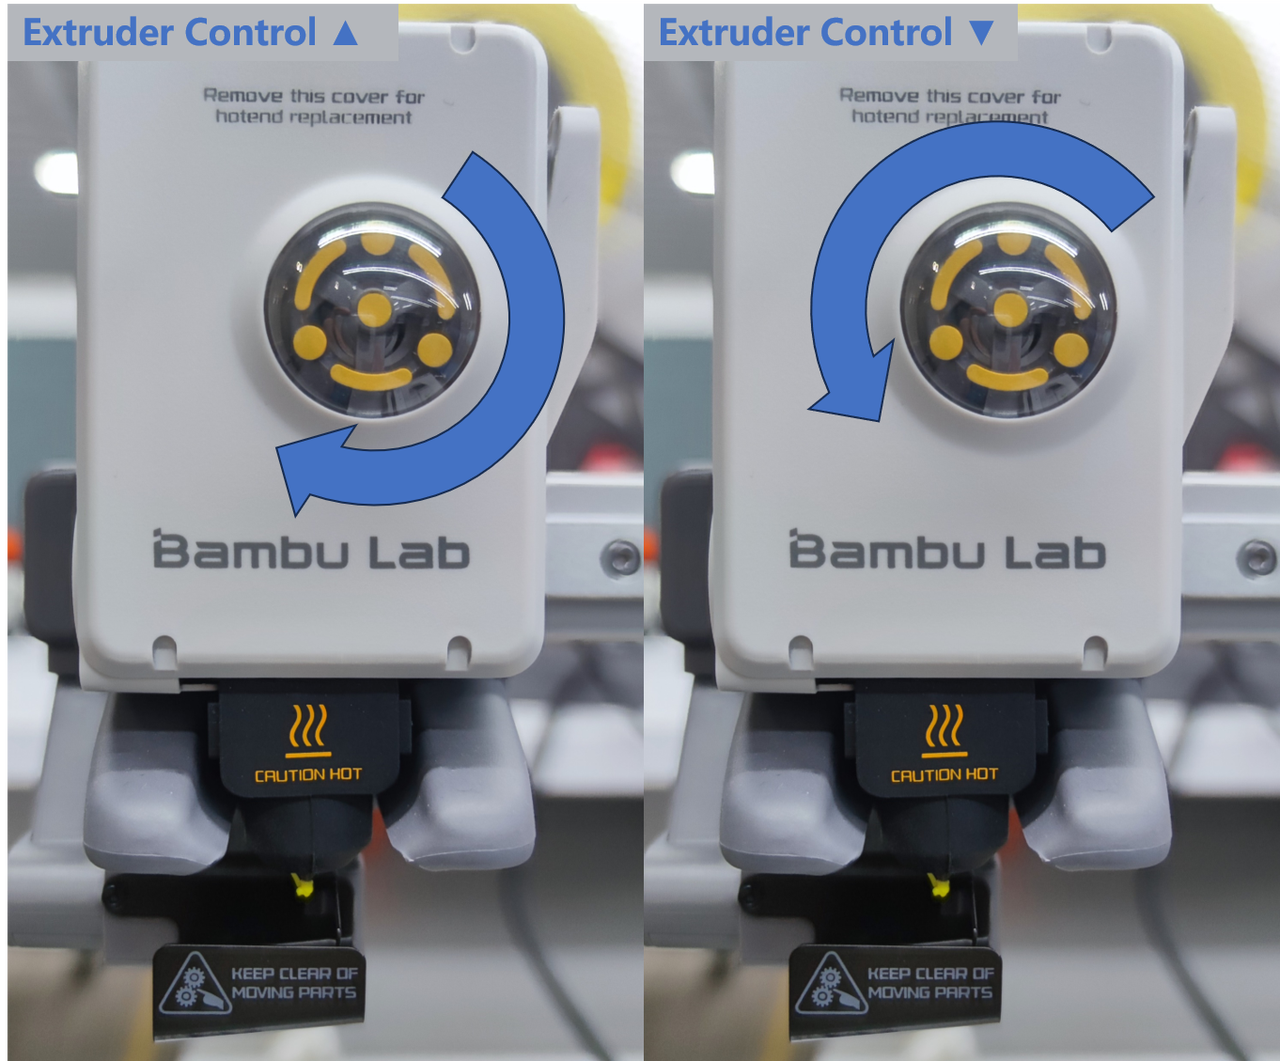
- After the printer has loaded filament, you can control the extruder to rotate in forward and reverse directions using button ⑥. The rotation of the extruder wheel can be observed from the front view of the printer. Please note that the extruder needs to reach a certain temperature for proper material extrusion. Otherwise, you may hear the extruder wheel making a clicking sound, indicating that the filament is not being properly fed.
¶ XYZ
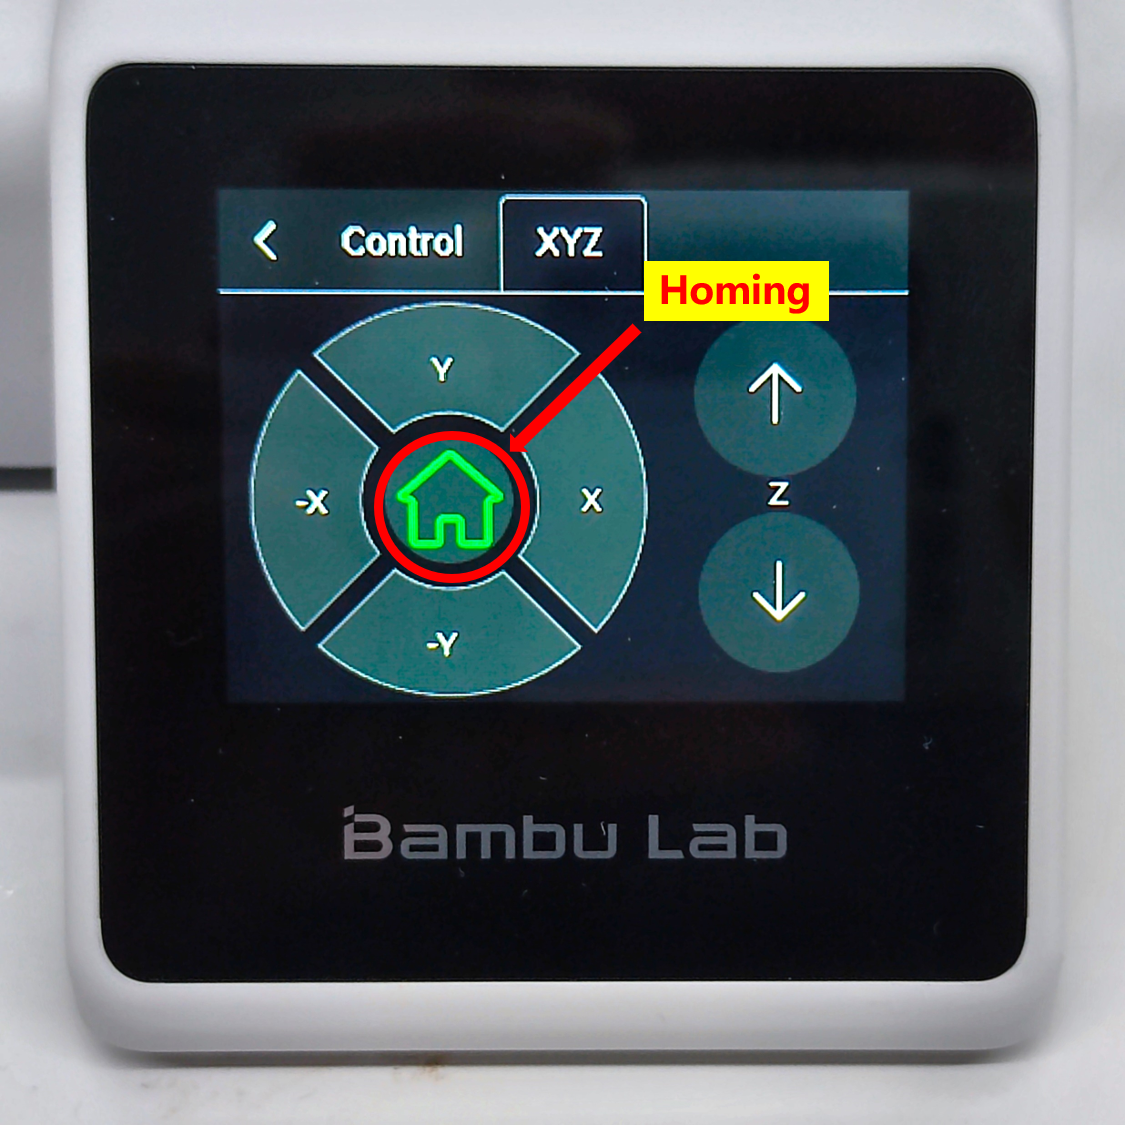
- The movement of the printer along X,Y,Z axes can be controlled in 'Major Screen - Control - XYZ'. Feel free to click any of the buttons to give it a try!
 |
|---|
| Movement Control |
¶ Setting
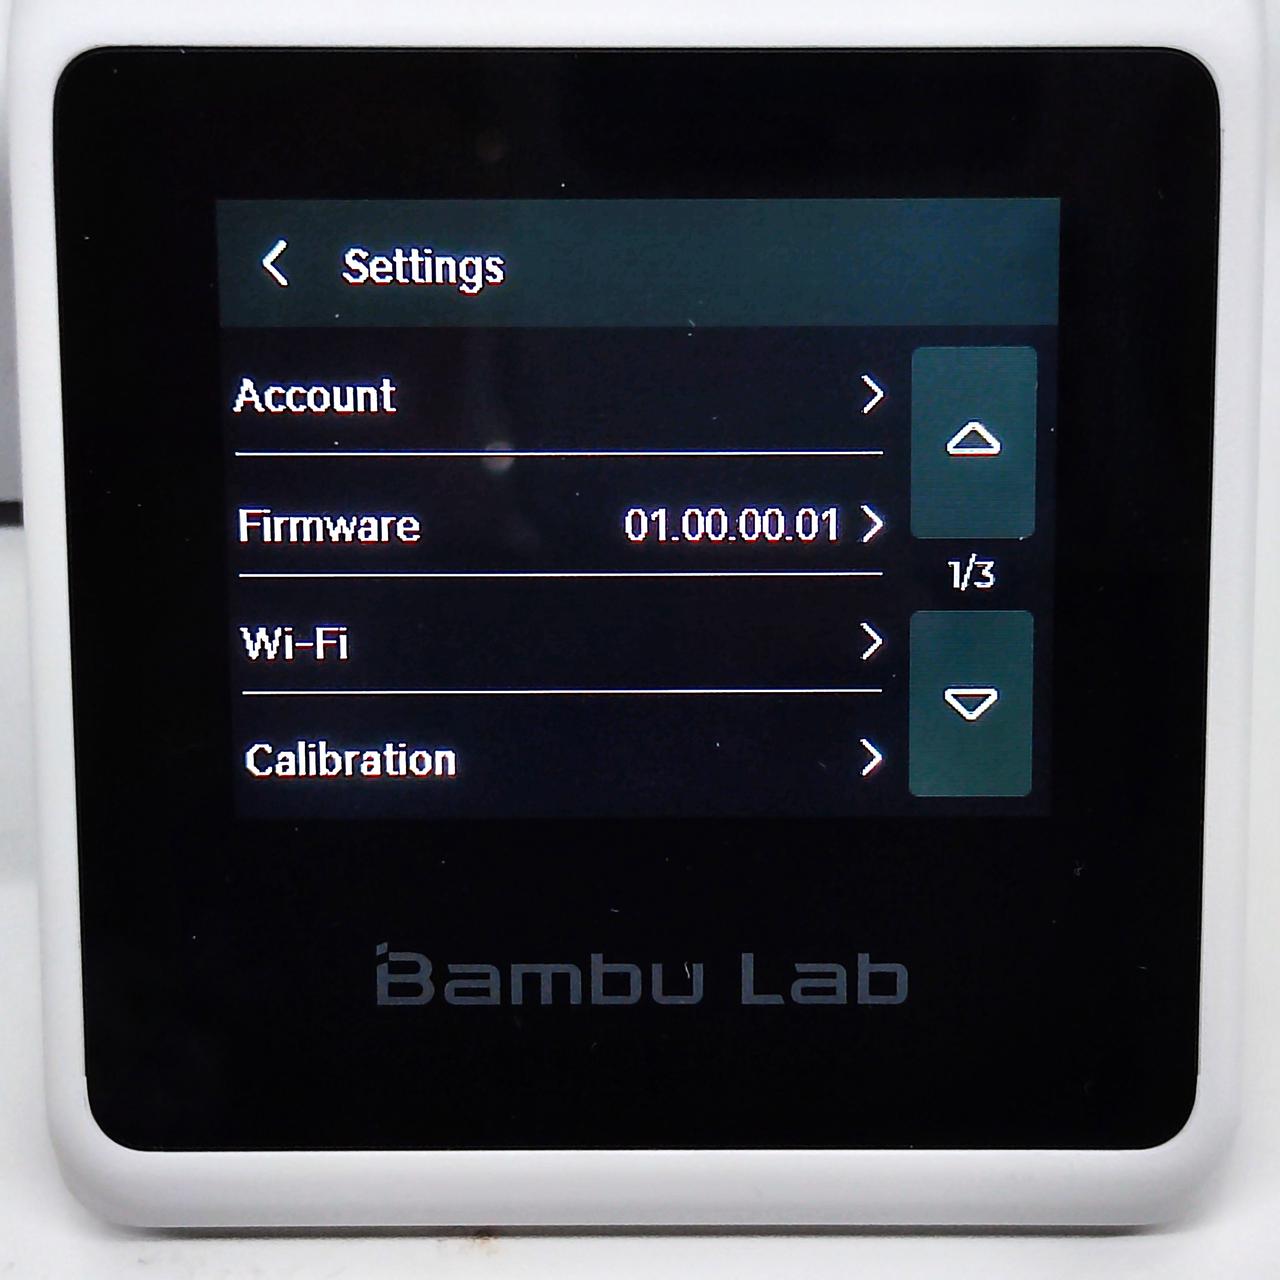
There are a series of general settings for printer in 'Major Screen - Settings'.
 |
|---|
| General setting 1 |
1. Account: Log in to your Bambu Lab account to synchronize printing settings and files (requires an internet connection).
2. Firmware: Click to check the newest firmware update
3. Wi-Fi: Connecting printer to the wireless network
4. Calibration: Same as the calibration performed during the initial setup, you can calibrate the printer at any time.
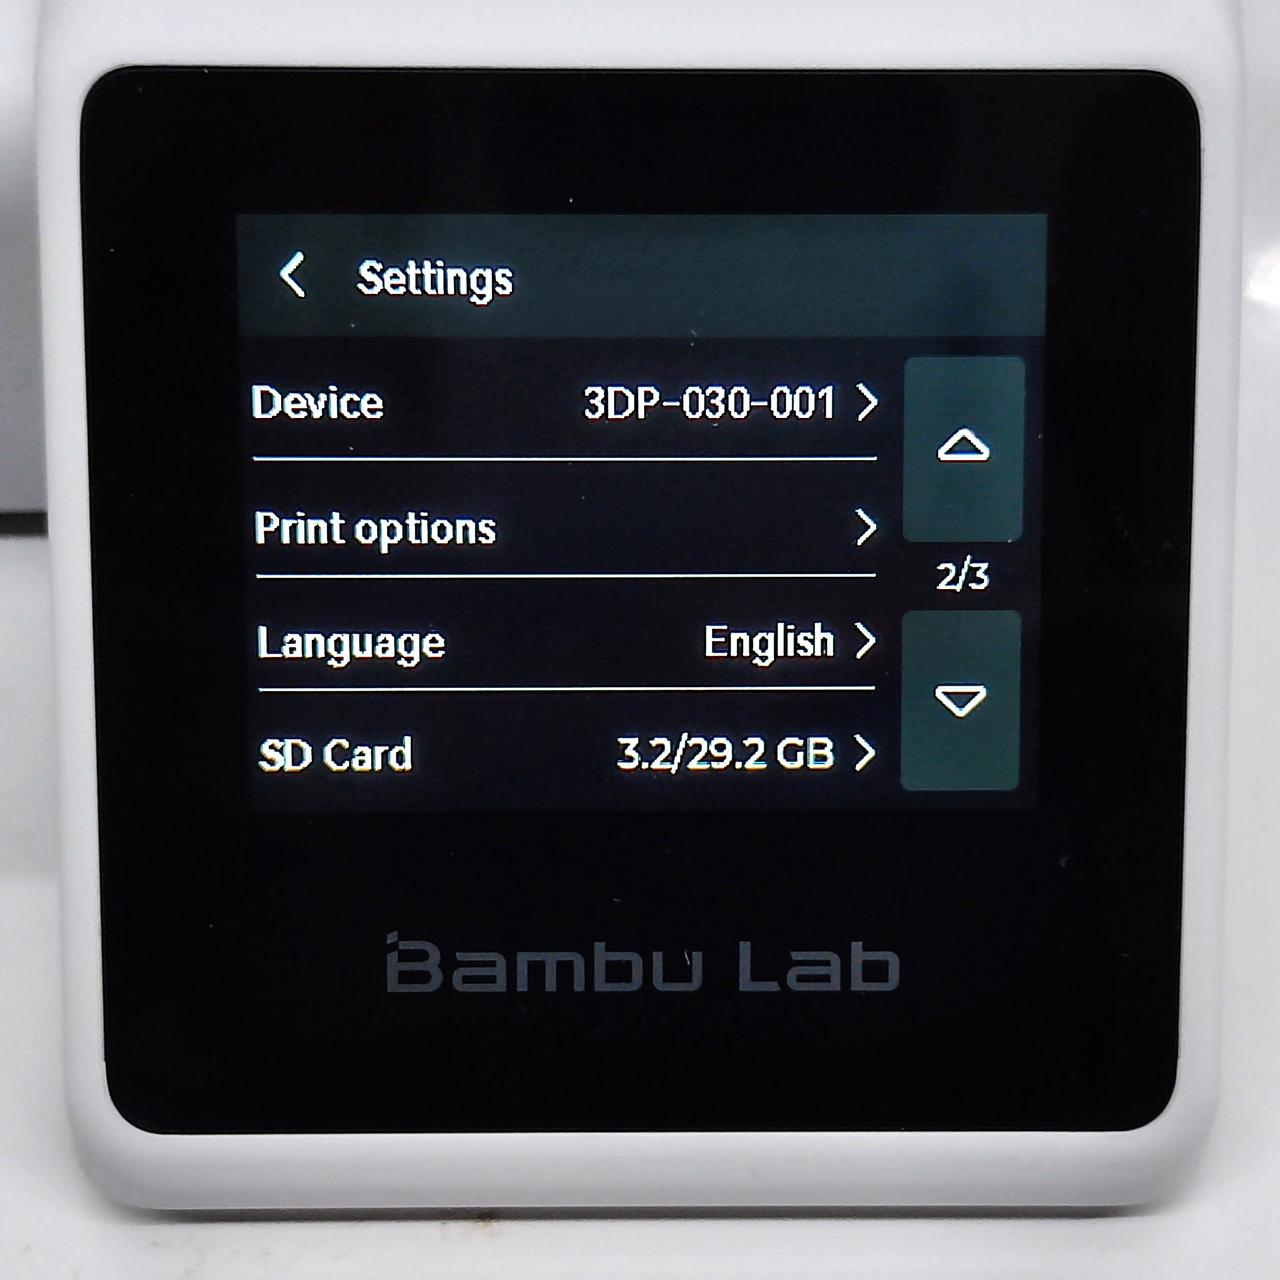 General setting 2 |
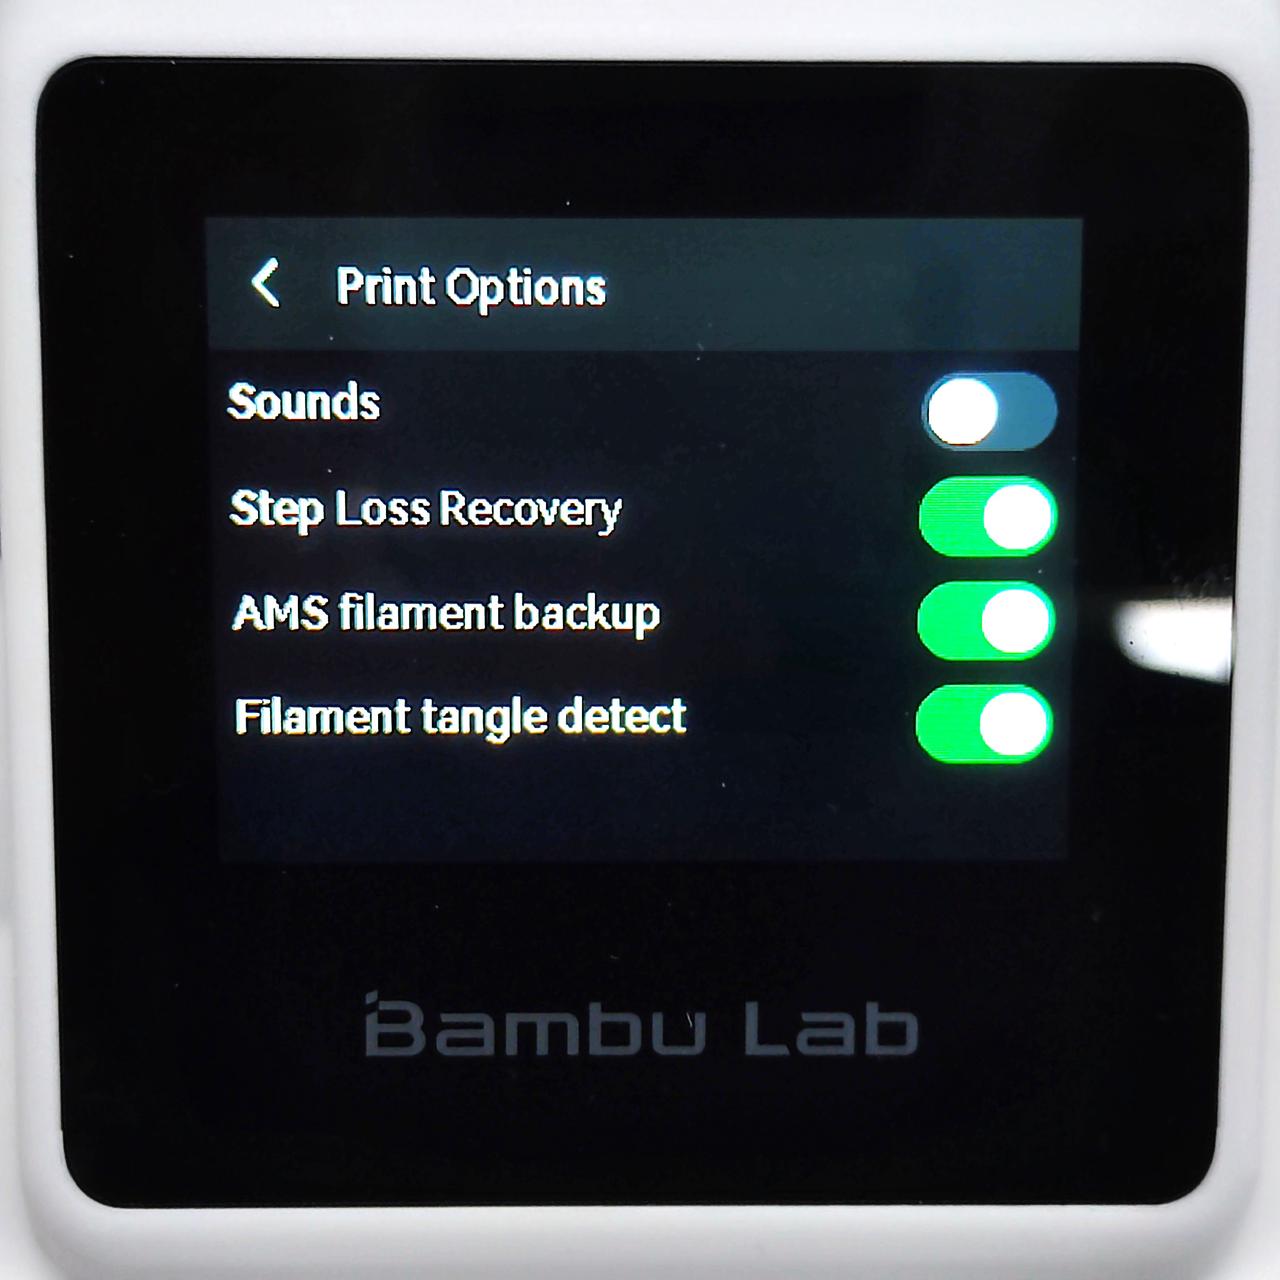 Printing options |
|---|
5. Device: View the device model, serial number and AMS serial number (if connected to AMS)
6. Print Options: Turn on/off Sounds (including startup sound, printing start and completion sound), Step Loss Recovery, AMS filament backup, and Filament tangle detect.
7. Language: Select the language displayed
8. SD Card: SD card capacity, format or eject SD card
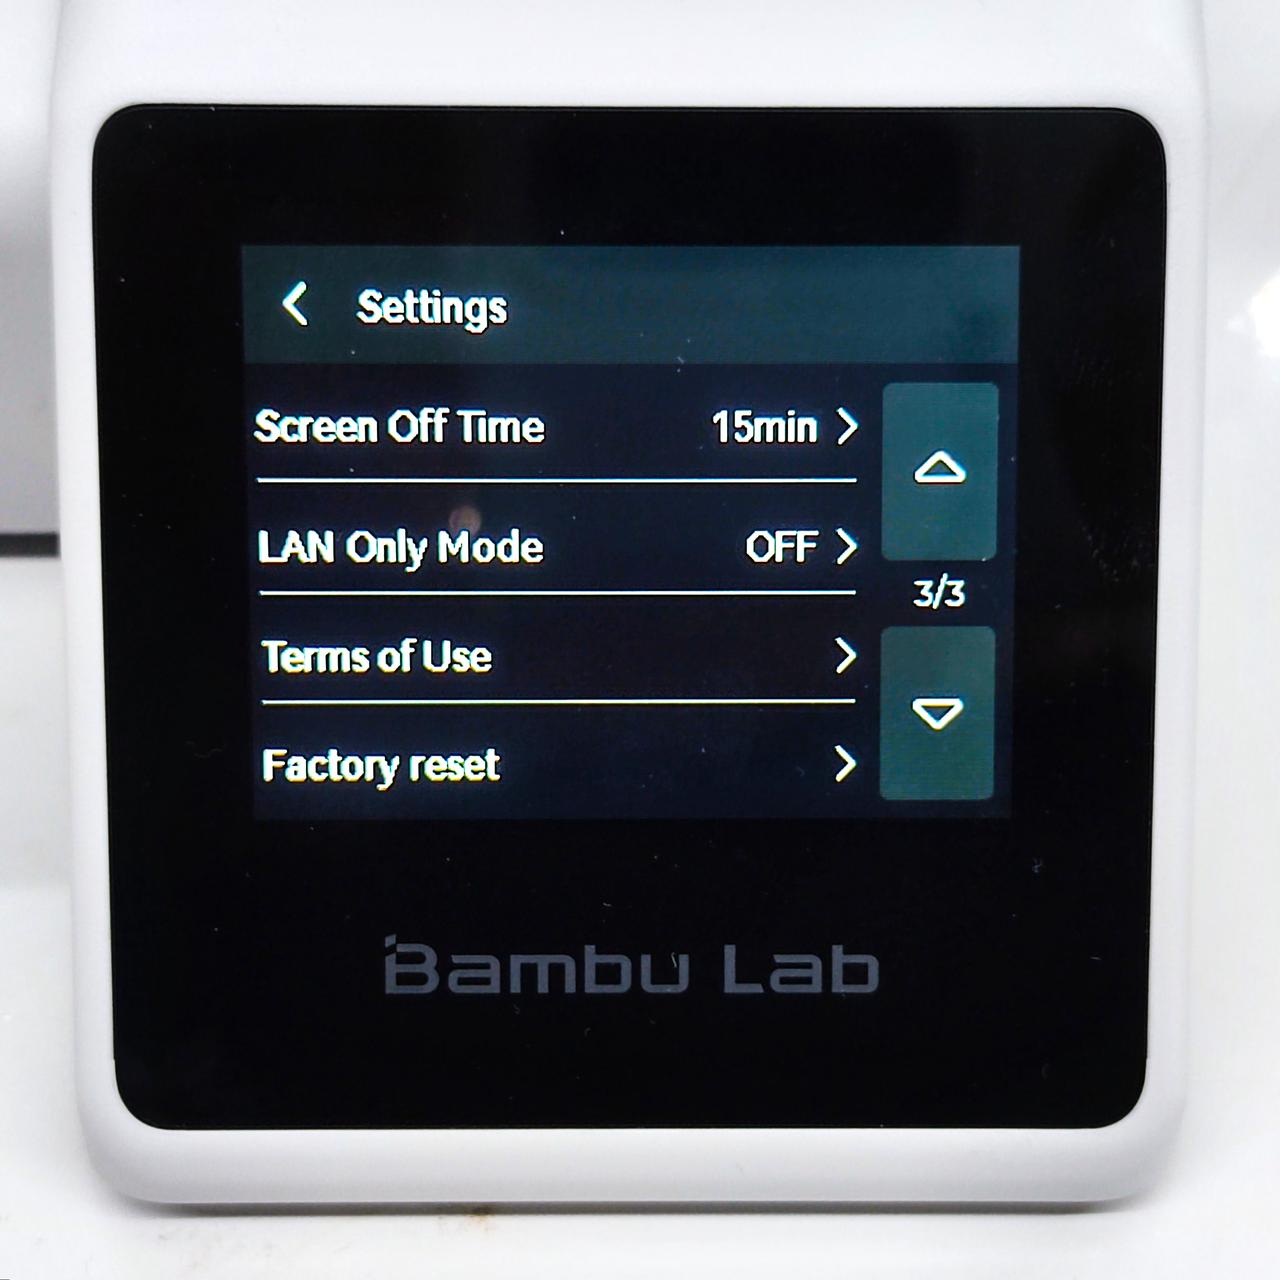 |
|---|
| General setting 3 |
9. Screen Off Time: Setting the maximum time the screen remains lit when the printer is not in operation
10. LAN Only Mode: Enable or disable LAN Mode
11. Terms of Use: Scanning QR code to read terms
12. Factory reset: This option will restore the printer to its factory settings. Please proceed with caution when performing this step.