Filament can sometimes break and become stuck in the AMS 2 Pro, leading to loading and unloading issues. This wiki provides a step-by-step guide for removing broken filament and outlines potential causes of filament breakage along with solutions to help prevent future problems.
¶ When to Use this guide?
-
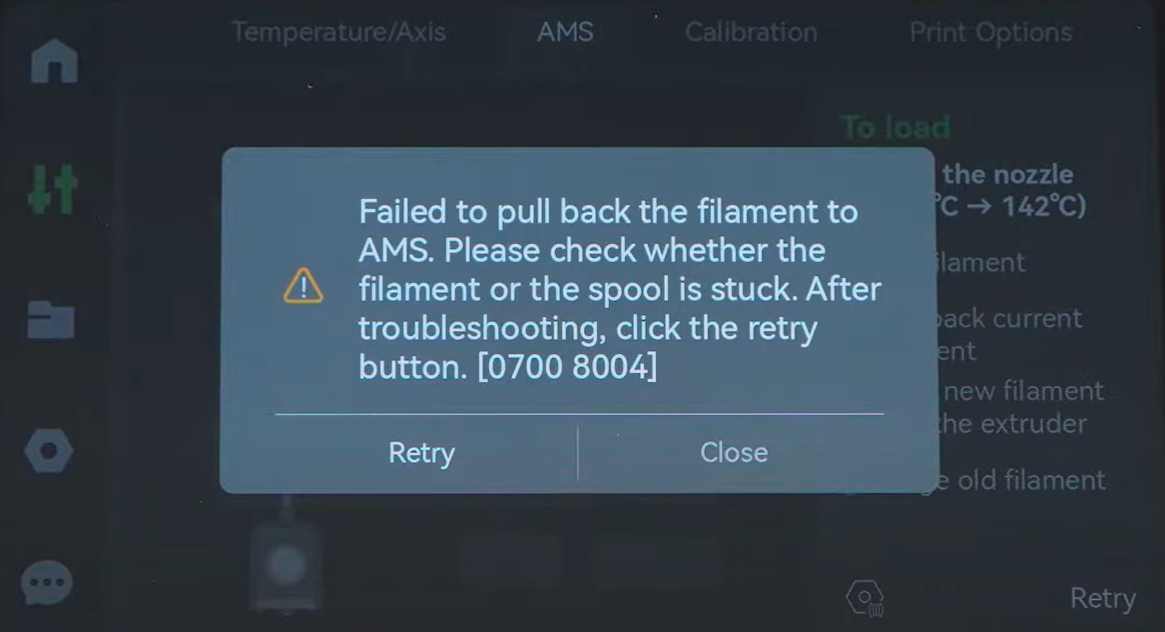
Use this guide when you encounter an error code [0700 8004], indicating that AMS can't pull back the filament, and you have ruled out other potential issues like the filament not being properly inserted.
-
Unusual clicking or grinding noises: Sounds from the feeder may indicate it's struggling to push filament through.
-
Visible filament remnants in the feeder or PTFE tube: You might see partial filament pieces inside the visible part of the tubes or near the feeder path.
¶ Tools and Materials Needed
- H2.0 and H1.5 Hex Key
- A small piece of filament (longer than 250mm)
¶ Safety Warning
It's crucial to power off the printer before performing any maintenance work on the printer and its electronics, including tool head wires, because leaving the printer on while conducting such tasks can cause a short circuit, which can lead to additional electronic damage and safety hazards.
When you perform maintenane or troubleshooting on the printer, you may be required to disassemble some parts, including the hotend. This process can expose wires and electrical components that could potentially short circuit if they come into contact with each other or with other metal or electronic components while the printer is still on. This can damage the electronics of the printer and cause further damage.
Therefore, it's essential to switch off the printer and disconnect it from the power source before doing any maintenance work. This will prevent any short circuits or damage to the printer's electronics. By doing so, you can avoid potential damage to the printer's electronic components and ensure that the maintenance work is performed safely and effectively.
To remove the broken filament stuck inside the AMS 2 Pro, you will need to push a small piece of filament through the feeder after removing the filament tubes. Follow the steps below to learn how to do it.
¶ Removing Stuck Filament by Pushing a Piece of Filament Through the Feeder
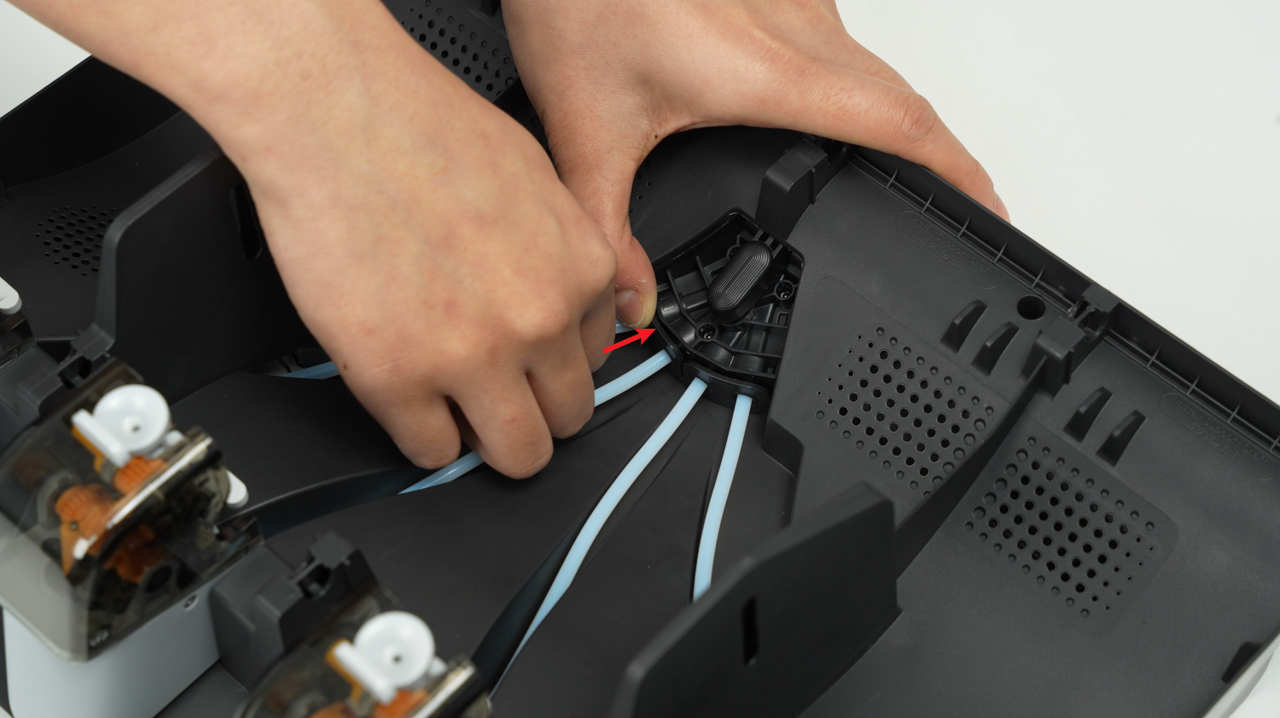
¶ Step 1: Remove the Tubes
Unclock the filament tubes by pushing the black buttons with one hand, and use the other one to pull the tube out.
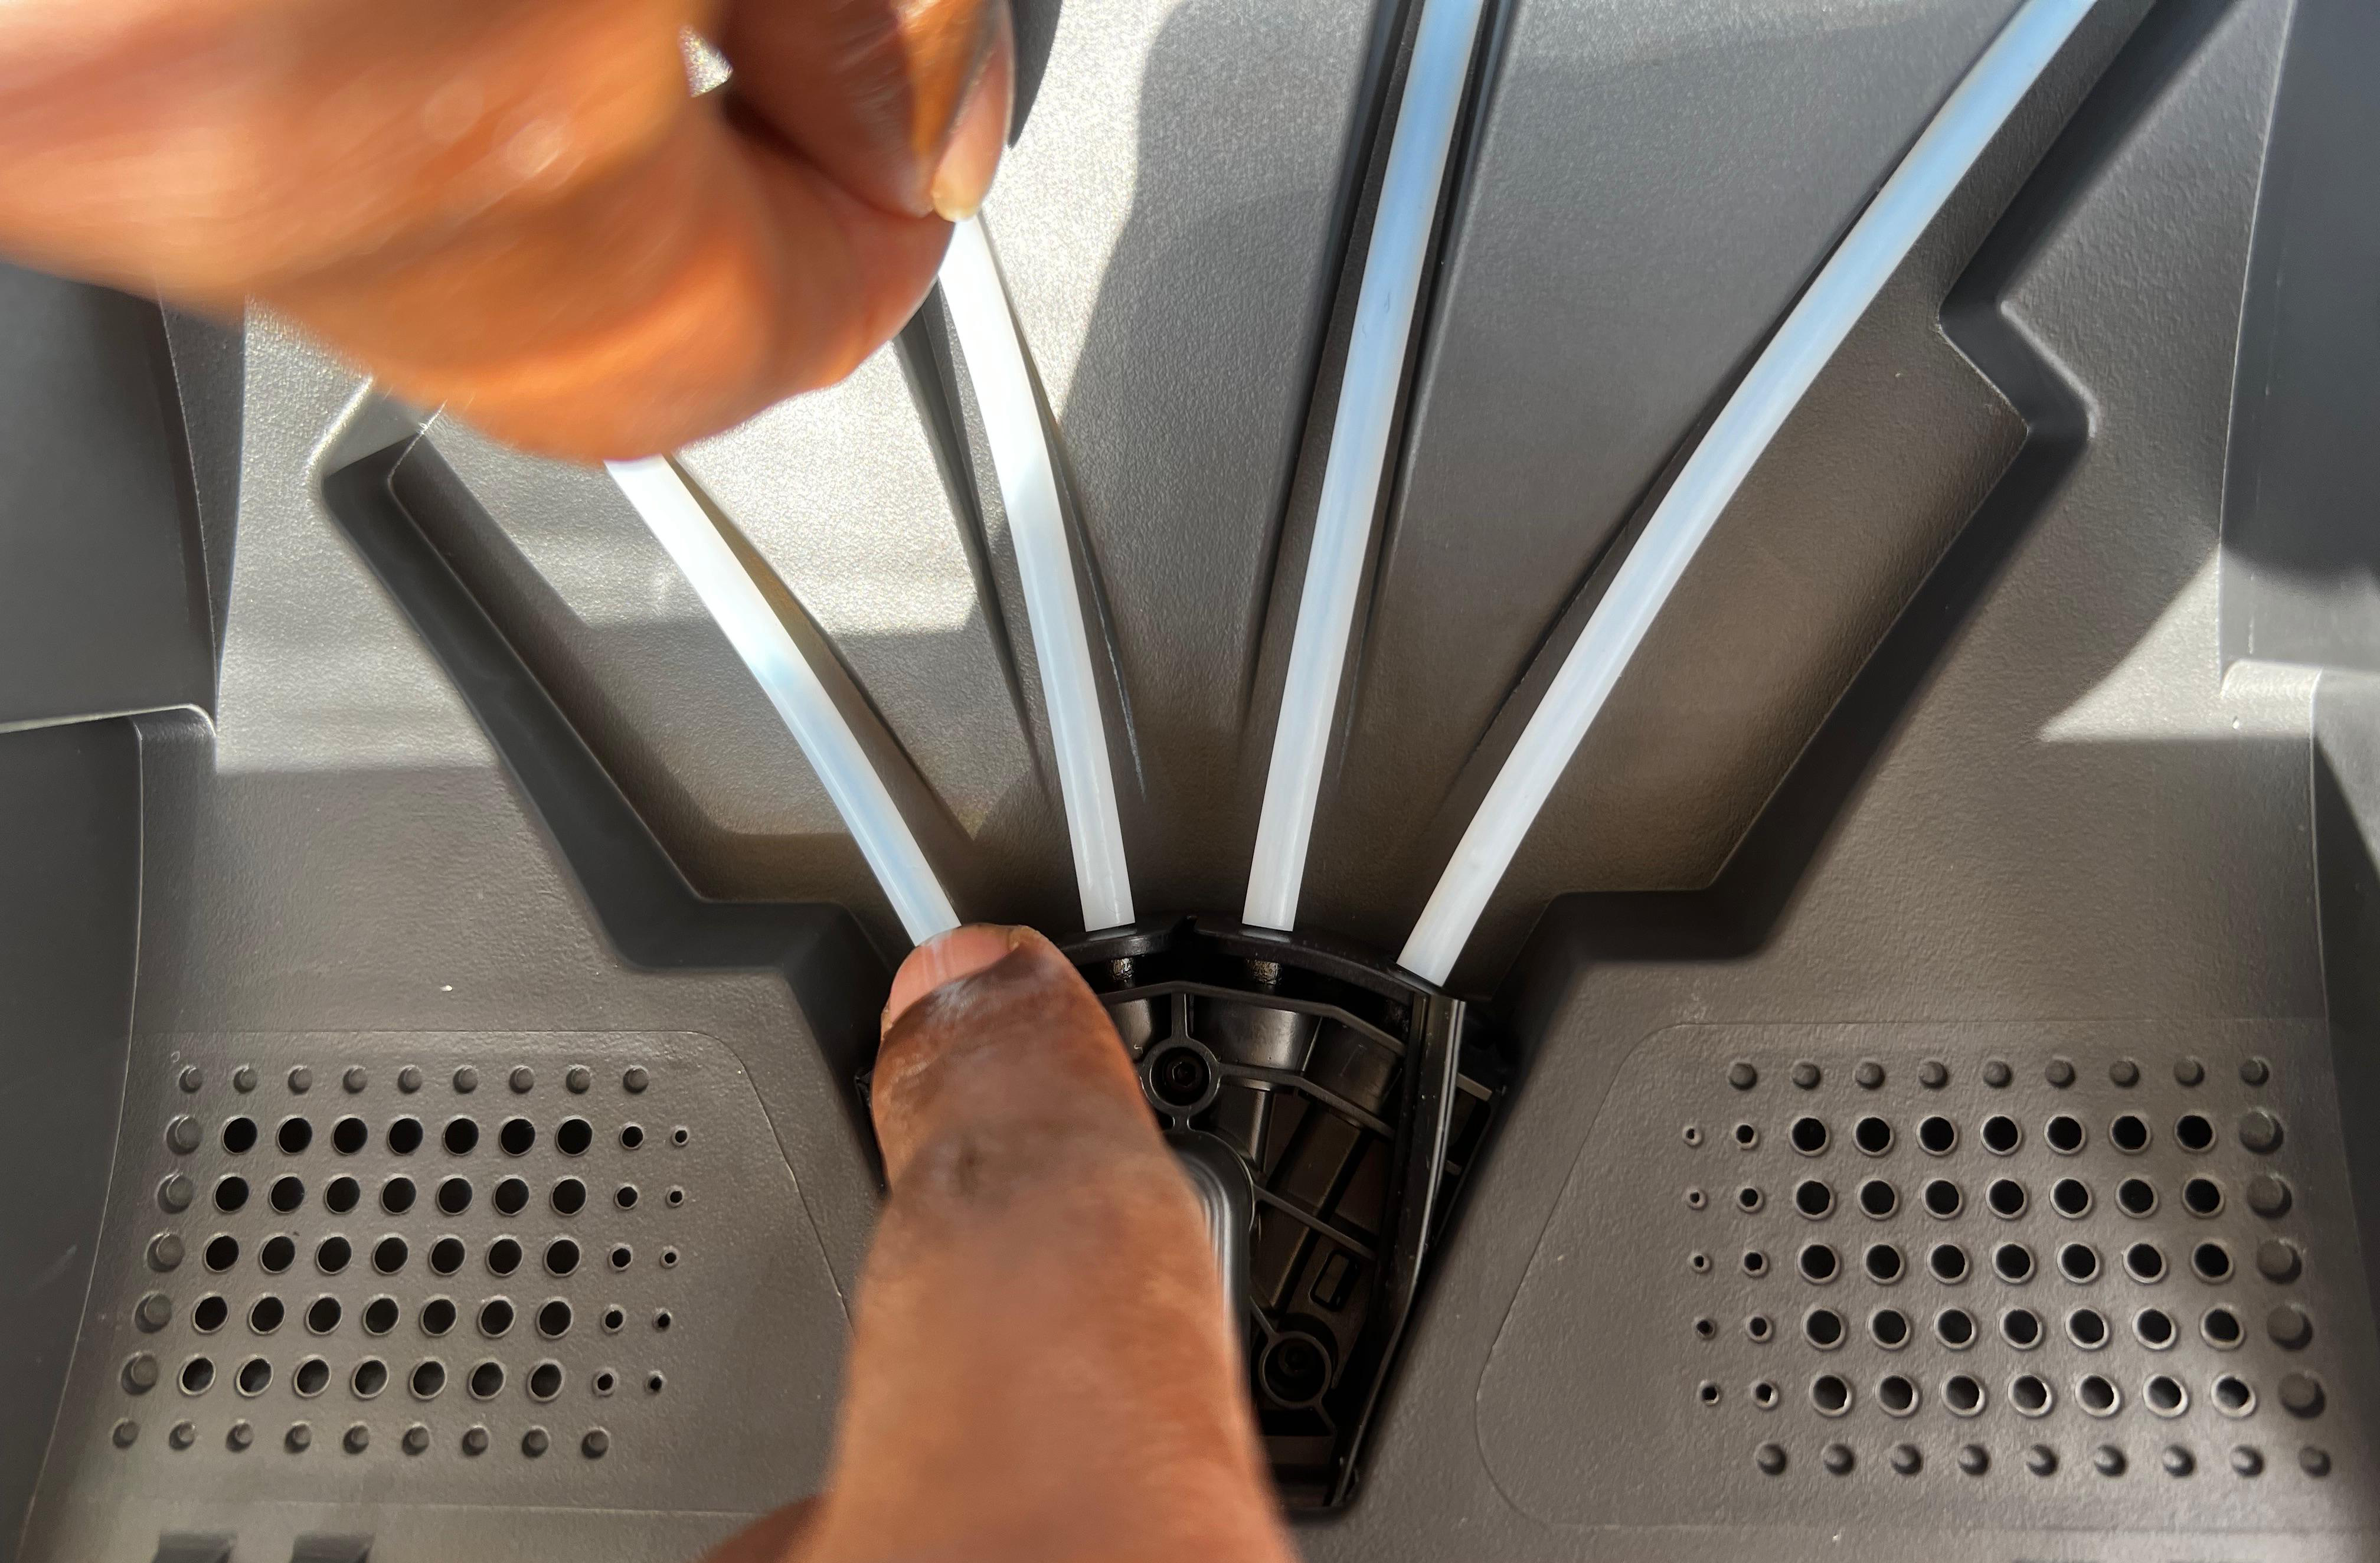
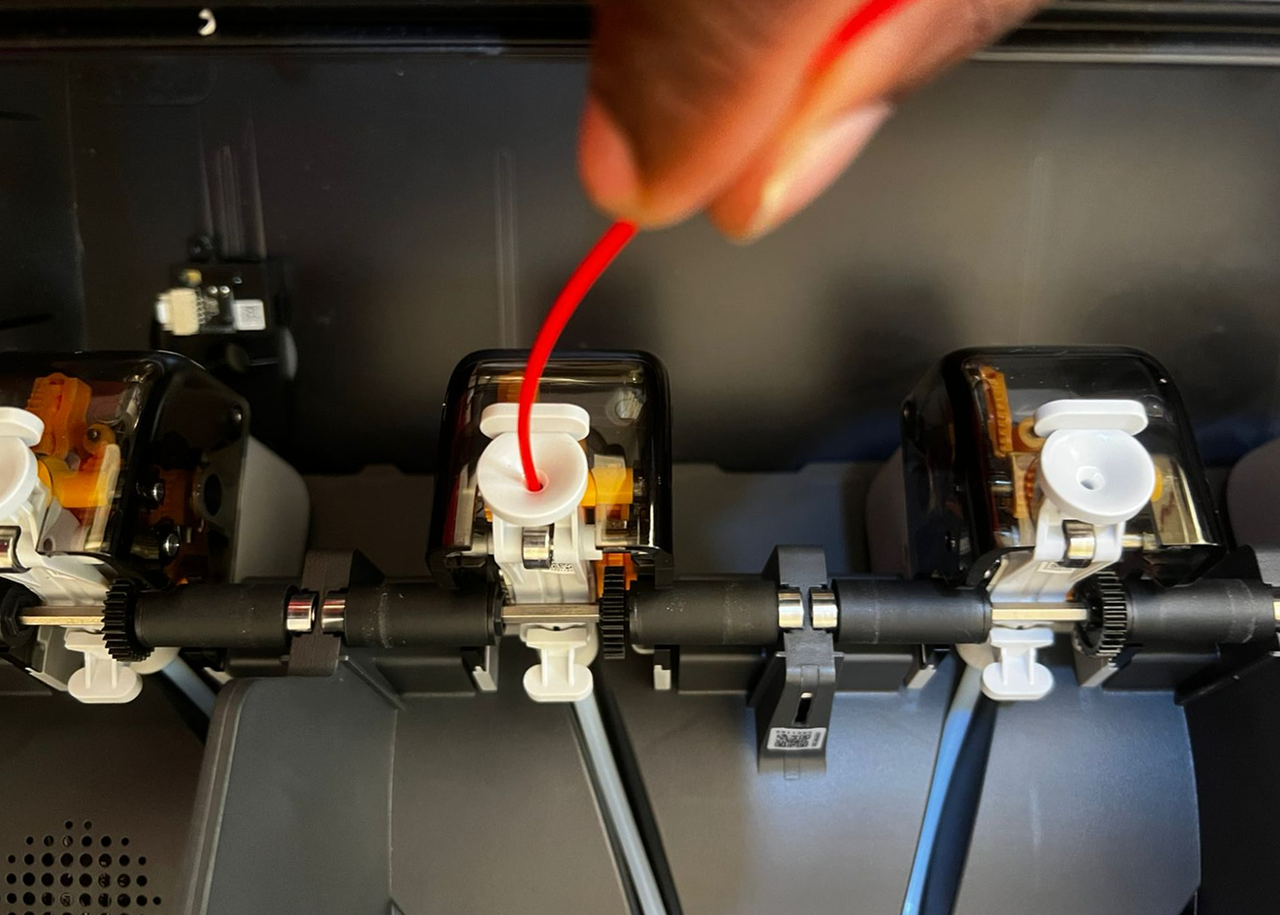
¶ Step 2: Insert the Filament Through the Feeder
Take a small piece of filament and insert it into the feeder until it goes through the tube, as shown below.
 |
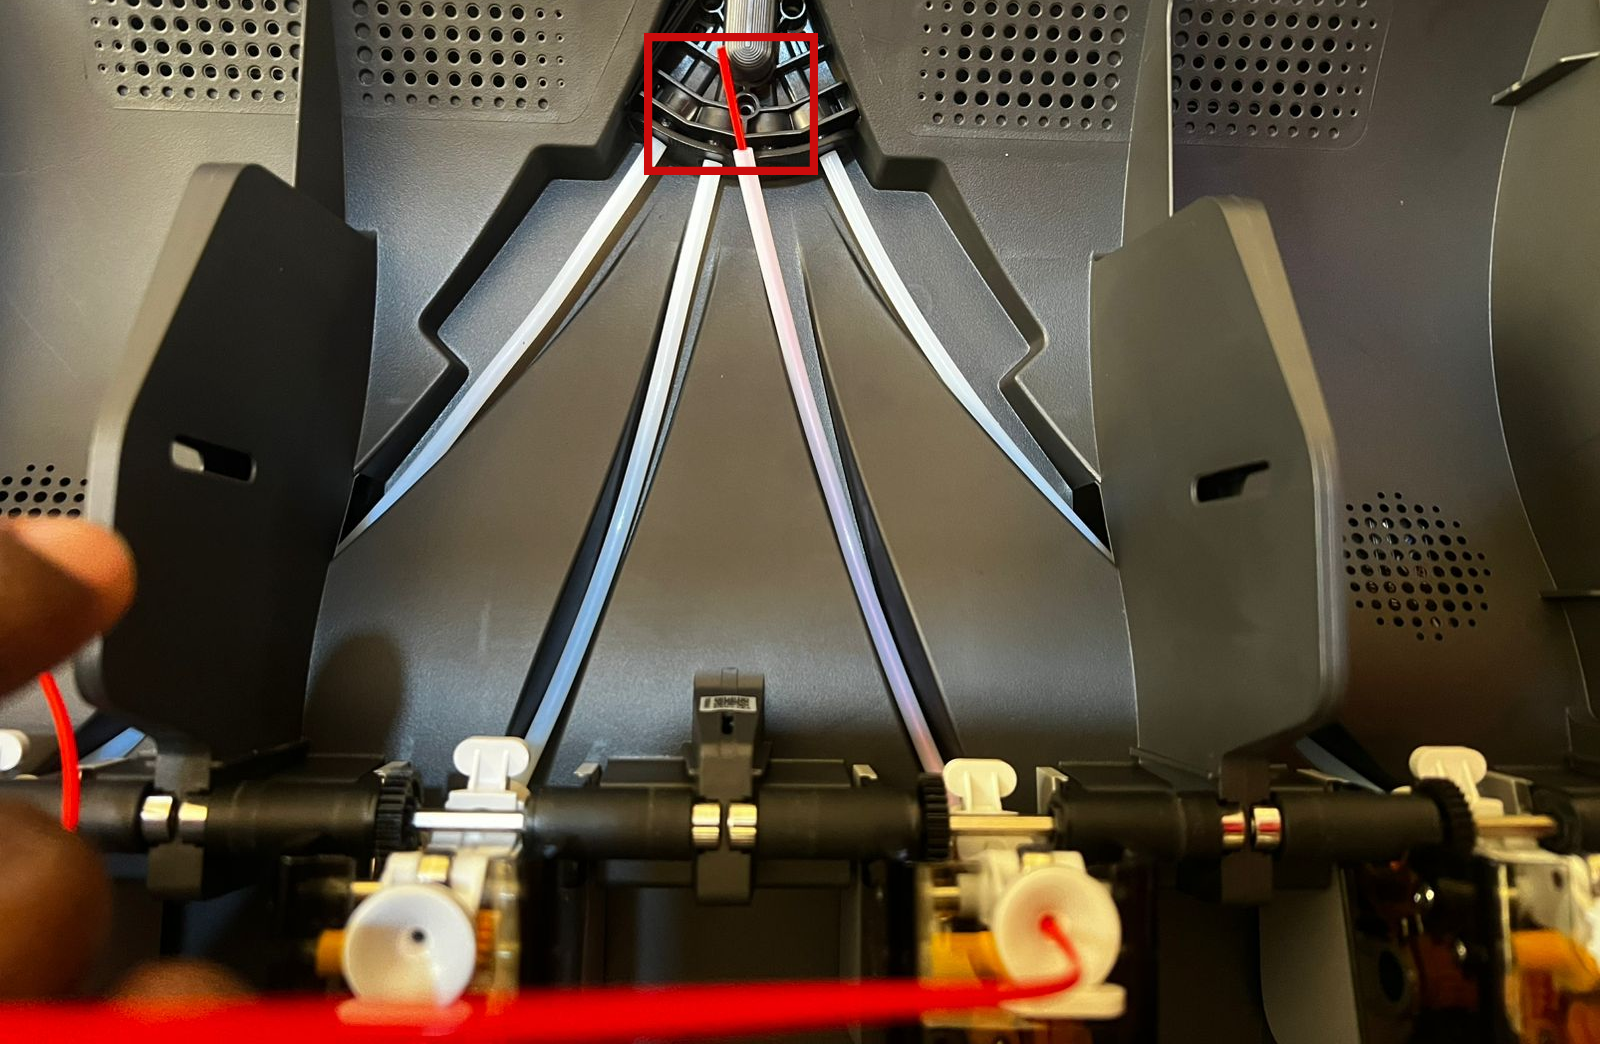 |
Any stack filament should be removed through the PETFE tube opening. You can try several times until you are sure all have been removed. As you do so, ensure you do it gently to avoid breaking the filament inside again. Once you are done, pull the filament out and continue to assemble.
¶ Step 3: Insert the Tubes Back
Insert the tubes back to their original slots.
If the filament breaks inside the internal hub, it is necessary to disassemble, inspect, and clean it.
¶ Cleaning the Internal Hub
¶ Step 1: Disassemble the AMS 2 Pro
To access the internal hub, you need to disassemble the AMS 2 Pro. Check out the AMS 2 Pro disassembly and assembly wiki to learn how to do it.
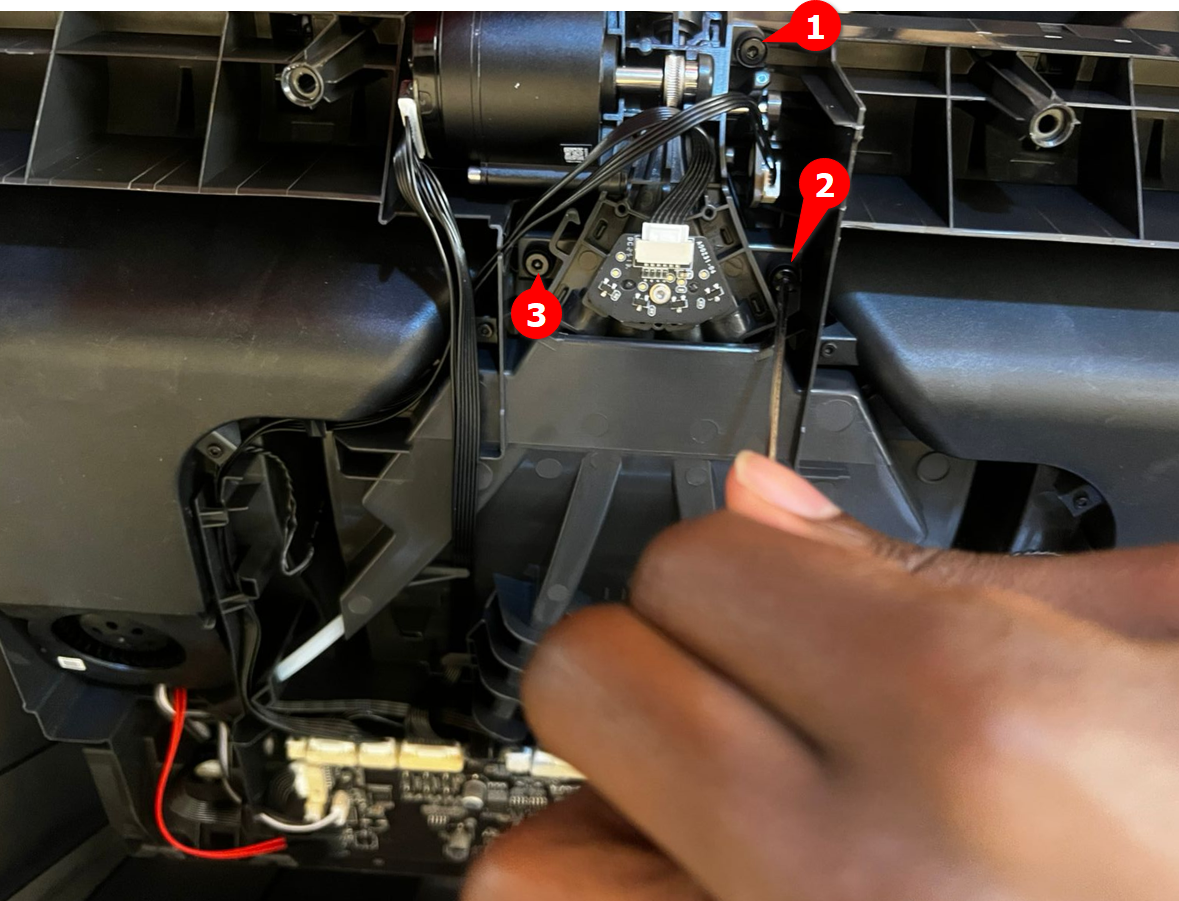
¶ Step 2: Remove the Filament Hub
Unscrew the three screws holding the internal hub, then remove it. Carefully store the shock-proof silicone strip of the filament hub to avoid losing it.
 |
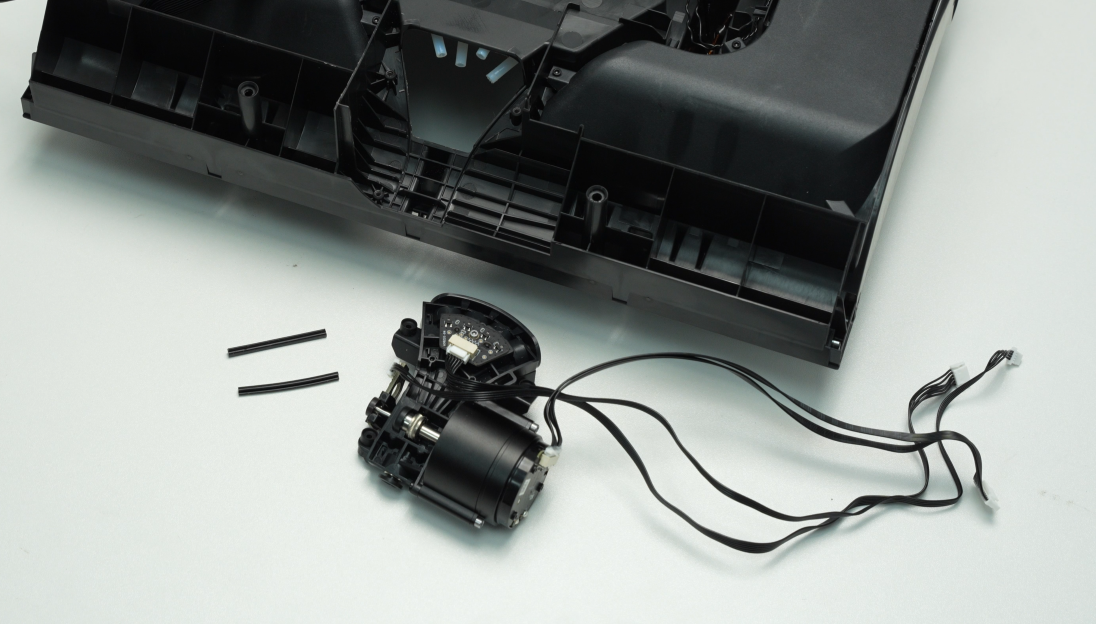 |
Next, remove the motor from the filament hub.
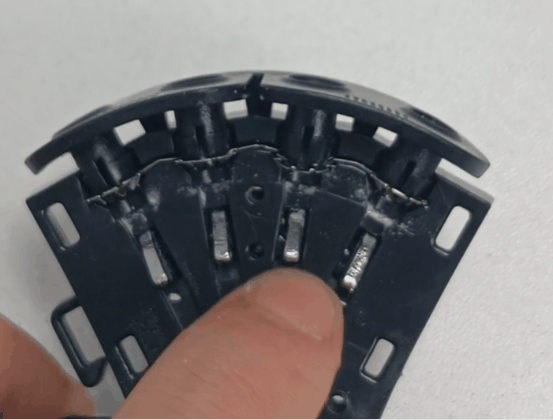
¶ Step 3: Clean the Filament Hub
Disassemble the internal hub and clean it for any stuck filament. Check the clean the filaments hub wiki to learn how to do it.
If there is no filament stuck inside the filament Hub but it is still detected as having material (usually indicated by the feeder of the corresponding slot not having material inserted while the red light remains constantly on) after testing, it is possible that the internal magnet is not rebounding smoothly.
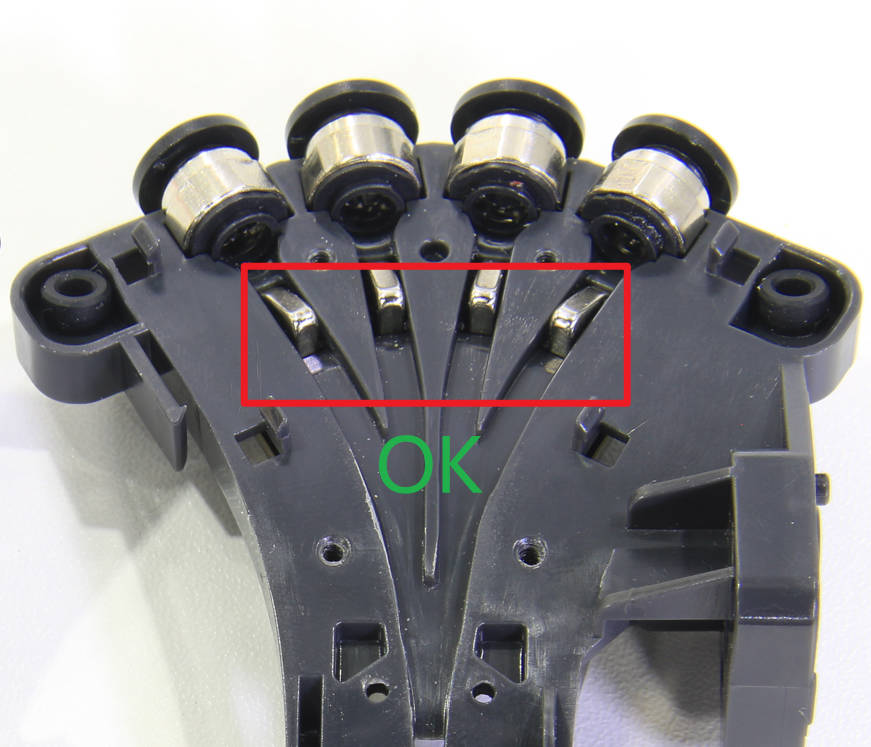
¶ Step 4: Check the Filament Hub Magnet
Check to ensure that all the four internal magnets are rebounding smoothly, as shown in the Gif below.
You should also check their direction and ensure they are facing the correct way.
 |
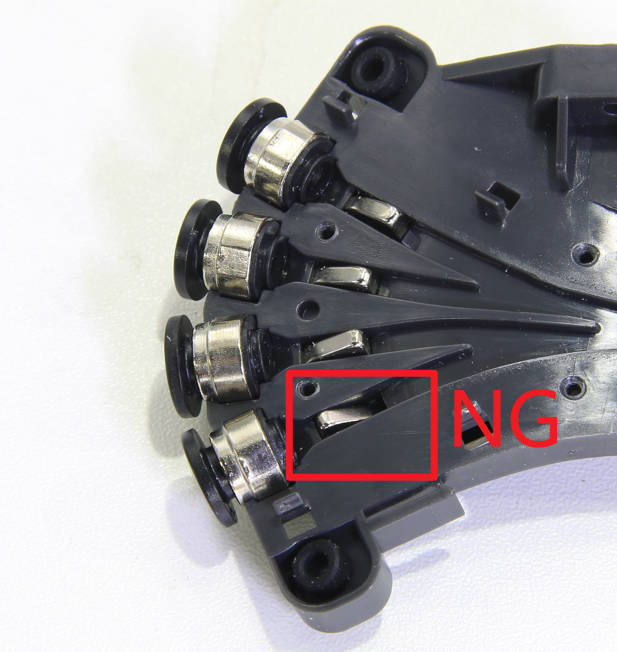 |
If they are not facing the correct direction, you should remove and reorient. Check the installing magnets in filament hub wiki to how to do it.
You can also contact our support team by submitting a ticket if you find any component to be malfunctioning.
Once you have fixed the above, reassemble the components.
¶ Verify the functionality
Once you are satisfied that everything is in order, proceed to turn on the 3D printer. Then, in the filament section of the screen, select one filament and choose the "Load" option to test the filament path. If the path feeds smoothly, you shouldn't get any error on the screen.
¶ Potential Causes and Solutions for Filament Breakage in AMS 2 Pro
Even though you might experience filament breakage in the AMS, even when you have done everything correctly, there are factors that can increase the likelihood of it happening. These include:
- Using poor-quality or incompatible filament: Using a filament that is not officially authorized or one that is brittle or overexposed can increase the chances of breakage inside. Use Bambu Lab filaments and avoid those that are brittle or overexposed.
- Using filament exposed to moisture: Moisture in the filament can result to this issue. Always use dry filament. Store spools in a dry environment or activate the AMS drying function.
- Incorrect loading or unloading: Attempting to load and unload manually can cause the filament to break. Always follow the AMS loading and unloading procedures carefully to avoid misalignment or excessive force that can cause the filament to snap.
- Worn or damaged PTFE tube: Over time, the PTFE tube can wear out, making the filament more prone to breaking inside. Always replace it as soon as you notice an issue with it. You can get it from the Bambu Lab store.
¶ End Notes
We hope our guide was helpful. If you have any questions or concerns about the process, please contact our customer service team. We're here to assist you.
Click here to open a new ticket in our Support Page.
We will do our best to respond promptly and provide you with the assistance you need.