¶ Phenomenon
Use this guide if the AMS 2 PRO does not power on. Typical symptoms include the AMS LED indicator remaining off, no filament detection or movement, and the printer not recognizing the AMS even though the printer itself powers on normally.
¶ 1. Confirm the printer is fully operational
First, make sure the printer itself is working. Check that it powers on normally, that the fans and LED indicators are active, and that the touchscreen responds. Make sure to disconnect the AMS from the printer.
If the printer does not power on or appears to have any issues, these should be resolved before troubleshooting the AMS.
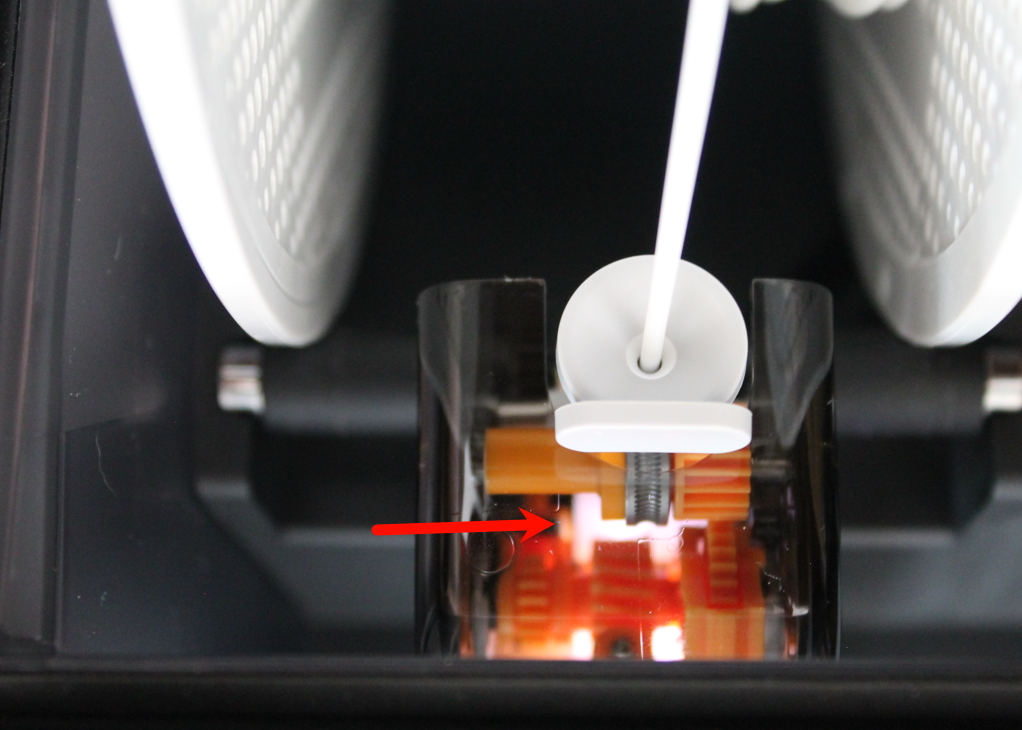
¶ 2. Inspect the AMS Status
After powering on the printer, observe the AMS. The status LED location can be found in the picture below. If the LED indicator on the AMS does not light up and the AMS does not respond, continue with the following steps.
If the LED is working, showing any LED status, click here to check the AMS 2 PRO LED Status Troubleshooting.
Each AMS feeder has an LED inside, you can see that each feeder unit lights up, as shown below:
If your AMS 2 Pro does not display any LED status codes or if none of the LEDs light up, proceed to the next step.
¶ 3. Reset and Power Cycle
Disconnect the AMS from the printer, then turn off the printer, unplugging the power cable. Wait at least 30 seconds before reconnecting everything. Plug the printer back in, reconnect the AMS 2 PRO, and confirm it is firmly seated. Power on the printer again to see if the issue is resolved.
¶ 4. Test with Another Cable or AMS (if available)
If you have access to a second AMS cable, replace the original and test again. If another AMS unit is available, connect it to the same printer port. This will help identify whether the issue is caused by the AMS, the cable, or the printer.
¶ 5. Check the AMS Cable Connection
Inspect both connectors for dust, bent pins, or damage. If any pin appears damaged or defective, the cable must be replaced, the AMS 2 PRO cable is available in the Bambu Lab Store.
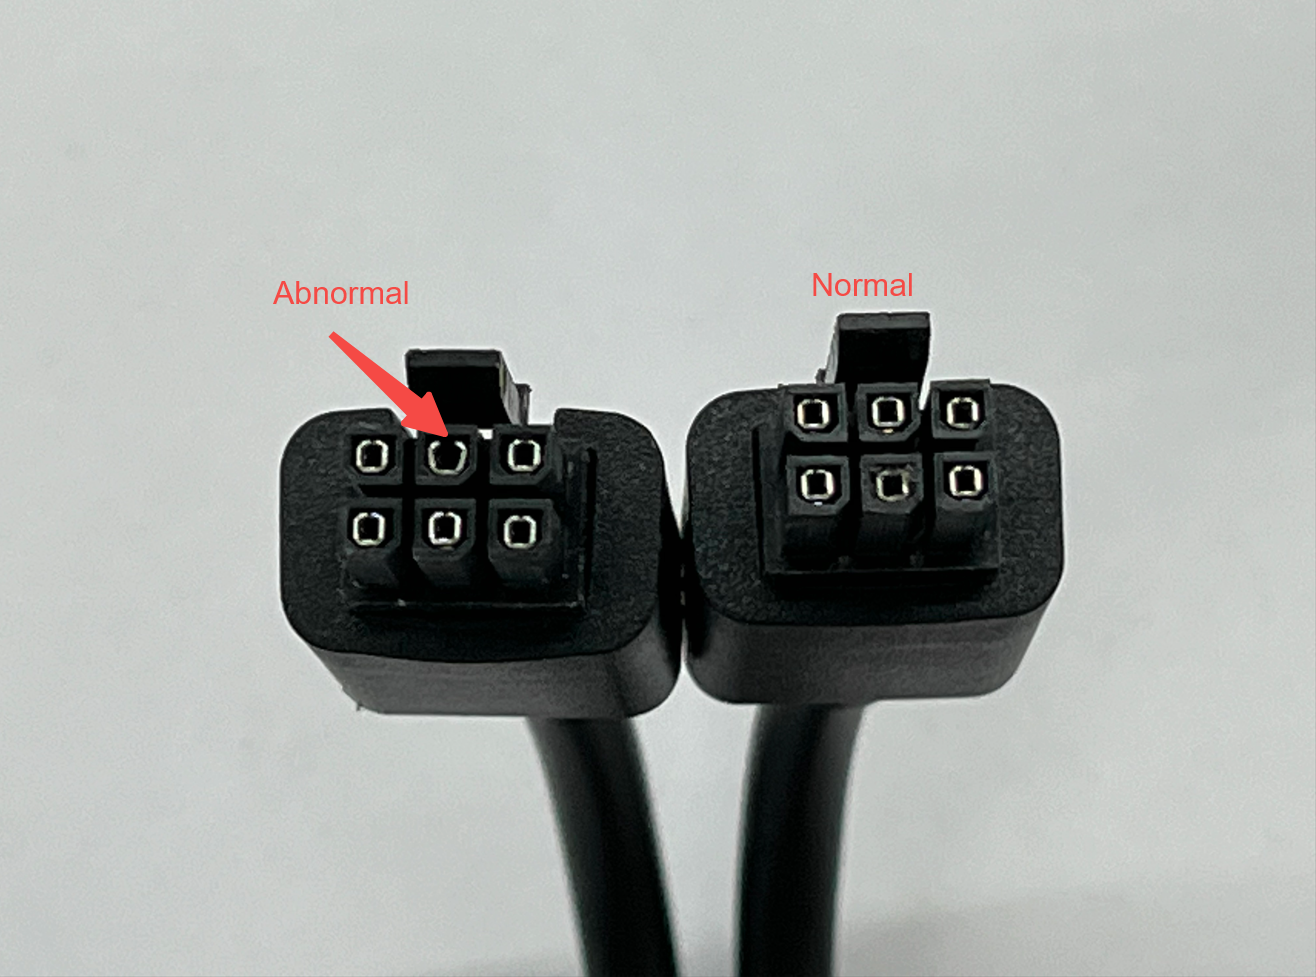
If both connectors look undamaged, proceed with cable connection diagnosis.
Use a multimeter to check the resistance across specific pins in the AMS connector cables. By comparing the measured values with known normal ranges, users can identify whether the AMS boards are likely to be malfunctioning.
Follow the Resistance Measurement and Fault Diagnosis Methods for AMS Series Guide, this is the easiest diagnosis of the mainboard without disassembling the AMS 2 PRO.
After measuring the pins, if your measurements differ significantly from the guide, there might be a problem with the mainboard.
¶ 6. Test the power board
The AMS power board is a circuit board installed at the rear of the AMS. It is responsible for receiving the DC power output from the printer and transmitting the power to the AMS mainboard. It also performs certain communication switching functions.
⚠️Warning! Avoid touching any part of the powerboard with your hands or metal tools, as this could cause injury or damage to the components.
For these steps, disassemble the AMS 2 Pro to access the power board. Follow the step-by-step AMS 2 PRO disassembly guide, completing steps 1,2 and 3 to expose the power board.
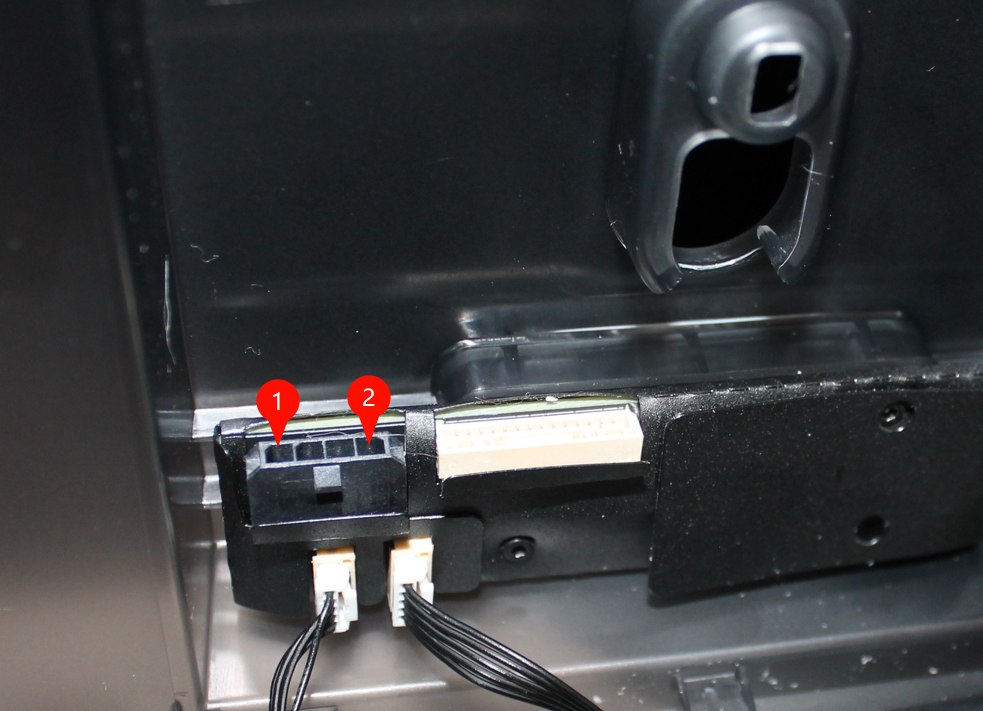
Once you have access to the power board, disconnect the top connectors. Using the positive (red) probe, touch the pin marked (1), and using the GND (black) probe, touch the pin marked (2). The multimeter should read 24V, as illustrated in the image below.
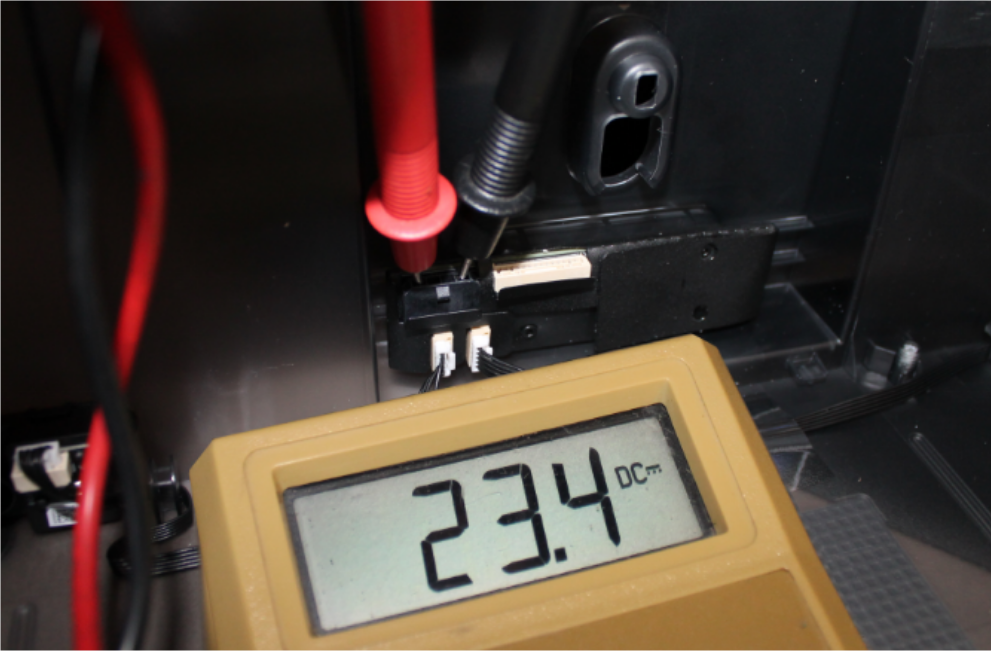
If the multimeter is not reading the 24V power, the power board needs to be replaced. Follow the AMS 2 Pro mainboard Replacement Guide.
Get a replacement board - Bambu Lab Store - AMS 2 PRO Power board replacement
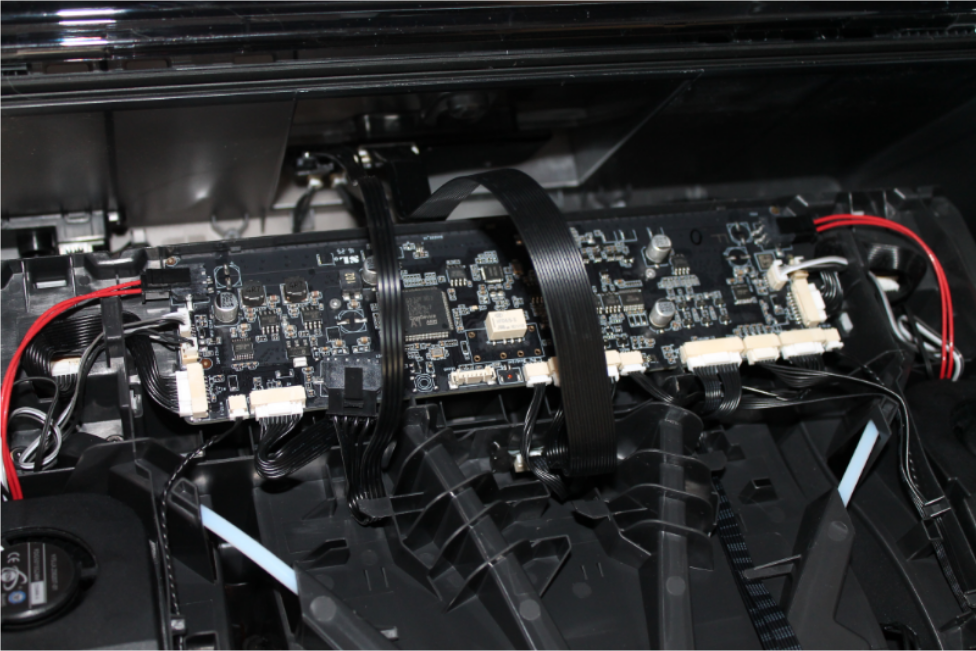
¶ 7. Test the mainboard
The AMS mainboard is the core power board of AMS. It provides a series of connectors through which various functional components are connected. If you disconnected the mainboard in the previous steps, reconnect it to the power board at this stage. Carefully flip the internal AMS assembly upside down to expose the mainboard. The purpose of this step is to verify that the mainboard is receiving power correctly.
⚠️Warning! Avoid touching any part of the mainboard with your hands or metal tools, as this could cause injury or damage to the components.
Using a multimeter, place the GND (black) probe on the input GND power pin (1), and the positive (red) probe on the input 24V pin (2). Ensure the multimeter is set to measure DC voltage with the appropriate range selected.
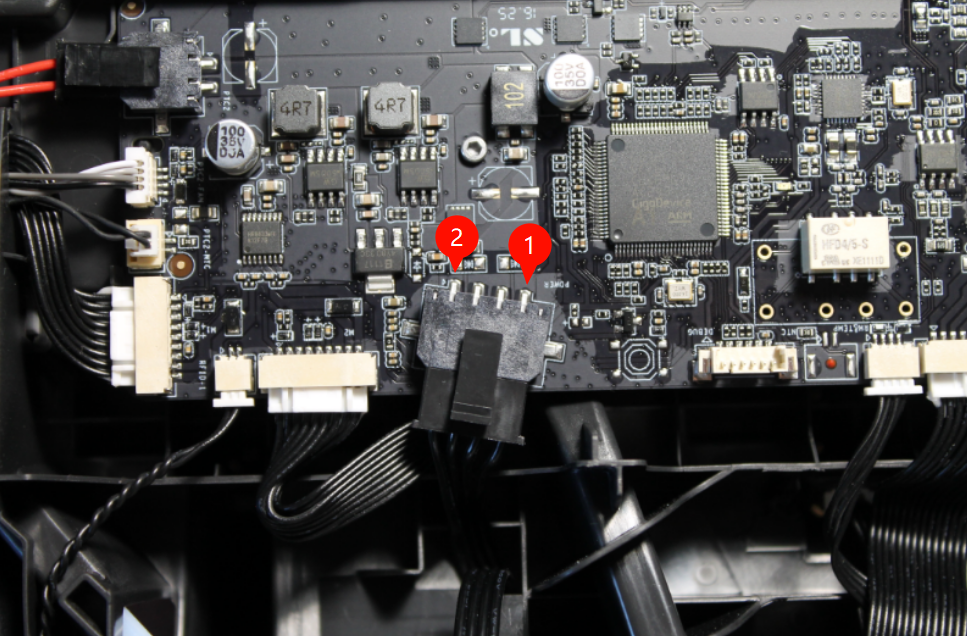
If you are reading 24V correctly, fully reassemble the AMS 2 Pro and test its functionality. In some cases, simply disconnecting and reconnecting the cables may restore operation by resolving a poor pin connection caused by corrosion or similar issues. However, if the AMS still fails to operate, this may indicate that the mainboard is faulty and requires replacement.
If you are not reading 24V, disconnect all connectors from the mainboard except for the two cables coming from the power board, marked with (1) and (2) in the picture below. Power on the AMS and measure the 24V again, by connecting it to the 3D printer. Measure the 24V on the power connector (1) as shown above.
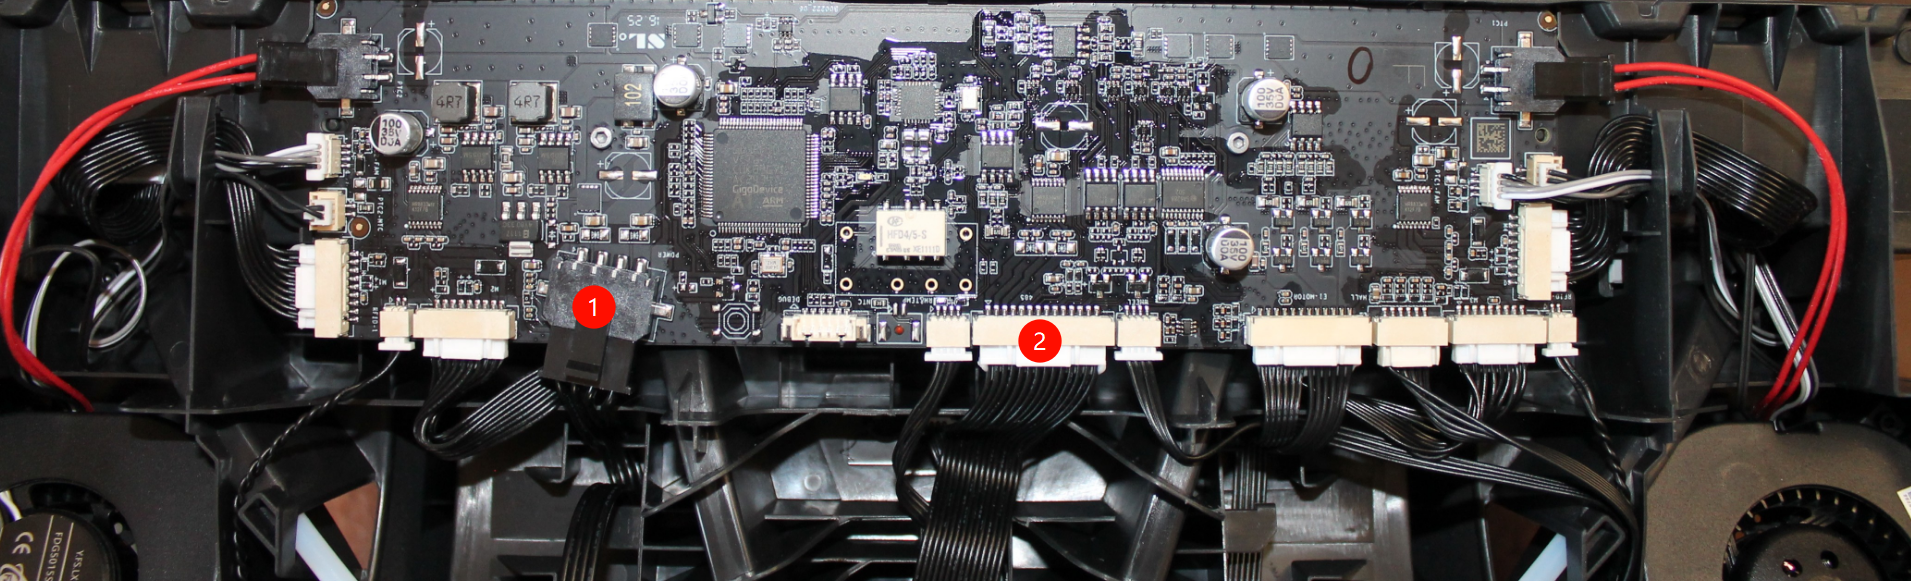
If the measurements are now correct, this indicates a problem with one of the feeders or the hub. Reconnect one at a time until you find out which is faulty.
Follow the AMS 2 Pro Feeder Unit Replacement Guide.
Follow the AMS 2 Pro Internal Hub Unit Replacement Guide.
If the measurements are still not as expected, then the mainboard needs to be replaced. Follow this wiki page for step-by-step instructions on how to replace the mainboard.
Get a replacement board - Bambu Lab Store - AMS 2 PRO Mainboard replacement
¶ End Notes
We hope the detailed guide provided has been helpful and informative.
To ensure a safe and effective execution, if you have any concerns or questions about the process described in this article, we recommend submitting a technical ticket regarding your issue.
Please include a picture or video illustrating the problem, as well as any additional information related to your inquiry.