Different processing types are suitable for different materials and patterns, and the processing effect of each type will be different. You can choose the appropriate production process according to the desired effect of the work. This article will briefly introduce the working principle and practical effect of each processing type.
¶ Laser line
Laser line engraving is the process of using smaller laser power and faster processing speed to burn lines on the surface of materials, which is suitable for vector graphics composed of lines. Therefore, when the process type of the pattern is set to laser line, only the lines will be rendered on the software canvas, and the filling part inside the pattern will not be rendered. The schematic diagram of the processing path is as follows:

¶ Laser fill
Laser filling engraving is a process that uses a smaller laser power and faster processing speed, and employs a line-by-line scanning method to ablate patterns on the surface of materials. It is suitable for closed shapes composed of lines. Therefore, when the pattern is set to laser-fill engraving, the software will focus on rendering the filling part of the shape. The schematic diagram of the processing path is as follows:

¶ Laser cut
Laser line cutting needs to cut through the material along the lines of the pattern, so it is very similar to laser line engraving, which is suitable for the vector diagram composed of lines, but the difference is that laser line cutting requires greater laser power and slower cutting speed to cut the material into a specific shape. Compared with laser line engraving, the laser line cut pattern is rendered thicker on the software canvas.

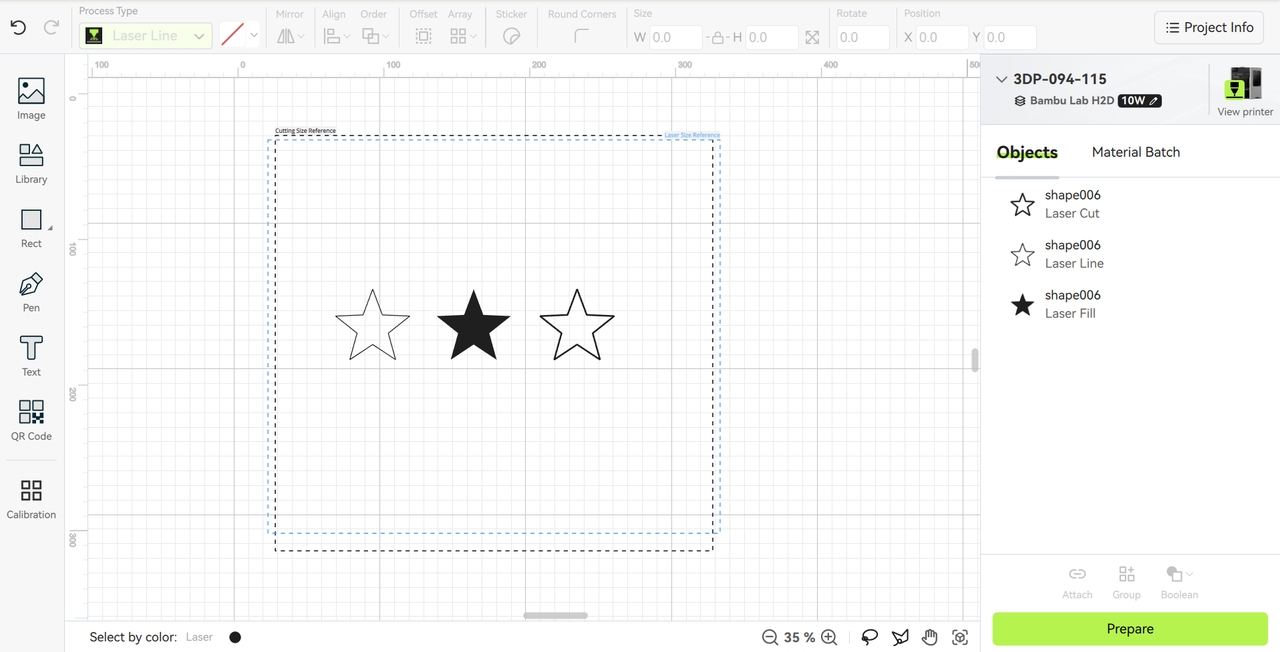
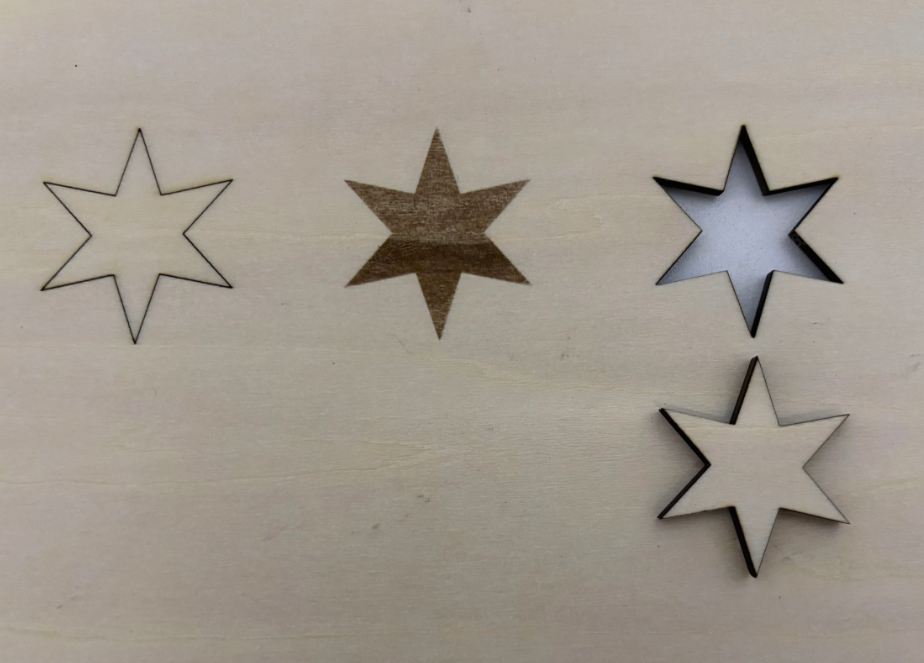
Laser line engraving, laser fill engraving, laser line cutting, the rendering effect and processing effect of these three on the canvas are shown in the following figure.
¶ Laser image
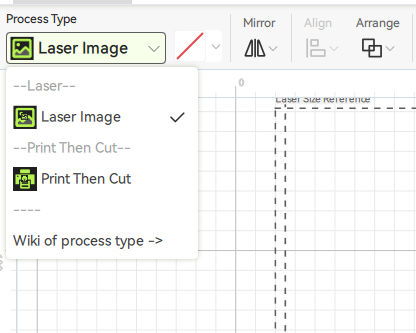
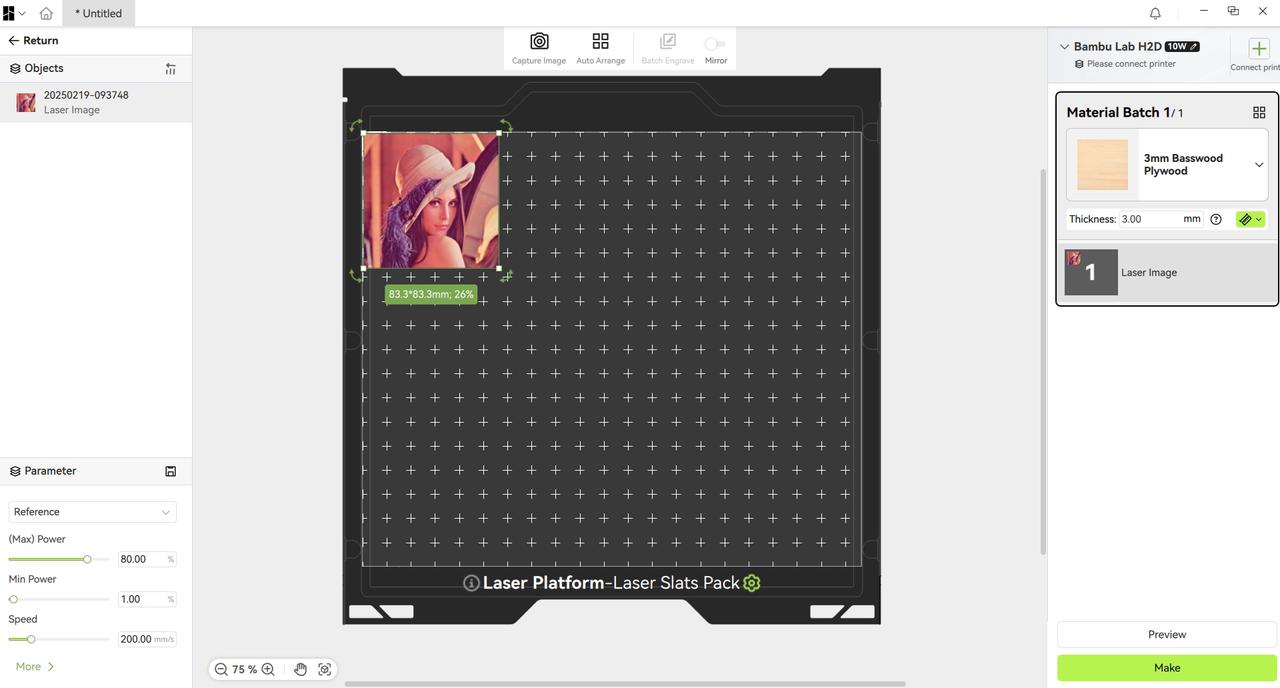
Laser image engraving is suitable for bitmaps composed of pixels, such as scenes that need to engrave a photo on the material surface, and it uses a progressive scanning method and changes the power at different pixel positions to ablate. Bitmaps are not vector graphics composed of lines, so the processing type of bitmaps cannot be set to laser line engraving, laser fill engraving, and laser line cutting. When you import a bitmap into the canvas, the only process types available are "Laser image" and "Print then cut".
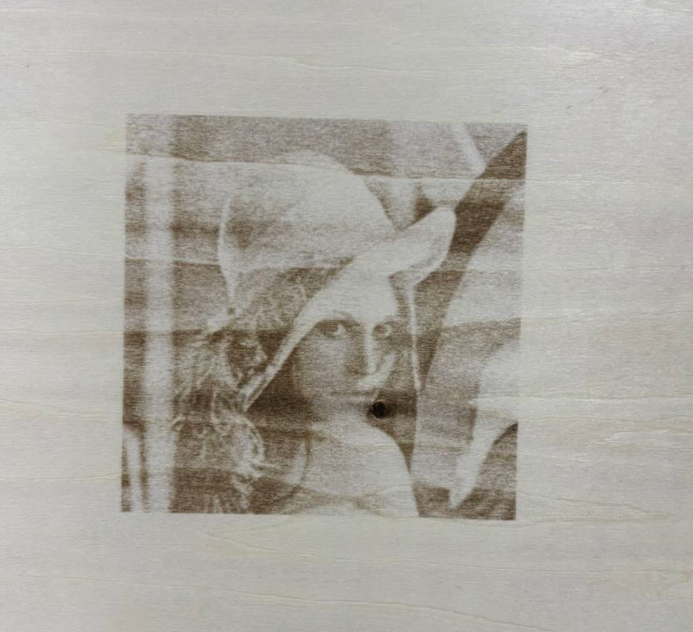
Laser image engraving will be affected by the texture of the material itself, such as wood, and the effect of engraving will be uneven. The user needs to select the right material and try to debug the processing parameters several times to achieve satisfactory results. When you choose the material to process on the preparation page, you can adjust the power, speed, image mode, and other parameters.
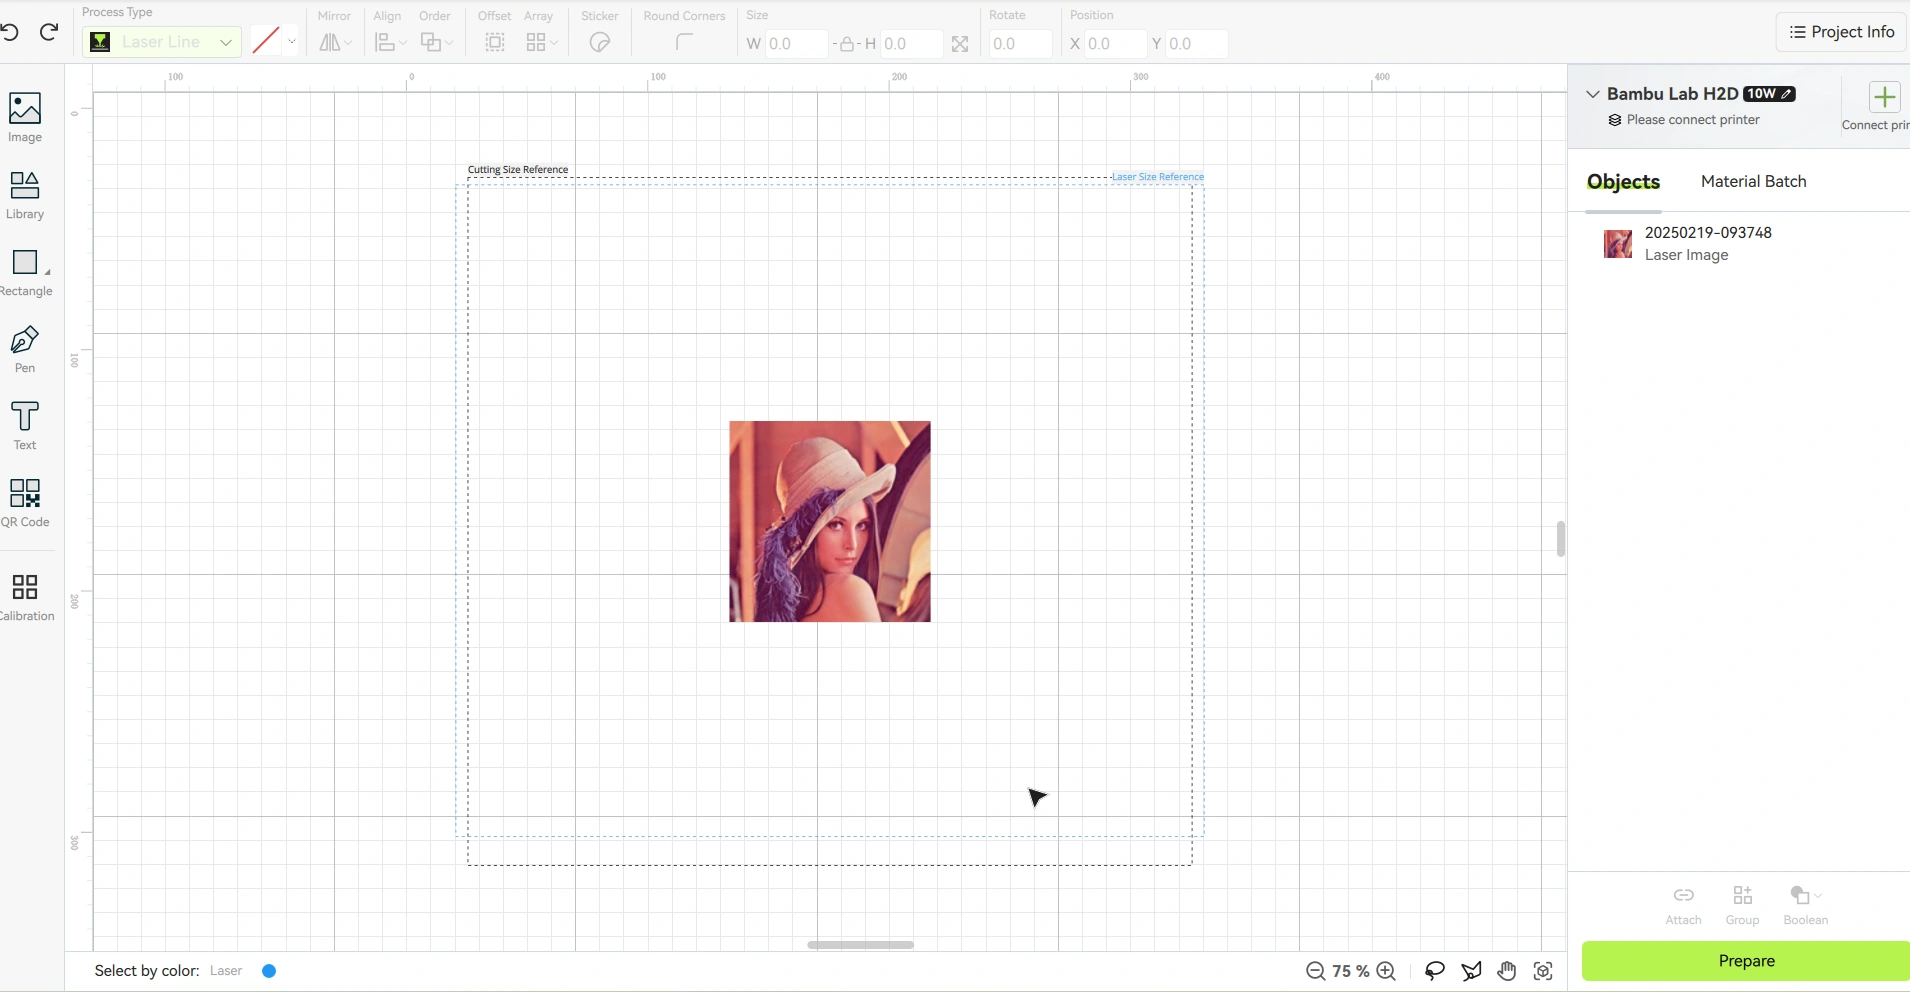
Suppose you need to cut off the photos engraved on the material. In that case, you can use the "offset" tool to generate a rectangular line border for the object, then set the process type of the border to laser line cutting (as shown in the following figure), and then bind them together for processing. Please refer to: Attach and Group.
¶ Basic cut
Basic cutting is the use of a cutting knife in thin materials, such as paper, cardboard, vinyl, etc., to cut a specific shape, in short, it is an "automatic paper cutter", or scissors, suitable for processing vector line graphics. What color the material is, what color is finally cut down, so for the basic cutting process of the pattern, the software will default to using filling for rendering. Different colors mean different materials for cutting.
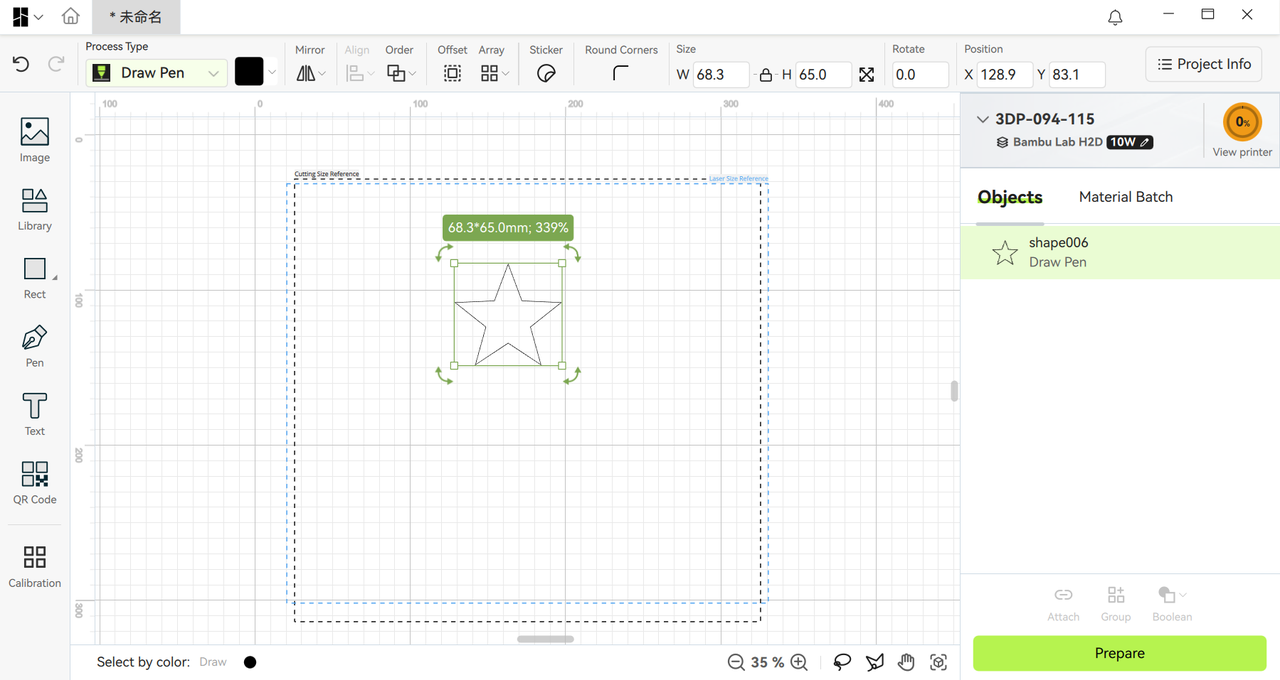
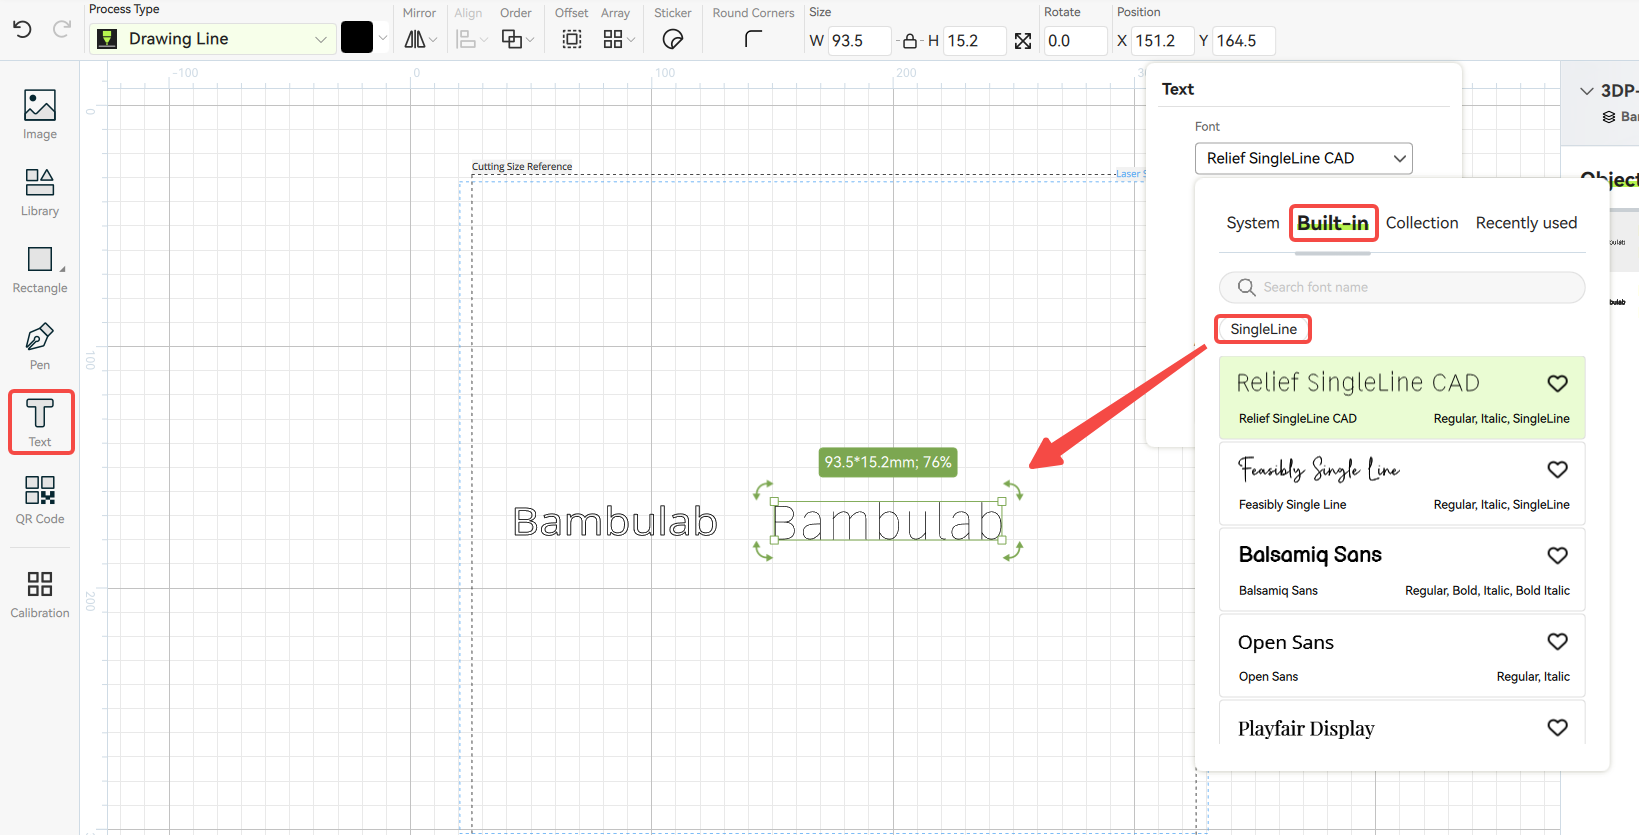
¶ Drawing line
This process is specially designed for drawing patterns or writing text on thin materials (such as ordinary A4 paper, cardboard, etc.), and is suitable for processing vector line graphics.

If you need to write text:
-
Select the [Text] tool in the left toolbar, and editable wide text will be generated by default;
-
If you need a single-line font:
-
After selecting the text, select "Built-in" → "SingleLine" in the editing window.
-
Select the desired style from the selected SingleLine fonts to create it.
¶ Drawing fill
Suitable for vector graphics processing, supports pattern drawing or text writing, and will use a brush to fill the inside of the pattern with a solid color block.
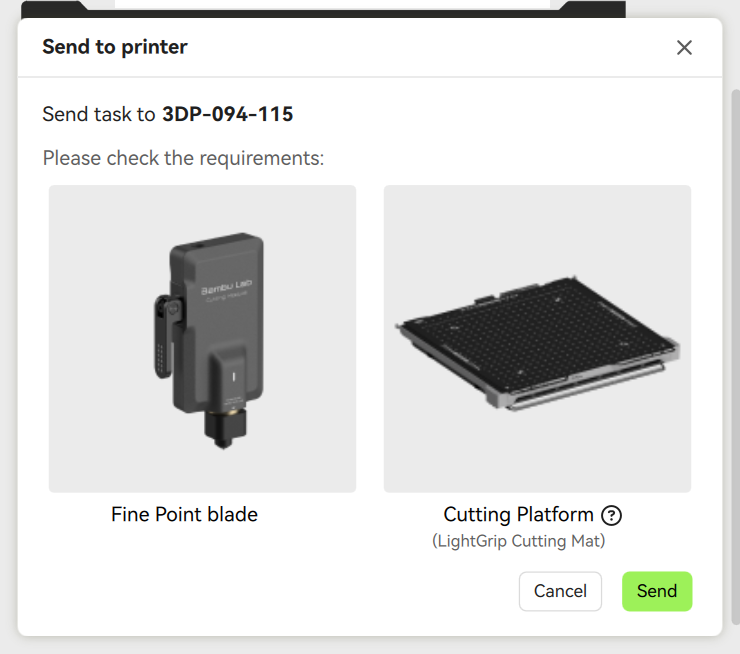
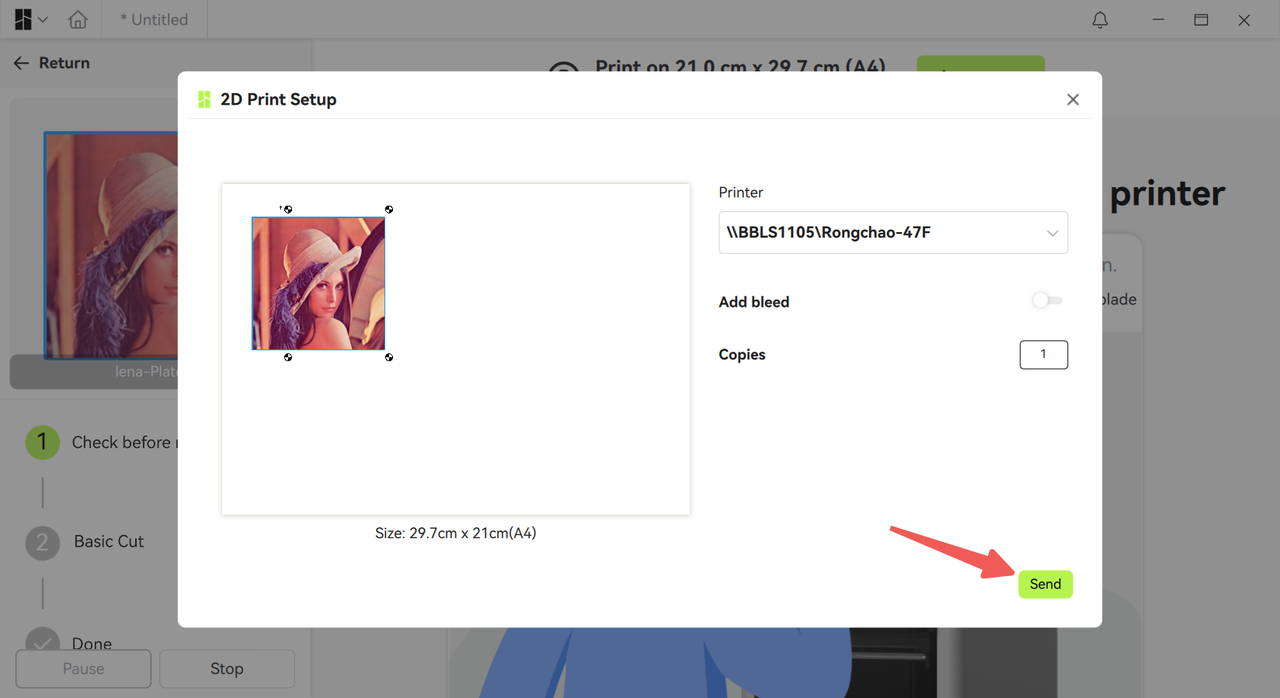
¶ Print then cut
This feature requires using a 2D printer to print the pattern on the material (such as A4 paper) first, and then paste it on the cutting platform after printing. The cutting is used to cut down the border or cutting path along the pattern, which is often used to make small stickers. For bitmaps, the cutting path will be cut along the edge of the image, and you can use tools in the image editing tool to remove unnecessary parts of the bitmap (such as the background) before making it. Please refer to: H2D Print Then Cut introduction.
After entering the preparation page to send the job, a dialog box will pop up in the software, you need to click "Send" to send the picture to the 2D printer connected to the computer (this step requires the computer to be connected to the printer in advance).

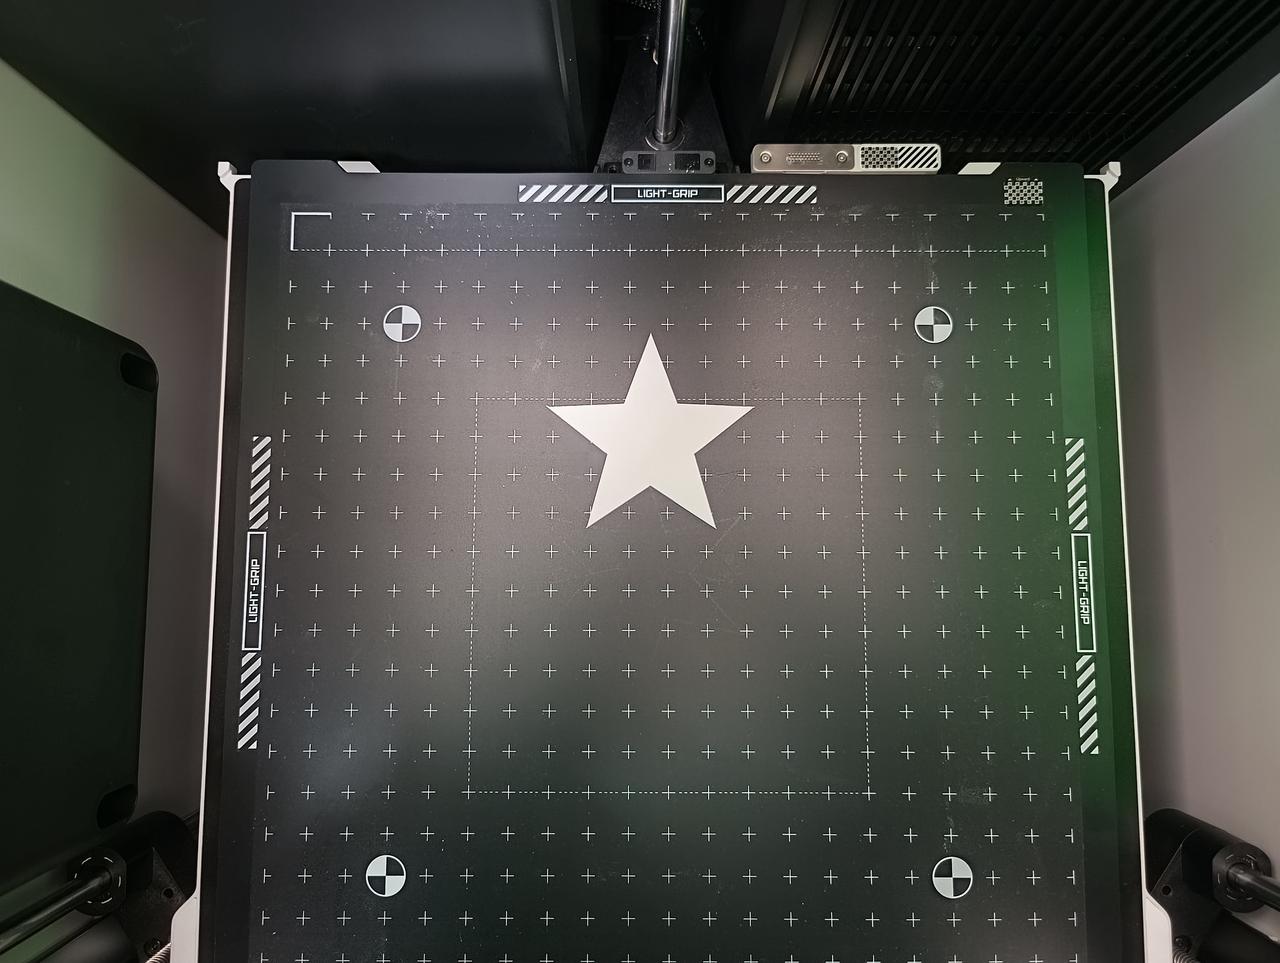
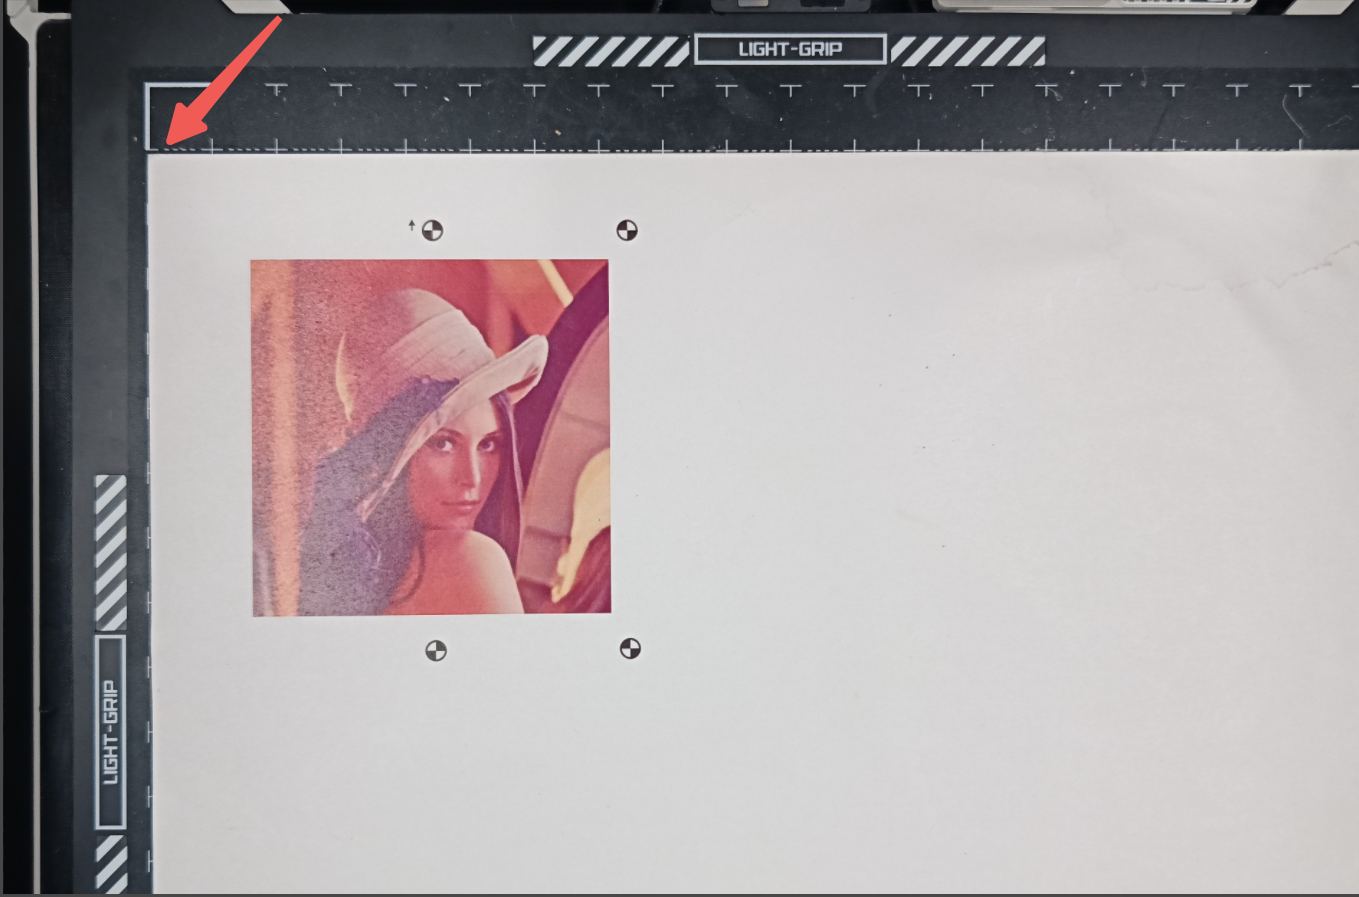
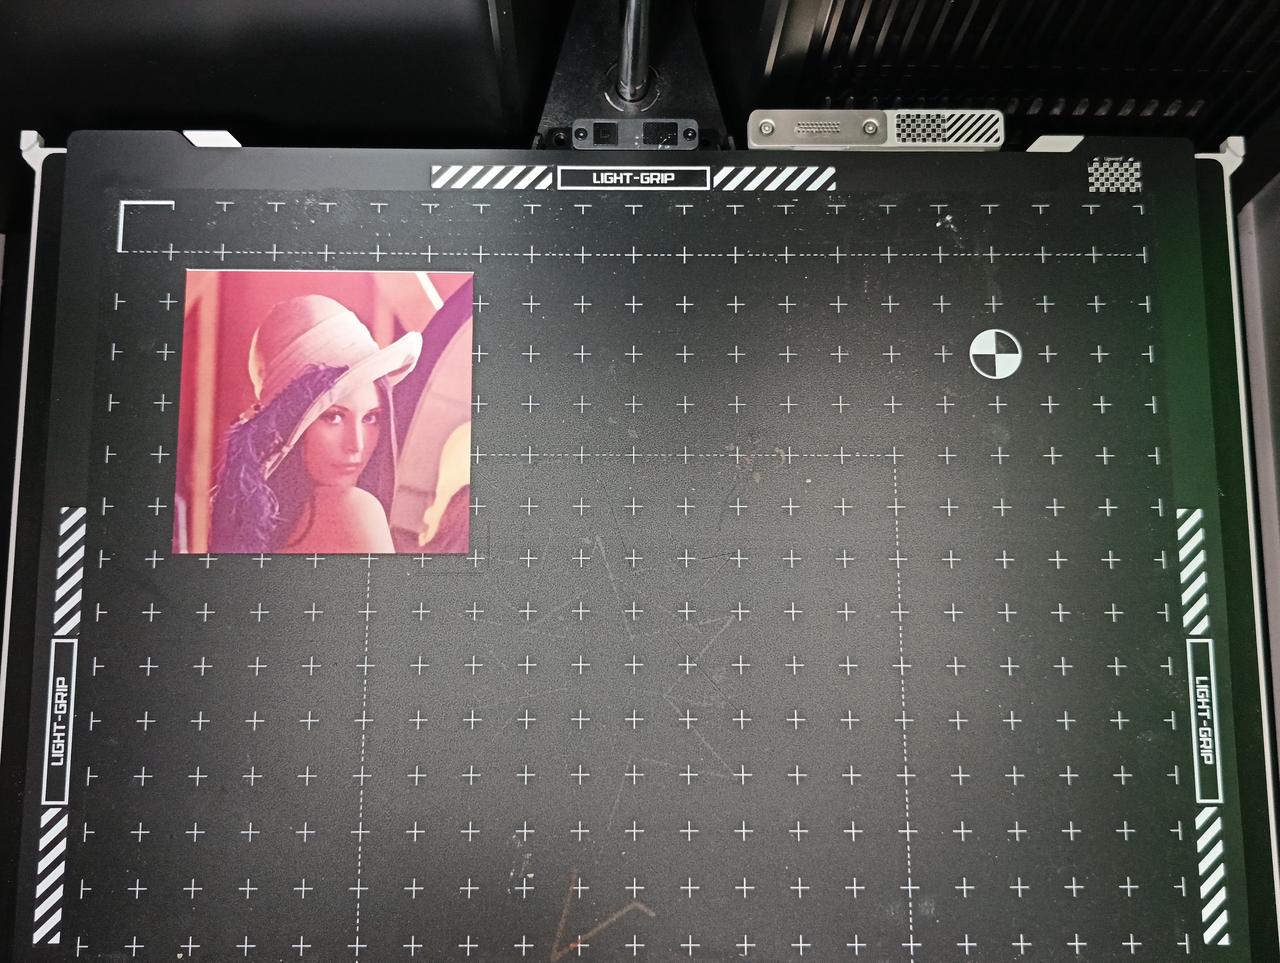
After printing, go to the printer to take out the printed A4 paper, and then stick the paper to the cutting platform according to the example in the following figure, and then click on the display screen to start the task. Note: The paper with the printed pattern must be pasted along the upper left corner of the second dotted line.
| The printed A4 paper is attached to the cutting platform | The cutter will cut the image out of the paper |
|---|---|
 |
 |
A more convenient way to use it is to combine Bambu Suite's sticker tool to make it.
¶ End Notes
We hope the detailed guide provided has been helpful and informative.
If this guide does not solve your problem, please submit a technical ticket, we will answer your questions and provide assistance.
If you have any suggestions or feedback on this Wiki, please leave a message in the comment area. Thank you for your support and attention!