Regular maintenance can minimize wear and extend the printer's lifespan while also lowering the risk of a print failure. To help ease your purchasing decision, we have listed all the commonly needed maintenance parts and offered tiered discounts. You can find the purchase link on Spare Parts Page.
If you are want maintenance guide on the AMS, please refer to Bambu Lab AMS Maintenance Recommendation.
¶ X-axis Carbon Rods
While the Carbon rods used on the X-axis don't require lubrication or maintenance, it's still recommended to clean them out periodically for dust and buildup.
Note: Please do not use grease on the carbon rod, as it will cause abnormal resistance and difficulty in cleaning.
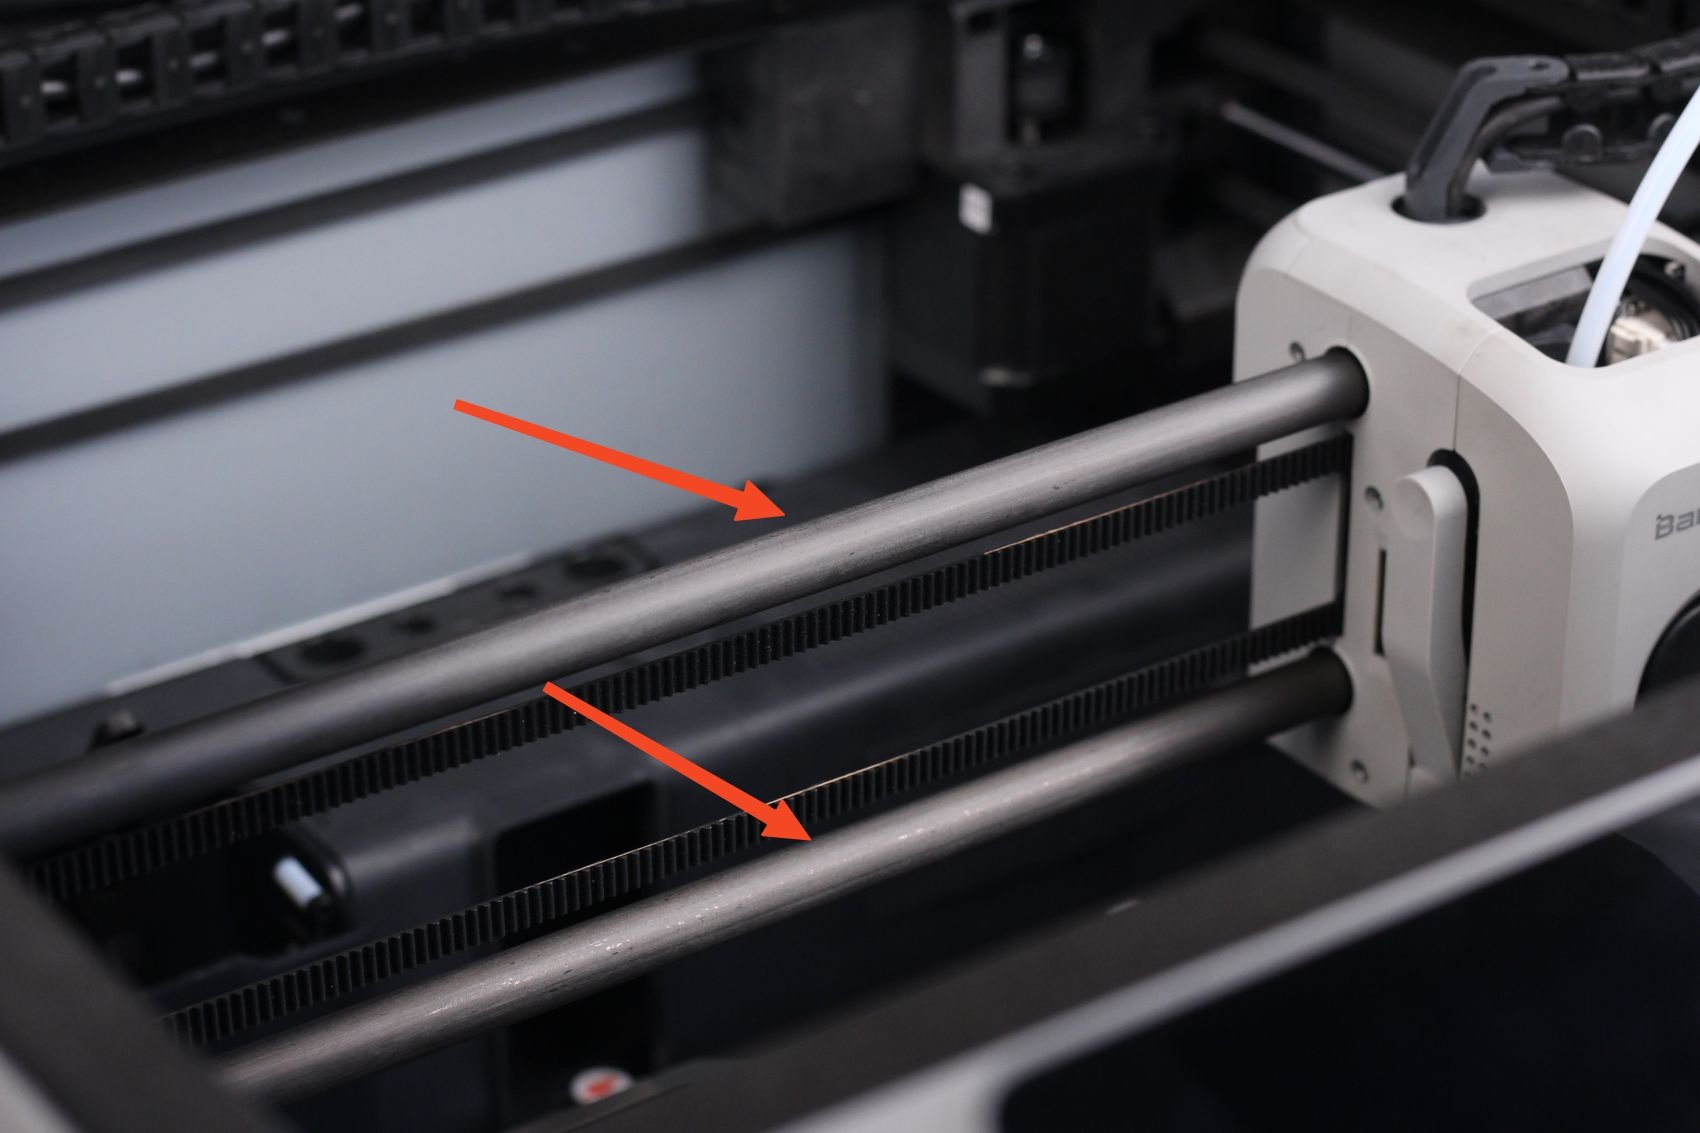
¶ When to do it?
The x-axis carbon rods should be checked once a month for any dust and particle buildup. If volatile filaments such as ABS or ASA are used, it is recommended to clean the rods every 5 rolls.
¶ How to do it?
The X-axis Carbon Rods can be cleaned with Isopropyl alcohol or alcohol and a dust-free cloth. Spray a bit of isopropyl alcohol on the fabric and gently rub the carbon rods to clean any debris.
The process is described in this guide:
https://www.youtube.com/watch?v=0T43m4FB854
¶ Z-axis Lead Screws
Three Z-axis lead screws require regular greasing. They are used for moving the heated bed on the Z axis, and proper greasing will ensure smooth operation.
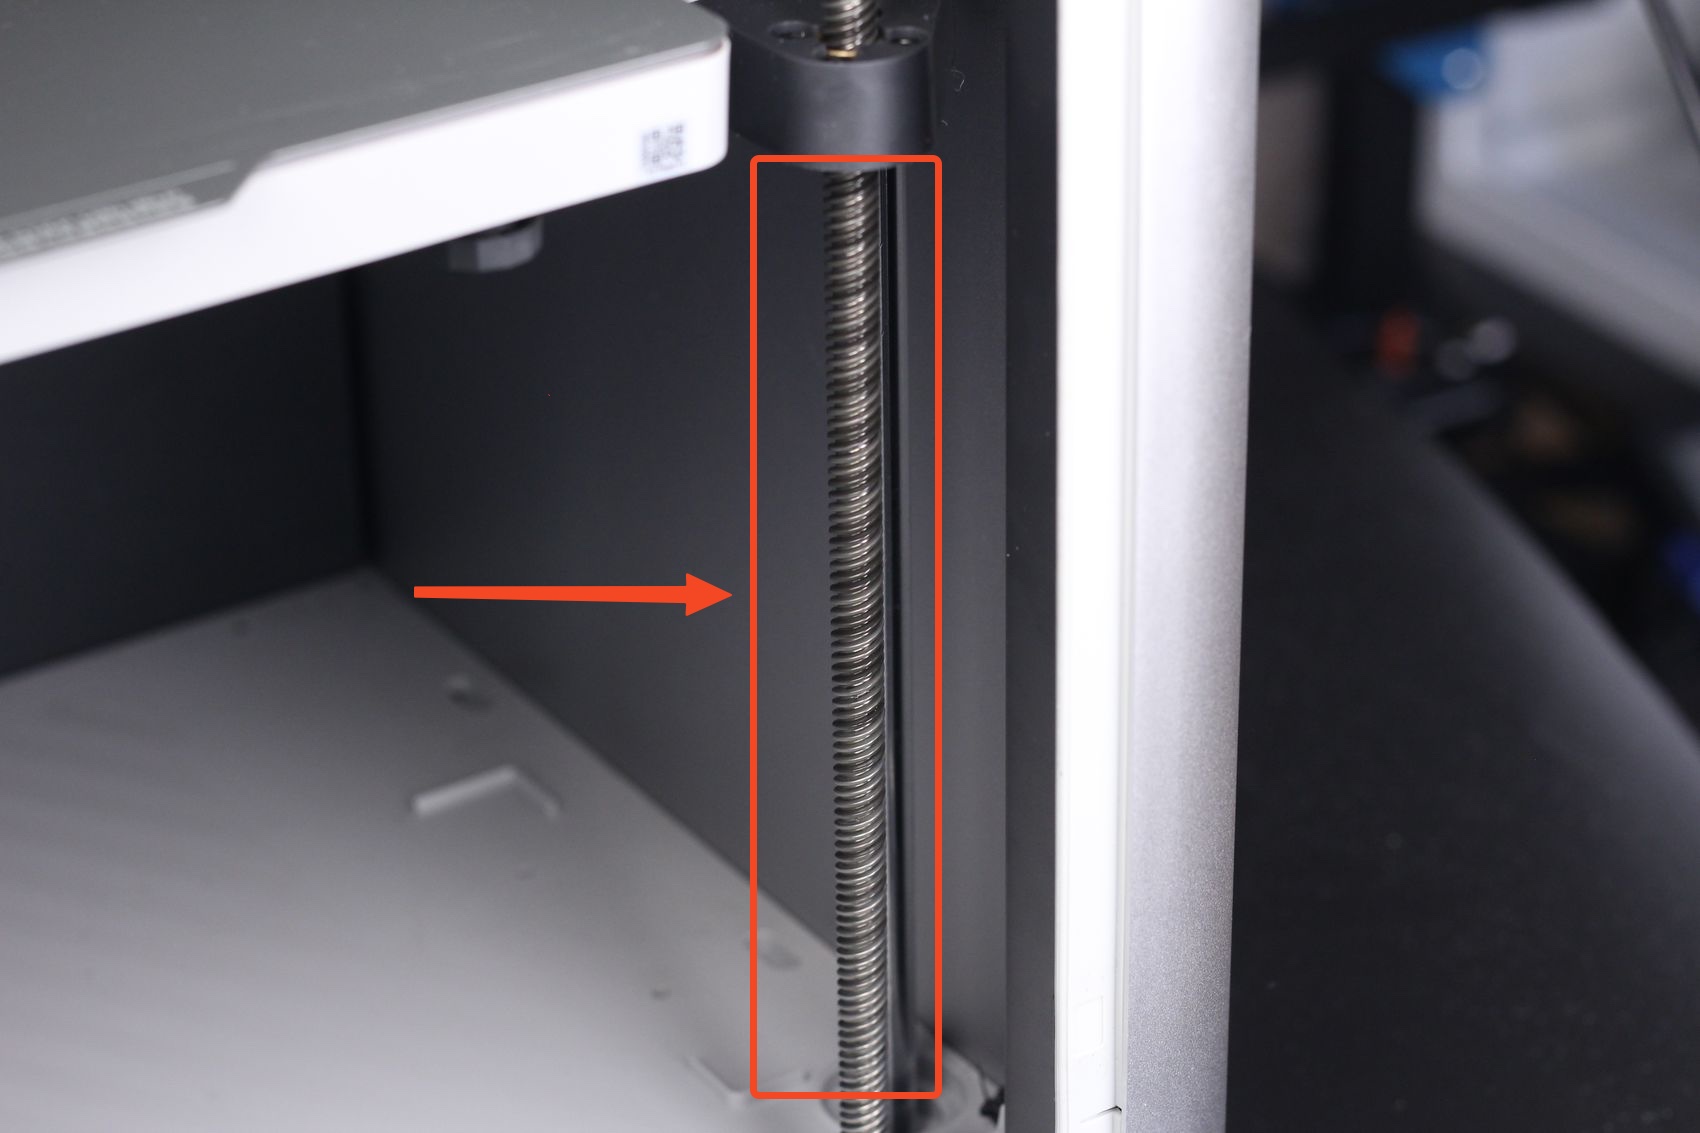
¶ When to do it?
The z-axis lead screws should be checked and greased every three months.
¶ How to do it?
Before greasing the z-axis lead screws, the first step before would be to clean them of any dust or plastic particles.
The next step is to use lubricating grease and apply a thin coat over the lead screws. With the bed home, apply a thin coat of lubricating grease, then move the bed to a lower position.
Apply another thin coat of grease on the z-axis lead screws and home the printer again.
You can repeat the movement process a few times to ensure the grease is evenly spread over the z-axis lead screws. When complete, clean out any excess grease that builds up close to the leadscrew nuts.
Please also refer to the How to lubricate the lead screws.
You can use the BX-300/F series grease in the link, but other lubrication alternatives can be used. A popular lubricant is Super Lube 92003 Silicone Lubricating Grease with PTFE or Lucas Oil 10533 White Lithium Grease which should work similarly.
¶ Y-axis and Z-axis Linear Rods and Bearings
To ensure smooth movement, the X1 uses LMU8 bearings and 8mm linear rods to ensure smooth movement. The bearings are greased from the factory, in order to prevent rust and prolong the service life, regular cleaning, and anti-rust maintenance are recommended for linear rods.
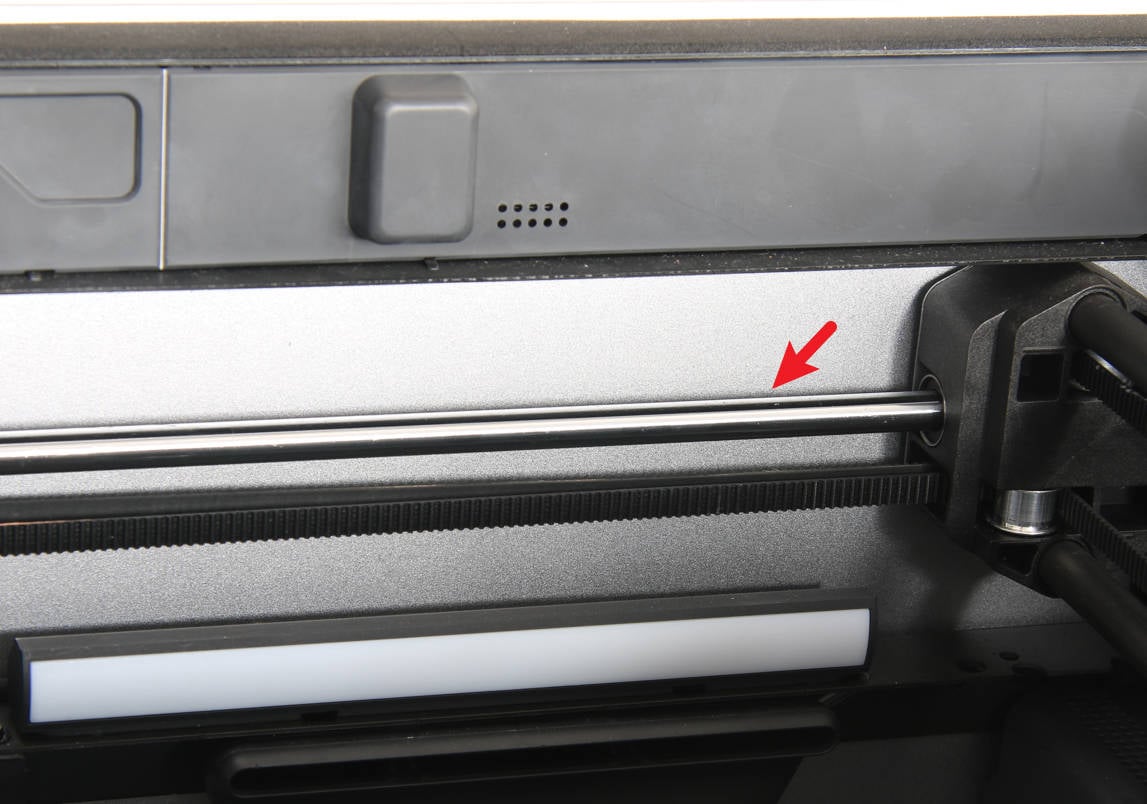
¶ When to do it?
Y-axis and Z-axis linear rods should be checked once a month for any dust and particle buildup. If volatile filaments such as ABS\ASA are used, it is recommended to clean every 5 rolls (5 kg).
Y-axis and Z-axis rods should be anti-rust every three months.
¶ How to do it?
Y-axis and Z-axis linear rods can be cleaned with isopropyl alcohol and a dust-free cloth. Spray a bit of isopropyl alcohol on the cloth and gently rub the rods to clean any debris.
The anti-rust maintenance of the Y-axis and Z-axis linear rods can also be done by spraying some anti-rust oil on a dust-free cloth, and then wiping the rods.
If the bearing has abnormal ball noise due to insufficient internal lubrication, you can also try to apply some grease on the bearing and slide the bearing several times to make the grease soak into the bearing to reduce the abnormal noise. This operation may be difficult to implement, but the abnormal sound will not affect the printing performance in theory, so it can be ignored.
You can refer to using Super Lube 52004 Synthetic Lightweight Oil for better performance.
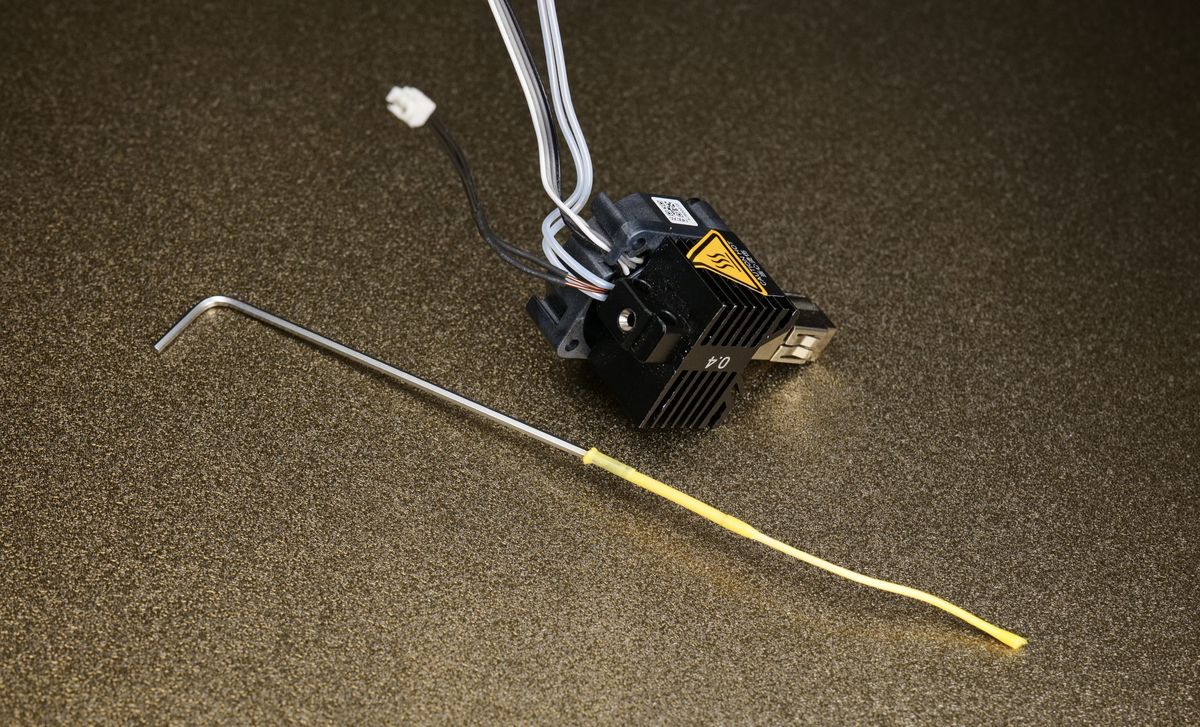
¶ Extruder Assembly
The X1 Extruder assembly can get filament dust and debris inside after using the printer for a long time. Some filaments generate more dust than others, so your mileage might vary.
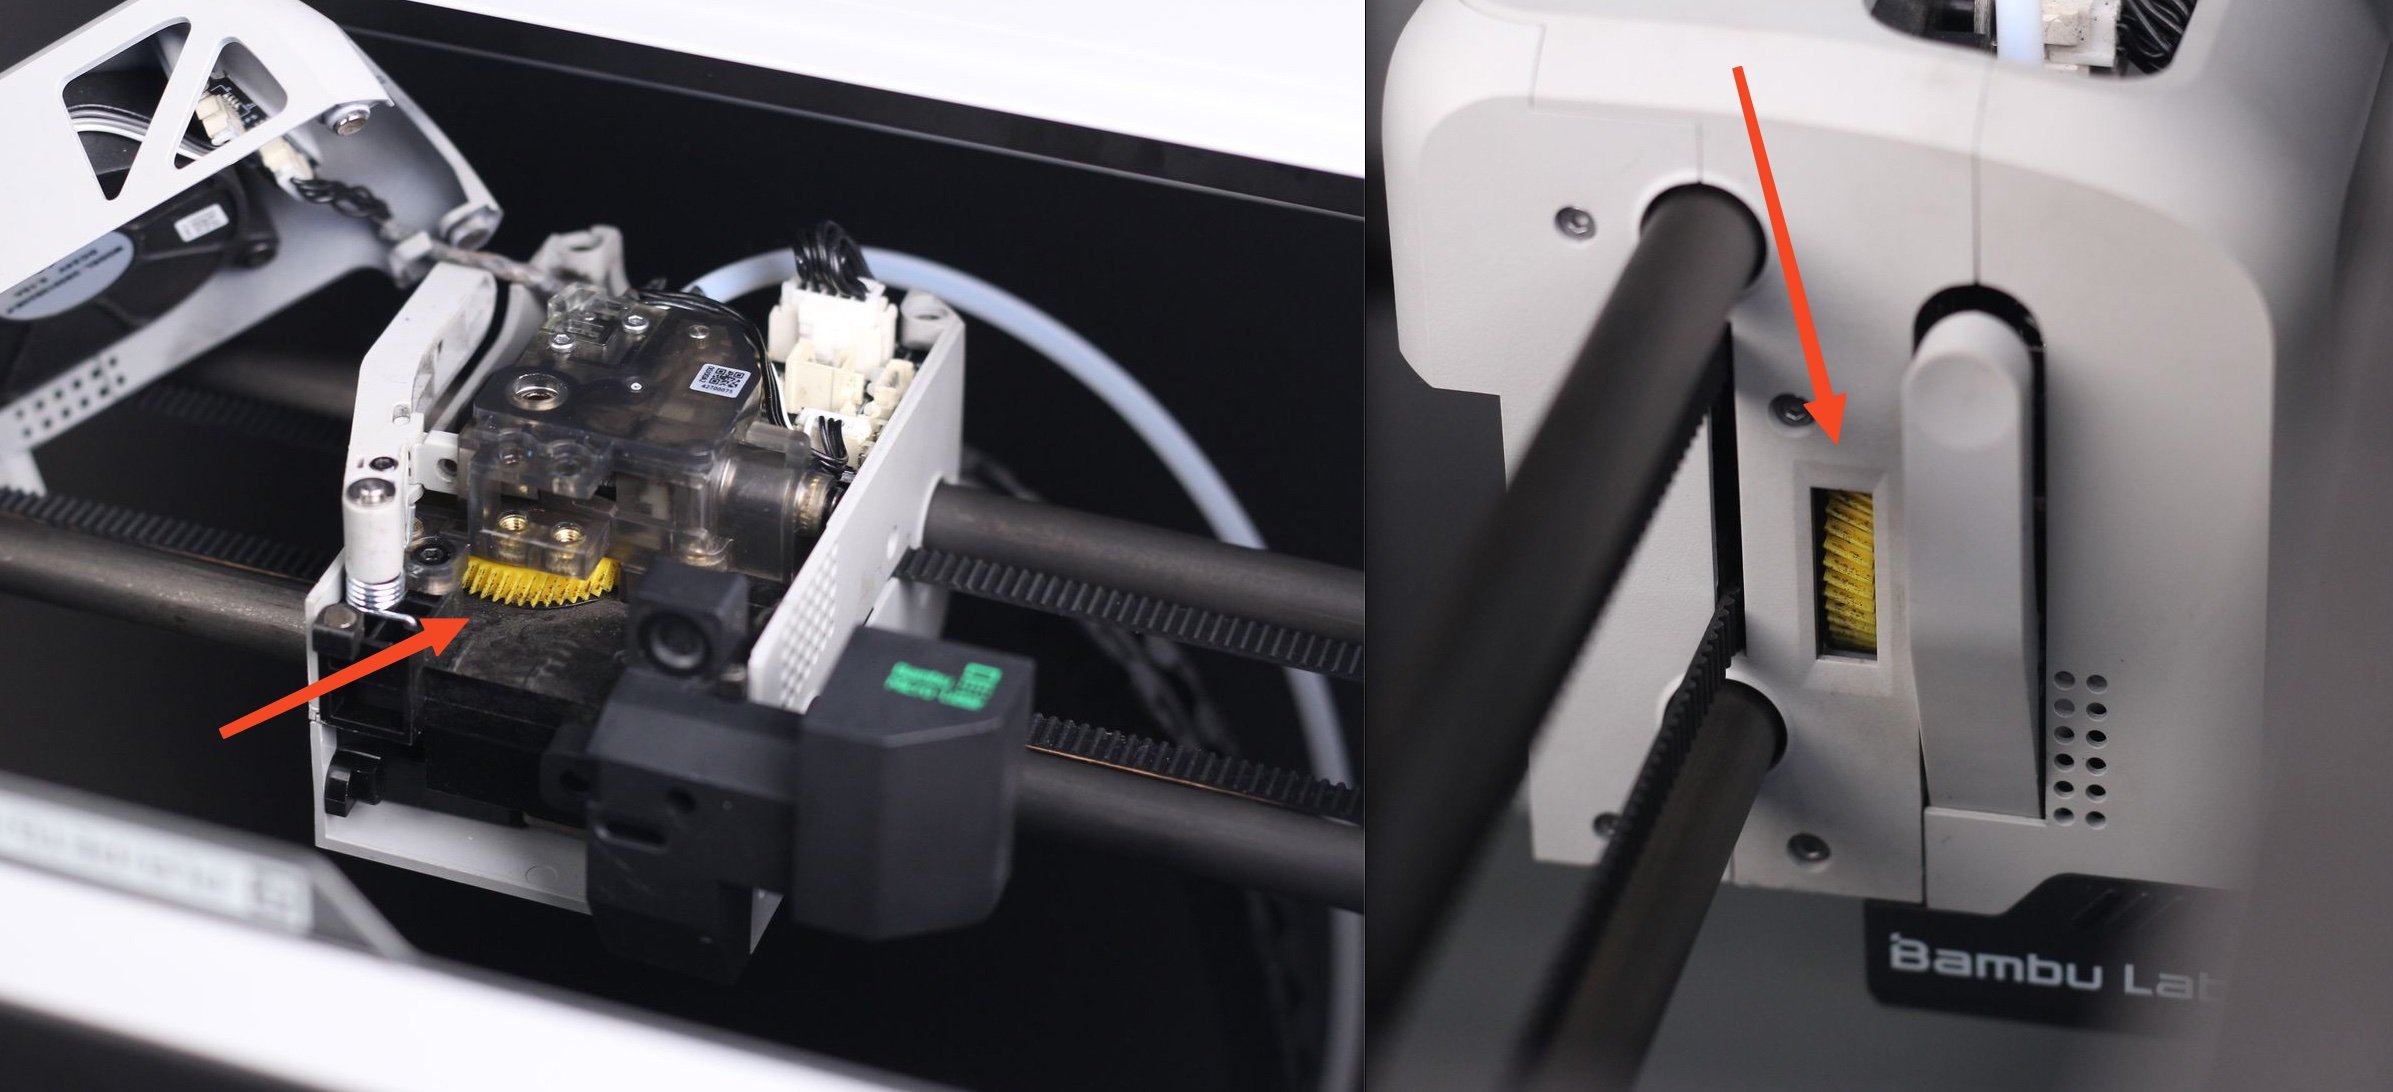
¶ When to do it?
You should clean the dust inside the extruder when you can see small amounts of dust on the yellow gear. We recommend checking and cleaning the extruder gear assembly once a week. If any wear is observed on the extruder gear, it should be replaced.
¶ How to do it?
The fastest way to clean it and ensure the extruder is free from debris or filament dust is to use a can of compressed air and blow air over the yellow gear.
You can also remove the hotend and blow some compressed air underneath the extruder. This should clean most of the filament dust inside.
We also recommend checking the Extruder Maintenance Guide: Cleaning and Lubrication Wiki article for detailed information on how to clean the extruder.
¶ Hotend Cleaning
It is very important to clean the hotend regularly, and ensure the inside of the hotend is clean.
Besides that, it is important to confirm that the hotend is straight, and does not have any bends in it caused by a print failure.
¶ When to do it?
The hotend should be cleaned from time to time, especially when transitioning from one type of filament to another.
¶ How to do it?
Follow the Nozzle/Hotend Unclogging Procedure for X1 wiki article to peform a complete nozzle cleaning, including a few cold pulls to bring the hotend to its original performance.
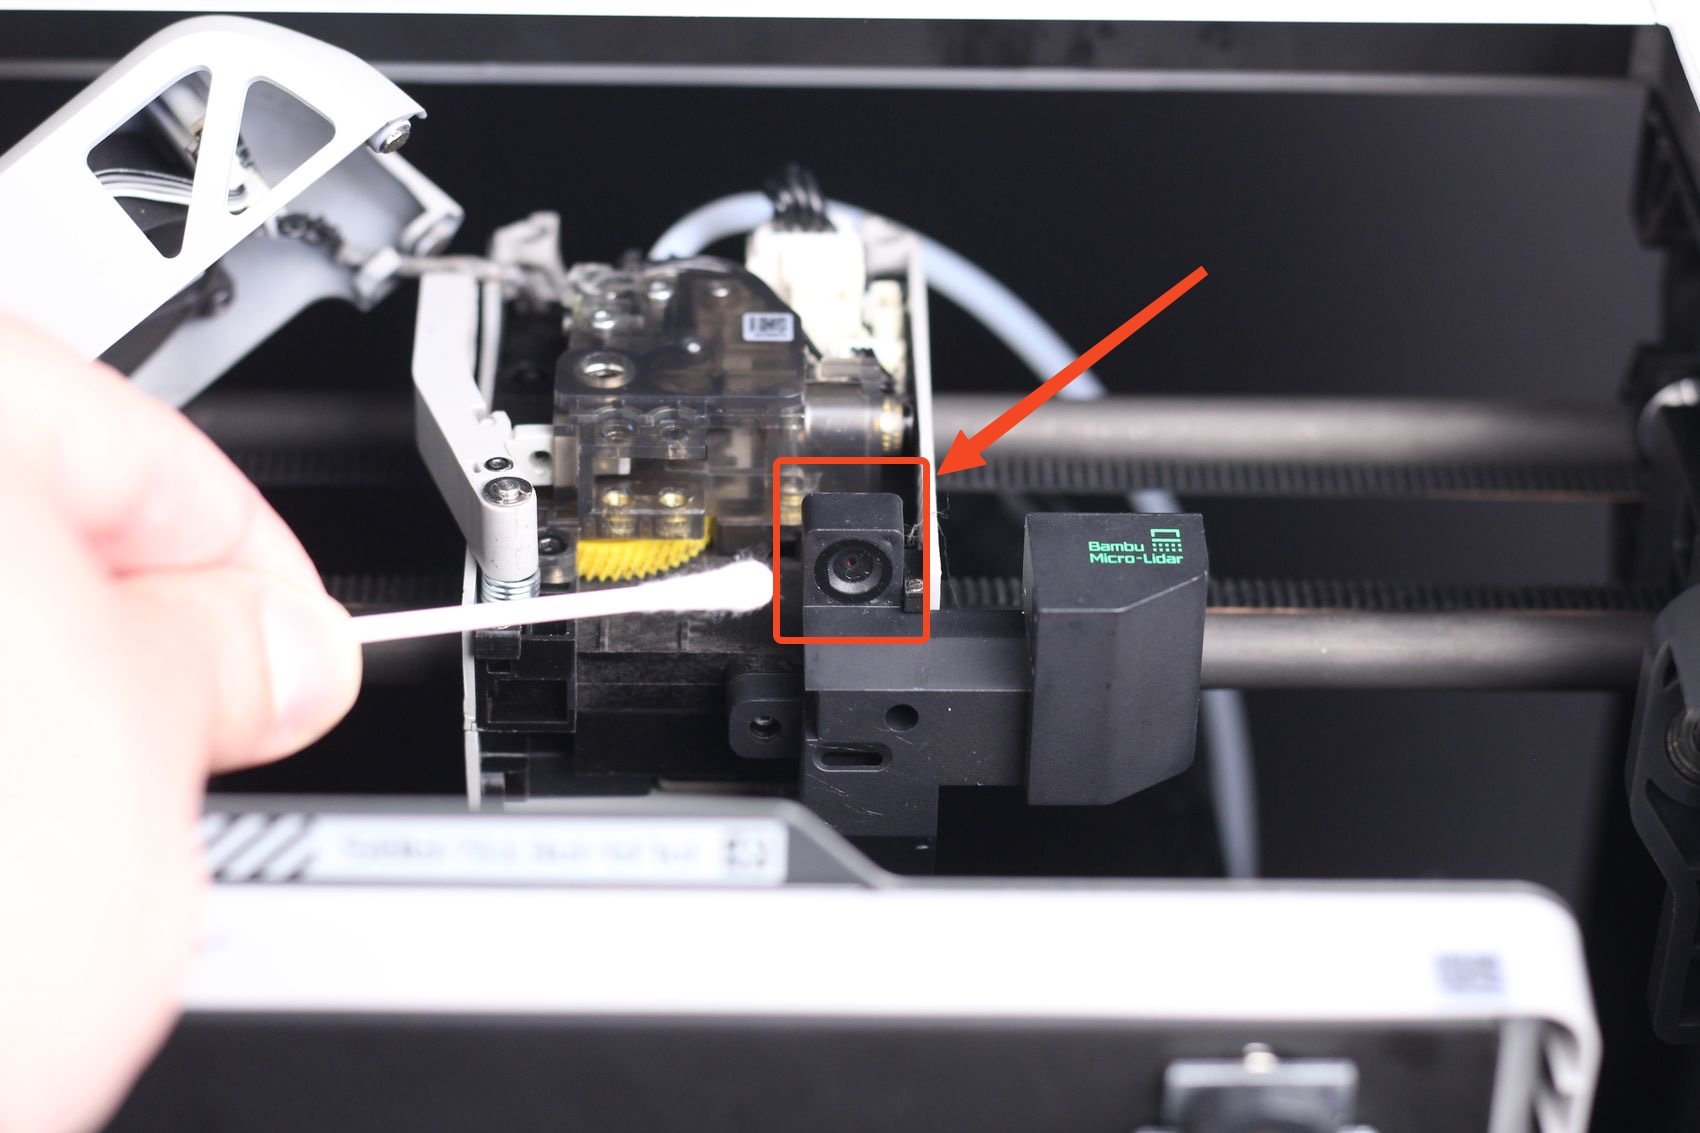
¶ Bambu Micro Lidar
The Micro Lidar uses a small camera and a laser to calibrate. The camera and laser need to be kept clean for smooth operation.
¶ When to do it?
The Micro Lidar must be cleaned when an error message pops up or the light is abnormal. If regularly printing with ABS, the camera must be cleaned every 3-5 days, as ABS particles can build up on the camera lens.
¶ How to do it?
Using a microfiber cloth and some isopropyl alcohol, gently rub the camera of the Micro Lidar. A q-tip can also be used as it allows the user to reach the camera easier.
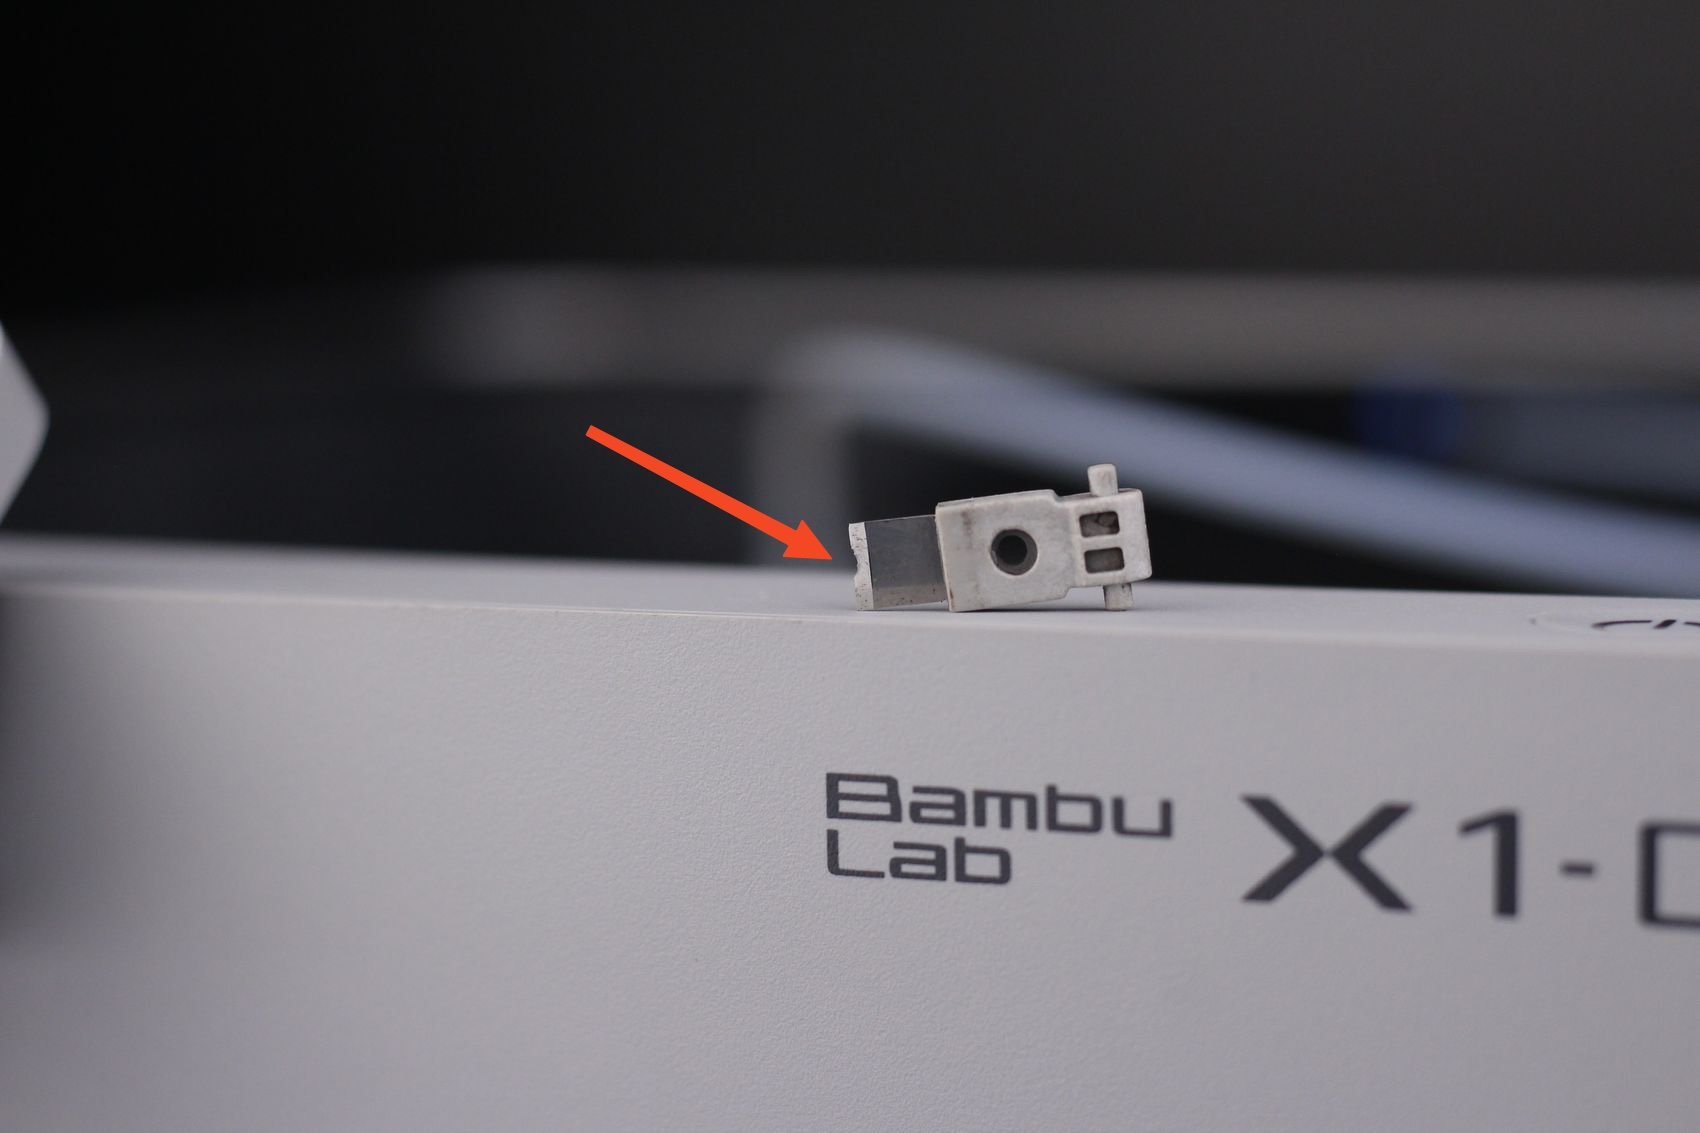
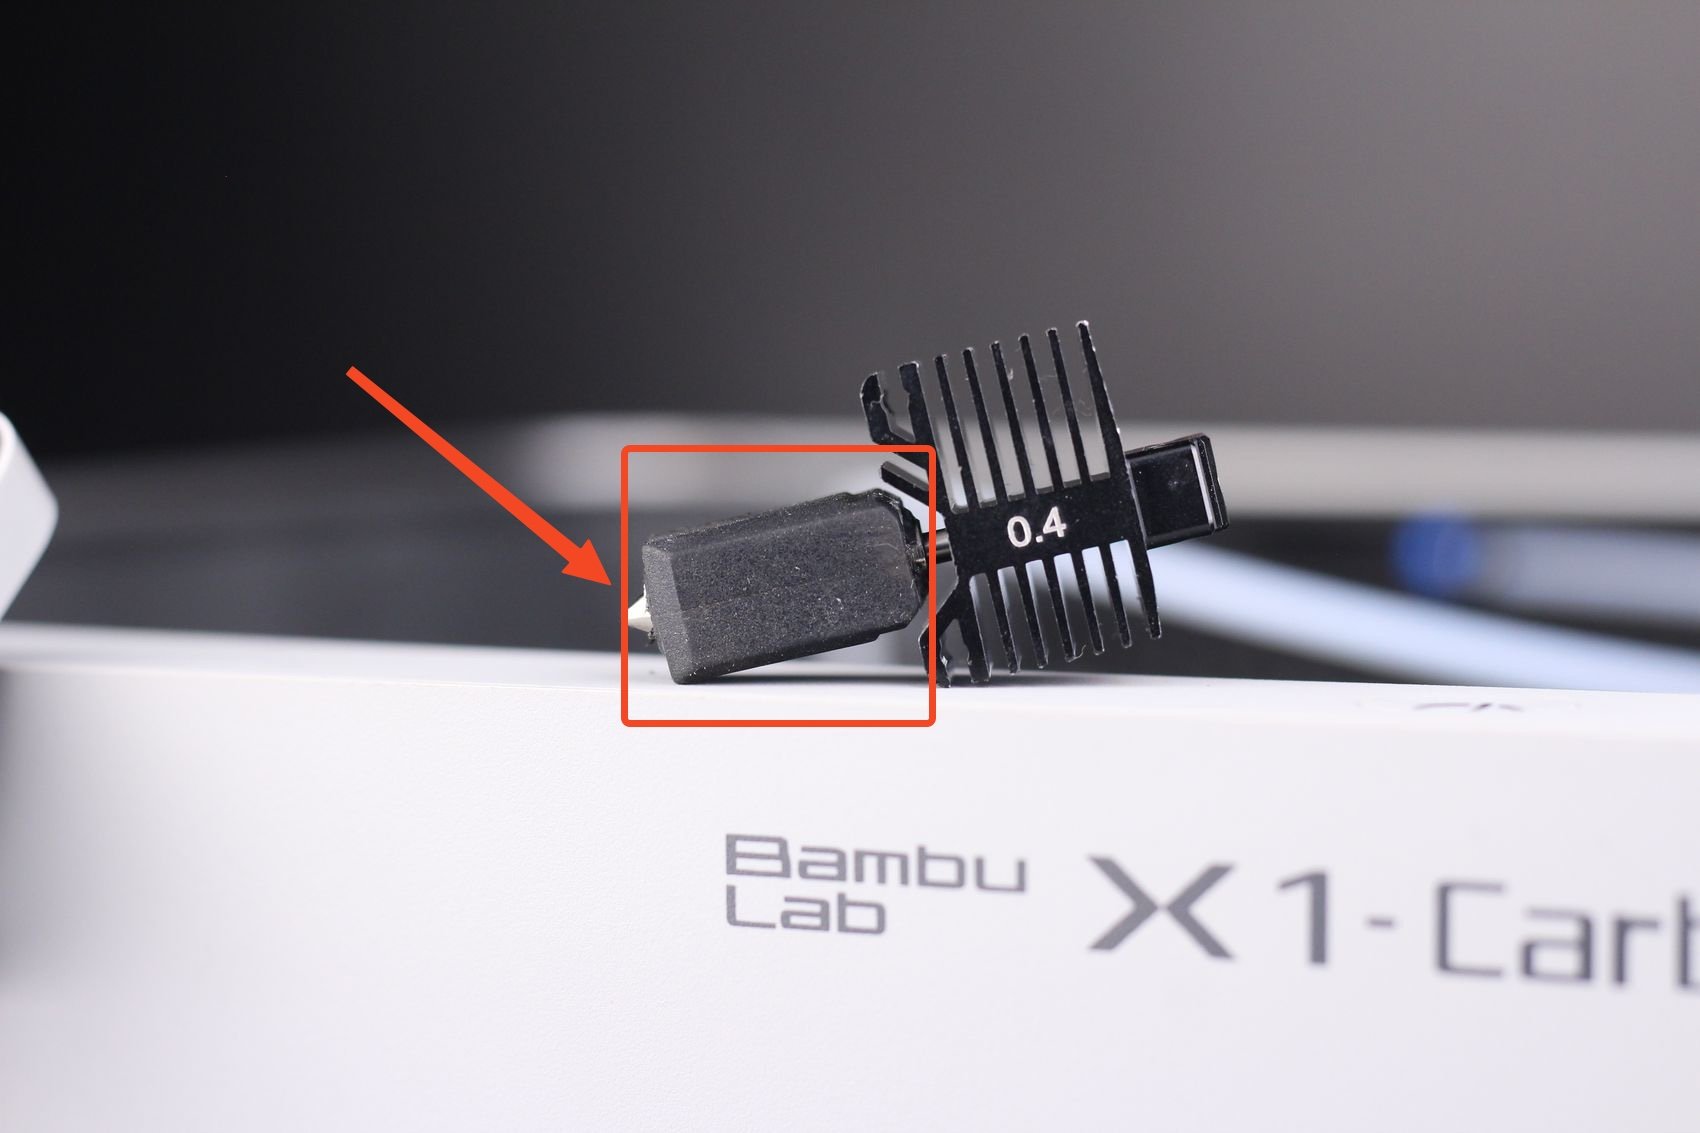
¶ Filament Cutter
The filament cutter used in the X1 extruder cuts the filament regularly, during filament swaps. The blade of the cutter can get dull after a few rolls of filament are printed so it should be checked regularly to ensure that the blade is still sharp.
¶ When to do it?
For regular filaments like PLA/PETG/ABS/PC, the blade should be checked every 3-5 rolls. If the blade is dull, replace it.
For abrasive filaments like PA+CF/PA+GF, the cutter can get dull much quicker, so we recommend checking it after printing 1-2 rolls of abrasive materials. If the blade is dull, replace it.
Update: We have found that after about 5.000-7.000 filament cuts, the filament blade can get dull but the blade might not get deformed as shown in the image above.
If you encounter issues with the AMS filament retractions, we recommend replacing the blade for the best results. If the blade is sharp, the filament will be cut cleanly and should not cause problems during operation.
¶ How to do it?
The process of replacing the filament cutter is described in this Wiki article.
¶ Hotend Silicone Sock
The silicone sock around the hotend helps maintain a consistent temperature while also protecting the hotend from plastic buildup during printing.
¶ When to do it?
The silicone sock should be replaced if wear signs are present on it, or if the silicone sock doesn't remain attached securely to the hotend.
¶ How to do it?
Simply remove the old silicone sock from the hotend, and install a new one.
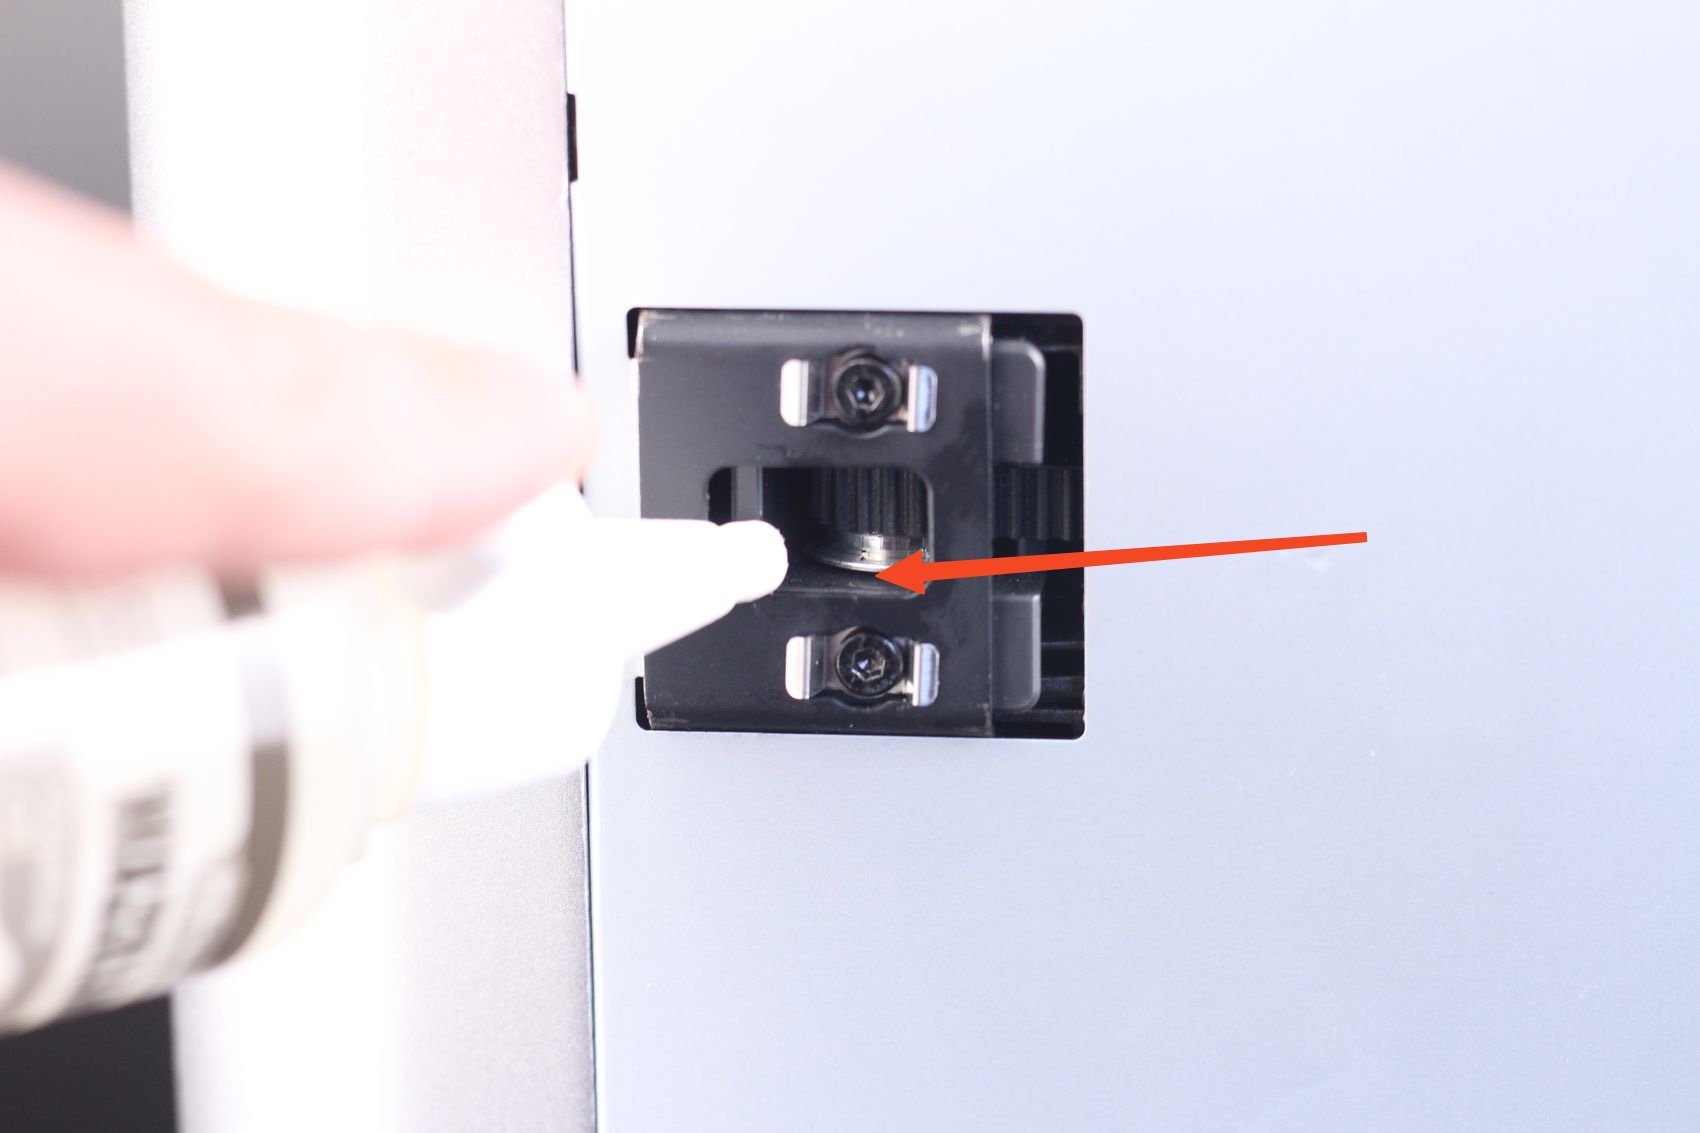
¶ Idler pulley
There are multiple idler pulleys installed on the printer. These idlers have sealed bearings inside which don't require greasing, but we still recommend adding a bit of lubricating oil between the idler flange and the plastic holder to avoid any squeaking noises.
¶ When to do it?
When squeaking noises are present during printing, or during the XY axis movement.
¶ How to do it?
A small amount of lubricating oil should be applied on top and on the bottom of the idler, in the location between the idler flange and the plastic holder, if needed. Avoid adding lubrication oil to the idlers if no squeaking noises are present, to avoid any dust buildup.
You can refer to using Super Lube 52004 Synthetic Lightweight Oil for better performance.
¶ Chamber Camera
The chamber camera lens should be cleaned regularly, to ensure a clear view.

¶ When to do it?
We recommend cleaning the camera lens when the video is blurred or visibly dirty. If printing ABS, we recommend cleaning it every week.
¶ How to do it?
Using a microfiber cloth and some isopropyl alcohol, gently rub the chamber camera. A q-tip can also be used as it allows the user to reach the camera easier.
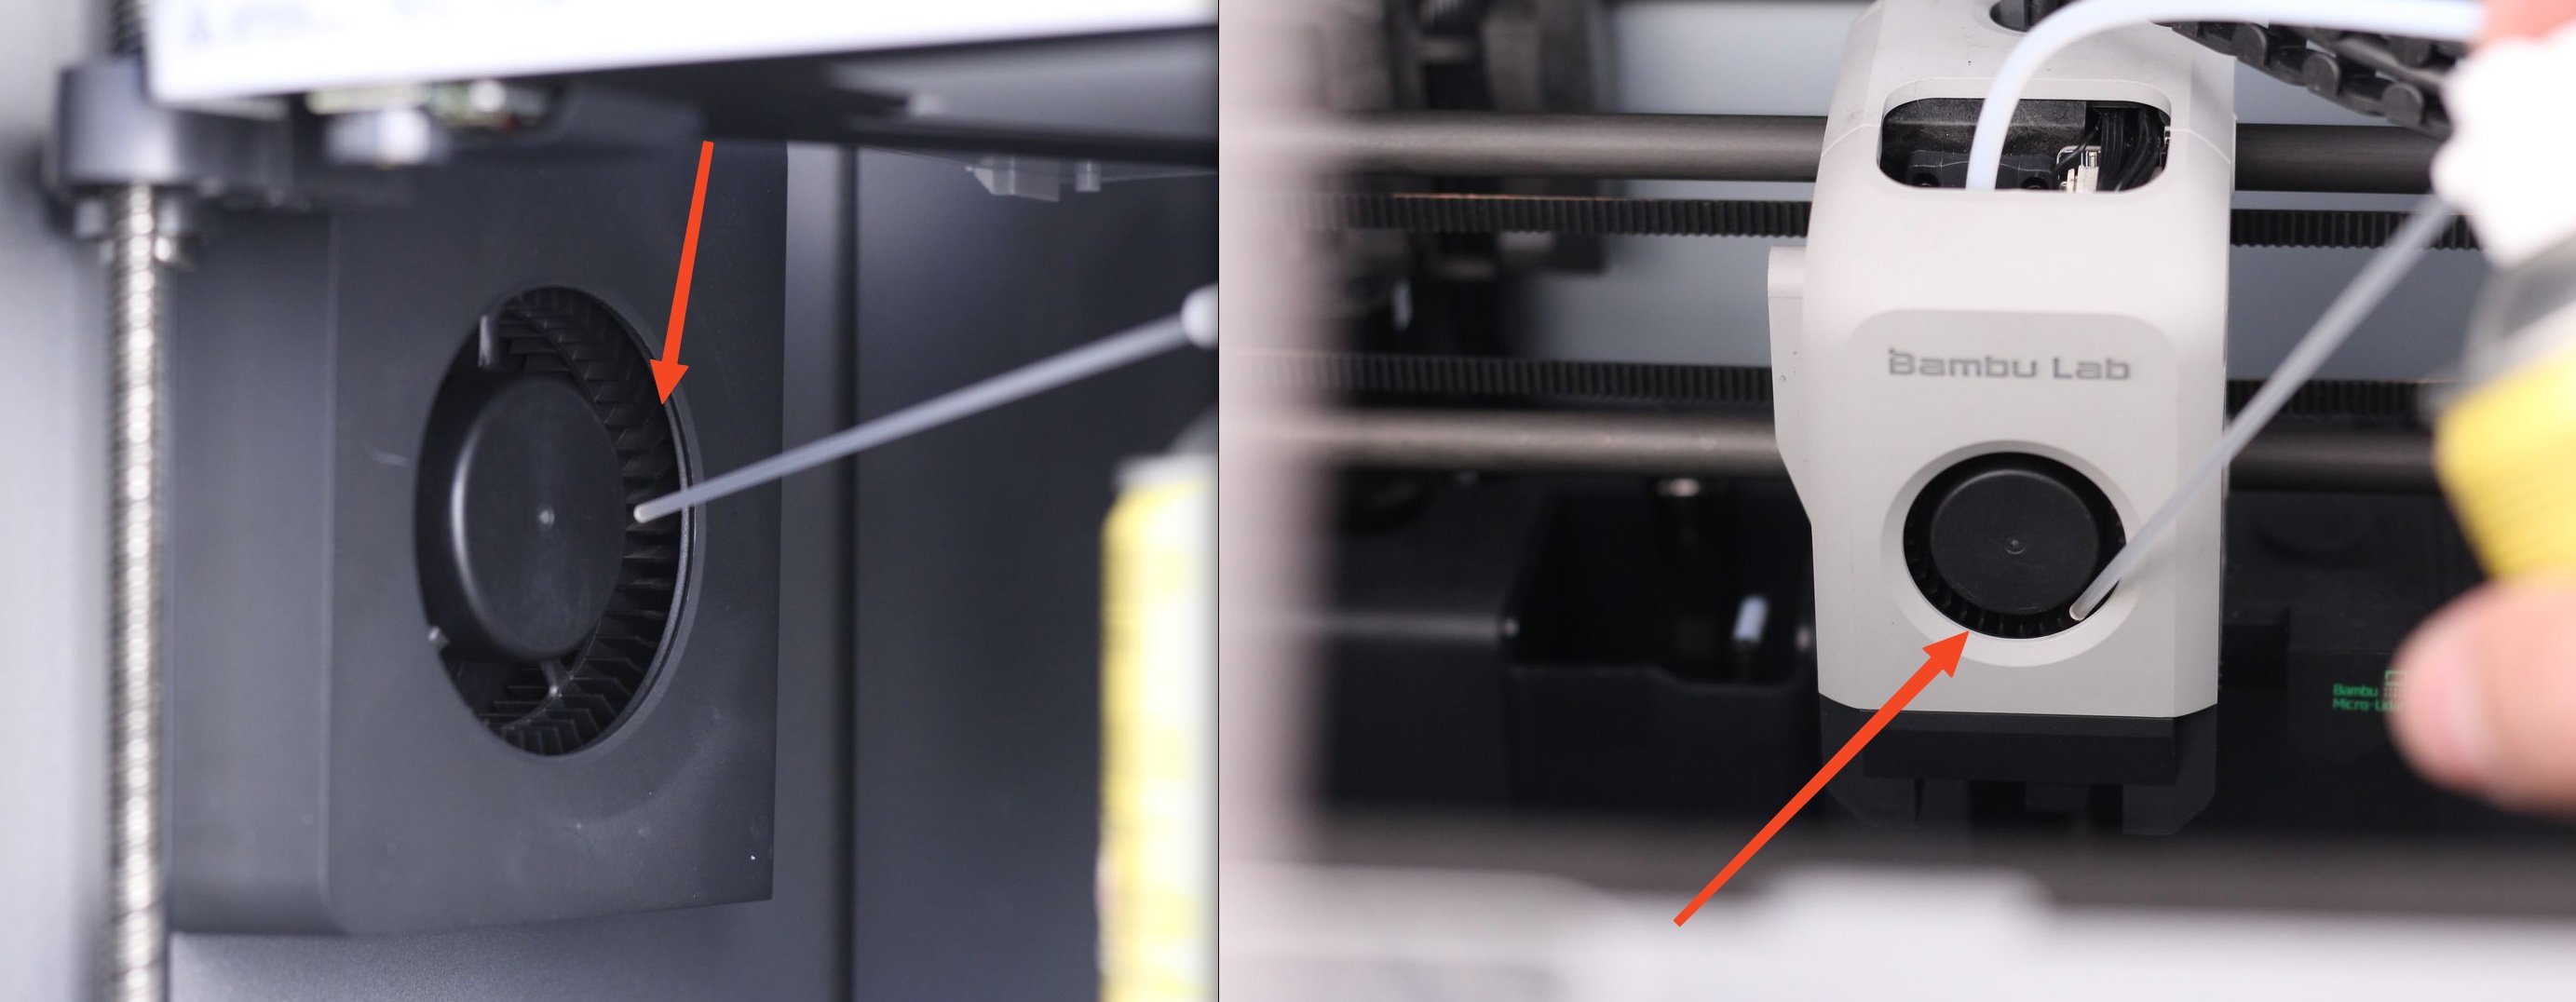
¶ Part cooling fans
There are three fans that should be regularly checked for any dust and debris build-up. The hotend fan, front cover fan and the auxiliary fan. They should be regularly checked for debris or dust buildup to ensure a smooth operation and long life.
¶ When to do it?
We recommend checking the fans every week to clean any debris or dust that might have built up around the blades.
¶ How to do it?
With the printer off, we recommend using a can of compressed air. While keeping the fan blades in place, use the compressed air to blow air over the blades and clean any dust or debris.
¶ Nozzle wiper
The nozzle wiper is an important part of the X1 that needs to be checked from time to time, to ensure it is undamaged, and the cleaning process works well.
¶ When to do it?
The nozzle wiper needs to be checked before starting any print, to ensure it is free of any filament debris and the PTFE side is not damaged. The wiper should also stay in a horizontal position for proper operation
¶ How to do it?
If the nozzle wiper is damaged, we recommend replacing it with a spare according to this Wiki guide.
¶ Nozzle
After prolonged use, the nozzle may accumulate residue or dirt on its surface and inner walls. Regular cleaning and maintenance are necessary to prevent printing issues and prolong nozzle lifespan.
¶ When to do it?
If the nozzle surface is dirty or there is under-extrusion during printing, we recommend nozzle maintenance. Especially when printing carbon fiber materials, regular maintenance is essential to ensure extrusion stability.

¶ How to do it?
-
Remove the extruder front cover, disassemble the hotend silicone sock, heat the nozzle to 200°C.
-
Then, wearing heat-resistant gloves, clean the nozzle surface with tissue, cloth, or tweezers.
-
Refer to the video guide below for cold pulling, clearing residue debris from the hotend and inside the nozzle.
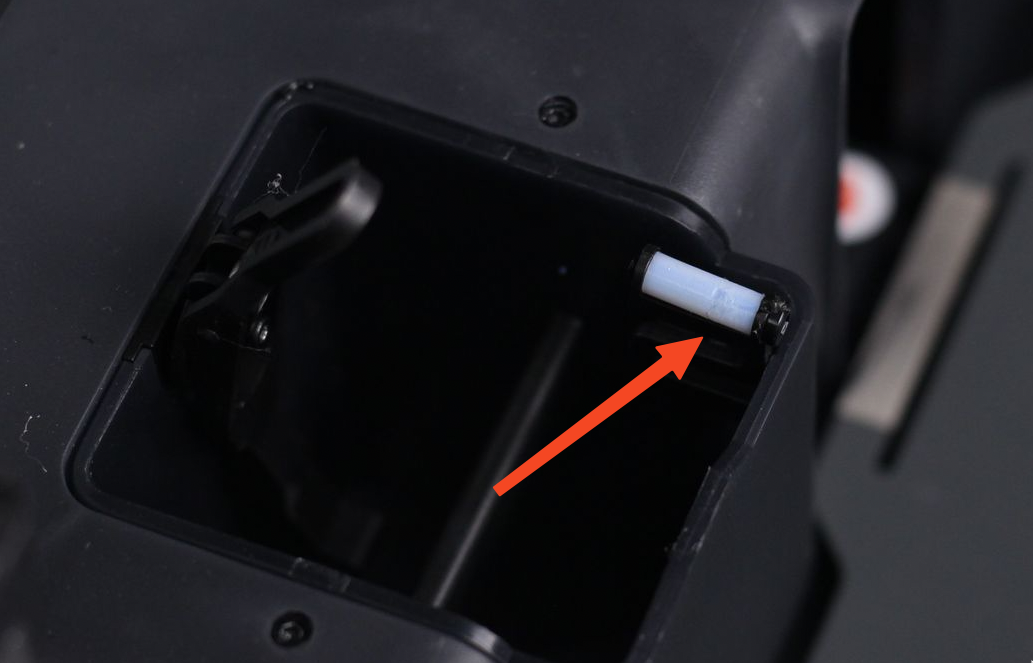
¶ PTFE Tube Coupler
When you encounter the following situations, you can resolve the issue by replacing the PTFE tube coupler:
- The PTFE tube cannot be secured, such as when the PTFE tube cannot be fixed to the extruder.
- The filament cannot pass through the pneumatic fittings, for example, when the filament cannot pass through the buffer (as shown in the image below, typically due to internal damage to the pneumatic fitting).
- The PTFE tube coupler is damaged.
Replacing the pneumatic connector (PTFE Tube Coupler) | Bambu Lab Wiki
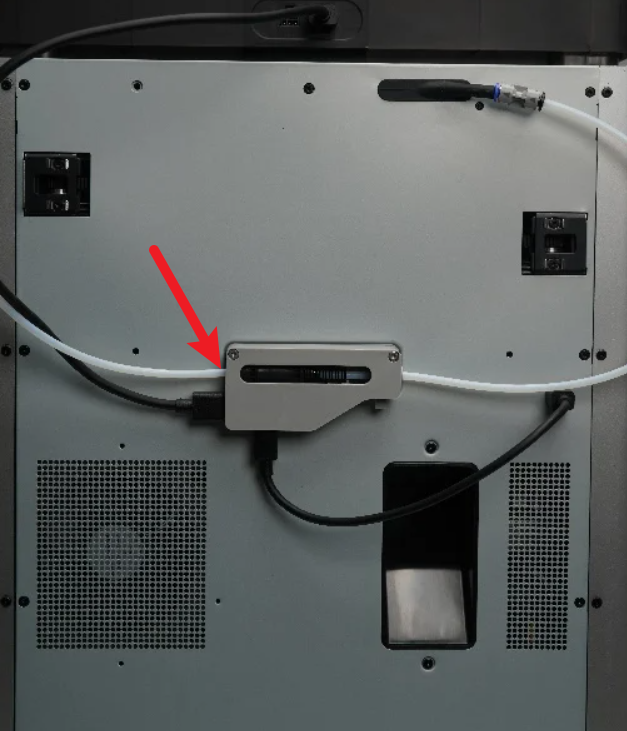
¶ Activated Carbon Air Filter
The Activated Carbon Air Filter is used for filtering some of the particles generated during the printing process and should be replaced regularly.
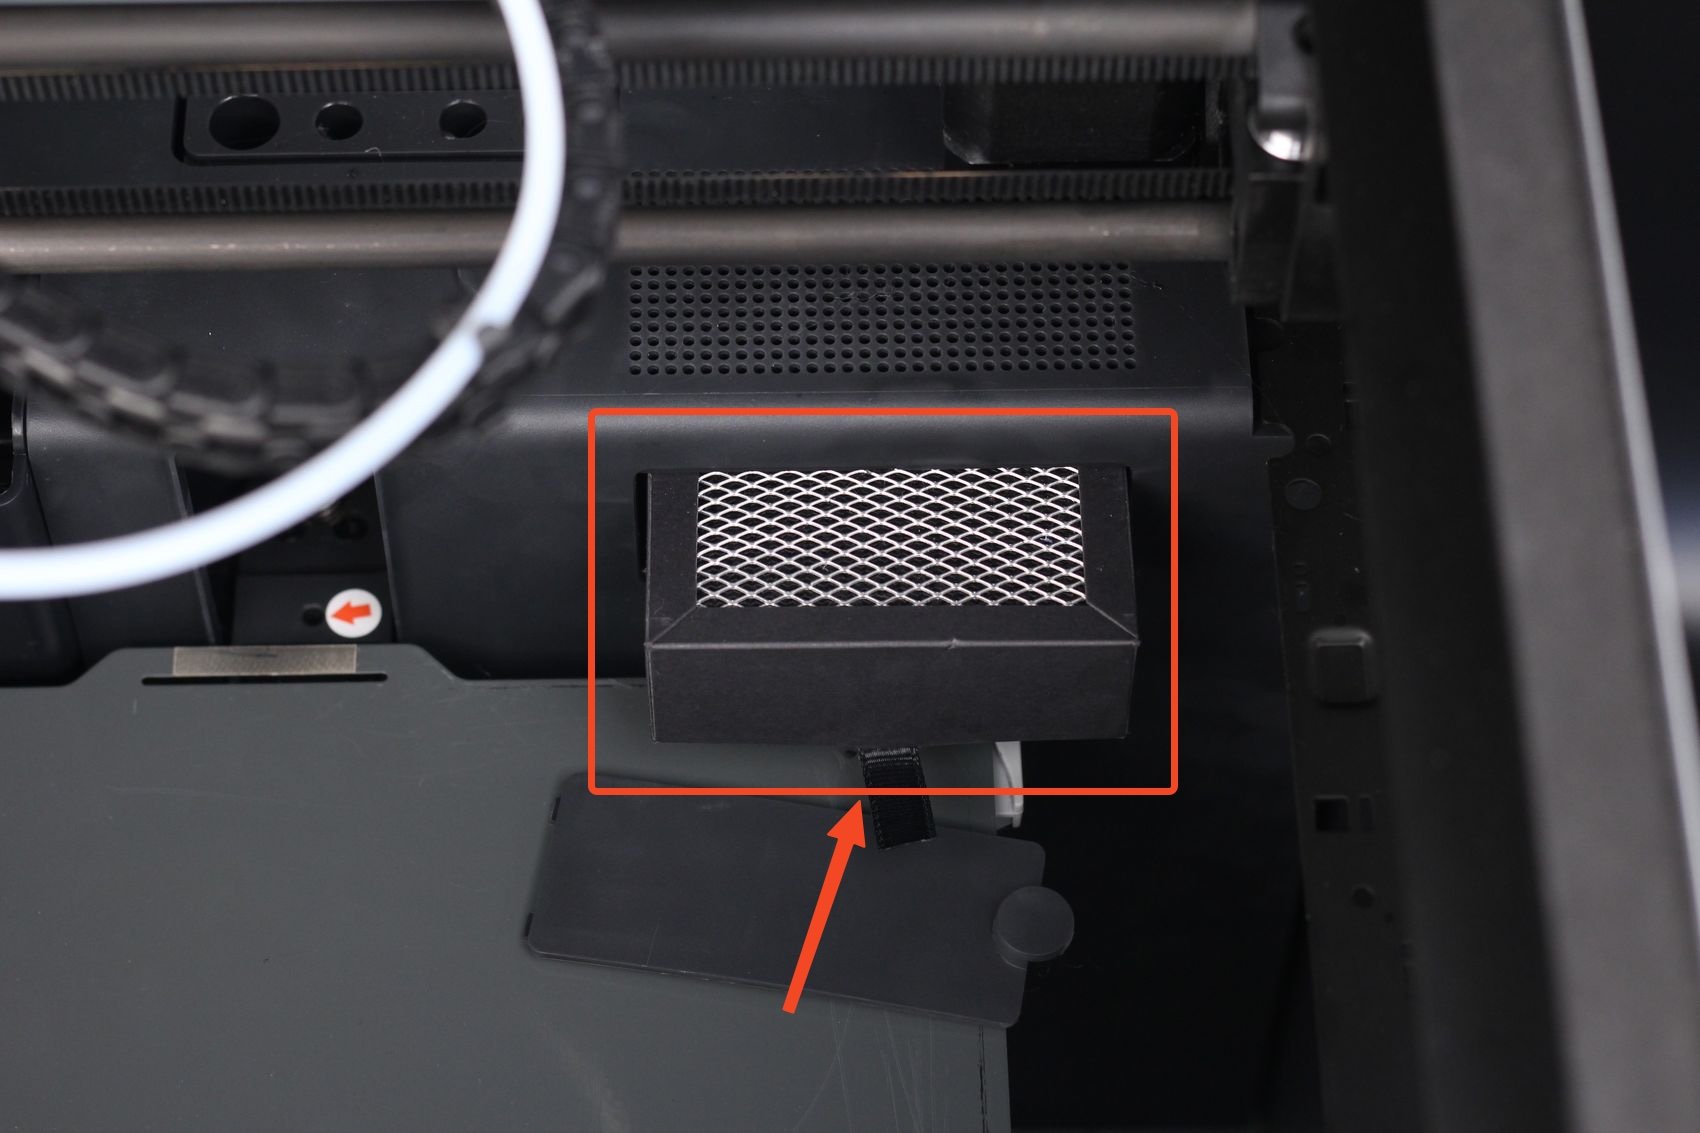
¶ When to do it?
We recommend replacing the activated carbon air filter every three months if the printer is used for about 8 hours a day. If the printer is used as a production machine, we recommend changing the filter every month.
¶ How to do it?
Replacing the activated carbon air filter is easy. Simply take out the old filter and install the new one, as described in this wiki article.
¶ Community Contributions
X and P Series Bambu Lab Recommended Maintenance Video (By 3D_Print_Stuff)
This article describes some of the maintenance methods and tools for the X and P series printers.
¶ End Notes
We hope the detailed guide provided has been helpful and informative.
To ensure a safe and effective execution, if you have any concerns or questions about the process described in this article, we recommend submitting a Technical ticket regarding your issue. Please include a picture or video illustrating the problem, as well as any additional information related to your inquiry.