¶ When do you need to replace it?
You may need to replace the pneumatic connector when you encounter the following situations:
- The PTFE tube can not be secured. For example, the PTFE tube can not be fixed on the extruder.
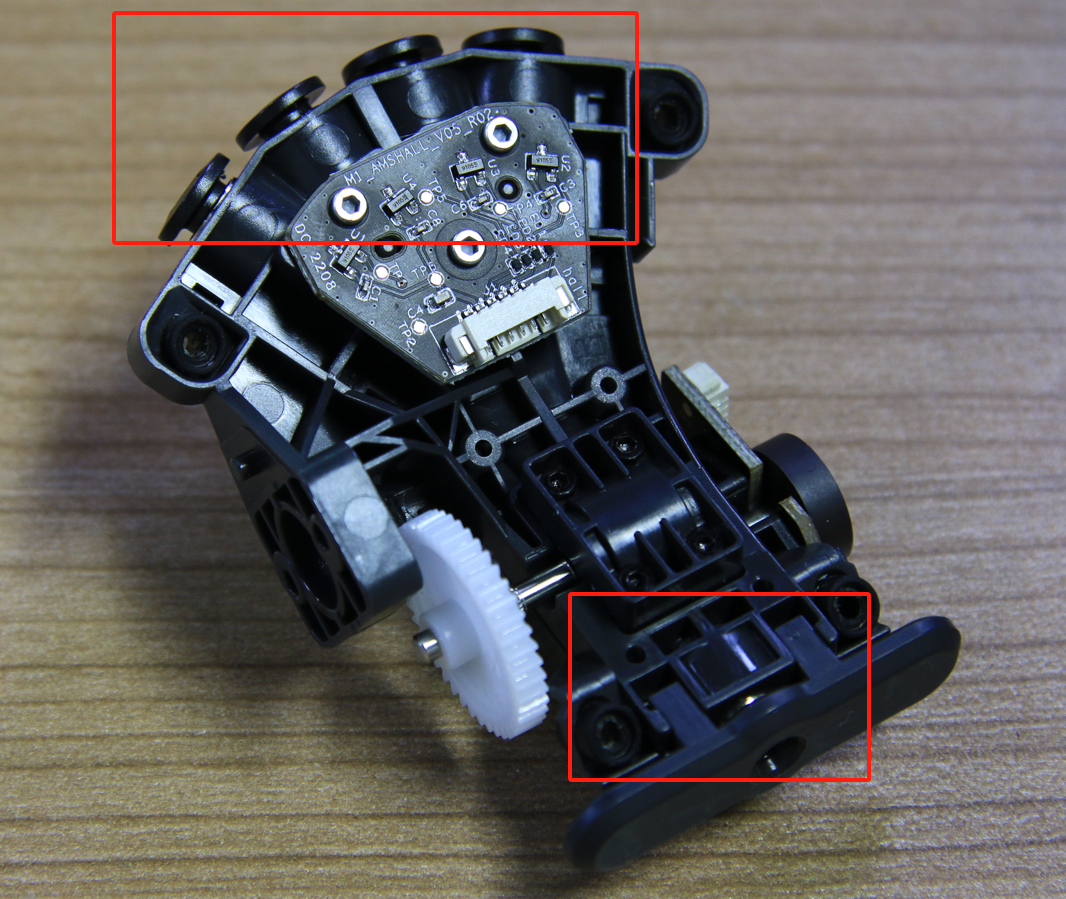
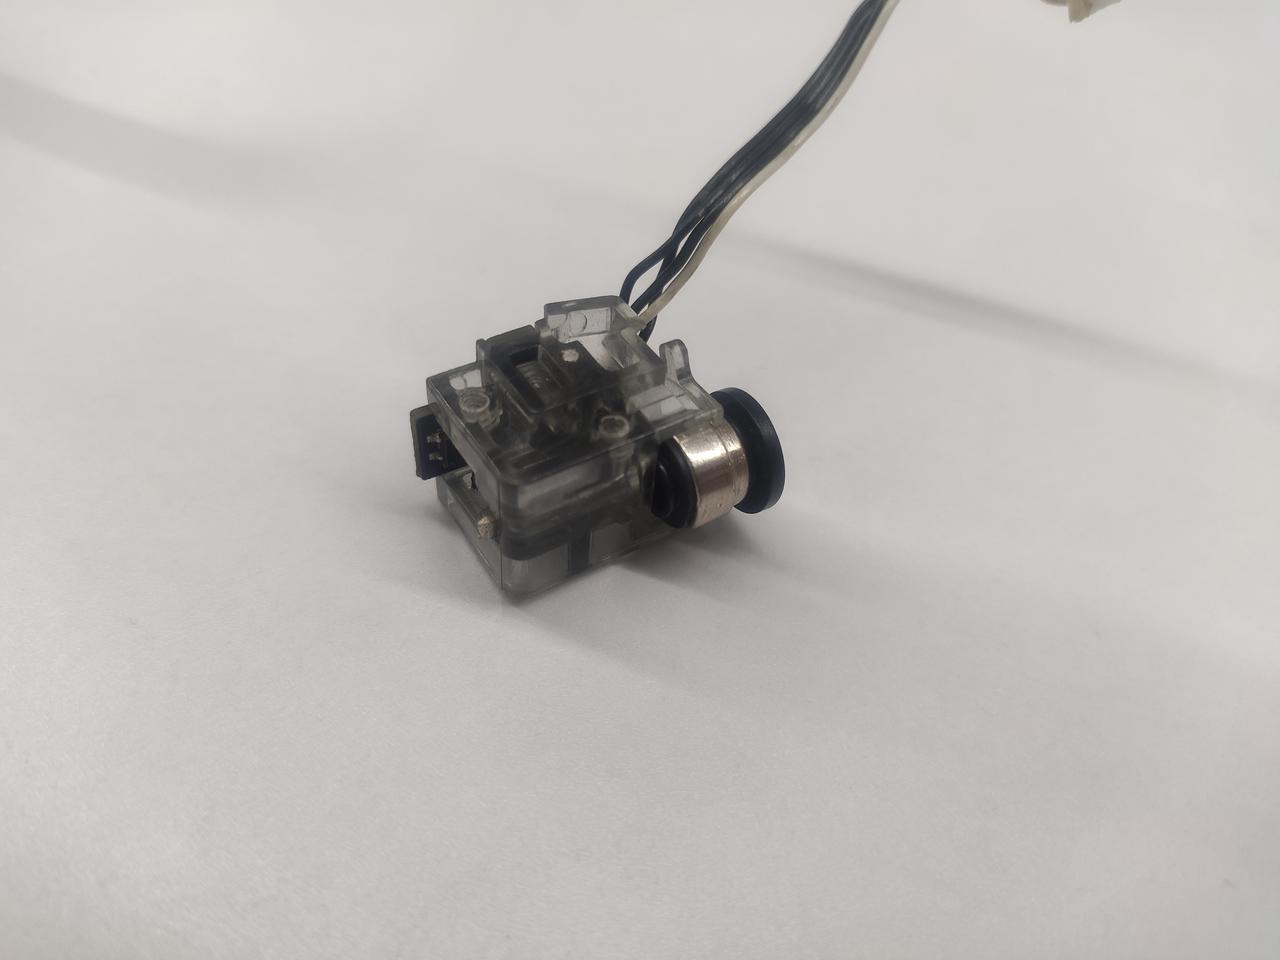
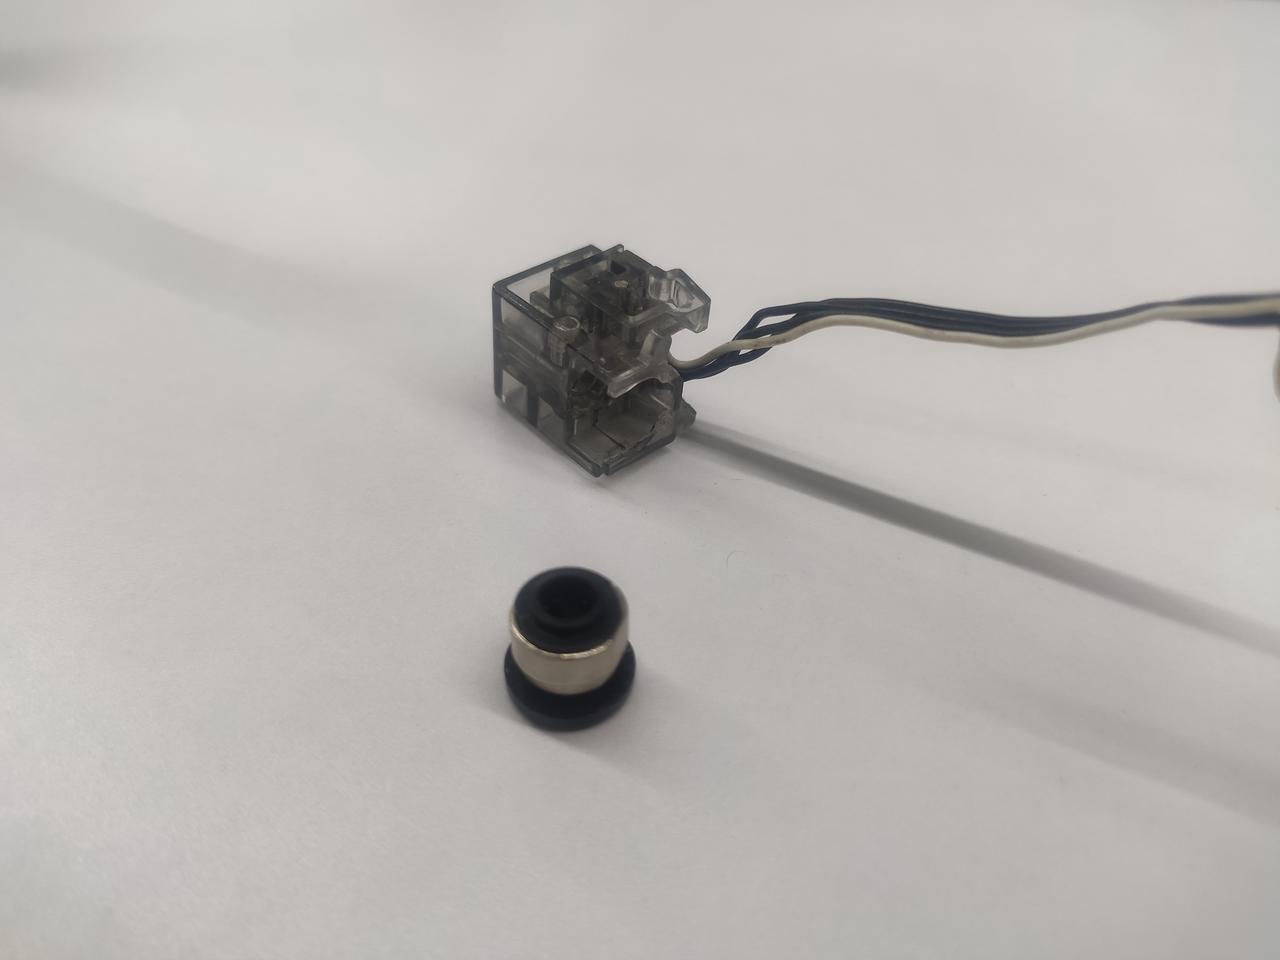
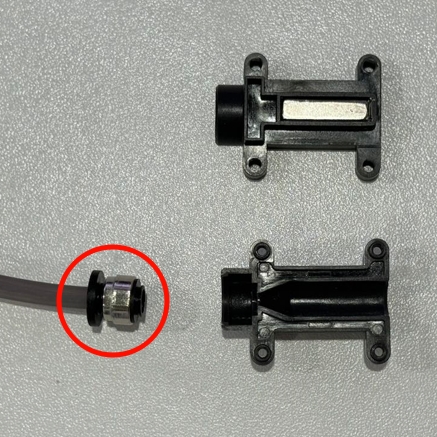
- The filament cannot pass through the pneumatic connector. For example, the filament cannot pass through the buffer (as shown in the picture below, it may be due to internal damage to the pneumatic connector).
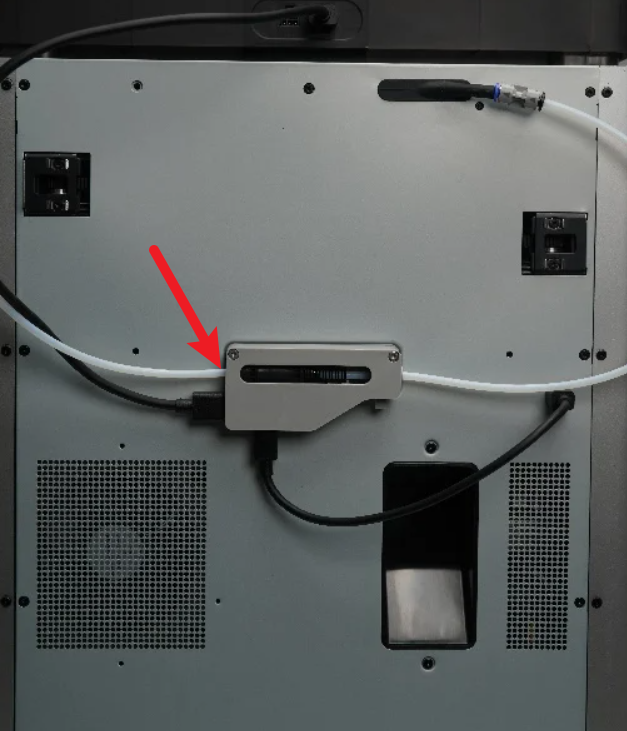
- The pneumatic connector is damaged.
All pneumatic connectors on the printer and AMS are of the same specification. Pneumatic connectors can be found in the following components:
- Hall switch
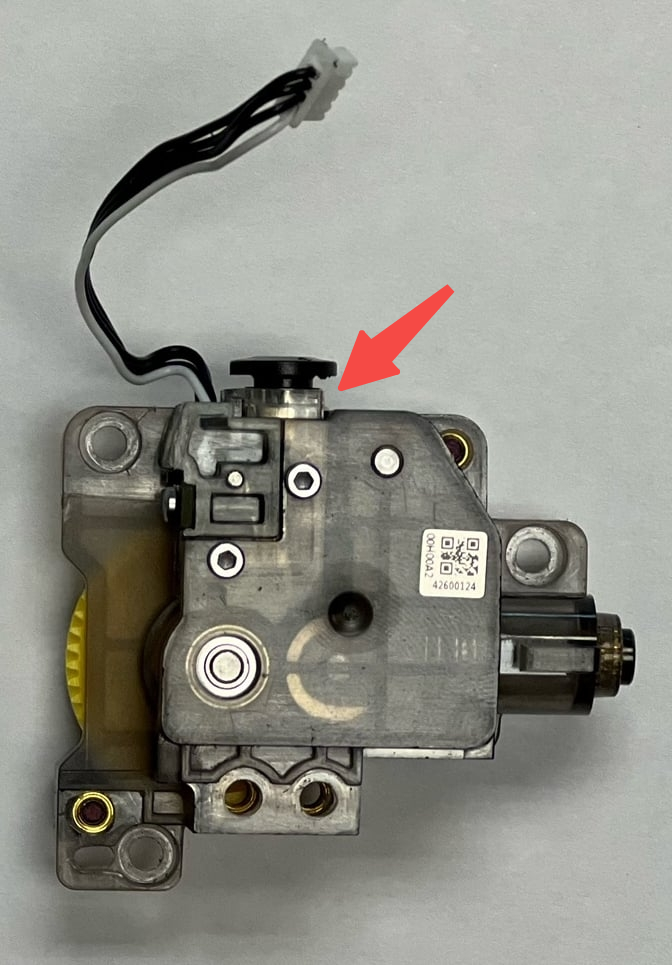
- Buffer
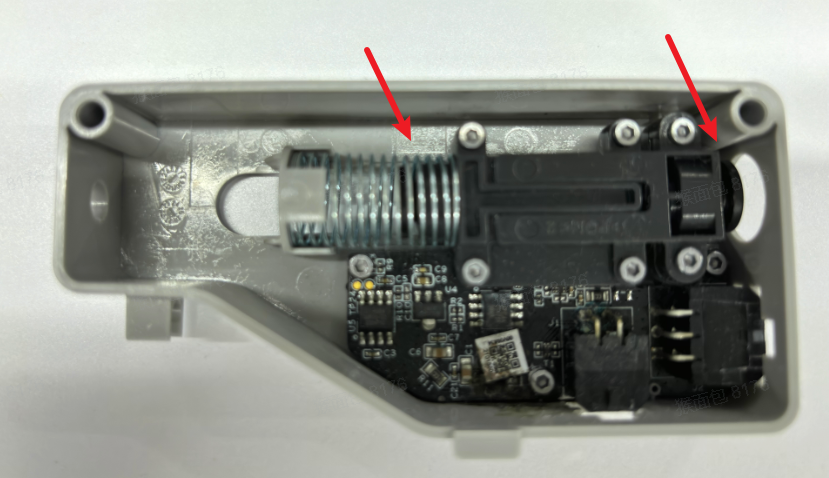
- AMS Hub
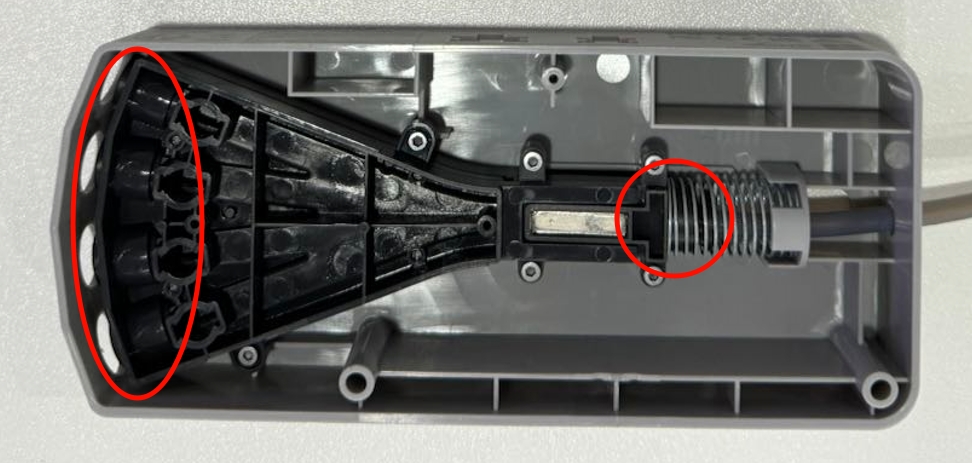
- AMS internal filament hub
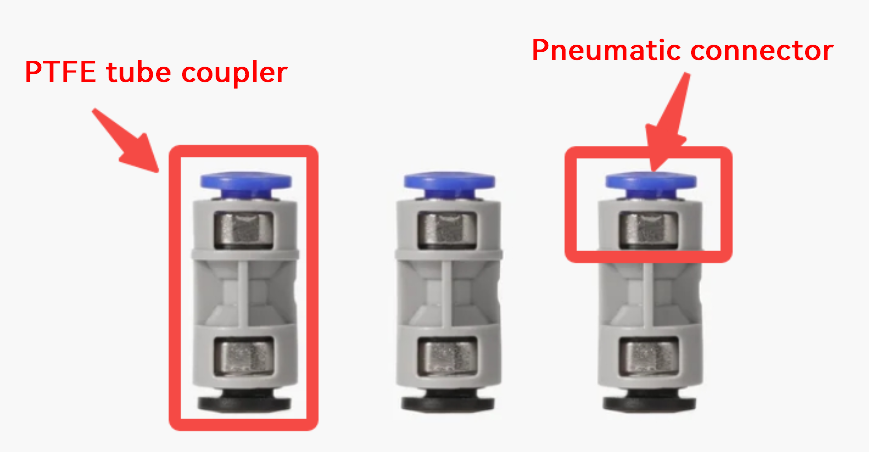
¶ How to remove the pneumatic connector from the PTFE tube coupler
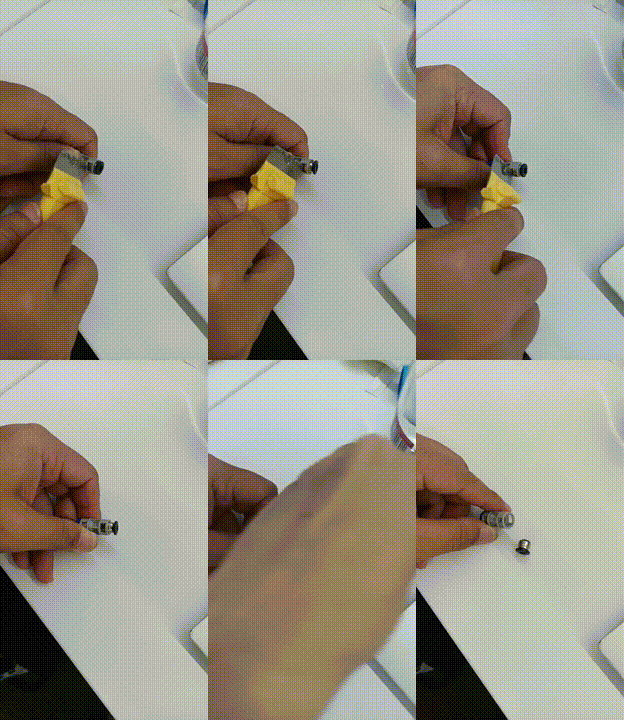
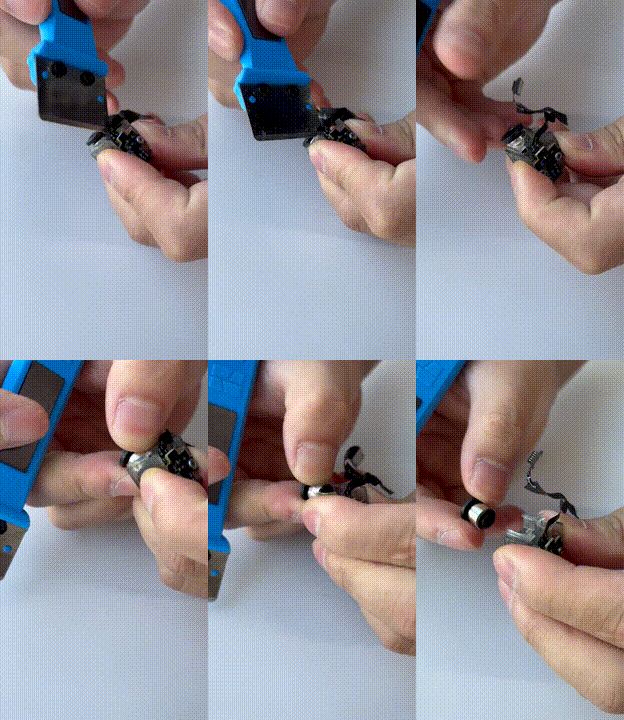
If you have a PTFE tube coupler, you can use a shovel to pry out the pneumatic connector and then install it in the desired position.
If you need to replace the pneumatic connector for the PTFE tube coupler on the H2D backplate, please refer to Step 3 in the following link: Replace H2D PTFE Tube Coupler
The complete procedure is as follows:
¶ How to purchase the PTFE tube coupler?

You can purchase it at our store here: PTFE Tube Coupler
¶ Hall switch pneumatic connector replacement
¶ 1. Remove the Hall switch from the extruder.
Extruder Filament and Cutter Sensor Assembly | Bambu Lab Wiki | X1C
Extruder Filament Sensor Replacement | Bambu Lab Wiki | P1S/P1P
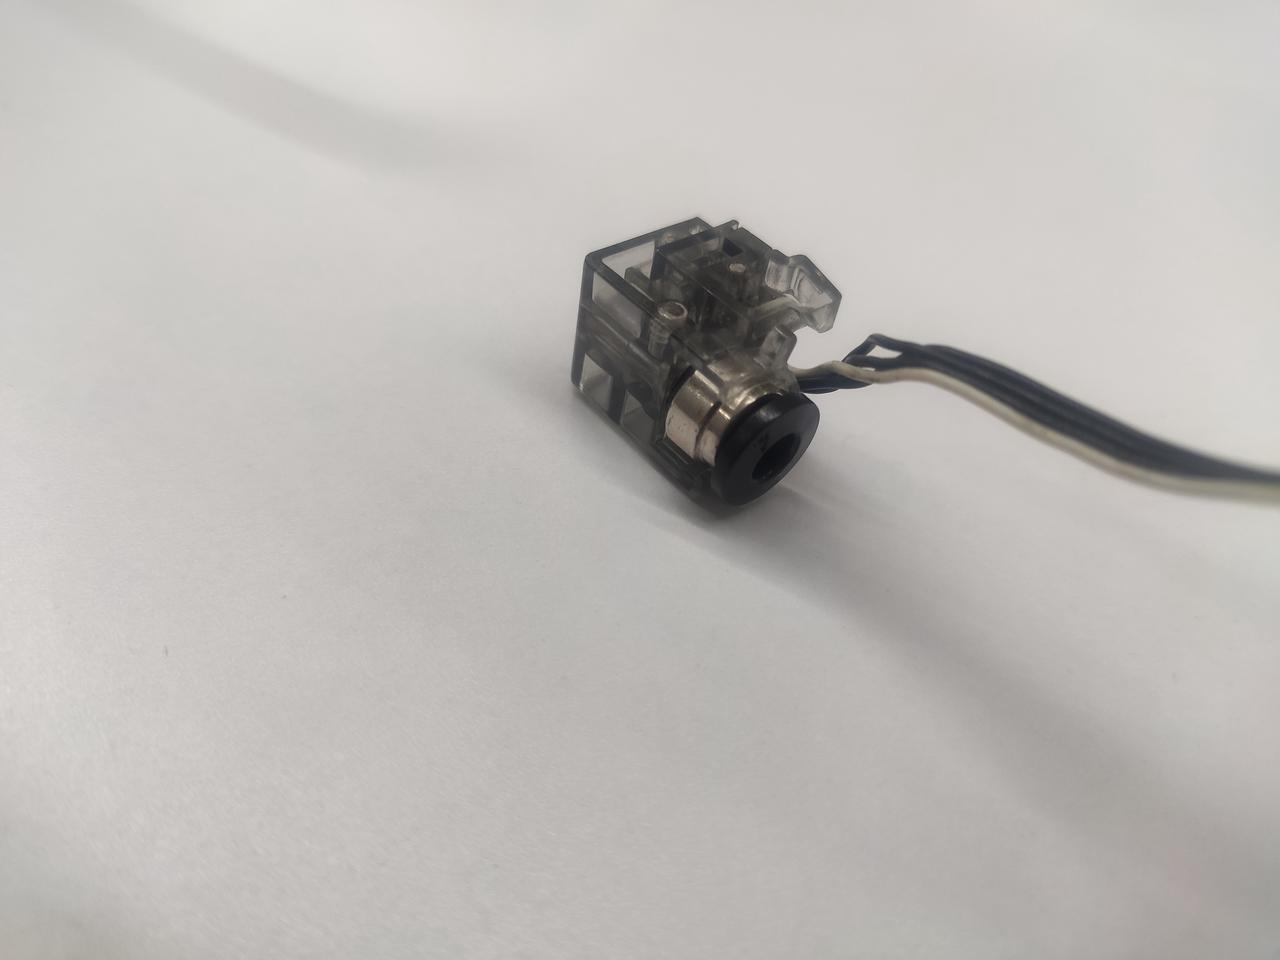
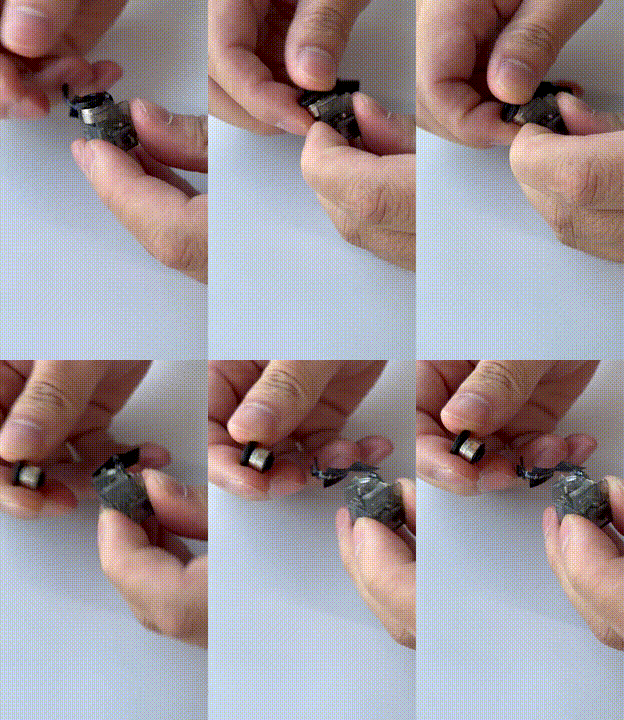
¶ 2. Push the pneumatic connector out from the side of the latch (if it is difficult to remove, you can use a shovel to pry it out).
 |
 |
 |
 |
 |
¶ 3. Push the new pneumatic connector back from the side (note: the bottom of the pneumatic connector needs to be fully installed).
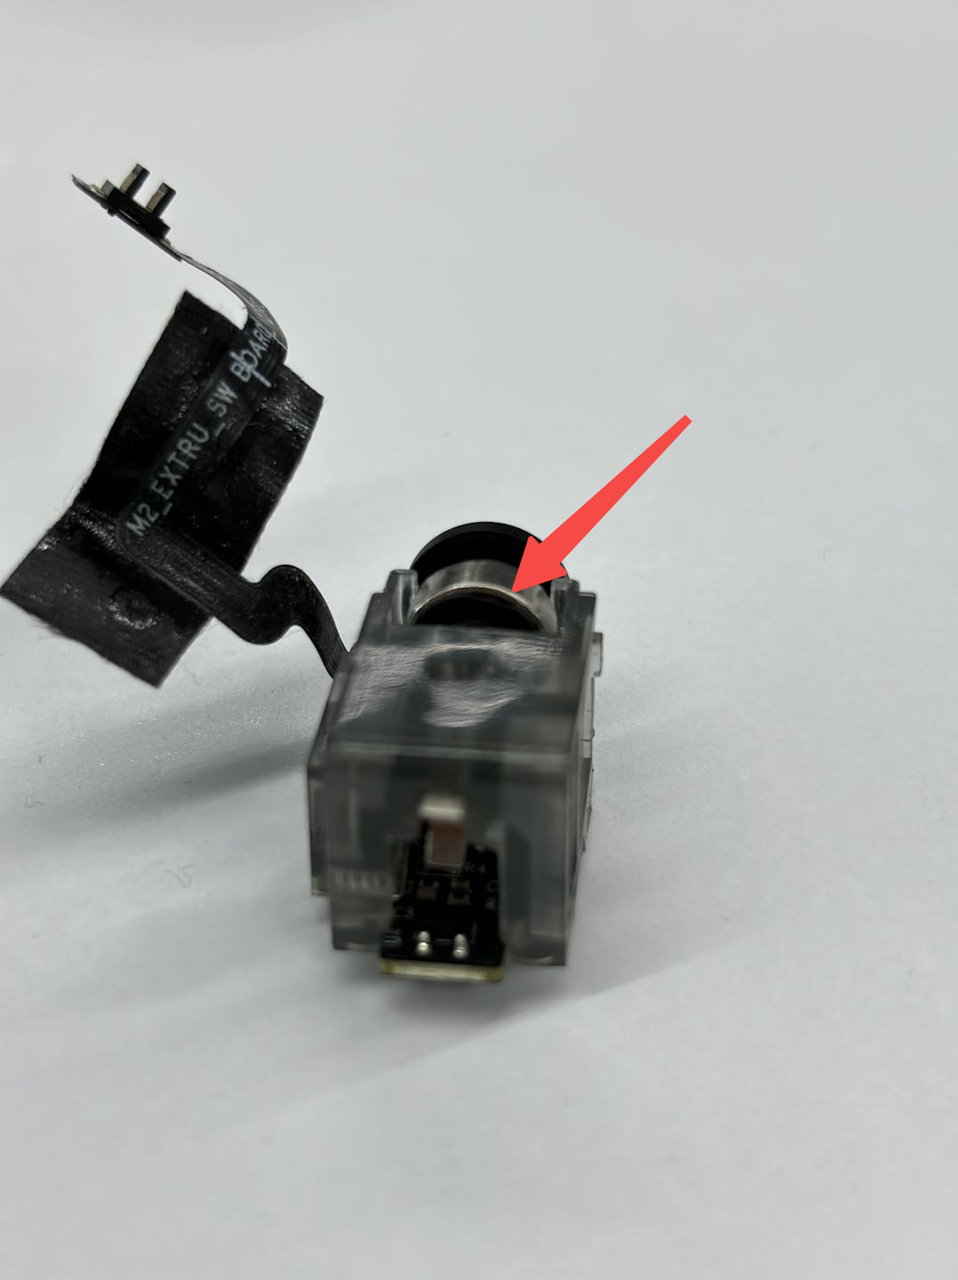 |
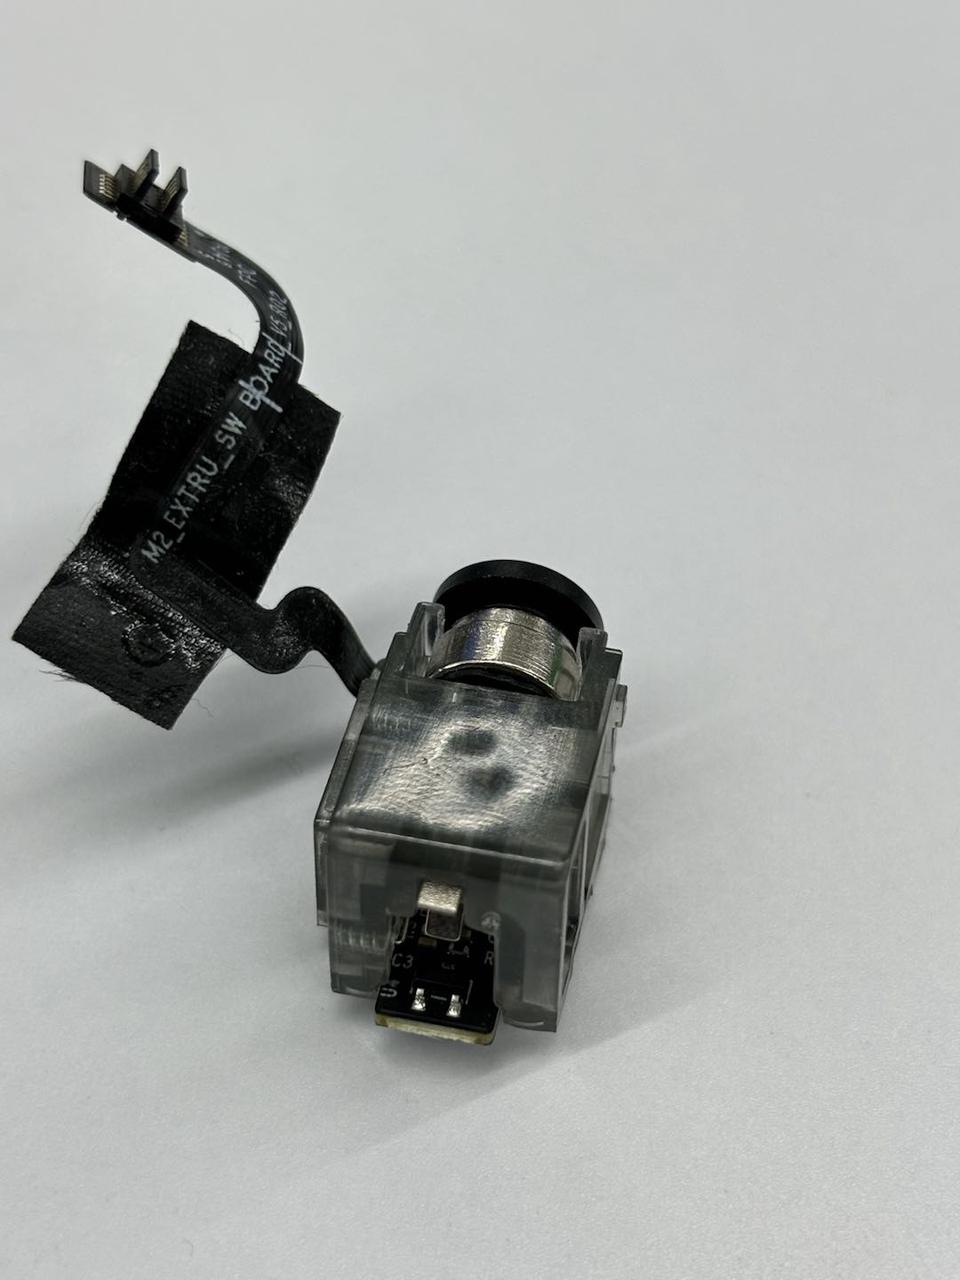 |
¶ 4. Install the Hall switch back onto the extruder.
Extruder Filament and Cutter Sensor Assembly | Bambu Lab Wiki | X1C
Extruder Filament Sensor Replacement | Bambu Lab Wiki | P1S/P1P
¶ Filament buffer pneumatic connector replacement
There are two pneumatic connectors on the buffer, as shown in the diagram below, one on the right and one on the left:
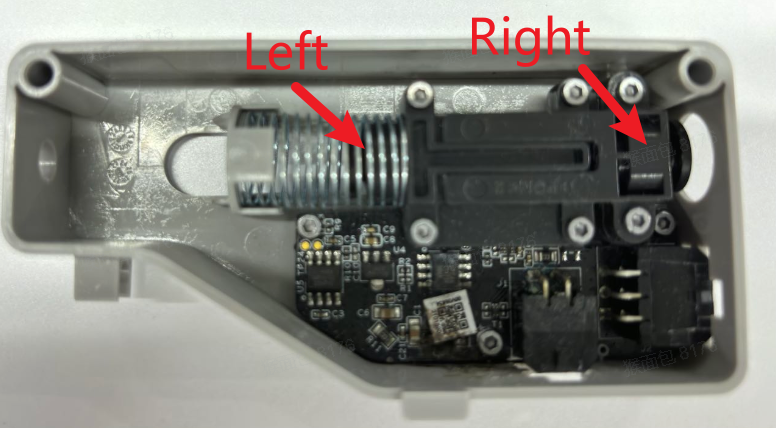
¶ Buffer pneumatic connector (right side) replacement
¶ 1. Remove the buffer from the back of the printer.
¶ 2. Unscrew the two screws as shown in the diagram.
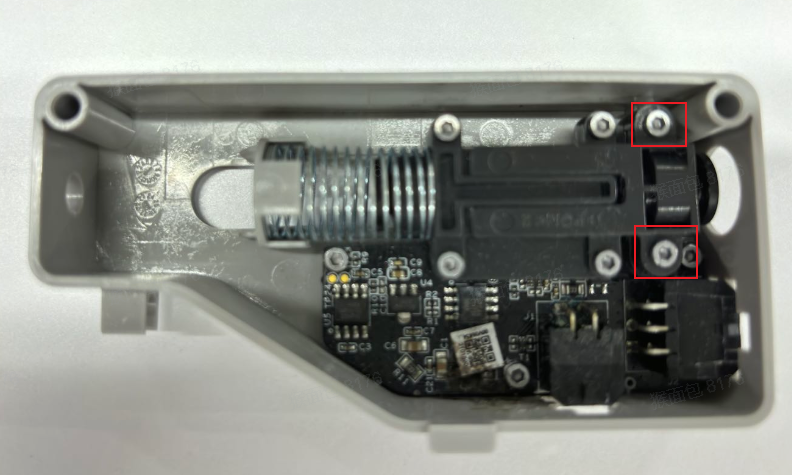 |
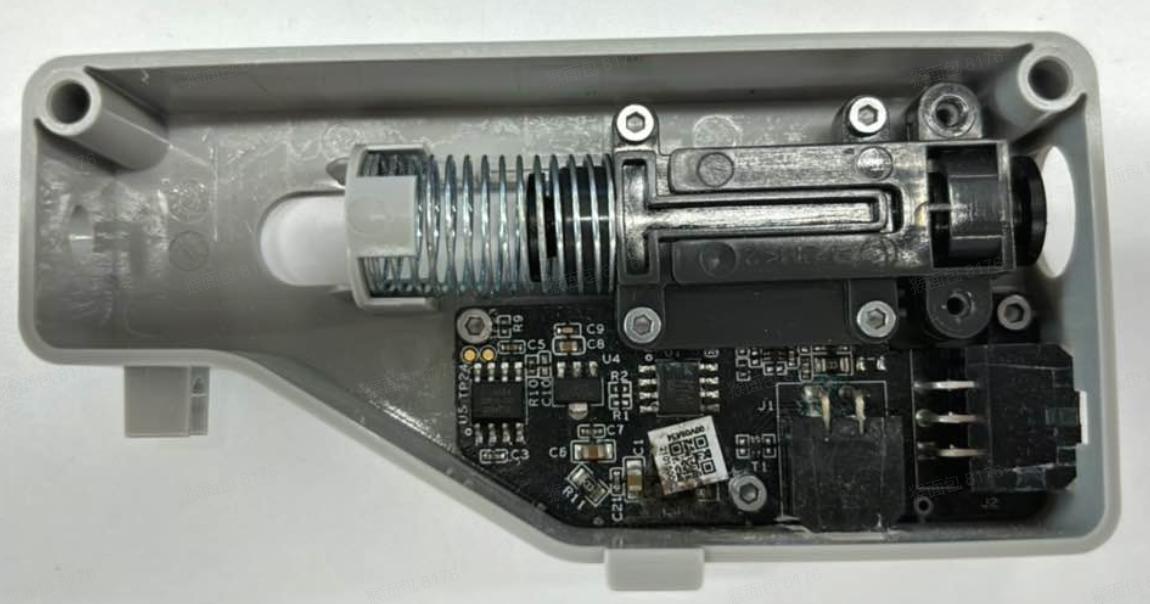 |
¶ 3. Remove the top cover.
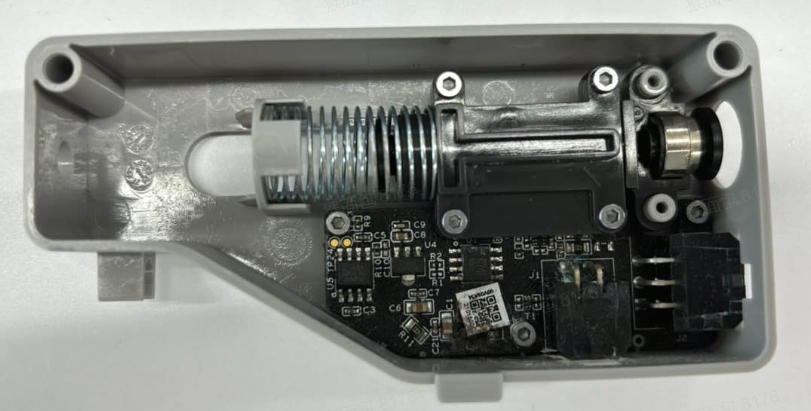
¶ 4. Take out the pneumatic connector.
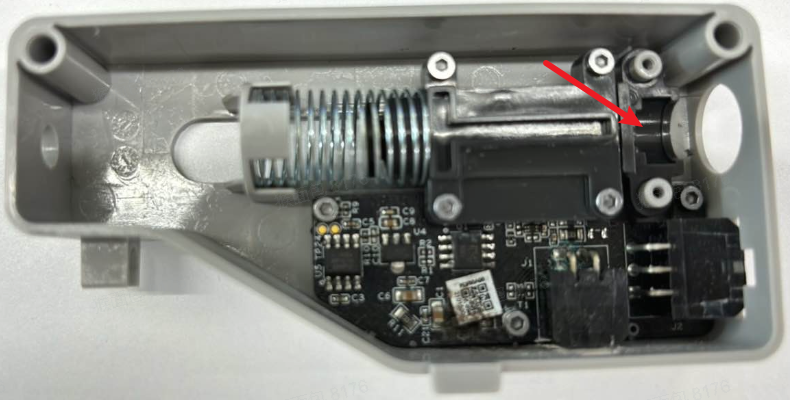
¶ 5. Install the new pneumatic connector.
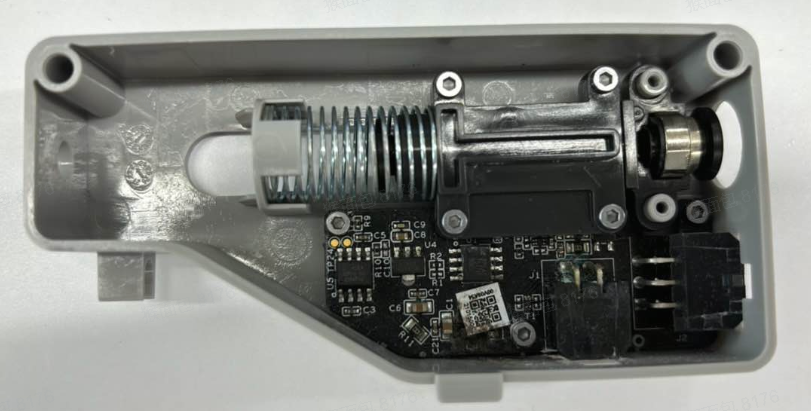
¶ 6. Install the top cover and tighten the two screws.
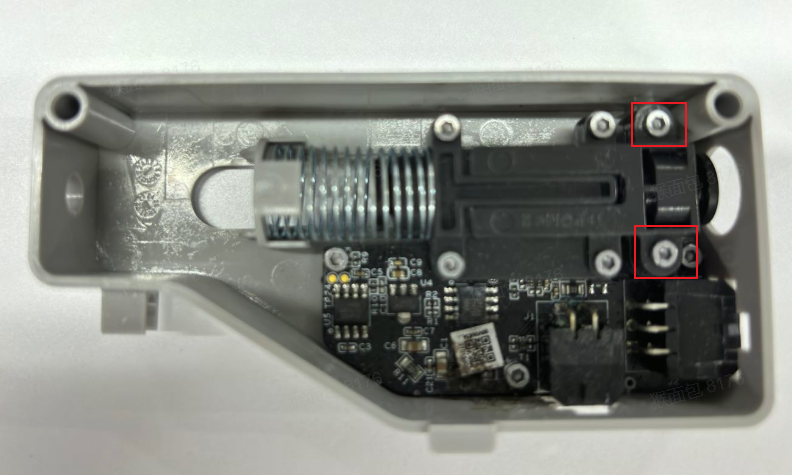
¶ 7. Install the buffer back onto the printer.
¶ Buffer pneumatic connector (left side) replacement
¶ 1. Remove the buffer from the back of the printer.
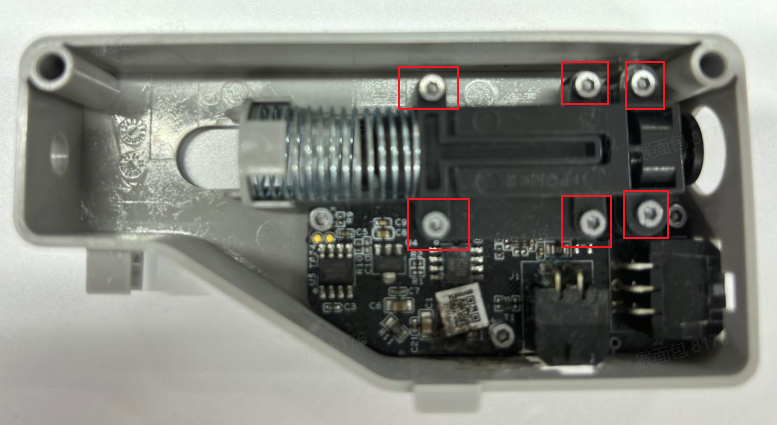
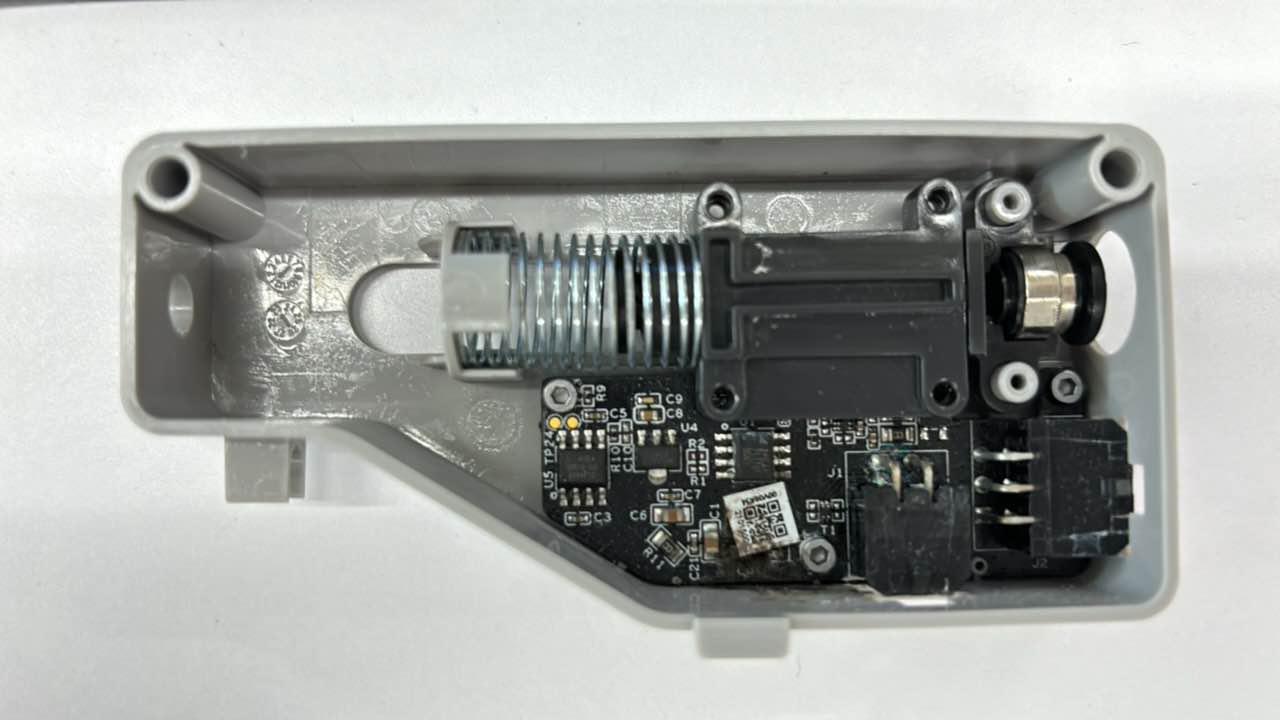
¶ 2. Unscrew the six screws as shown in the diagram and remove the top cover
 |
 |
¶ 3. Hold down the spring.
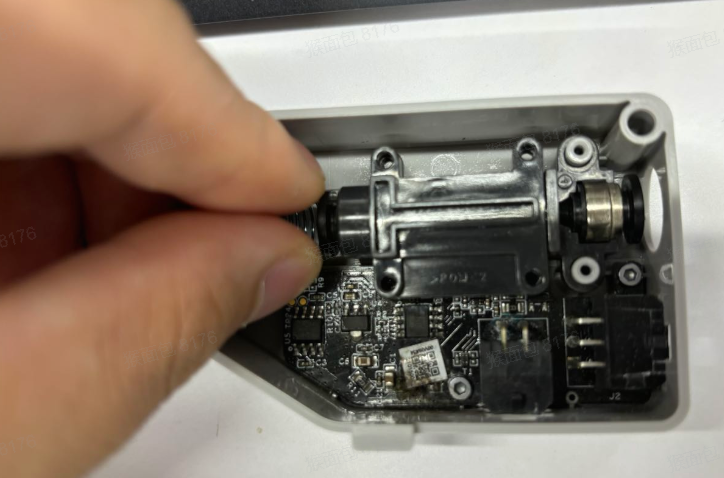
¶ 4. Remove the upper cover (note: be careful not to remove the magnet shown in the diagram together with the upper cover).
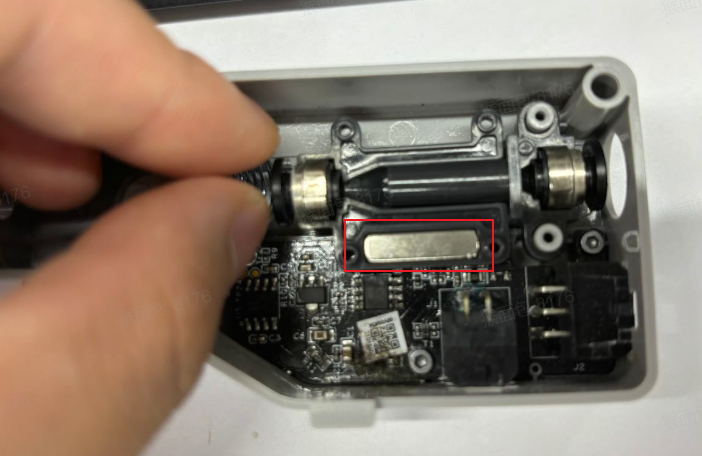
¶ 5. Replacing the pneumatic connector.
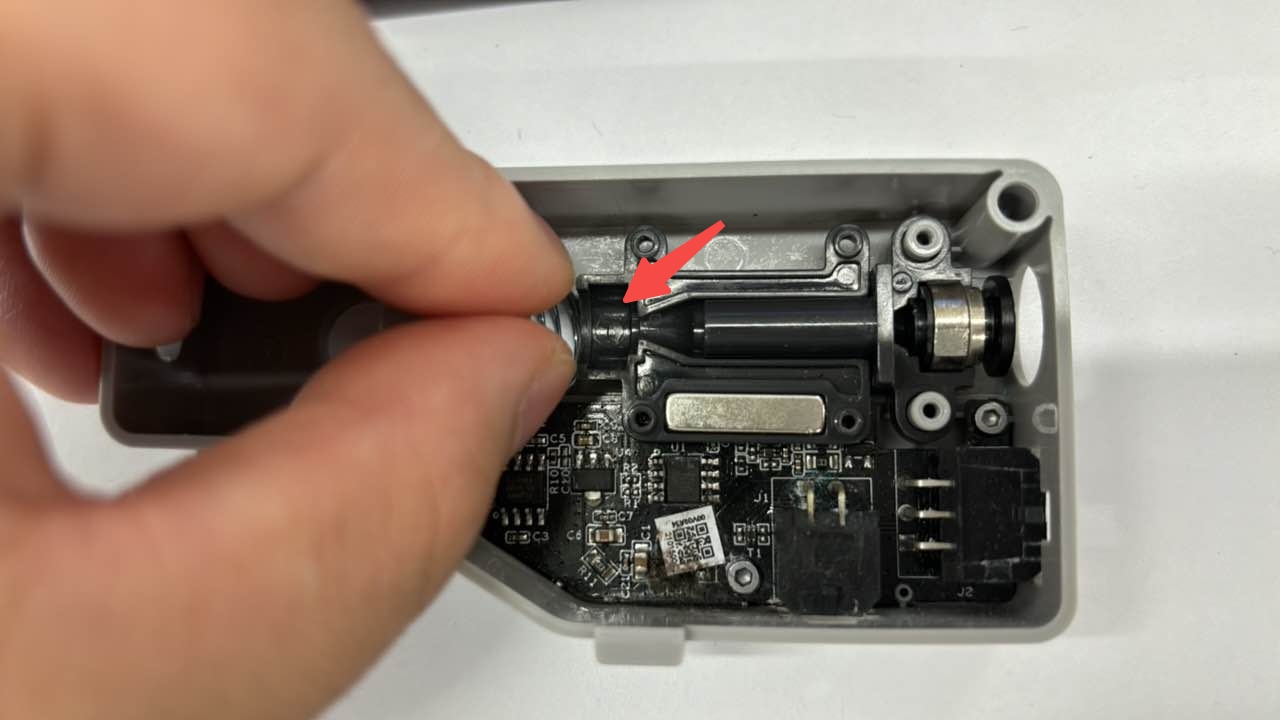
¶ 6. Install the upper cover.
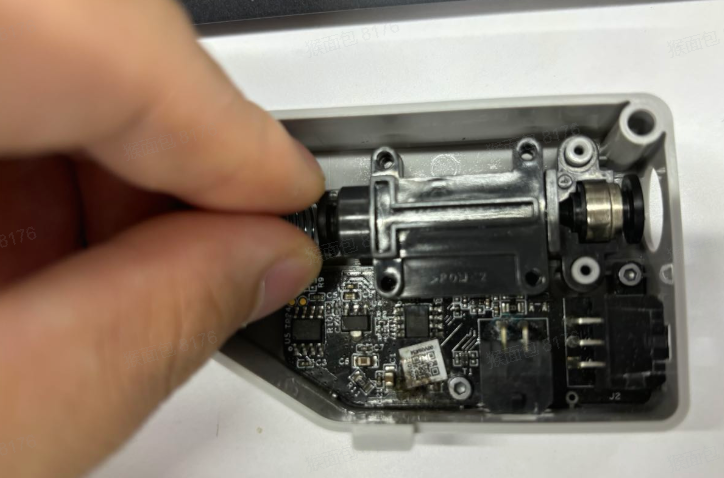
¶ 7. Release the spring and install the top cover and tighten the six screws one by one.

¶ 8. Install the buffer onto the pneumatic connector.
¶ AMS hub pneumatic connector replacement
¶ 1. Remove the AMS hub from the printer
Referring to the video below, remove the AMS hub from the printer and disconnect its connection cables and filament tube to each AMS.
¶ 2. Disassemble the AMS hub
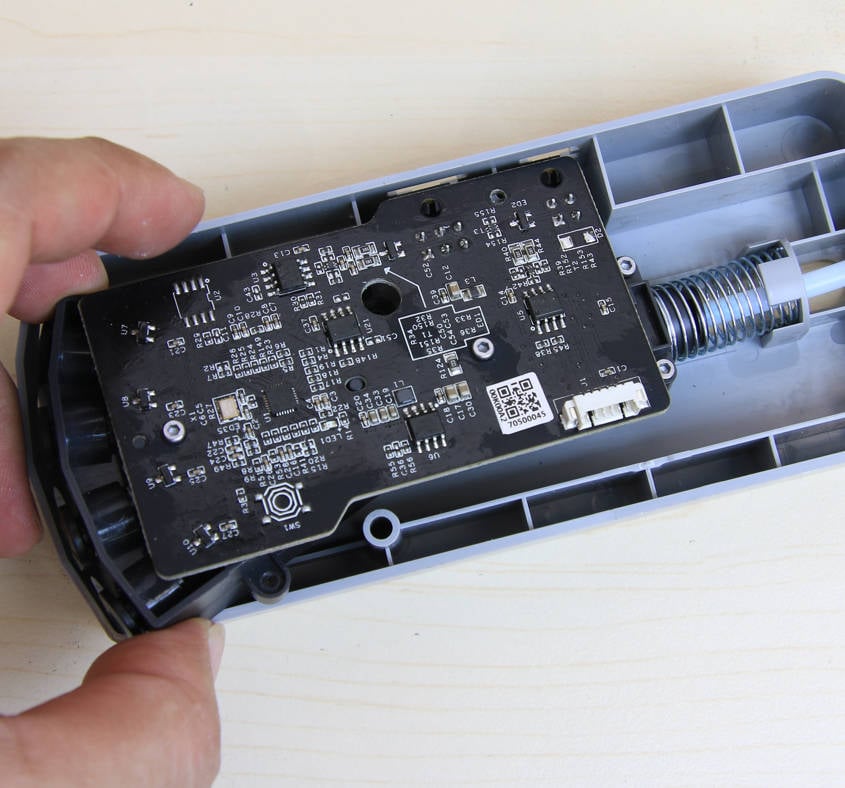
Unscrew 3 screws with an H1.5 hex key as shown in the figure below, and then take out the board assembly.
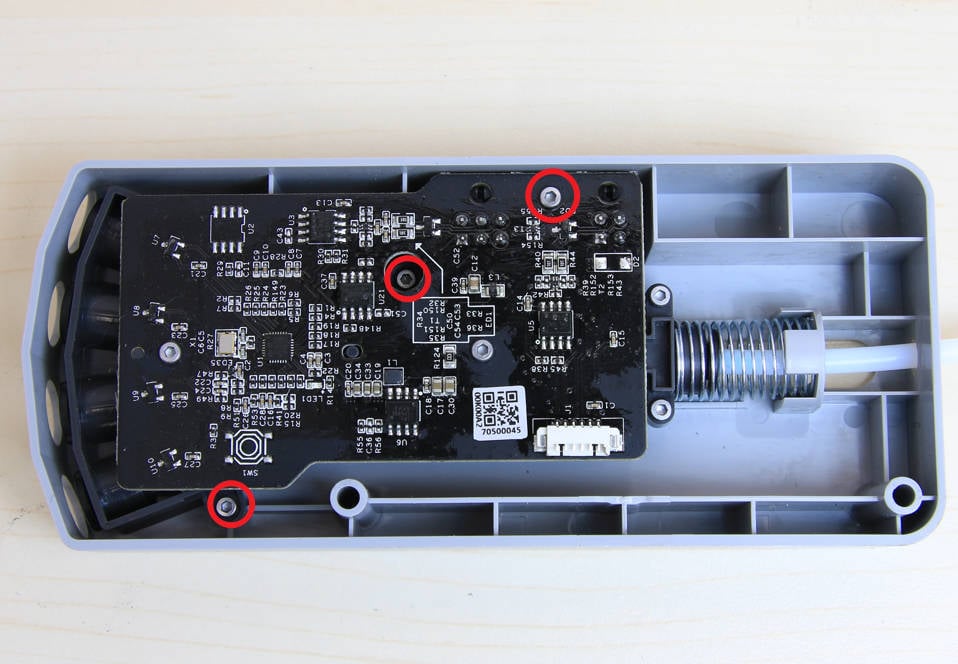 |
 |
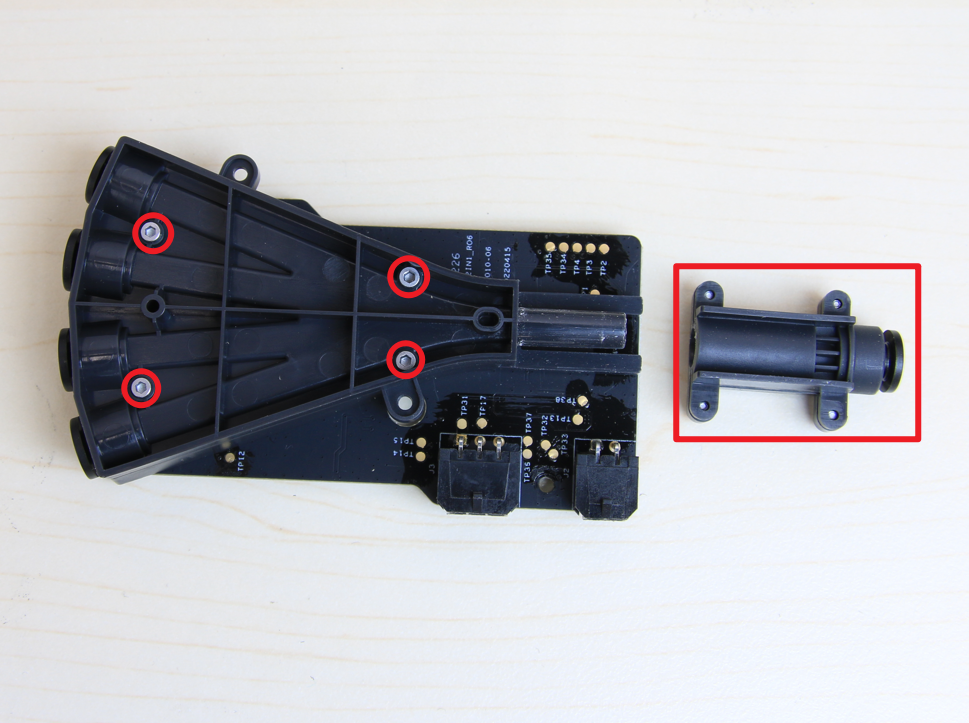
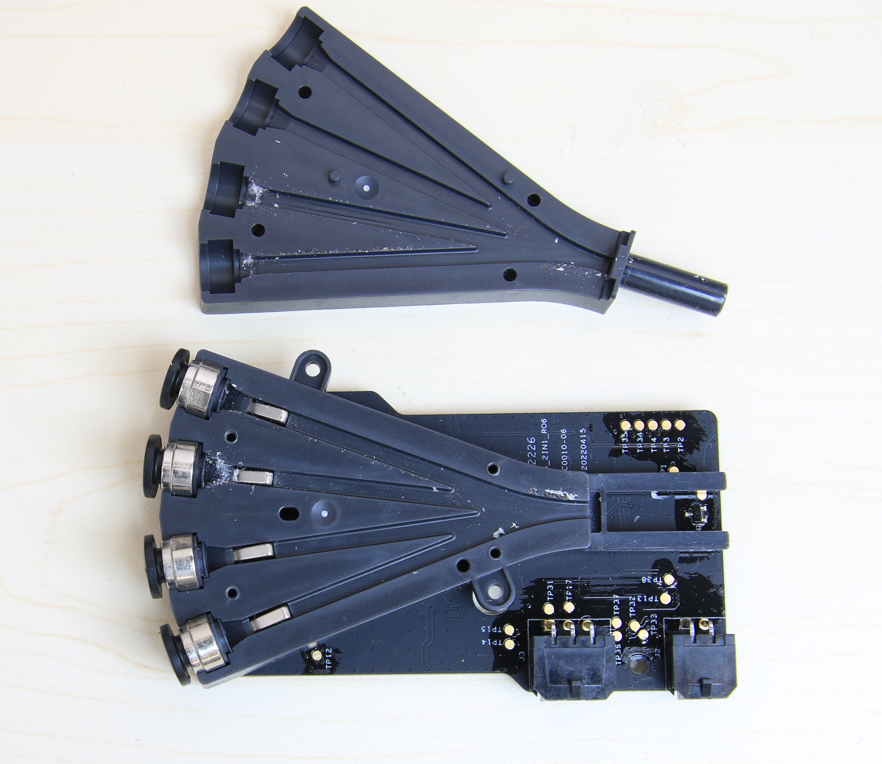
Remove the filament tube joint on the right side, remove 4 screws to open the cover, and replace the damaged parts.
 |
 |
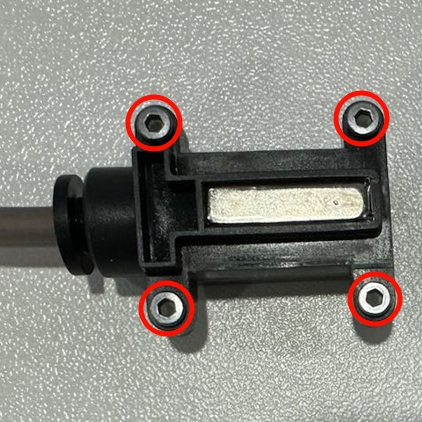
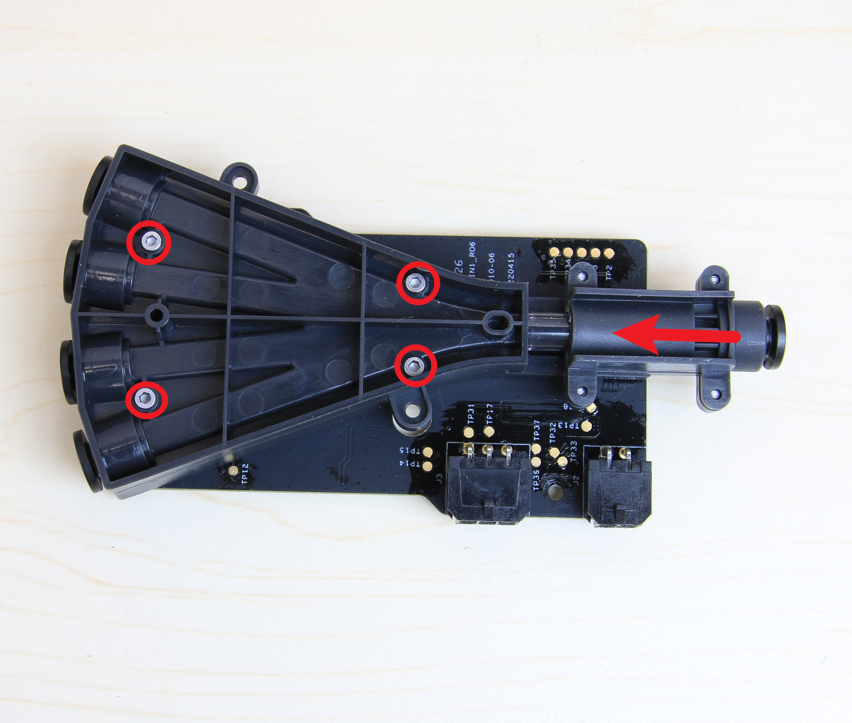
(Optional step) If the pneumatic connector on the right side of the above diagram is damaged, please proceed to remove the four screws and replace the pneumatic connector.
 |
 |
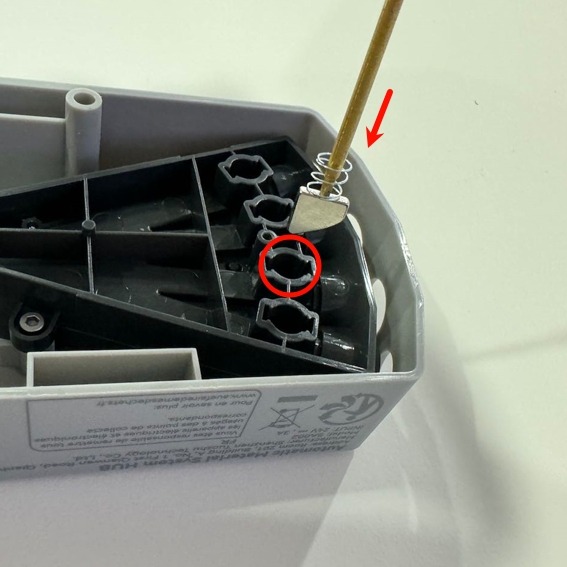
Note: If the magnet of the hub falls off during disassembly, you can install it with the help of an Allen key and refer to the picture below.
¶ 3. Assemble the AMS hub
(Optional step) Insert the new pneumatic connector into the assembly, then close the two components together and tighten the four screws.
 |
 |
Reinstall the tube connectors, close the cover and lock in 4 screws. Then, install the tube joint assembly on the right side.
 |
 |
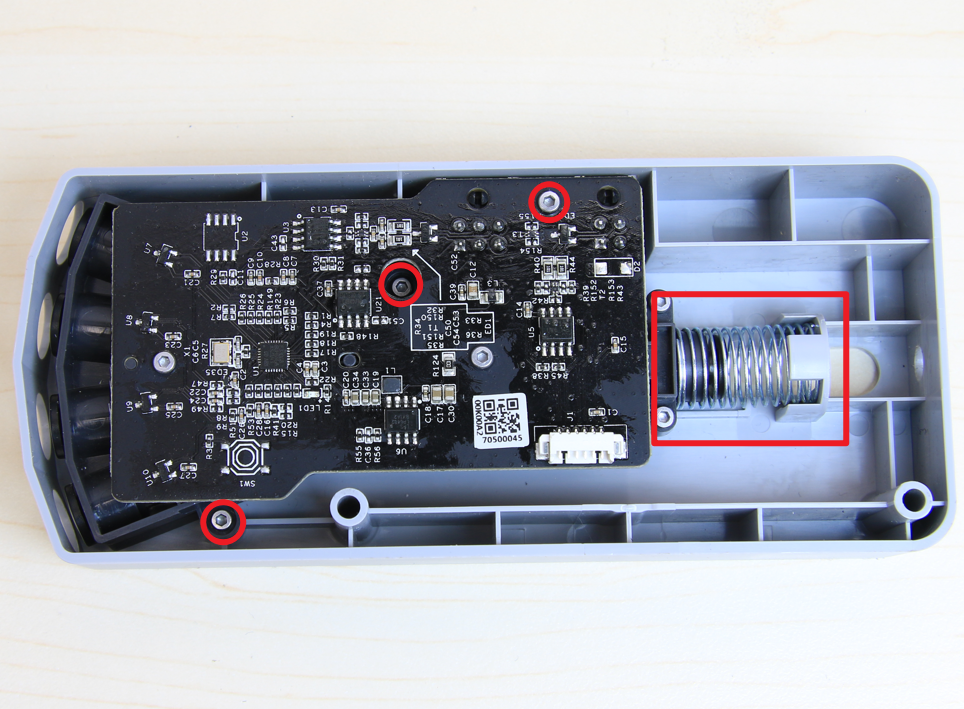
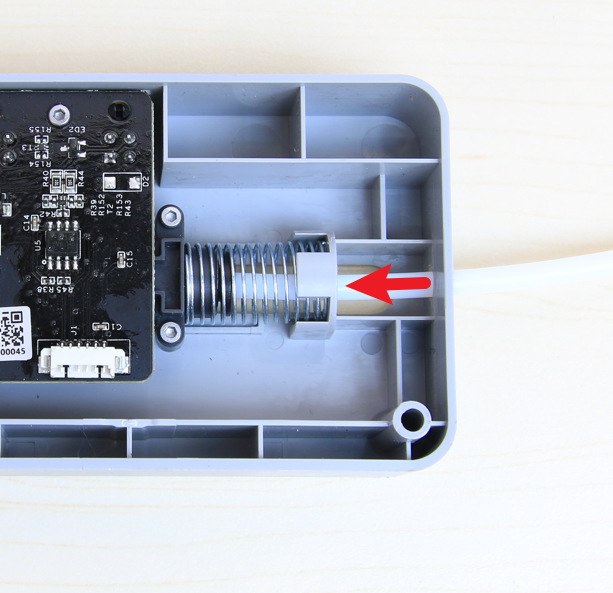
Install the board assembly into the housing, confirm that the spring is installed in place, and then connect the PTFE tube on the right side.
 |
 |
¶ 4. Install the AMS hub onto the printer
Refer to the latter part of the video in Step 1 above to install the AMS hub onto the printer, and connect it to each AMS using PTFE tubes.
For more precautions and details, please refer to the following Wiki: Connect AMS hub and multi-AMS
¶ AMS internal filament hub pneumatic connector replacement
There are a total of five pneumatic connectors in the AMS internal filament hub, four of which connect to the four feeders, and one pneumatic connector is connected to the buffer via a PTFE tube.
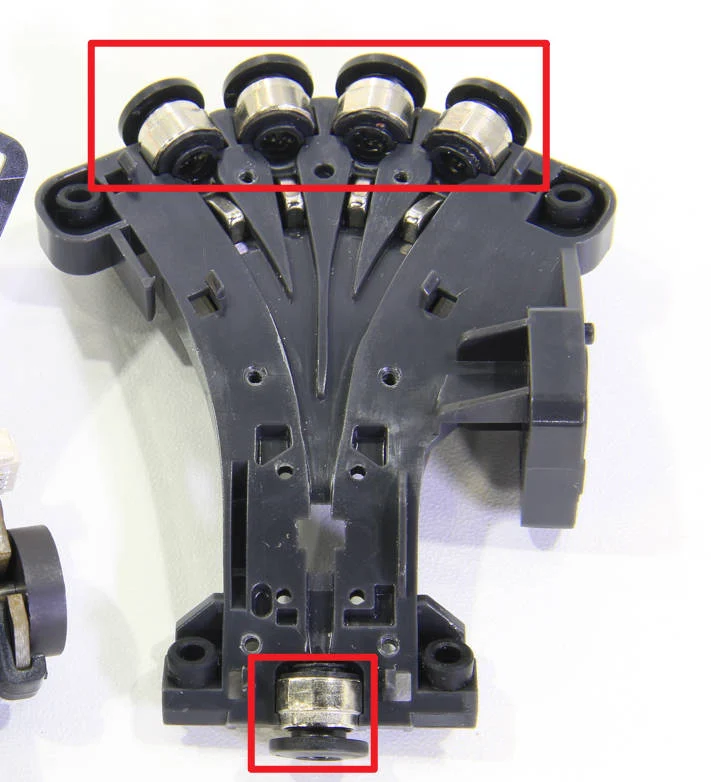
If one of the pneumatic connectors is damaged and cannot secure the PTFE tube, you can refer to the following method to disassemble the AMS internal filament hub and replace the new pneumatic connector.
¶ 1. Disassemble the AMS internal filament hub.
Please refer to the instructions for replacing the AMS internal filament hub to remove and separate the motor from the AMS.
Replacing the AMS internal filament hub | Bambu Lab Wiki
¶ 2. Remove the AMS internal filament hub buttons.
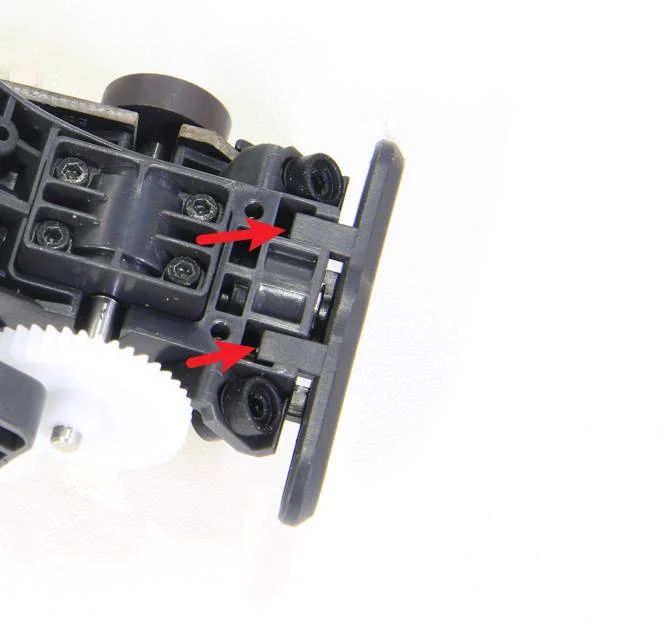
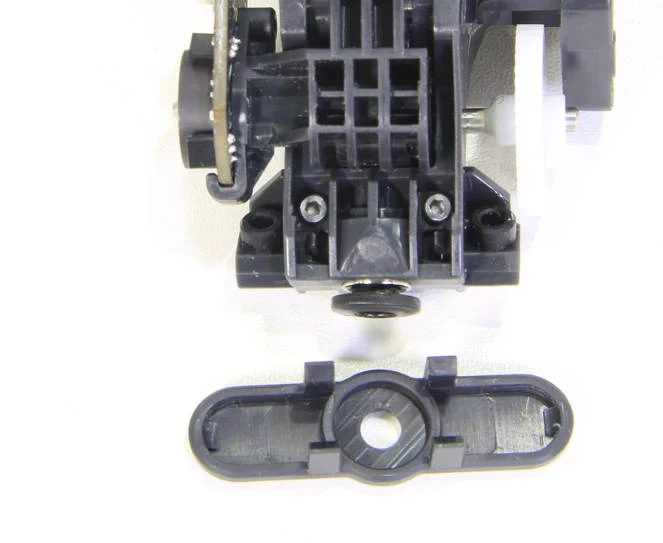
Unlock the four claws of the tee junction component and remove the AMS internal filament hub buttons.
 |
 |
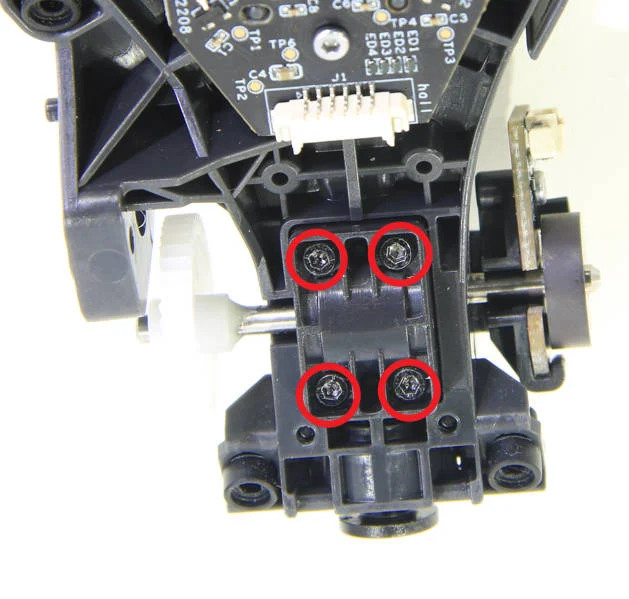
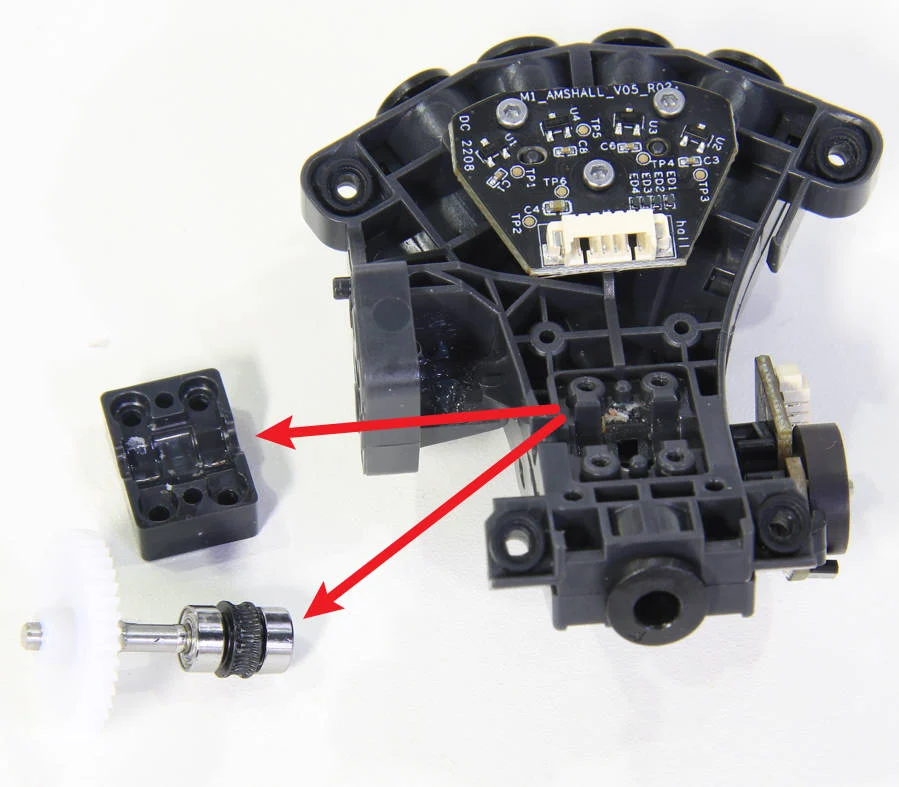
¶ 3. Remove the AMS internal filament hub drive wheel.
Use a H1.5 hex wrench to remove the four screws, and remove the protective cover and drive wheel.
 |
 |
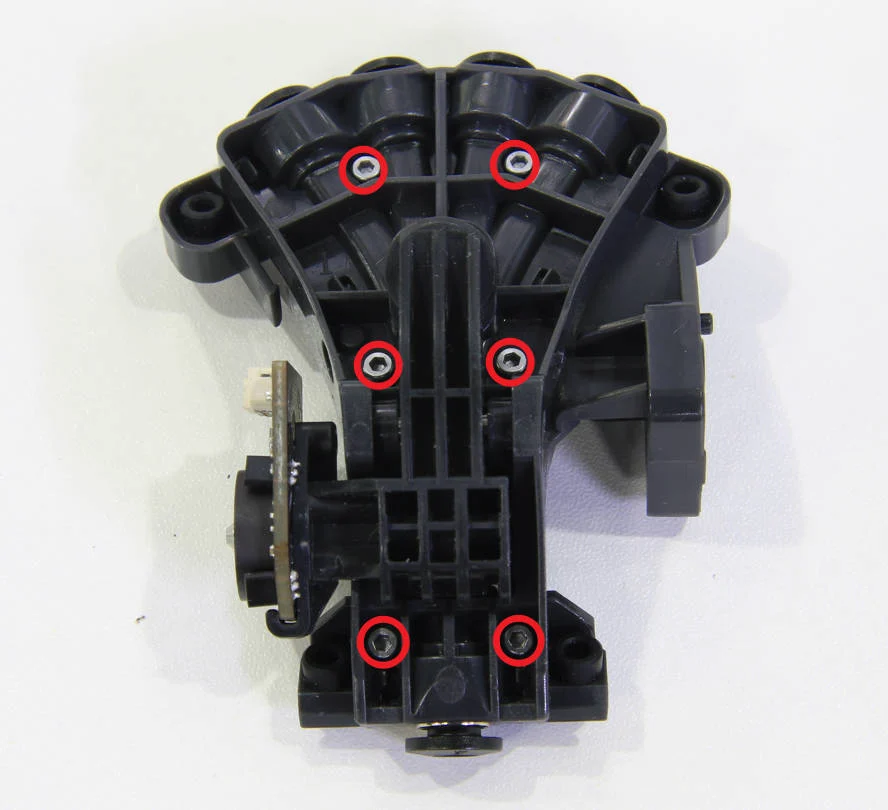
¶ 4. Separate the upper and lower shells of the AMS internal filament hub.
Use a H1.5 hex wrench to remove the six screws and separate the upper and lower shells of the AMS internal filament hub. (Note: be careful when disassembling to prevent the pneumatic connectors from coming loose.)
 |
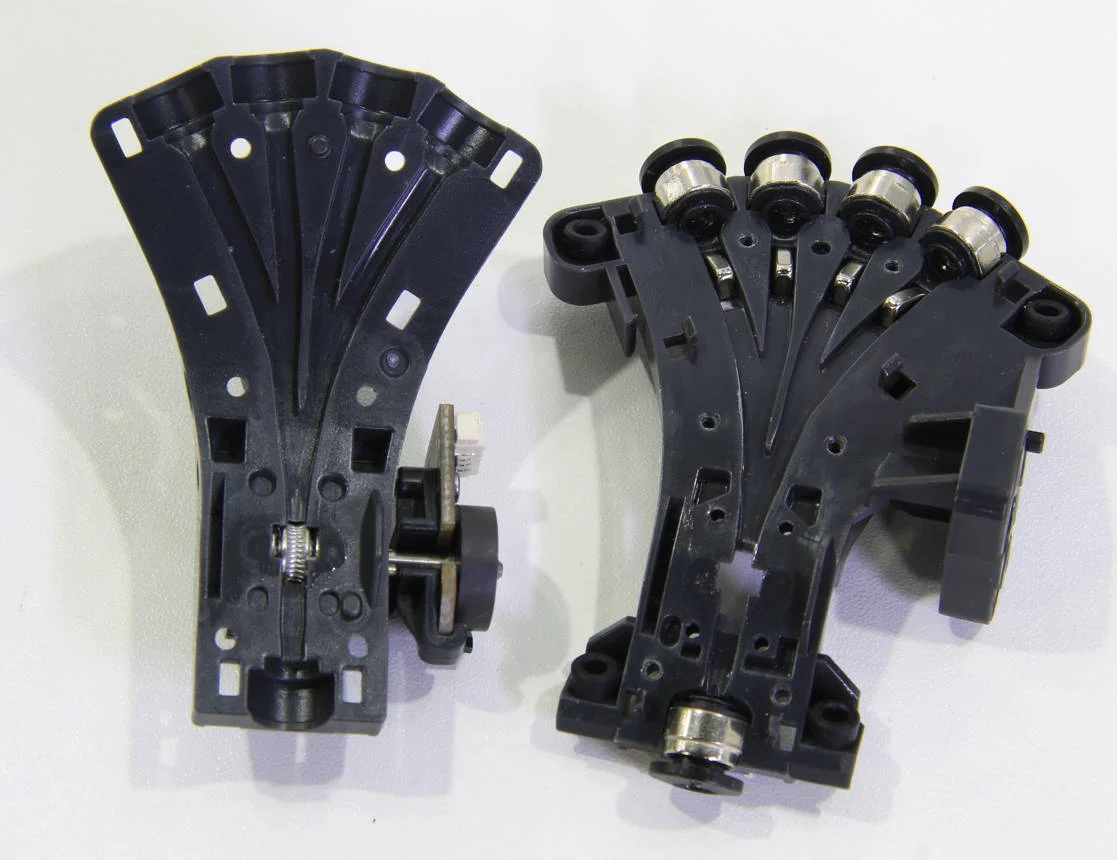 |
¶ 5. Replace the corresponding pneumatic connector.
If any of the pneumatic connectors shown in the diagram below are damaged, remove the corresponding pneumatic connector and replace it with a new one.

¶ 6. Assemble the upper and lower shells of the AMS internal filament hub.
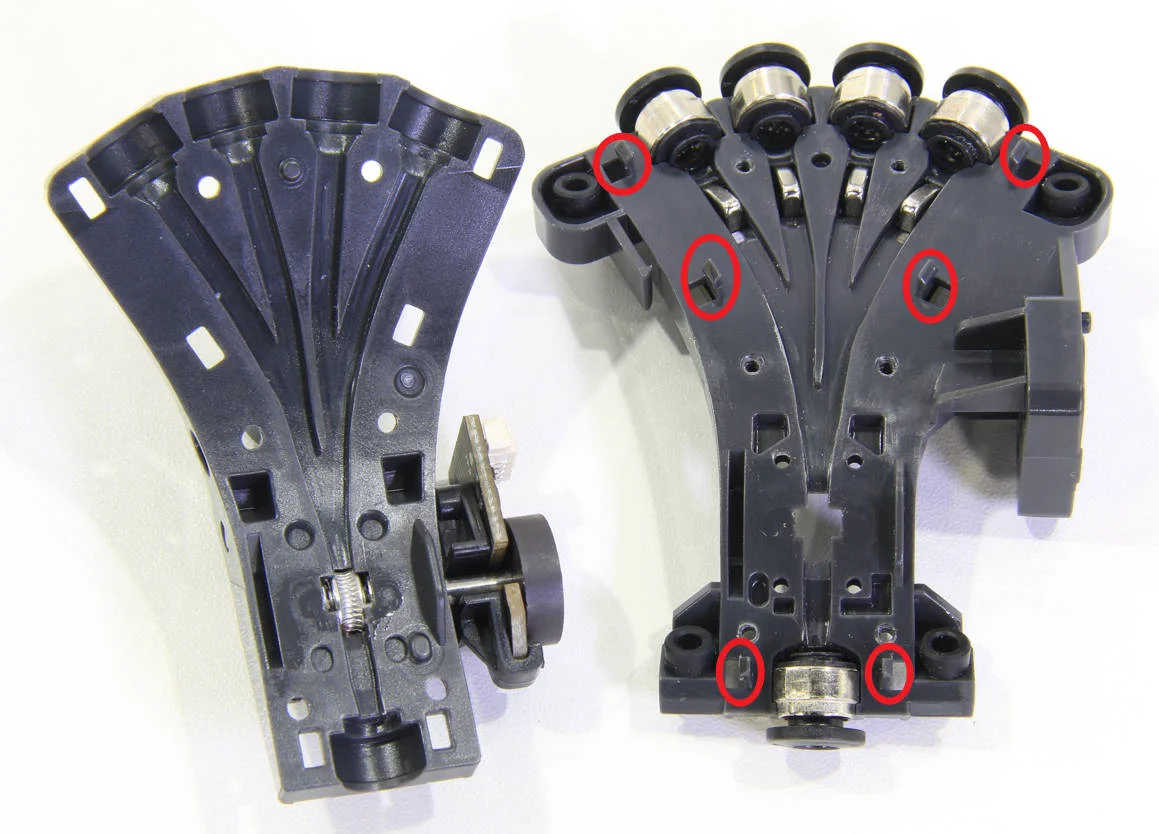
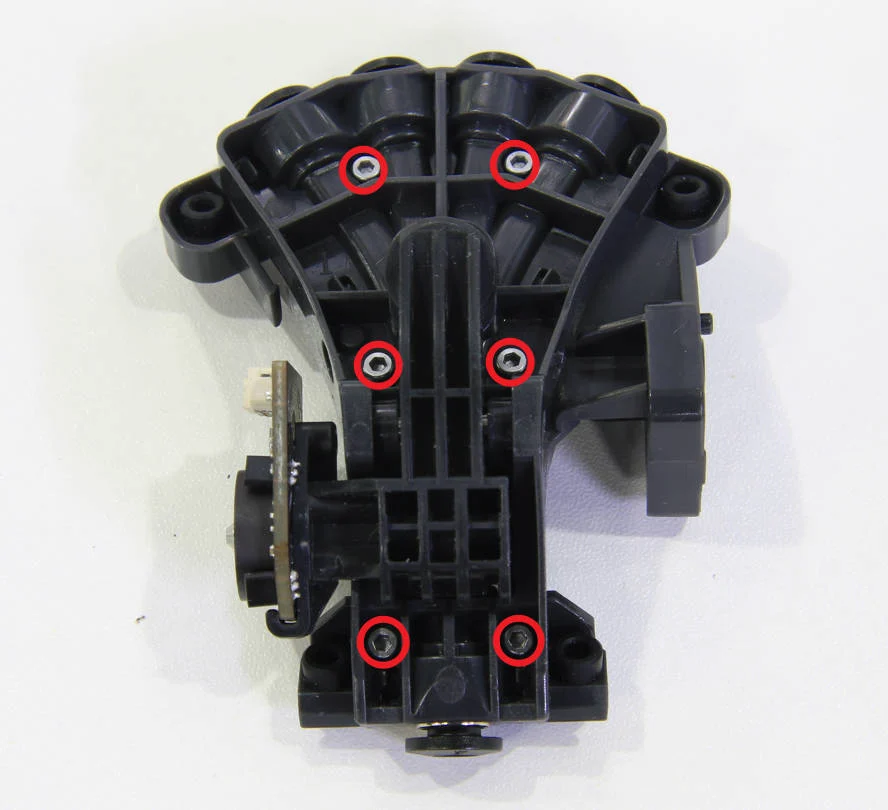
The upper and lower shells of the AMS internal filament hub can be initially secured with six claws, and then fixed with six screws.
 |
 |
¶ 7. Install the AMS internal filament hub drive wheel.
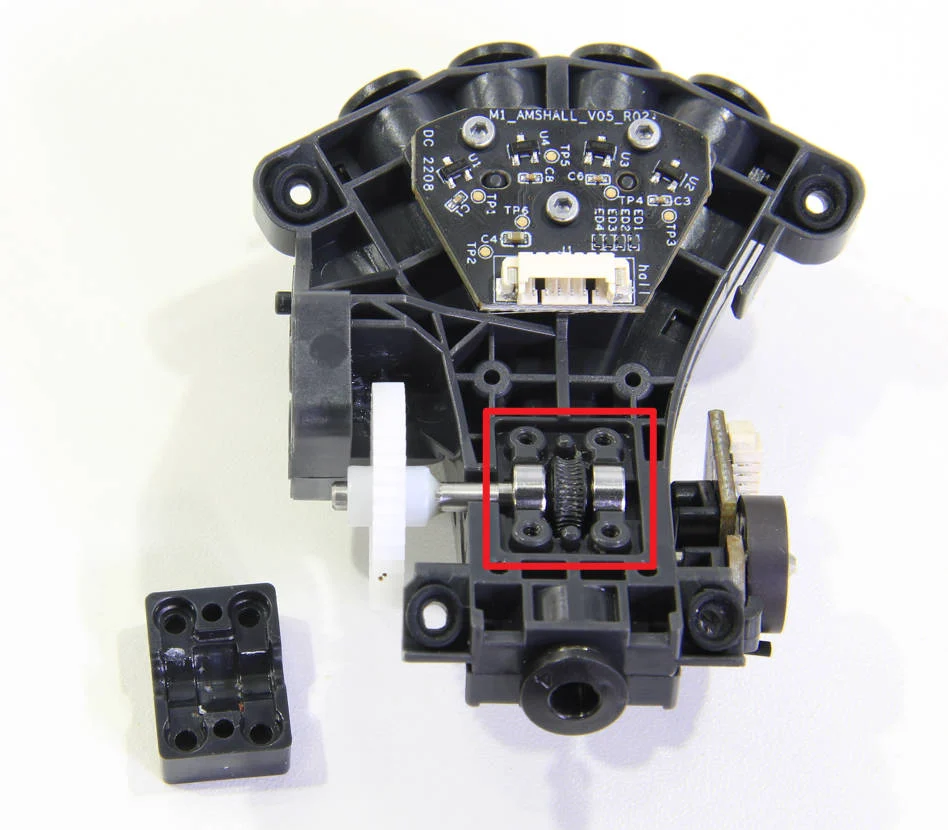
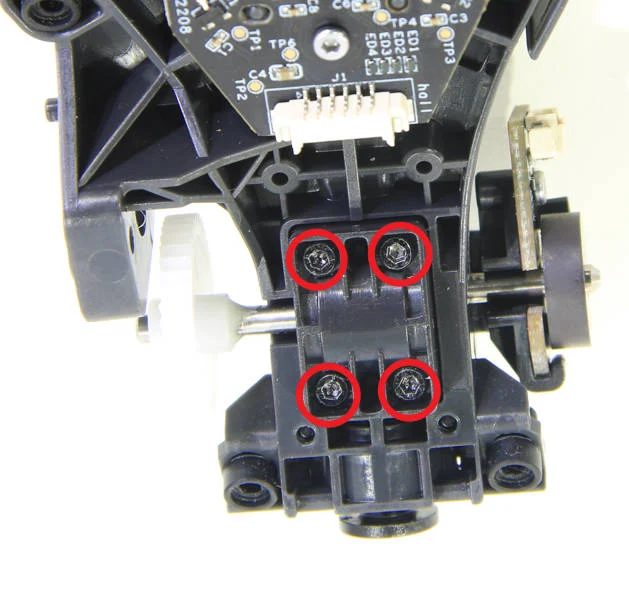
Install the AMS internal filament hub drive wheel and protective cover, and secure them with four screws.
 |
 |
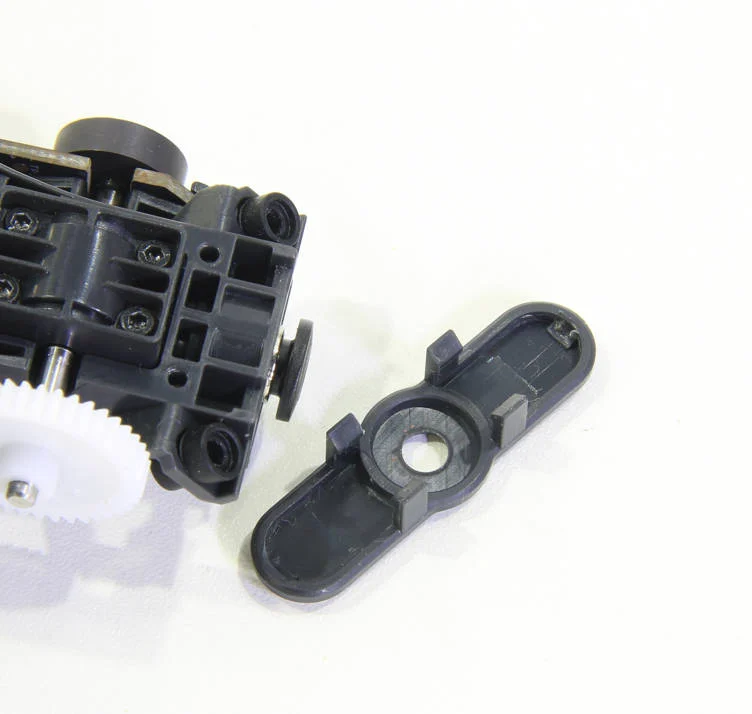
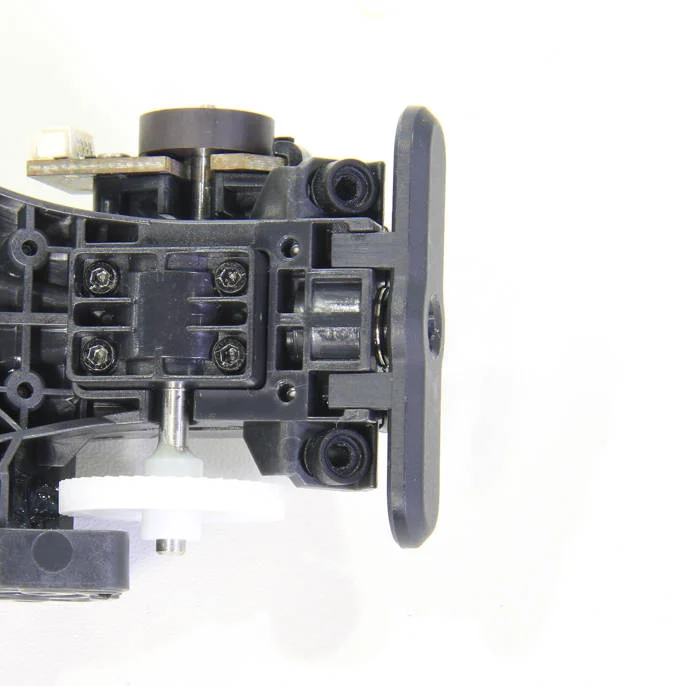
¶ 8. Install the AMS internal filament hub buttons.
Fit the AMS internal filament hub buttons into their respective positions, press the buttons to ensure smooth operation.
 |
 |
¶ 9. Install the AMS internal filament hub component.
Please refer to the instructions for replacing the AMS internal filament hub to install the motor onto the tee junction component, and then assemble the AMS.
Replacing the AMS internal filament hub | Bambu Lab Wiki
¶ AMS 2 Pro internal filament hub pneumatic connector replacement
There is a pneumatic connector in the AMS internal filament hub, which is connected to the buffer via a PTFE tube.
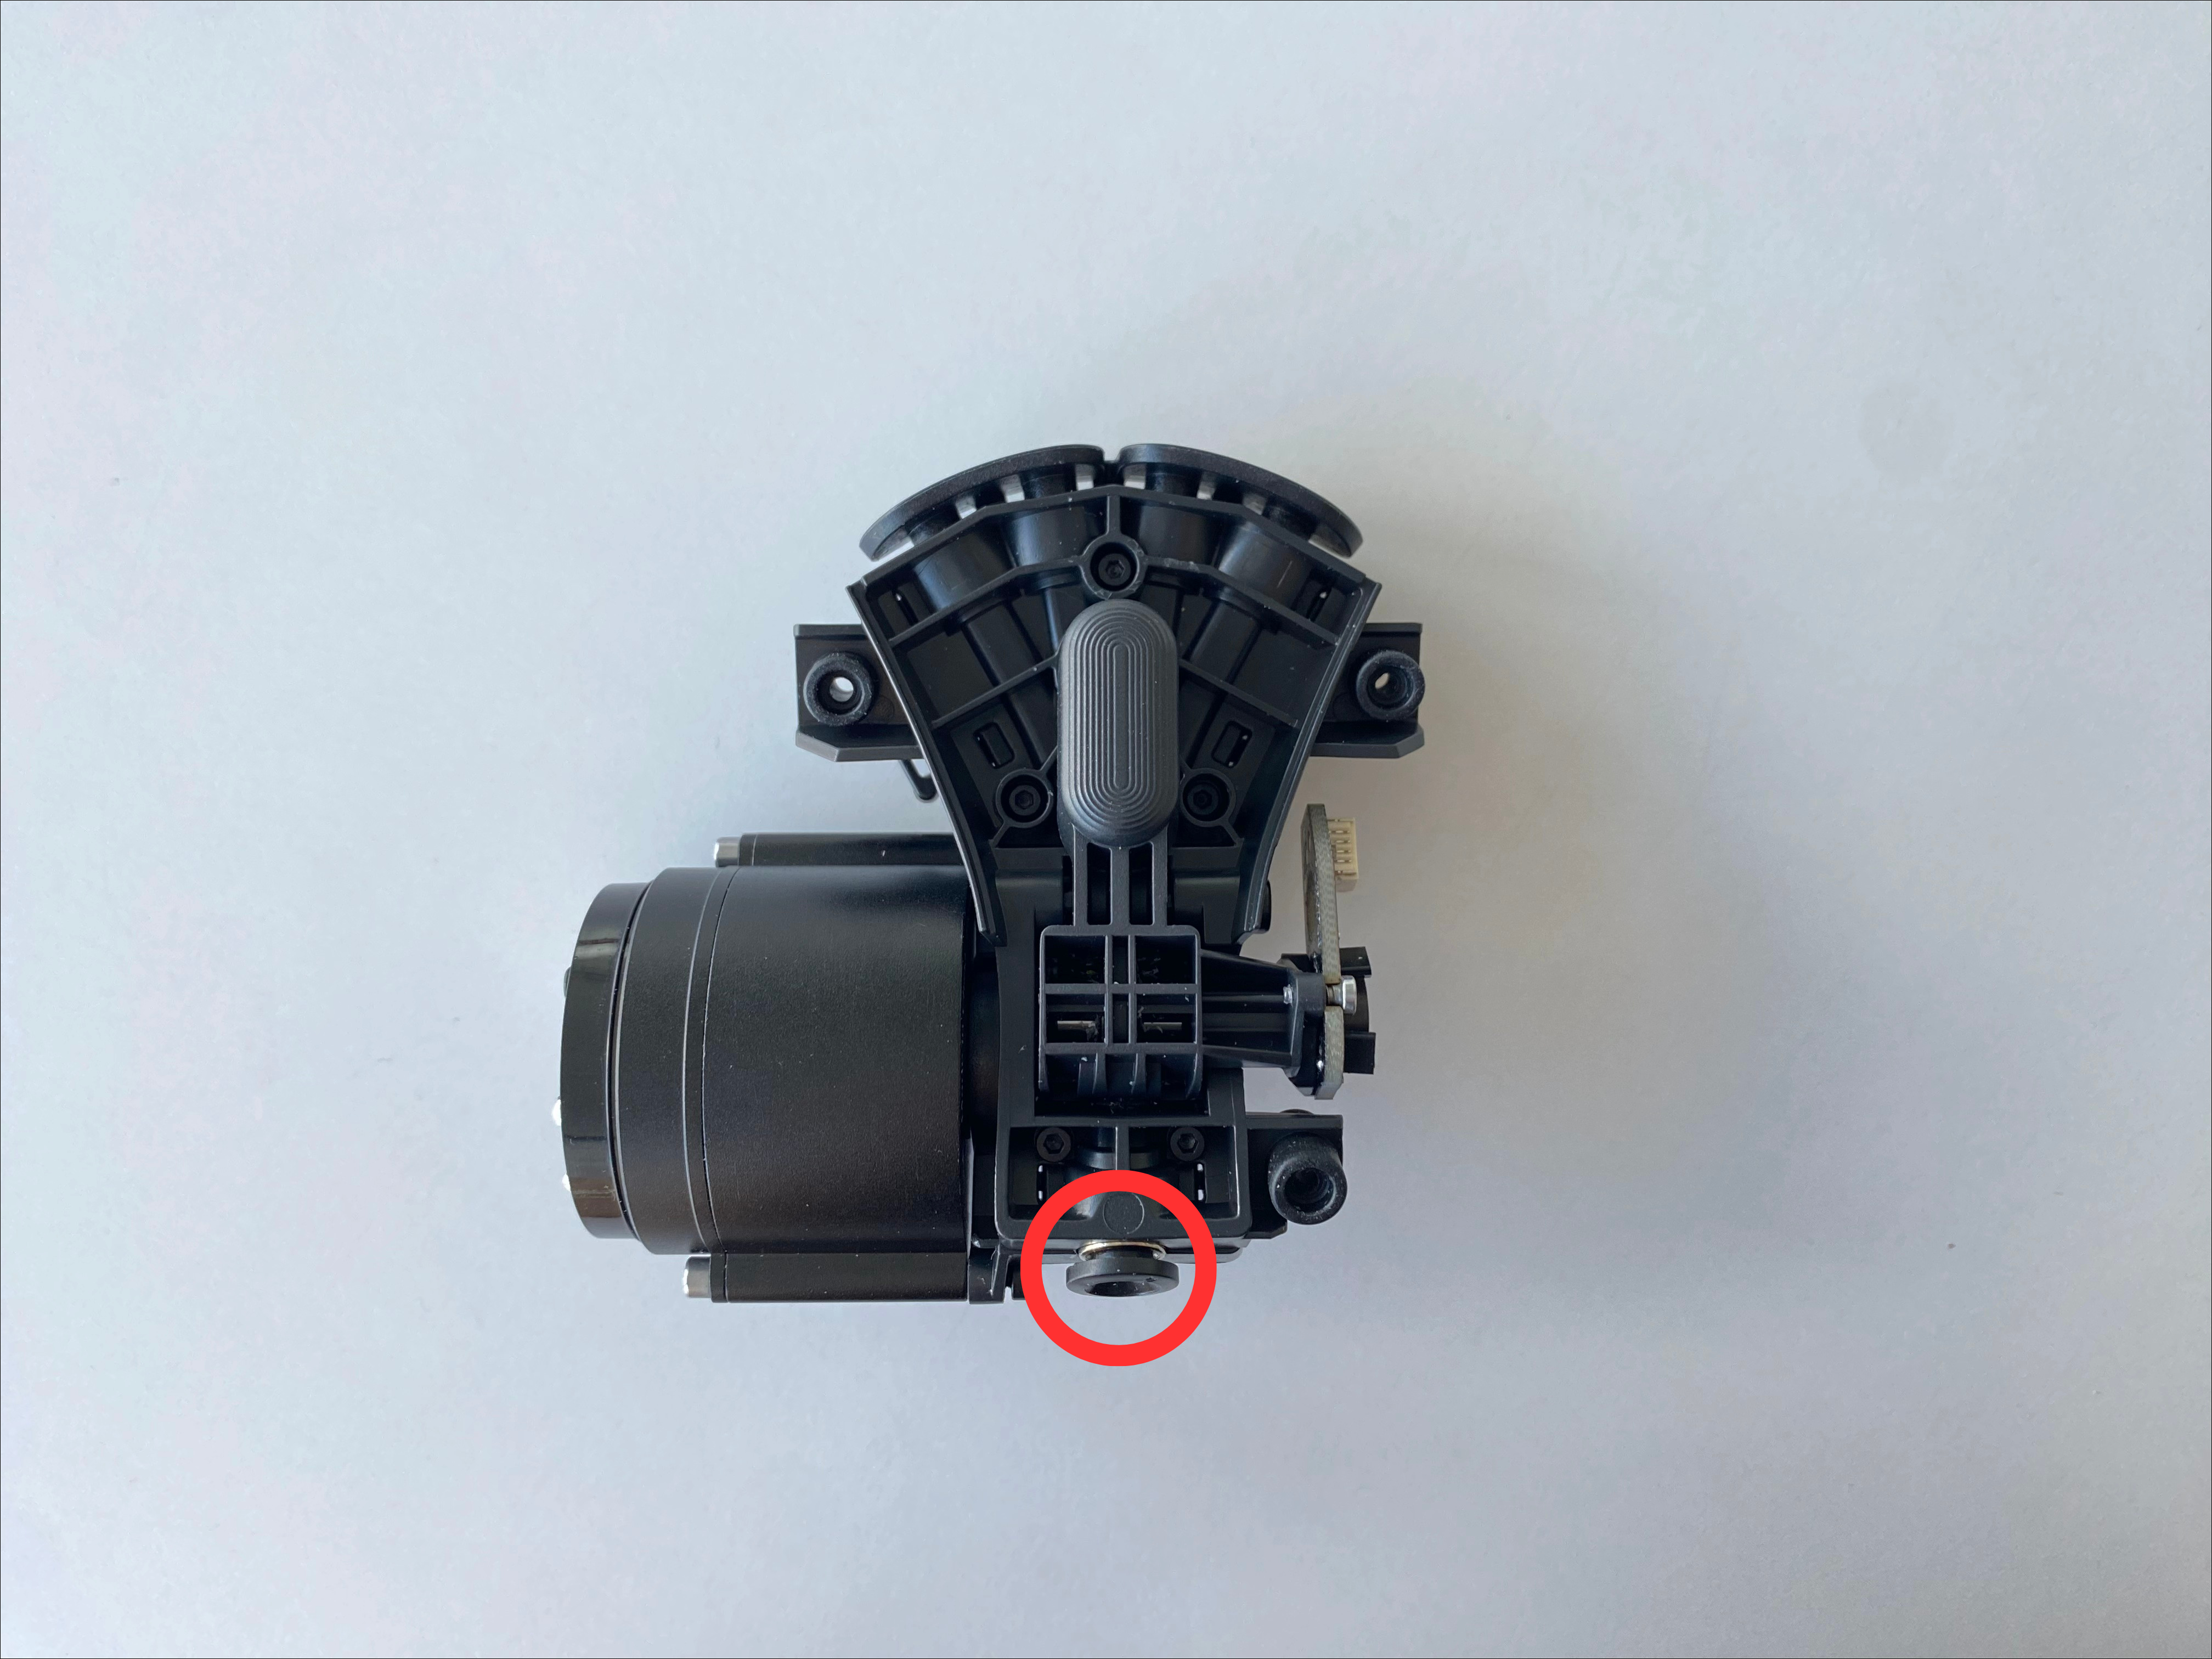
If the pneumatic connector is damaged and cannot secure the PTFE tube, you can refer to the following method to disassemble the AMS internal filament hub and replace the new pneumatic connector.
¶ 1. Disassemble the AMS 2 Pro internal filament hub.
Please refer to the instructions for replacing the AMS 2 Pro internal hub unit to separate the internal hub from the AMS 2 Pro without removing the motor.
Replace AMS 2 Pro Internal Hub Unit and Internal Hub Motor | Bambu Lab Wiki
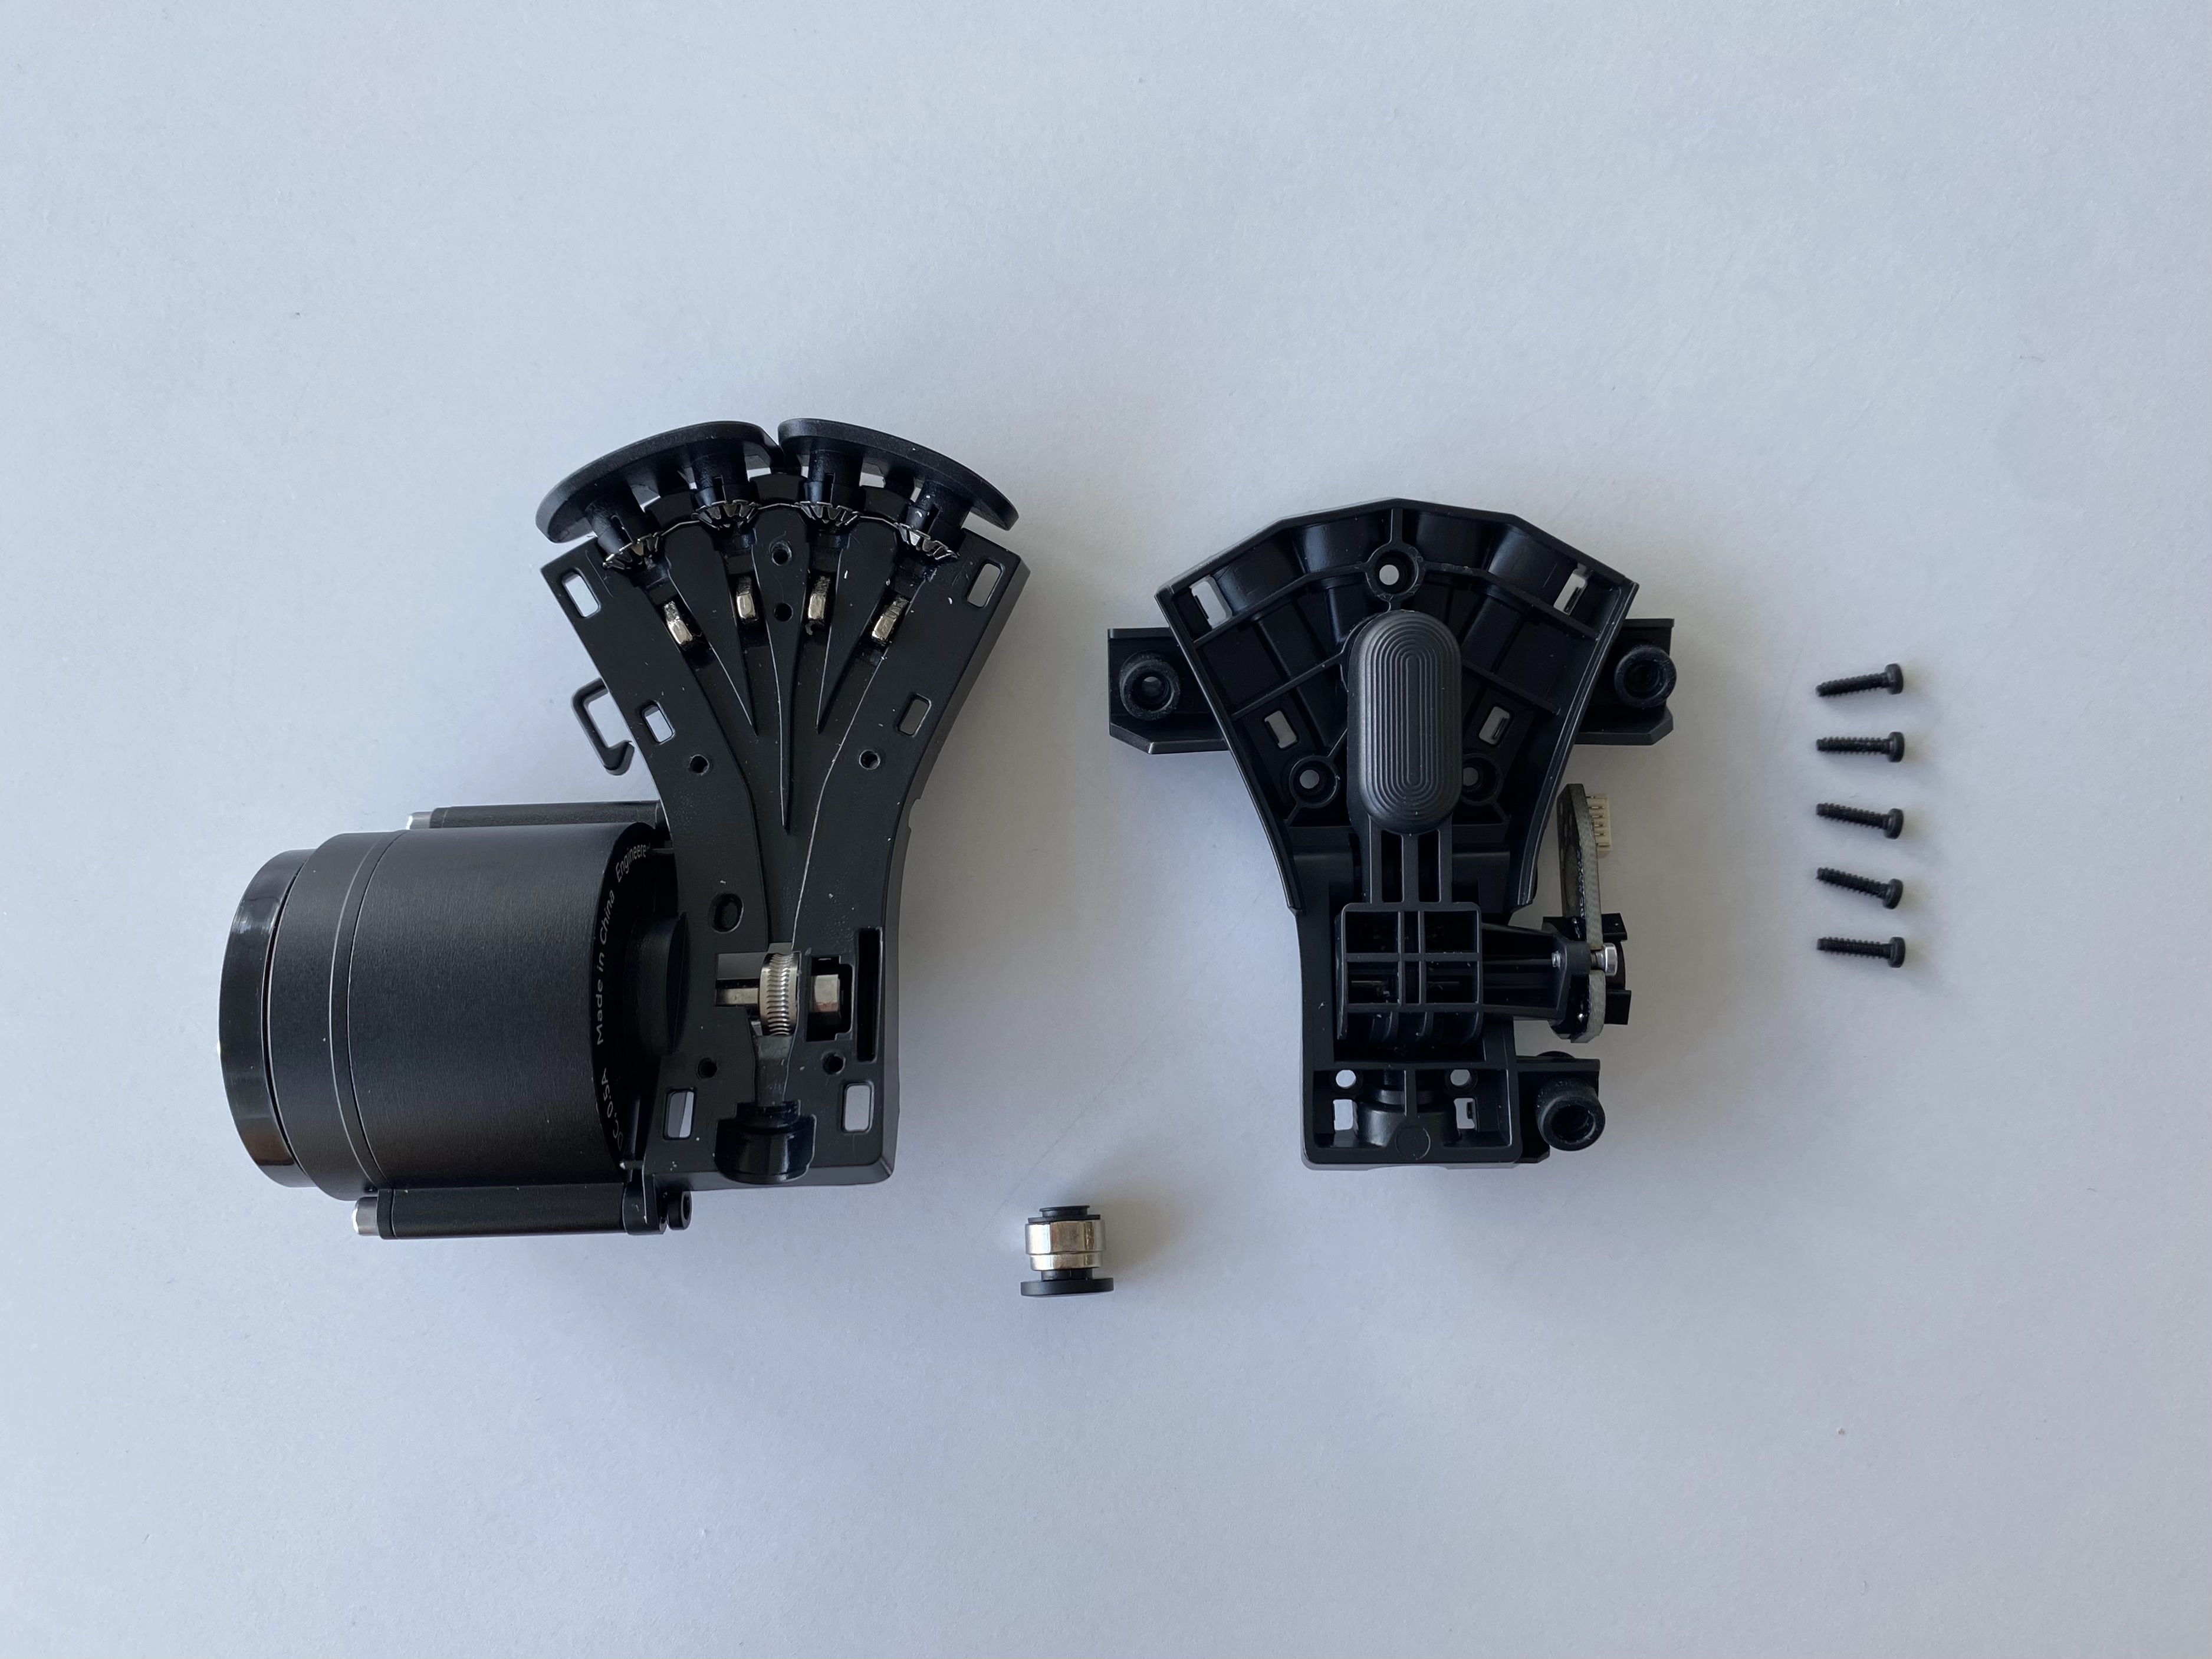
¶ 2. Separate the upper and lower shells of the AMS 2 Pro internal filament hub.
Use a H1.5 hex wrench to remove the five screws and separate the upper and lower shells of the AMS 2 Pro internal filament hub.


¶ 3. Replace the pneumatic connector.
Remove the pneumatic connector and replace it with a new one.
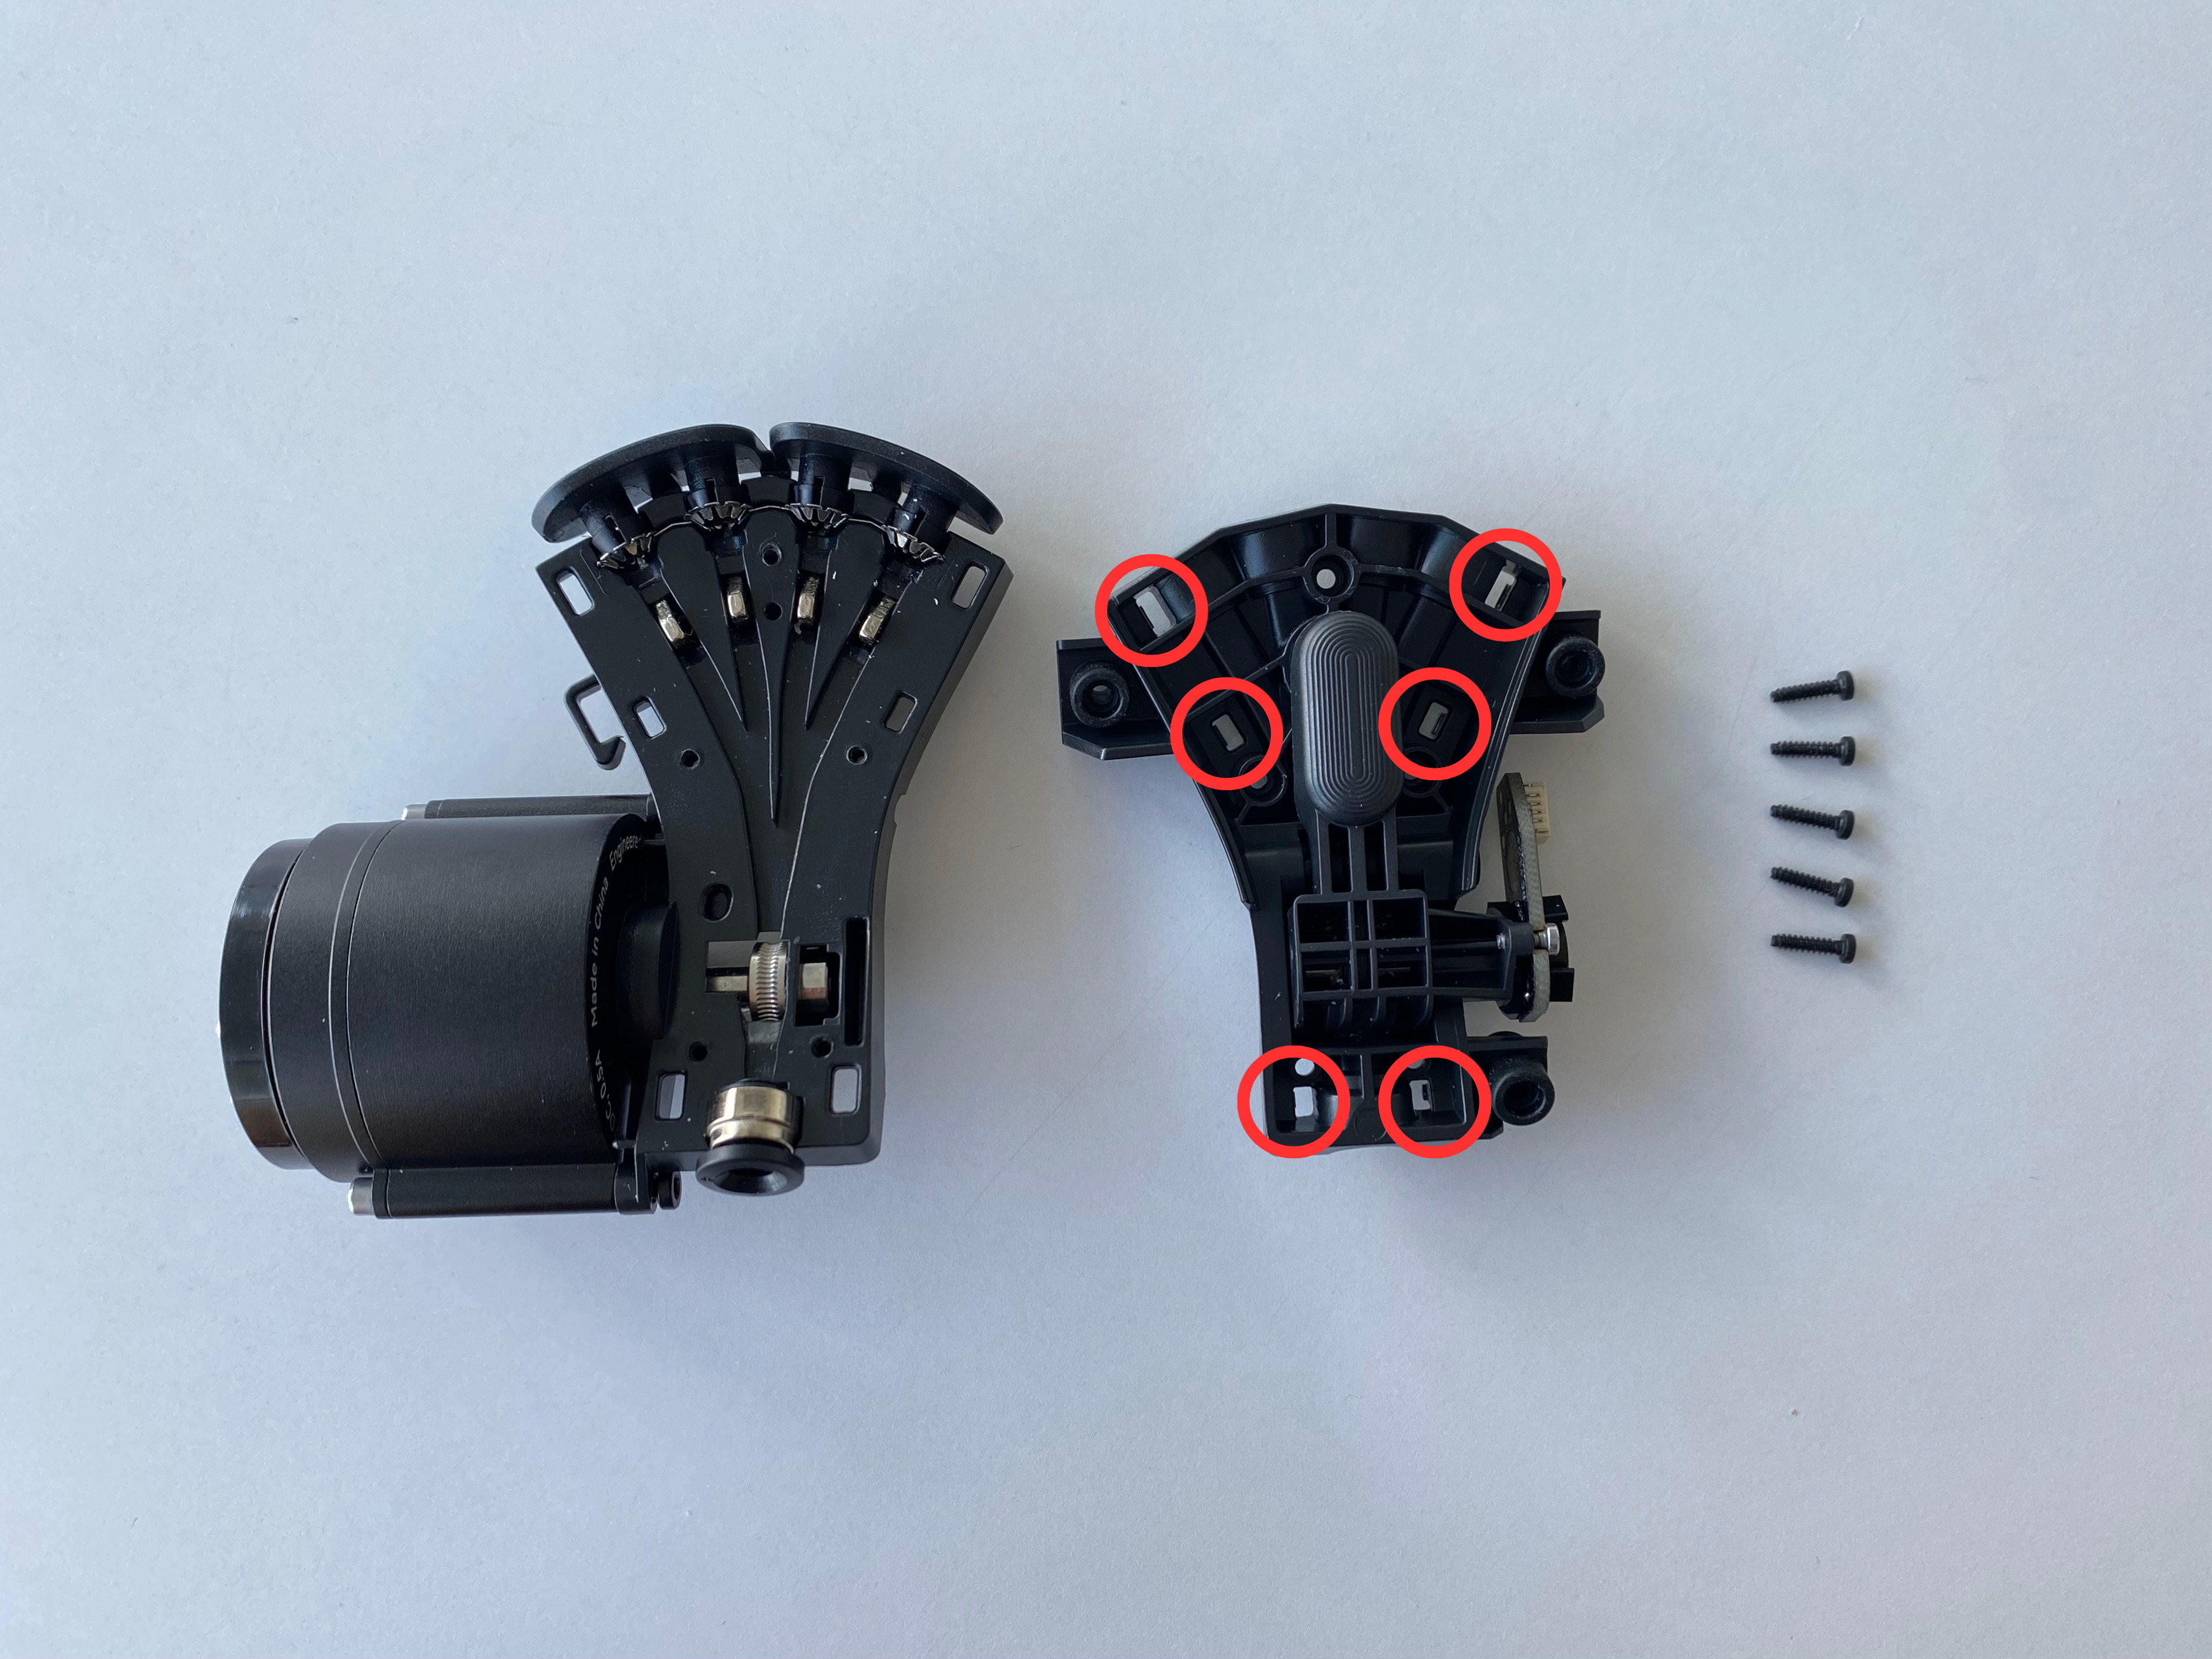
¶ 4. Assemble the upper and lower shells of the AMS 2 Pro internal filament hub.
The upper and lower shells of the AMS 2 Pro internal filament hub can be initially secured with six claws, and then fixed with five screws.

¶ 5. Install the AMS 2 Pro internal filament hub component.
Please refer to the instructions for replacing the AMS 2 Pro internal hub unit to install the internal hub unit, and then assemble the AMS 2 Pro.
Replace AMS 2 Pro Internal Hub Unit and Internal Hub Motor | Bambu Lab Wiki
¶ End notes
We hope that the detailed guide we shared with you was helpful and informative.
We want to ensure that you can perform it safely and effectively. If you have any concerns or questions regarding the process described in this article, we encourage you to reach out to our friendly customer service team before starting the operation. Our team is always ready to help you and answer any questions you may have.
Click here to open a new ticket in our Support Page.
We will do our best to respond promptly and provide you with the assistance you need.