This wiki provides step-by-step instructions for connecting the AMS 2 Pro to the Bambu Lab X1C 3D printer, enabling multi-material printing and filament drying functionality.
¶ What You Need to Have
¶ Option 1: When You Have X1C Only
If you have the X1C only, the necessary component you will have is the H2.0 Allen key only. The other components you will need to purchase are:
- AMS 2 Pro Unit. You can buy it from Bambu Lab store.
- Filament buffer (or AMS Hub for multiple units). You can buy filament buffer or AMS Hub from the Bambu Lab store. Filament buffer comes with 2 M3 × 21.5 screws (for securing the filament buffer).
- Bambu bus cables (4-pin and 6-pin). You can buy them from Bambu store: Bambu Bus Cable. (For the 6-pin cable, you can either buy the 510 mm or the 1500 mm option.).
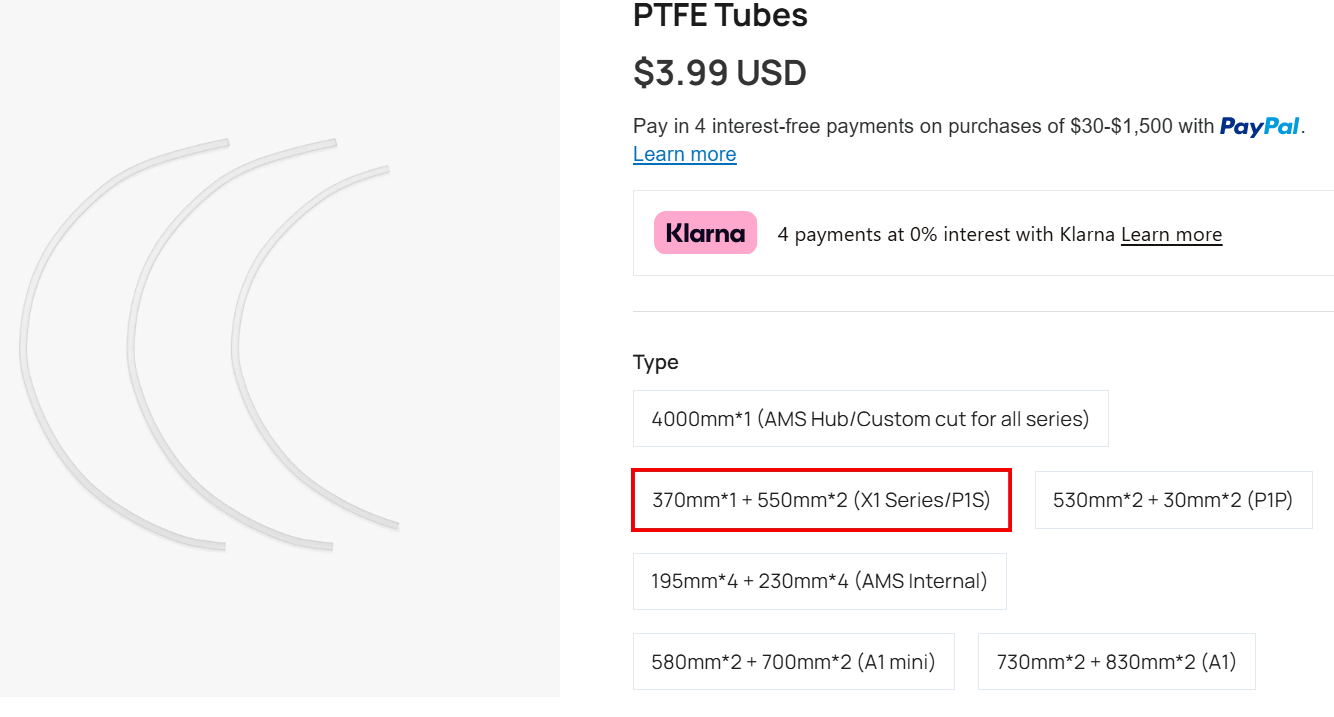
- Two PTFE Tubes for filament buffer (550 mm for AMS 2 Pro to filament buffer, 1 PTFE Tube (370 mm for filament buffer to printer). Buy them from the Bambu store: PTFE tubes.
- Bambu lab switching adapter (required for drying function on X1C). Get it from Bambu store.
- PTFE coupler. Buy it from Bambu lab store: PTFE Tube coupler .
¶ Option 2: When You Have X1C Combo
If you purchased the X1C AMS 2 Pro Combo from Bambu Lab store, it includes the X1C printer, the AMS 2 Pro unit, and all the necessary accessories listed above, except for the 6-pin bus cable (the 6-pin bus cable is not included because the switching adapter serves the same purpose). You won't need to buy any other accessory.
Note: If you want only to dry the filamet, you need only AMS 2 Pro and the switching adapter.
¶ Option 3: When You Bought X1C and AMS 2 Pro Separately
If you have X1C, and AMS 2 Pro that you bought separately, it means you will have only 6-pin bus cable, and you will need to buy the following components:
- Bambu 4-pin bus cable.
- Two PTFE Tubes for filament buffer: (550 mm for AMS 2 Pro to filament buffer, and 1 PTFE Tube (370 mm for filament buffer to printer).
- Bambu lab switching adapter.
- Filament buffer
- PTFE coupler.
¶ How to Connect AMS 2 Pro to X1C
¶ Step 1: Update the Firmware
You need to update the firmware to the latest version before connecting AMS 2 Pro to avoid initialization issues. Check the X1/X1C and AMS Firmware Release History for details.
¶ Step 2: Unbox the AMS 2 Pro
Remove all packaging materials from the AMS 2 Pro and verify that all included components are present. Check out the AMS 2 Pro unboxing and setup wiki to learn how to unbox it. Follow that guide up to the section for checking the active drive shafts.
Place the AMS 2 Pro on top of the X1C for optimal space efficiency.
¶ Step 3: Connect the Tubes
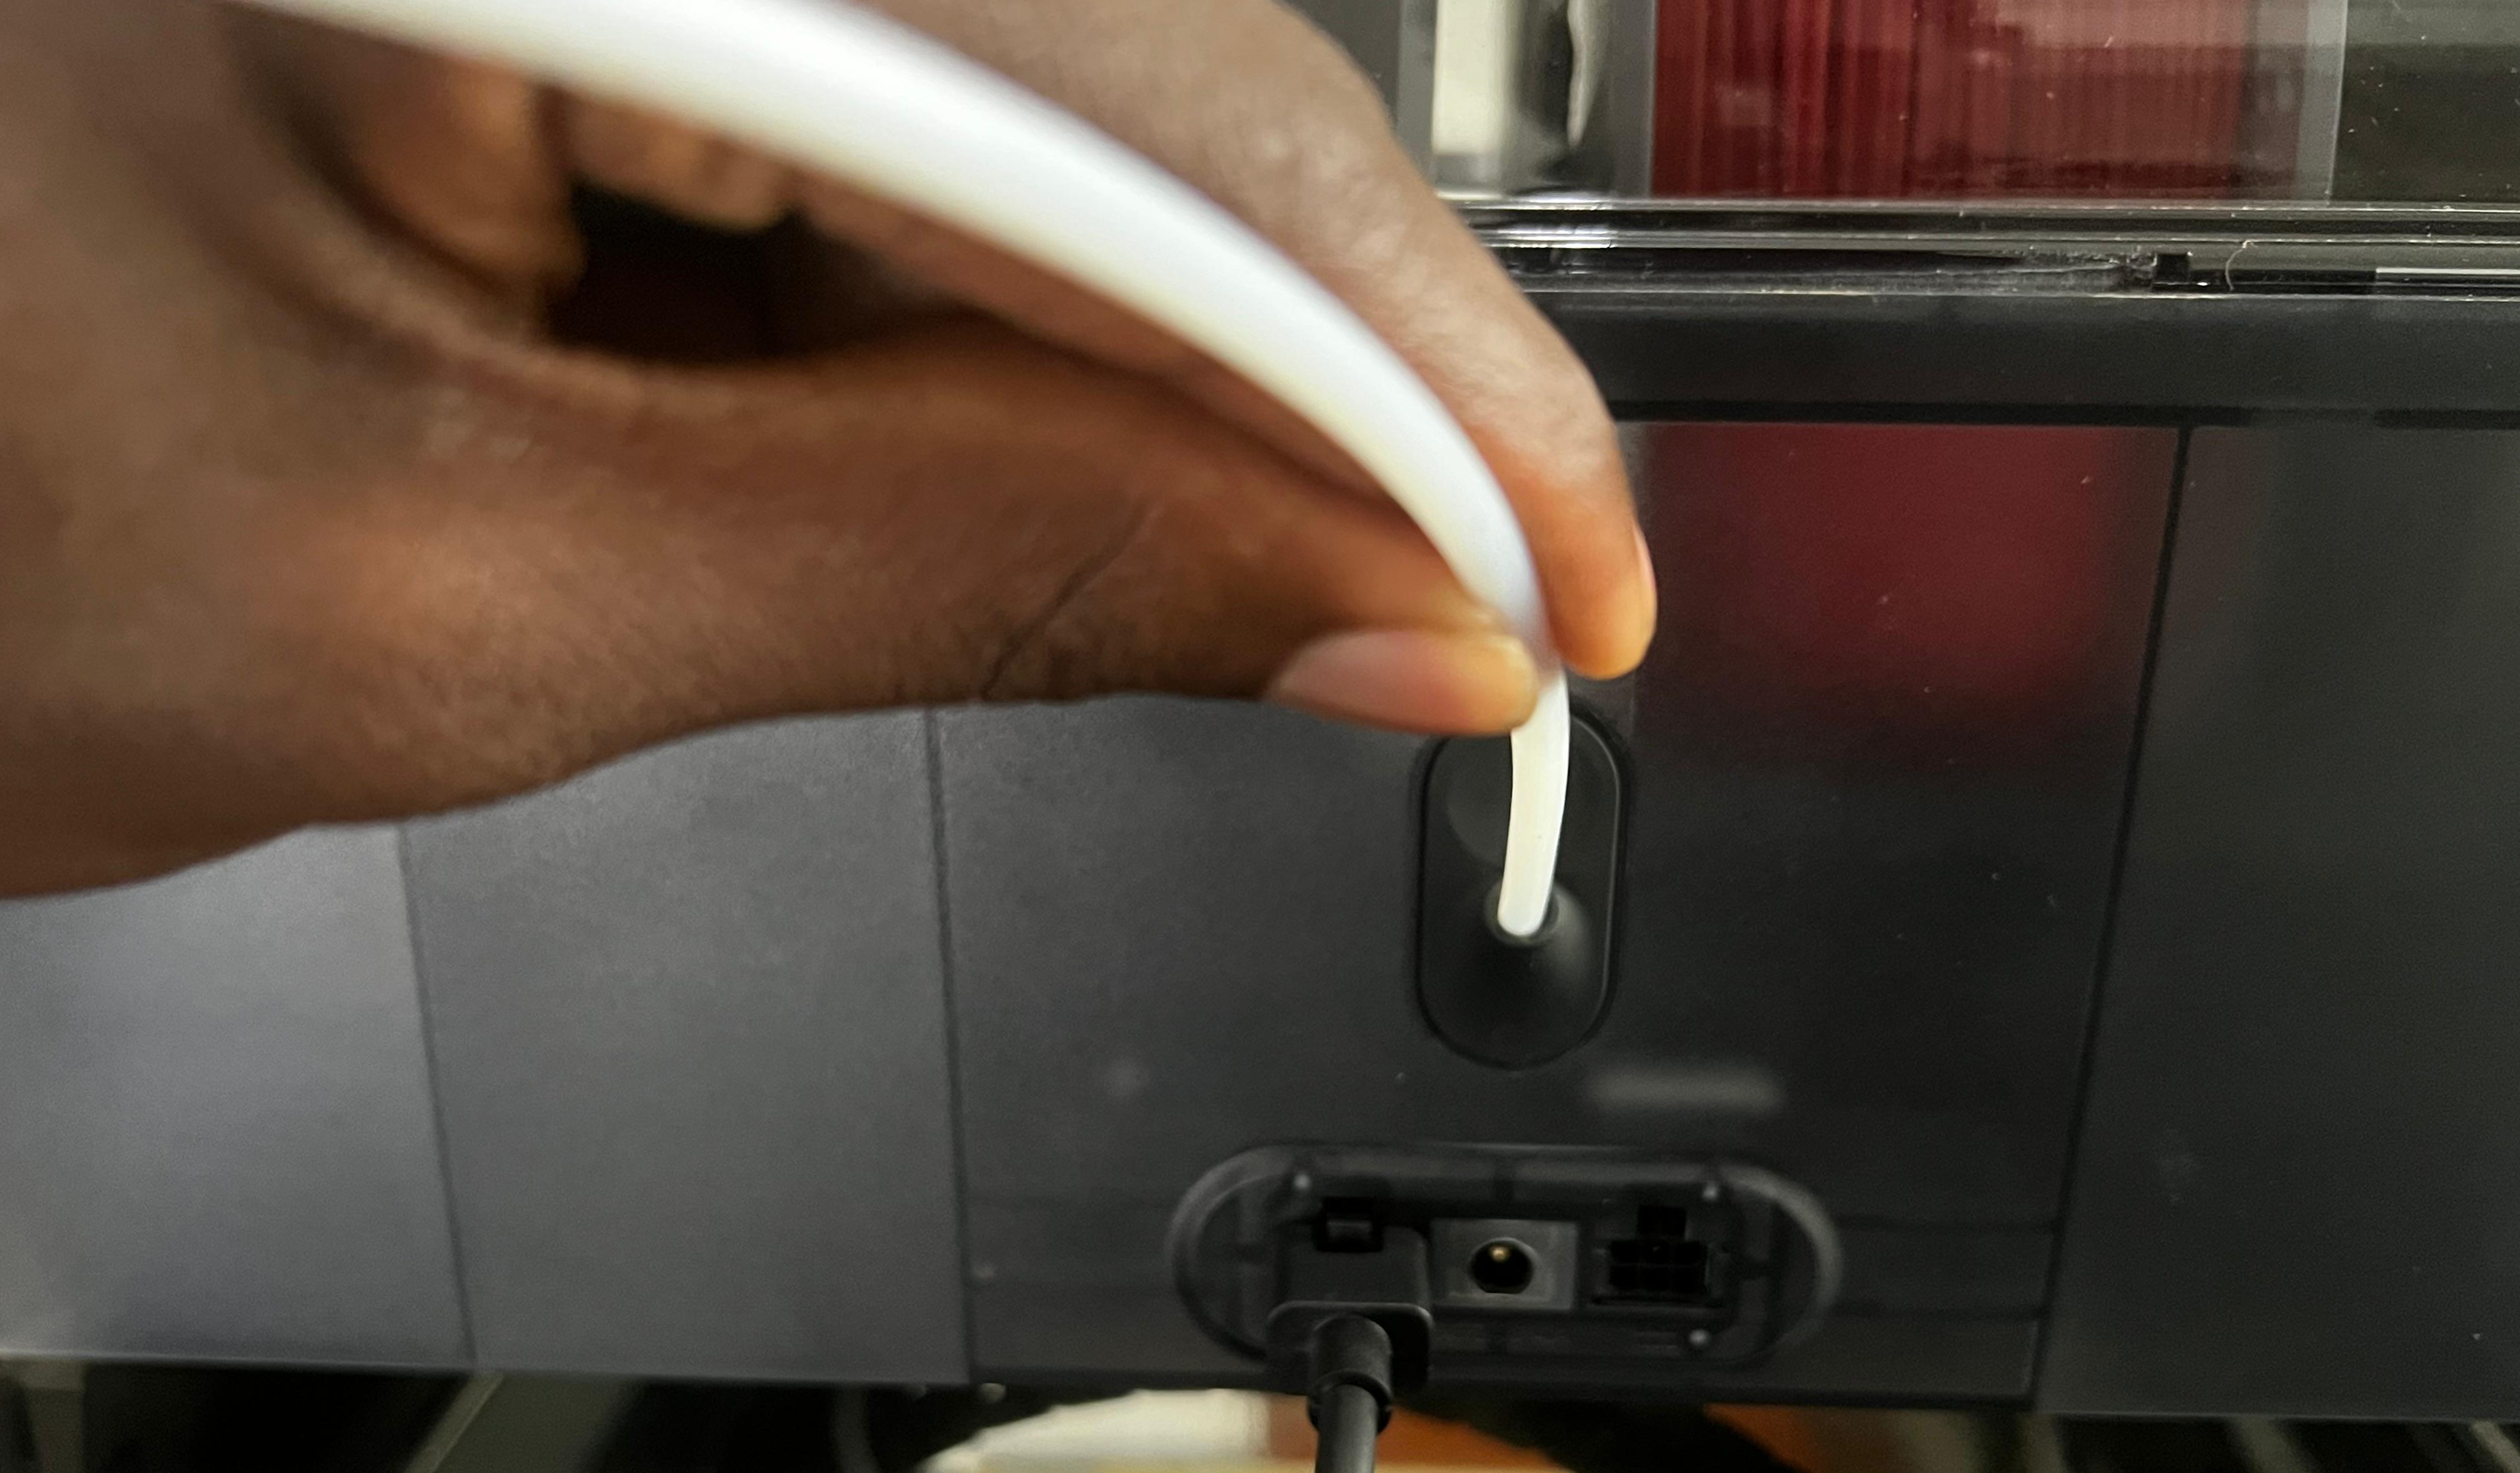
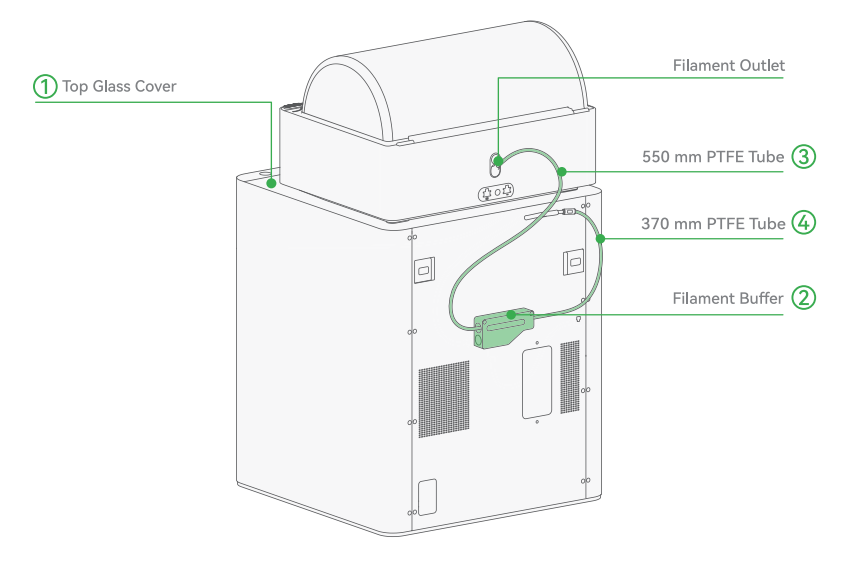
Push the PTFE tube (500 mm) from the rear of the AMS. After installation, pull the PTFE tube to confirm that it is securely fixed. Then, insert the other end into the left port of the filament buffer.
 |
 |
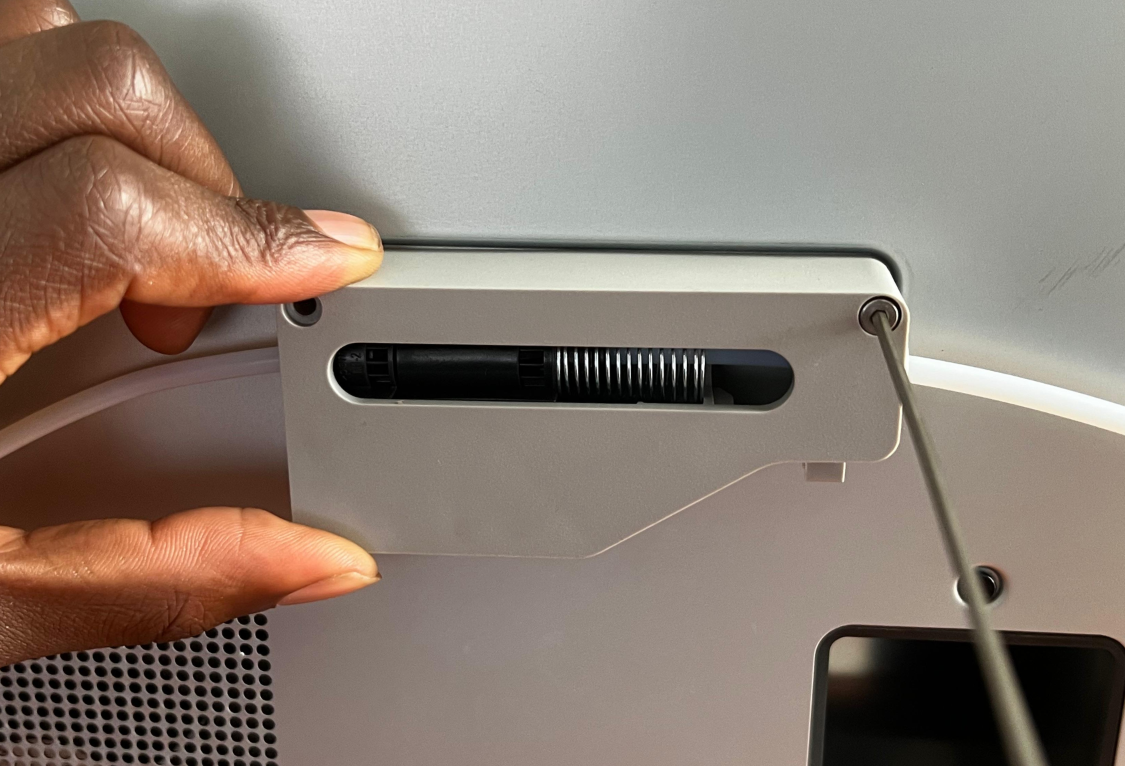
Next, insert one end of the 370 mm PTFE tube into the right port of the filament buffer, then the other end into the black section of the PTFE coupler.
 |
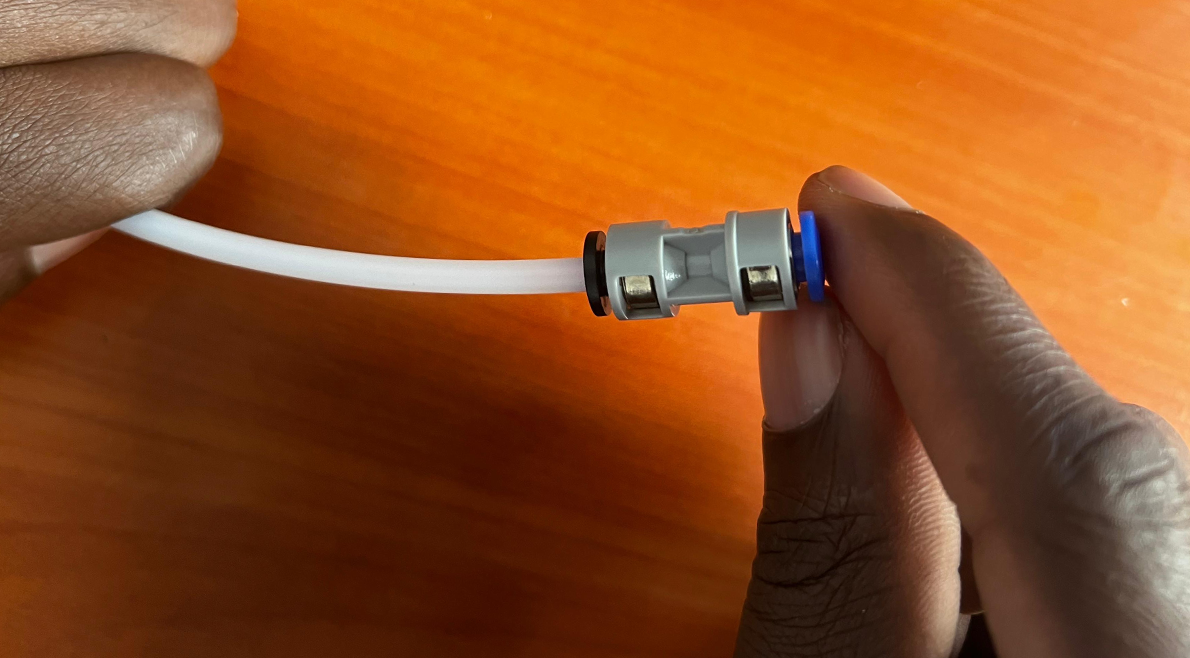 |
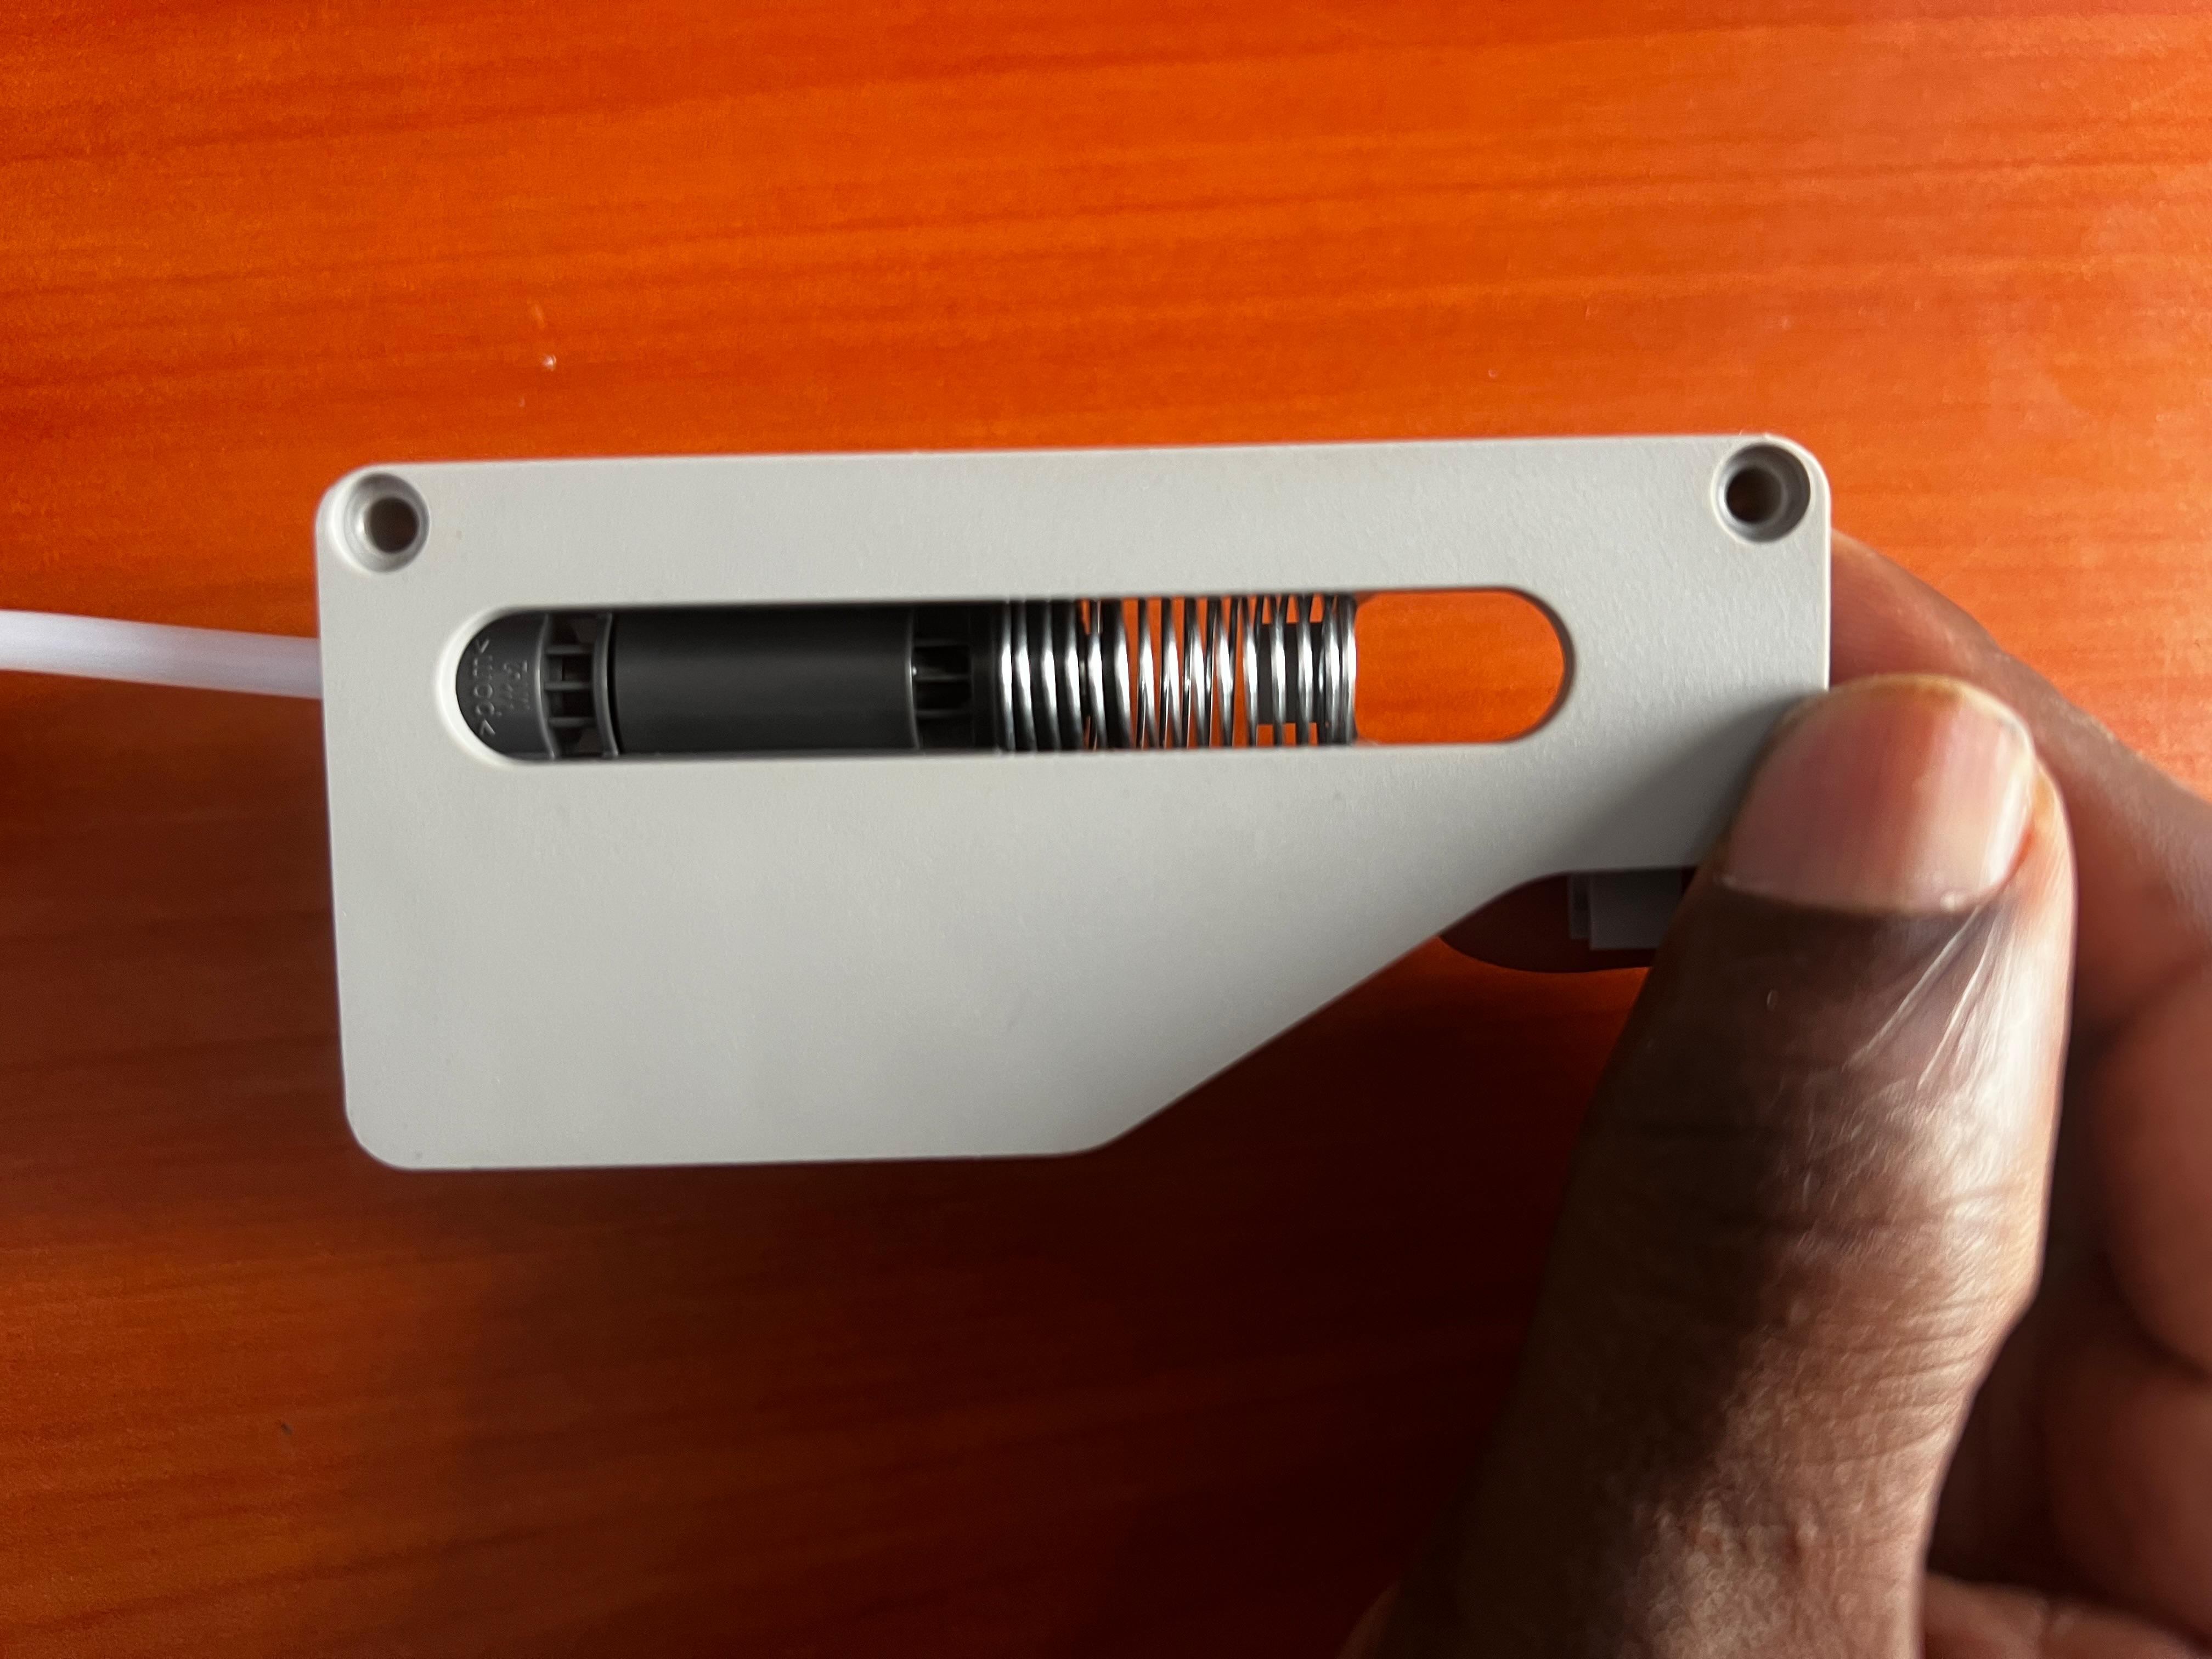
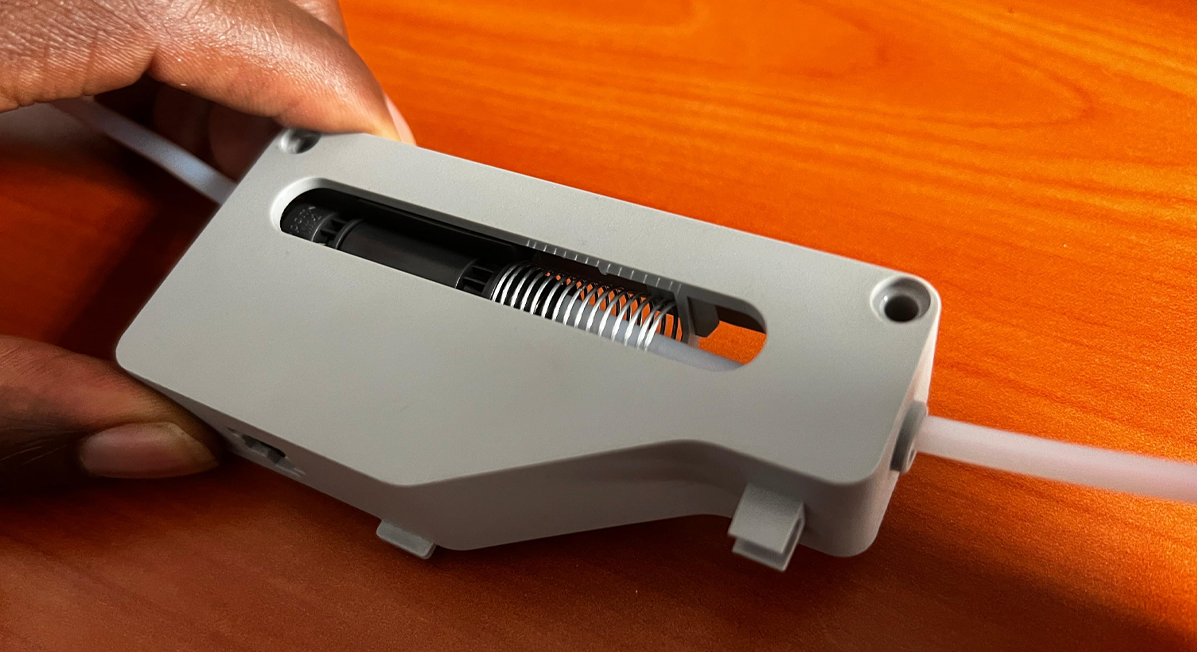
The spring should not be stuck/compressed. It should move freely within filament buffer. You can try pulling it and see if it's inserted correctly. The spring inside will stretch as you push.
¶ Step 4: Install the Filament Buffer
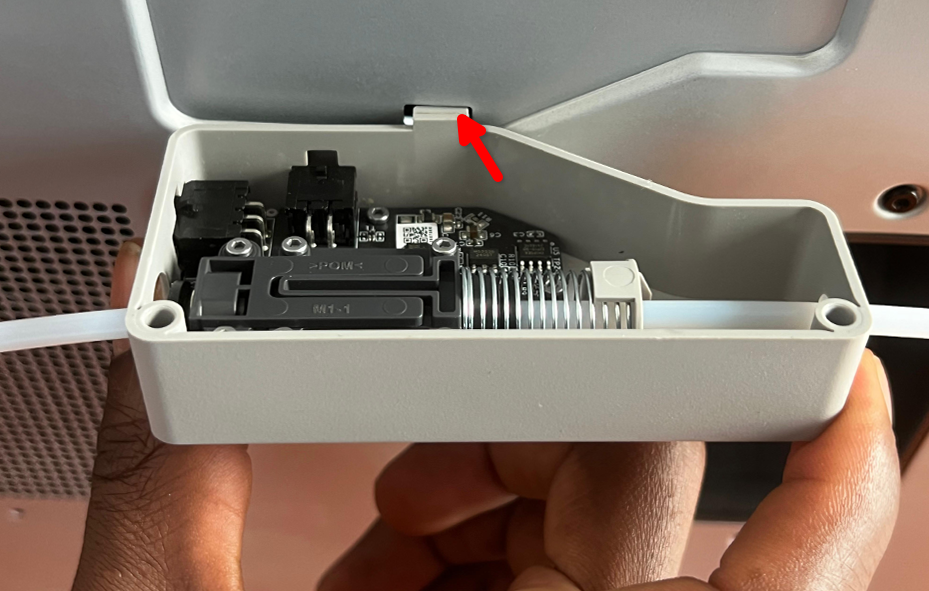
At the back of the X1C, identify the indentation matching the filament buffer's shape. Position the filament buffer correctly, ensuring the bottom tab enters the hole at the bottom, as shown below.
The Gif below also shows the process.
Use a H2.0 Allen key to secure the buffer to the 3D printer using the two M3 x 21.5 screws.
Next, insert the PTFE coupler connector to X1C, directing the filament to the extruder.
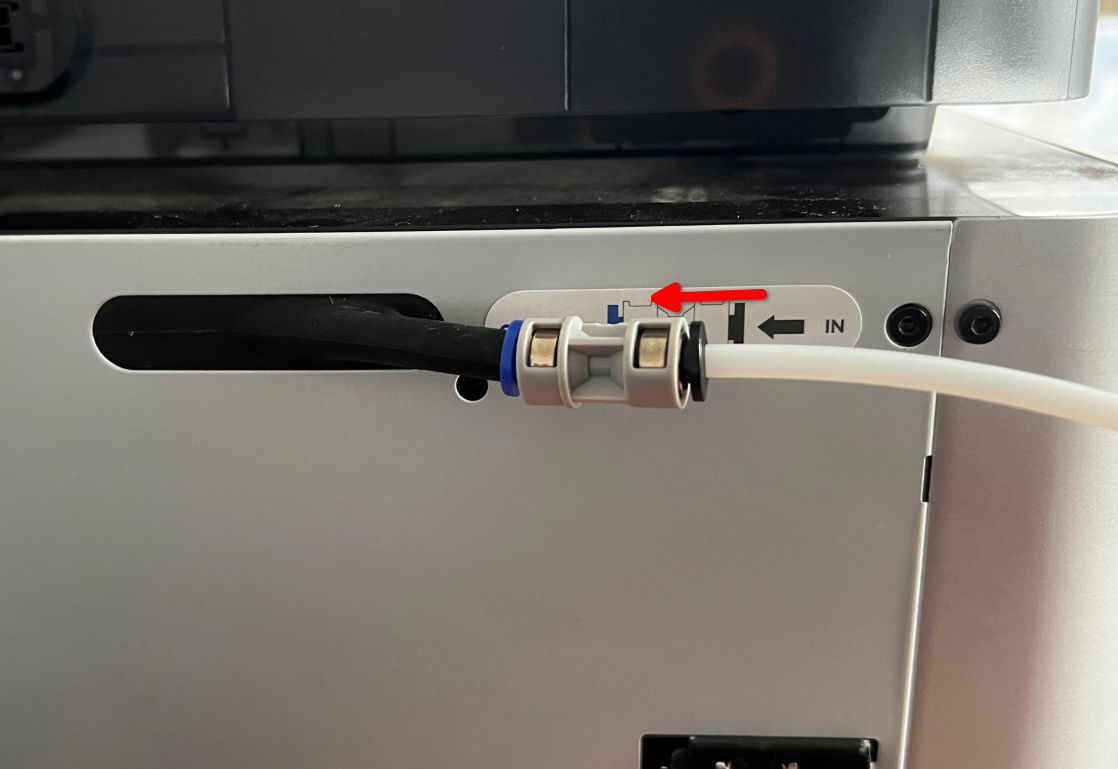
The entire connection should be as shown below.
Ensure the PTFE tube is routed under the spool holder, not over it.
Note: If using multiple AMS 2 Pro units, replace the filament buffer with an AMS Hub to connect up to four AMS units. Refer to the AMS Hub connection guide for details.
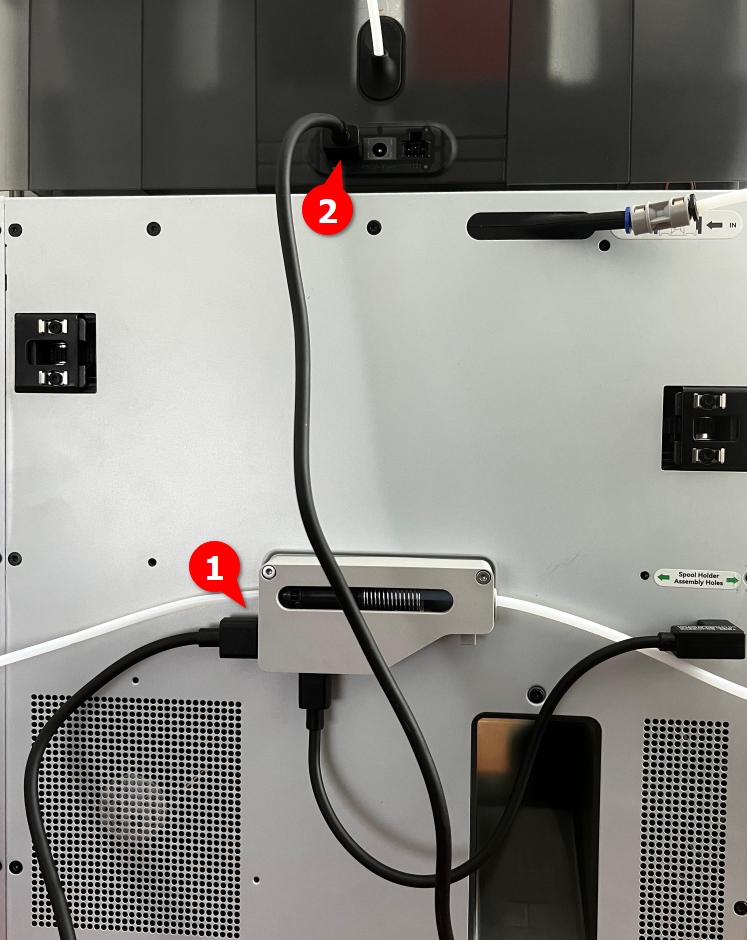
¶ Step 5: Connect the Bus Cables
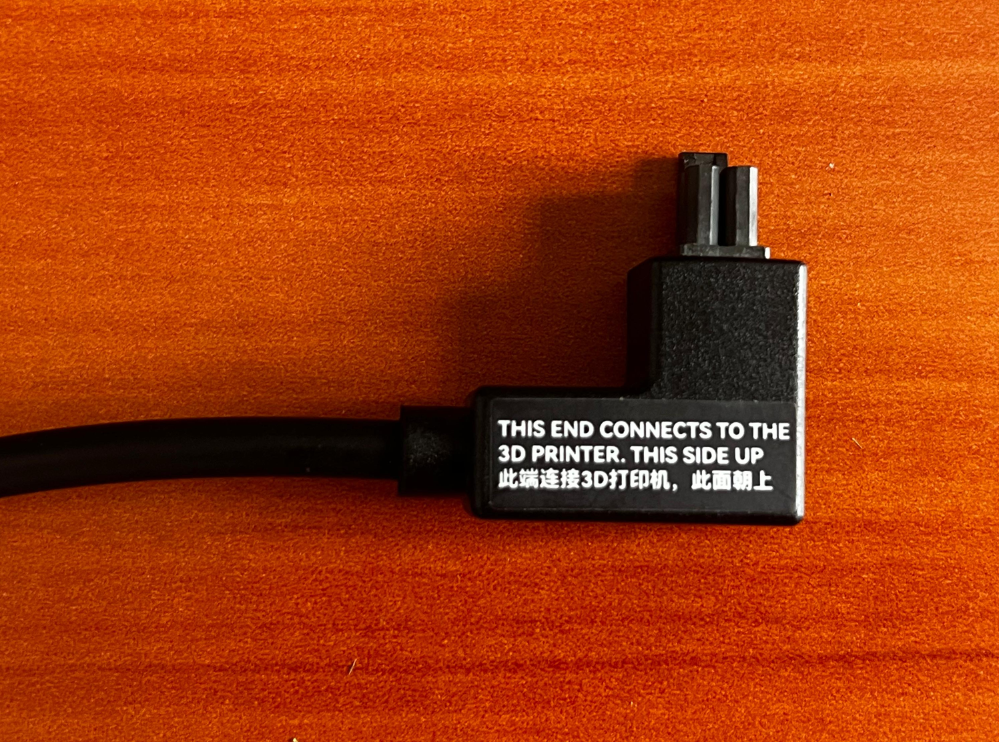
Take the 4-pin bus cable (L-shaped), then connect it to the 4-pin port on the back of the 3D printer. Ensure the orientation is correct.
 |
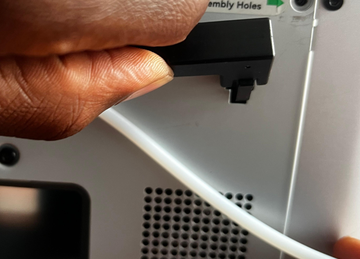 |
Next, connect the other end to the bottom port of the filament buffer.
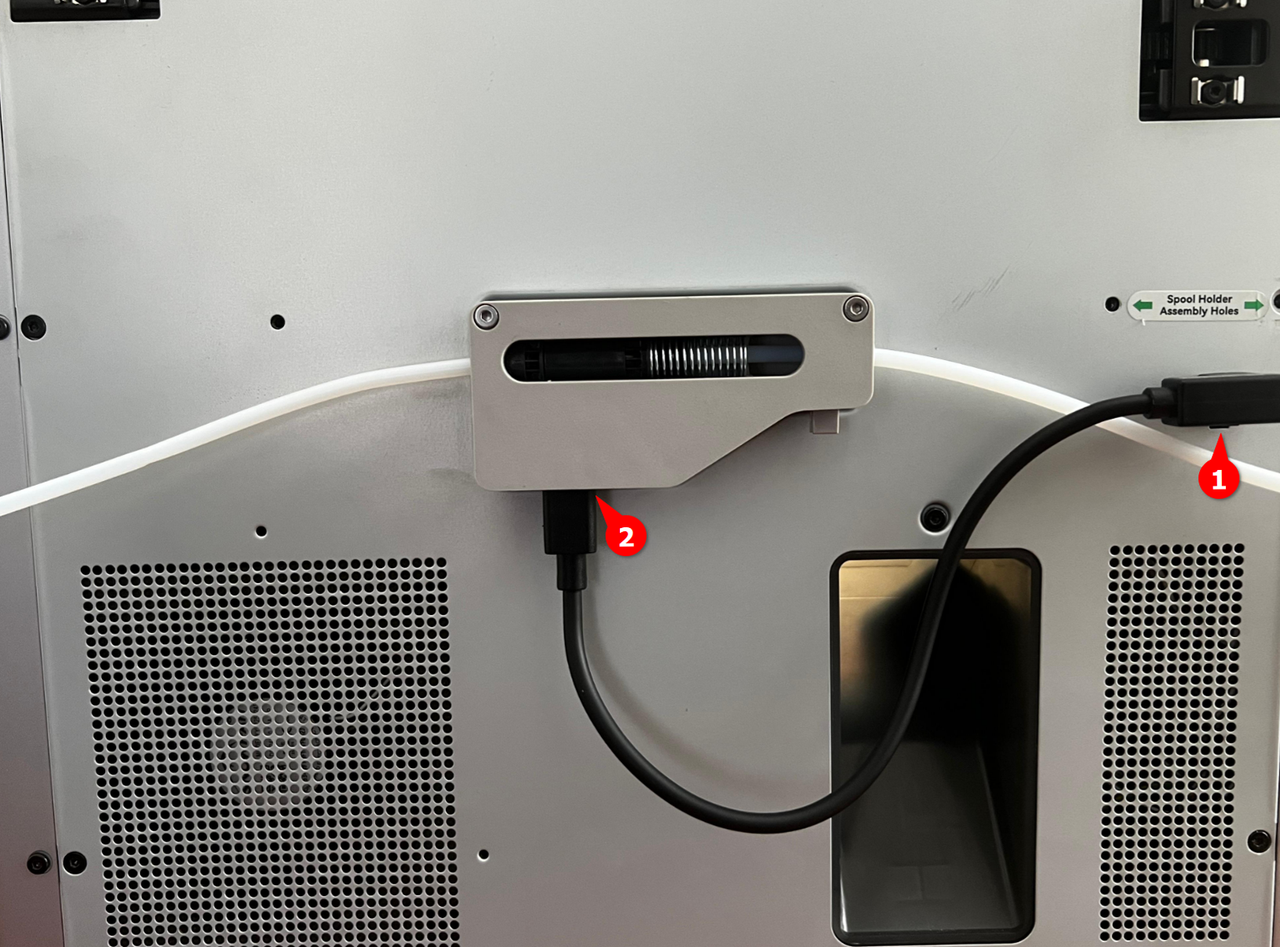
Take the 6-pin Bambu Bus cable and connect one end to either of the two 6-pin ports on the AMS 2 Pro (both ports are the same). Connect the other end to the left port of the filament buffer (both ends of the cables are identical).
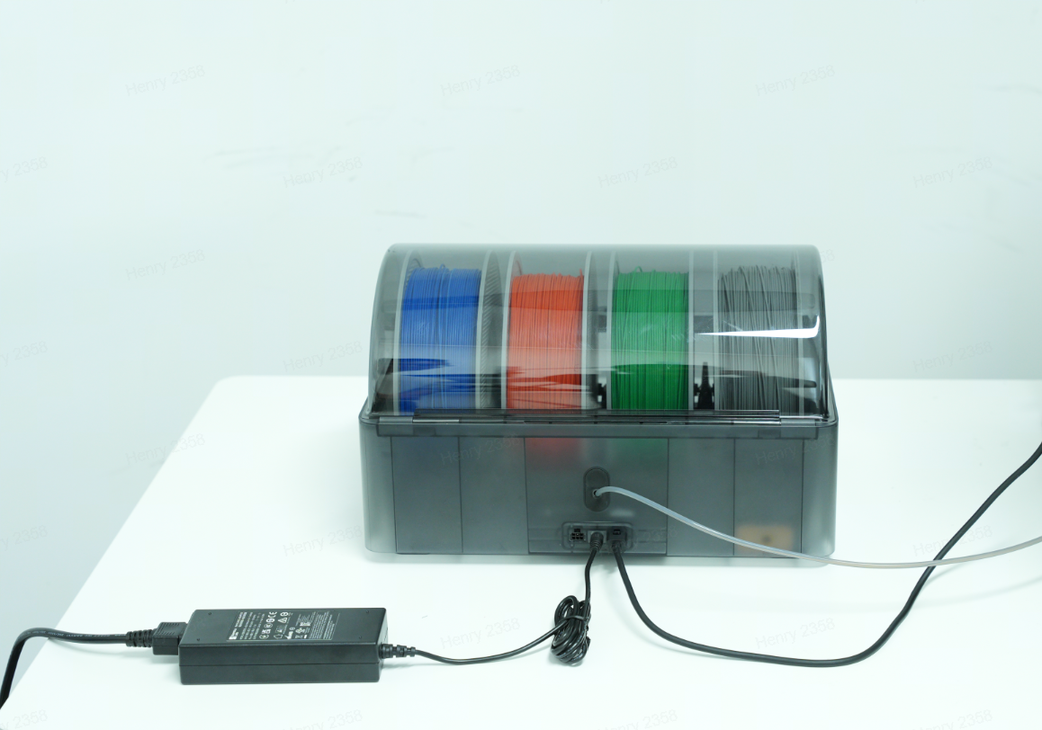
¶ Step 6: Power the AMS 2 Pro (For Drying Function)
If you plan to use the drying function, you must plug the Bambu Lab Switching Adapter into the power connector of the AMS 2 Pro, then plug it into a power outlet.
Note: Each AMS 2 Pro used for drying requires its own power adapter. If you are using several AMS 2 Pro, plan to have a power adapter for each.
¶ Step 7: Turn on the 3D Printer and Check the AMS 2 Pro
Turn on the X1C and ensure the AMS 2 Pro is connected. On the X1C touchscreen, navigate to the Filament section. If the AMS 2 Pro is properly connected, you will be able to see it there.
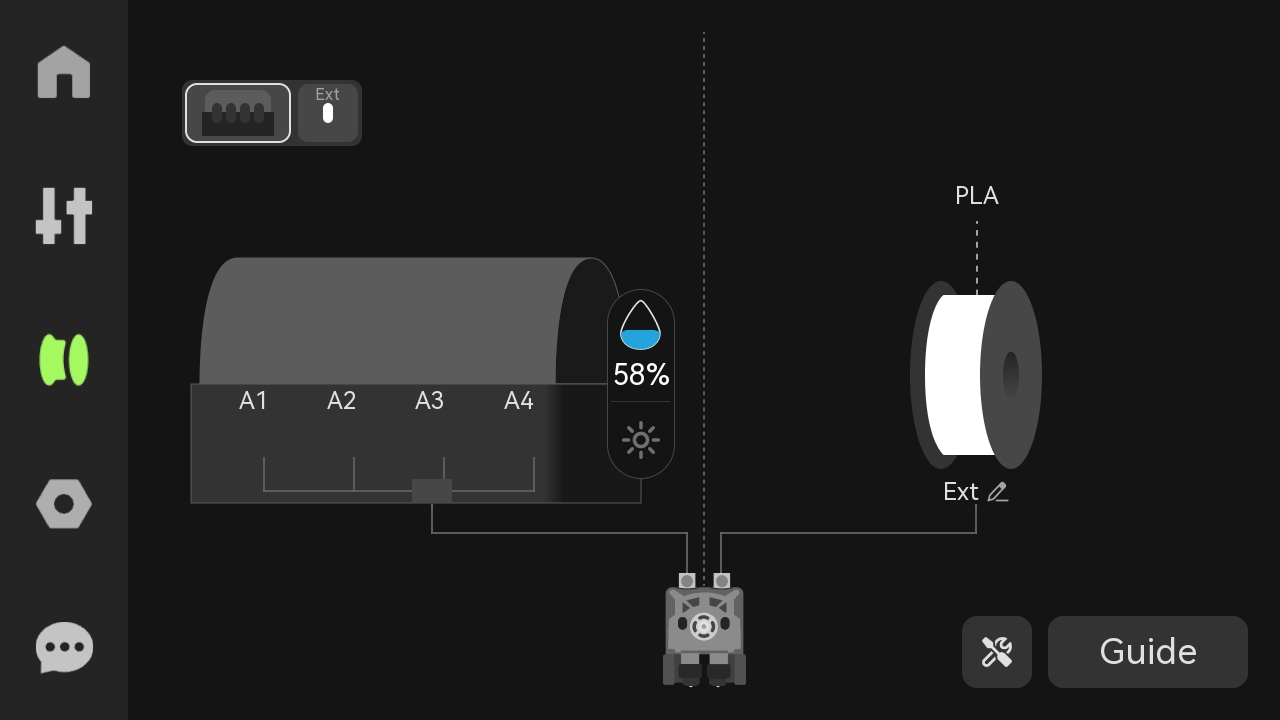
If the AMS is not detected, verify all cable connections and ensure the 4-pin and 6-pin cables are fully seated.
¶ Step 8: Insert and Load the Filament
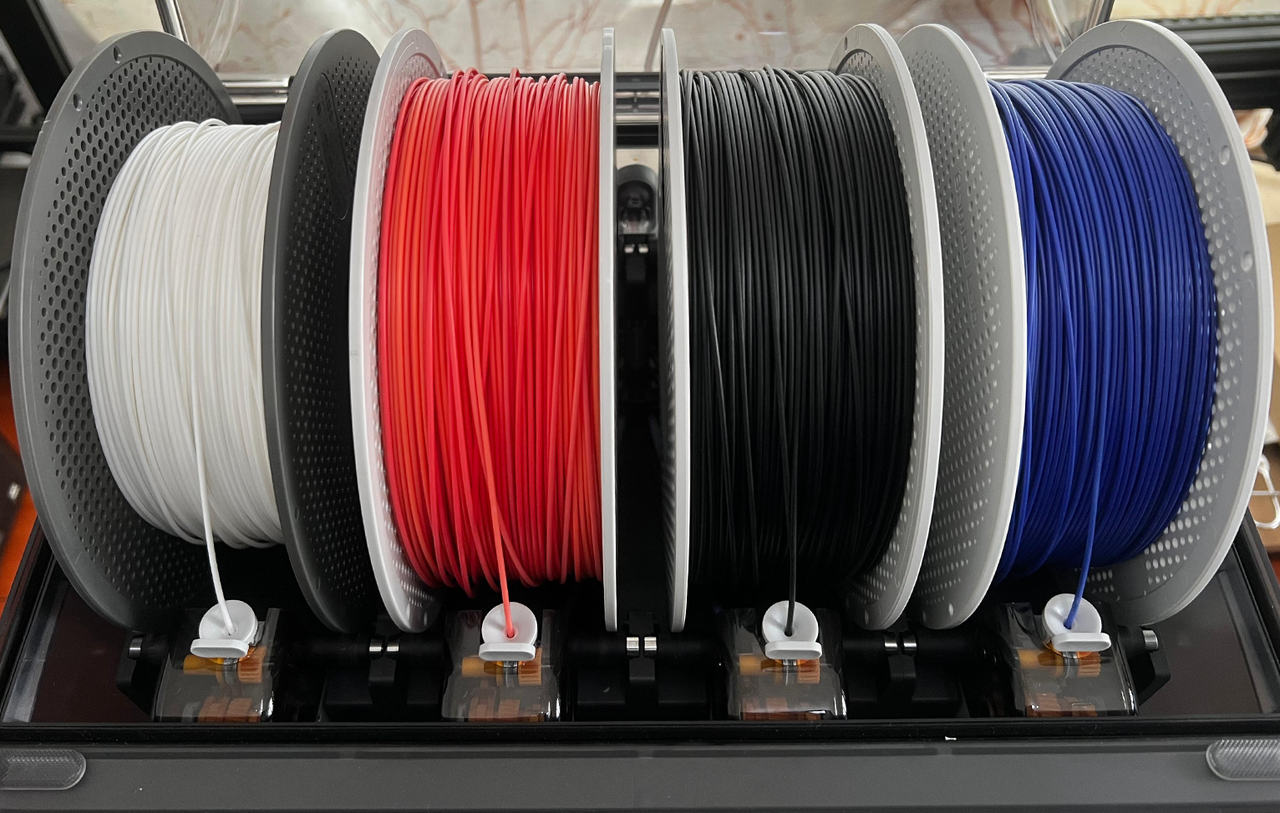
Lift the top cover of the AMS 2 Pro to access the filament slots, then place the filament spools in the slots. Gently push the grey feeder tab and insert the filament about 2 cm. The AMS 2 Pro will detect the filament and begin to pull it.
 |
To load the filaments, click on each of them, then select "Load".
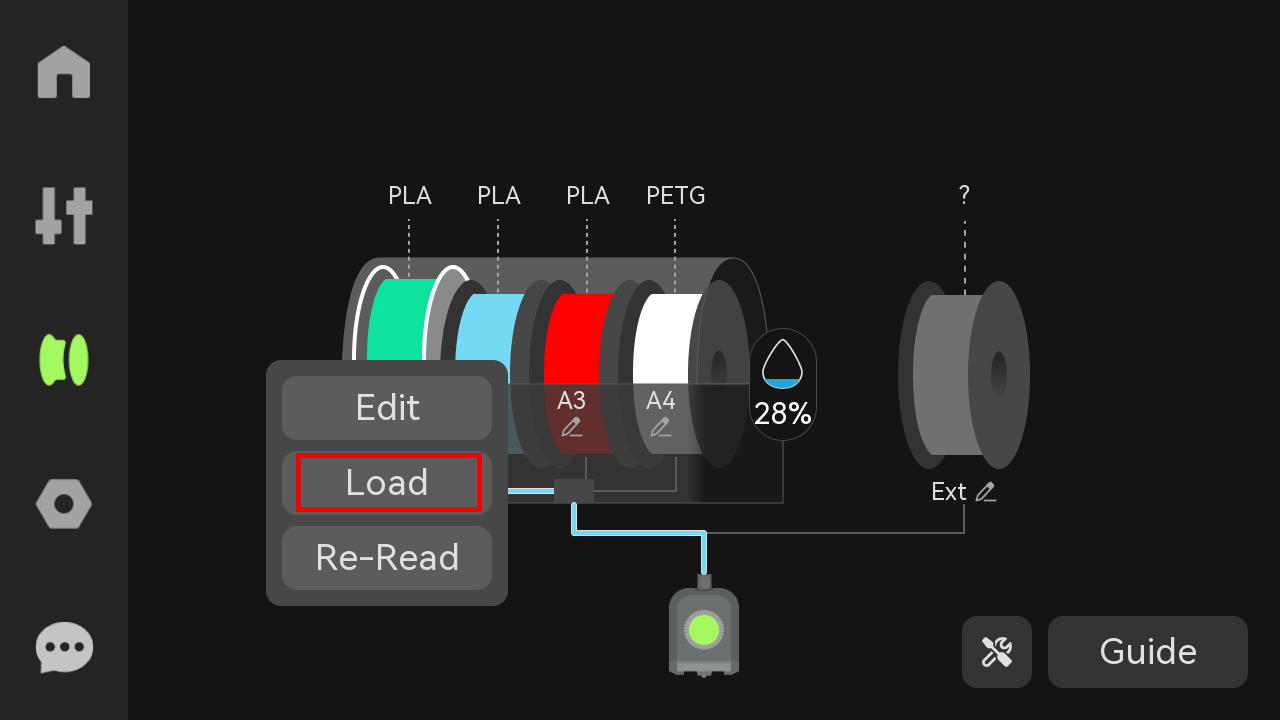
For Bambu Lab filaments, the RFID reader will automatically detect the filament type and color. For third-party filaments, manually set the filament type and color in Bambu Studio or on the X1C touchscreen.
Note: Do not edit filament information during the printing process.
¶ Use AMS 2 Pro for Multi-Color 3D Printing or Filament Drying
After connecting, you are now ready to start using the AMS 2 Pro either for multi-color 3D printing or for drying filament. Check out the multi-color 3D printing guide to learn how to create 3D prints in various colors using AMS 2 Pro. If you would like to use it for drying, refer to the X1C wiki for instructions on using the AMS 2 Pro for drying.
¶ Troubleshooting
- AMS 2 Pro not recognized: If the AMS 2 Pro is not recognized at all, check that all cables are fully and securely connected. Refer to the official Bambu Lab AMS troubleshooting guide for detailed steps or submit a technical support ticket for assistance.
- Issues with multiple AMS units: If multiple AMS 2 Pro units are not detected, ensure you're using the AMS Hub instead of the filament buffer.
- AMS 2 Pro not functioning properly: If the AMS 2 Pro is not functioning properly, especially the drying function, ensure your X1C firmware is up to date, and also ensure you use Bambu Lab switching adapter.
- Incorrect cable routing: Avoid routing cables around sharp corners or near moving printer parts. Tension or repeated flexing can cause internal wire breakage, leading to AMS malfunctions.
- AMS 2 Pro not drying: The AMS needs the power adapter to dry on X1C.
¶ End Notes
We hope our guide was helpful. If you have any questions or concerns about the process, please contact our customer service team. We're here to assist you.
Click here to open a new ticket in our Support Page.
We will do our best to respond promptly and provide you with the assistance you need.