Wiki in additional languages can be found below:
¶ Safe information
-
Do not operate the cutting module unless it is correctly installed with all safety locking and detection mechanisms active.
-
Do not hold materials by hand during cutting.
-
If the cutting module becomes jammed or obstructed, immediately cut off the printer’s power. Wait for all moving parts to stop before disconnecting the cutting module connector. Only then can you handle the module and material.
-
Before removing the blade from the holder, securely cover it with the provided rubber protective cover to prevent injuries while handling. Please visit our Wiki and get detailed guidance.
-
After removing the blade, ensure the rubber protective cover is securely in place, and store the blade out of reach of children to prevent accidents.
-
Before starting the cutting process, ensure the material is securely fastened to prevent it from becoming loose, which could damage the device or cause injury.
-
When removing materials, please pay attention to the blade to prevent injury.
-
If you use the drawing pen, strictly follow the pen installation process. Do not use the pen holder unless the pen is properly installed.
¶ Printing and assembly auxiliary tools
Before using the cutting module for work, it is recommended to print and assemble the weeding tool, scraper, and roller. These tools help press and process materials on the mat and remove cutting works from the mat. You can refer to the wiki for more information:
Cutting Module Assist Tool (Weeding Tool, scraper and roller) Usage Introduction
¶ Cutting module introduction and assembly
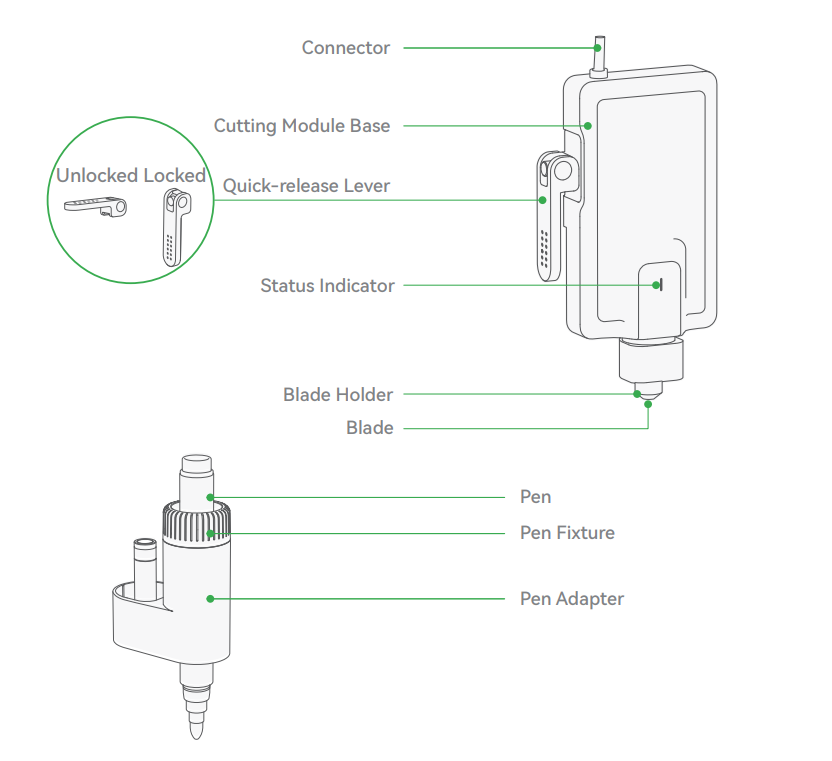
¶ Cutting module introduction
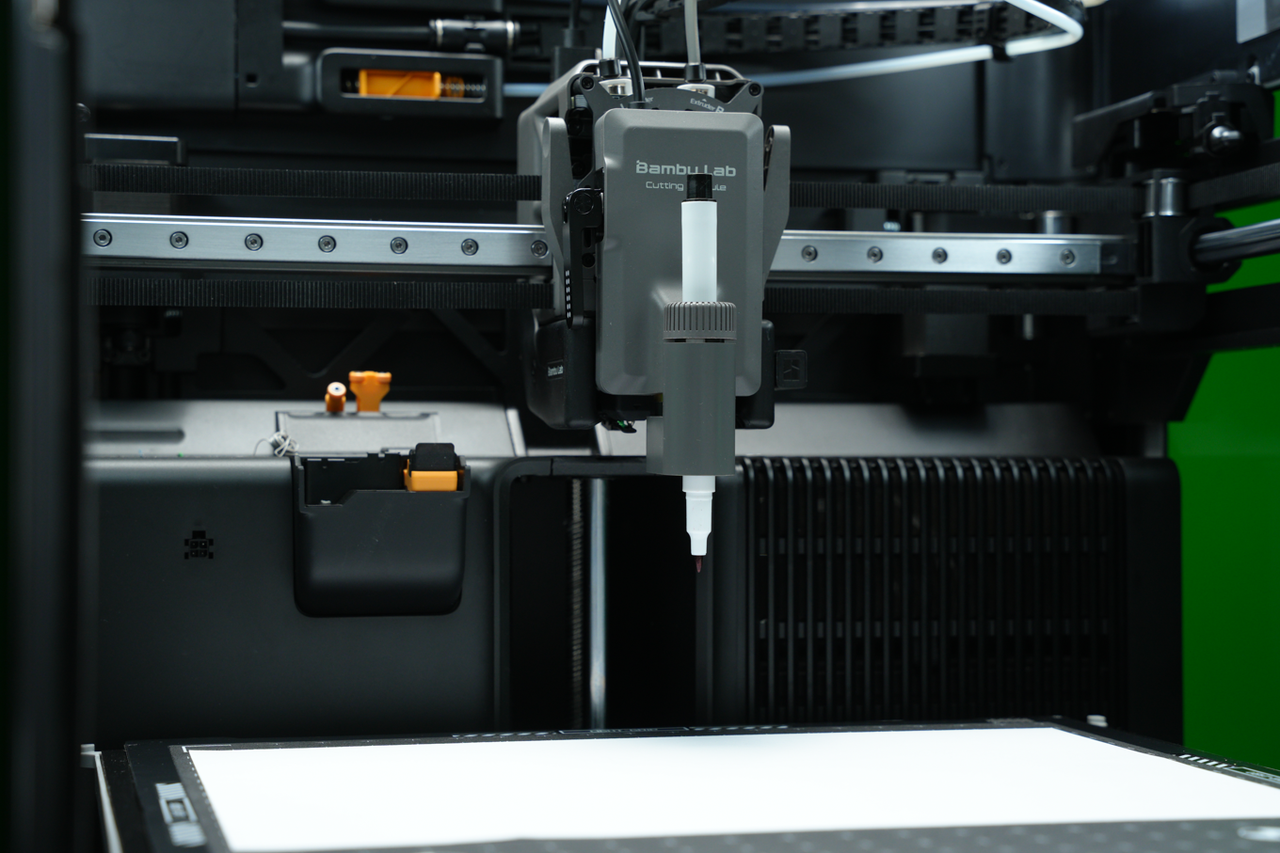
The module introduction of the cutting module is as follows, and the blade holder can also be replaced with a draw pen.
Before using the cutting function, please visit makerworld.com/en/@BambuLab, and then download and print the 3 tools shown above: • Weeding tool: Removes waste after cutting. • Scraper: Takes off the material from the cutting mat. • Roller: Used to flatten the material to ensure cutting accuracy.
¶ Cutting module installation steps
For more detailed cutting module and the draw pen installation steps, please refer to the video: Cutting Module Installation Guide
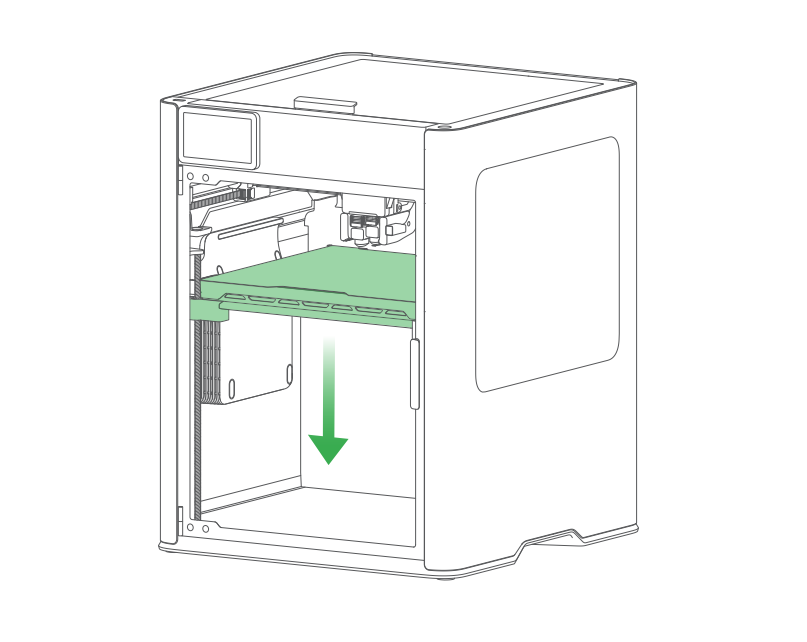
Lower the heatbed before installing the cutting module. Because the blade is very sharp, if the heatbed is too close during the operation, the internal reserved space is too small, it is possible to scratch the cutting platform or even your hand when installing or removing the platform.
- Press the two top corners of the front cover and remove it.
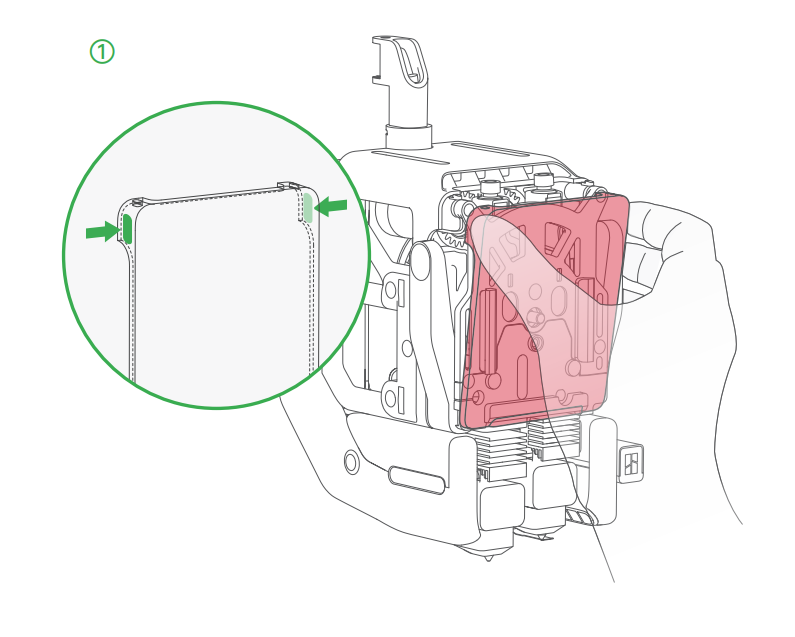
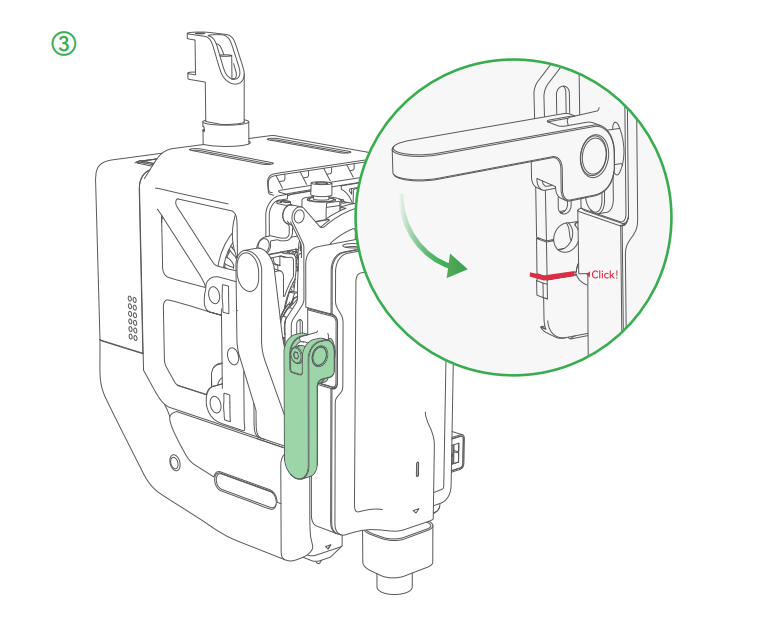
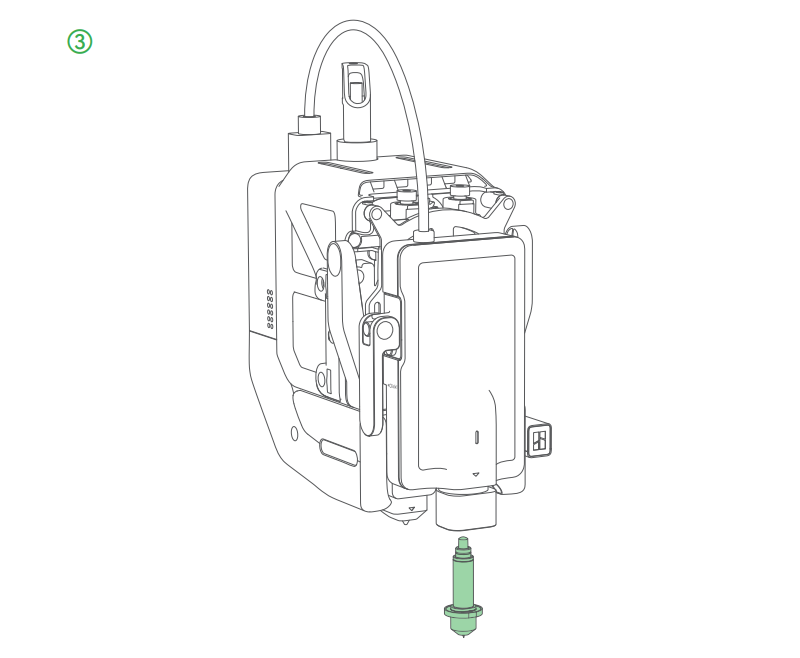
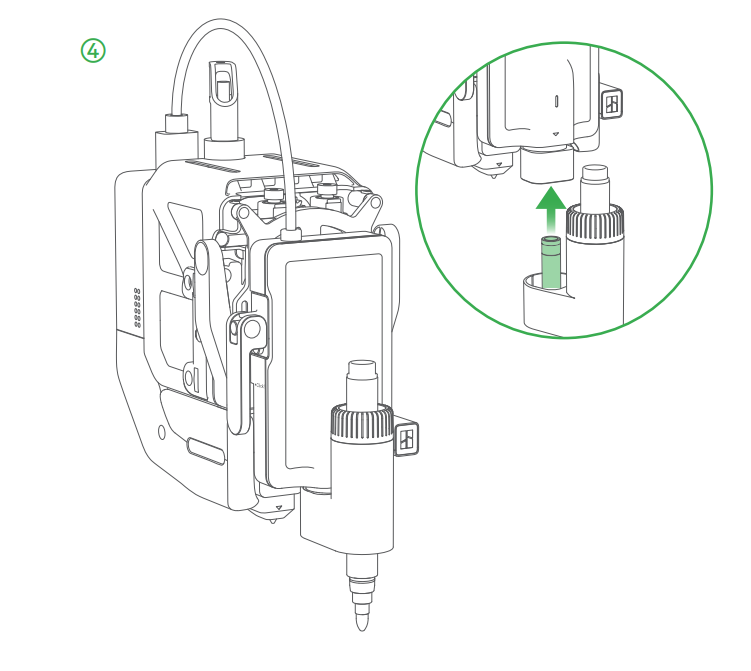
- As shown in the picture, unlock the quick-release lever. Then, align the slots of the cutting module and the toolhead, and slide the module all the way down.
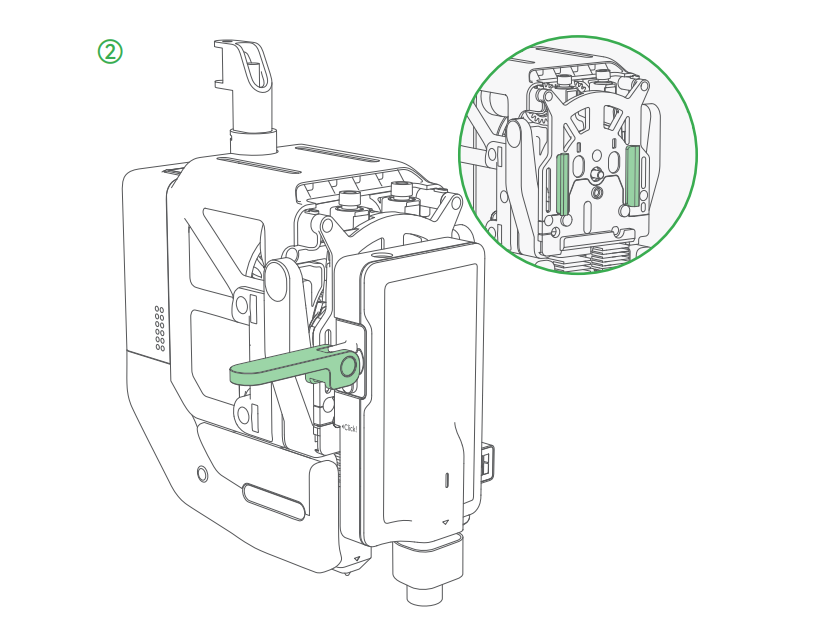
- As shown in the picture, ensure the module's “Click” mark is aligned with the dented slot on the toolhead. Then, push the quick-release lever down to lock it.
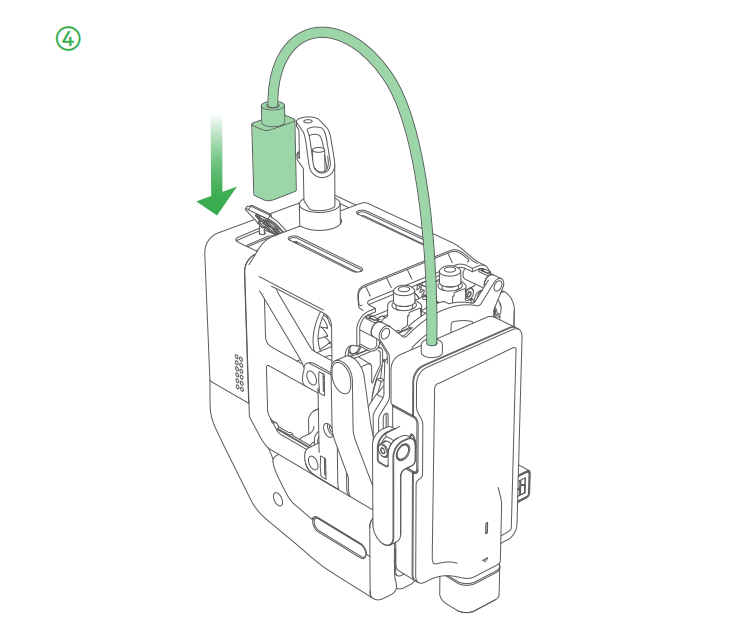
- Open the dust-proof cover, and insert the connector into the toolhead interface.
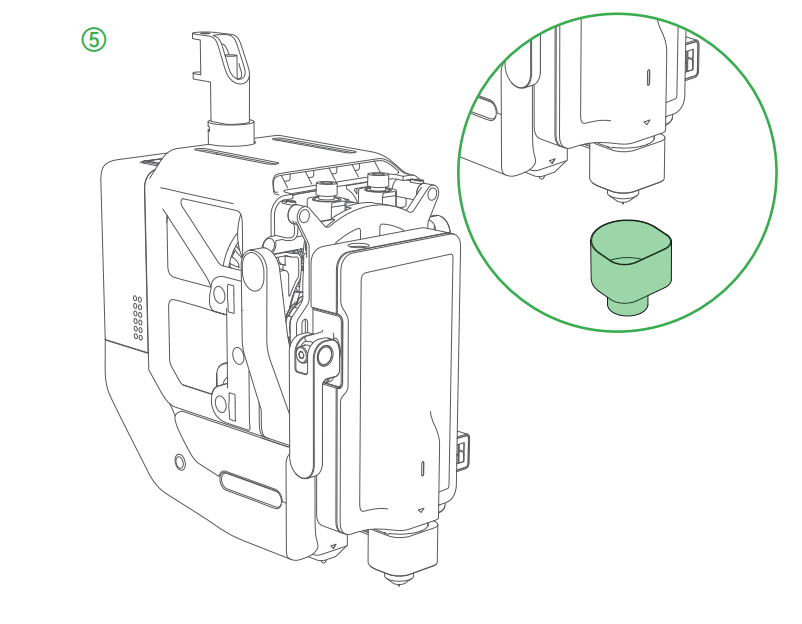
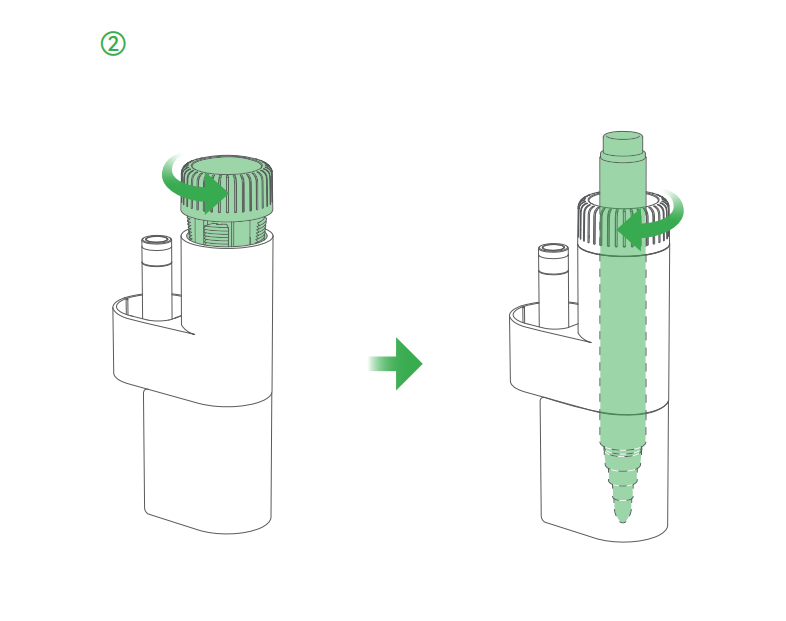
- Remove the protective cover on the blade holder. Caution! Sharp blade! Please carefully operate to avoid injury. Keep the protective cover safe to re-attach it when the blade is not in use.
¶ Draw pen installation steps
If you want to use the drawing function, follow the steps below to remove the cutter blade and install the pen.
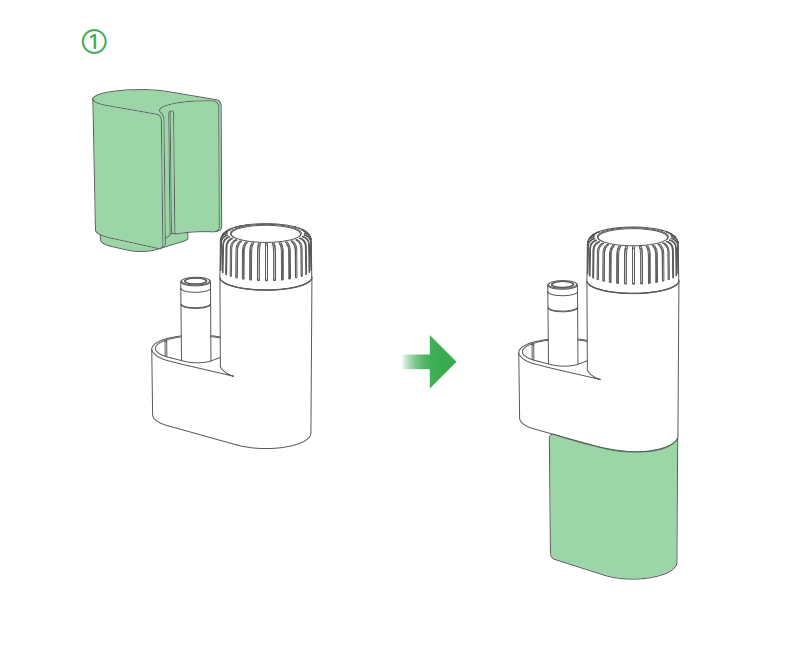
- Remove the height calibrator from the pen holder, and install it on the bottom.
- Rotate the pen fixture counterclockwise to loosen it. Insert a pen to the bottom, and then rotate the fixture clockwise to tighten it.
- Pull the blade holder downward by the round edges to remove it. The blade is sharp. Please operate carefully to avoid injury!
- Remove the pen height calibrator, and then insert the pen into the cutting module.
¶ Installation and introduction of cutting platform
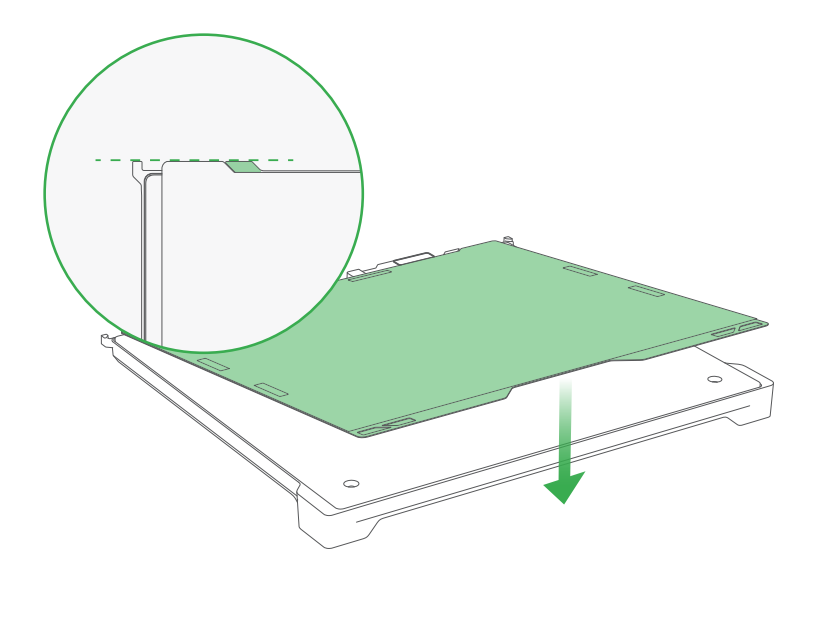
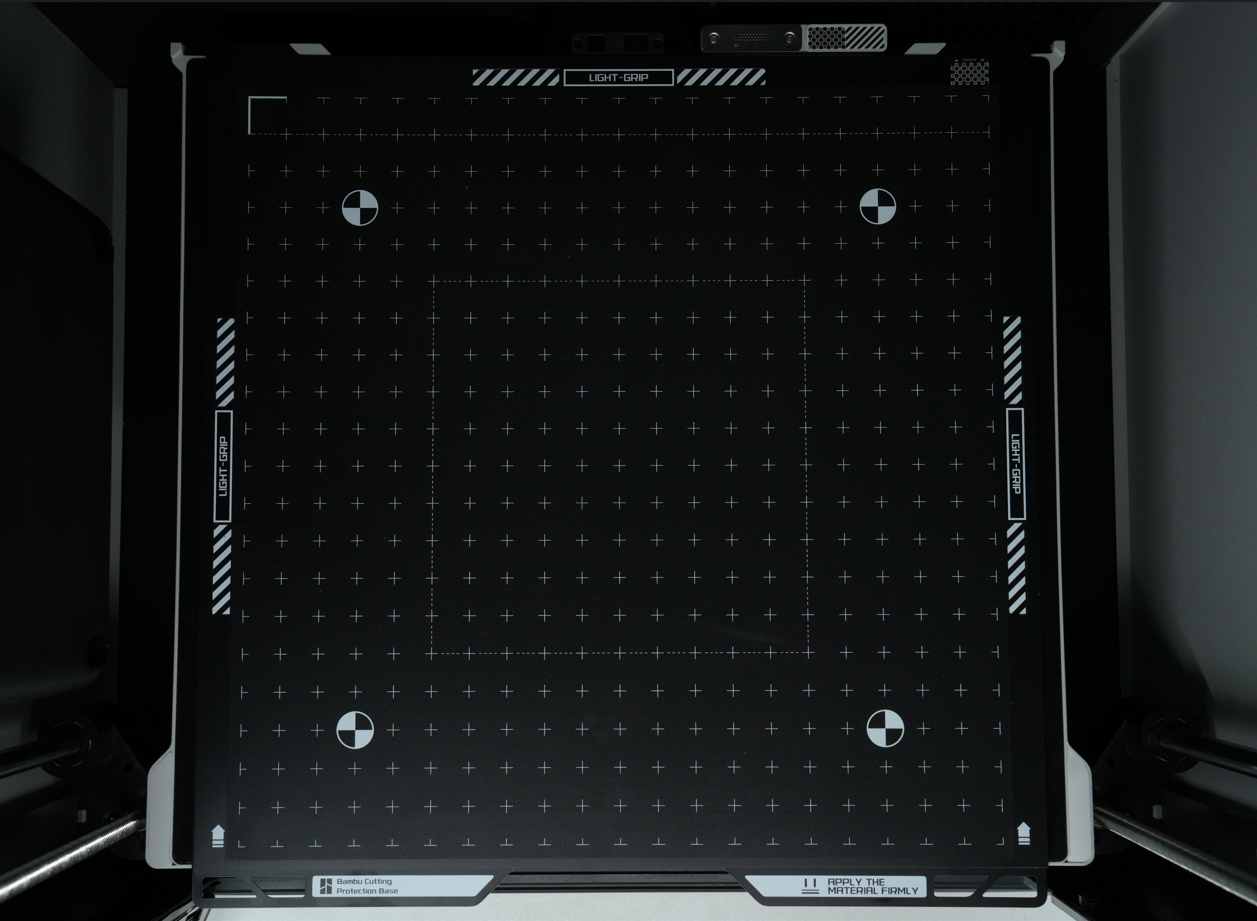
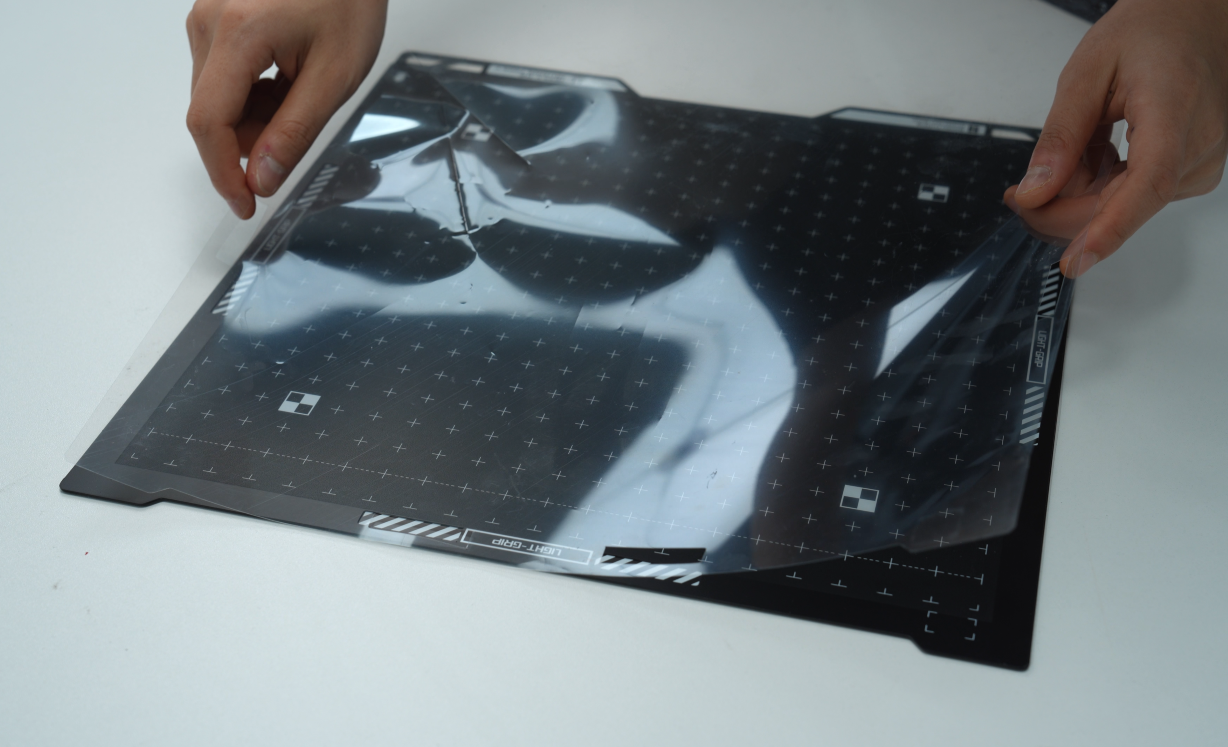
When you want to work with cutting modules or brushes, you need to place the cutting platform on the heatbed. First, remove the build plate, place the cutting platform on the heatbed, make sure that the 2 corners are fitted with the limit block of the heatbed, and then remove the transparent protective film above. For a more detailed introduction to the cutting platform, please refer to the wiki: Introduction to the Laser Platform and Cutting Platform
| Align the heatbed limit block | Cutting platform placement diagram |
|---|---|
 |
 |
¶ Calibration
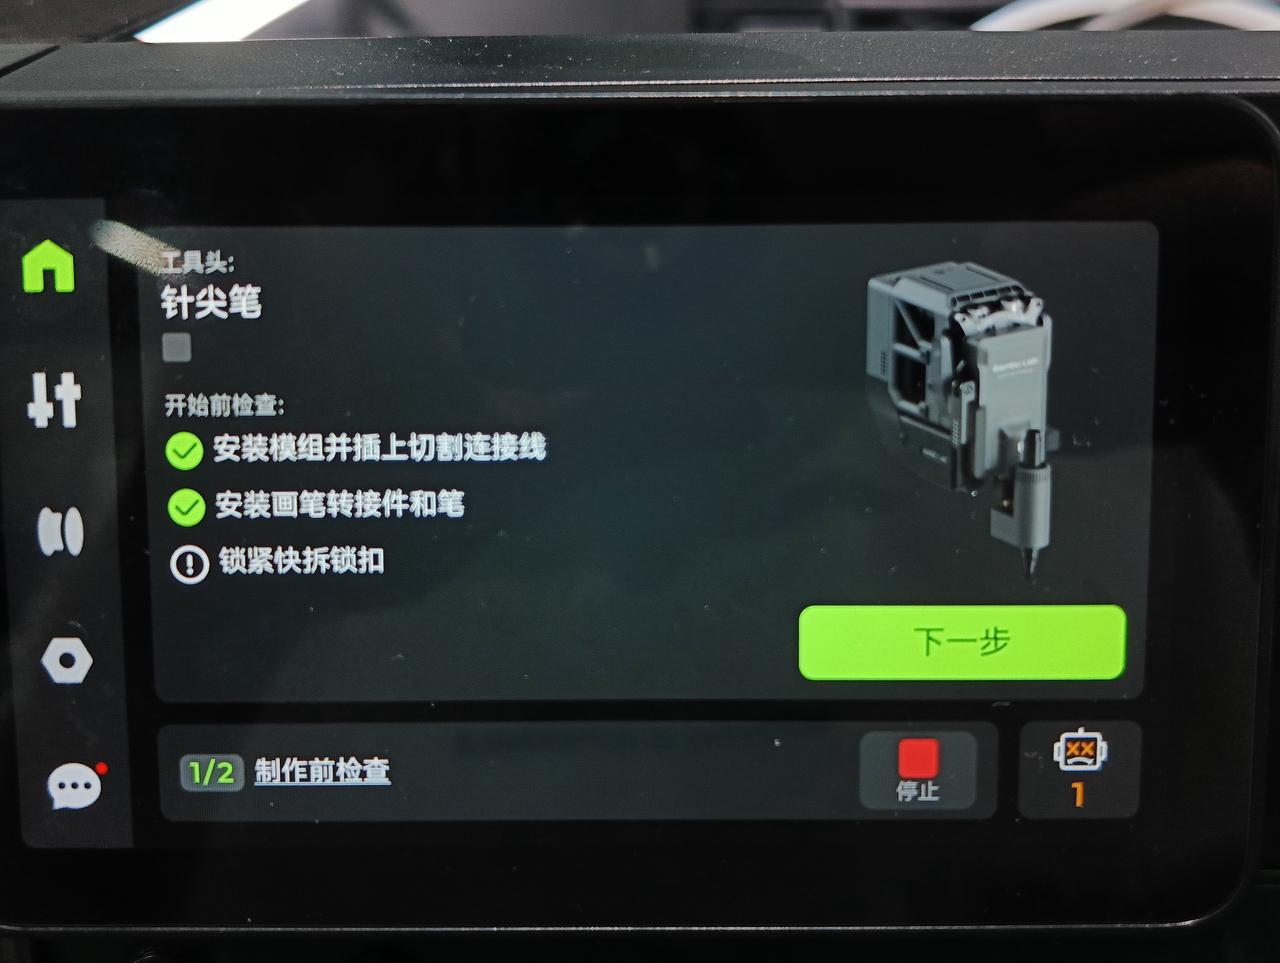
Before using the cutting module for processing, the cutting module needs to be mounted and calibrated. When the machine determines the need for mount calibration, the "Assistant" page will pop up the corresponding prompt. You can also find the entrance to the cutting module mount calibration in the "Settings" - "Toolbox".
¶ Cutting Module Mount Calibration
Each time the printer is powered on, a cutting module mount calibration is required to help the cutting module homing and leveling. This step requires placing the cutting platform on the heatbed. Attention: When running the Cutting Module Mount Calibration, you cannot install the pen, only the blade holder.
¶ BirdsEye Camera Begin Setup
If you install a Bird’s Eye Camera yourself, it only needs to be calibrated once and will not require further calibration afterwards. However, if the Bird’s Eye Camera is replaced or has been disassembled and reinstalled by the user, it must be recalibrated.
Bird’s Eye Camera Initialization is used to calibrate the camera to improve the accuracy of image alignment. The calibration process relies on the four markers on the build plate, so please make sure the build plate is completely clear and that the markers are visible to the Bird’s Eye Camera.
If you are not satisfied with the cutting accuracy of the Blade Cutting Module, you can trigger Bird’s Eye Camera Initialization from Settings → Toolbox to recalibrate the camera.
Currently, this process only supports running with the Laser Module mounted, so please make sure the Laser Module is installed beforehand.
¶ Start cutting
-
Connect the machine. Scan the QR code to bind the printer with Bambu Handy, open Bambu Suite on the PC, and log in to your account( Bambu Suite Software Operation Manual)。
-
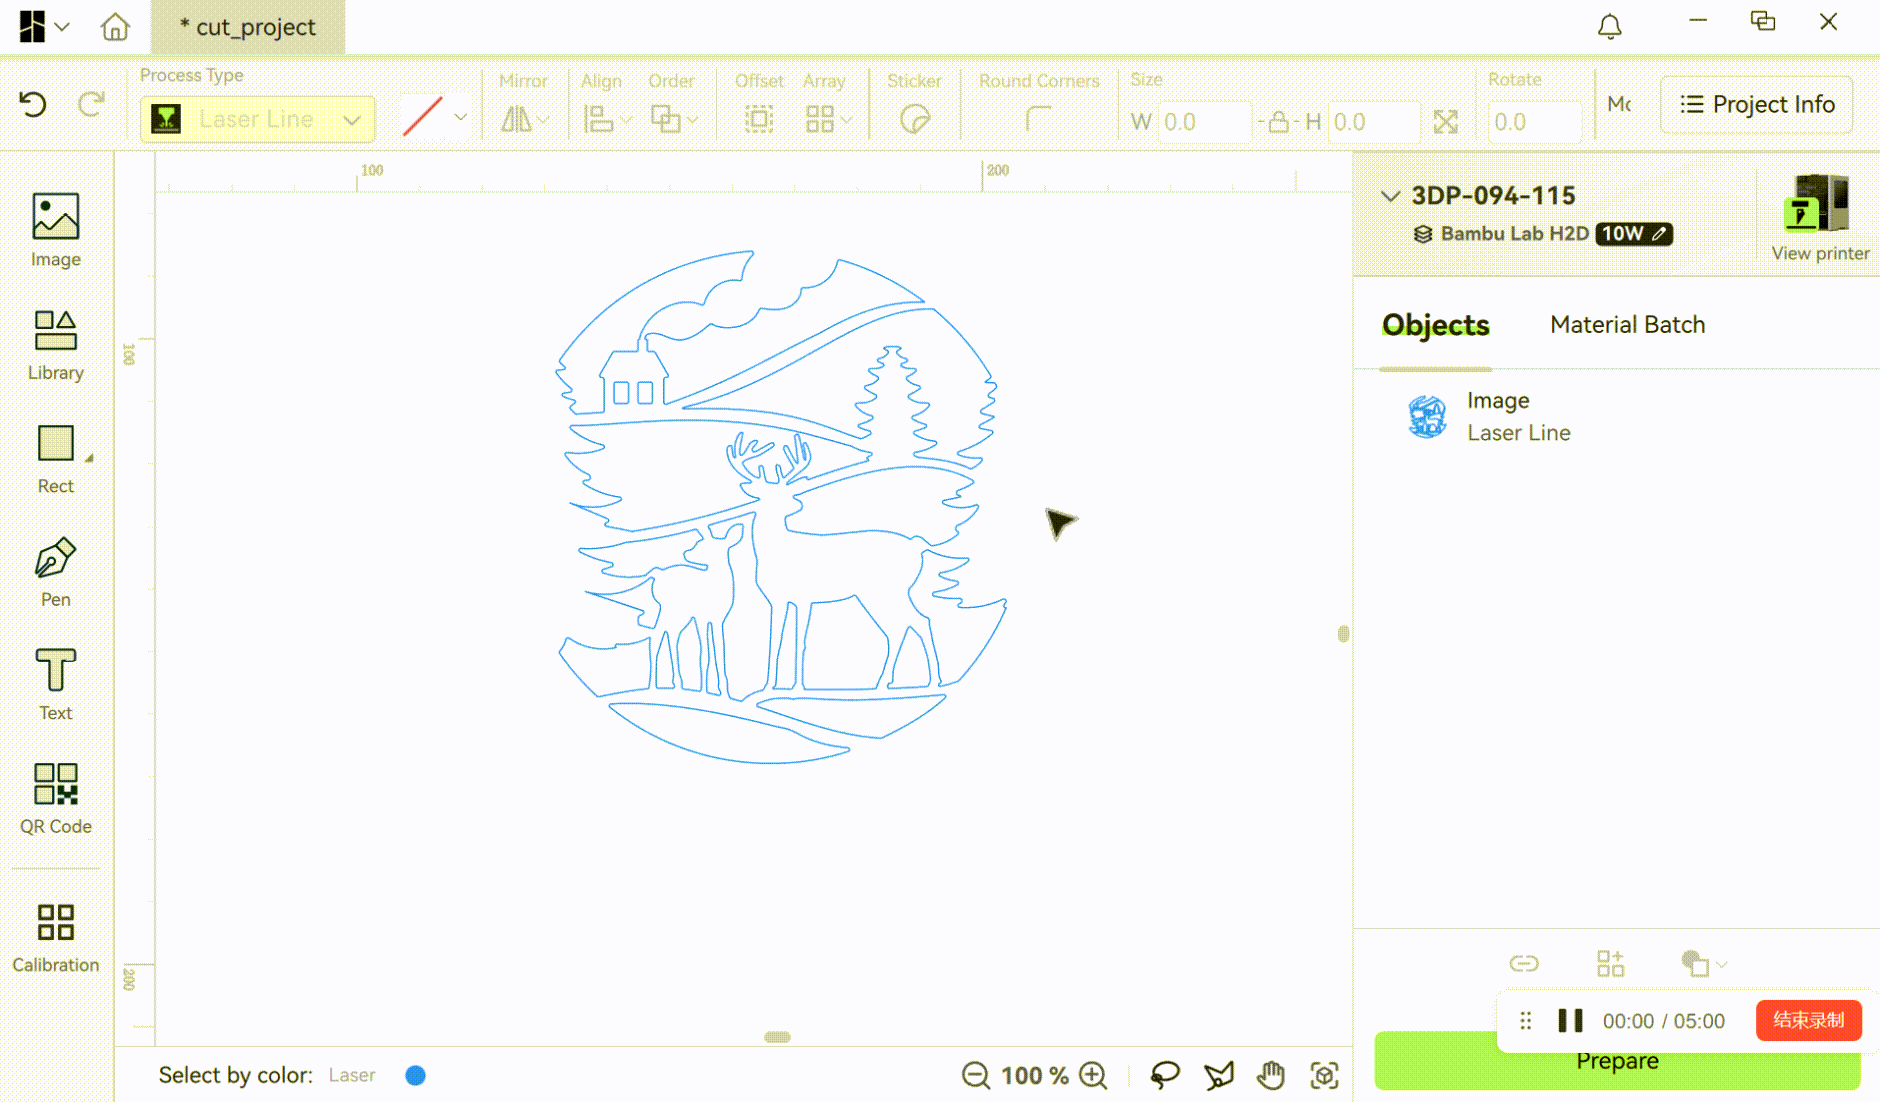
On the canvas of Bambu Suite, import the image you want to process and select a specific process type for it, such as basic cutting or print then cutting ( Introduction of 2D processing type).
-
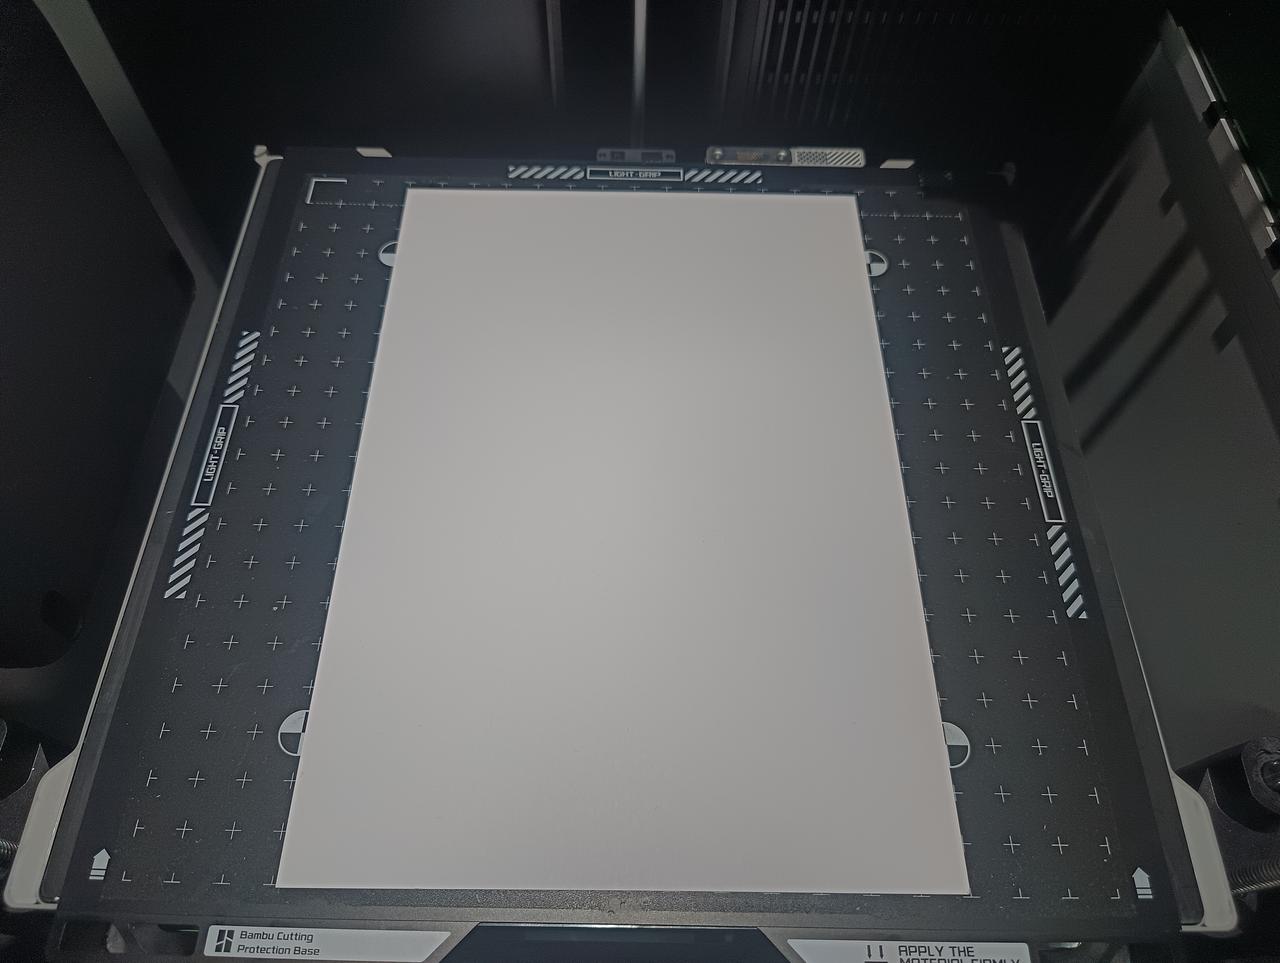
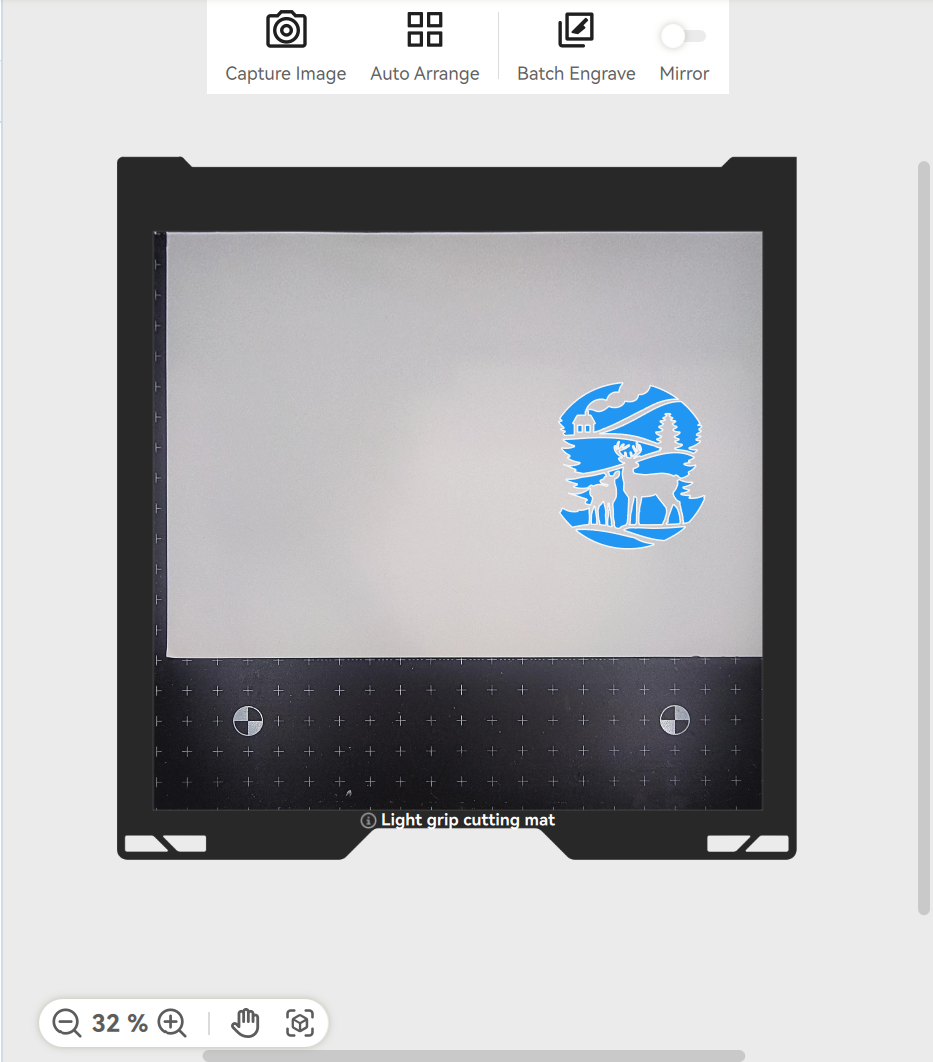
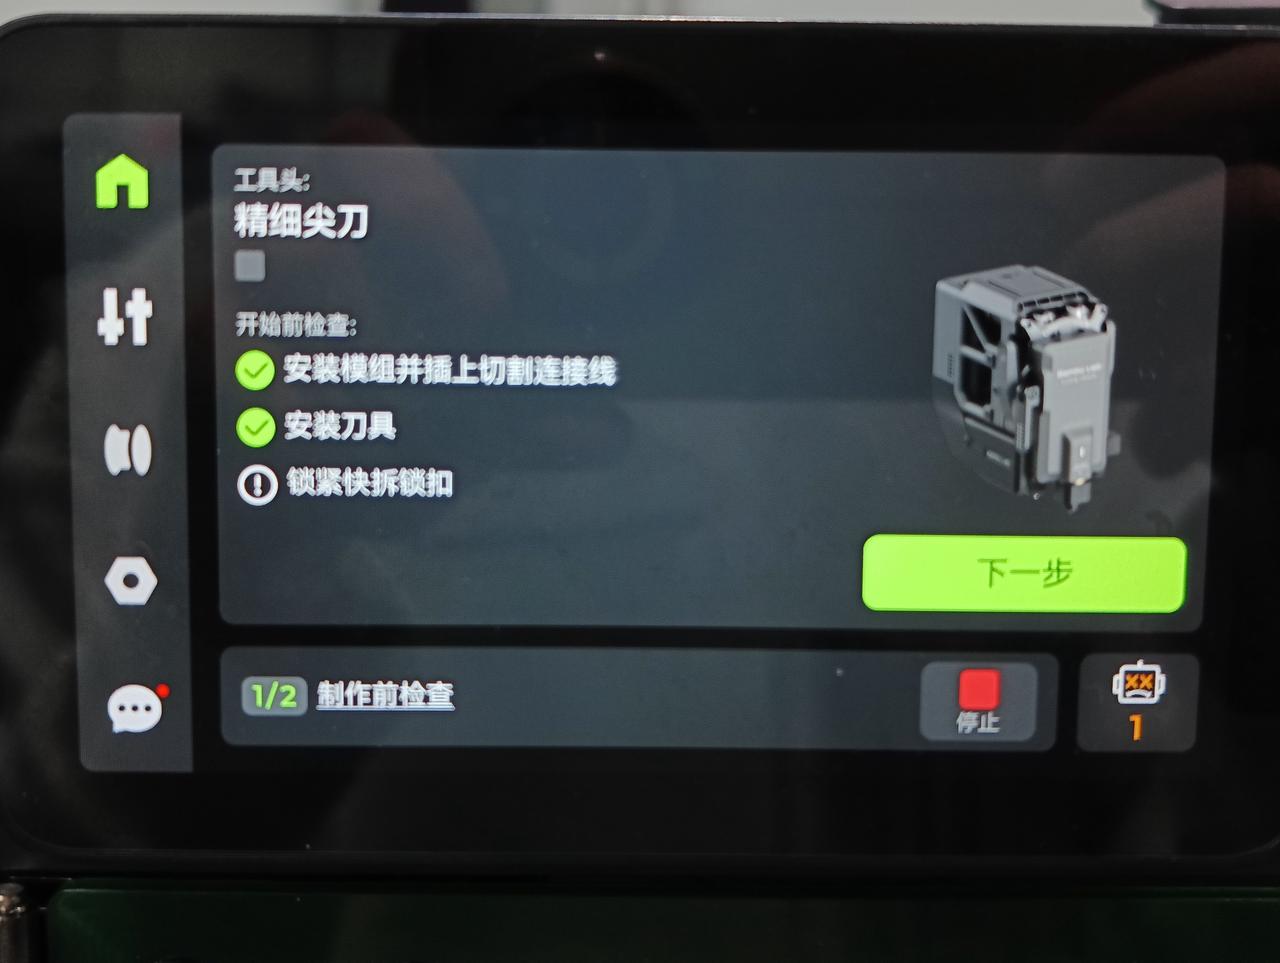
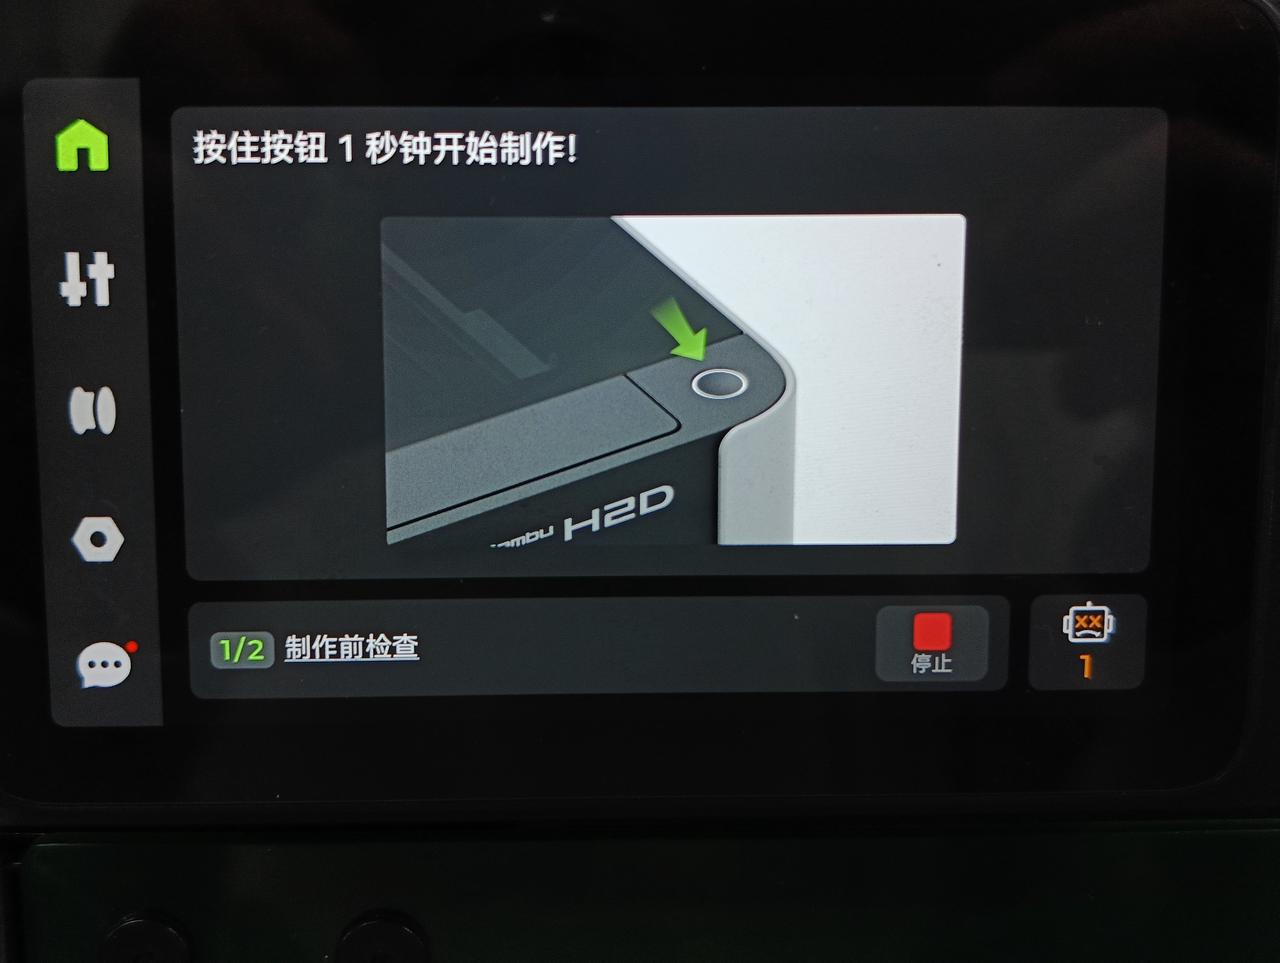
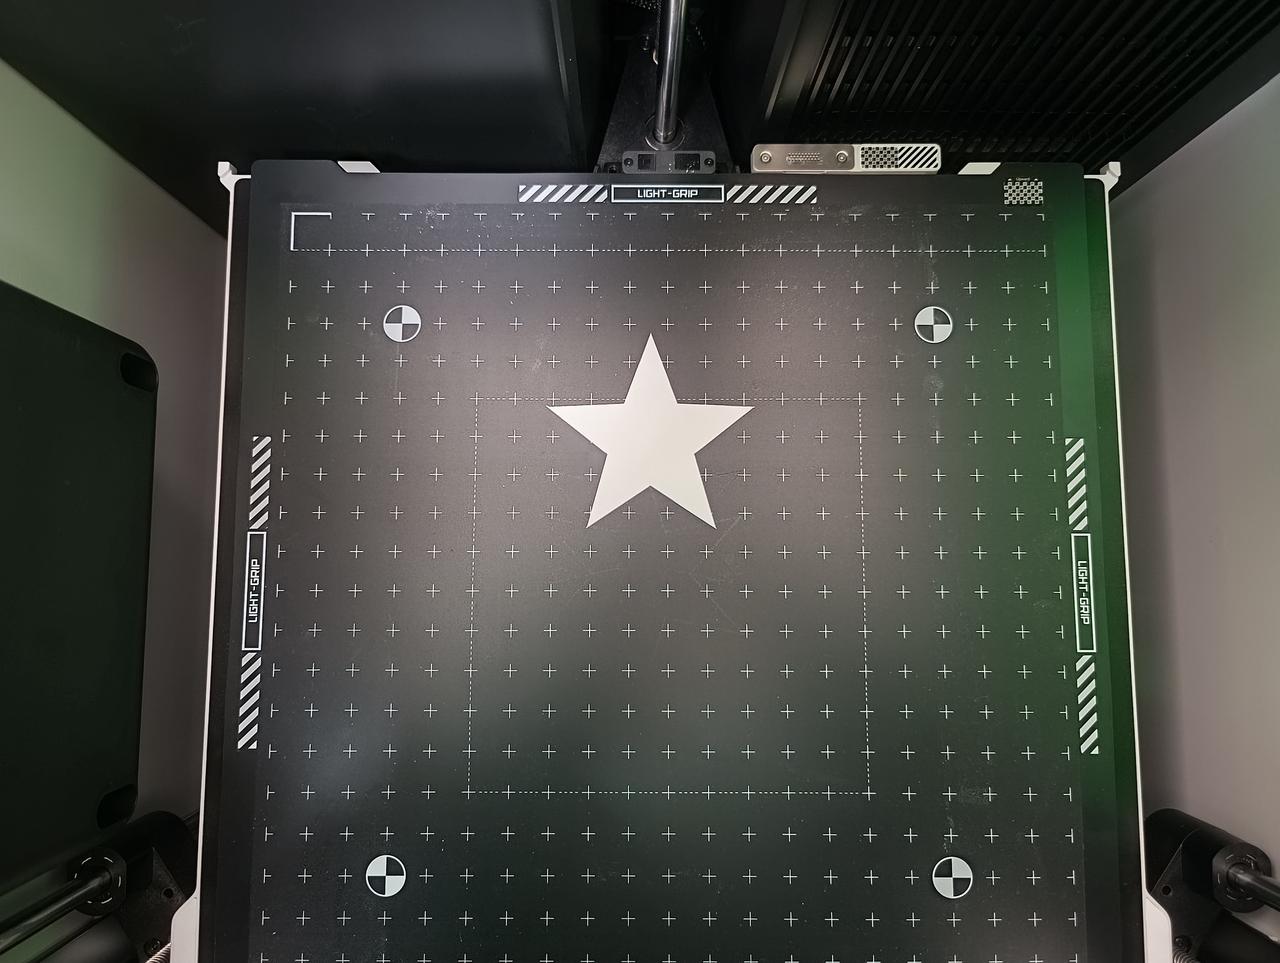
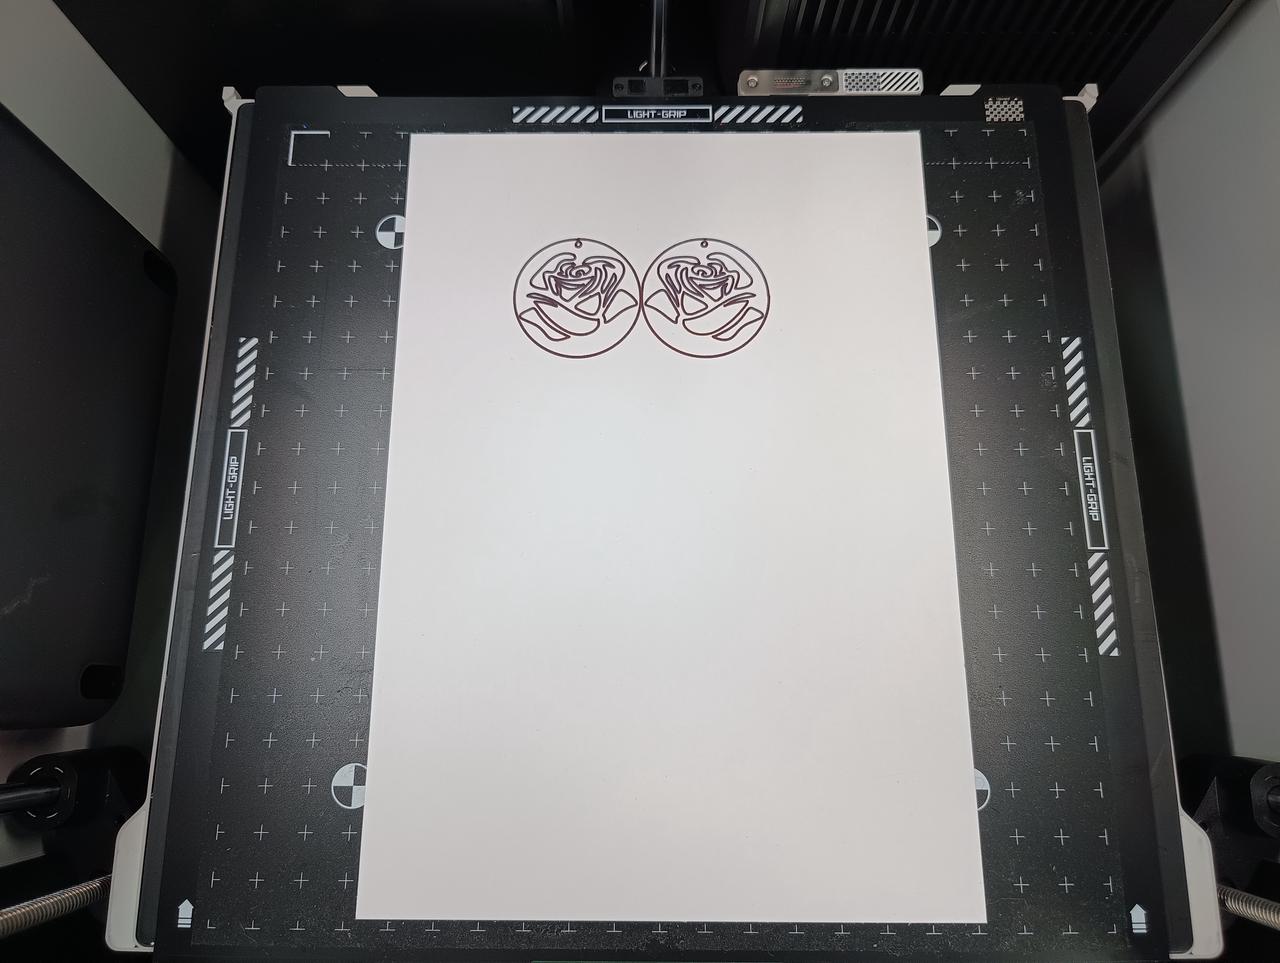
Ensure that the cutting platform is placed on the heatbed, and the material to be processed adheres to the mat, and the roller tool is used to make it fully fit ( Place material on the cutting platform). Click "Prepare" to enter the preparation page. Select the material to be processed in the "Material Batch" on the far right of the software. Then click "Capture image", after a few seconds to get the processing background image, adjust the pattern on the processing background to the required position, and click "Make" to send the task.
| Place the cutting platform and the material to be processed | Get the processing background in Bambu Suite and adjust the pattern position, then send the task | Confirm on the printer screen and start the process |
|---|---|---|
 |
  |
  |
- After cutting, use tools such as a spatula to carefully remove the work from the mat.
| Remove the materials from the mat, and the cut pattern will adhere to the mat | Remove the cut piece carefully from the mat |
|---|---|
 |
Video TBD |
- Remove the cutting platform and reapply the protective film.
¶ Start drawing
- If you want to use the pen to draw, you can remove the blade holder first and install the pen module by following the steps in the previous section. For specific precautions on the type of pens to install, please refer to: Suggestions for using drawing pens.
-
On the canvas of Bambu Suite, import the picture you want to process and select the draw pen in the process type.
-
Place the cutting platform on the heatbed, adhere the material to be processed to the corresponding mat, and use the roller tool to make it completely fit. Click "Prepare" to enter the preparation page. Select the material to be processed in the "Material Batch" on the far right of the software. Then click "Capture image", after a few seconds to get the processing background image, adjust the pattern on the processing background to the required position, and click "Make" to send the task.
| Place the cutting platform and the material to be processed | Get the processing background in Bambu Suite and adjust the pattern position, then send the task | Confirm on the printer screen and start the process |
|---|---|---|
 |
 |
  |
- After the painting is finished, use tools such as a spatula to carefully remove the work from the platform.
| The painting is finished | Remove the work |
|---|---|
 |
Video TBD |
-
If you do not need to continue using the pen, remove the pen module and cover the pen.
-
Remove the cutting platform and reapply the protective film.
¶ Regular maintenance
Regular maintenance is essential to ensure the cutting module’s longer lifespan and optimal performance.
-
Cutting module base: Regularly inspect the base to ensure it is properly installed on the toolhead. After locking the quick-release lever, verify that the module is stable and does not wobble. If any wobbling is detected, tighten the screws on the quick-release lever.
-
Blade holder: Regularly check for debris near the blade. If there is any, unscrew the end cap to remove the debris to prevent buildup that can obstruct the blade’s rotation.
-
Consumables: • Regularly check the adhesion of the cutting mat and replace it when necessary to ensure the material can be securely held in place. • Over time, the blade will wear down, resulting in cutting quality decline. Replace the blade regularly to maintain optimal performance. • The lifespan of the blade can vary depending on the materials being cut. For more details, please refer to our wiki.