¶ Foreword
¶ Disclaimer
¶ Safety Promotion
a. Read the manual and safety statement
b. Correctly assemble the machine and ventilate and exhaust smoke
c. Set the correct working parameters
d. Someone needs to be on duty during processing. In case of emergency, immediately press the emergency stop button to cut off the power supply
e. Place a fire extinguishing device next to the machine
f. Cleaning and regular maintenance are required after each laser processing
¶ Laser safety guide
Important information for using the Laser Module
¶ Software and firmware
You need to download the Bambu Suite software in advance and upgrade the printer firmware to the latest version.
¶ Laser module introduction and assembly
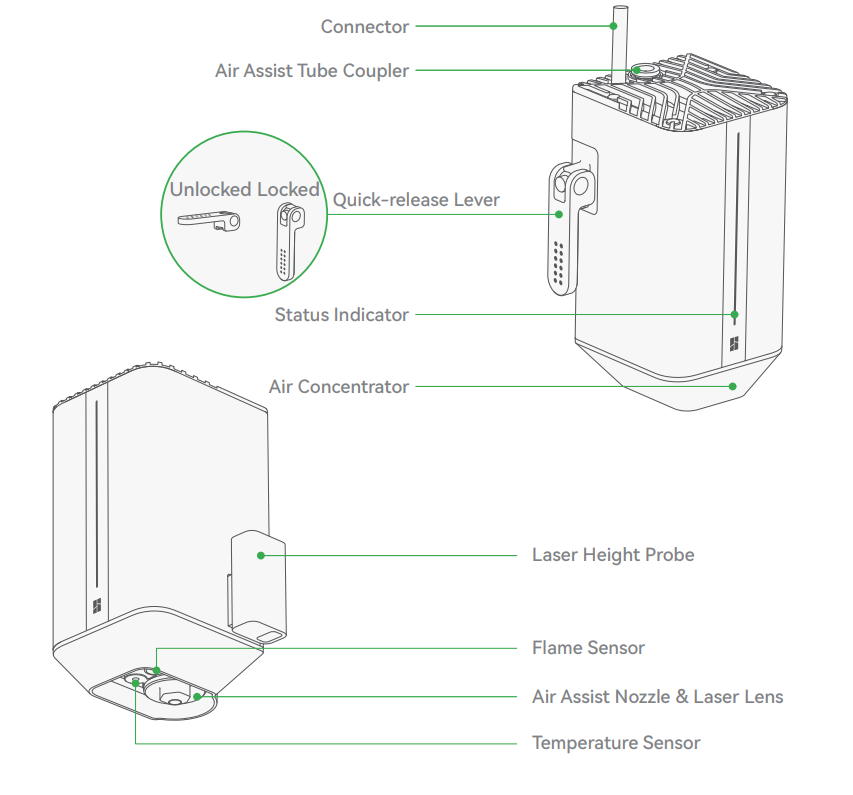
¶ Laser module introduction
¶ Laser module installation procedure
You can refer to the video of the detailed installation process of the emergency stop button and smoke ventilation pipe: Laser Module installation
-
Take the laser module out of the packing case and install it by performing the following steps:
A. Press the two top corners of the front cover and remove it.
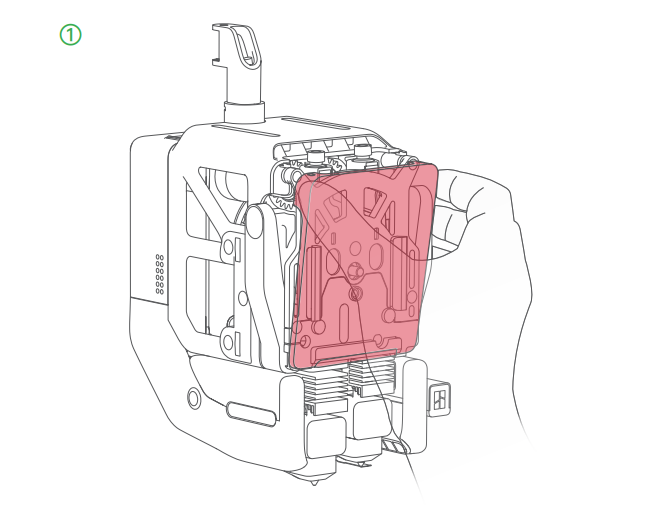
B. As shown in the picture, unlock the quick-release lever. Then, align the slots of the laser module and the toolhead, and slide the module all the way down.
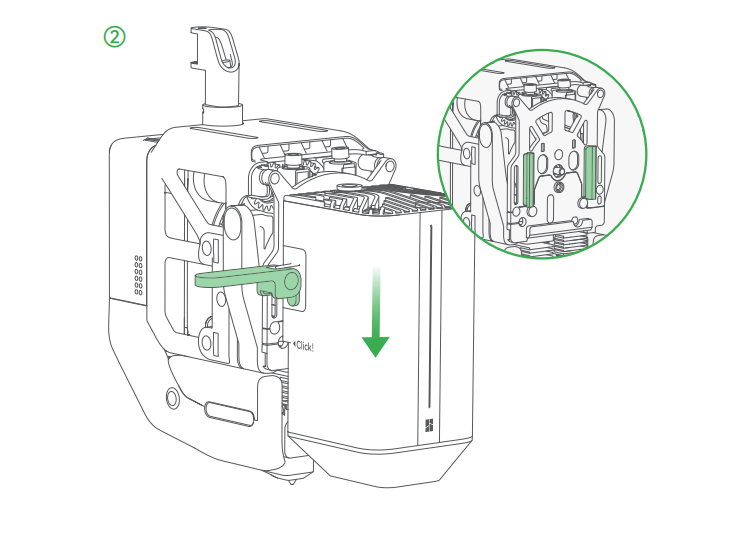
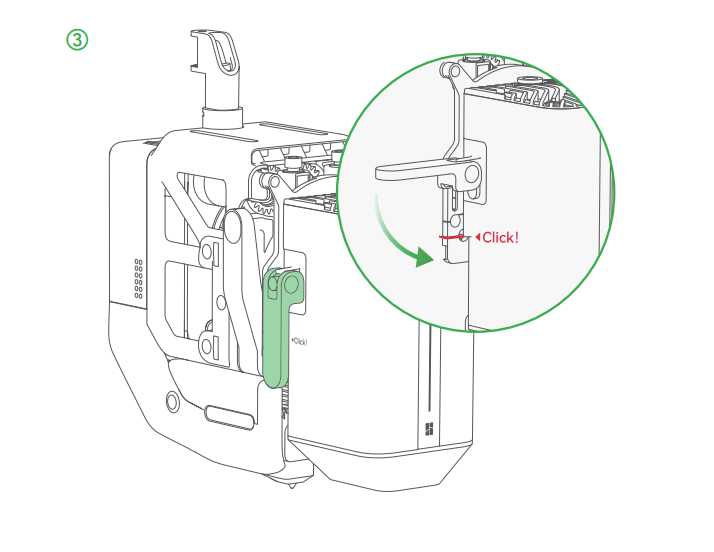
C. As shown in the picture, ensure the module's “Click” mark is aligned with the dented slot on the toolhead. Then, push the quick-release lever down to lock it.
D. Open the dust-proof cover, and insert the connector into the toolhead interface.
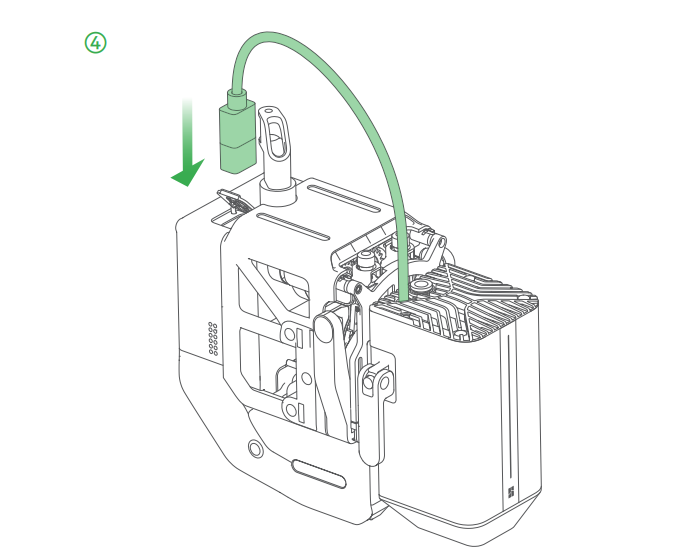
E. Remove the top cover. Take out the black air assist tube from the accessory box. Insert it into the air assist tube coupler in the middle of the filament buffer, and the one on the laser module. The tube is correctly connected if it cannot be gently pulled out. Then, tuck the tube into the clips on top of the cable chain, and even it out so that it is not excessively bent on any location. Finally, put the top cover back.
*If you do not use the laser module, remove the air assist tube to allow the cable chain to move freely.

¶ Laser platform use instructions
After you install the laser module, you need to place the laser platform on the heatbed to cooperate with the laser module for processing. For instructions on the use of the laser platform, you can refer to the wiki for more information: Introduction to the Laser Platform and Cutting Platform
¶ Initialization and calibration
Before processing with the machine's laser module, you need to find the laser module calibration tips from the "Assistant". The prompt usually includes "Laser Module Begin Setup", "Laser Module Mount Calibration", and "BirdsEye Camera Begin Setup".
¶ Laser Module Begin Setup
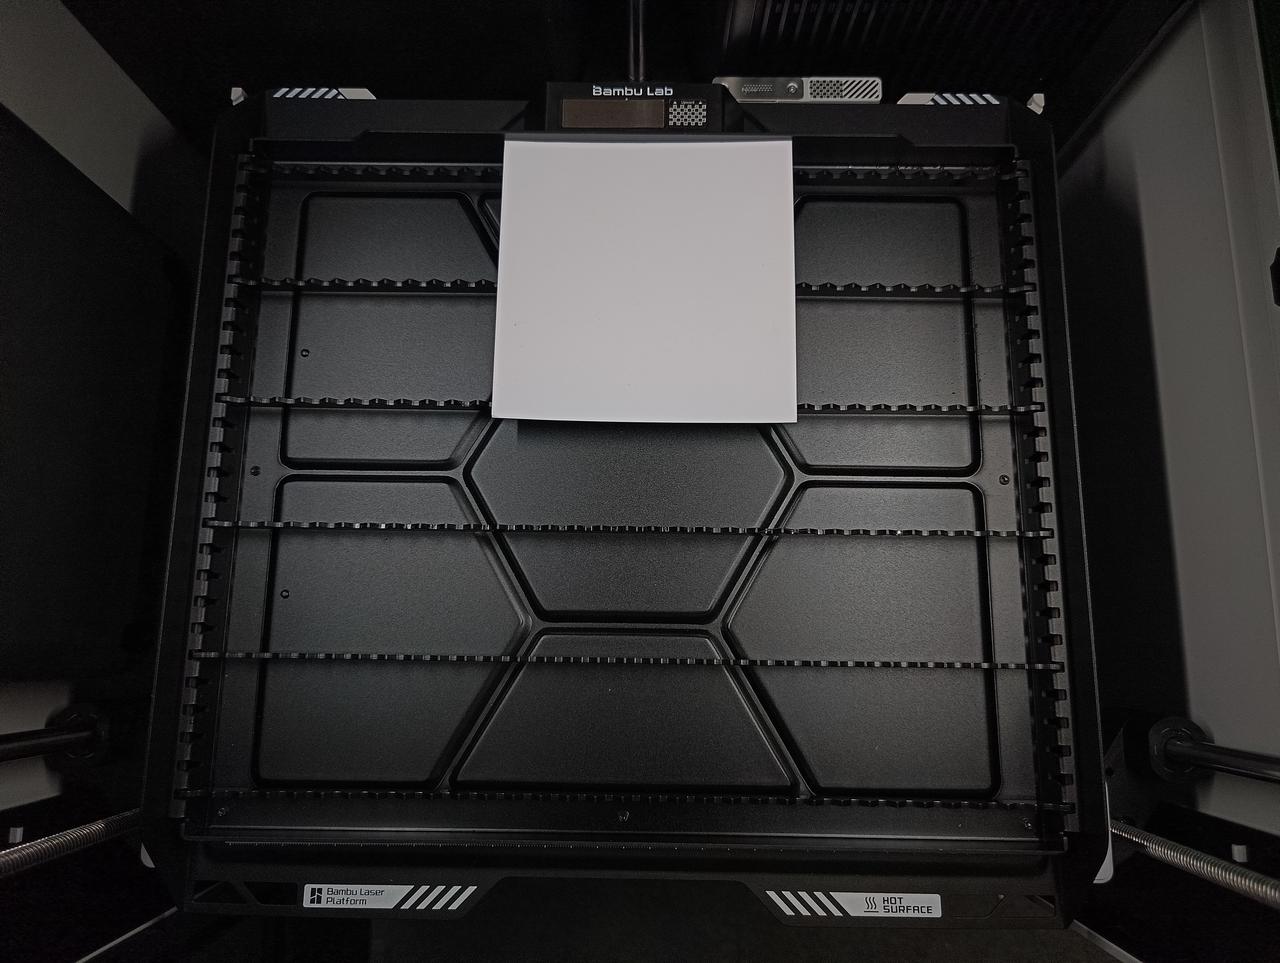
When installing and using the laser module for the first time, it is necessary to run it once, and then there is no need to perform this process again. If another laser module is replaced, it needs to be reinitialized. This process will calibrate the position and focal length of the laser, and put the machine into absolute position mode. This step requires placing the laser platform and materials (calibration card) on the heatbed, as shown in the following figure. Regarding laser focus calibration, you can refer to the wiki for more information:
Laser Focus Calibration Introduction
¶ Laser Module Mount Calibration
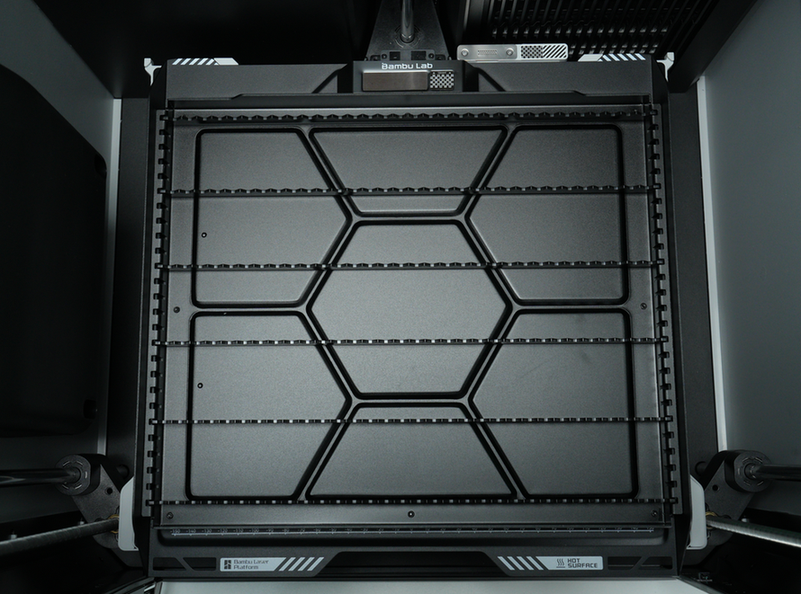
Every time the machine is powered on again, the motor is powered on again, or the motor loses the step, if you want to use the laser module, you need to recalibrate it. When calibration is required, it will automatically pop up on the "Assistant" page, without requiring users to make their own judgments. The main purpose of this calibration is to home the laser module and determine the relative position between the laser module and the heatbed. This step requires placing the laser platform on the heatbed in advance, as shown in the following figure.
¶ BirdsEye Camera Begin Setup
This is used to calibrate the birdseye camera to improve its accuracy in photo correction. This calibration requires four markers on the heatbed to achieve this, so there is no need to place anything on the heatbed in this step. The markers on the heatbed need to be exposed to the birdseye camera. The camera has been calibrated before leaving the factory, and users can use it directly upon receiving it. However, due to transportation, long-term use, and other reasons, the calibration parameters of the birdseye camera may gradually become invalid. When you are not satisfied with the accuracy of laser processing, you can trigger the initialization of the overhead camera in the "Settings" - "Toolbox" to calibrate the birdseye camera again.

¶ Start laser processing
-
Connect the machine. Scan the QR code to bind the printer with Bambu Handy, open Bambu Suite on the PC, and log in to your account ( Bambu Suite Software Operation Manual).
-
On the canvas of Bambu Suite, import the image you want to process and select a specific process type for it ( Introduction of 2D processing type).
-
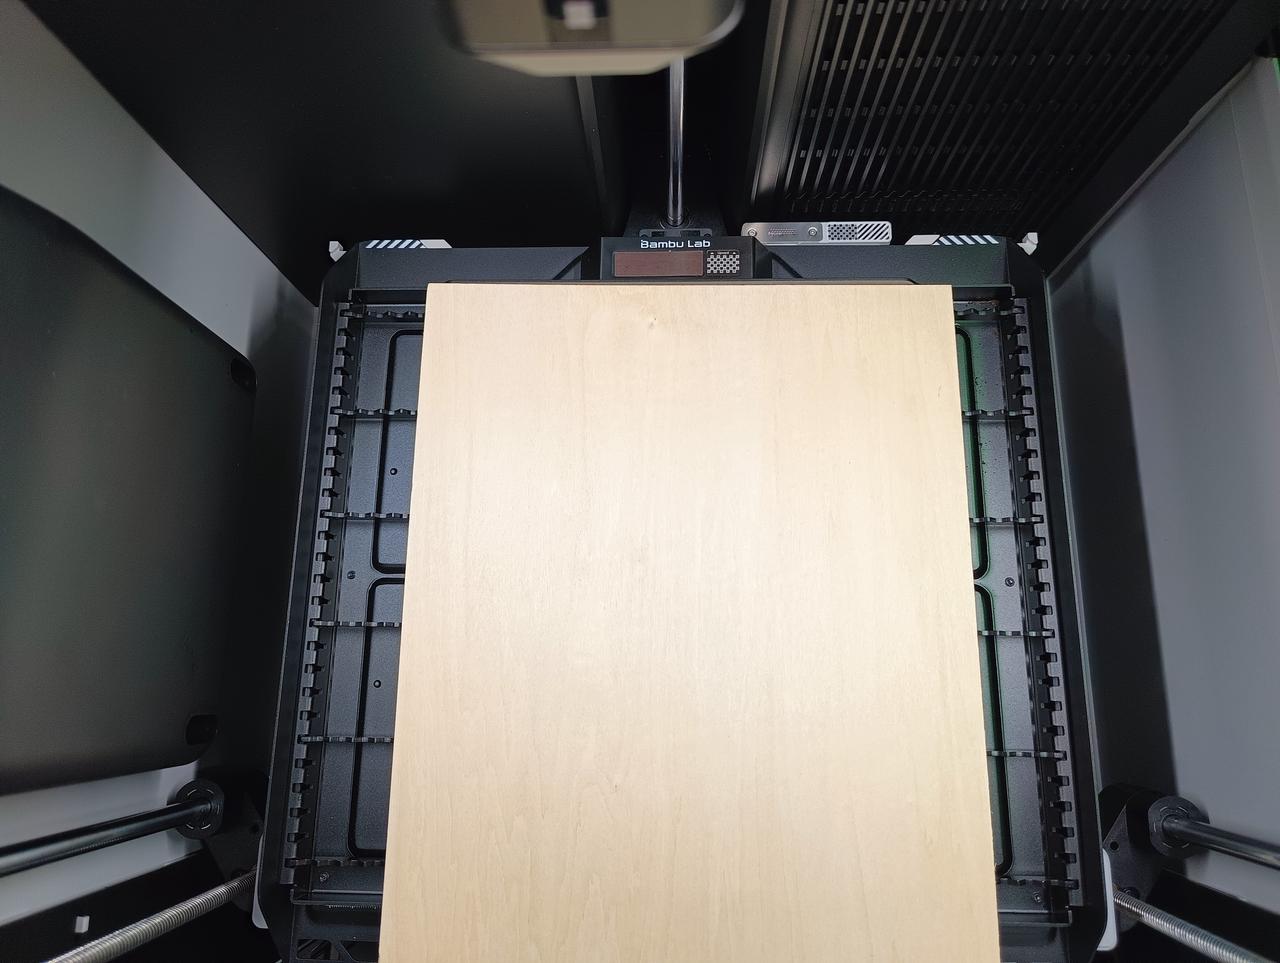
Ensure that the laser pad and the materials to be processed are placed on the heatbed of the machine ( Place material on the laser platform), click "Prepare" to enter the preparation page, and select the materials to be processed in the "Material Batch" on the far right of the software. Then click on "Capture image", it takes a few seconds to obtain the processed background image, adjust the pattern to the desired position on the processed background, confirm it is correct, and then click "Make" to send the task.
| Place the laser platform and the material to be processed | Get the processing background in Bambu Suite and adjust the pattern position, then send the task |
|---|---|
 |
 |
If you select the material in the materials group and then click "Capture image", the camera will measure the thickness of the material when it gets the processing background image. Suppose you need to measure the thickness of the material separately. In that case, you can also re-measure the thickness of the placed material by clicking on "Measure" in the "Materials Batch" - "Thickness". The explanation of measuring thickness can be found in the wiki: Material thickness measurement
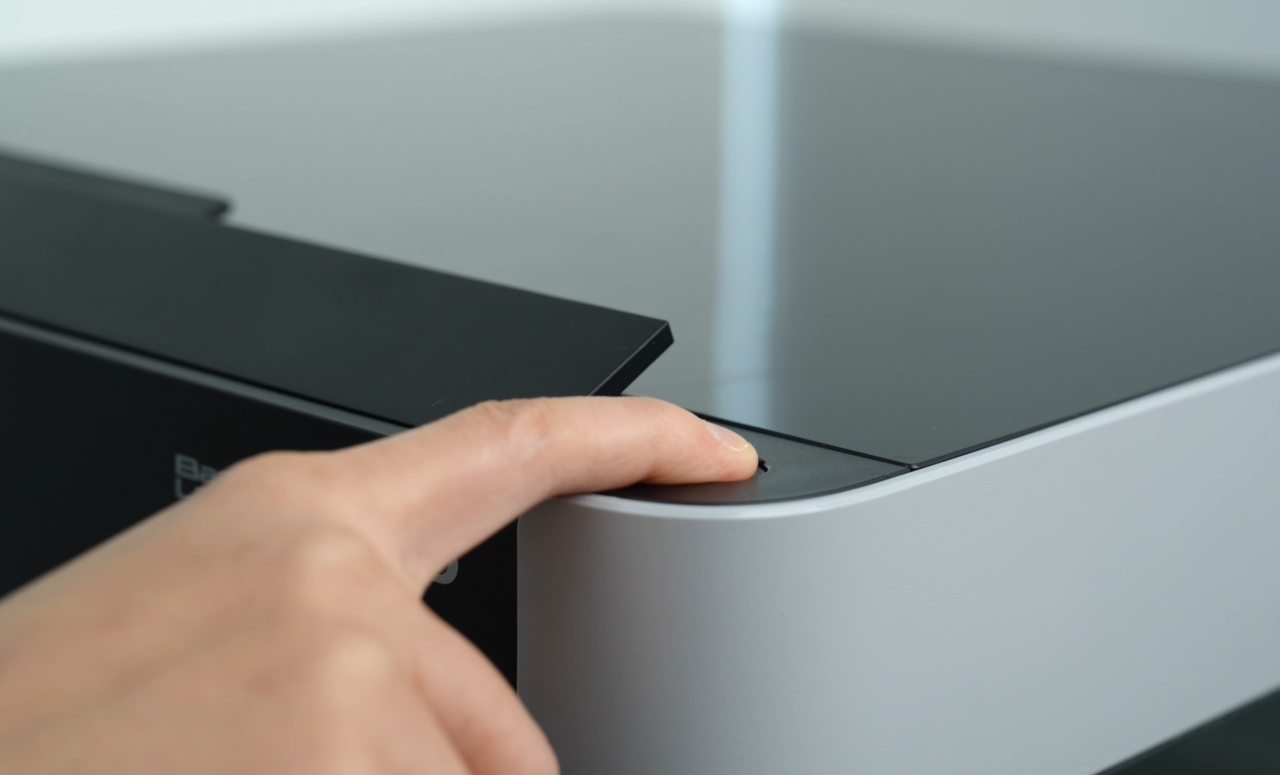
- Make sure the cover and front door of the printer are closed. After sending the task, you need to click the "Start" button on the printer screen or hold down the physical button above the printer (about 1 second) then you can start the laser engraving task.
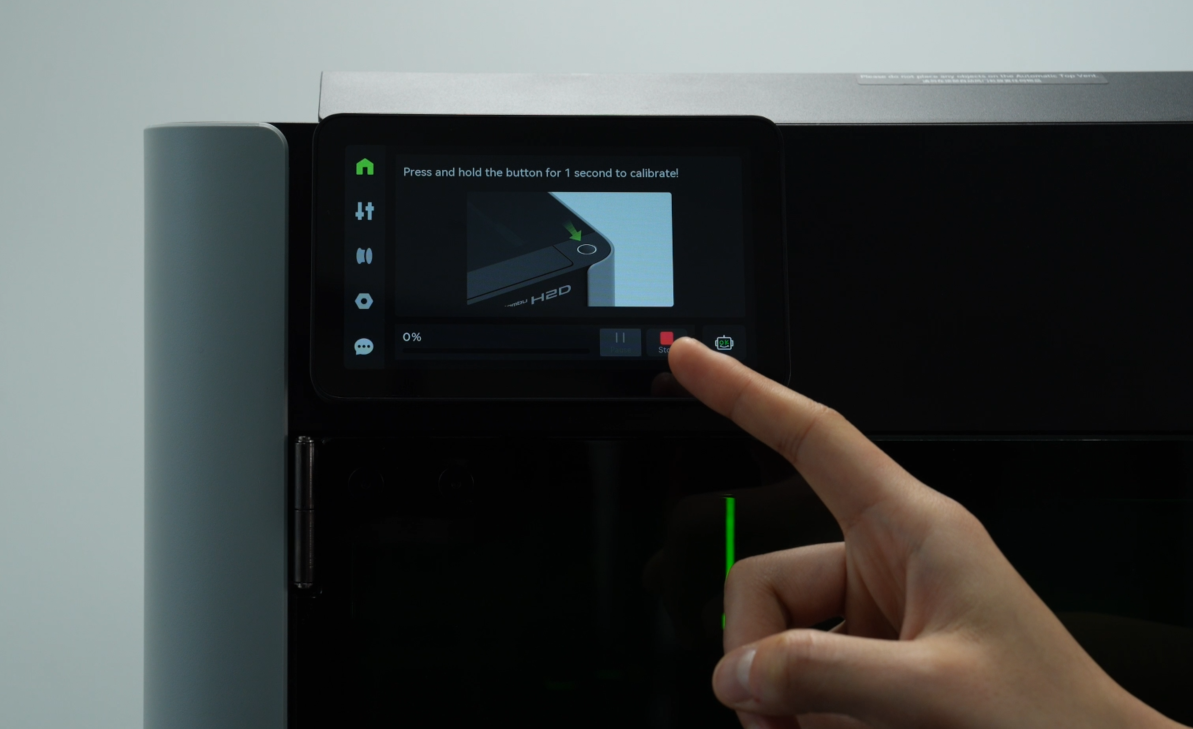
- Attention: Laser production may have safety hazards such as fire. During the processing, please do not walk away and do not leave the printer unattended.
¶ Cleaning after each task
Clean debris and dust from the work area after each project to reduce the risk of fire and harmful particulate matter.
Video TBD
¶ Routine maintenance
Smoke can accumulate inside the machine, leading to reduced efficiency, decreased performance, and potential damage. Please perform regular maintenance and upkeep according to the equipment's maintenance instructions.
Video TBD
¶ End Notes
We hope the detailed guide provided has been helpful and informative.
If this guide does not solve your problem, please submit a technical ticket, we will answer your questions and provide assistance.
If you have any suggestions or feedback on this Wiki, please leave a message in the comment area. Thank you for your support and attention!