Important!!
The following steps have some safety risks. Incorrect operation may produce smoke, and in serious cases, could even cause a fire.
Please work in a spacious, well-ventilated, and safe area. When using a hot air gun, keep the power low and the temperature below the filament’s ignition point to avoid smoke or fire. Common filaments: PLA – melting point about 150 °C, ignition point about 380 °C; PETG – melting point about 220 °C, ignition point about 450 °C. Do not leave the hot air gun unattended and avoid heating the same spot for too long.
¶ When to Use?
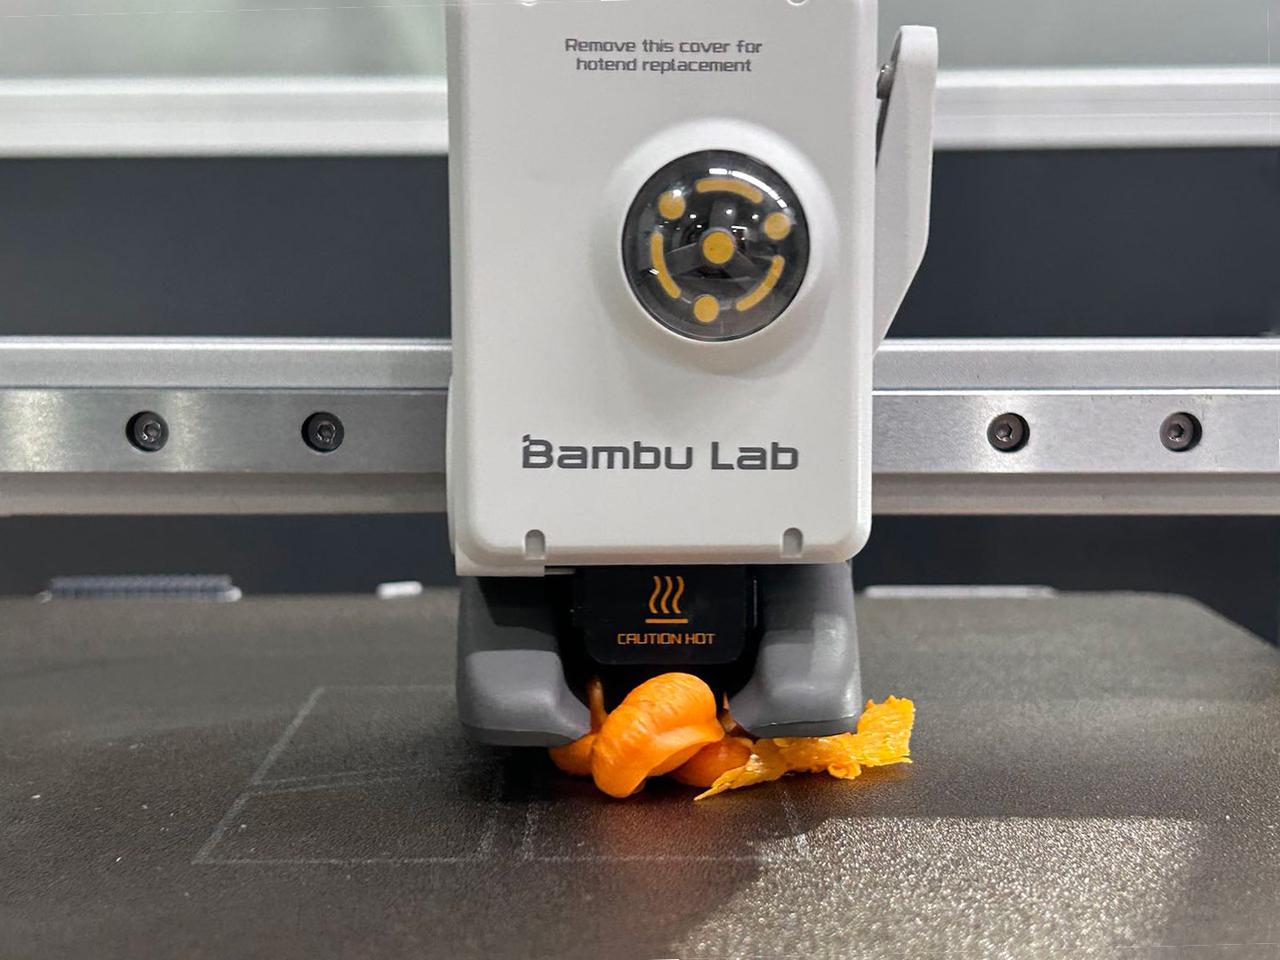
This guide applies when the printer hotend has a blob/clump (filament accumulated around the hotend) and the hotend cannot heat to the target temperature.
If the hotend can heat normally, refer to the blob-cleaning guides for each model:
-
Hotend Blob/Clump occurs when filament builds up around the hotend. This often happens if a printed part detaches in the first few layers and sticks to the hotend. Continued printing enlarges the blob.
-
Hotend Heating Abnormal occurs when the hotend cannot reach the set temperature. Causes include severe blobs or improper removal, which may damage heating cables.
Normally, clearing a blob requires heating the hotend above the filament printing temperature (e.g., 250°C for PLA) to soften filament for removal. If the hotend cannot heat, cleaning becomes difficult, and direct replacement of the heating assembly may not be possible.There is almost no simple way to fix this issue. We strongly recommend that you follow the official guidance when hotend blob occurs, such as checking the Wiki article above or submitting a support ticket.
Following official guidance is strongly recommended when a blob occurs. Check the above Wiki articles or submit a support ticket.
Note: The following steps involve forceful disassembly and may damage components. Replace damaged parts through the official store or contact online support.
This guide uses the A1 printer as an example to demonstrate blob cleaning when the hotend cannot heat, enabling replacement of the hotend heating assembly and complete blob removal.
¶ Safety Warning
Important !
This troubleshooting guide involves many connector plug - ins and pull - outs. Before performing any maintenance or connector plug - in and pull - out work on the printer and its electronic devices (including toolhead cables), please turn off the printer power and disconnect the power supply to avoid short - circuiting due to live operation, which may cause additional electronic device damage and safety hazards.
When you perform maintenance or troubleshooting on the printer, please first confirm the temperature of the hotend and the heatbed to avoid operating at high temperatures. If it is necessary to operate at high temperatures, please wear heat - resistant gloves to ensure safe and effective maintenance work.
For any questions about this guide, submit a support ticket and assistance will be provided promptly.
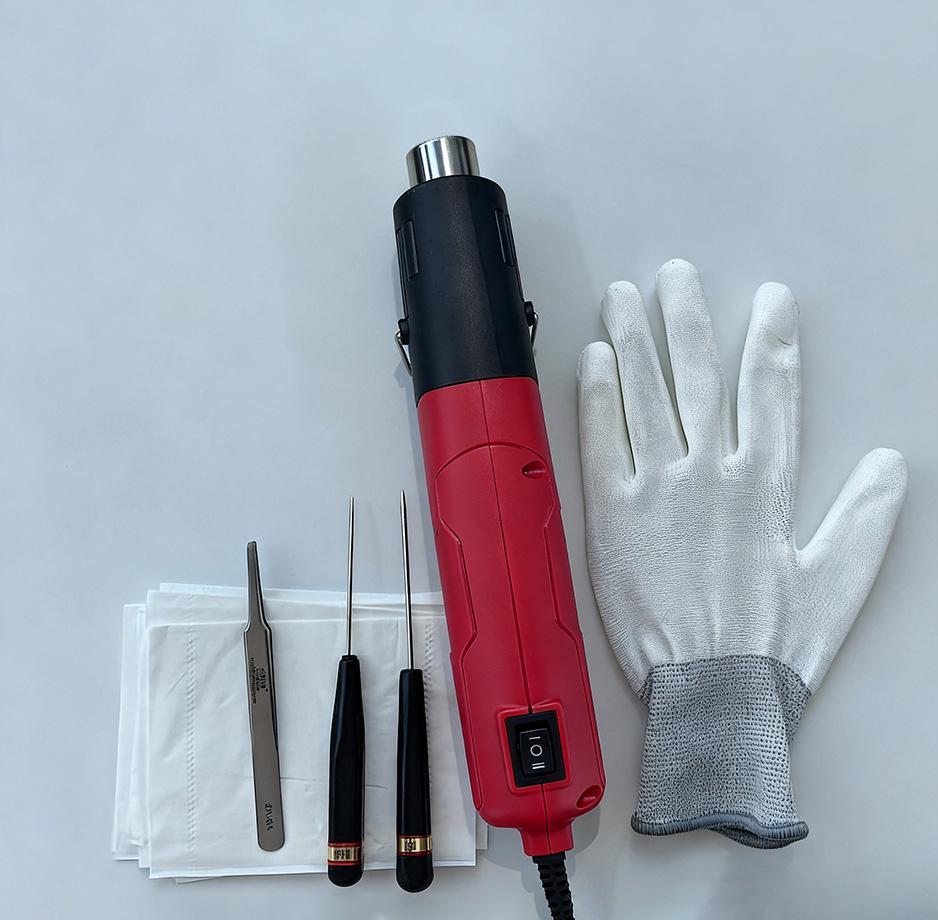
¶ Tools Needed
- Hot air gun or hair dryer
Note: Please keep the hot air gun temperature below 280 °C or use a lower power setting for safe operation. Heating with a hair dryer may take longer, so it may require some patience.
-
Flat tweezers / pliers
-
Paper towels
-
Heat-resistant gloves
-
H1.5 / H2.0 hex wrenches
¶ Steps to remove the hotend blob
¶ Lift the X-axis
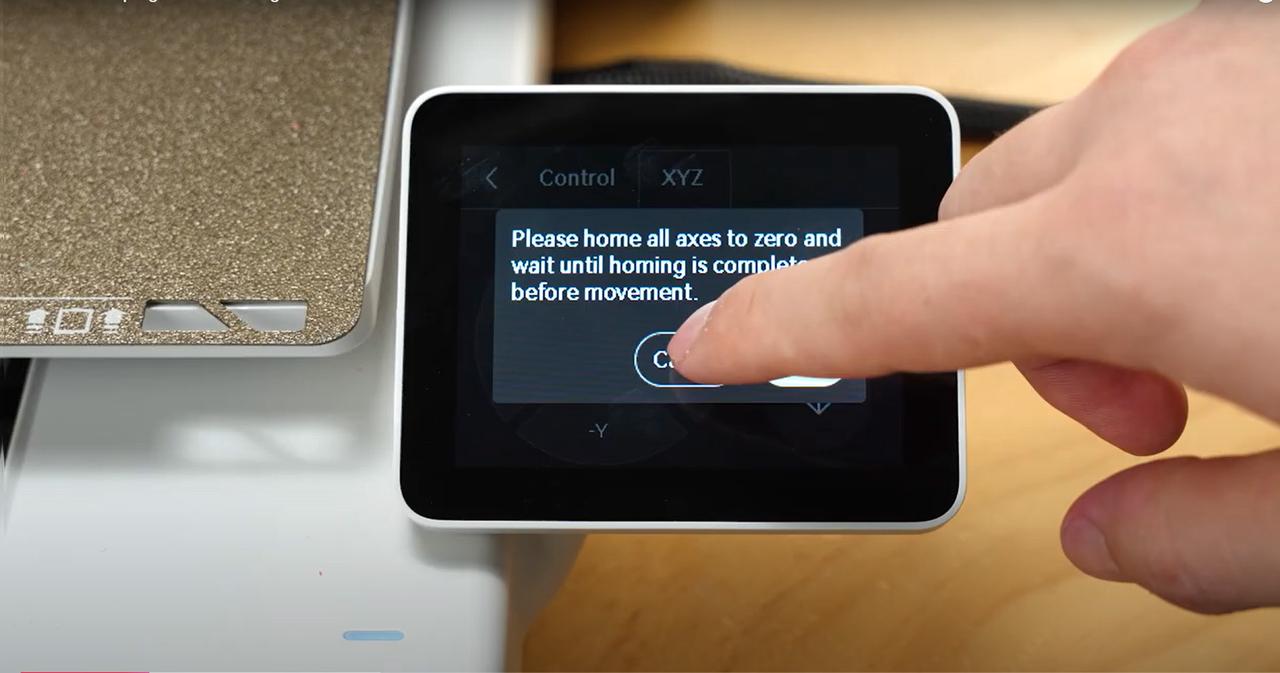
Move the X-axis up to increase working space. Then power off the printer.
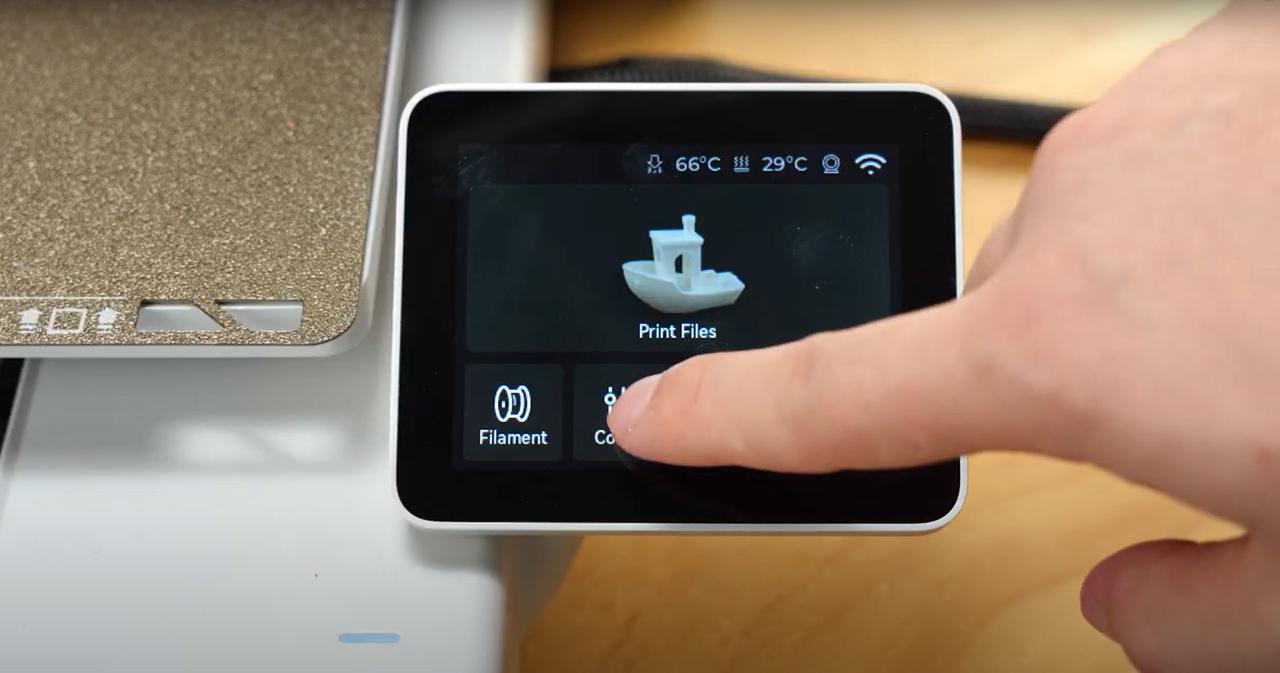
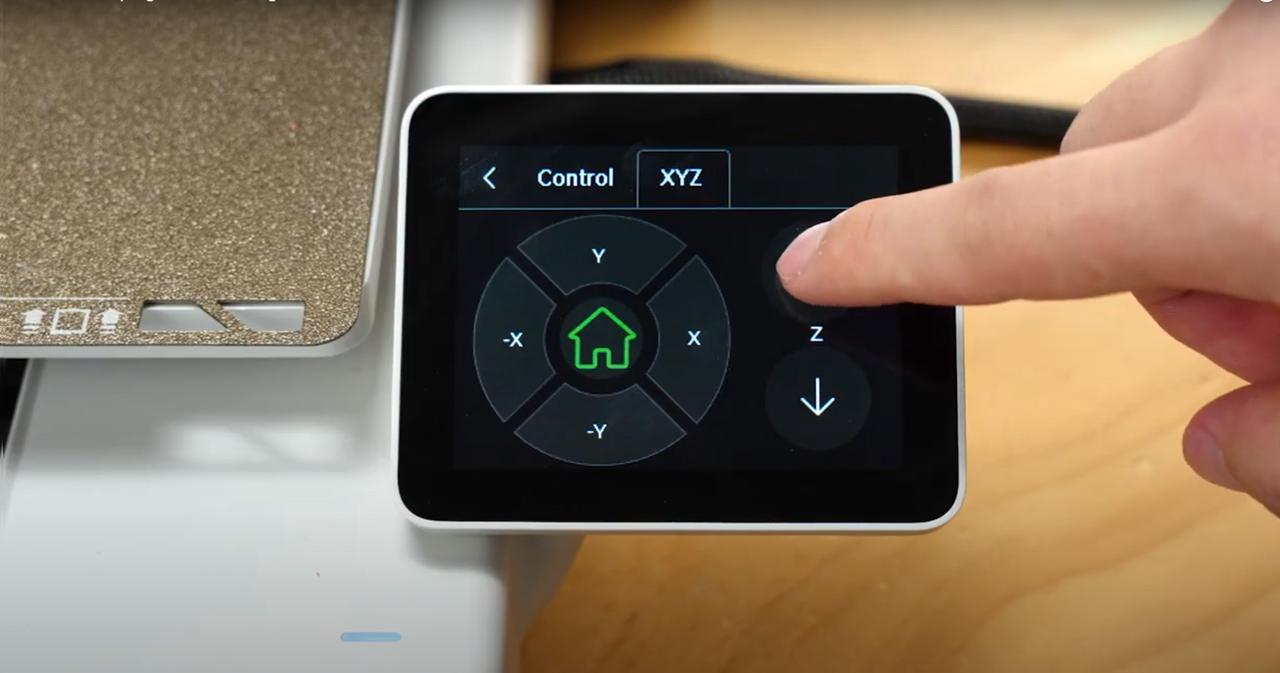
Step 1: Tap Control → XYZ → Up Arrow.
Step 2: Tap Cancel multiple times to lift the X-axis. Do not tap Center.
 |
 |
 |
 |
¶ Remove Fan Screws
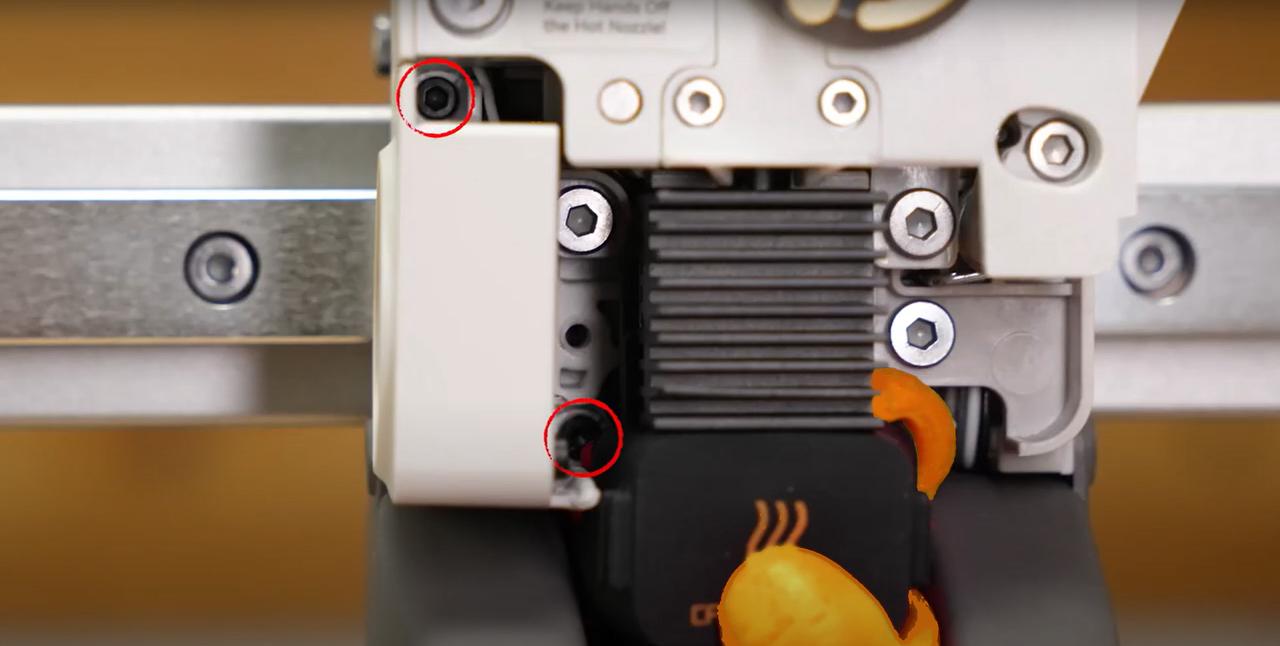
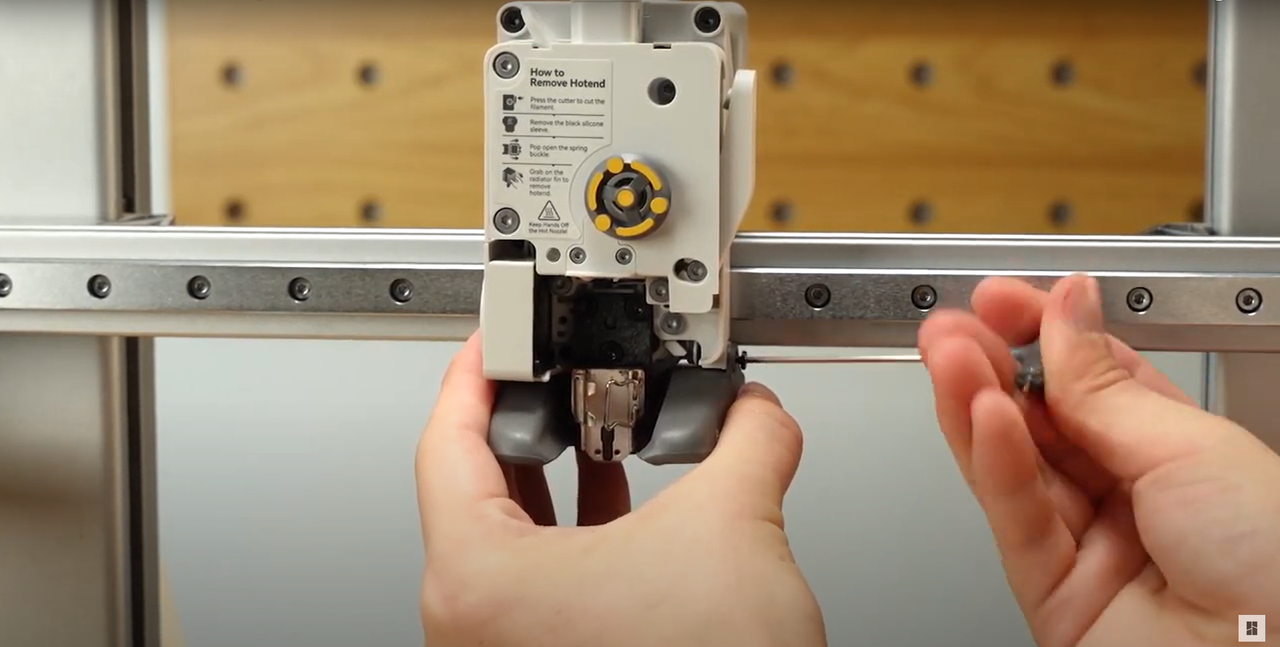
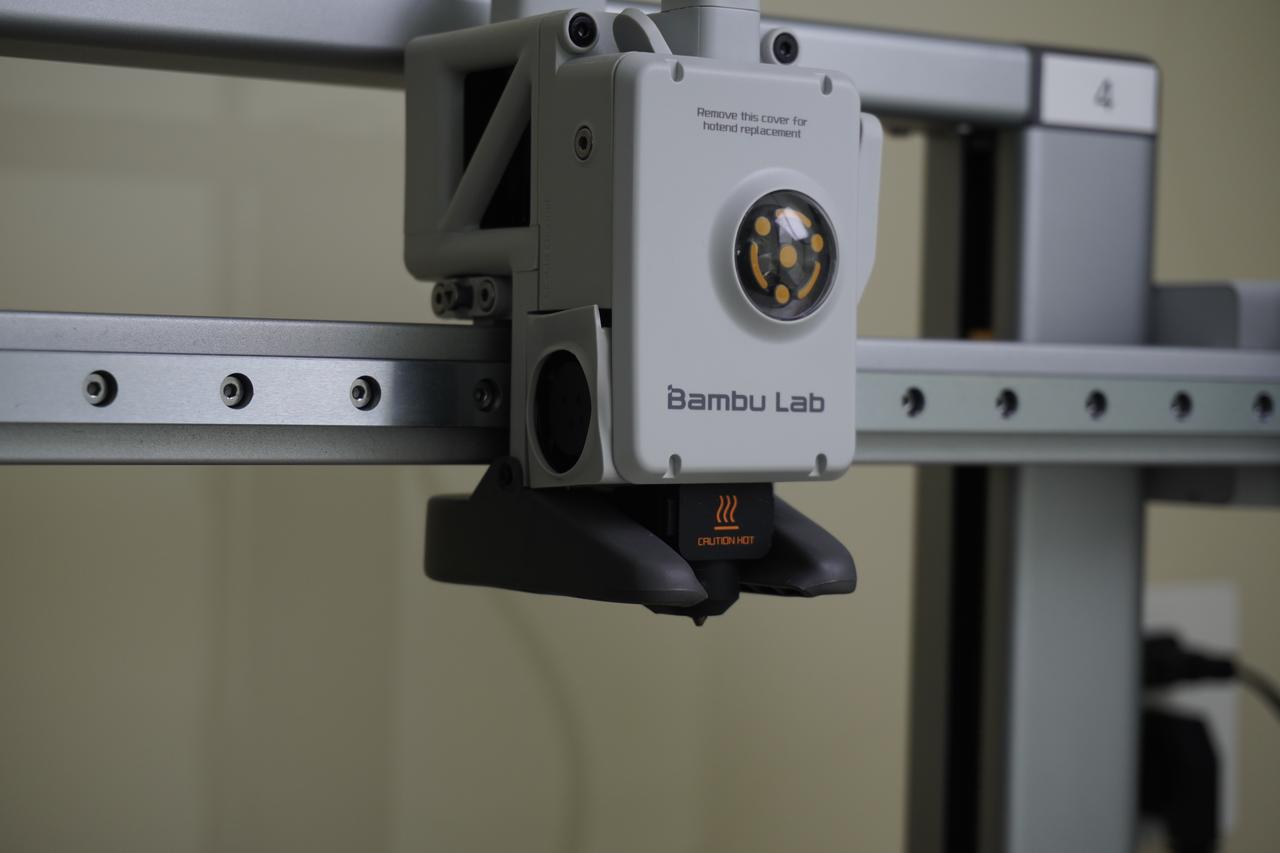
Step 1: Remove the toolhead front cover.

Step 2: Unscrew the two screws of the hotend fan.
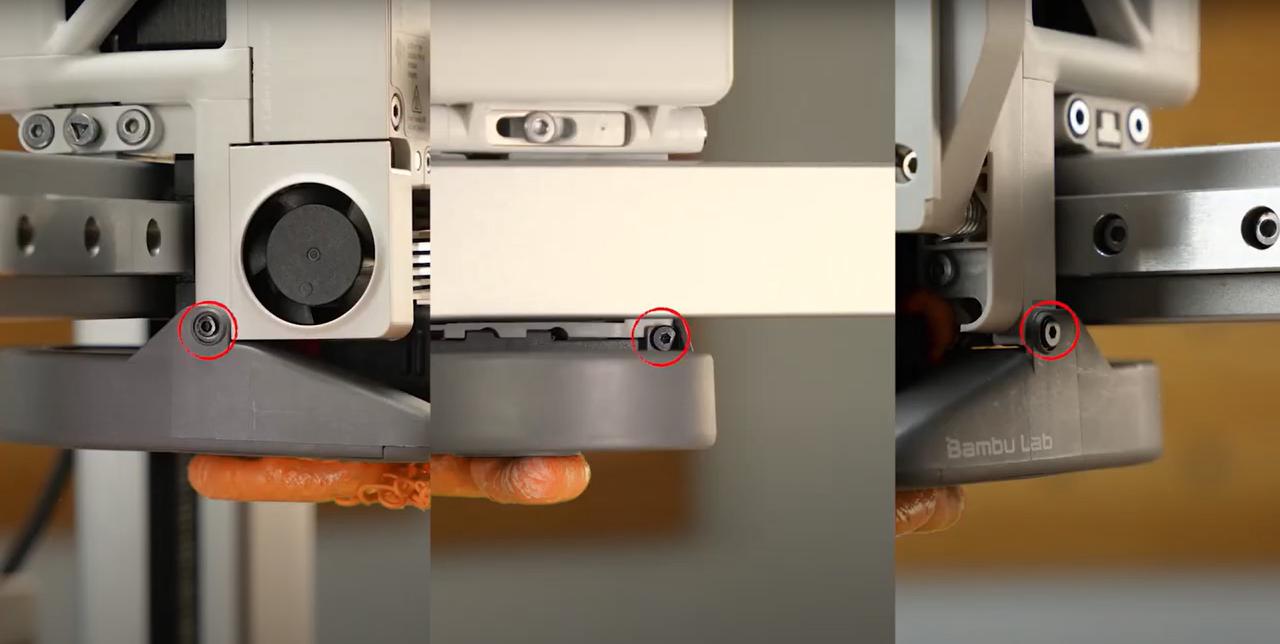
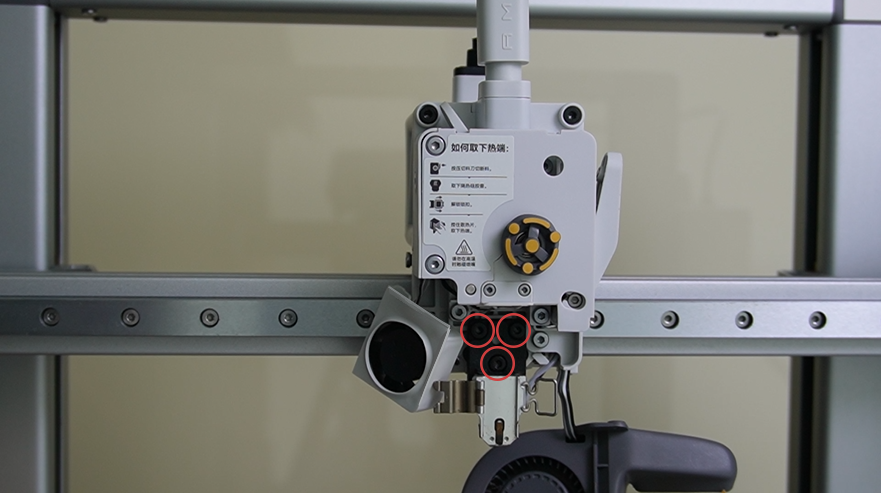
Step 3: Unscrew the three screws of the part cooling fan.
Step 4: During the following hot air gun operation, it is recommended to fix the fan onto the printer with tape to keep it away from the hot air gun outlet and prevent it from being melted. If it cannot be fixed, wear heat-resistant gloves while heating and hold the fan part to avoid exposing the fan assembly to the hot air. Optionally, a simple piece of aluminum foil placed in front of the extruder’s plastic can help prevent further unnecessary damage from heating.
Note: Please wear heat-resistant gloves during the following steps to ensure safe operation.
¶ Clear Part Cooling Fan
Step 1: Use a hot air gun from a safe distance to heat filament near the part cooling fan, from bottom to top.
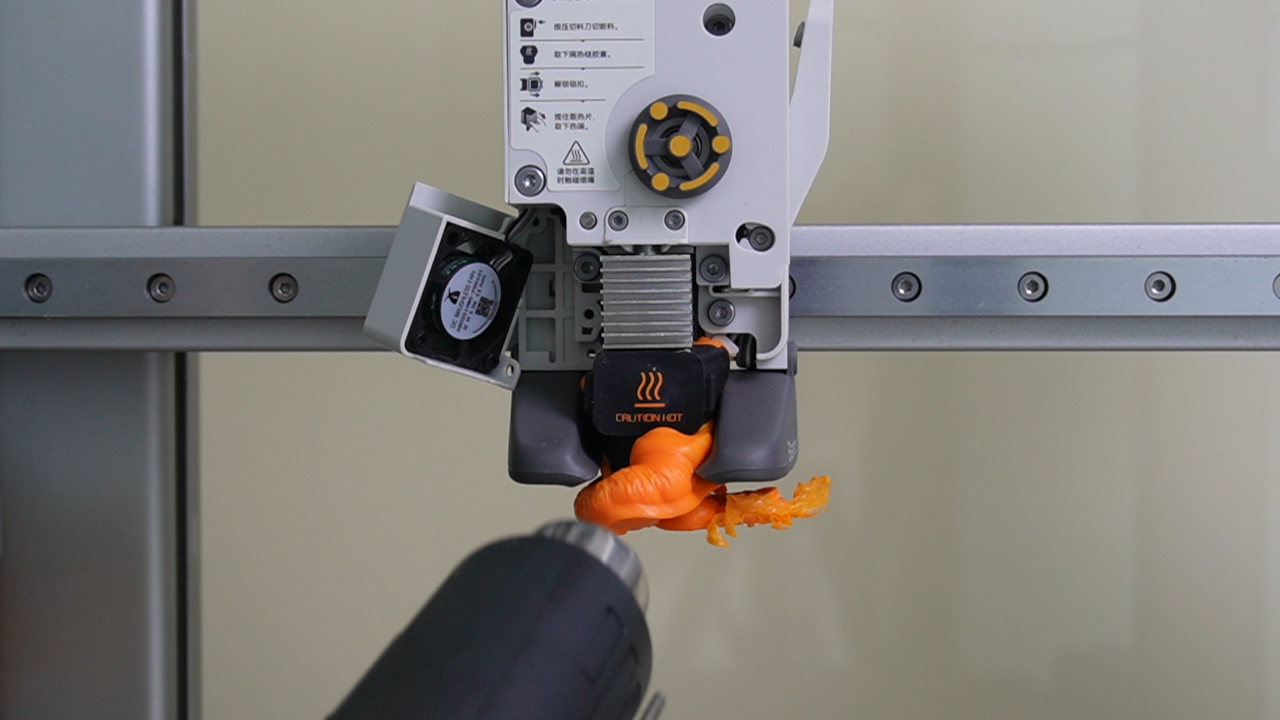
Note: When using a hot air gun, keep some distance between the nozzle and the printer components to prevent high temperatures from deforming the component housings. Do not heat the same spot for too long. It is recommended to check the filament’s softening status every 30 seconds. Once the filament has softened, stop heating and quickly remove the clogged material.
Step 2: Once softened, gently pull away the filament. It may be a bit difficult to remove. Please handle it gently to avoid damaging other components or cables.
¶ Remove Fans
Step 1: Slightly wiggle the part cooling fan and remove downward, taking care not to damage cables.
Step 2: If the blob is minor, both the hotend fan and part cooling fan can be removed. See Wiki for fan replacement:
-
Hotend Fan: Hotend Fan Replacement Guide - A1 Series
-
Part Cooling Fan: Part Cooling Fan Replacement guide - A1
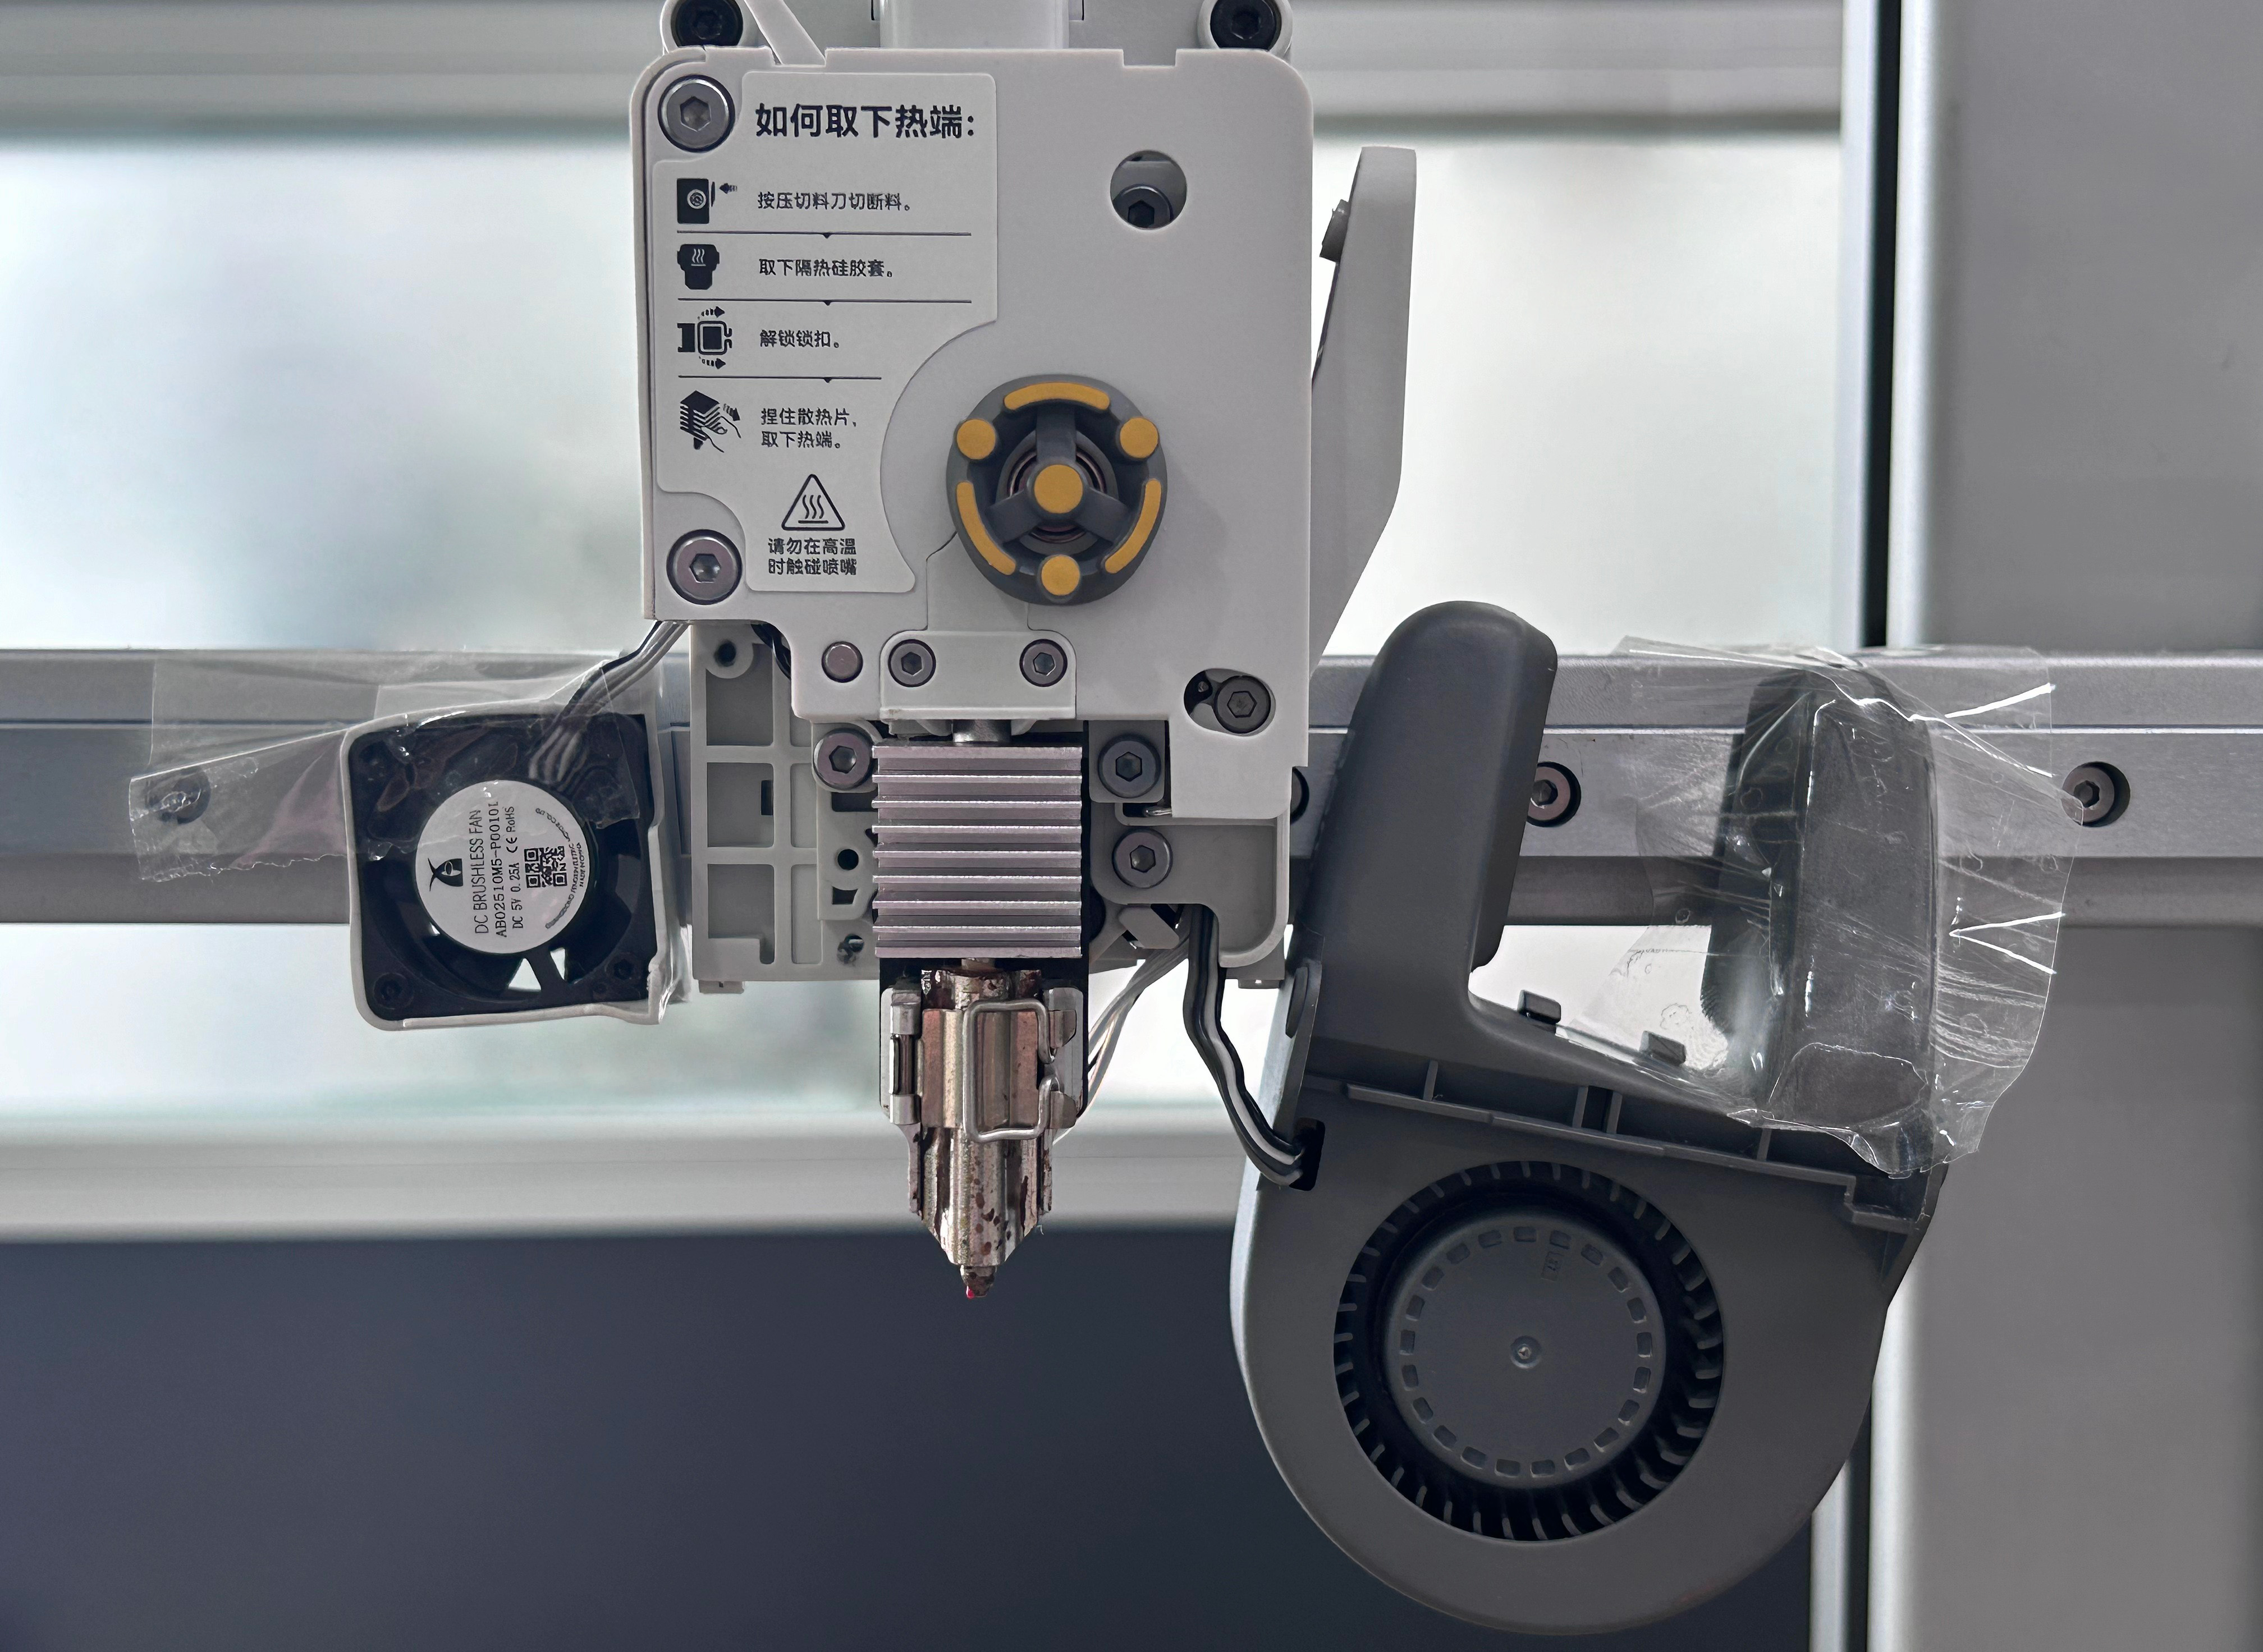
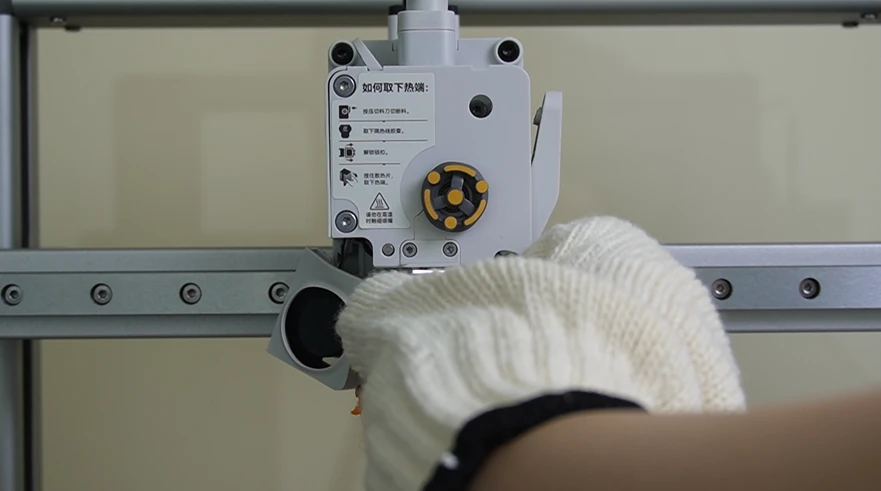
¶ Clean Hotend and Silicone Sock
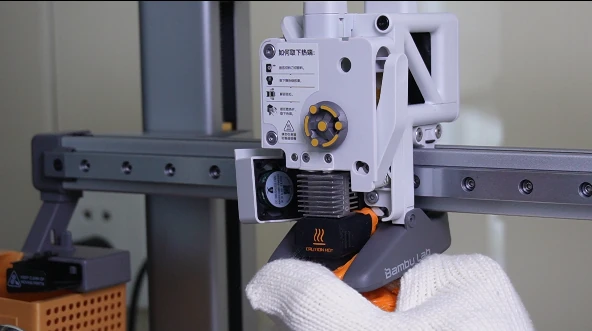
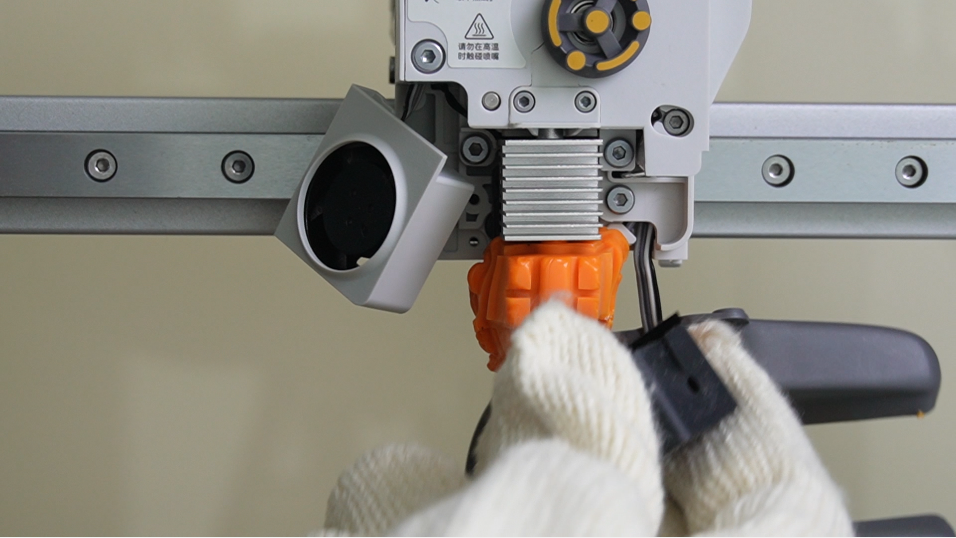
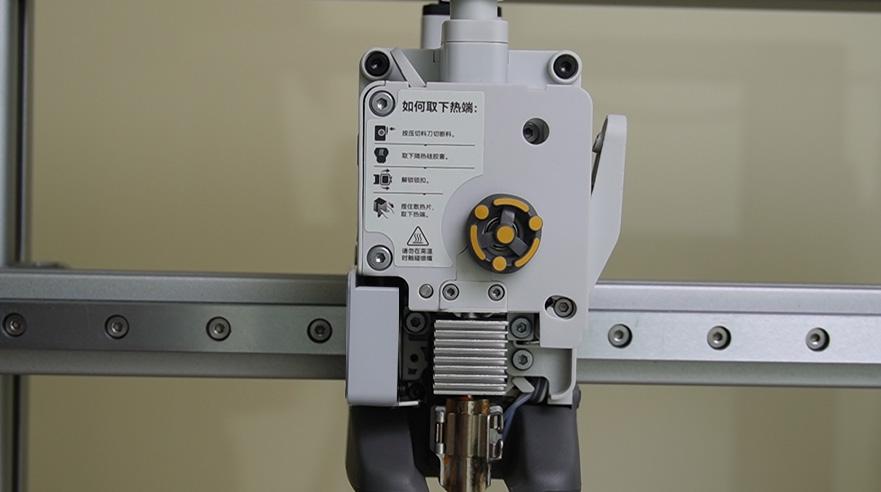
Step 1: Heat the hotend filament area with a hot air gun at a safe distance, then remove the silicone sock.
 |
 |
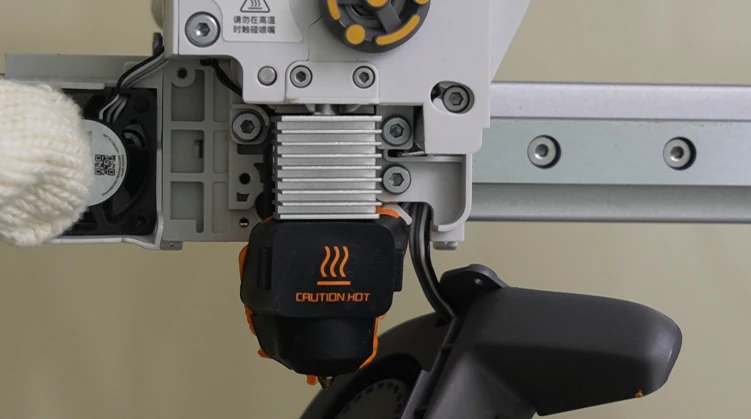
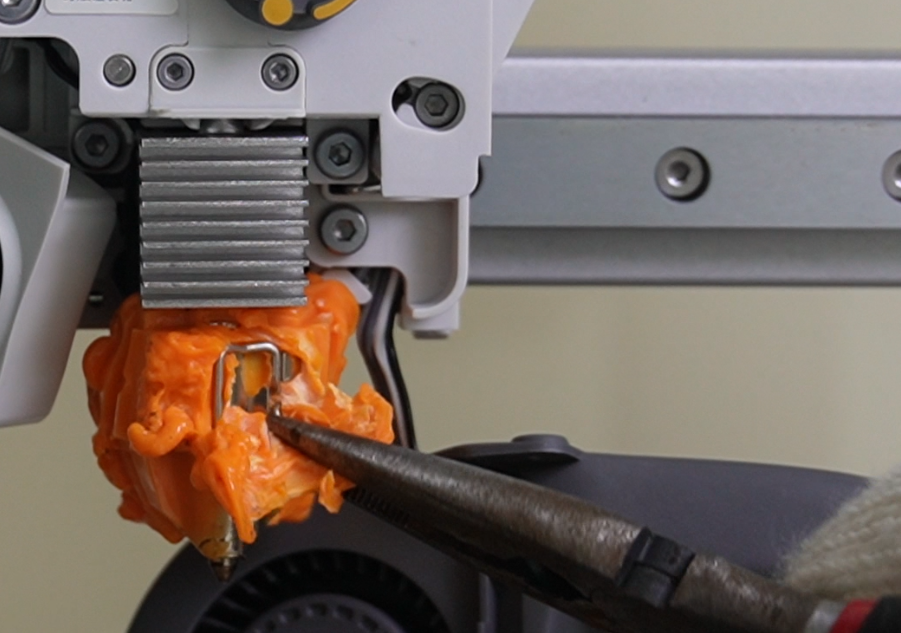
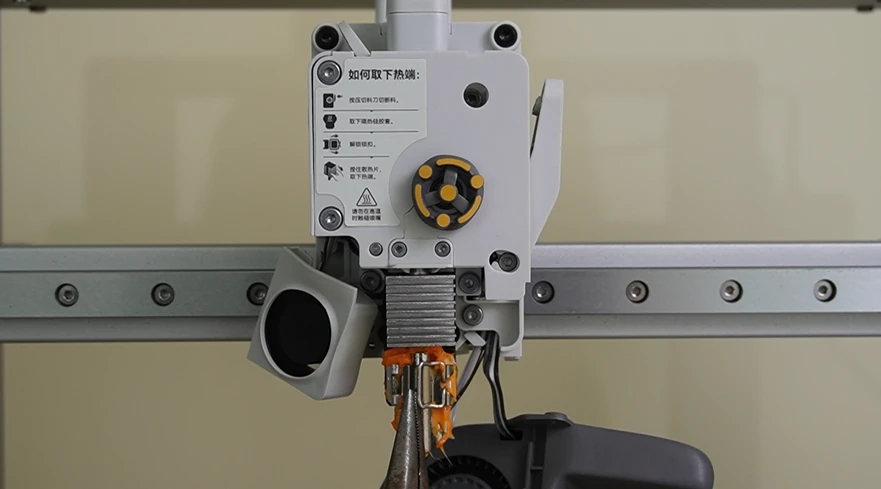
Step 2: Press the cutter, and continue heating until the filament softens. Use pliers to carefully remove filament around the hotend, focusing on the clip area. Do not force the clip nozzle off if filament remains elsewhere.
 |
 |
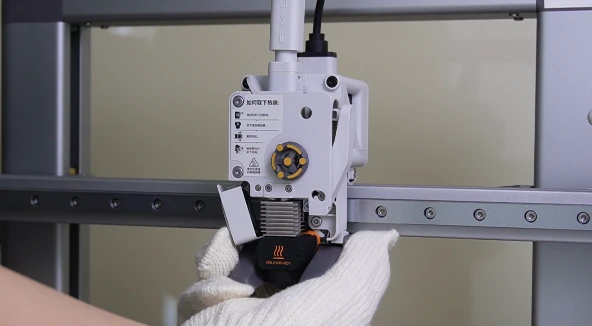
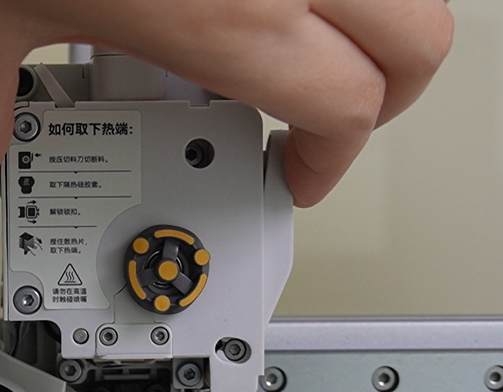
Step 3: Open the clip with a tool, and remove the nozzle while wearing gloves.
 |
 |
¶ Replace Hotend Heating Assembly
Step 1: If screws on the hotend heating assembly still have leftover filament, heat with a hot air gun and clean before replacement.
Step 2: Refer to the Wiki:A1 Series Hotend Heating Assembly Replacement Guide. Other models:
¶ Install Fans
Step 1: Reinstall the hotend fan screws.
If the fan is slightly deformed but functions normally, it can continue to be used.
Step 2: Replace any damaged fans. See Wiki:
Note:If any parts are damaged, purchase replacements from the official store or contact online support.
-
Hotend Fan: Hotend Fan Replacement Guide - A1 Series
-
Part Cooling Fan: Part Cooling Fan Replacement guide - A1
¶ Install Nozzle and Silicone Sock
Step 1: Install the nozzle. If leftover filament prevents the clip from locking, do not force it to avoid damage.
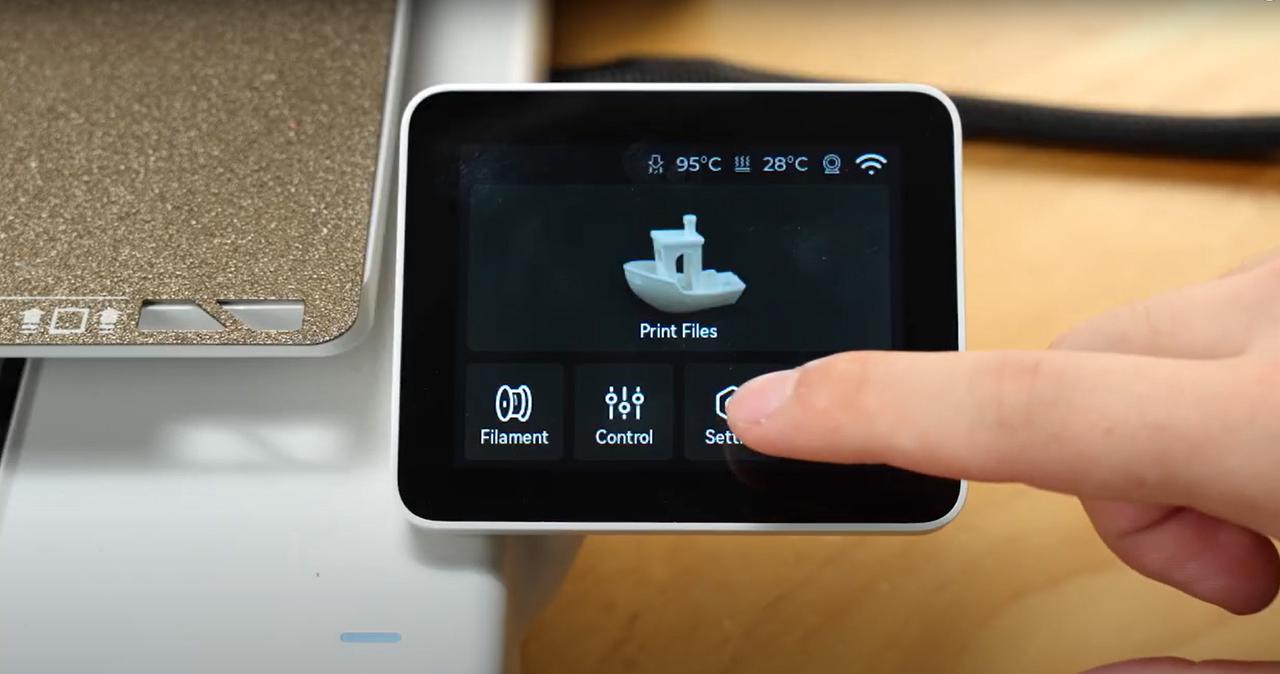
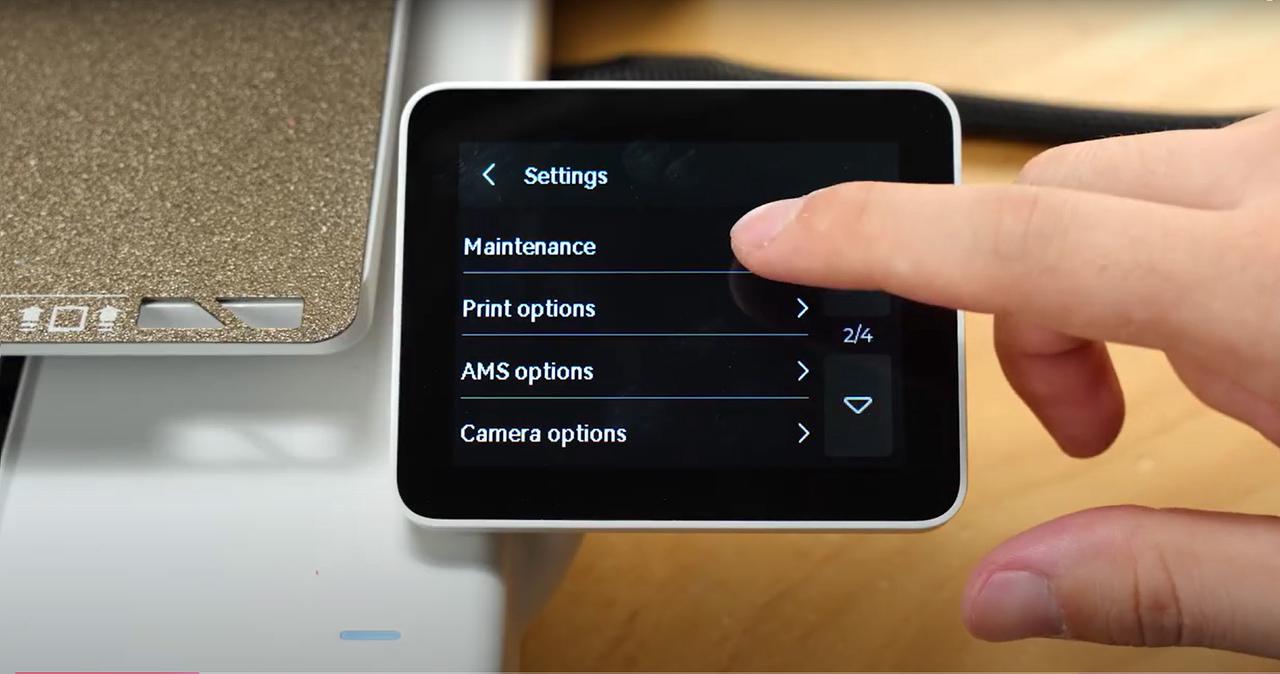
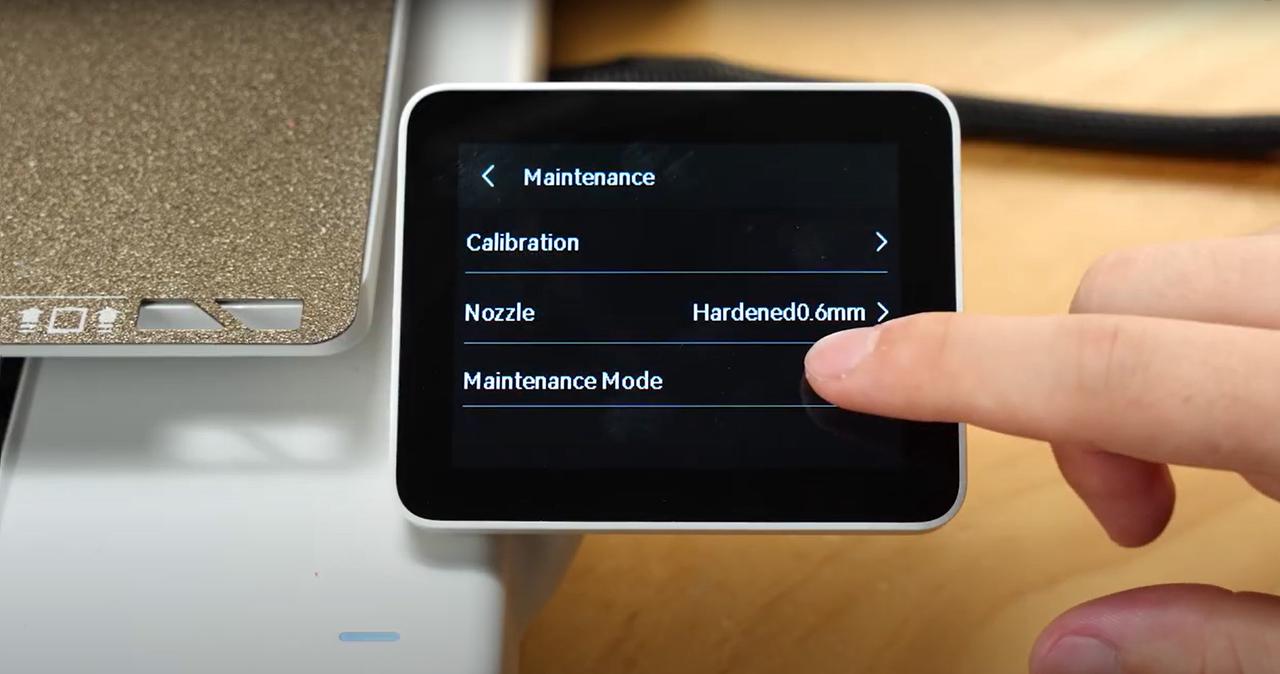
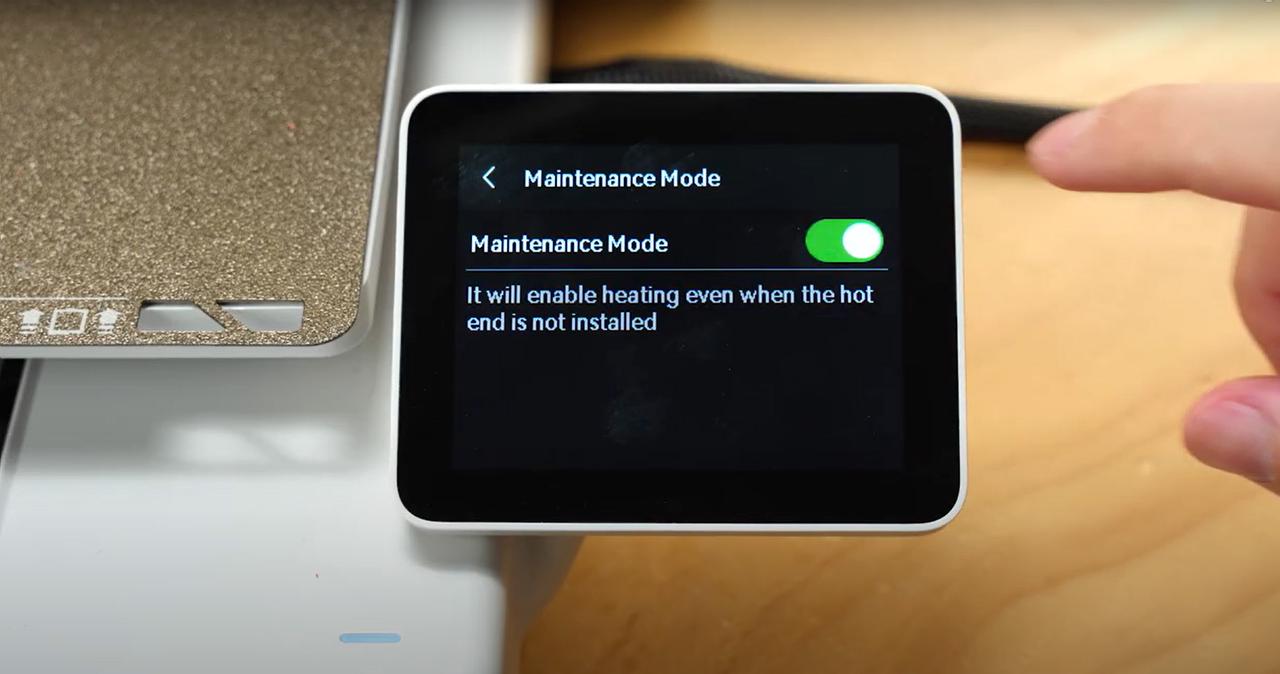
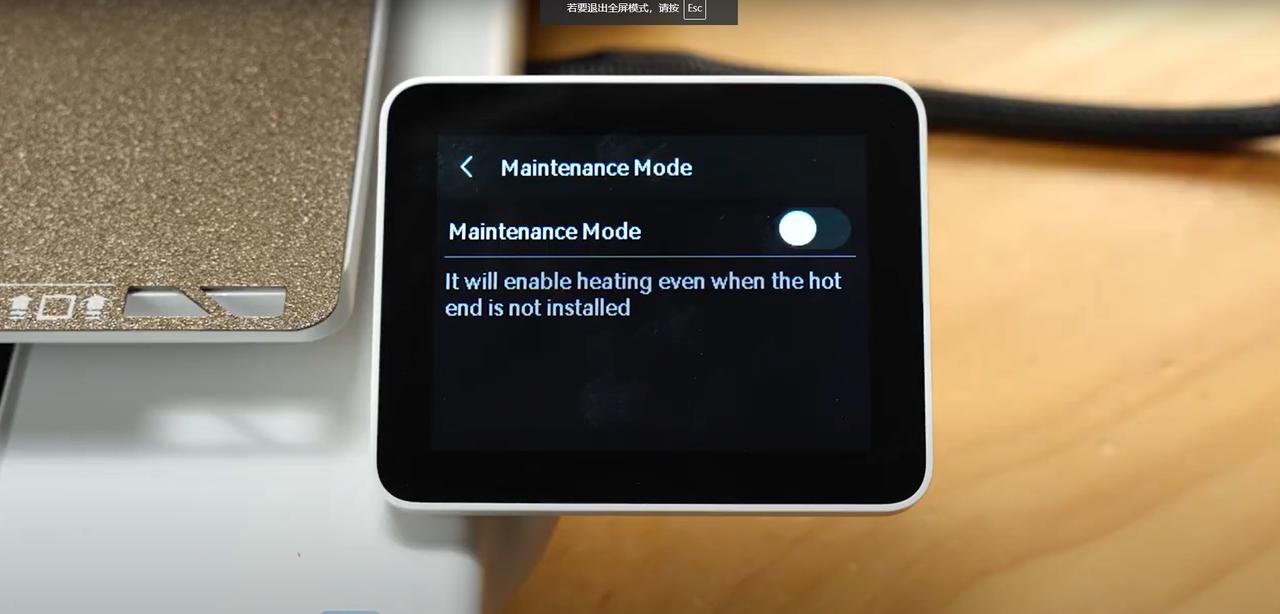
Step 2: Connect power and enable maintenance mode.
 |
 |
 |
 |
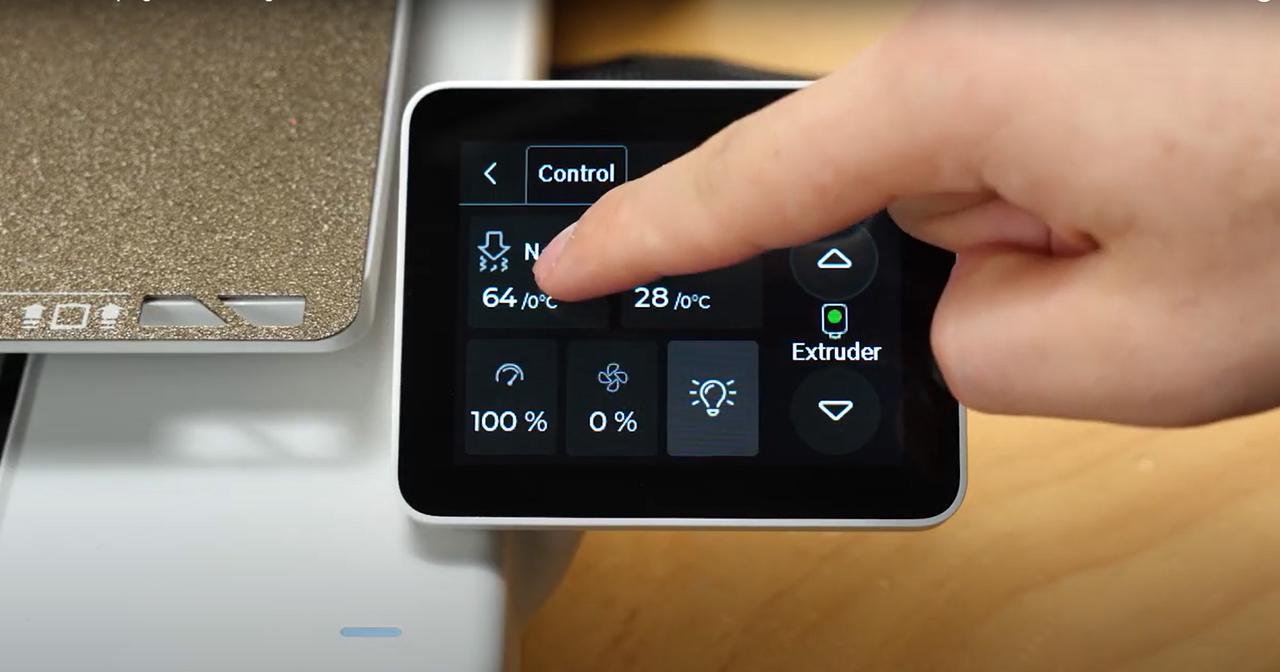
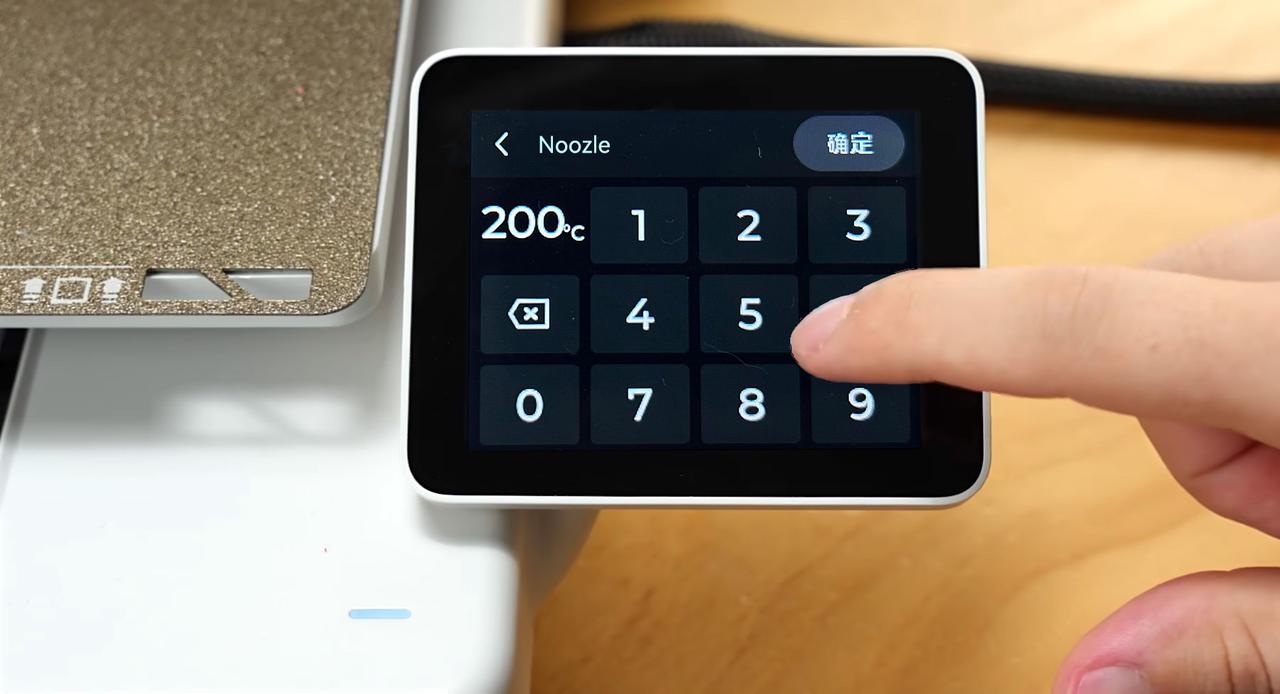
Step 3: Increase the hotend temperature by clicking Control > Nozzle > Set Temperature. After setting, click OK.
 |
 |
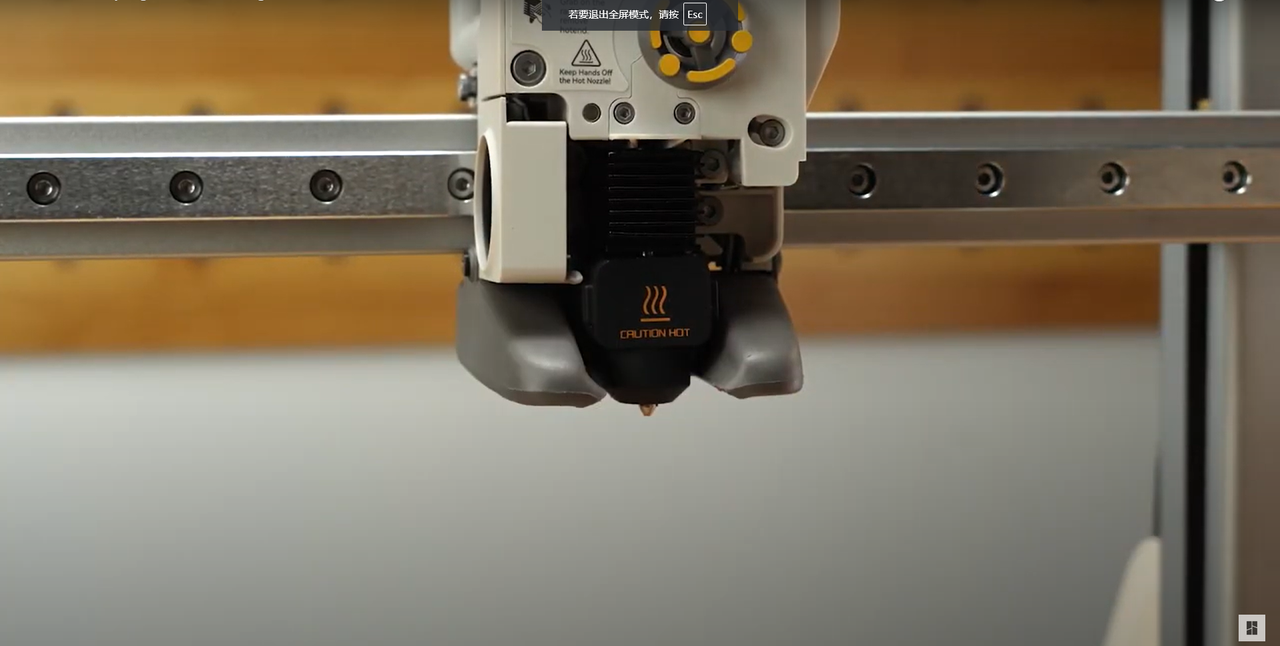
Step 4: Use tweezers to remove the remaining filament and reinstall the silicone sock and toolhead front cover.
 |
 |
Step 5: After installation, disable maintenance mode following the preparation instructions.
¶ Verify the Functionality
Step 1: Set the hotend temperature to 100°C. The hotend fan should start spinning within a few seconds, confirming the correct installation.
Step 2: Click Filament > Load on the printer screen to confirm filament extrudes normally.
If extrusion is blocked, clean the nozzle and repeat the test. Refer to Wiki: A1 series Nozzle Unclogging Guide
¶ How to Avoid
To prevent hotend blob from happening again, pay attention to the following before and during printing. These steps can greatly reduce the chances of happening:
Step 1: Clean the build plate.Before printing, clean the build plate or apply glue as needed to improve adhesion between the print and the plate.
Step 2: Enable clog detection. You can enable the printer’s nozzle clog detection before printing. Note that this feature only reduces the likelihood of clogging but cannot completely prevent it.
Step 3: Check the print. We recommend using the monitoring on the Bambu Handy device page to check the print. If hotend blob occurs, stop the print immediately.
¶ End Notes
We hope the detailed guide provided has been helpful and informative.
If this guide does not solve your problem, please submit a support ticket. We will answer your questions and provide assistance.
If you have any suggestions or feedback on this Wiki, please leave a message in the comment area. Thank you for your support and attention!