¶ H2D
The following section covers the 3D printing part of the H2D 3D Printer.
If you have a H2DL printer, you can learn more about the H2D Laser Module by clicking here or about the H2D Cutting Module by clicking here.
¶ Homepage
On the left side of the homepage is an on-screen menu bar that includes Homepage, Controls, Filaments, Settings, and HMS; on the right side is the Print Files, Nozzle Temperature, Filament, Network Settings, and HMS.

¶ Controls
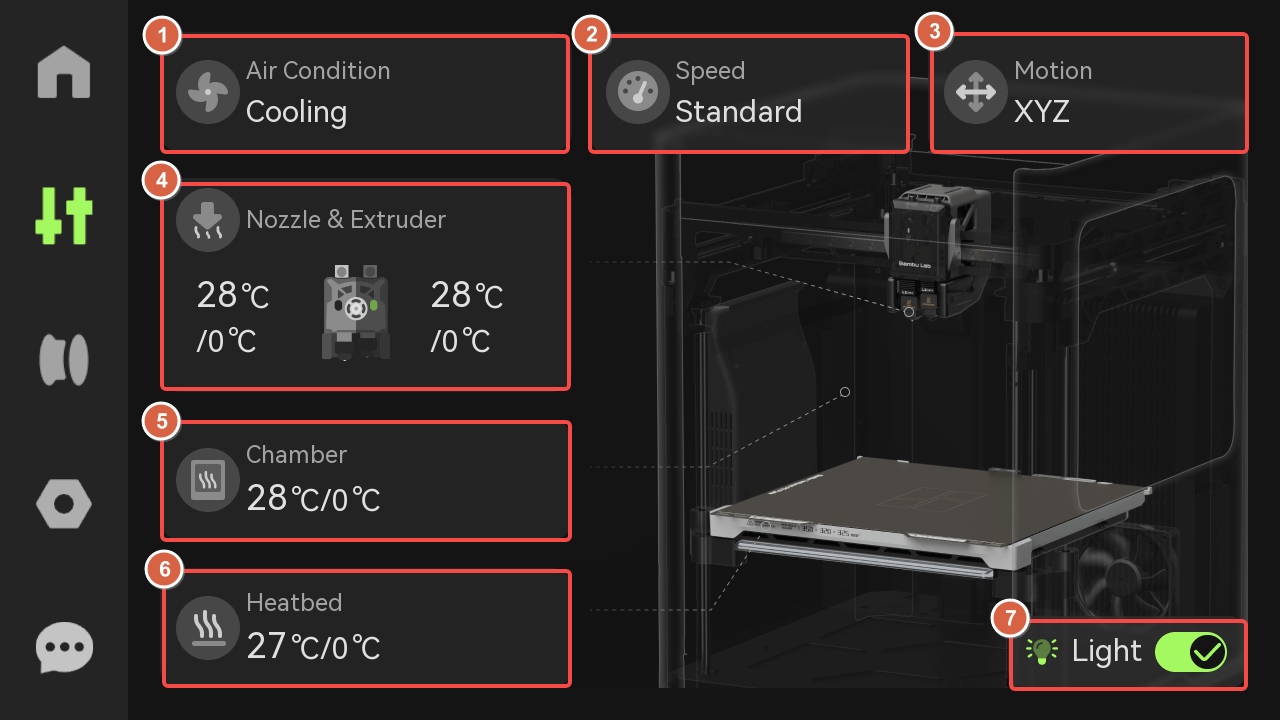
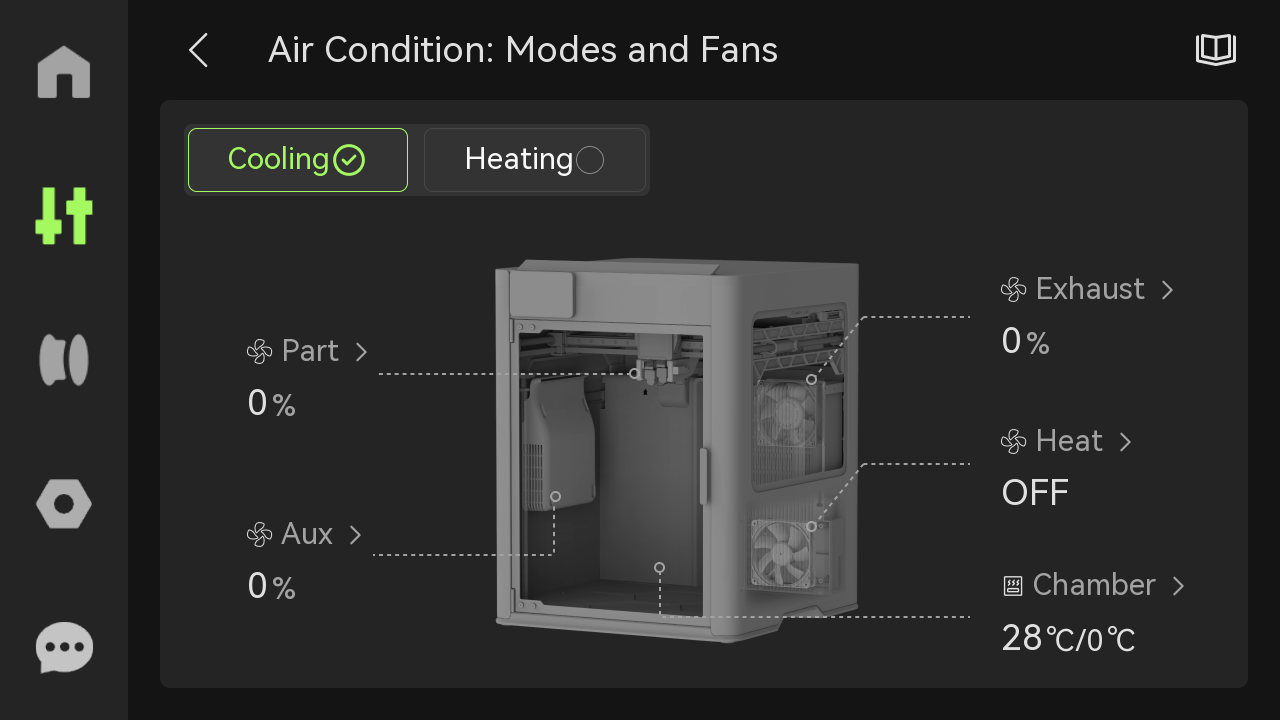
¶ 1. Air Condition
Depending on the filaments, you can choose the appropriate air condition system.
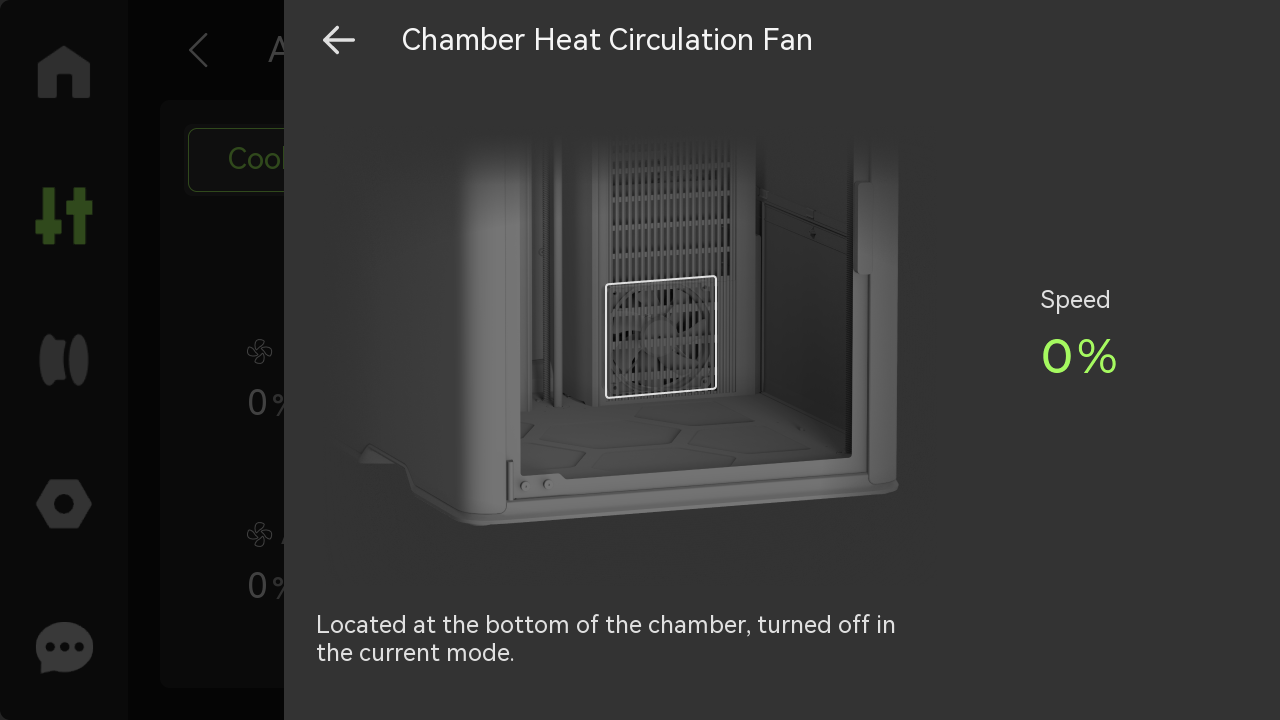
- Cooling mode: Cooling mode is suitable for printing filaments with low heat resistance, such as PLA/TPU; the chamber heat circulation fan remains off in this mode.
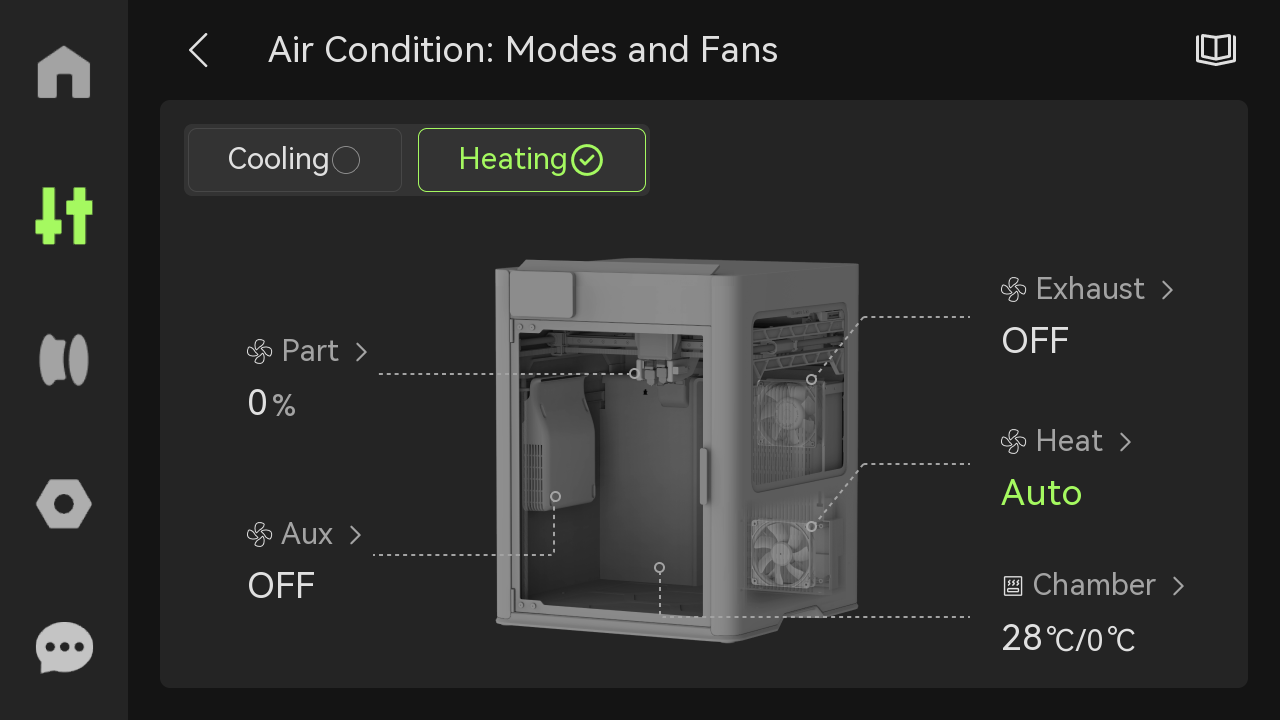
- Heating mode: Heating mode is suitable for printing ABS/ASA/PC/PA and other filaments with high heat resistance. When the chamber is heated, the system will automatically switch to the heating mode; in this mode, the chamber heat circulation fan will automatically turn on, and the auxiliary part cooling fan will remain off.
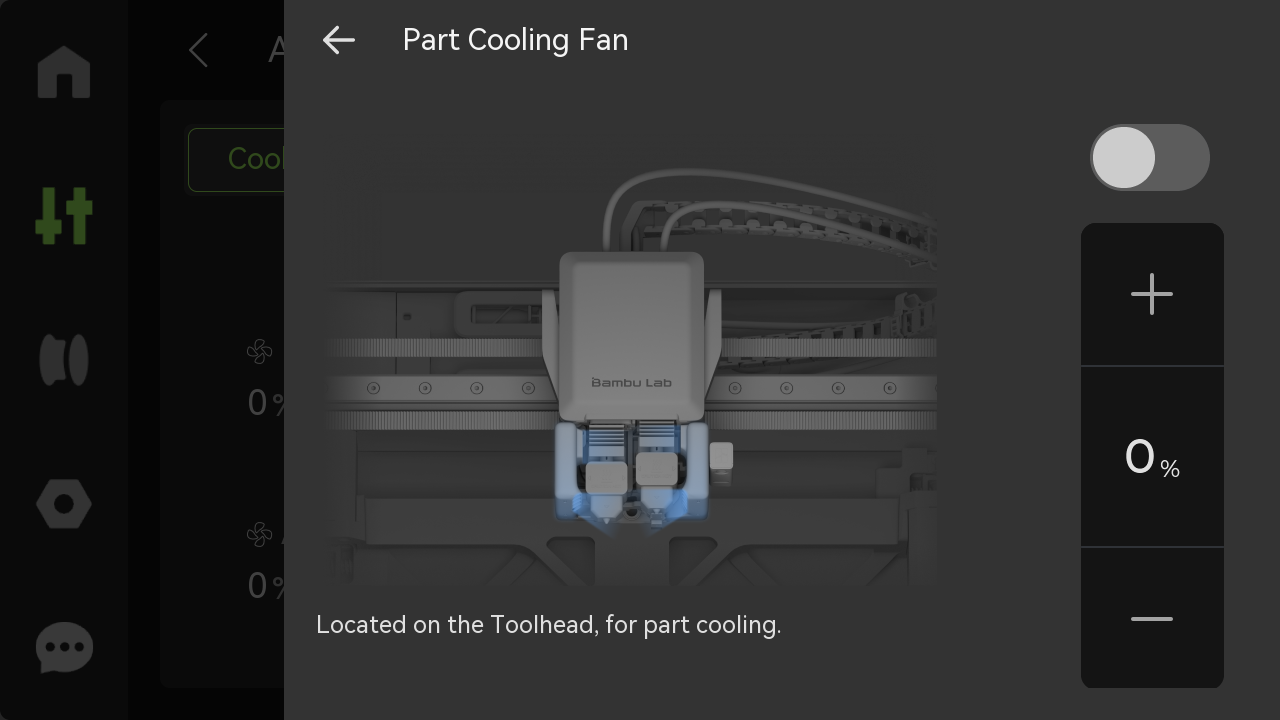
- Part Cooling fan: It is installed on the toolhead, and is used to ensure adequate cooling of the printed layers during the printing process. It helps in rapidly cooling the material as it is extruded, allowing each layer to solidify and maintain its shape before the next layer is deposited.
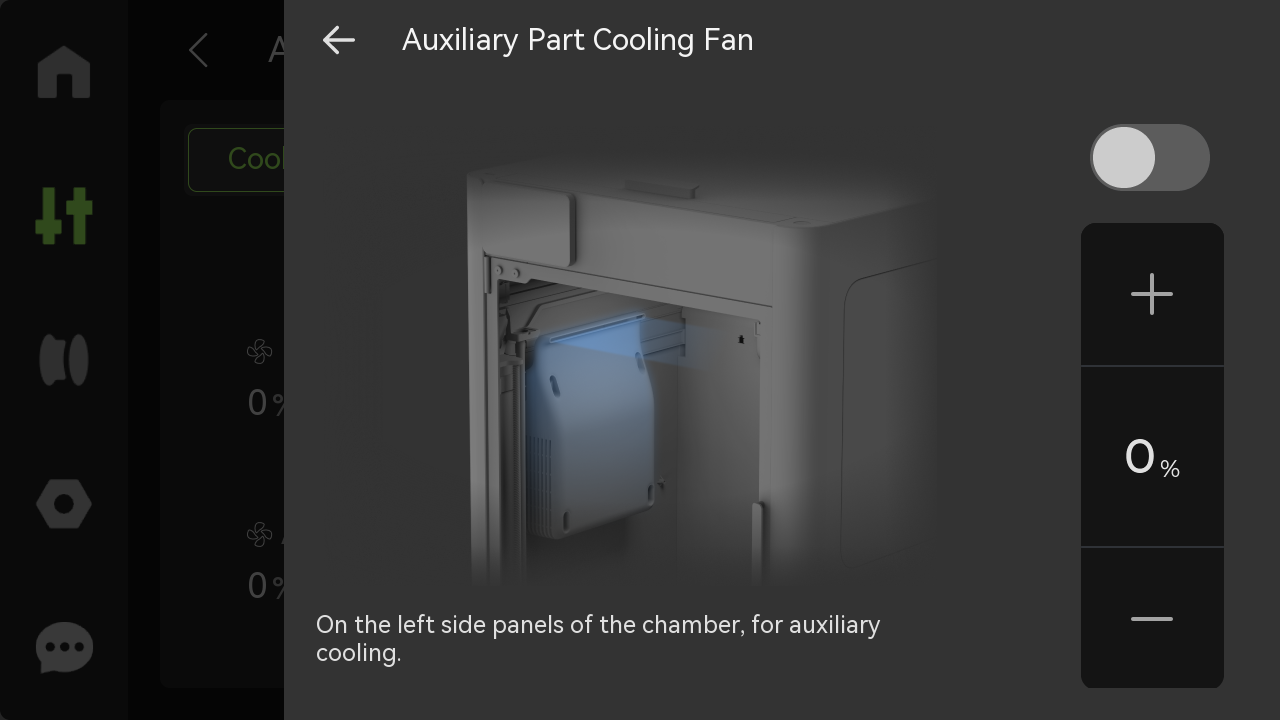
- Auxiliary Part Cooling Fan: It is installed on the left side of the chamber, and provides a better cooling condition for high-speed printing.
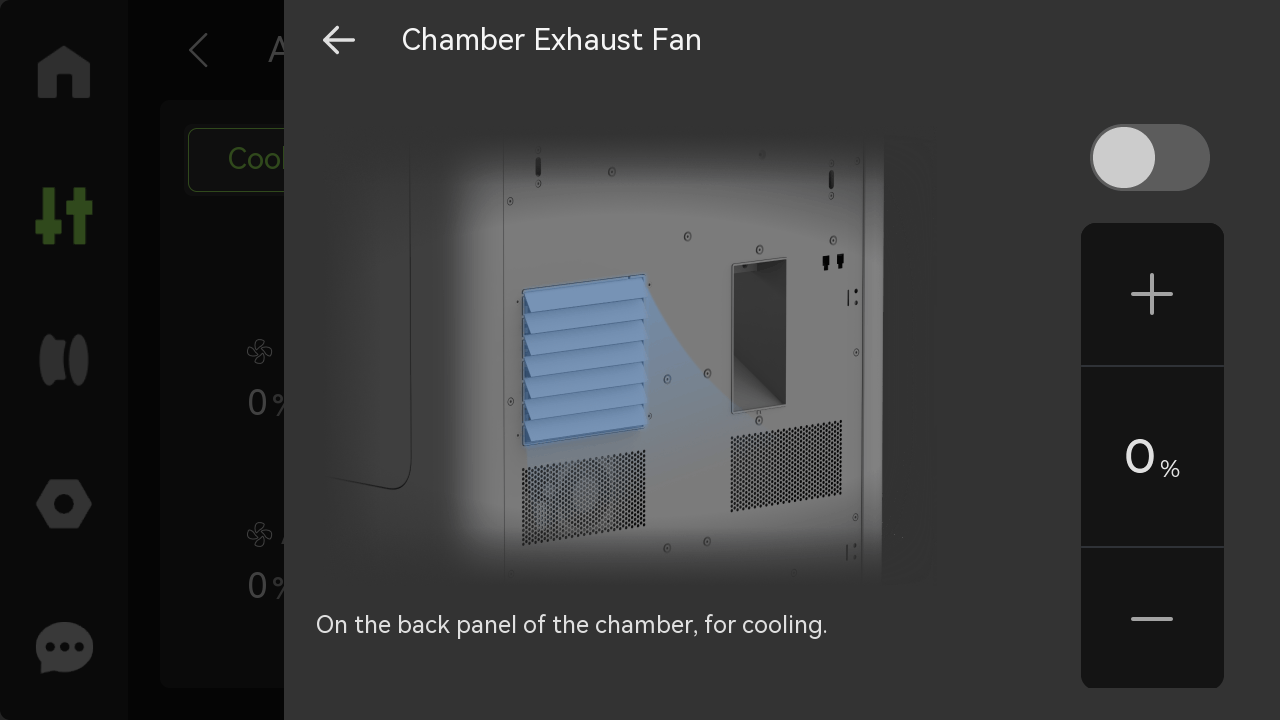
- Chamber Exhaust Fan: When the chamber cools down, the air condition will switch to cooling mode. The speed of the chamber exhaust fan will increase as the chamber temperature rises during printing. When the chamber temperature is lower, the chamber exhaust fan will reduce its speed to 30%.
- Chamber Heat Circulation Fan: During chamber heating, the printer will switch to heating mode. After setting the chamber temperature, the chamber heater (composed of PTC and the chamber heat circulation fan) will begin to operate, with the PTC heating at full power and the fan running at full speed. Once the chamber temperature reaches the target value, the fan speed remains constant while the PTC power decreases to maintain a stable temperature.
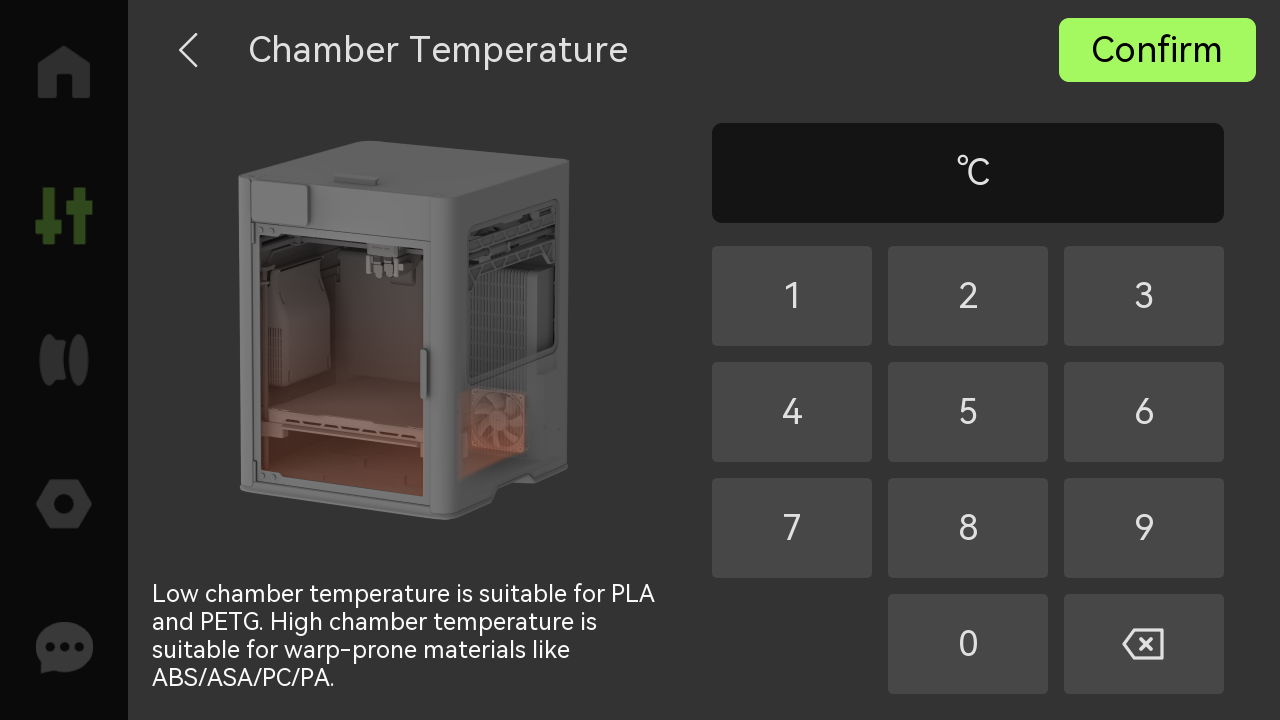
- Chamber Temperature: Set the appropriate chamber temperature according to the different filaments. Low chamber temperature is suitable for printing filaments such as PLA and PETG; high chamber temperature is suitable for printing warp-prone filaments such as ABS.
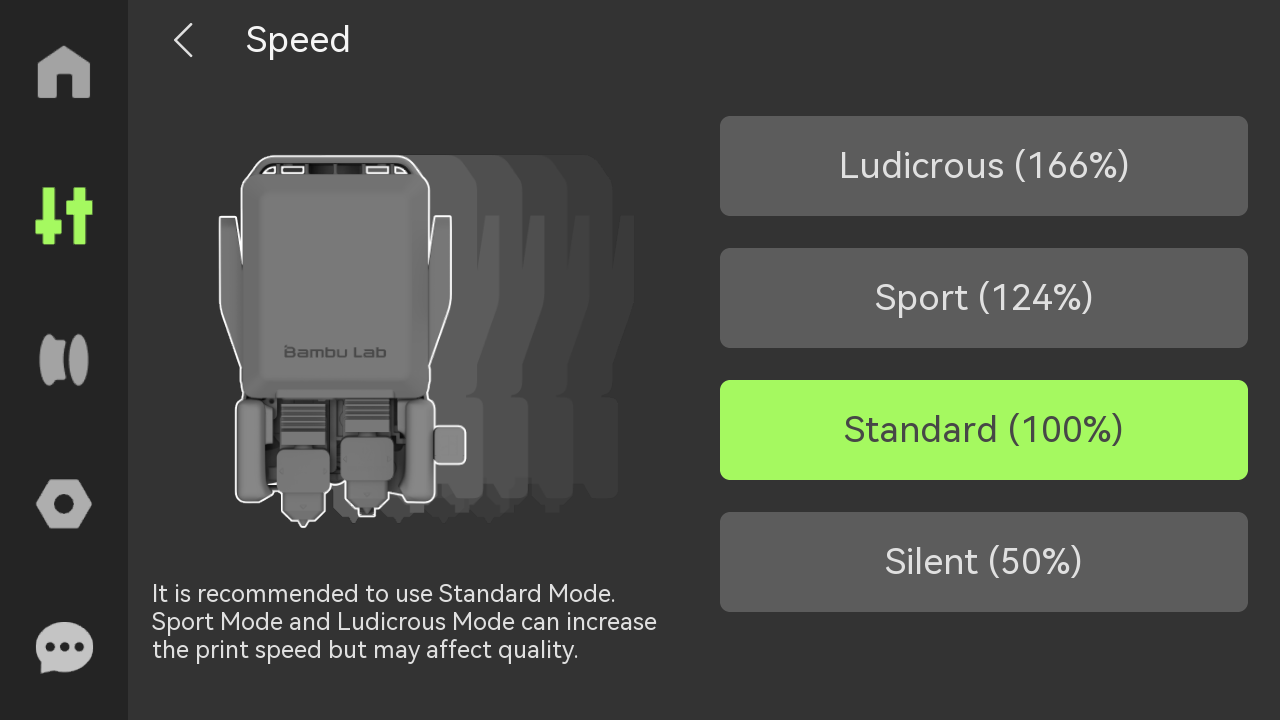
¶ 2. Speed
Set the printing speed mode.
-
Ludicrous: 166% of normal print speed and acceleration
-
Sport: 124% of normal print speed and acceleration
-
Standard: normal print speed and acceleration
-
Silent: 50% of normal print speed and acceleration
¶ 3. Motion
-
Toolhead: Click +1 or +10 to control the toolhead movement in the X-axis and Y-axis.
-
Heatbed: Click the 1 or 10 move button to raise or lower the heatbed.

¶ 4. Nozzle & Extruder
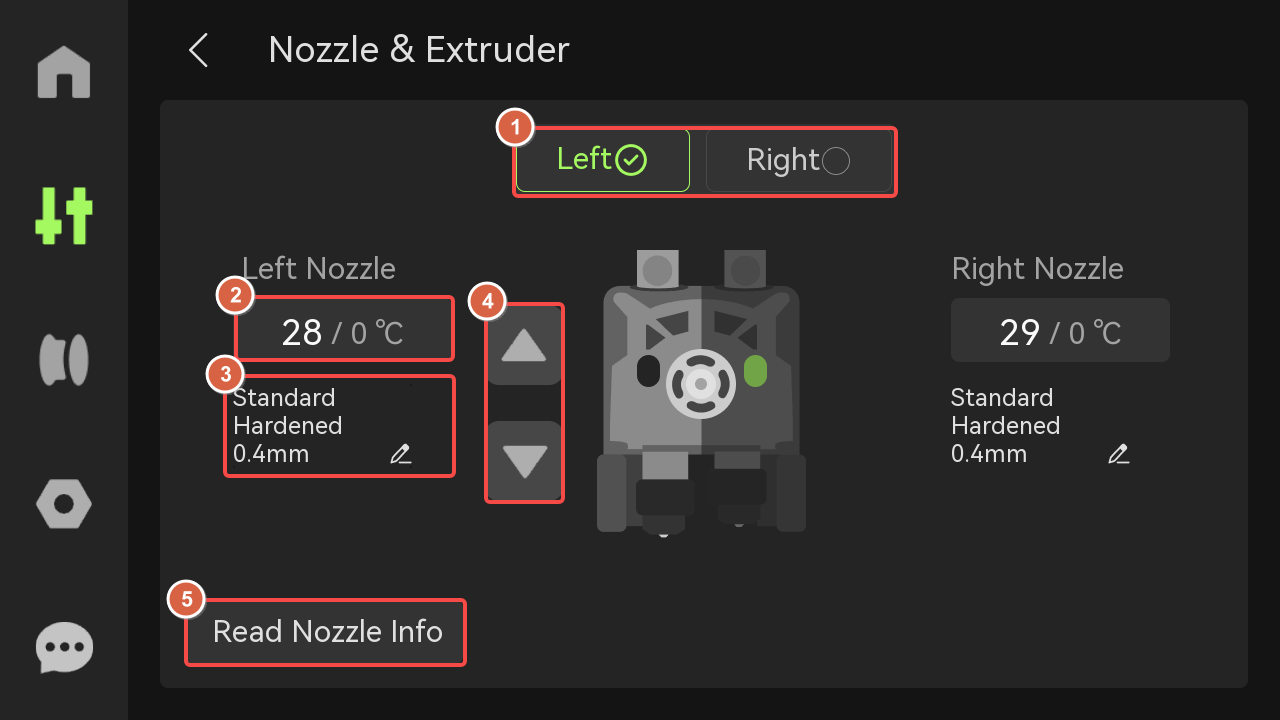
- Left/Right: Click the left/right nozzle to switch the extruder and switch the left and right hotend up and down.
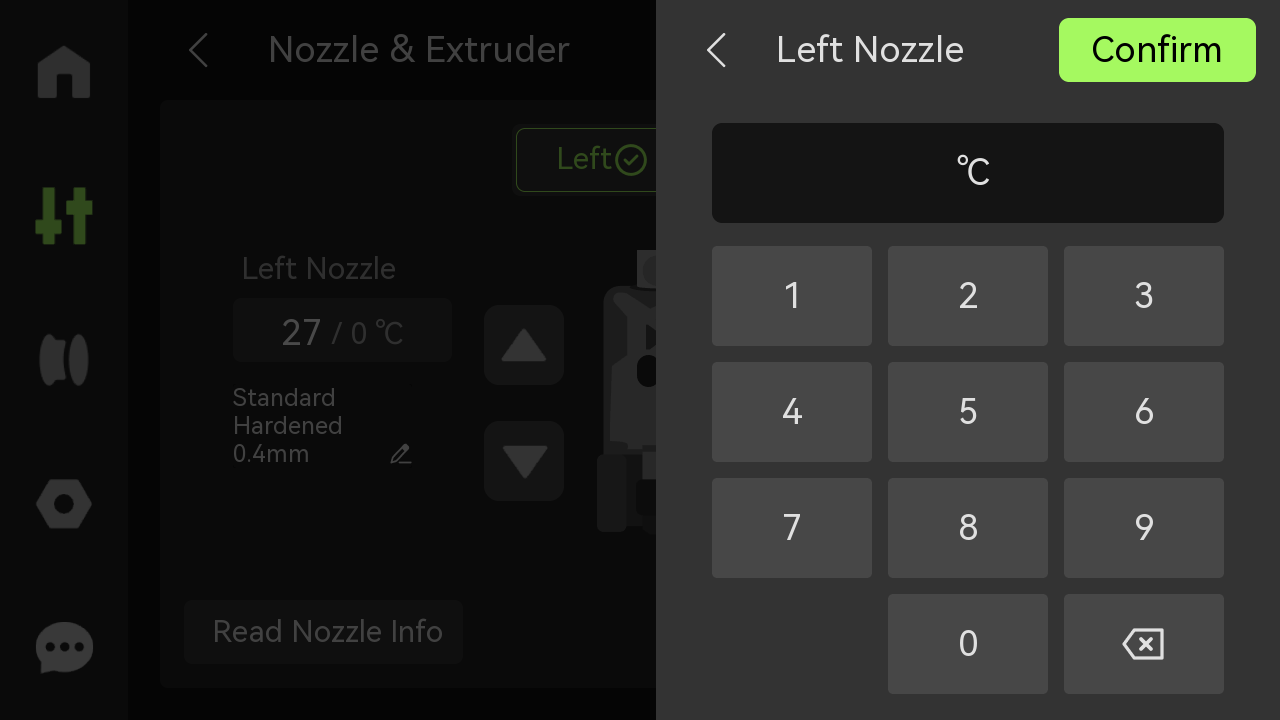
- Nozzle temperature: Enter a value to set the left nozzle temperature.
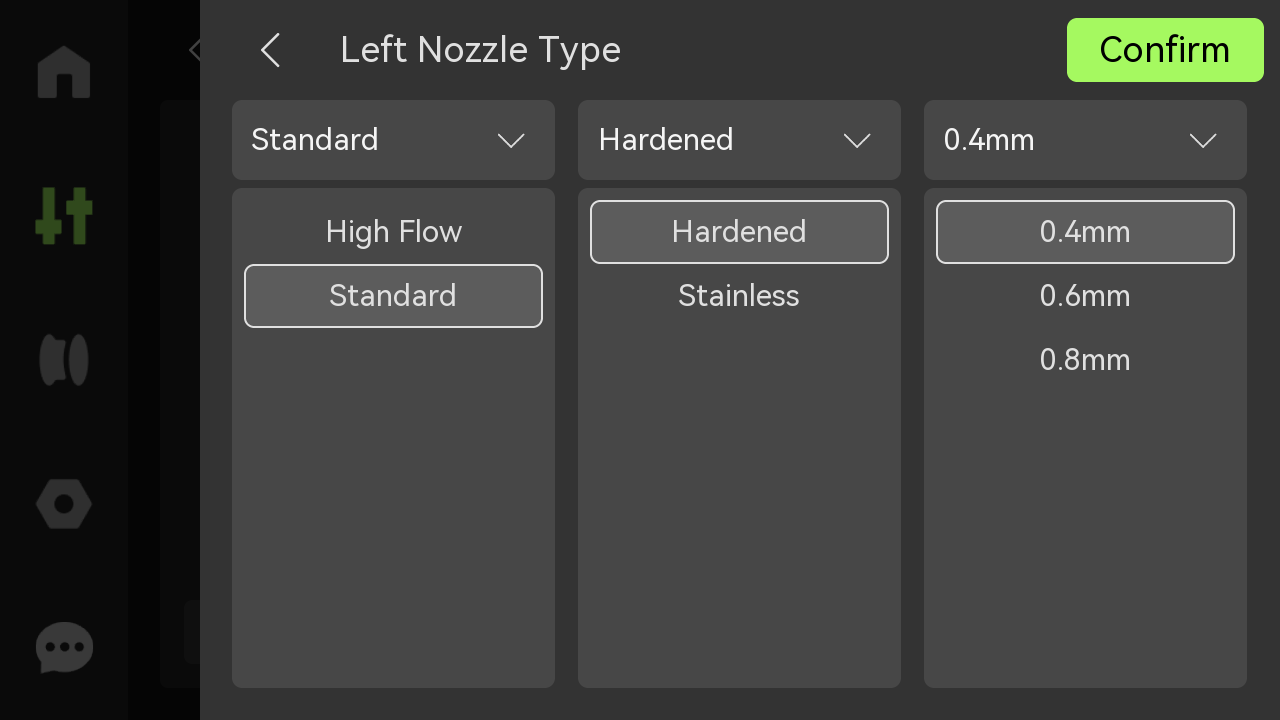
- Nozzle type: Set the type, material, and diameter of the nozzle.
- Extruder: Click the up and down buttons to manually extrude or eject filament. If the green light is on, the extruder filament sensor has detected the entry of filament.
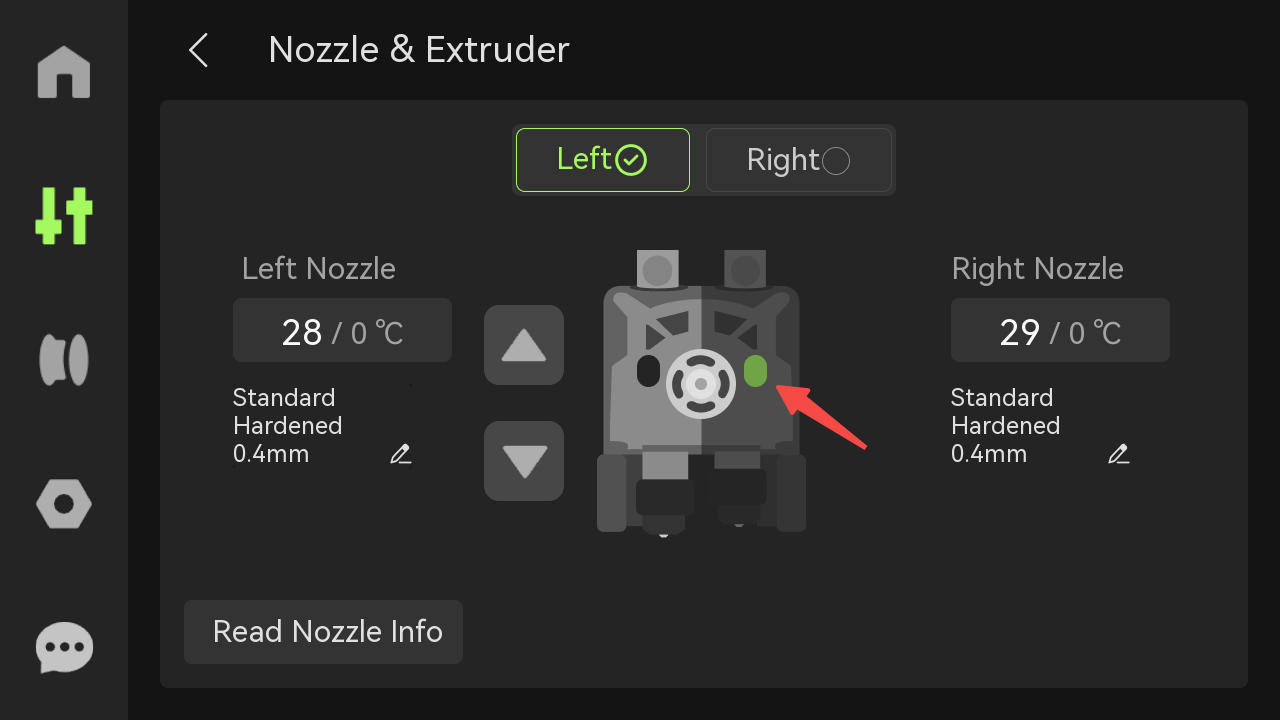
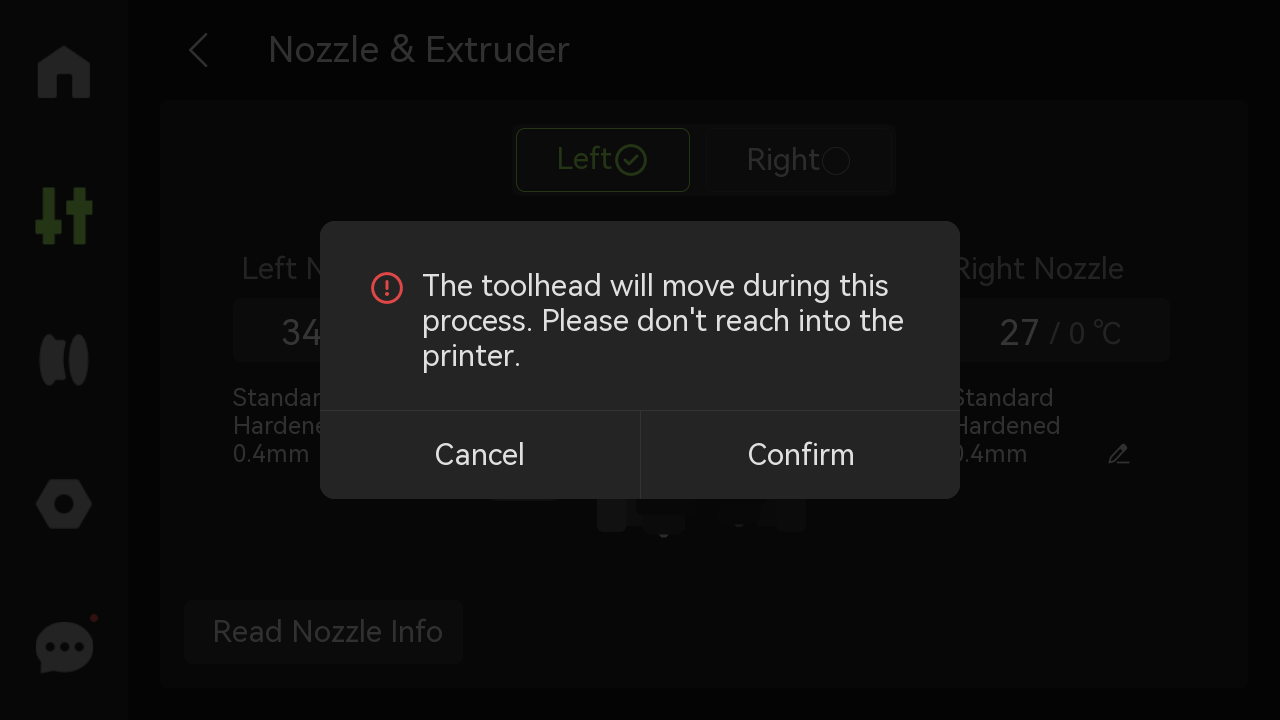
- Read Nozzle Info: After turning it on, the printer will automatically read the nozzle information. Please make sure the build plate is empty and avoid putting your hands into the printer.
¶ 5. Chamber Temperature
Same as the above chamber temperature.
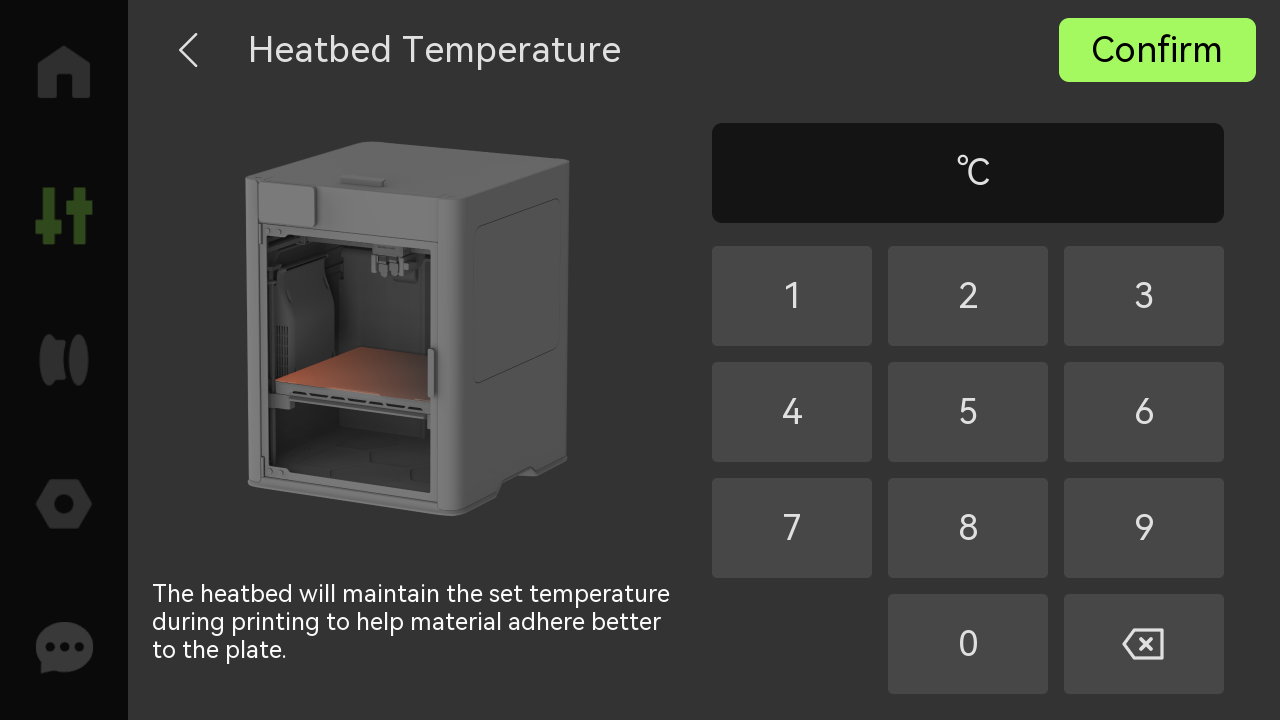
¶ 6. Heatbed Temperature
Enter a value to set the heatbed temperature.
¶ 7. LED light
Click the icon to open or close the LED light.
¶ Filament
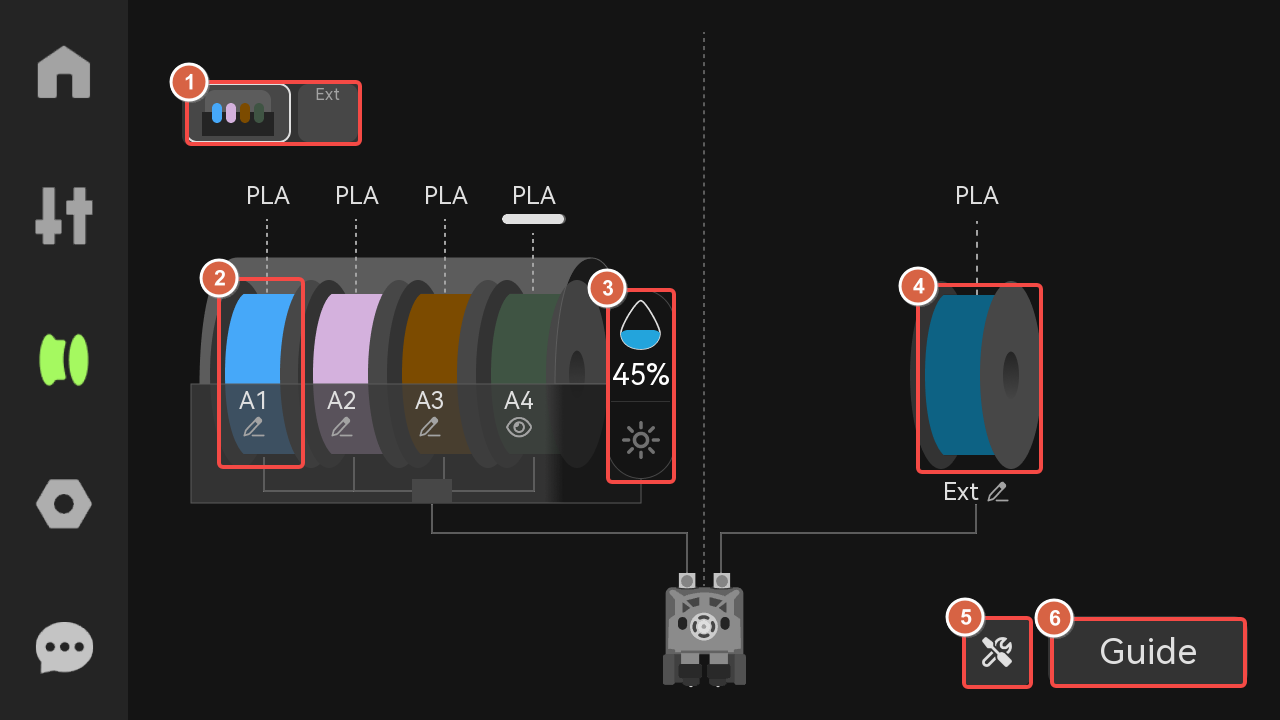
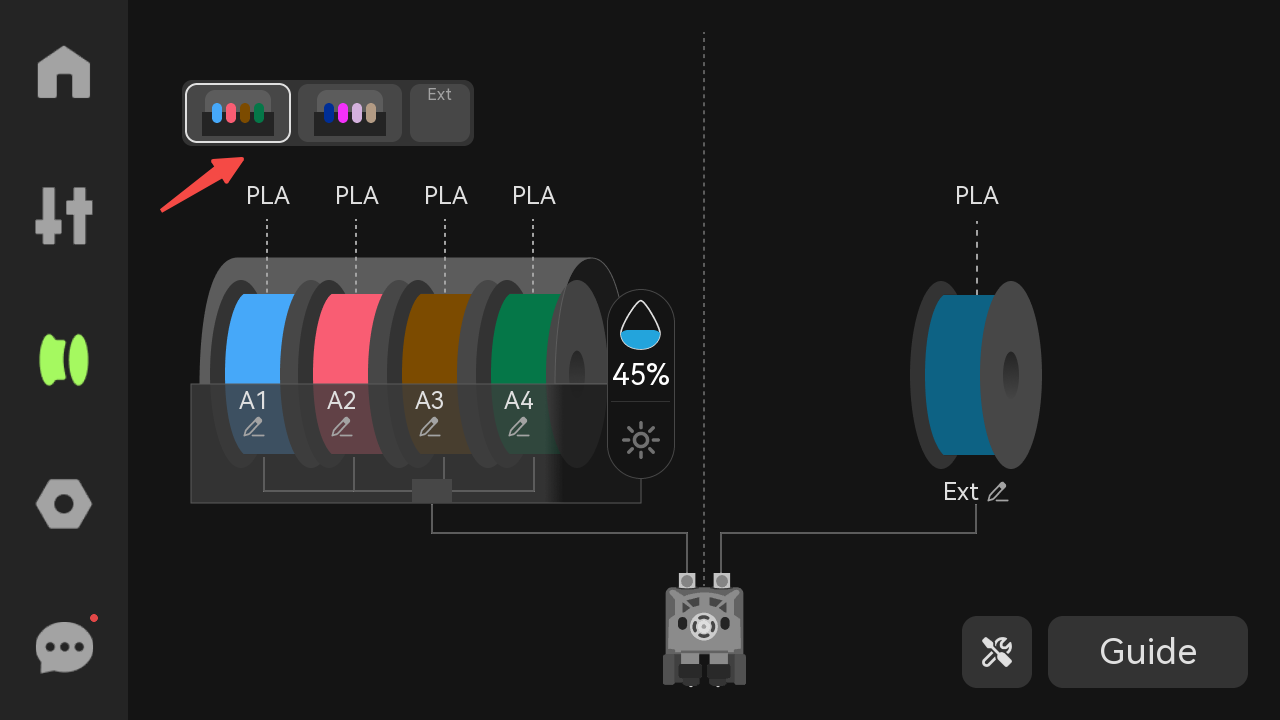
¶ 1. Device
Click to switch between different devices (AMS or external spool).
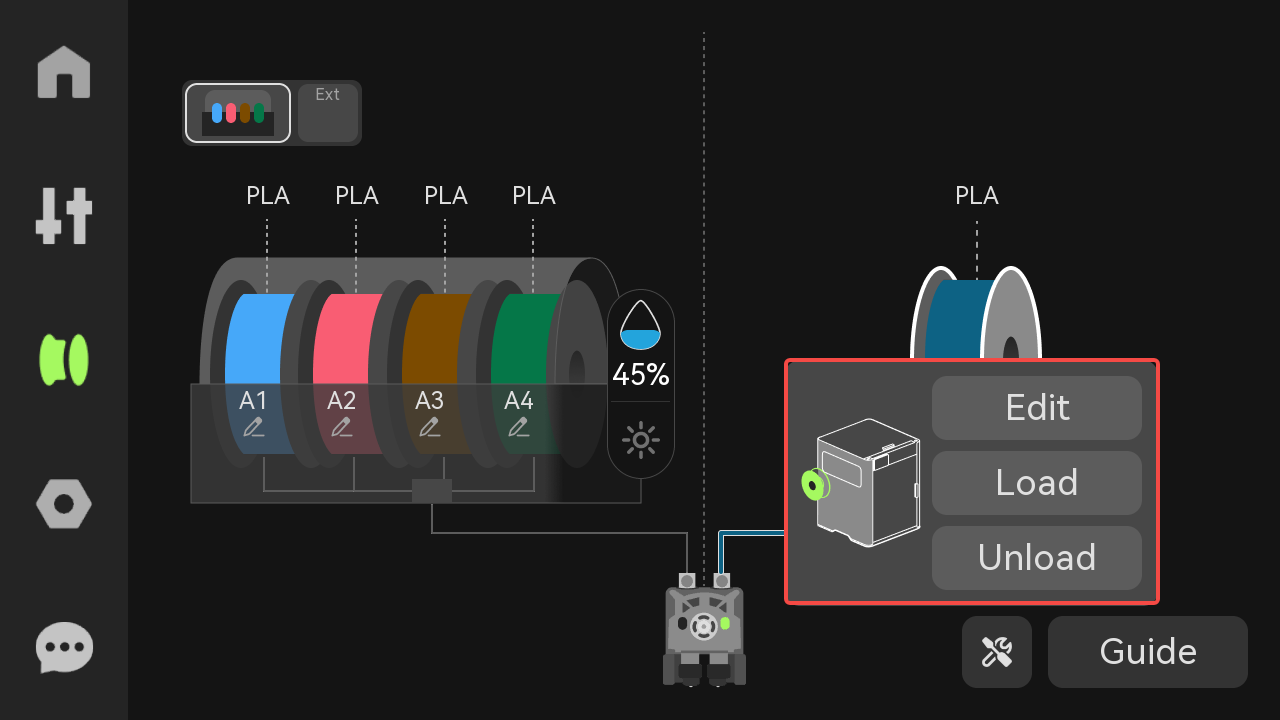
¶ 2. Spool
Click any spool icon to edit, load/unload, and re-read filament RFID.
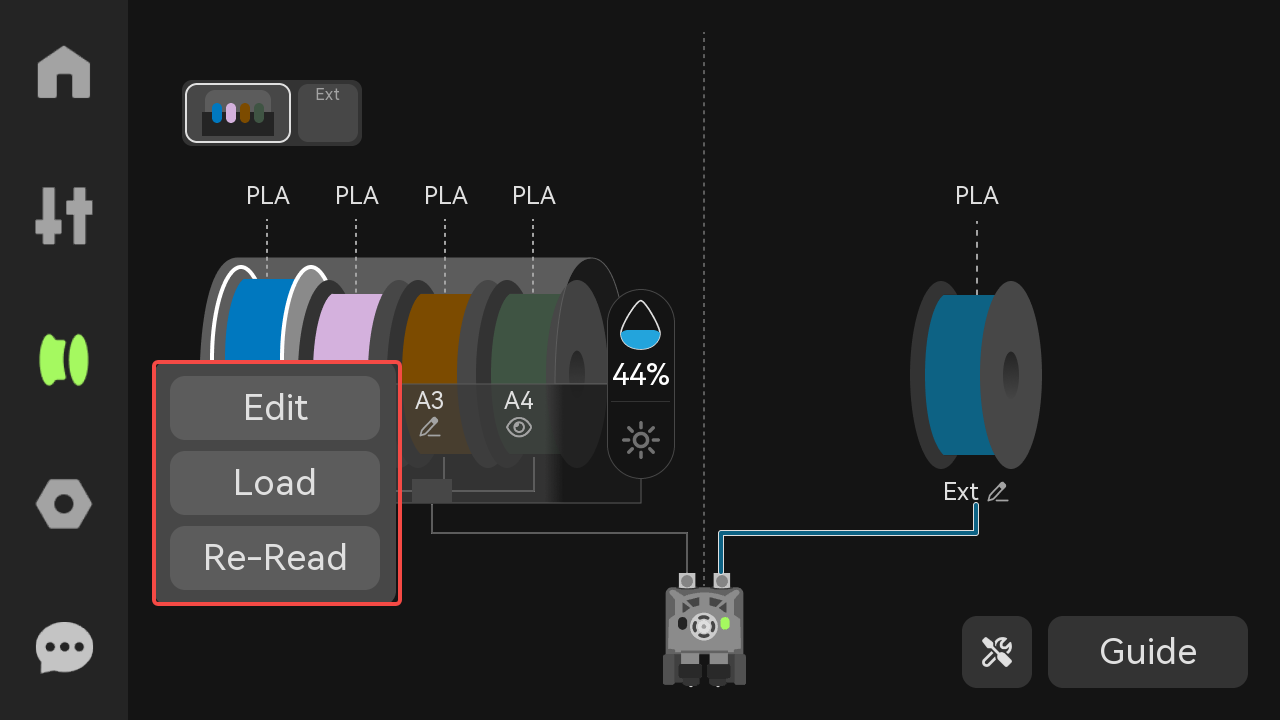
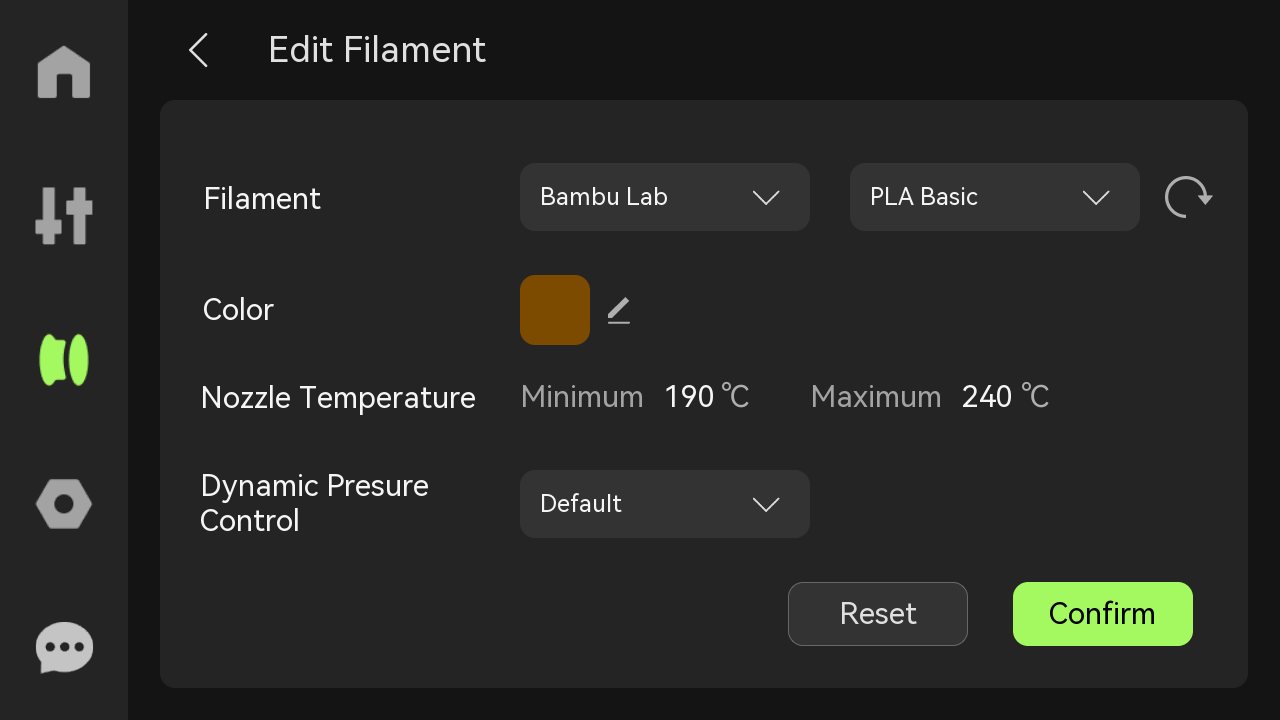
- Edit: If AMS has identified a spool through RFID, you can view the filament information here, but you cannot modify the filament parameters; if the RFID is not read, you can modify the filament information here;
 RFID read |
 RFID not read |
-
Load: Click the button, and the AMS 2 Pro will automatically feed the filament into the extruder;
-
Re-Read: Click the button, and AMS 2 Pro will reread the RFID of the spool in the slot.
¶ 3. Dry and Humidity
The humidity and temperature inside the AMS can be checked, and filaments can be dried.
NOTE: You can also turn on the drying function in Setting > Toolbox > Dry Filament.
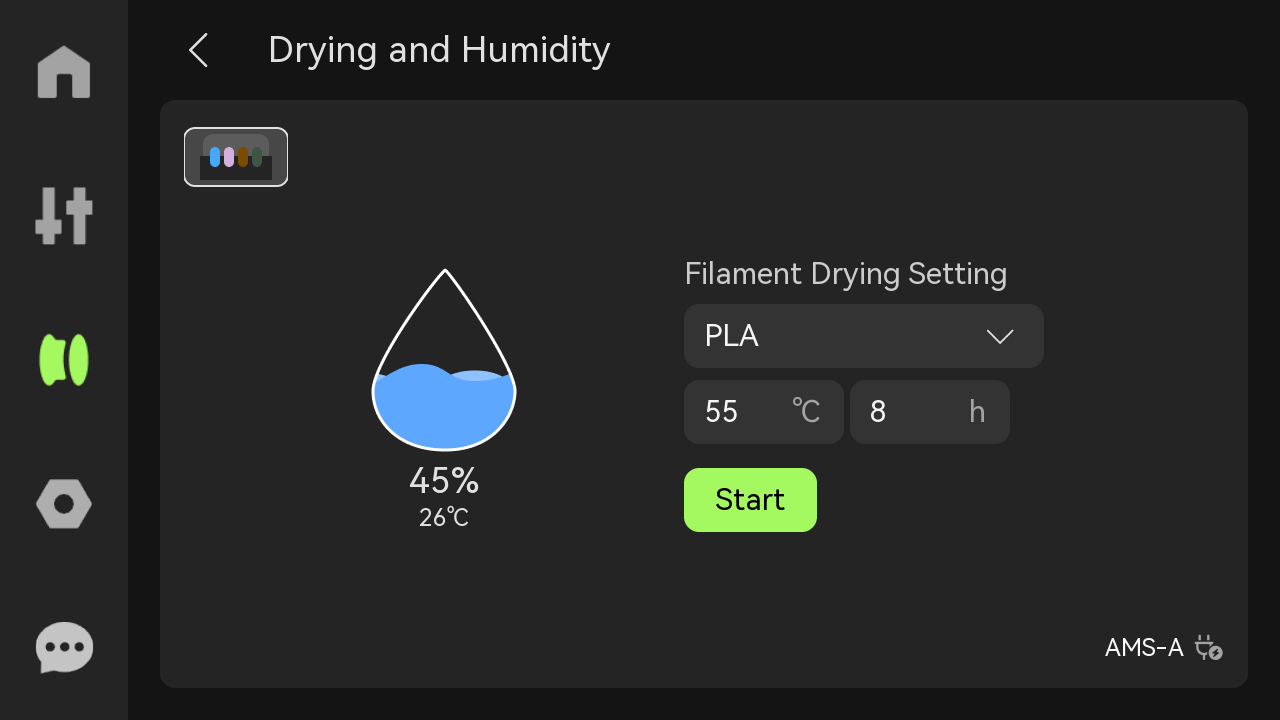
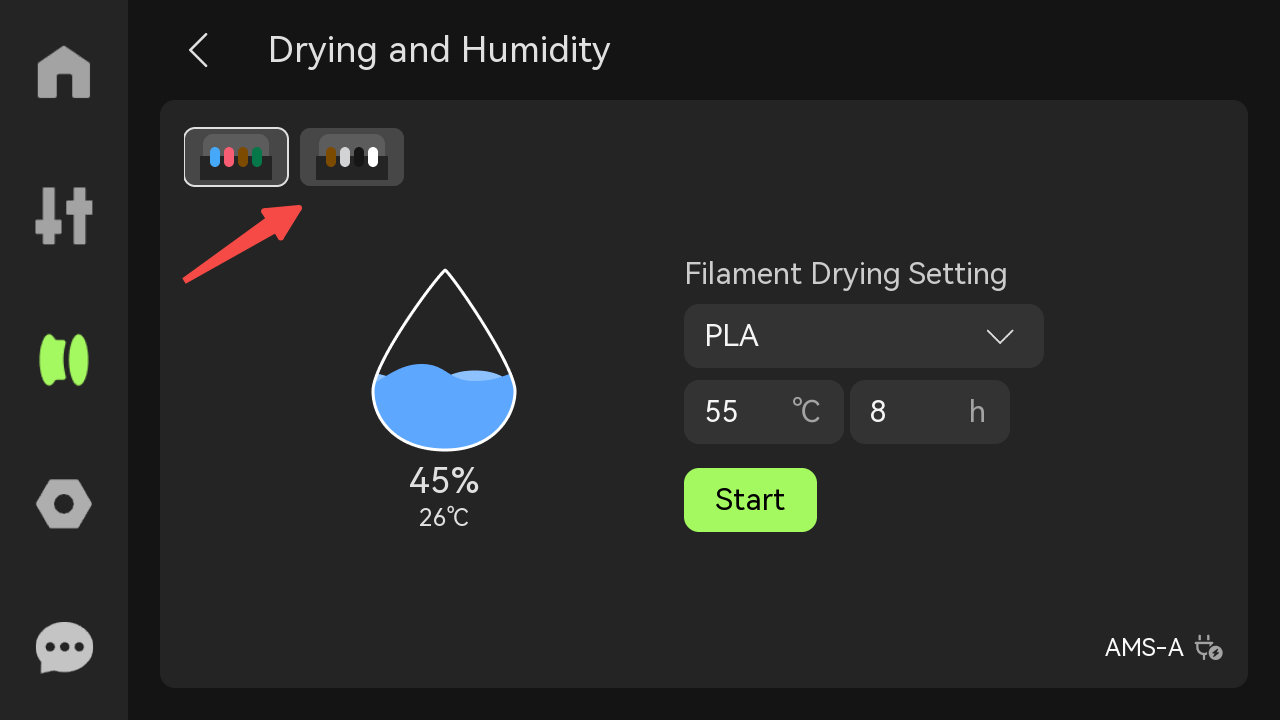
If multiple AMS 2 Pro/HT are connected, you can click the icon in the upper left corner to switch between different devices, view the real-time humidity and temperature data of each AMS, or start drying.
¶ 4. External spool
Click the external spool icon to edit, load and unload filaments;
¶ 5. Tools
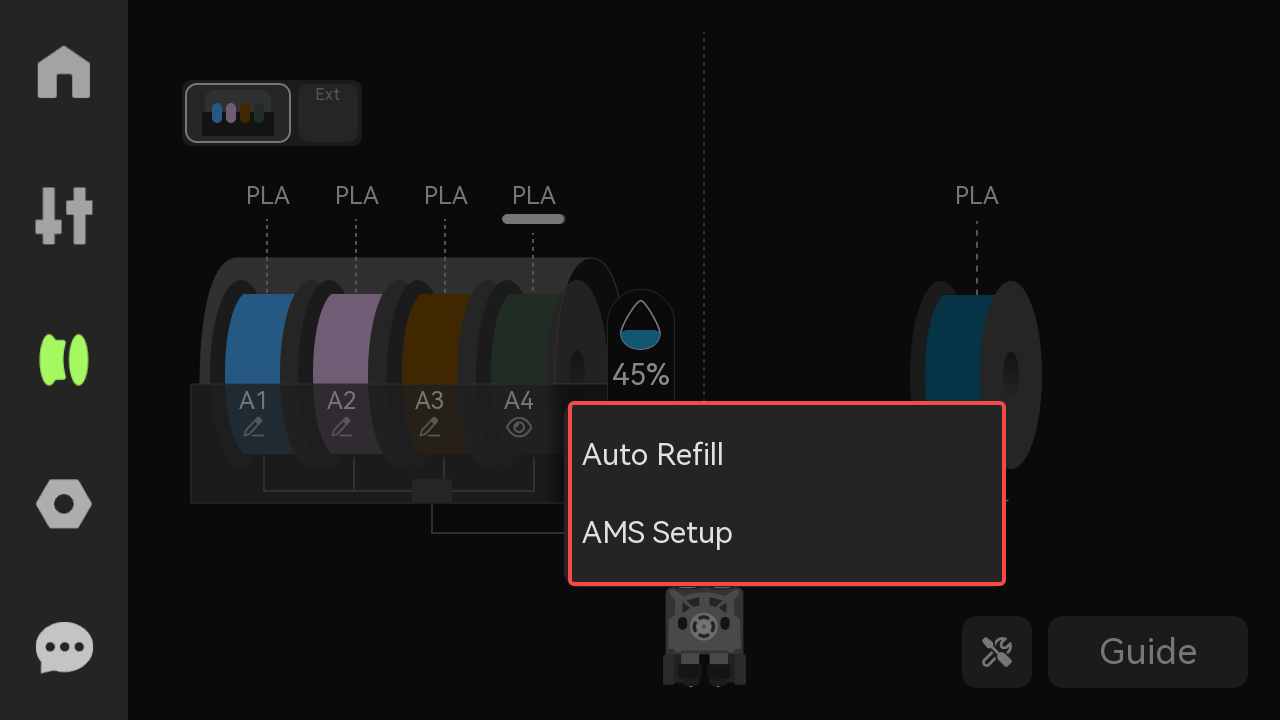
- Auto Refill: When the brand, type, and color of the filaments are identical, the system will establish an automatic refill relationship. When the current filaments run out, the printer will automatically switch to another filament with the same properties to continue printing.
Note: An automatic refill relationship can only be established if both identical filaments come from the same extruder connected to the AMS, meaning left to left and right to right. If the filaments come from different extruders, an automatic refill relationship cannot be established.

- AMS Setup: When the AMS 2 Pro is connected to the H2D printer for the first time, it requires setup to detect which side of the extruder the AMS is connected to.
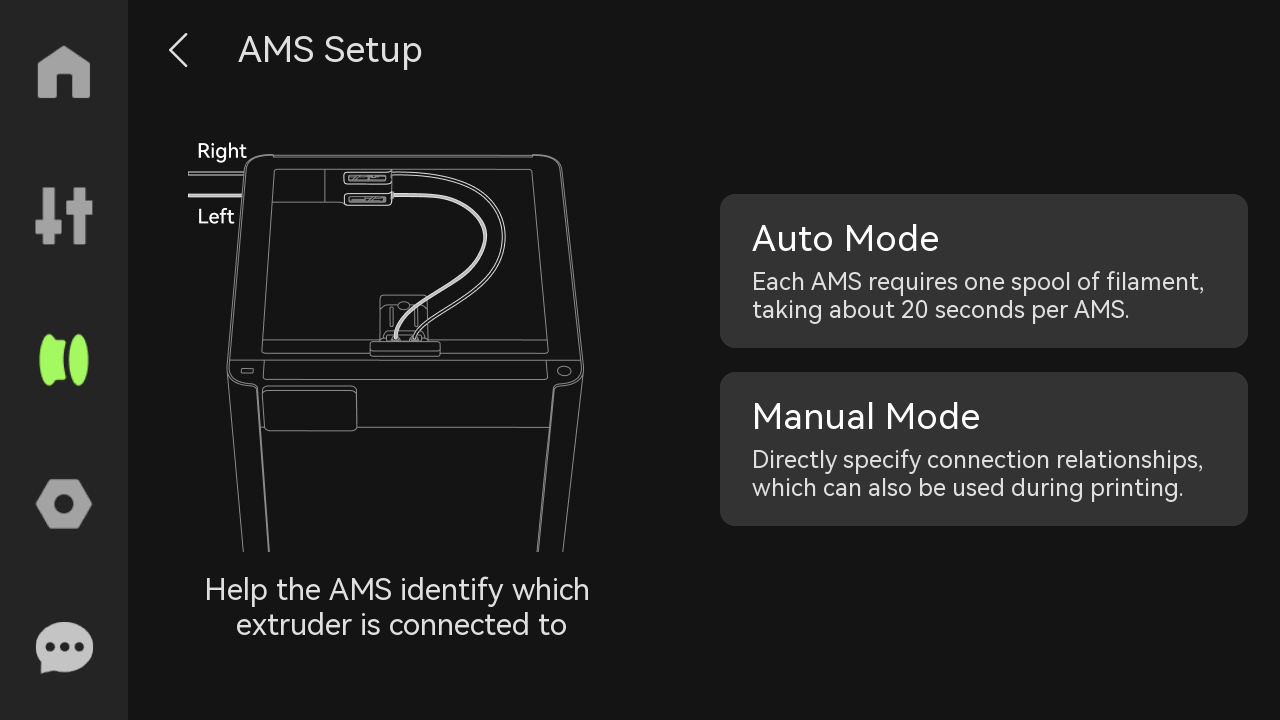
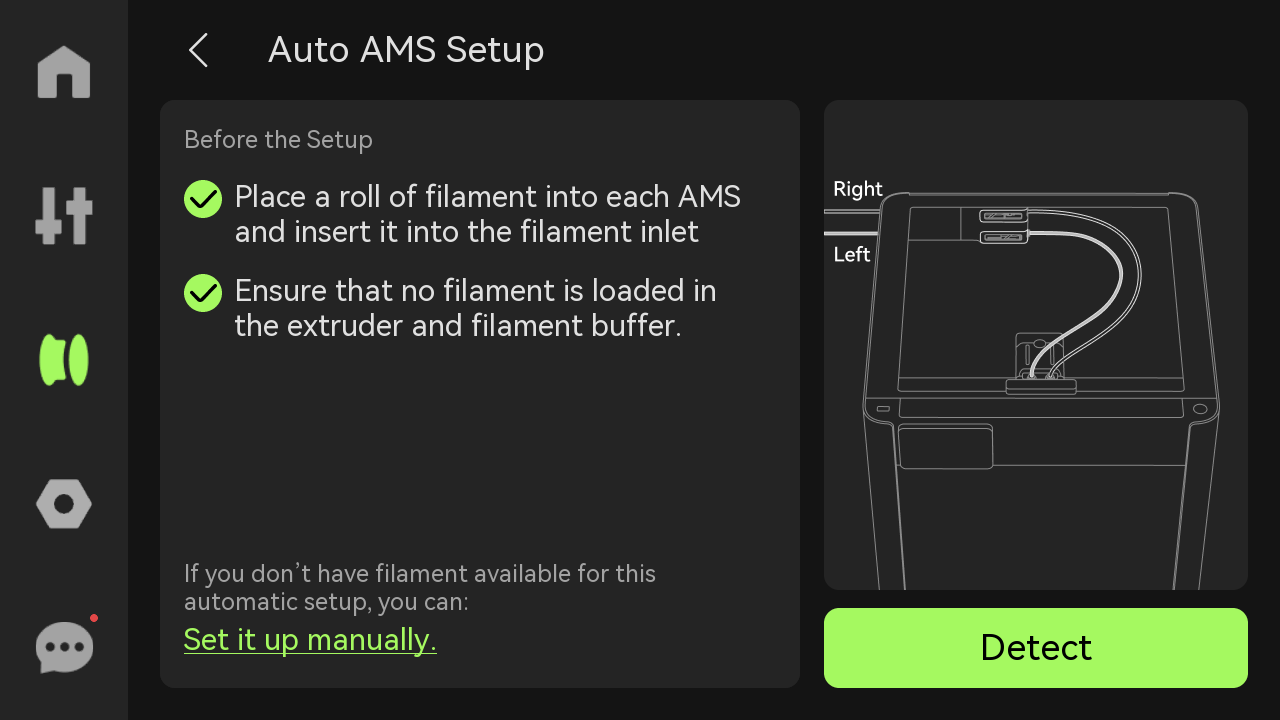
- Auto AMS Setup: AMS sends the filament to the extruder. Each left and right extruder is equipped with a Hall sensor. The signal triggered by the Hall sensor is used to determine which extruder AMS is paired with.
Note:
Ensure that the filament is inserted into AMS 2 Pro (any slot is fine).
Any loaded filament must be unloaded in advance.
Ensure that no filament is broken in the buffer. Ensure that there is no residual filament inside the filament buffer (to avoid leftover filament inside).
- Manual AMS Setup: Manually adjust the pairing relationship between AMS and extruder when there is no filament in AMS. When an AMS has sent the filament to the extruder, its icon will be gray (AMS-B in the figure below) and the pairing relationship with the extruder cannot be changed.

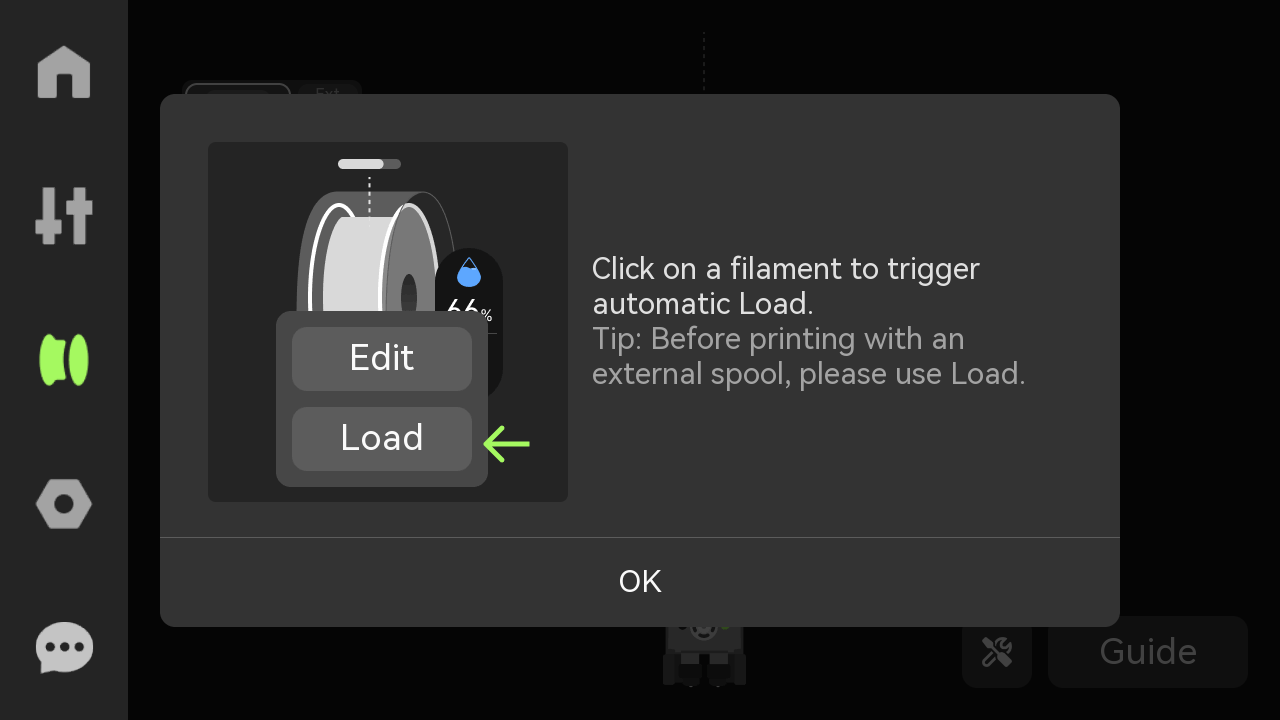
¶ 6. Guide
Instructions for feeding operation: Select a specific slot, click the spool icon, and then click the Load button to trigger automatic loading.
For more information on the filamnet page, please refer to:
¶ Setting
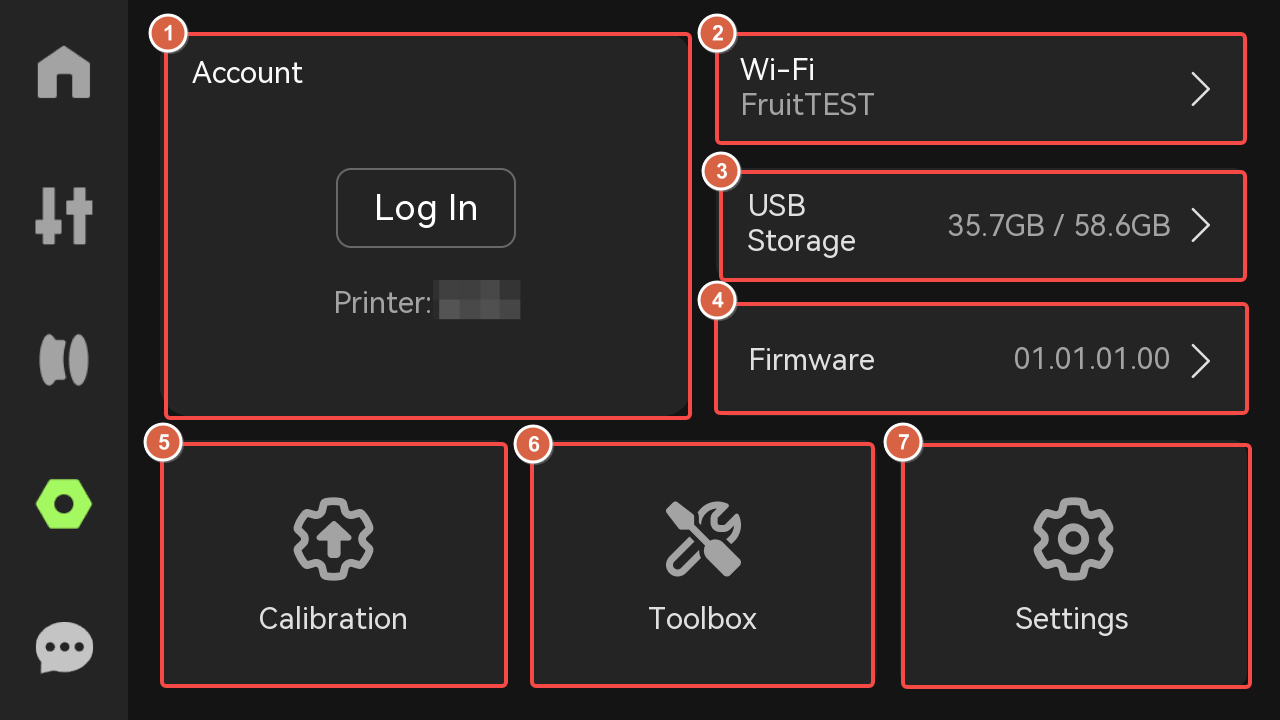
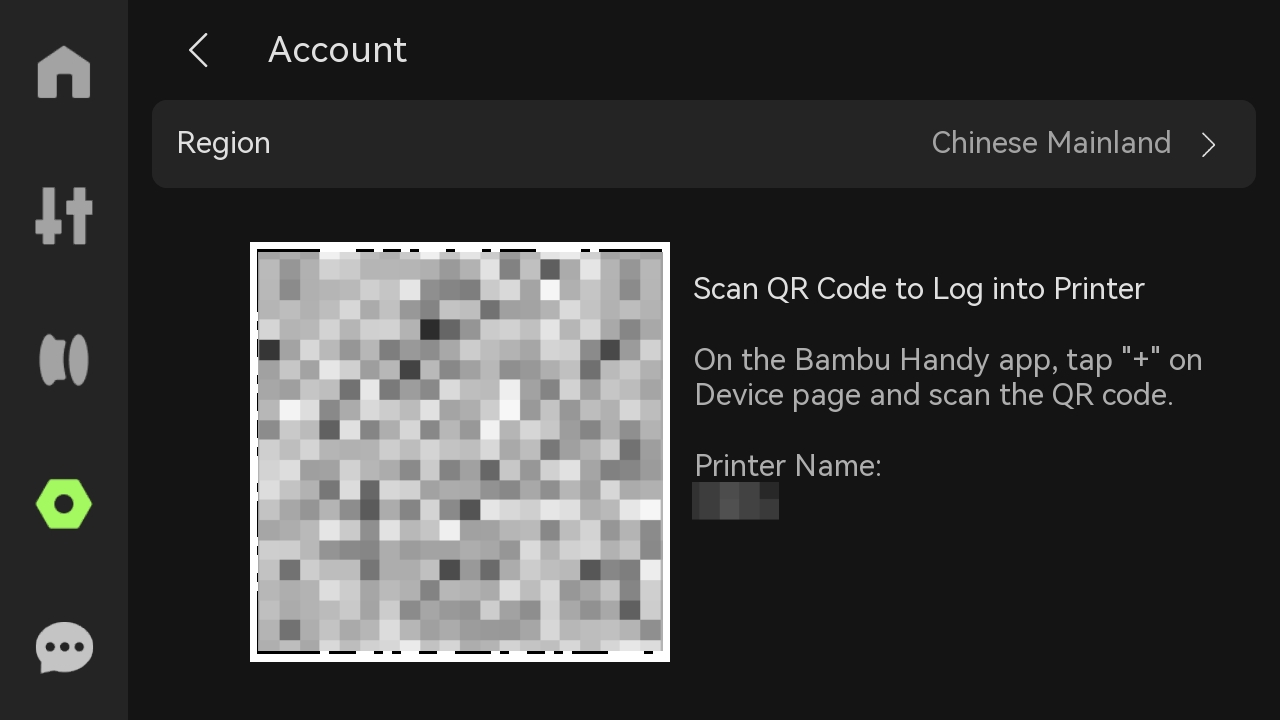
¶ 1. Account
Open Bambu Handy and scan the code to access the account.
¶ 2. Wi-Fi
Set up the WLAN, view the current network, test network, or view and add other networks.

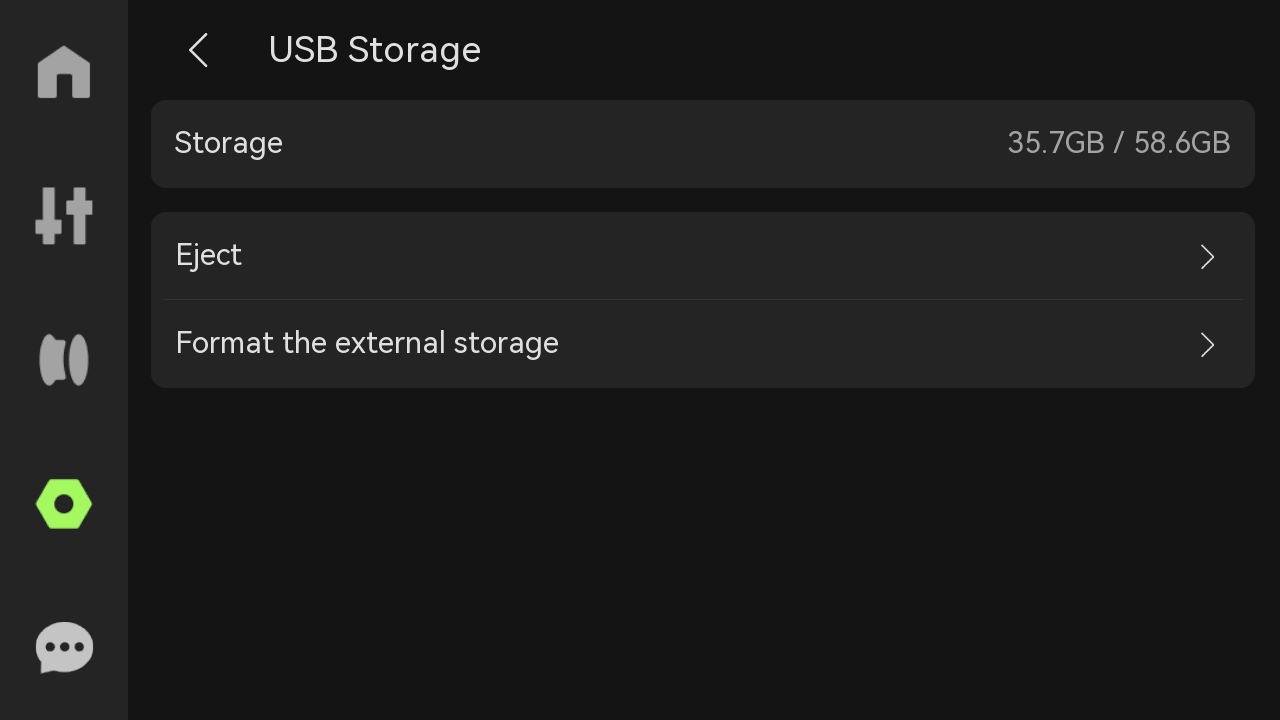
¶ 3. USB Storage
-
Storage: Display the used capacity and maximum capacity of the USB flash drive.
-
Eject: Click "Eject" to eject the USB drive safely.
-
Format external storage: Once reset, the storage cannot be restored.
For USB flash drive specifications and usage recommendations, please refer to: Specifications and Usage Recommendations of H2D USB Flash Drives.
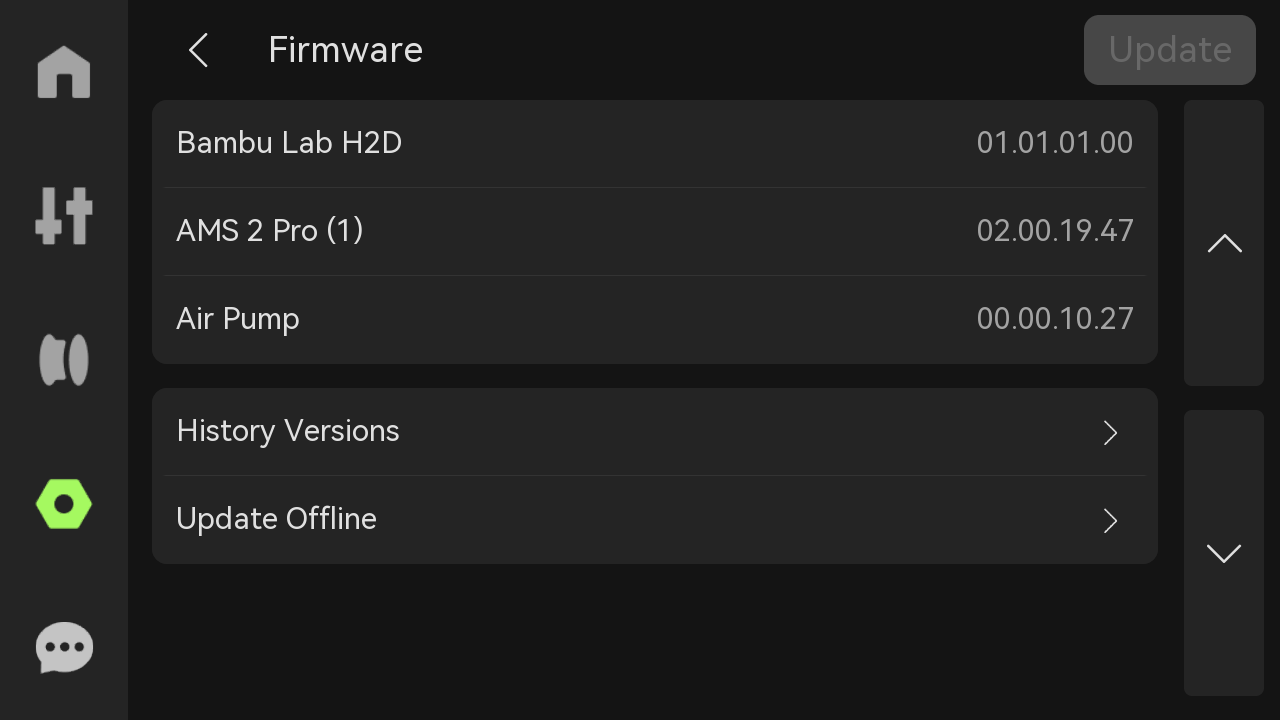
¶ 4. Firmware
View the current version of the device and historical versions, or perform offline upgrades. If the firmware needs to be updated, the "Update" button in the upper right corner will light up.
¶ 5. Calibration
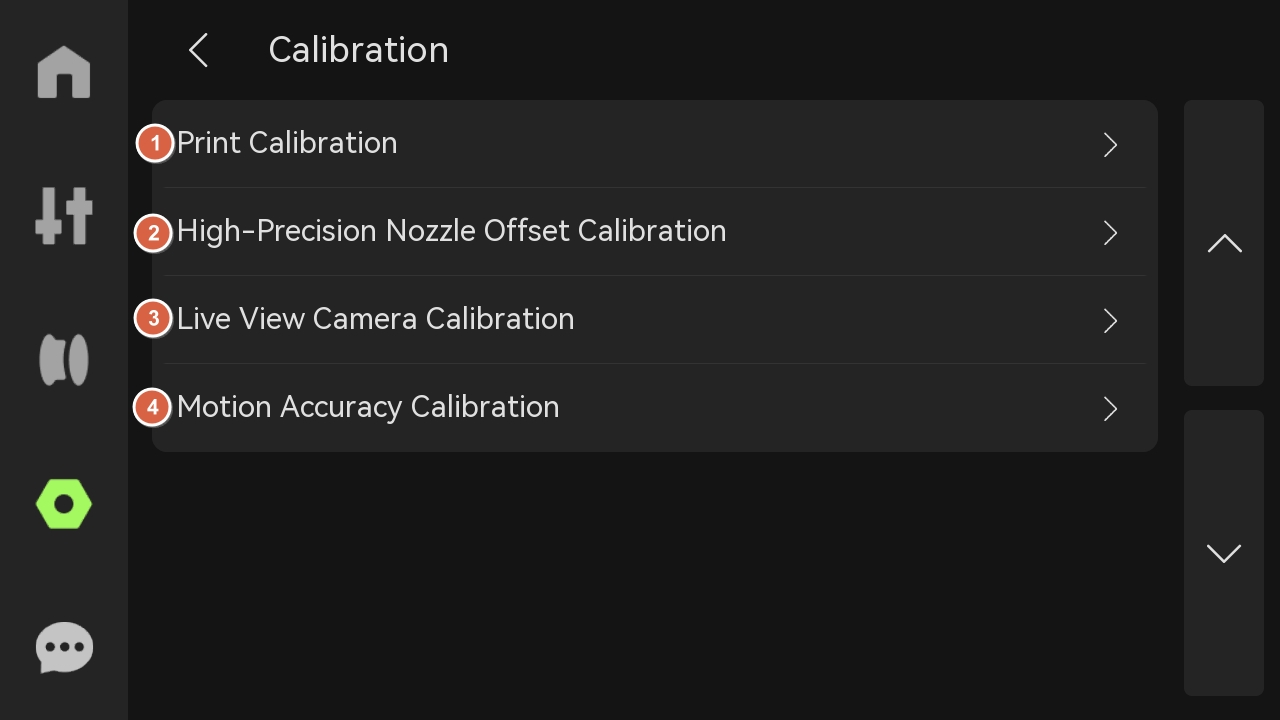
- Print Calibration: Includes motor noise cancellation, vibration compensation, auto bed leveling, high-temperature bed leveling and nozzle offset calibration.

-
Motor Noise Cancellation: Reduces the noise generated by the motor during printing, especially when printing for a long time or at high speed. By optimizing the motor's operating algorithm and control strategy, it can not only reduce noise, but also make the print surface smoother, thereby improving the final printing effect.
-
Vibration Compensation: When any vibration is detected in real-time during printing, the toolhead position can be automatically adjusted to ensure the accuracy of printing. Especially when printing complex or detailed models, this calibration can effectively prevent errors caused by vibration and ensure that each layer is completed accurately.
-
Auto Bed Leveling: Through intelligent algorithms, the distance between the nozzle and the build plate is adjusted to ensure that the gap in each corner is consistent, which can effectively avoid printing defects caused by uneven heatbed, thereby improving printing accuracy.
-
High-temperature Bed Leveling: Before printing with high-temperature filaments such as ABS/ASA/PC/PA, high-temperature heatbed calibration can ensure that the heatbed remains stable in a high-temperature environment, effectively preventing warping or poor adhesion of the first layer, and improving the quality of the first layer print.
-
Nozzle Offset Calibration: If the positioning of the two nozzles is offset, it may cause the model to be misaligned or layer-shifted during printing. If you find that the model has an obvious layer shift after switching nozzles during printing, it is recommended to perform a nozzle offset calibration. This process uses the eddy current sensor in the toolhead and the nozzle offset calibration sensor behind the heatbed to ensure the accuracy of the nozzle position to improve the quality and accuracy of the print. Through effective calibration, you can reduce printing errors and ensure perfect alignment of each layer.
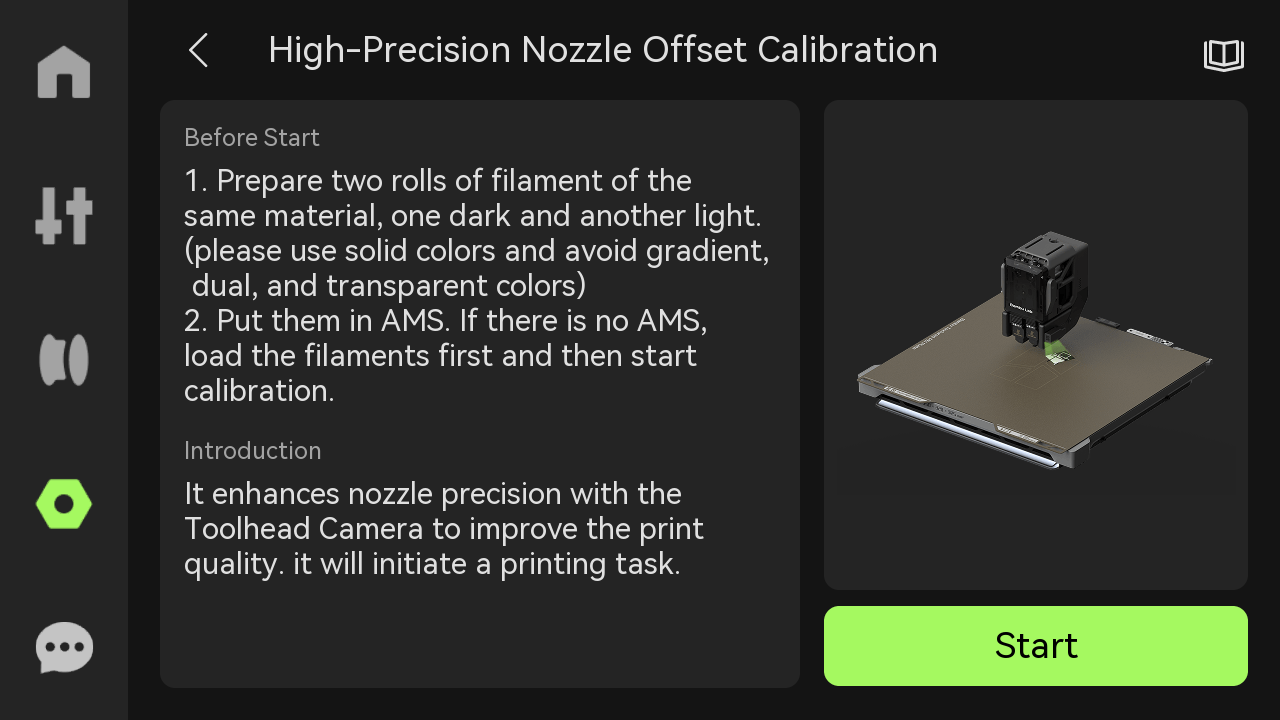
- High-Precision Nozzle Offset Calibration: Load two filaments, one dark and one light, to two nozzles respectively, and use AI visual inspection technology to accurately calibrate the offset of the two nozzles in the XY direction to improve print quality and accuracy.
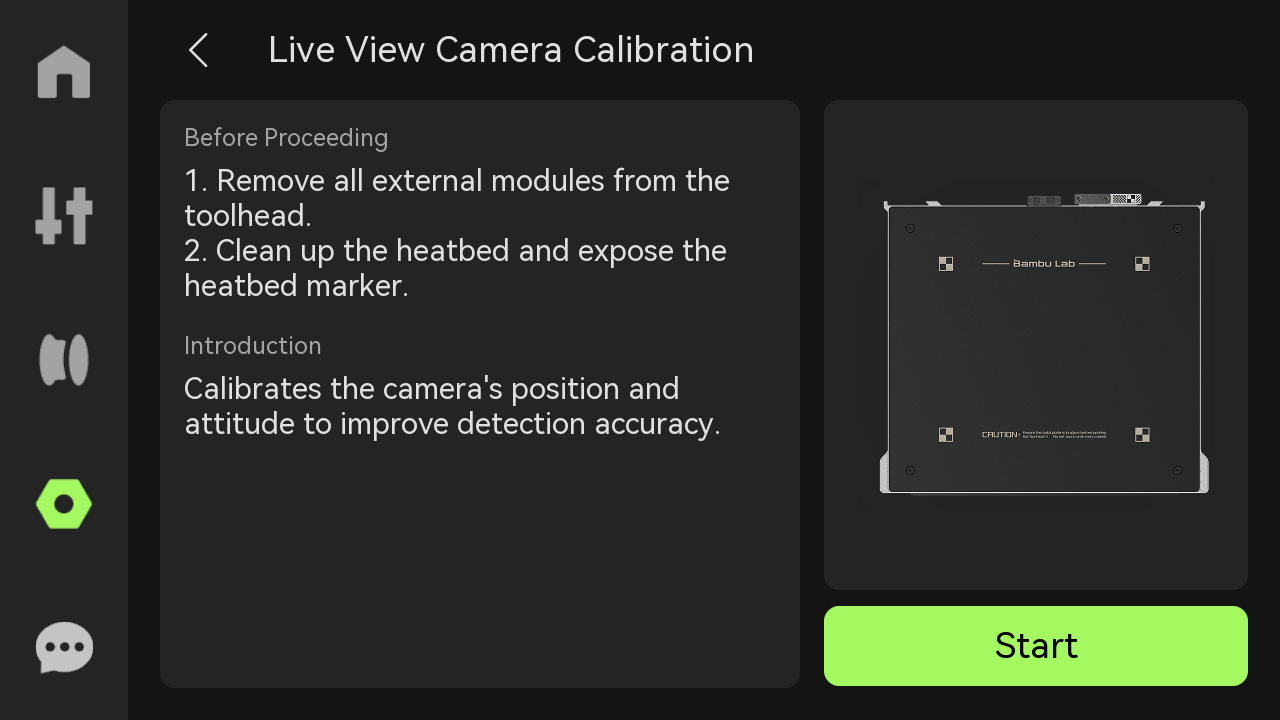
- Live View Camera Calibration: By identifying specific marks on the heatbed and calibrating the position and angle of the live camera, the detection error caused by camera viewing angle deviation and position error can be reduced, thereby significantly improving its detection accuracy and achieving higher image capture quality.
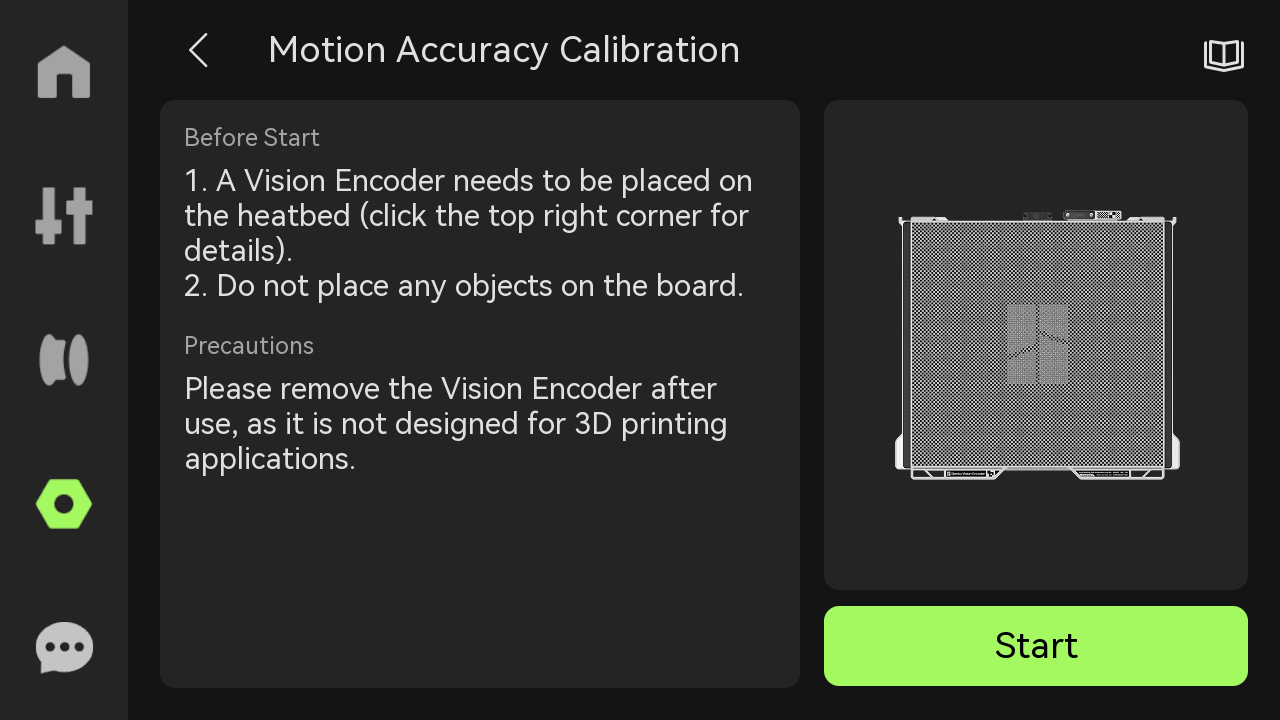
- Motion Accuracy Calibration: Designed for users who have high requirements for print quality, it aims to solve the absolute positioning problem in the 3D printing process, thereby improving printing accuracy, especially for large-size printing. Through this process, motion hysteresis and motion distortion can be significantly suppressed, ensuring a more accurate printing.
For more information on motion accuracy calibration, please refer to: Motion Accuracy Calibration.
¶ 6. Toolbox
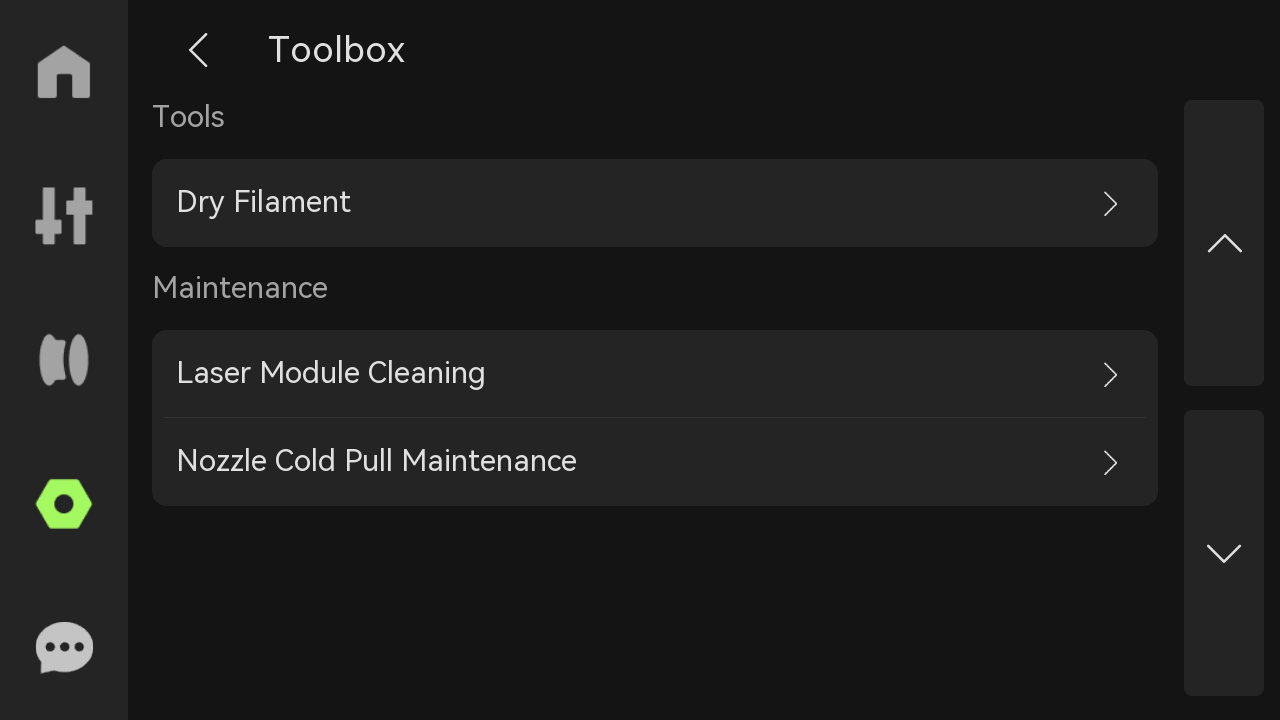
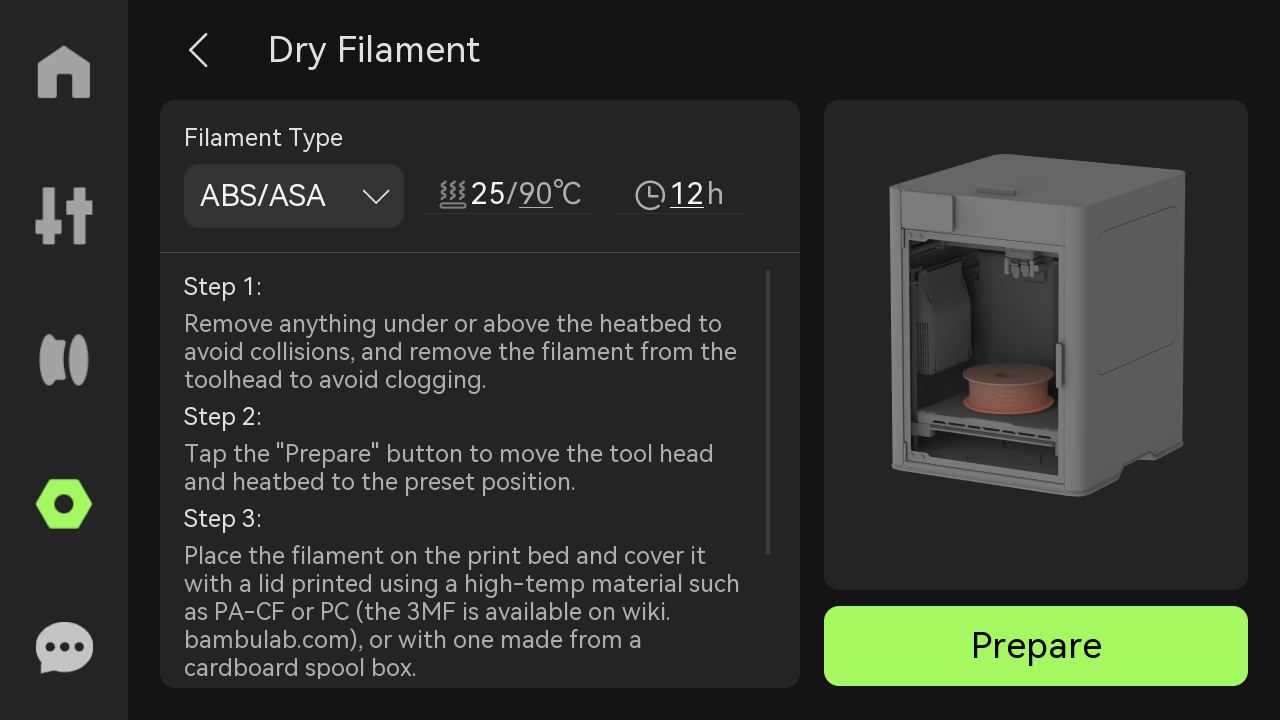
- Dry Filament: Select the filament type, set the drying temperature and duration, and dry the filament.
- Laser Module Cleaning: Regular cleaning of the laser module prevents the accumulation of powder and debris, ensuring the normal operation of the equipment and extending its service life. The printer will assess the degree of contamination of the printer based on the total engineering time and laser task type in Bambu Suite. The length of the green progress bar on the left side of the screen will decrease as the laser module is cleaned; if the progress bar turns red and displays "Cleaning Required Immediately", cleaning is required. Specific tutorials can be obtained through the QR code on the right. Please refer to: Regular maintenance recommendations for 10w laser module.

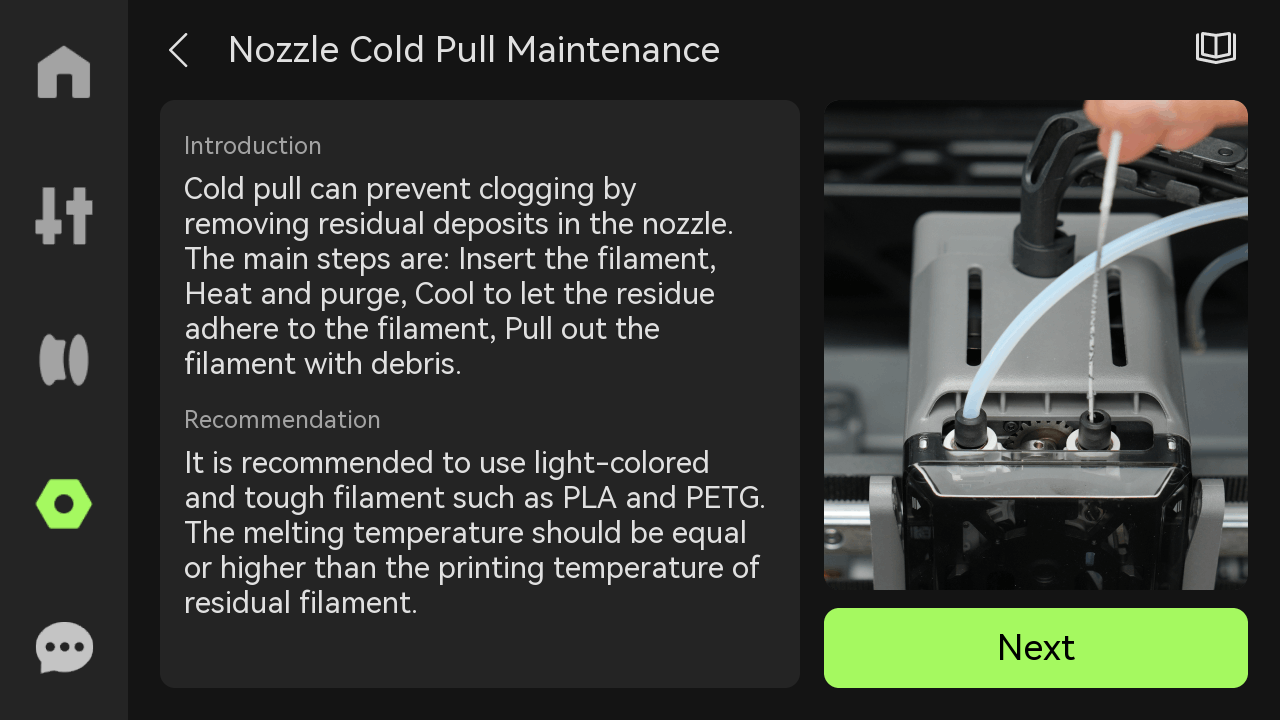
- Nozzle Cold Pull Maintenance: When the extruder motor frequently overloads and reports errors at normal printing flow, it means that the nozzle resistance is too large and needs to be cleaned urgently; at the same time, since TPU is extremely sensitive to nozzle resistance, if the nozzle has been used to print other filaments before, it is recommended to perform cold pull cleaning on the nozzle before printing TPU to ensure smooth printing. For details on nozzle cold pull maintenance, please refer to: H2D Nozzle Cold Pull Maintenance and Cleaning.
¶ 7. Settings
 |
 |
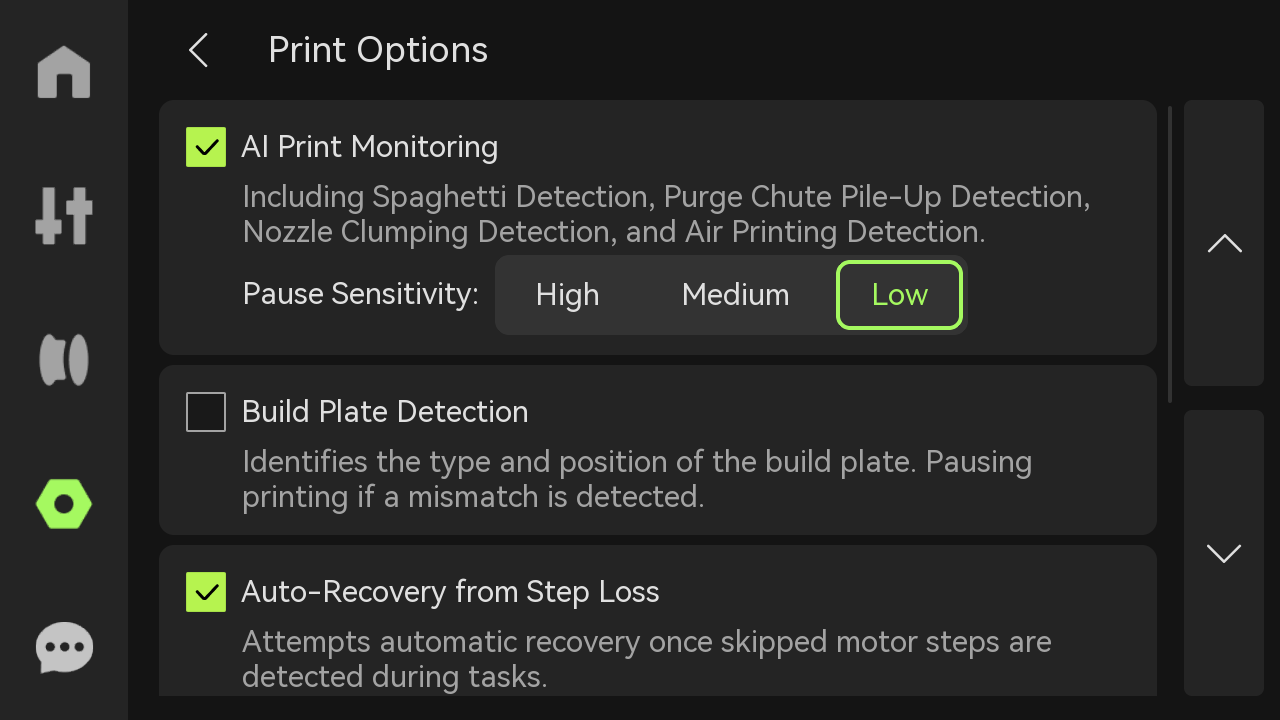
- Print Options:
 |
 |
-
AI Print Monitoring: Detect spaghetti, purge chute pile-up and nozzle clumping during the printing process, and select the sensitivity to pause printing. The pause sensitivity is divided into high (pause immediately when small problems are found), medium (pause when a certain degree of problem occurs), and low (pause only when there is an obvious abnormality) to adapt to different print quality needs.
-
Build Plate Detection: Detect print plate markings. If the markings are not within the predefined range or do not match the slice file, the printer stops printing. This prevents unplaced or misplaced print plates.
For more information about intelligent detection, please refer to: Introduction to H2D Intelligent Detection.
-
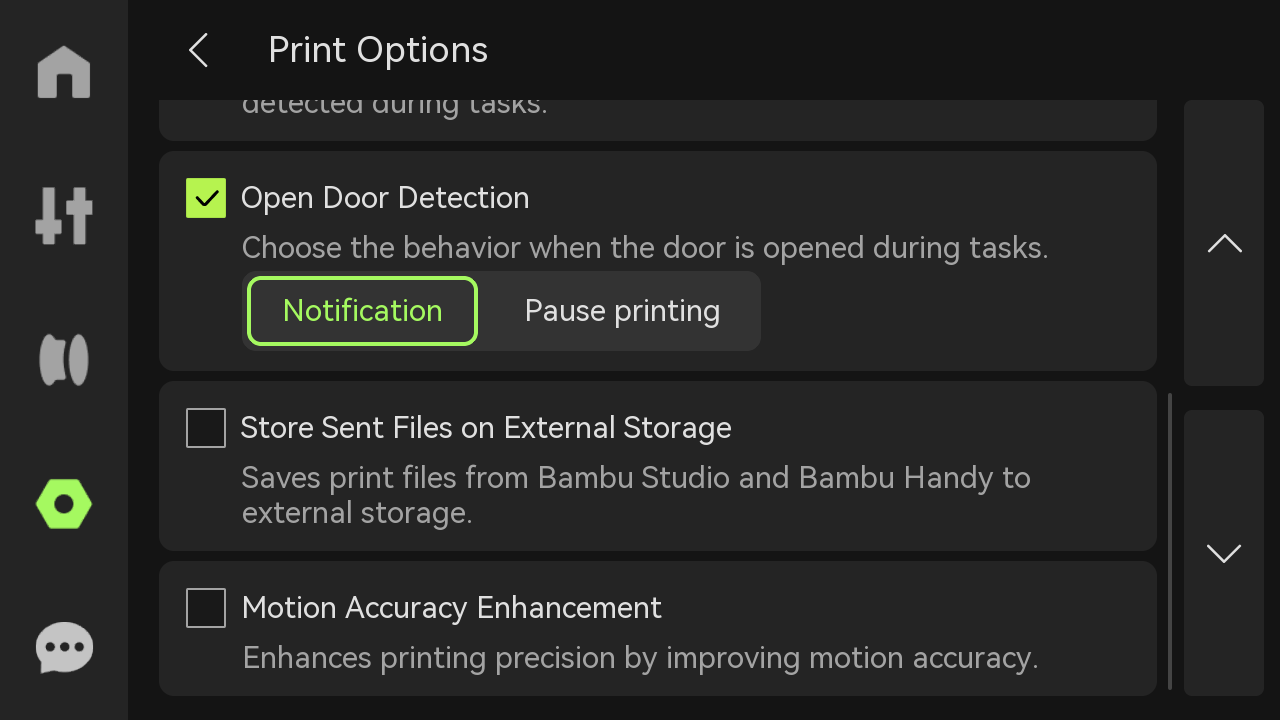
Auto-Recovery from Step Loss: When the motor detects a position shift (lost step), the X-axis, Y-axis, and Z-axis are repositioned and returned to the pre-shift position to continue executing the unfinished G-code to ensure print quality.
-
Open Door Detection: When turned on, the printer will detect whether the front glass door is open, and you can choose to trigger a notification or pause printing when the door is opened.
-
Store Sent Files on External Storage: If printing is initiated through the cloud, the print files will be cached in external storage.
-
Motion Accuracy Enhancement: Designed for users who have high requirements for print quality, it aims to solve the absolute positioning problem in the 3D printing process, thereby improving printing accuracy, especially for large-size printing. Through this process, motion hysteresis and motion distortion can be significantly suppressed, ensuring a more accurate printing.
- AMS Settings:
 |
 |
-
Read Filament on Insertion: After inserting the filaments for pre-loading, AMS will perform RFID reading operation.
-
Read Filament on Startup: Every time you restart the printer, AMS will automatically read the inserted filaments information (the reading process will rotate the filaments).
-
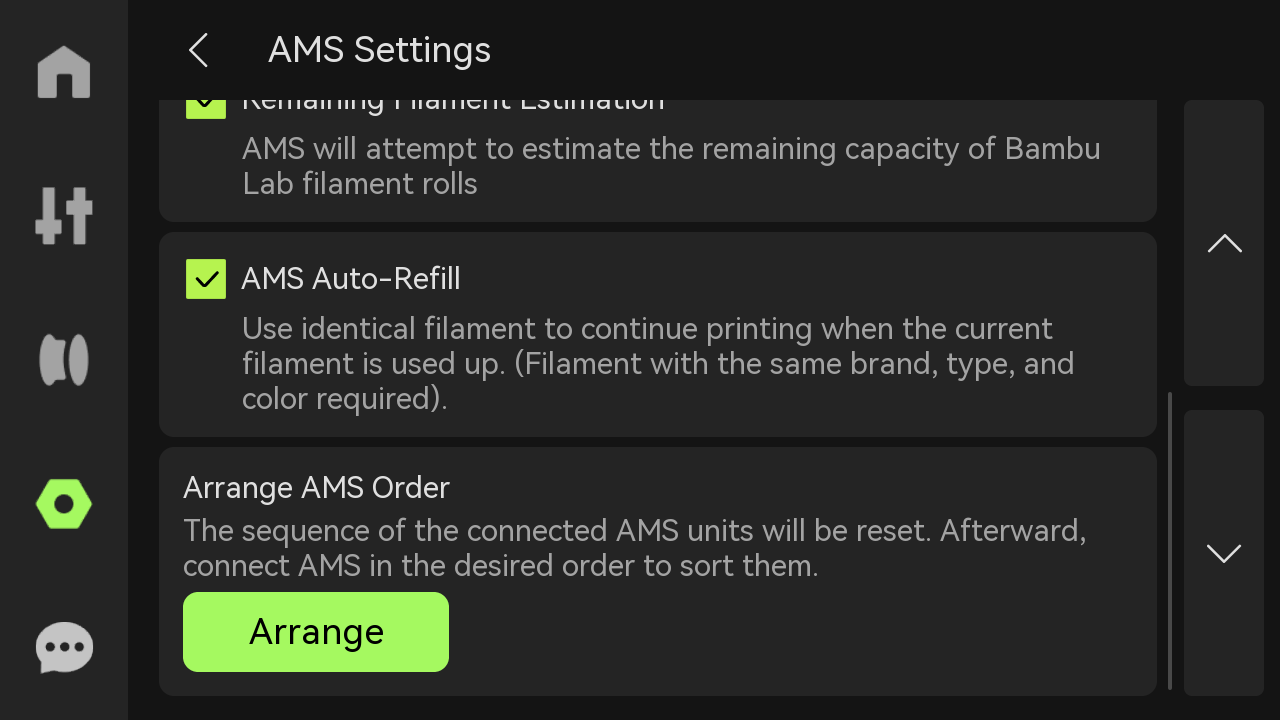
Remaining Filament Estimation: Estimate the remaining filaments when reading the RFID. When this function is turned on, the RFID will be read twice to obtain the filament information and estimate the remaining quantity. After reading the RFID and remaining quantity information of the filament, you can view the filament name above each slot. The small horizontal bar below the filament name shows the estimated remaining filaments.
-
AMS Auto-Refill: When the filaments in one slot of the AMS run out, it can automatically switch to filaments with the same properties in other slots. These properties include brand, type, color, and nozzle temperature. Please make sure to configure the information of all filaments before printing to meet the requirements of auto-refill.
-
Arrange AMS Order: Each AMS is assigned a sequence and displayed on the screen. The purpose of assigning AMSID is to facilitate the identification of their connections. The logic of assigning IDs is: the one directly connected to the printer is AMS-A, the one connected to AMS-B is AMS-C, and so on. If you need to reorder the AMS, you can click "Arrange", which will reset the order information of the AMS. After the reset is completed, please connect the AMS in sequence as needed.
-
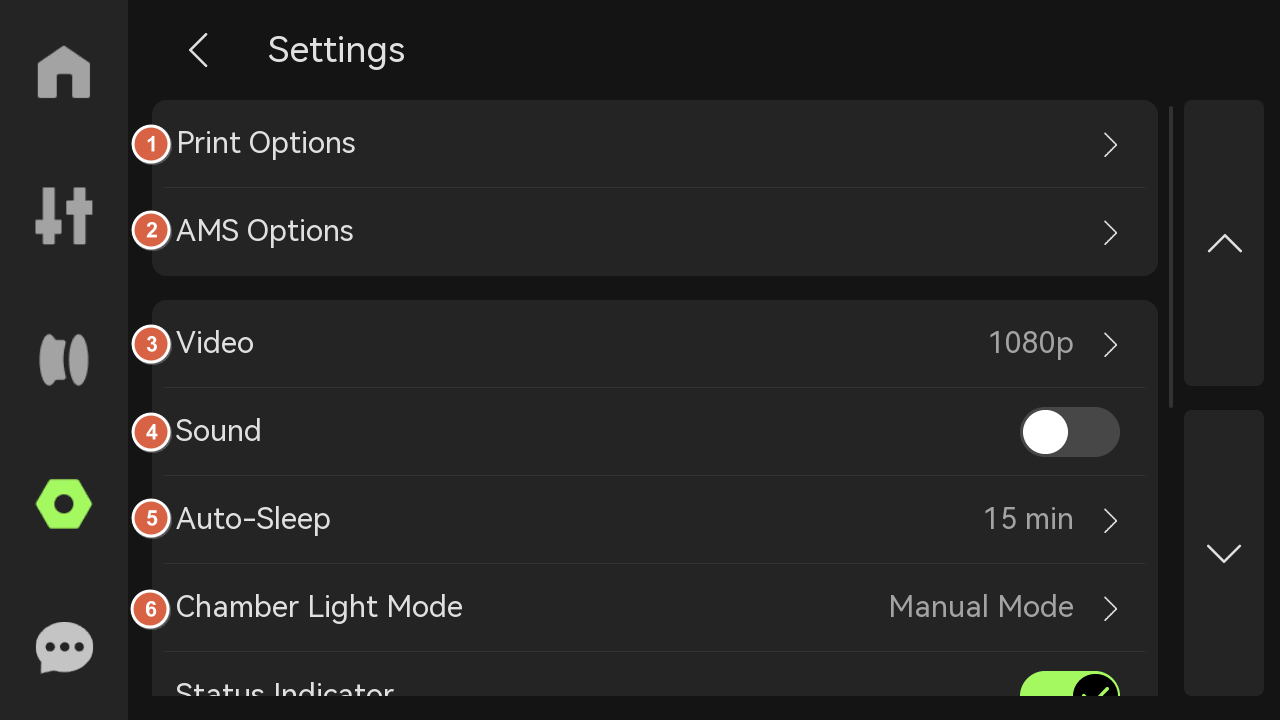
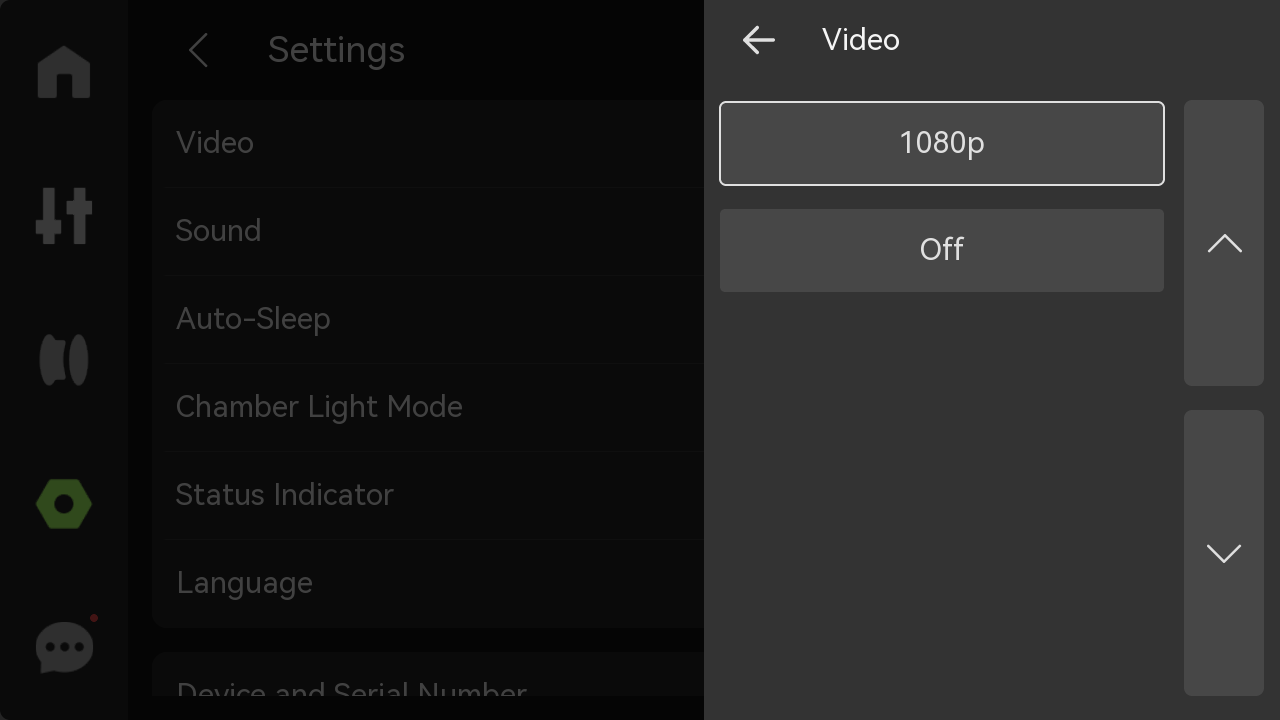
Video: Set the video resolution. Higher resolution requires more storage space.
-
Sound: If you turn on the option, the printer will emit a sound when it is turned on, when printing starts, and when printing ends.
-
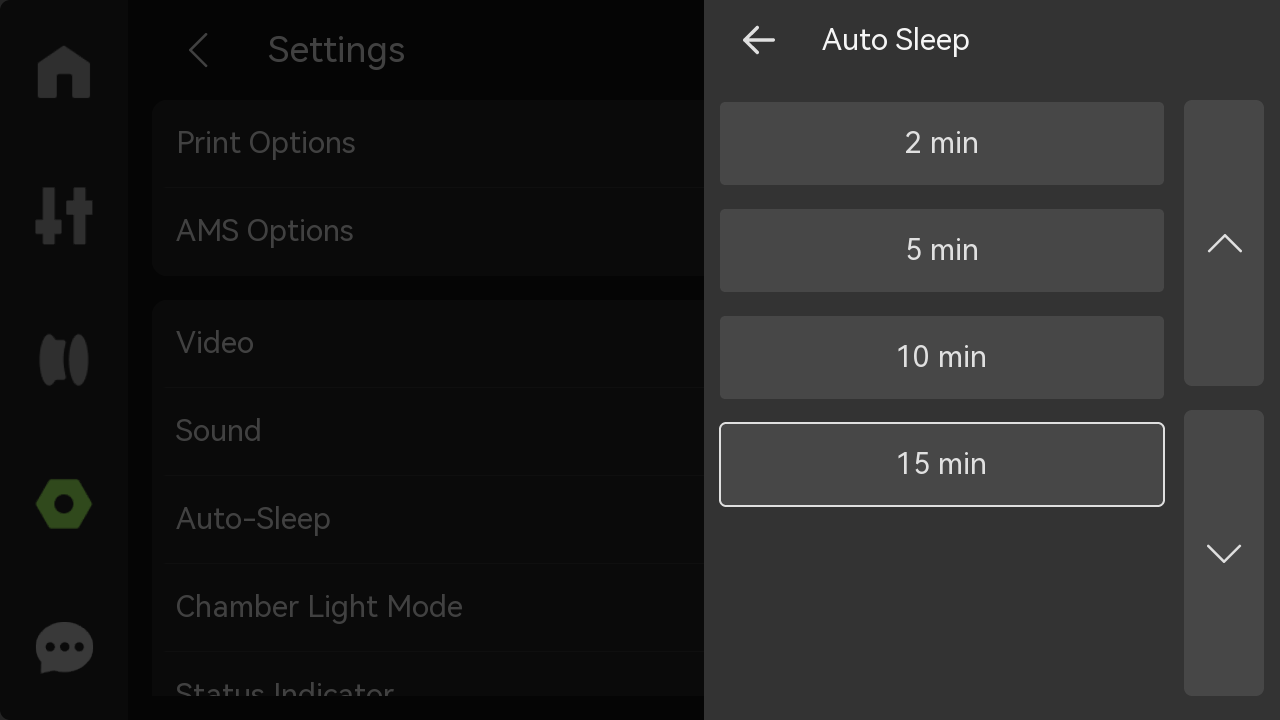
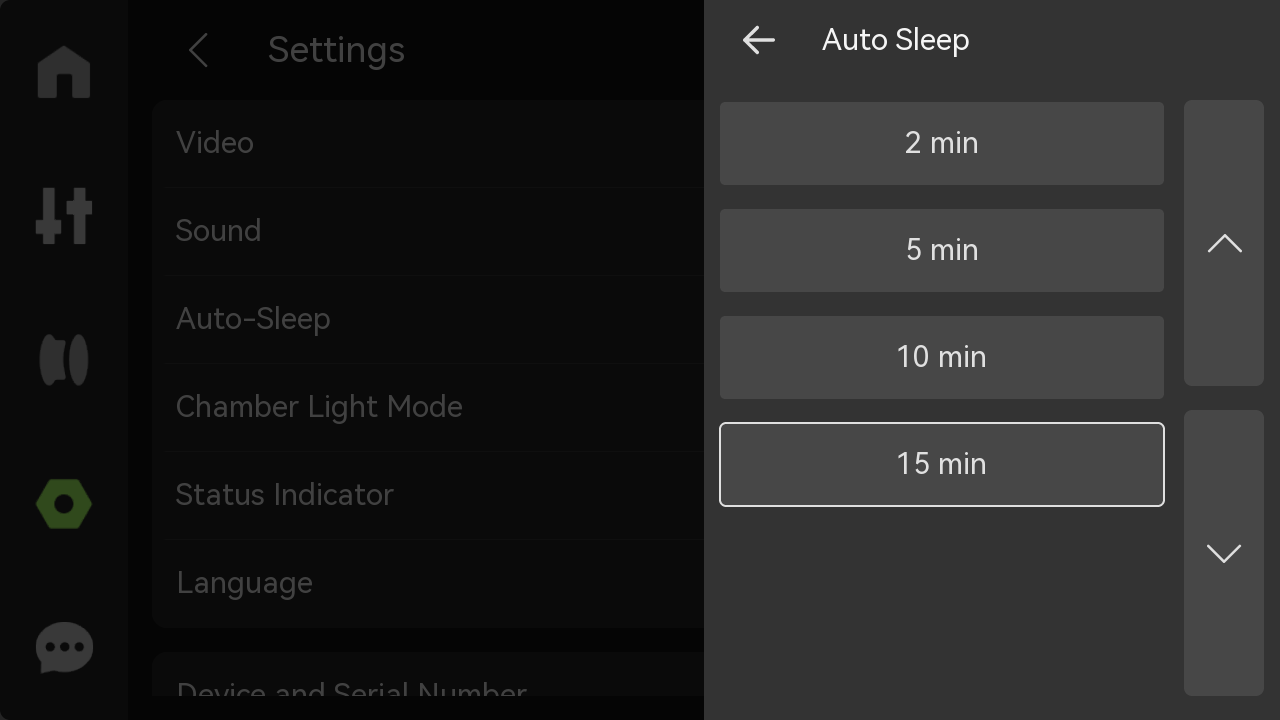
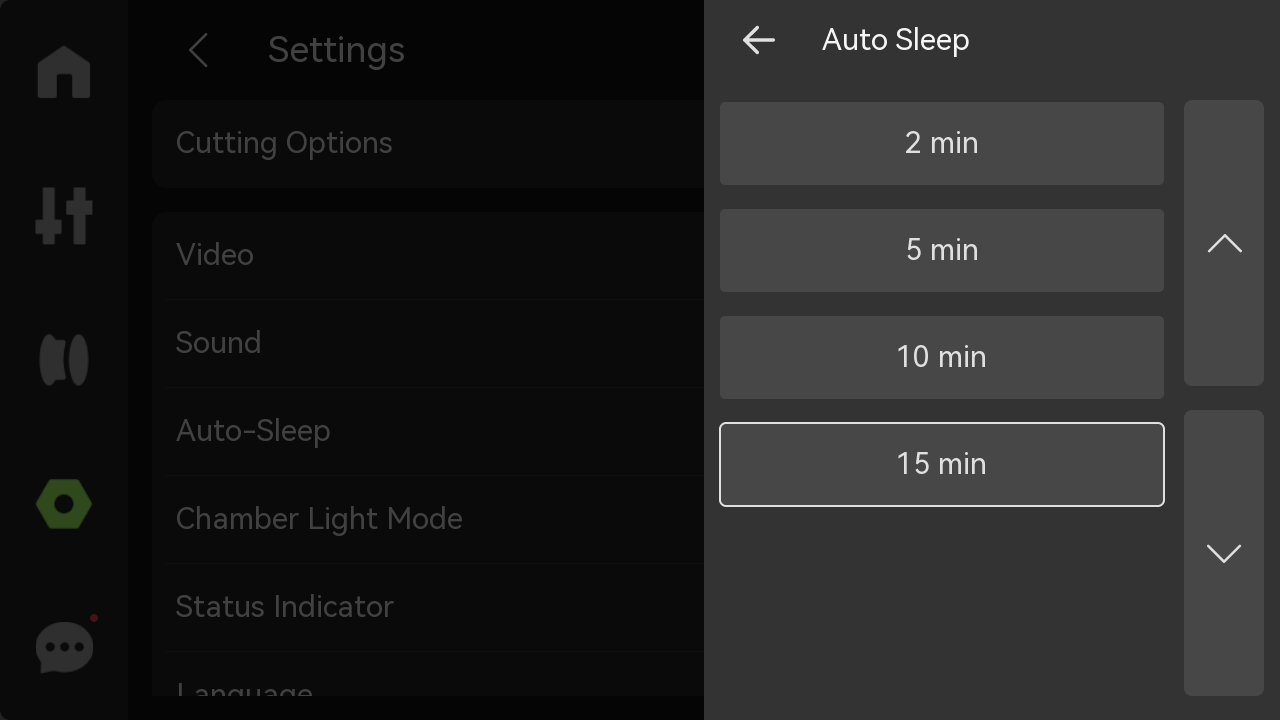
Auto-Sleep: Select the length of time the printer will automatically sleep.
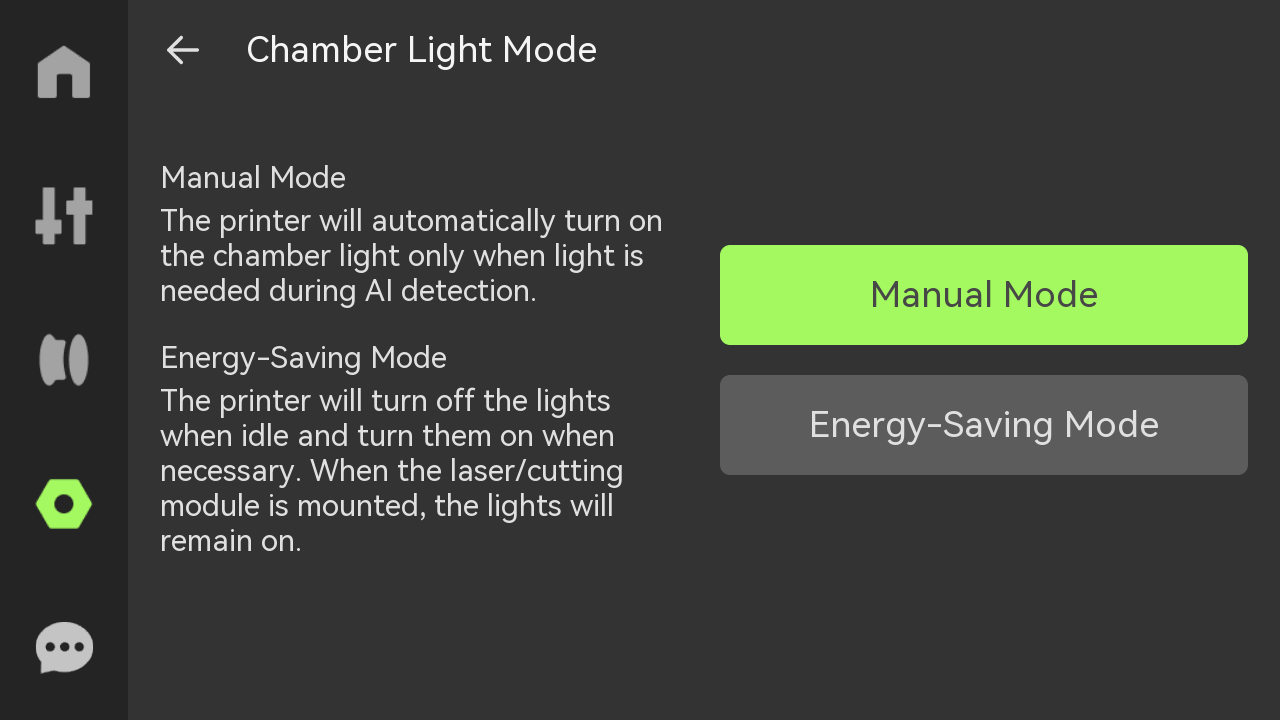
- Chamber Light Mode: You can choose manual mode or energy-saving mode according to actual needs.

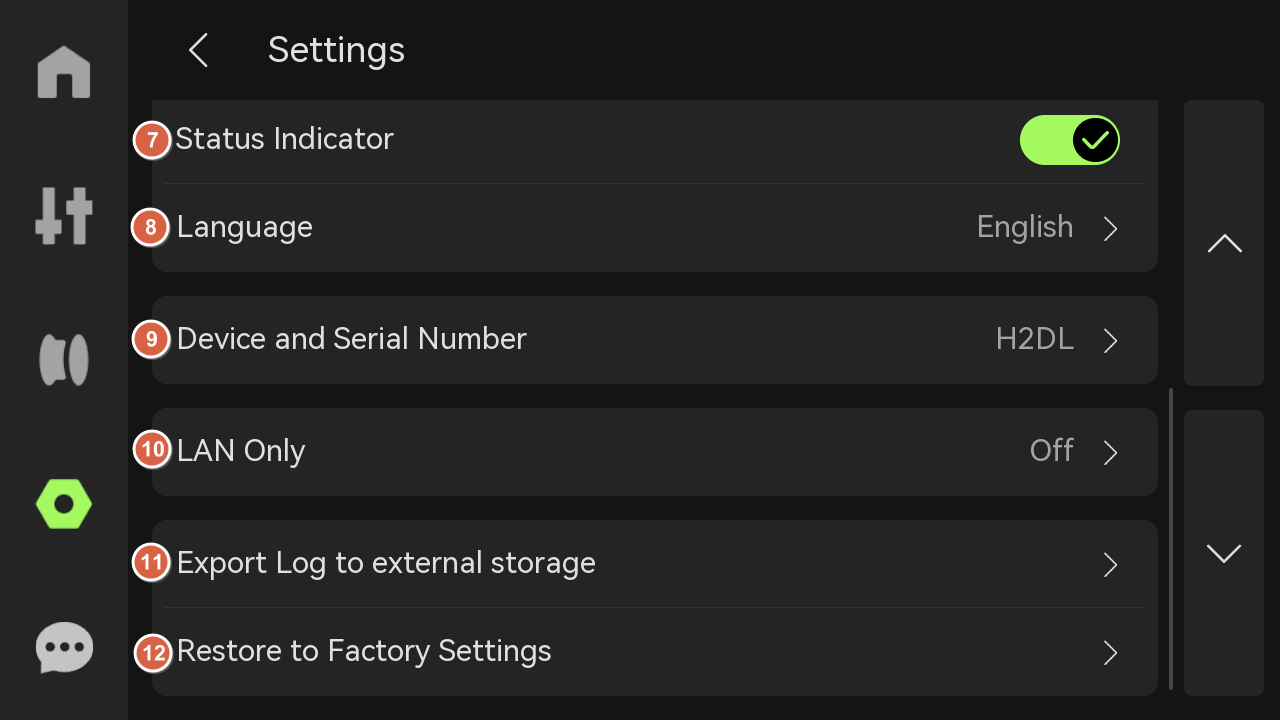
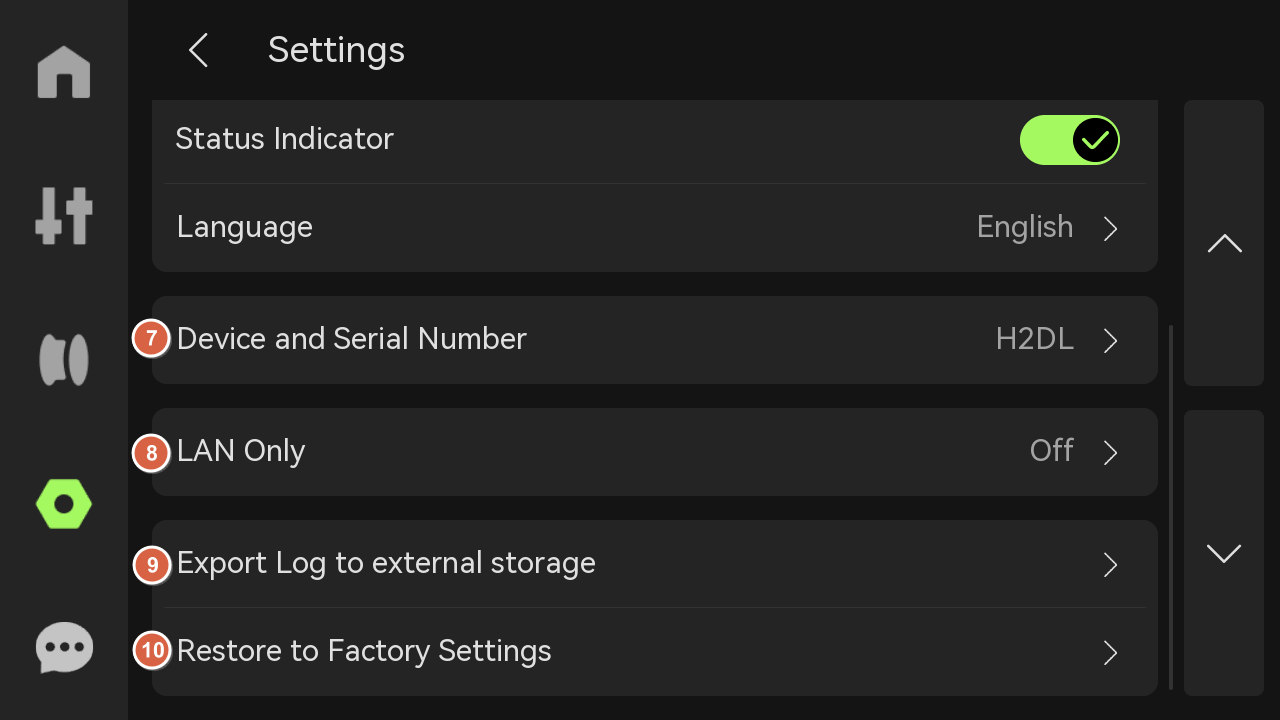
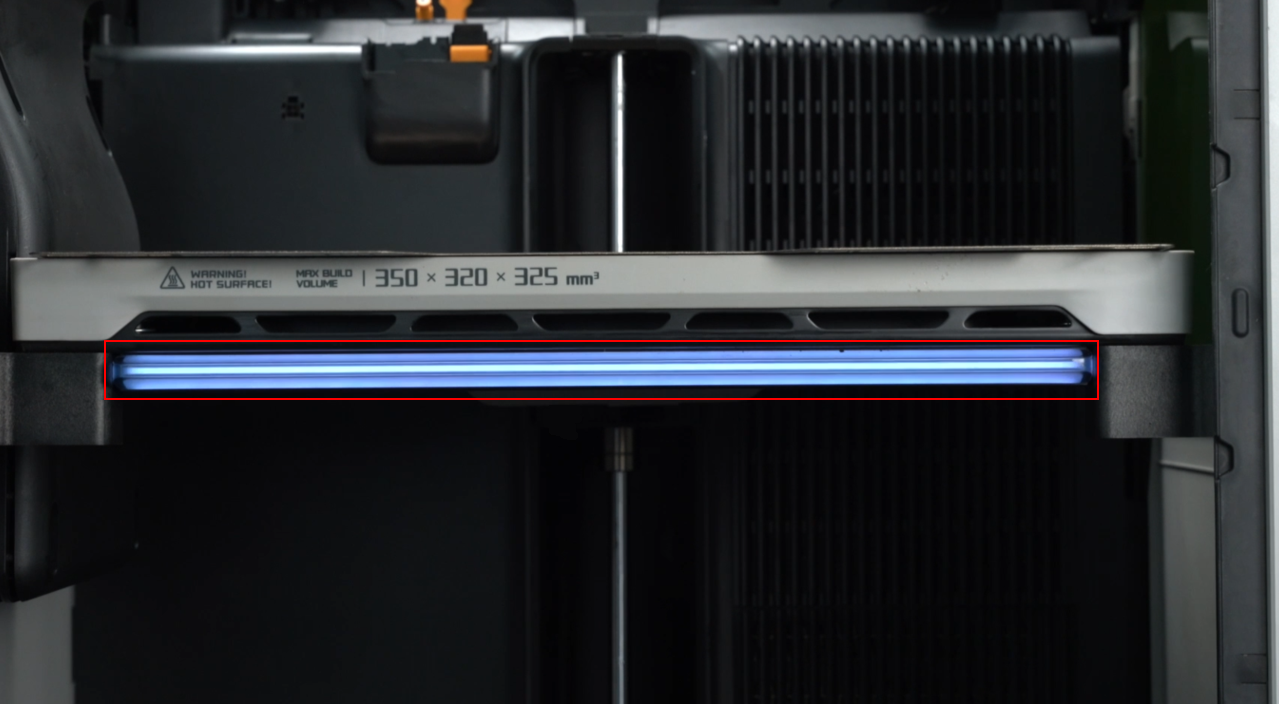
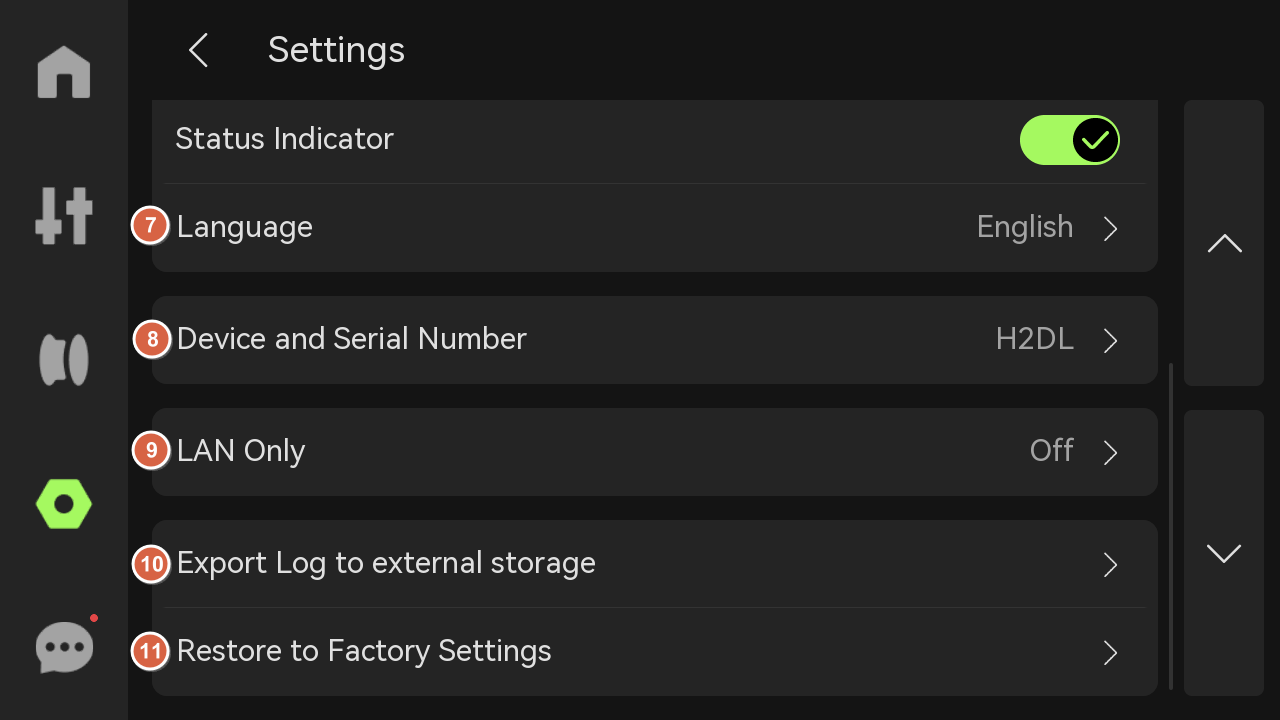
- Status Indicator: Used to indicate the printer's health status and print task status.

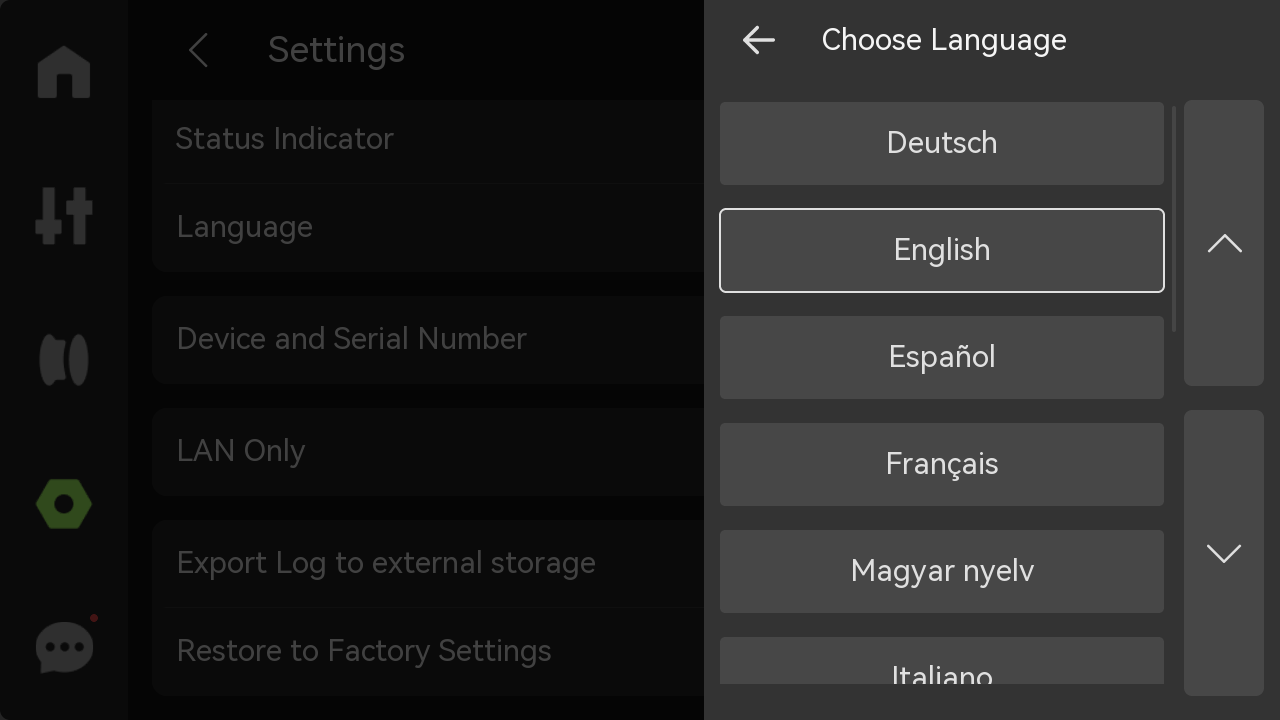
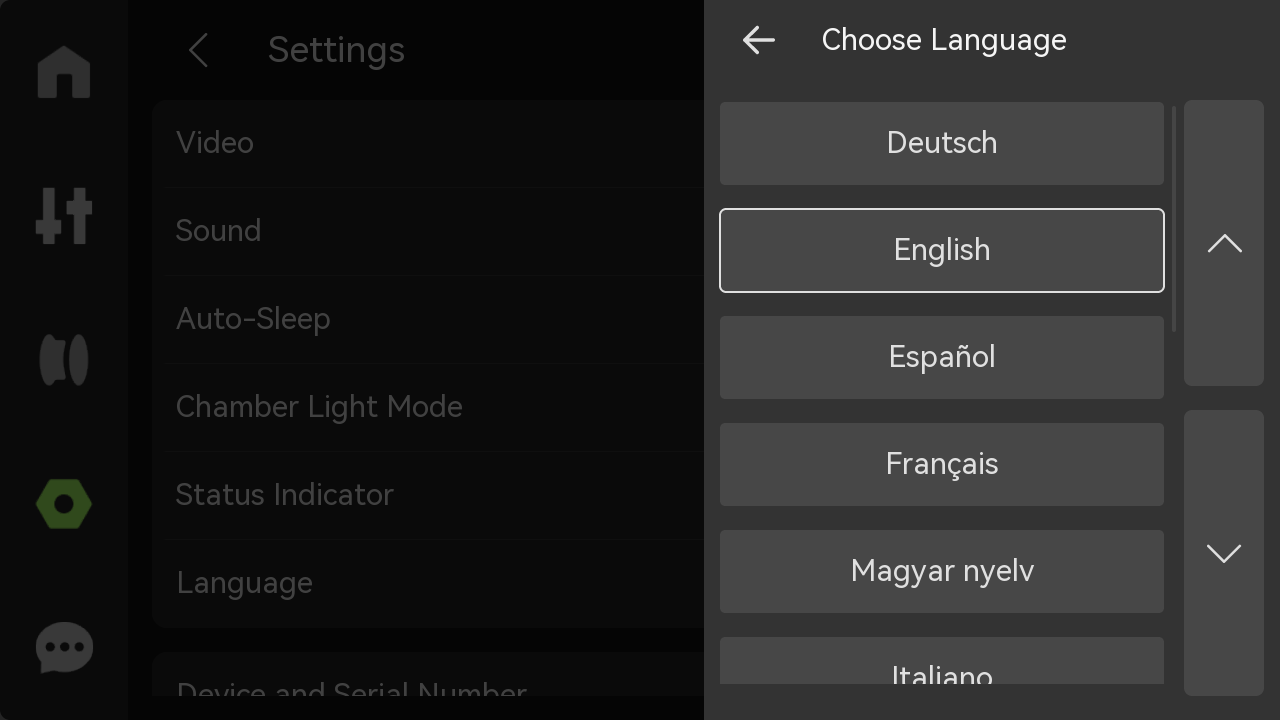
- Language: Select the language in which the printer screen is displayed.
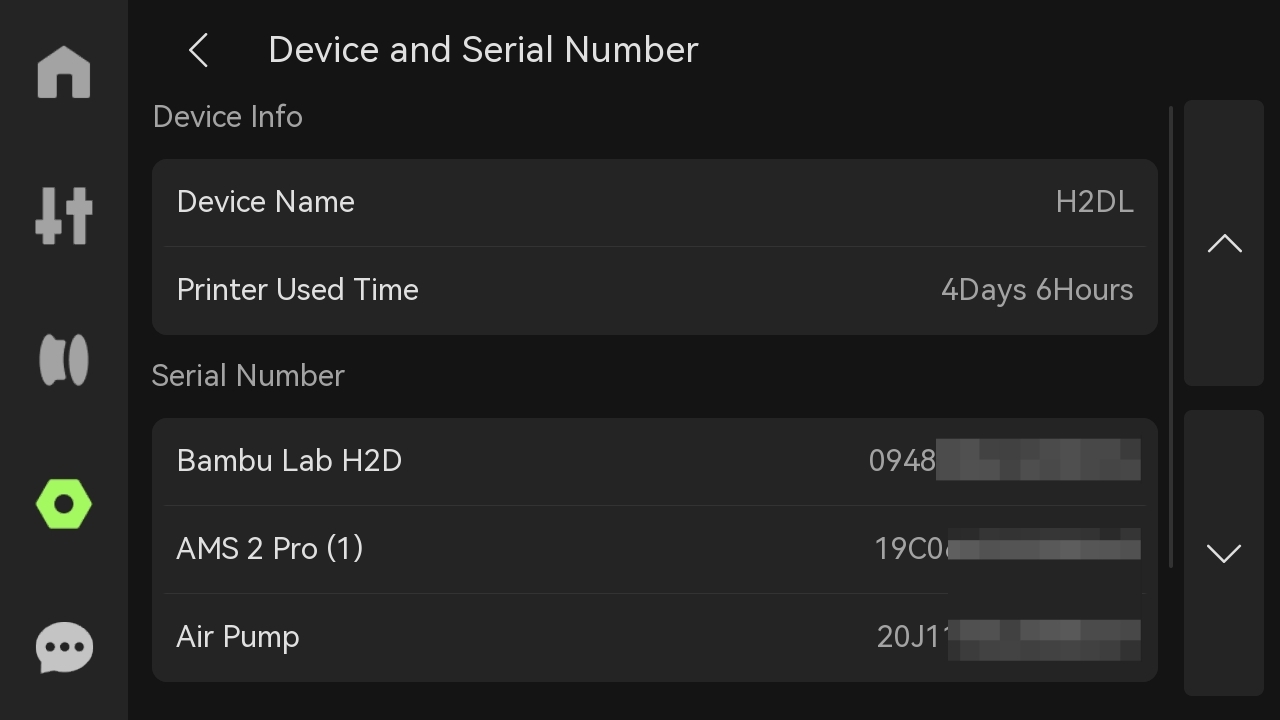
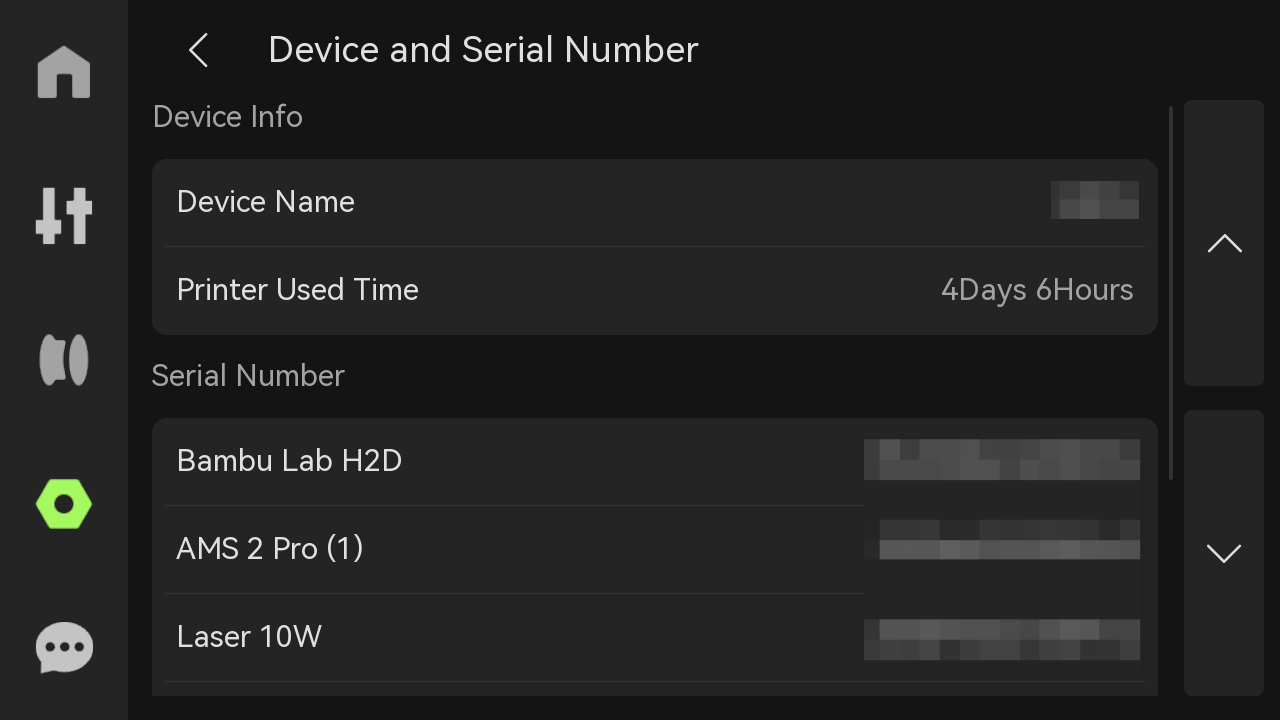
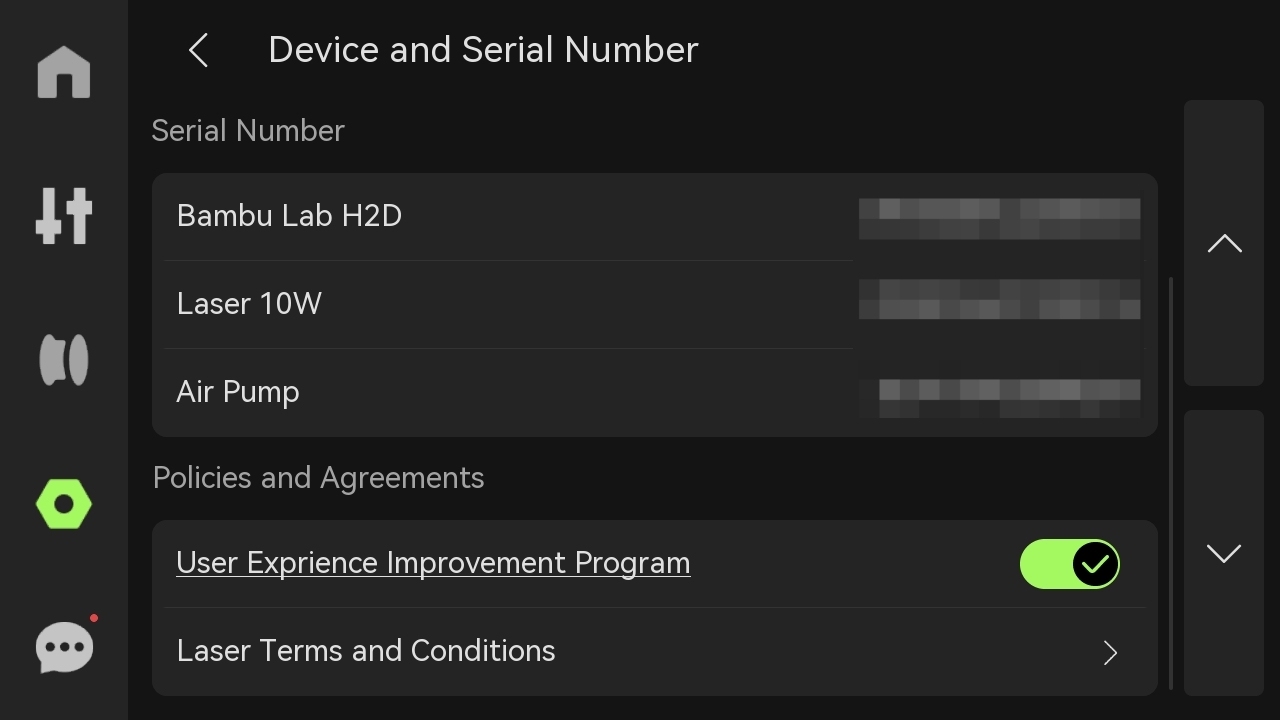
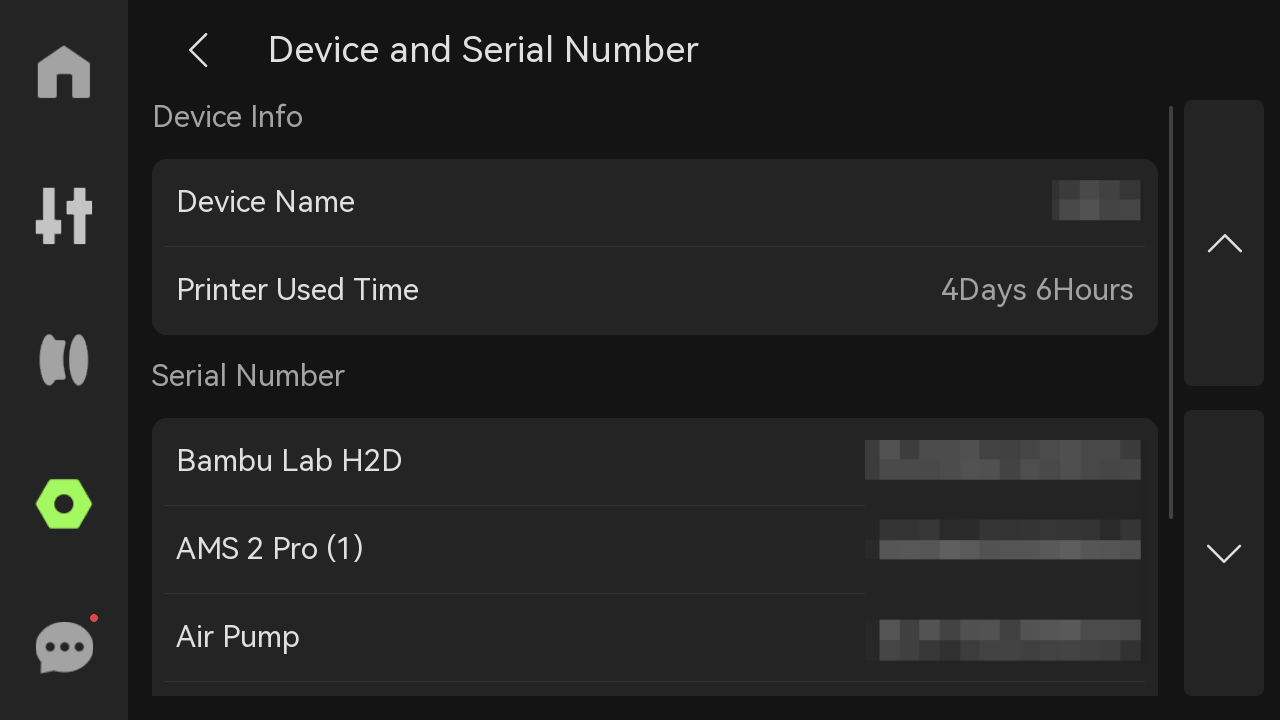
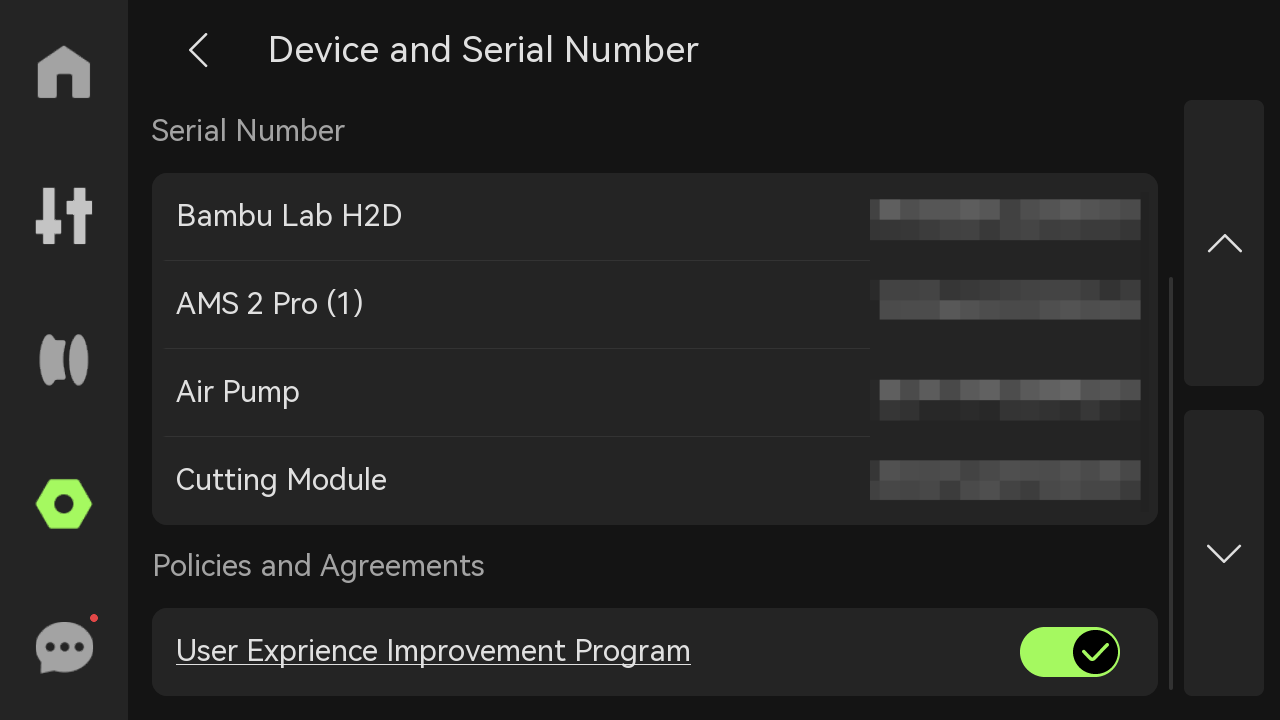
- Device and Serial Number: View the device name, device usage time, and serial number. Choose whether to join the user experience improvement program. Once enabled, the machine data (such as printing time, error information, etc.) can be uploaded to the official backend for subsequent statistics and improvements.
- LAN Only: When turned on, the printer can only be connected and accessed within the local network and cannot be accessed or controlled remotely over the Internet. If multiple devices are connected via the same LAN, live view or data sharing is possible.

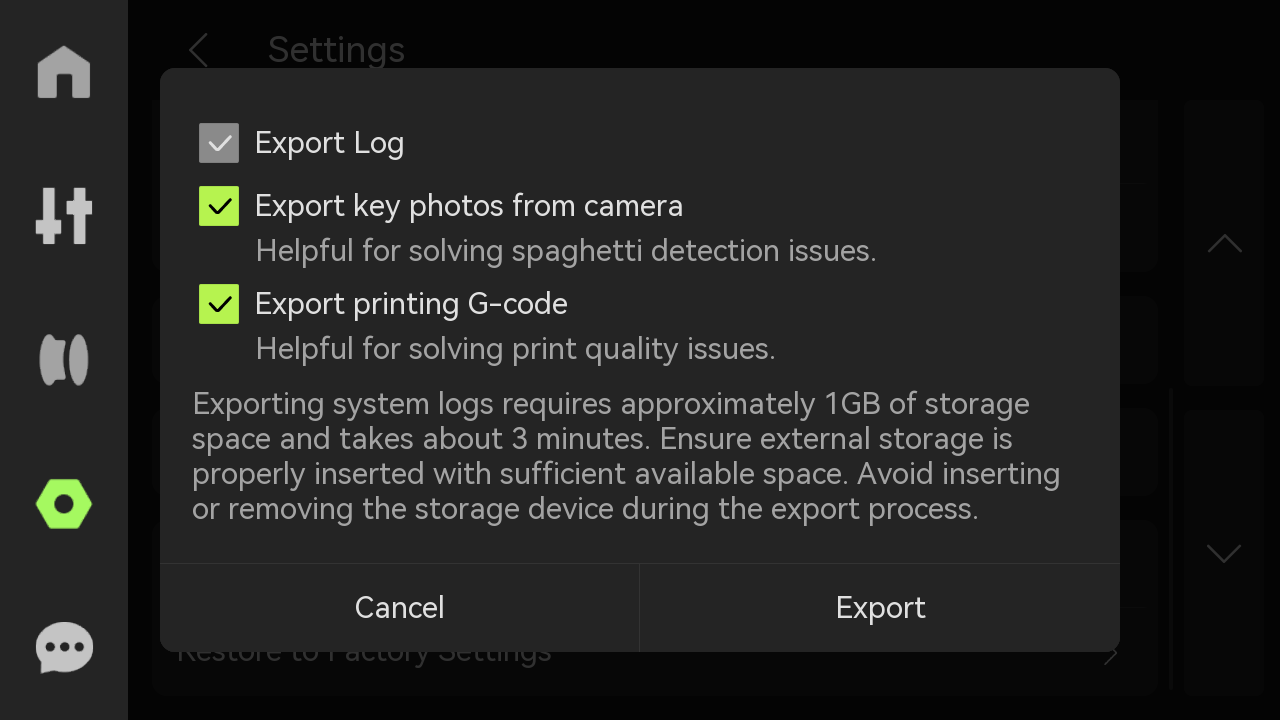
- Export Log to External Storage: Choose whether to export all logs, key photos (to determine micro radar and spaghetti problems), and G-code (to determine print quality problems) according to your needs.
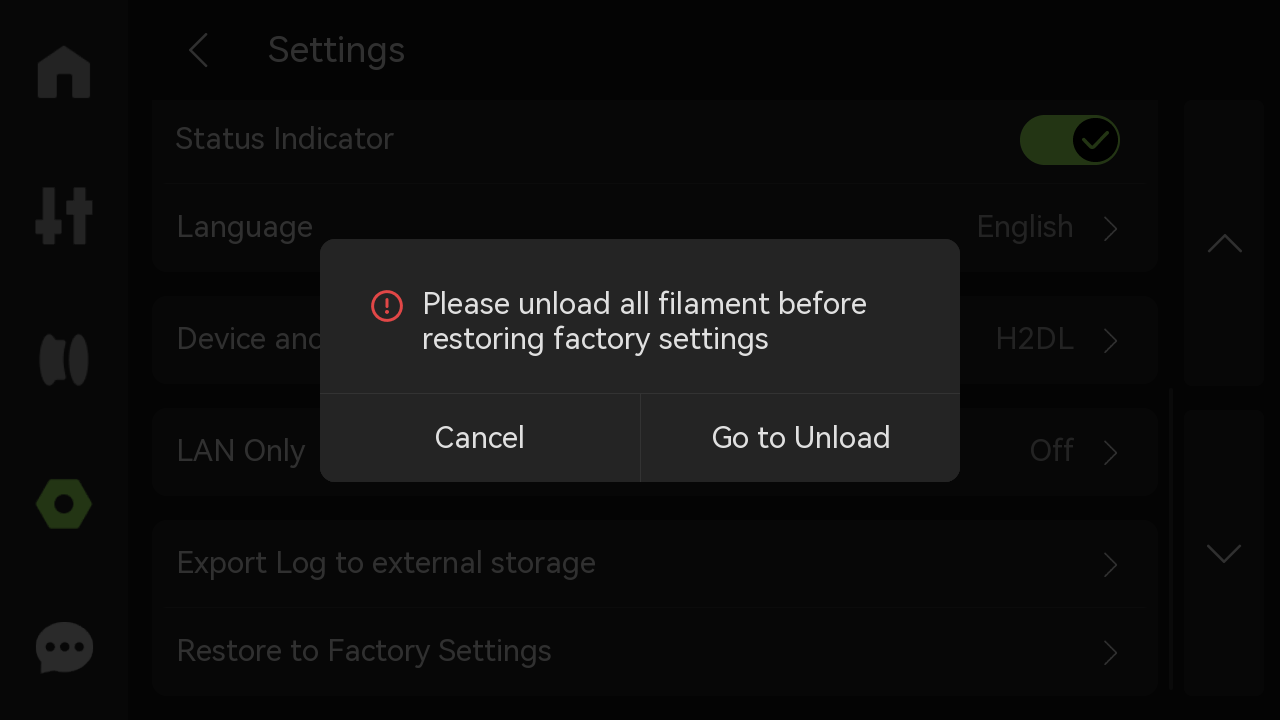
- Restore Factory Settings: Reset the printer to the factory settings. Once reset, the settings cannot be restored.
¶ HMS
If there is a problem with the printer, an error message will be displayed here.

¶ H2DL Laser Module
Note: Since the H2DL laser/cutting module does not involve the "filament" interface, this article will not explain it in detail.
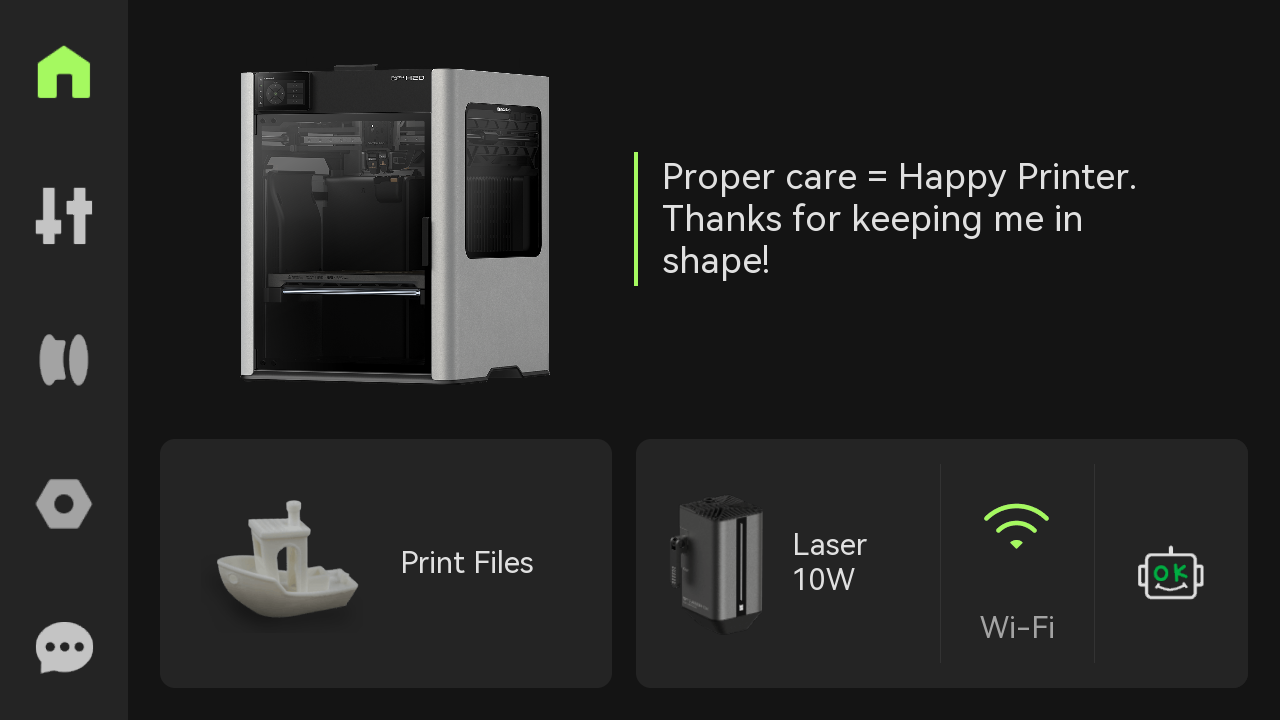
¶ Homepage
On the left side of the homepage is an on-screen menu bar that includes Homepage, Controls, Filaments, Settings, and HMS; on the right side is the Print Files, Laser Module, Network Settings and HMS.
¶ Controls
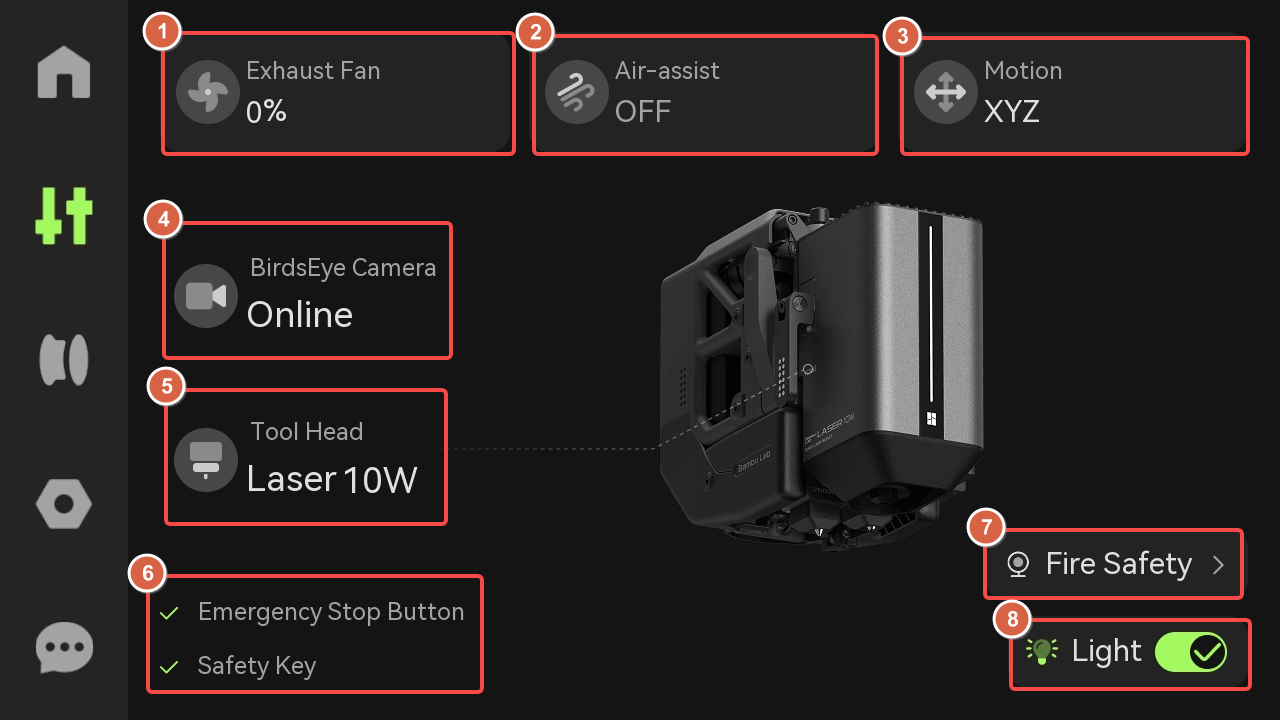
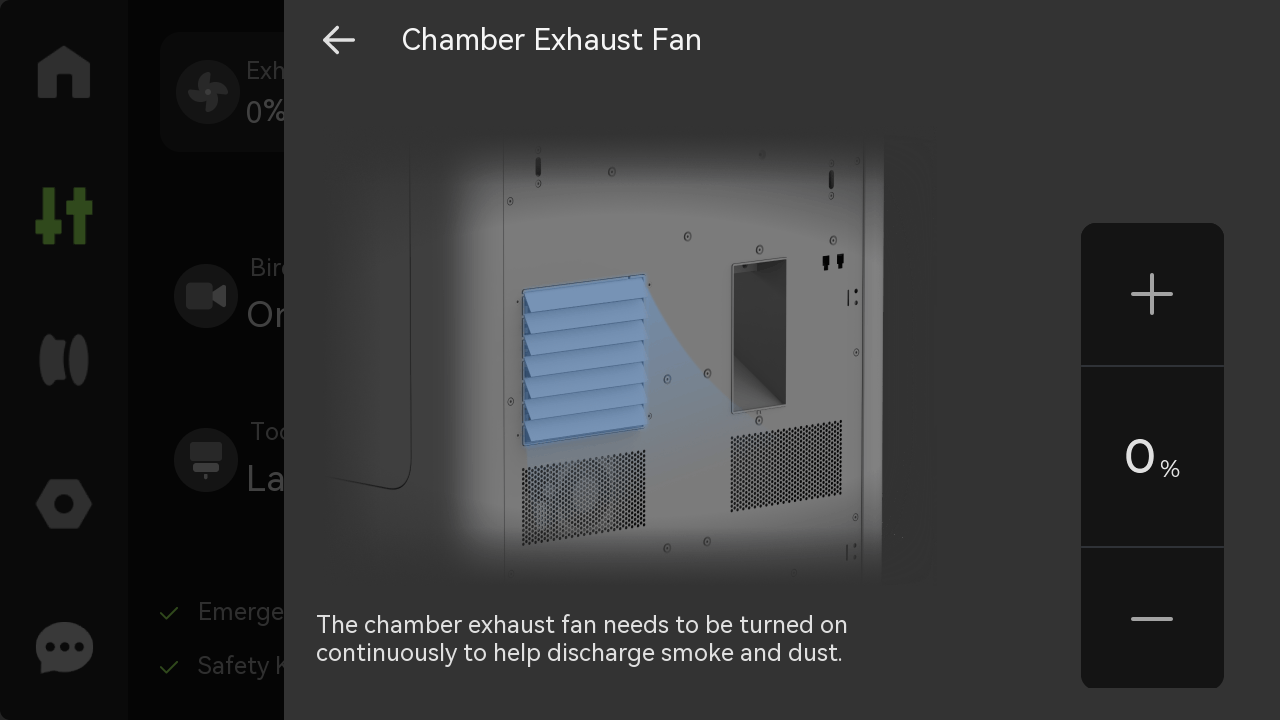
¶ 1. Exhaust Fan
Installed on the right lining of the printer, when the chamber cools down, the printer air condition system will switch to cooling mode, and the speed of the chamber exhaust fan will increase as the chamber temperature rises. If the current printer chamber temperature is not high and the heat dissipation demand of the printing filaments in the chamber is low, the speed of the chamber exhaust fan will drop to 30%.
¶ 2. Air-assist
When the air-assist module is working, the printer will detect its status in real time and will report an error to the user when the status is abnormal. Turning on the air-assist not only helps improve the engraving quality, but also avoids the risk of fire caused by heat accumulation when processing some materials.
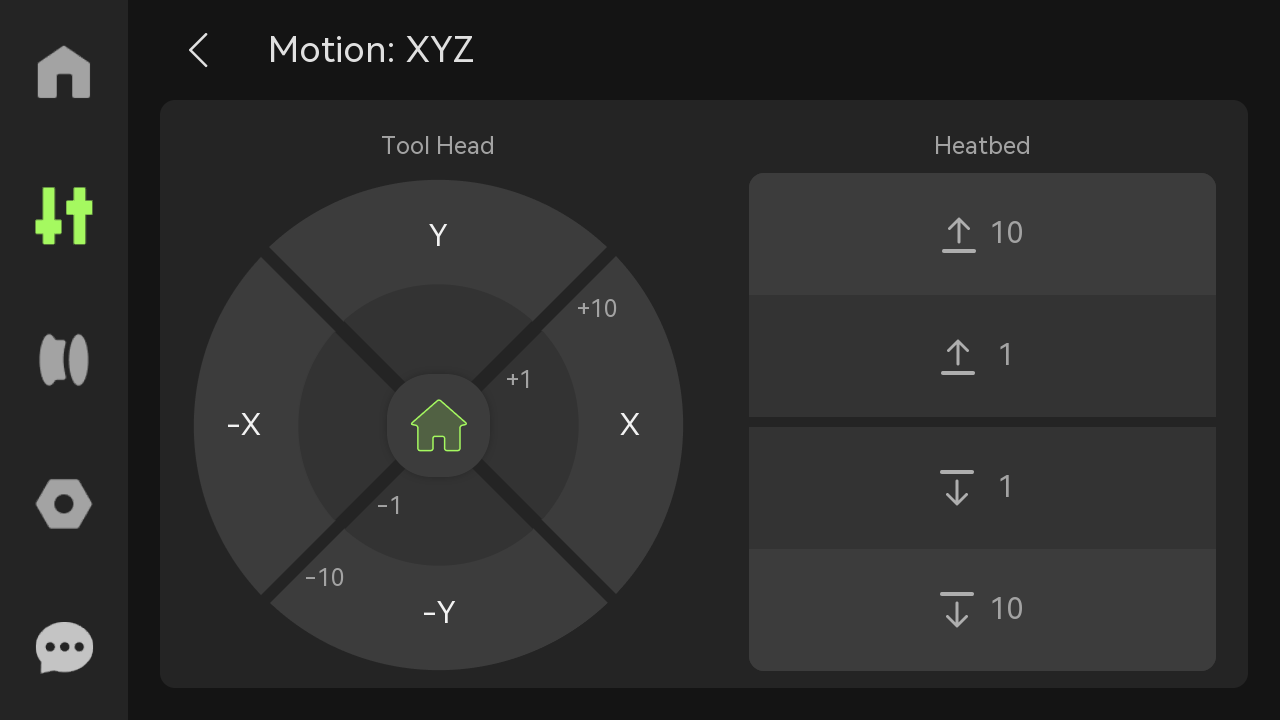
¶ 3. Motion
-
Toolhead: Click +1 or +10 to control the toolhead movement in the X-axis and Y-axis.
-
Heatbed: Click the 1 or 10 move button to raise or lower the heatbed.
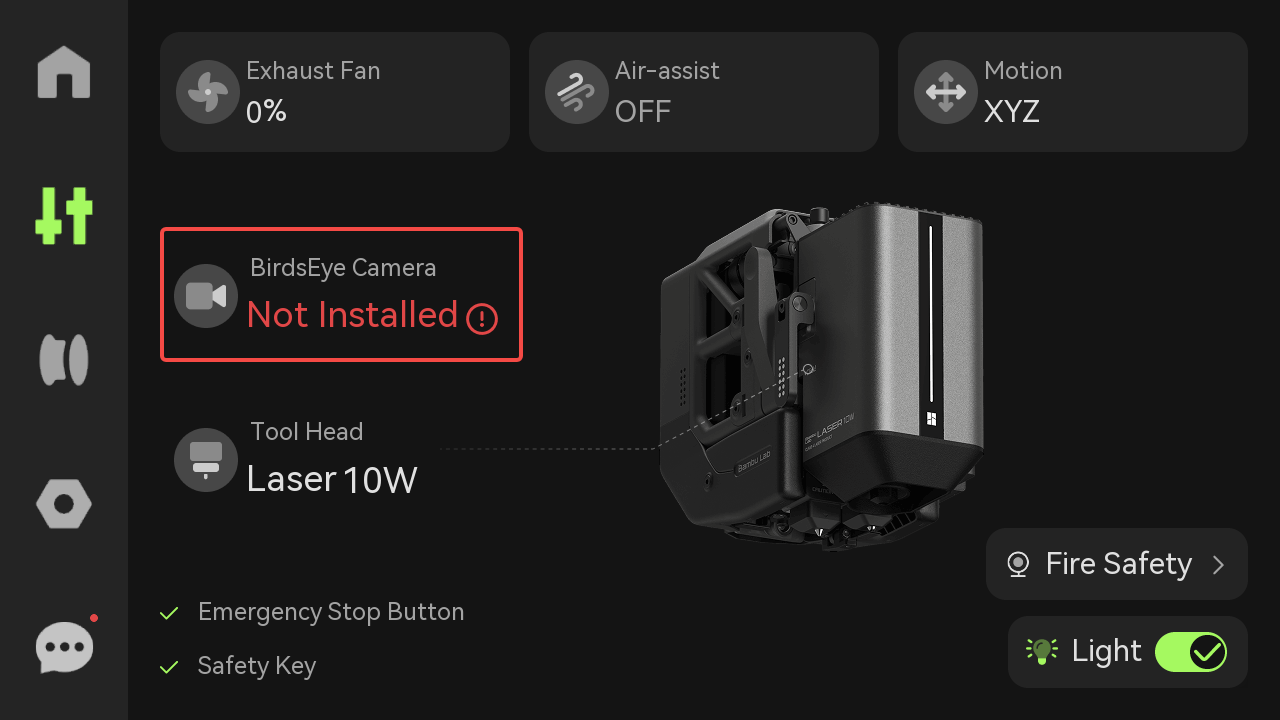
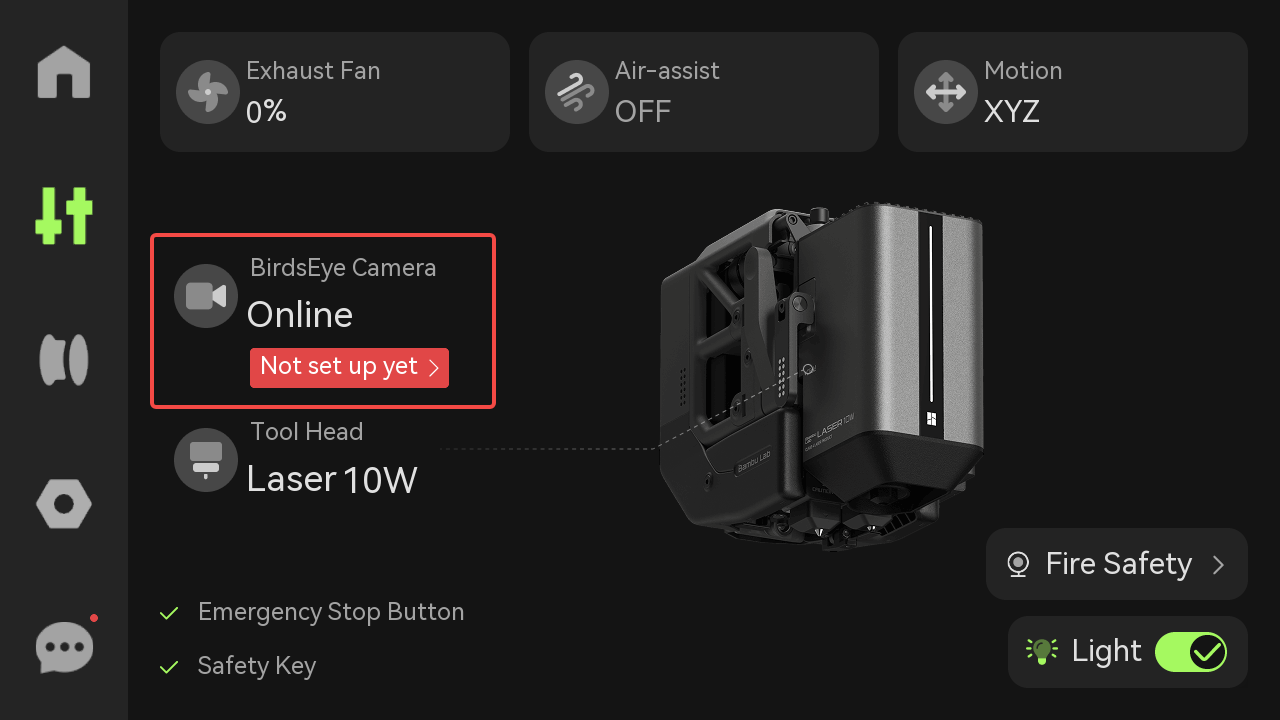
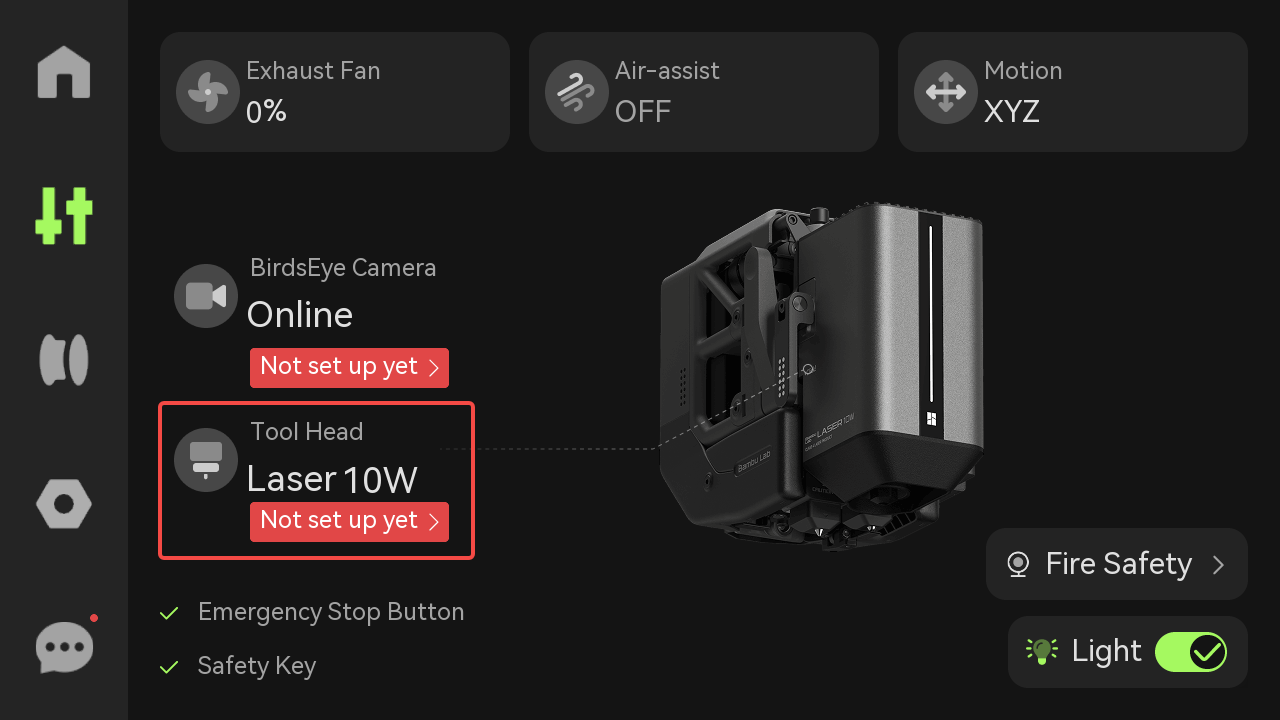
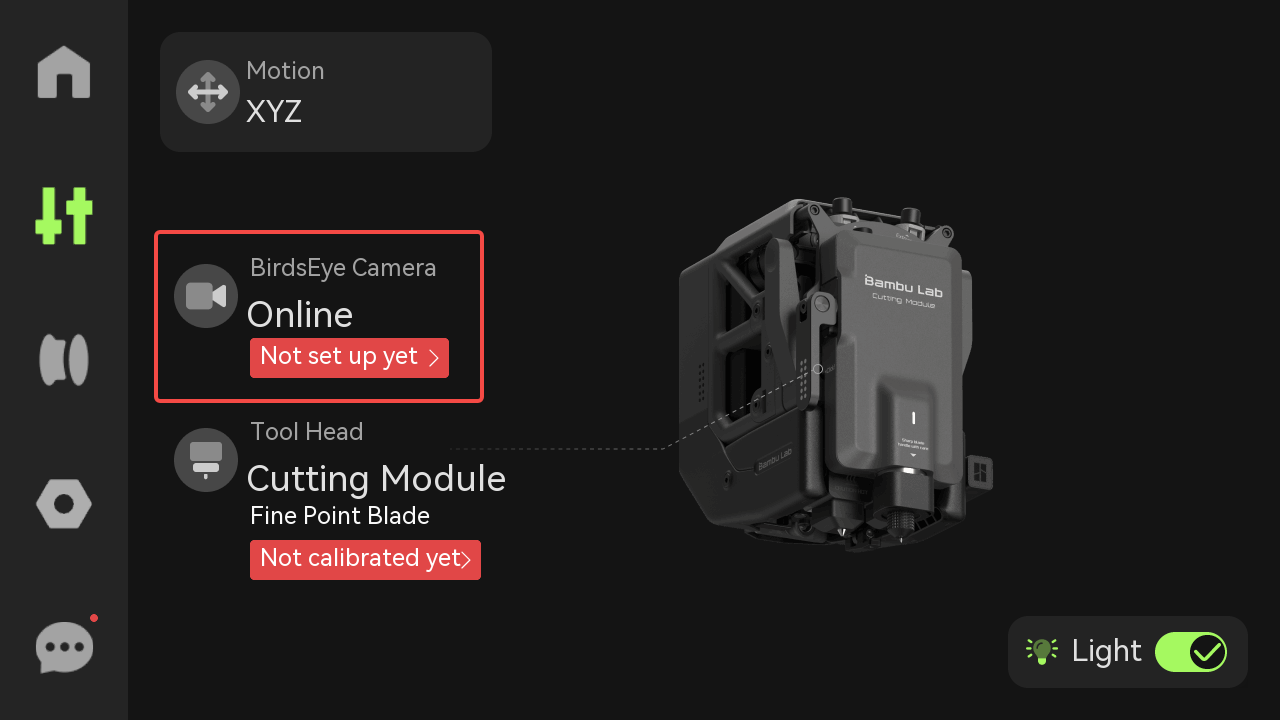
¶ 4. BirdsEye Camera
-
If the birdseye camera is not installed or not installed properly, it will display "Not installed".
-
If it is installed but not setup, it will display "Not set up yet".
 Not installed |
 Not set up yet |
¶ 5. Toolhead
Displays the power type and status of the laser module. If it is not initialized, it will display "Not set up yet".
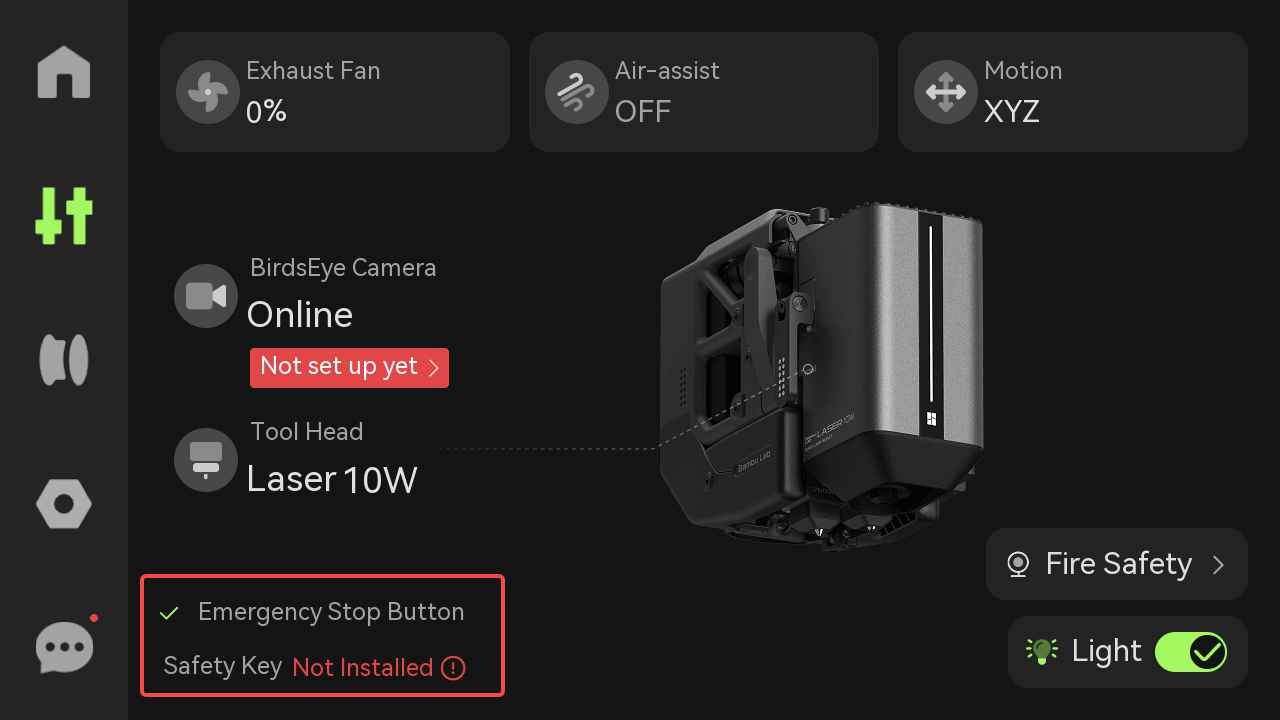
¶ 6. Emergency Stop Button & Safety Key
Displays whether the emergency stop button and safety key are installed; if an accessory is not installed, "Not Installed" will be displayed.
¶ 7. Fire Safety
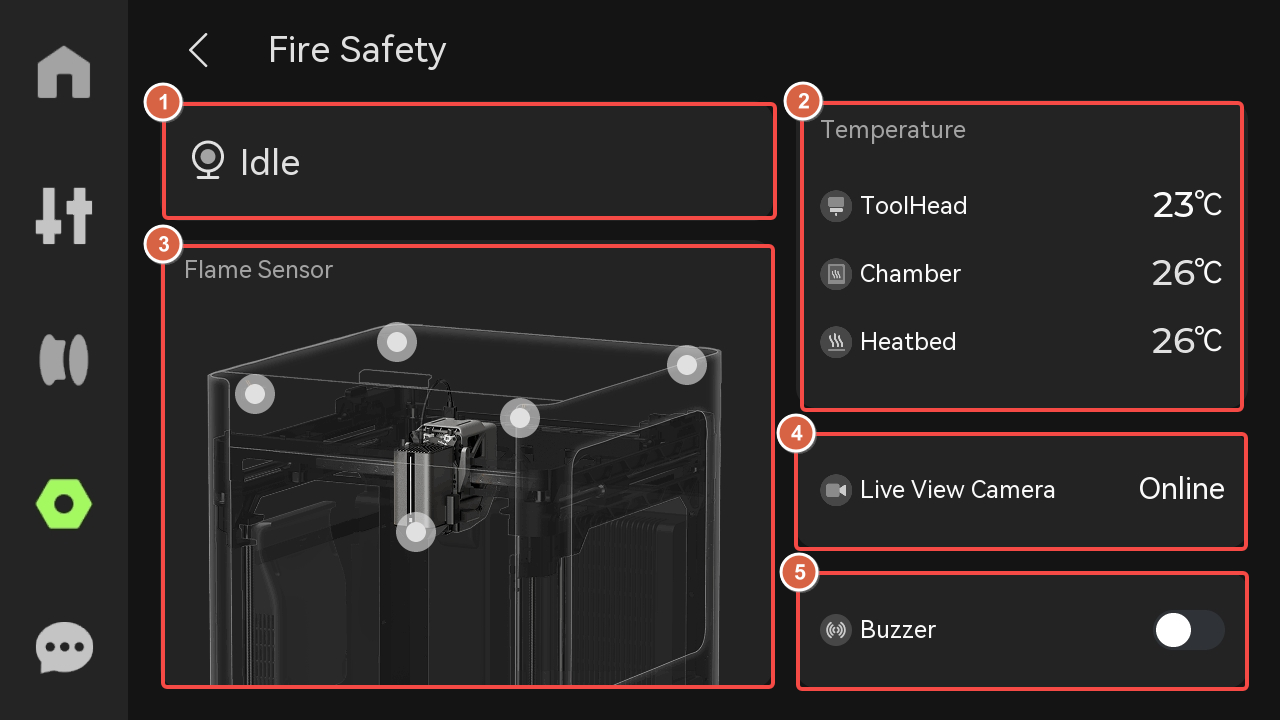
-
Flame Safety Status: Automatically activates upon laser task initiation and maintains continuous monitoring until task completion.
-
Temperature: The toolhead temperature, chamber temperature and heatbed temperature inside the chamber can be monitored in real time.
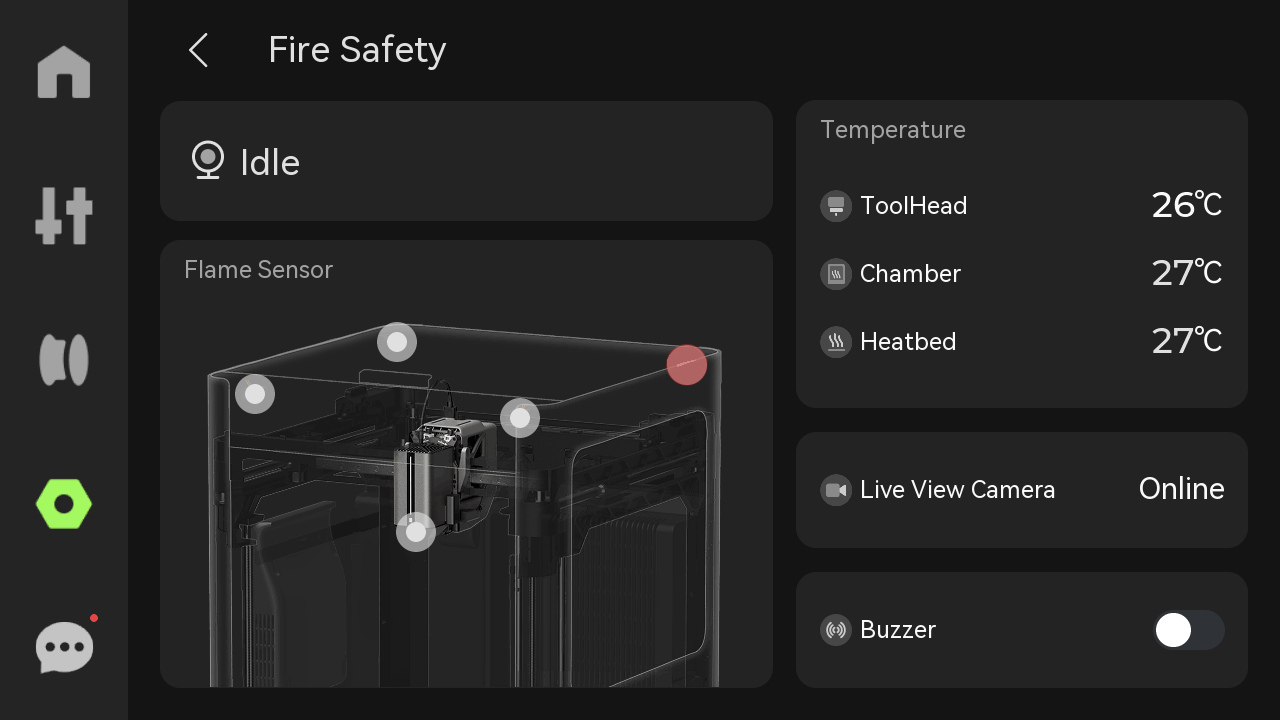
-
Flame Sensor: Including infrared sensors at the four corners of the chamber, as well as the temperature sensor and flame sensor that comes with the laser module. If the sensor detects a flame, the sensor icon on the screen will flash red.
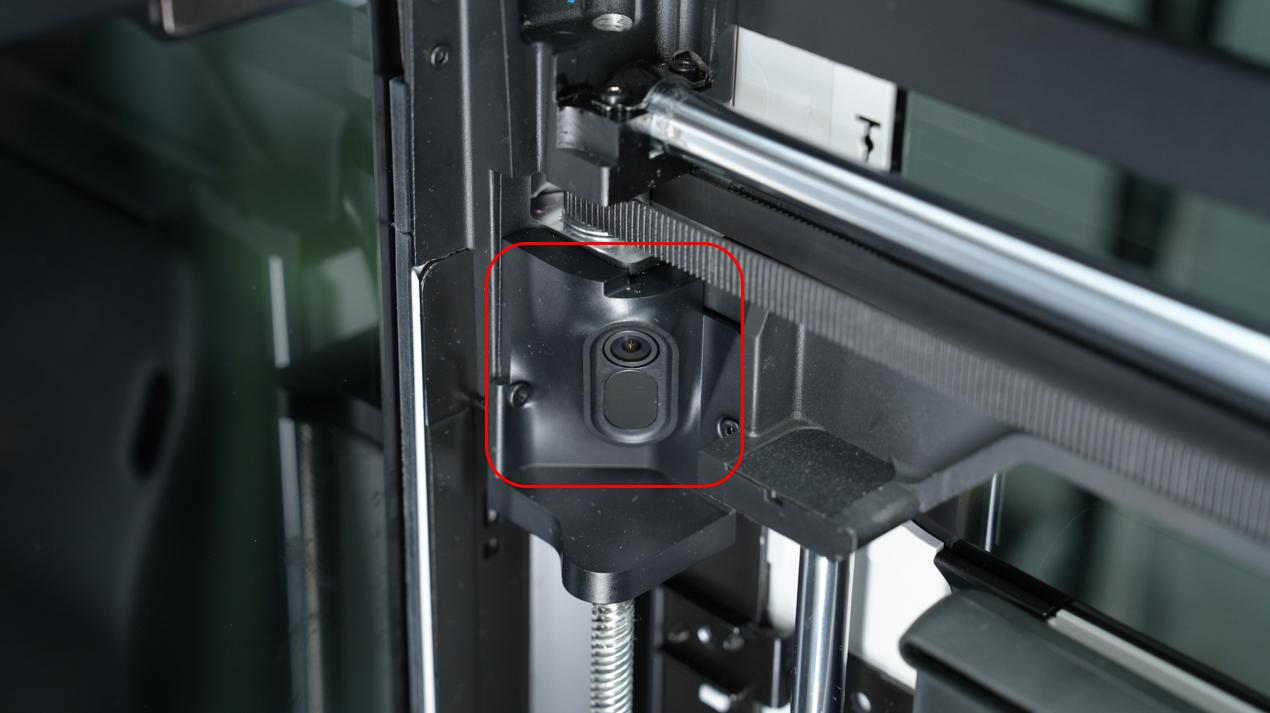
- Live View Camera: The side-mounted live view camera captures real-time processing within the chassis, using AI algorithms to analyze image features for fire detection.
- Buzzer: Triggers a fire alarm upon detecting flame signatures, including audible alerts (via buzzer) and visual warnings (pop-up notifications), prompting immediate user intervention. Users can manually turn the buzzer on and off here to test whether it is normal.
For details about the flame detection feature, please refer to: Introduction to H2D Flame Detection Feature.
¶ 8. Light
Click this button to control the LED light.

¶ Settings

¶ 1. Account
Open Bambu Handy and scan the code to access the account.

¶ 2. Wi-Fi
Set up the WLAN, view the current network, test network, or view and add other networks.

¶ 3. USB Storage
-
Storage: Display the used capacity and maximum capacity of the USB flash drive.
-
Eject: Click "Eject" to eject the USB drive safely.
-
Format external storage: Once reset, the storage cannot be restored.
For USB flash drive specifications and usage recommendations, please refer to: Specifications and Usage Recommendations of H2D USB Flash Drives.

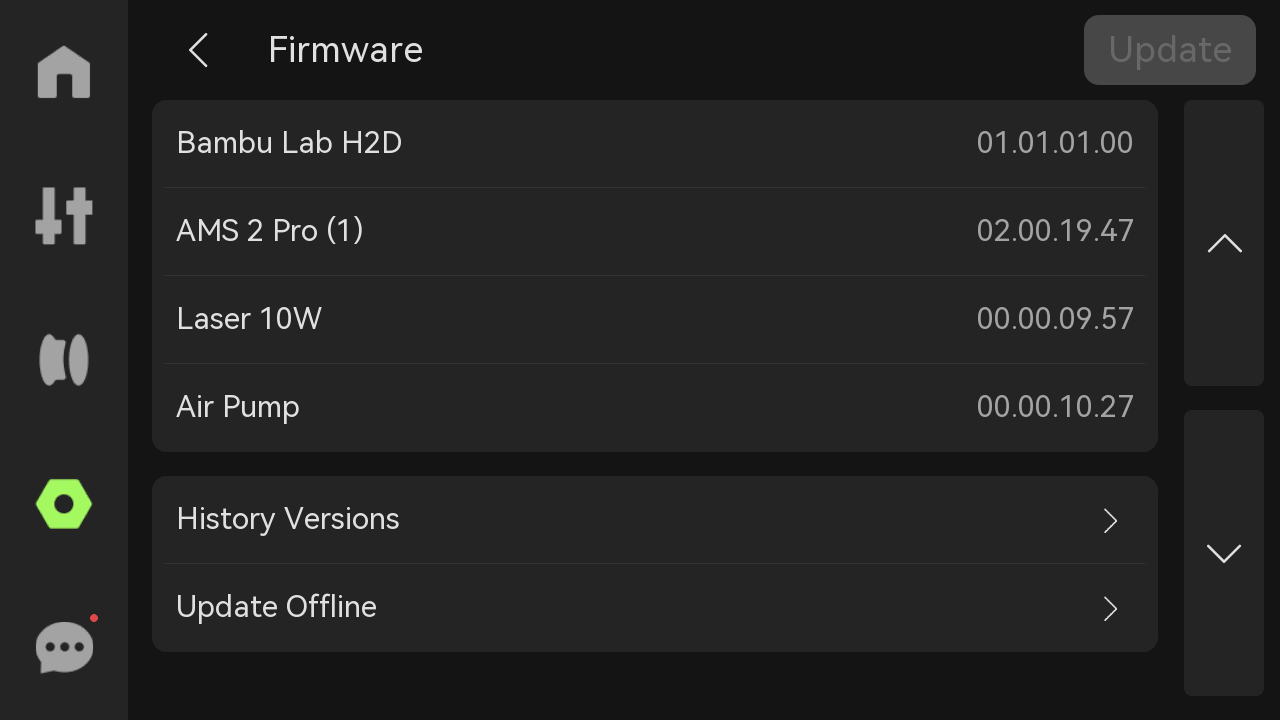
¶ 4. Firmware
View the current version of the device and historical versions, or perform offline upgrades. If the firmware needs to be updated, the "Update" button in the upper right corner will light up.
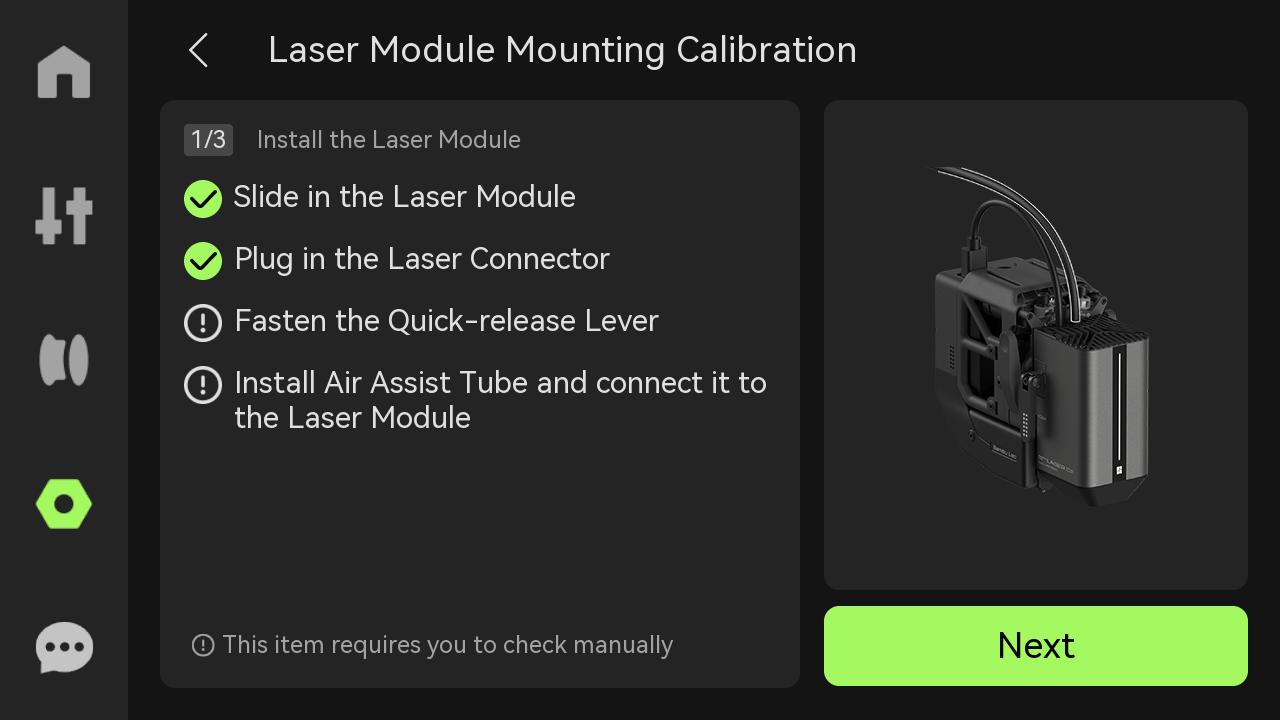
¶ 5. Mounting Calibration
After every power-up of the printer, motor restart, or occurrence of motor step loss, if you want to use the laser module, you need to recalibrate it. The purpose is to adjust the laser focus position and to set the printer into absolute positioning mode. When calibration is necessary, the "Assistant" page will automatically display a prompt. Before calibration, please ensure that the laser platform is placed on the heatbed.
¶ 6. Toolbox
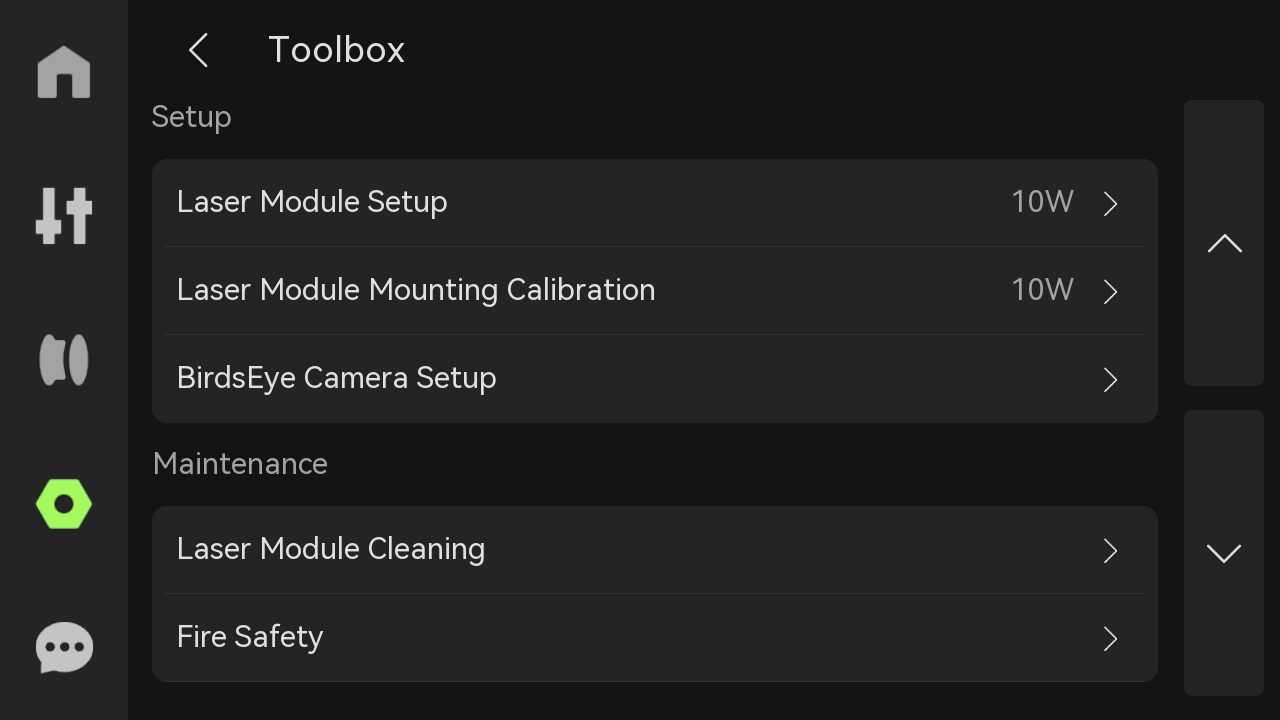
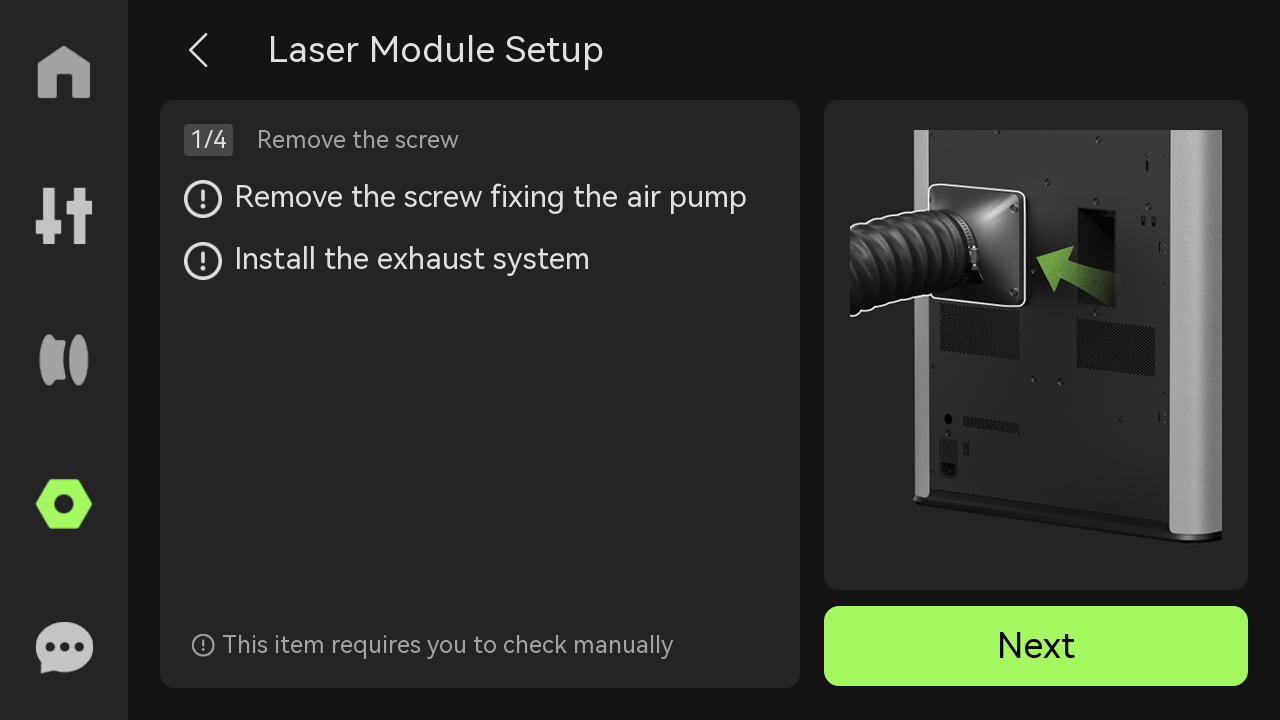
- Laser Module Setup: When installing the laser module for the first time, setup is required. This process does not need to be repeated afterward unless the laser module is replaced, in which case re-setup is necessary. During this step, ensure that the laser platform and materials (calibration card) are placed on the heatbed.
For more information on laser focus calibration, please refer to the relevant section in the Wiki: Laser Focus Calibration Introduction.
-
Laser Module Mounting Calibration: Same as above "mounting calibration".
-
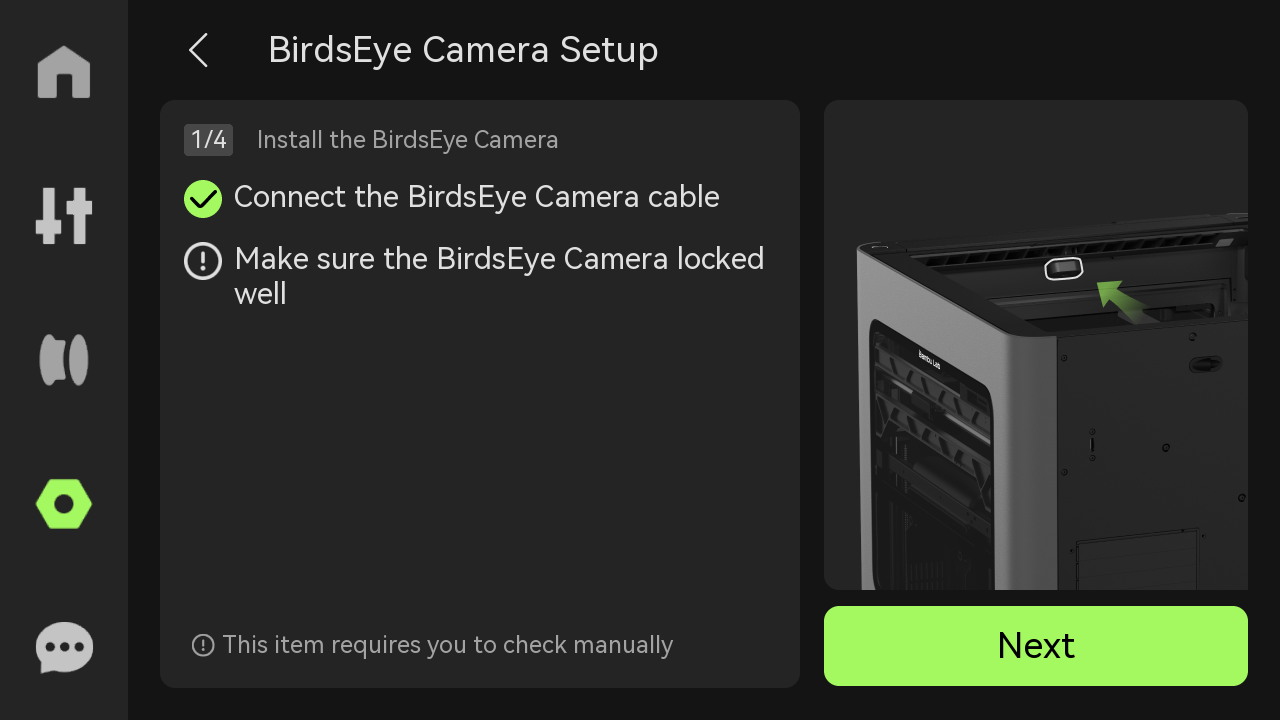
BirdsEye Camera Setup: The BirdsEye camera is calibrated at the factory and can be used immediately. However, due to factors such as transportation or prolonged use, the calibration parameters of the BirdsEye camera may gradually become less effective. If you are dissatisfied with the precision of laser processing, you can trigger the BirdsEye camera setup. During the setup process, it is necessary to use the four markers on the heatbed. Therefore, in this step, no other items should be placed on the heatbed, and it is essential to ensure that the markers are visible to the BirdsEye camera to improve the accuracy of the imaging.
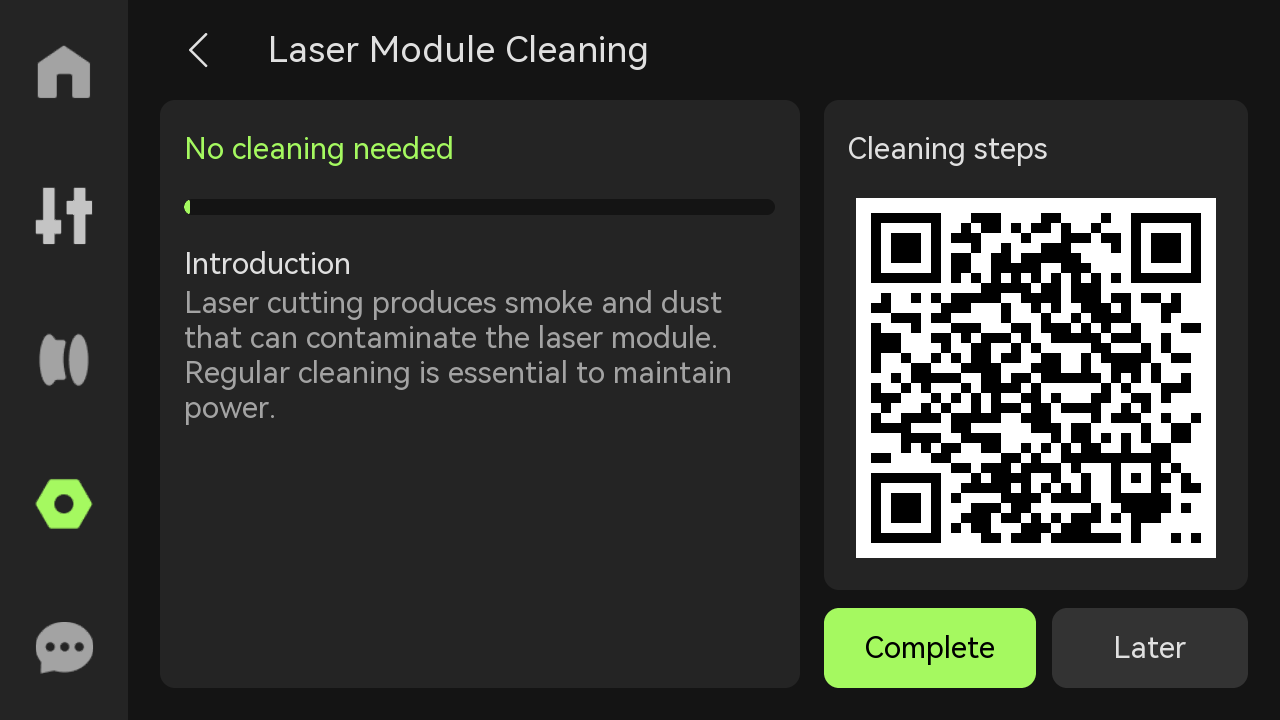
- Laser Module Cleaning: Regular cleaning of the laser module prevents the accumulation of powder and debris, ensuring the normal operation of the equipment and extending its service life. The printer will assess the degree of contamination of the printer based on the total engineering time and laser task type in Bambu Suite. The length of the green progress bar on the left side of the screen will decrease as the laser module is cleaned; if the progress bar turns red and displays "Cleaning Required Immediately", cleaning is required. Specific tutorials can be obtained through the QR code on the right.
For more information on laser module cleaning, please refer to Regular maintenance recommendations for 10w laser module.
- Fire Safety: Same as above “Fire safety”.
¶ 7. Settings
 |
 |
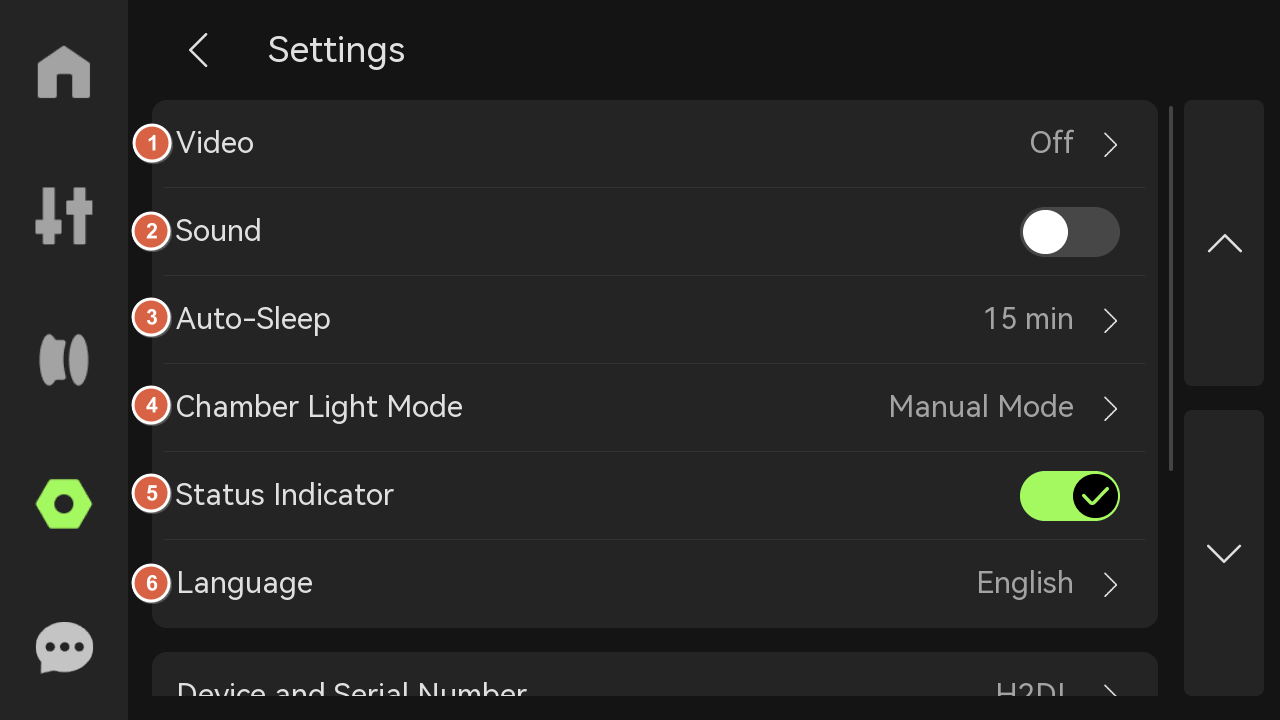
- Video: Choose to turn the video function on or off.
-
Sound: If you turn on the option, the printer will emit a sound when it is turned on, when printing starts, and when printing ends.
-
Auto-Sleep: Select the length of time the printer will automatically sleep.
- Chamber Light Mode: You can choose manual mode or energy-saving mode according to actual needs.
- Status Indicator: Used to indicate the printer's health status and print task status.
- Language: Select the language in which the printer screen is displayed.
- Device and Serial Number: View the device name, device usage time, and serial number. Choose whether to join the user experience improvement program. Once enabled, the machine data (such as printing time, error information, etc.) can be uploaded to the official backend for subsequent statistics and improvements.
 |
 |
- LAN Only: When turned on, the printer can only be connected and accessed within the local network and cannot be accessed or controlled remotely over the Internet. If multiple devices are connected via the same LAN, live view or data sharing is possible.
- Export Log to external storage: Choose whether to export all logs, key photos (to determine micro radar and spaghetti problems), and G-code (to determine print quality problems) according to your needs.

- Restore to Factory Settings: Reset the printer to the factory settings. Once reset, the settings cannot be restored.

¶ HMS
If there is a problem with the printer, an error message will be displayed here.

¶ H2DL Cutting Module
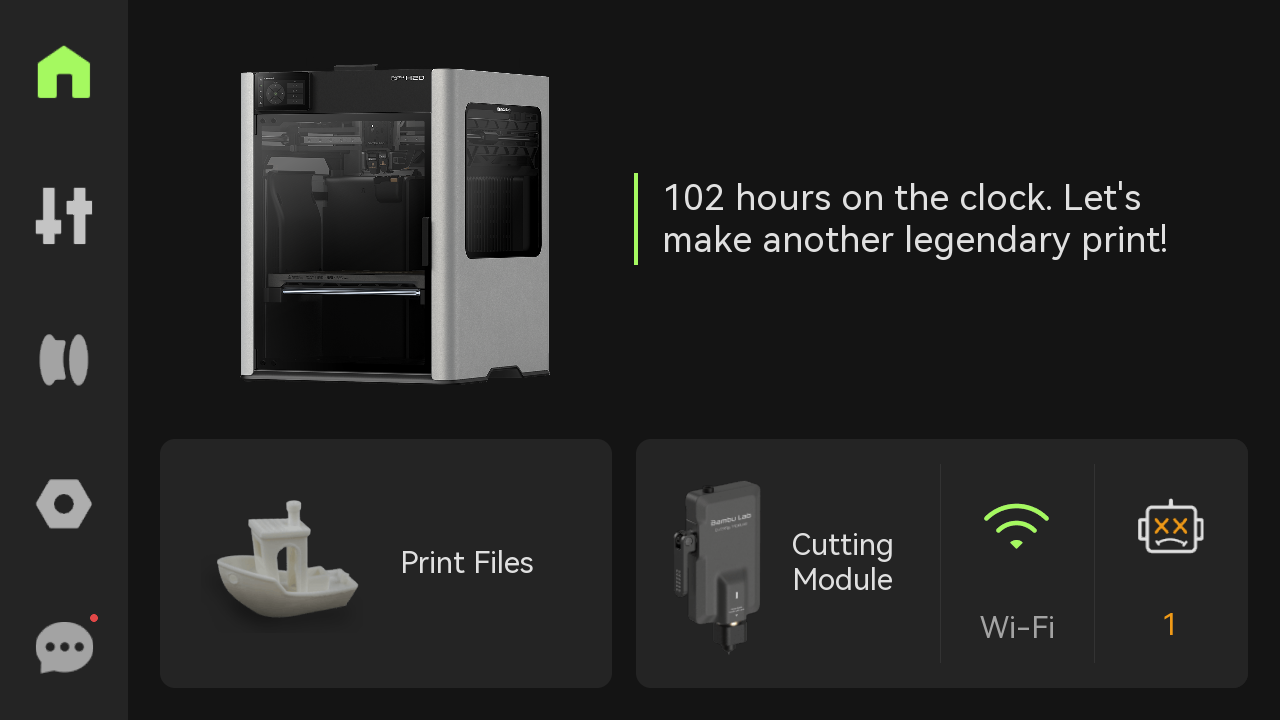
¶ Homepage
On the left side of the homepage is an on-screen menu bar that includes Homepage, Controls, Filaments, Settings, and HMS; on the right side is the Print Files, Cutting Module, Network Setting, and HMS.
¶ Controls
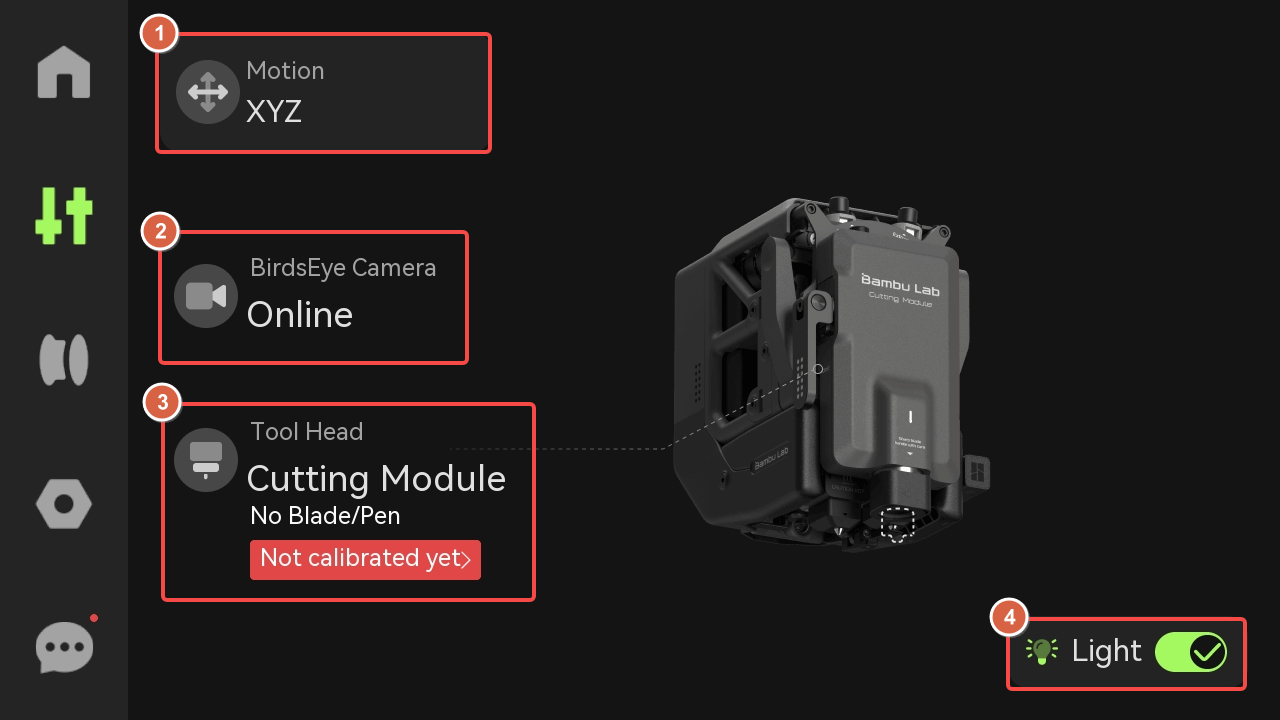
¶ 1. Motion
-
Toolhead: Click +1 or +10 to control the toolhead movement in the X-axis and Y-axis.
-
Heatbed: Click the 1 or 10 move button to raise or lower the heatbed.

¶ 2. BirdsEye Camera
-
If the birdseye camera is not installed, the birdseye camera icon will not be displayed.
-
If it is installed but not setup, it will display "Not set up yet".
 Icon not displayed |
 Not set up yet |
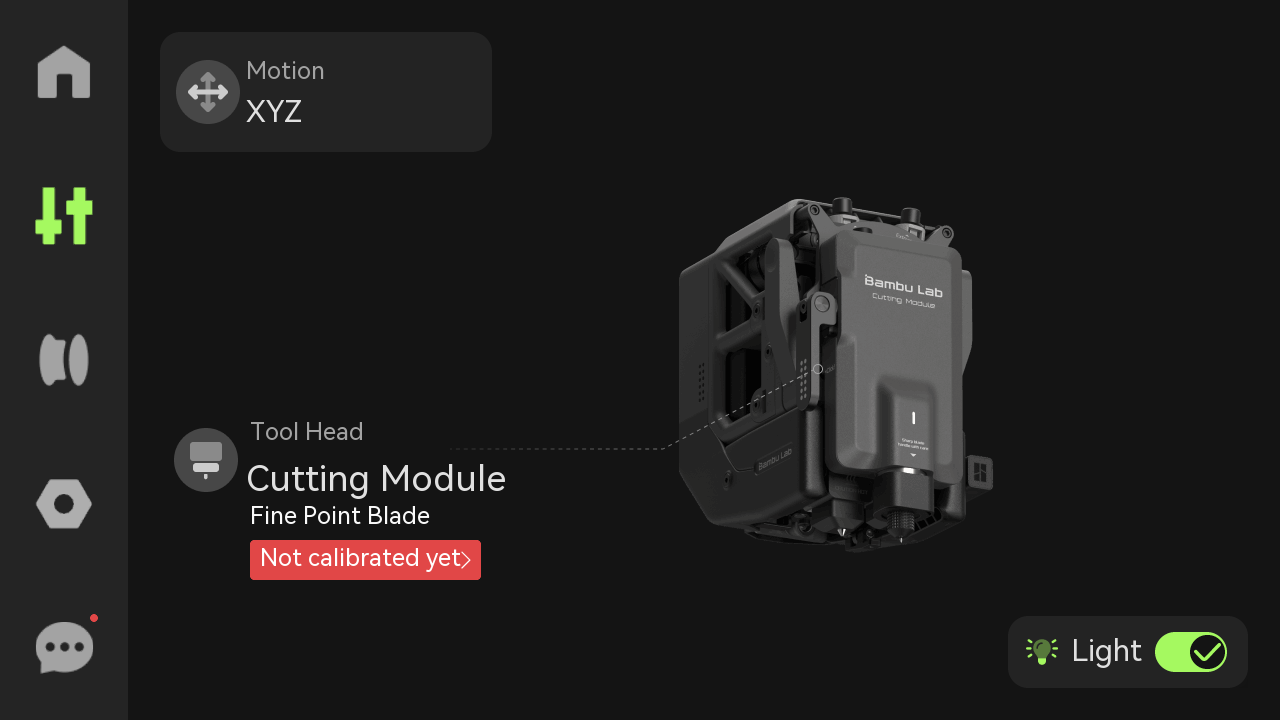
¶ 3. Toolhead
Displays the status of the cutting module and the type of module installed. If it is not initialized, it will display "Not calibrated yet".
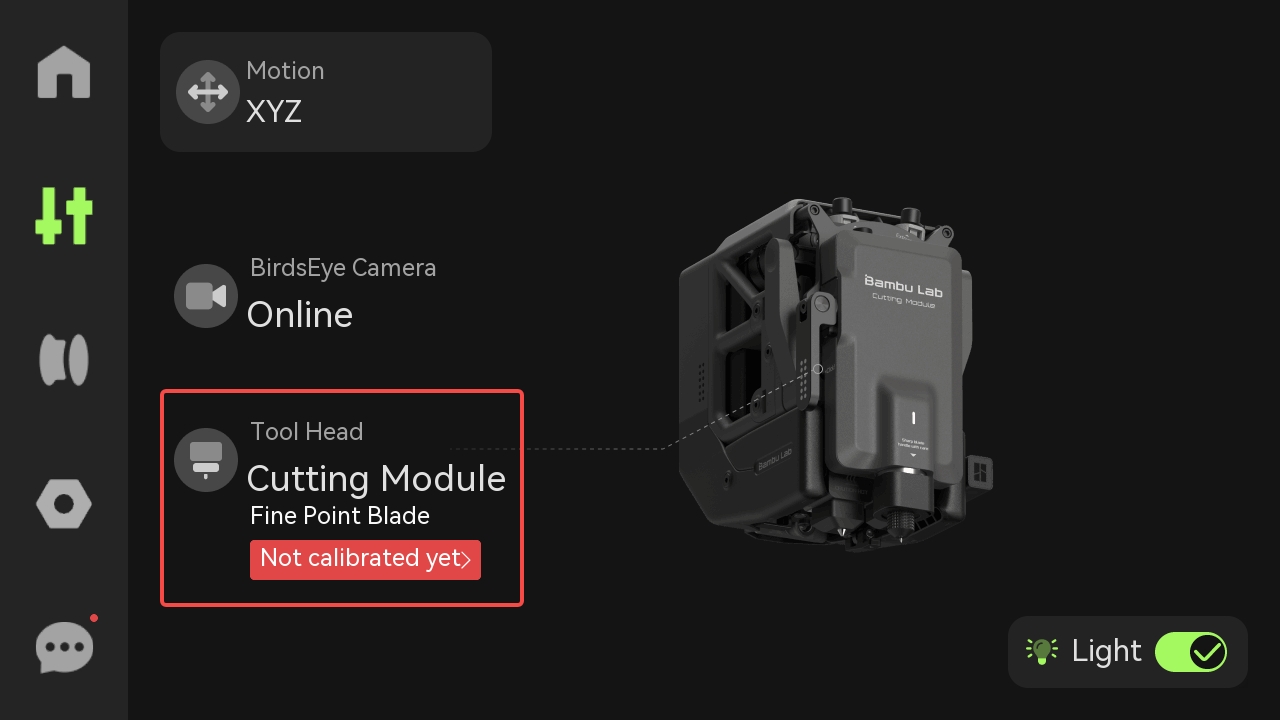 Fine Point Blade |
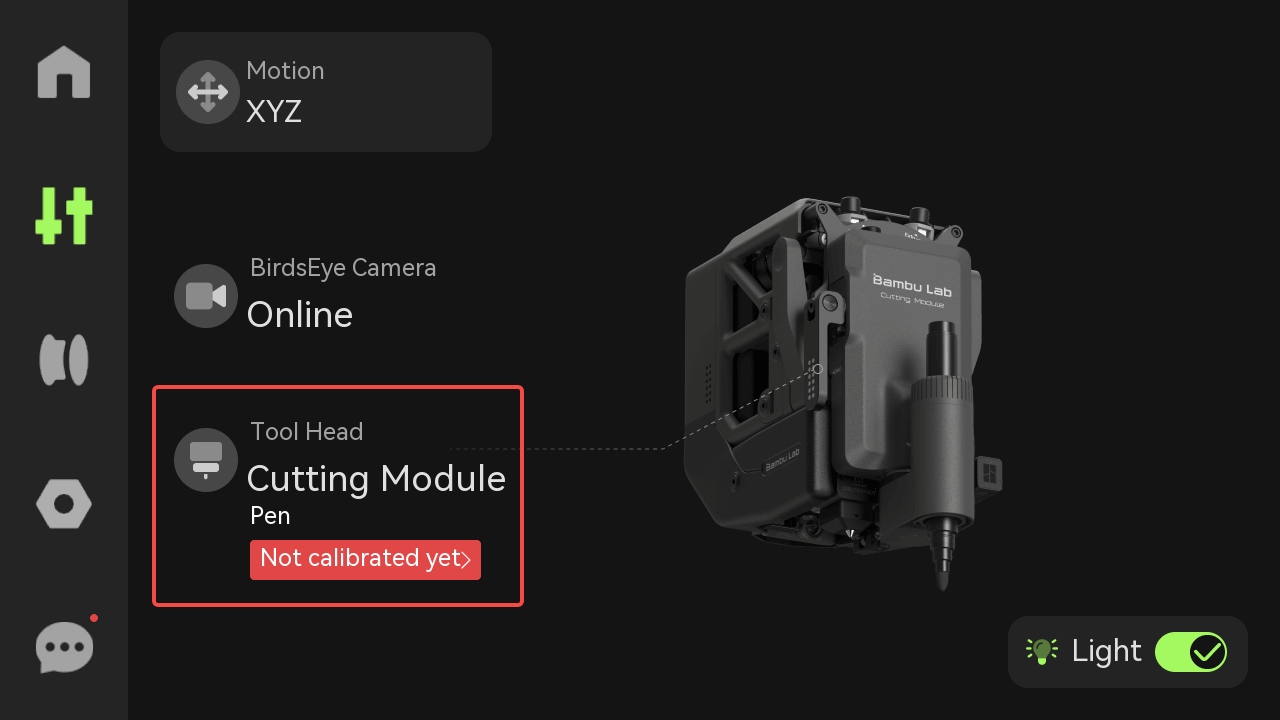 Pen |
¶ 4. Light
Click this button to control the LED light.
¶ Settings
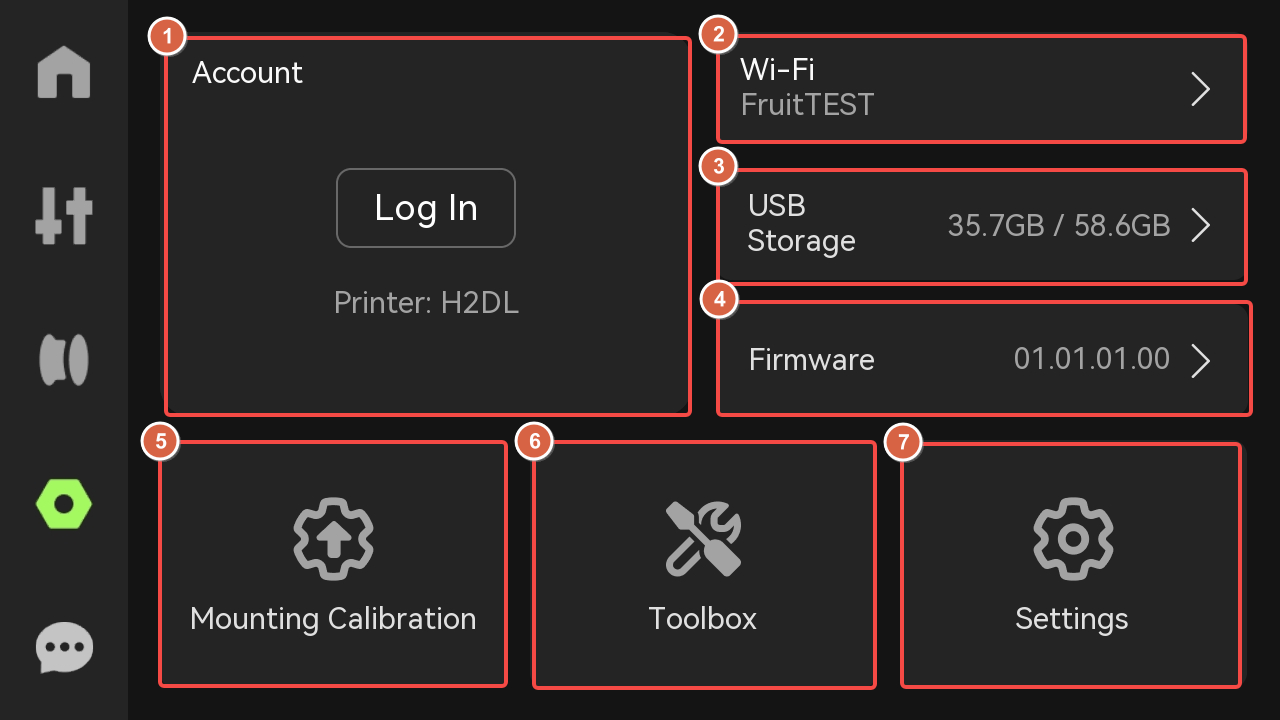
¶ 1. Account
Open Bambu Handy and scan the code to access the account.

¶ 2. Wi-Fi
Set up the WLAN, view the current network, test network, or view and add other networks.

¶ 3. USB Storage
-
Storage: Display the used capacity and maximum capacity of the USB flash drive.
-
Eject: Click "Eject" to eject the USB drive safely.
-
Format external storage: Once reset, the storage cannot be restored.
For USB flash drive specifications and usage recommendations, please refer to: Specifications and Usage Recommendations of H2D USB Flash Drives.

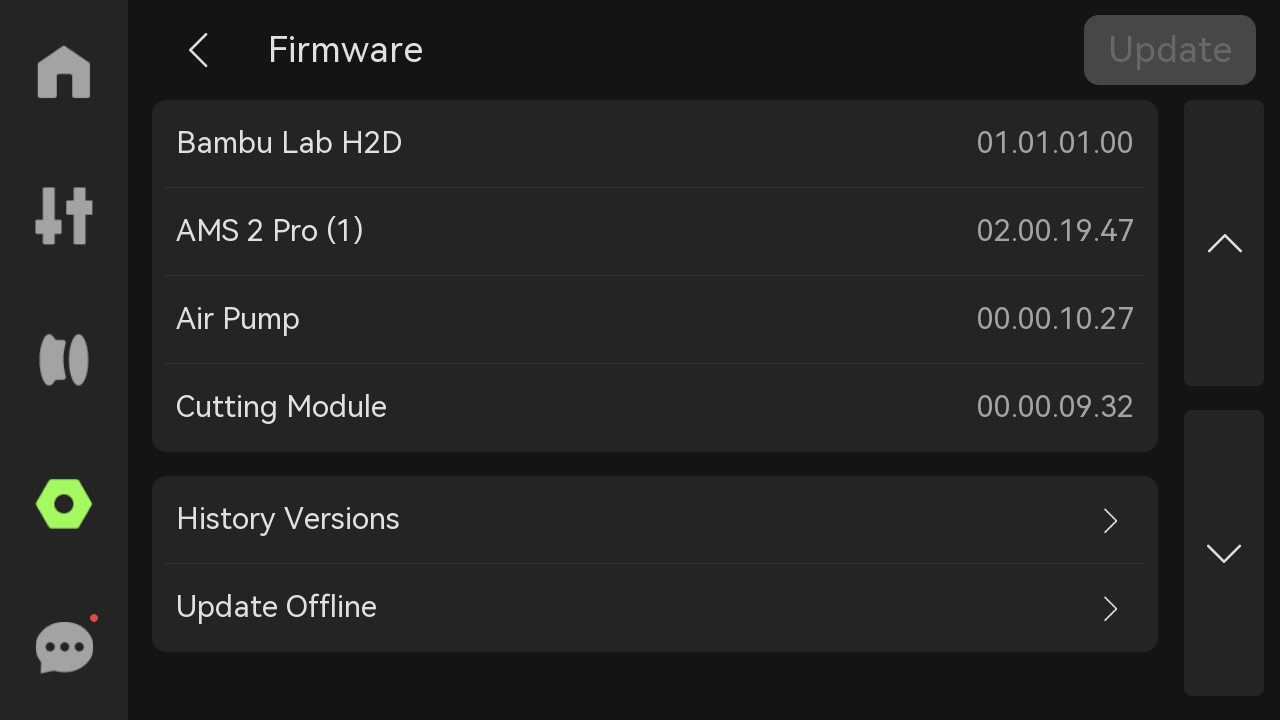
¶ 4. Firmware
View the current version of the device and historical versions, or perform offline upgrades. If the firmware needs to be updated, the "Update" button in the upper right corner will light up.
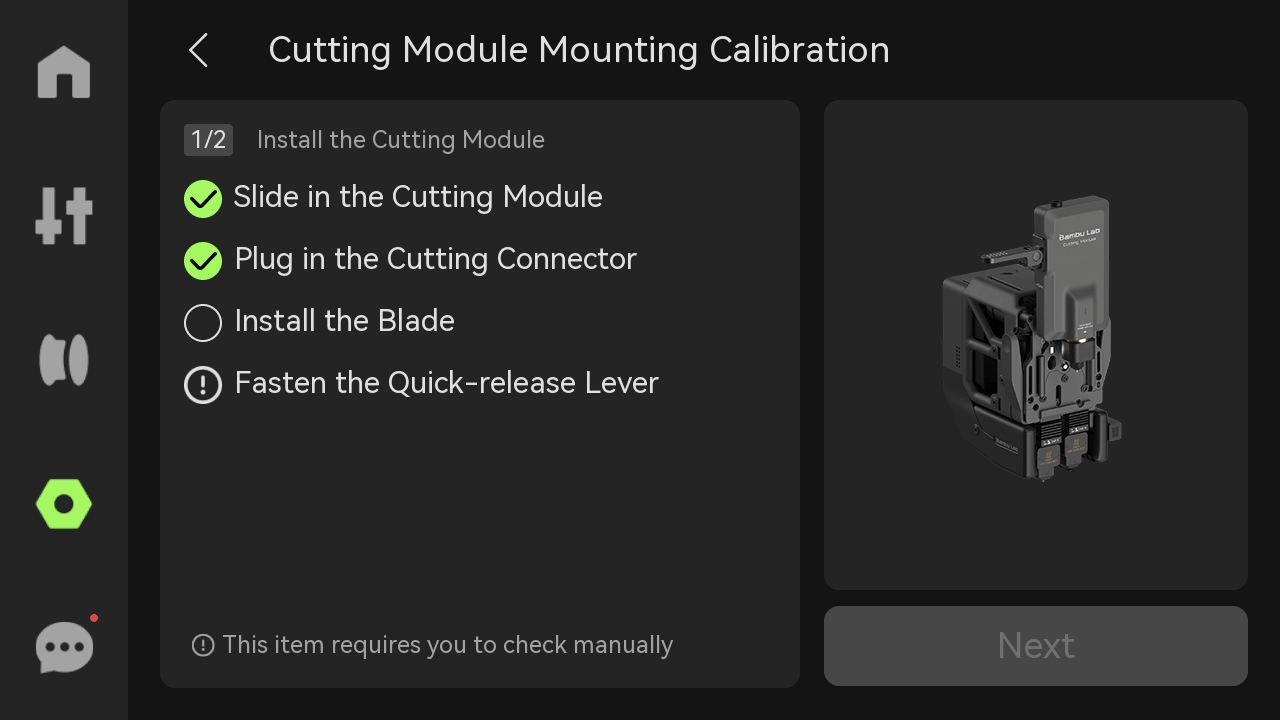
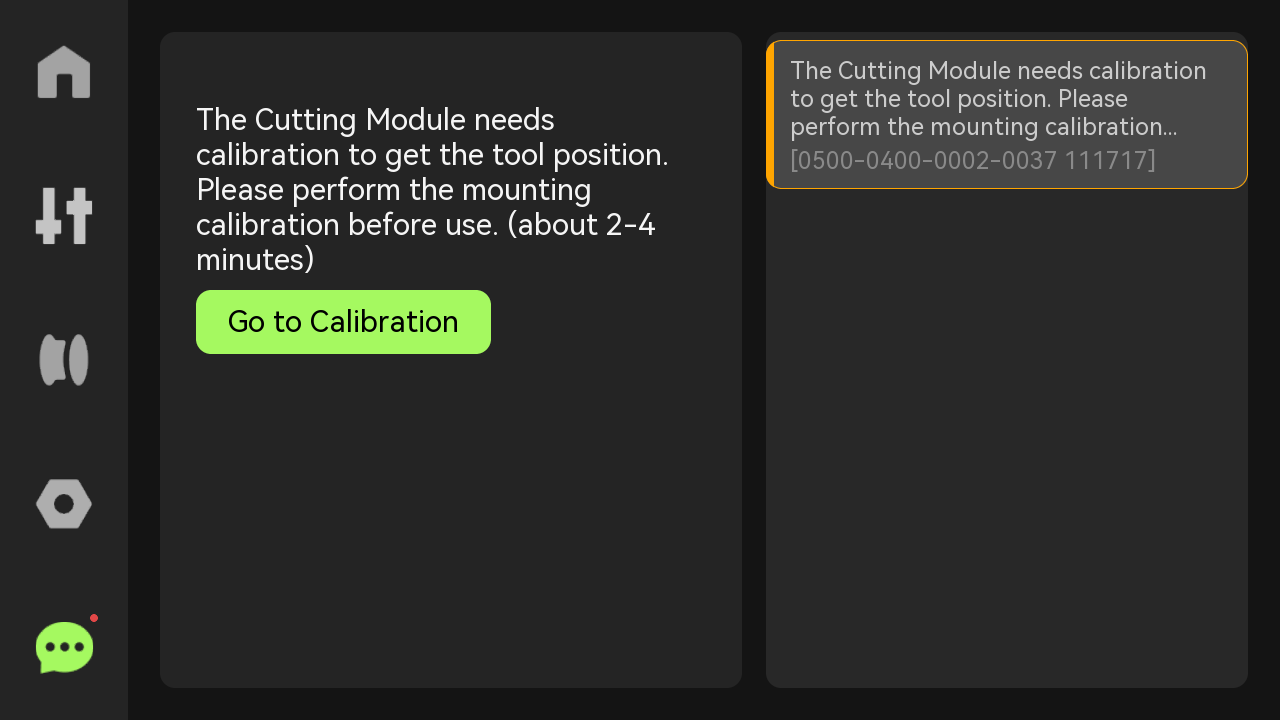
¶ 5. Mounting Calibration
Every time the printer is powered on again, a cutting module mounting calibration is required to help the cutting module return to the center. To this end, a cutting platform must be placed on the hot bed to ensure the accuracy of the calibration process.
¶ 6. Toolbox
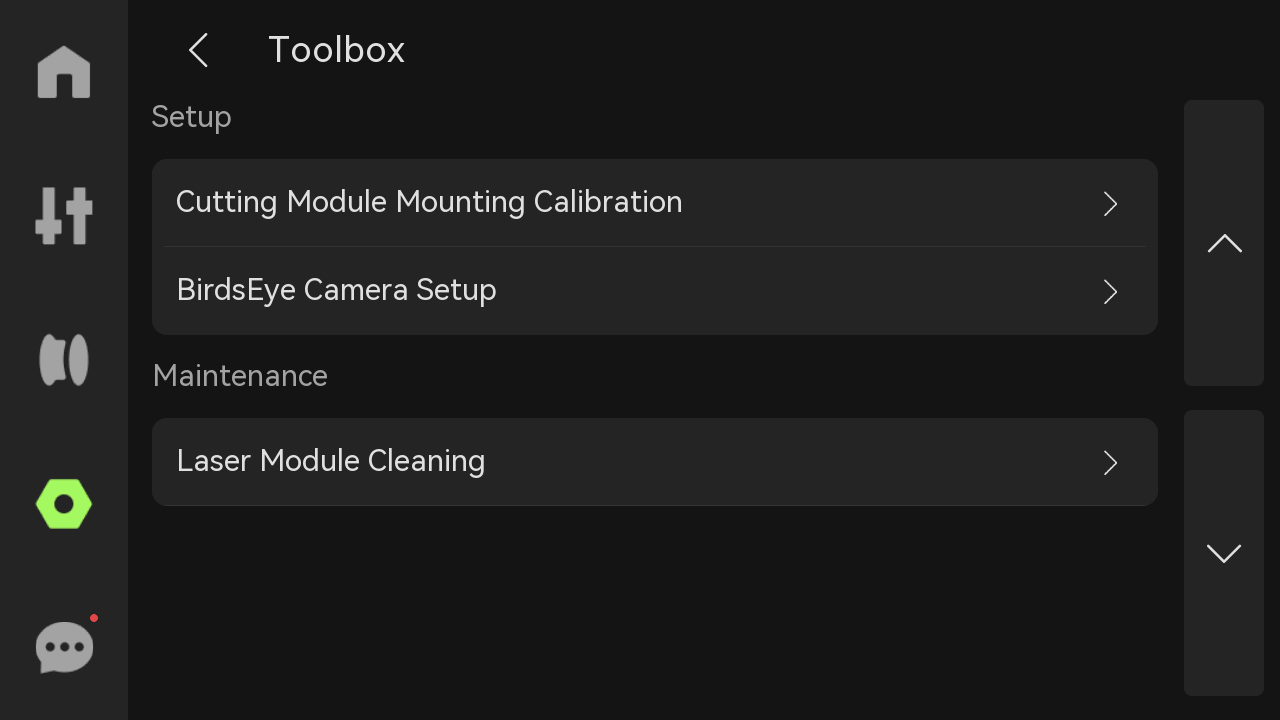
- Cutting Module Mount Calibration: Same as above “Mounting Calibration”.

- BirdsEye Camera Setup: The BirdsEye camera is calibrated at the factory and can be used immediately. However, due to factors such as transportation or prolonged use, the calibration parameters of the BirdsEye camera may gradually become less effective. If you are dissatisfied with the precision of laser processing, you can trigger the BirdsEye Camera Setup. During the setup process, it is necessary to use the four markers on the heatbed. Therefore, in this step, no other items should be placed on the heatbed, and it is essential to ensure that the markers are visible to the BirdsEye camera to improve the accuracy of the imaging.

- Laser Module Cleaning: Regular cleaning of the laser module prevents the accumulation of powder and debris, ensuring the normal operation of the equipment and extending its service life. The printer will assess the degree of contamination of the printer based on the total engineering time and laser task type in Bambu Suite. The length of the green progress bar on the left side of the screen will decrease as the laser module is cleaned; if the progress bar turns red and displays "Cleaning Required Immediately", cleaning is required. Specific tutorials can be obtained through the QR code on the right. Please refer to: Regular maintenance recommendations for 10w laser module.

¶ 7. Settings
 |
 |
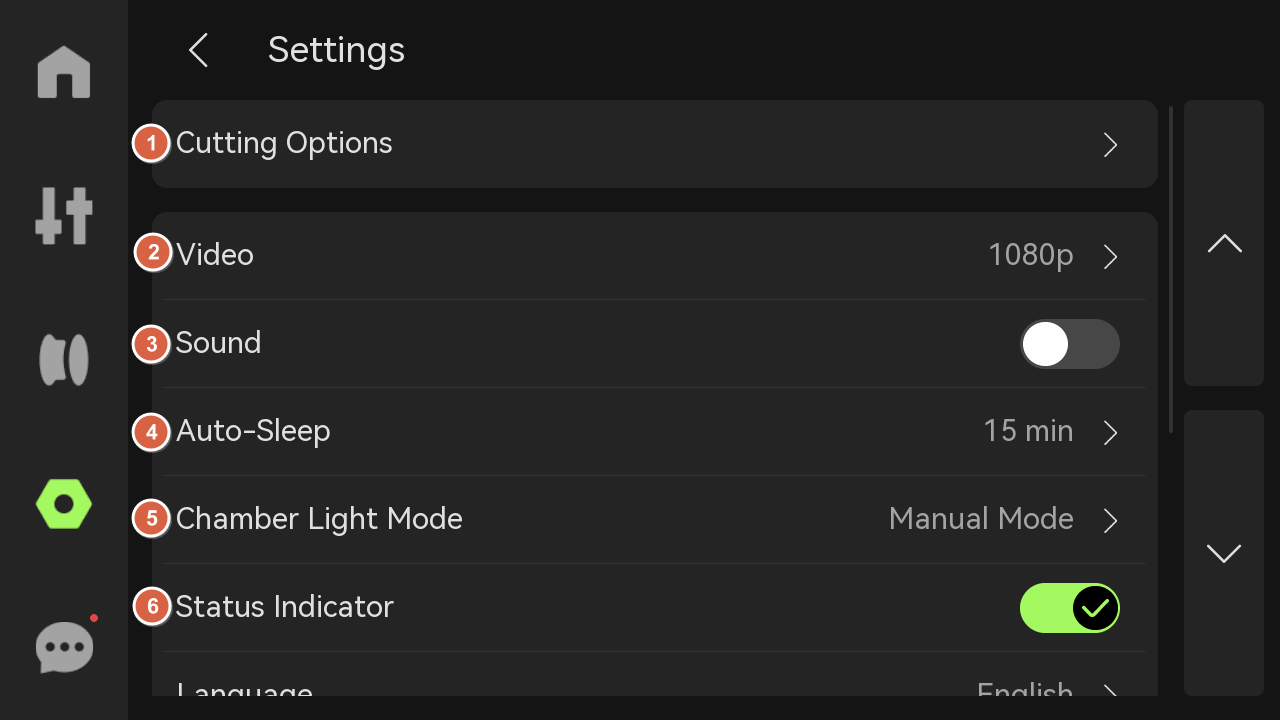
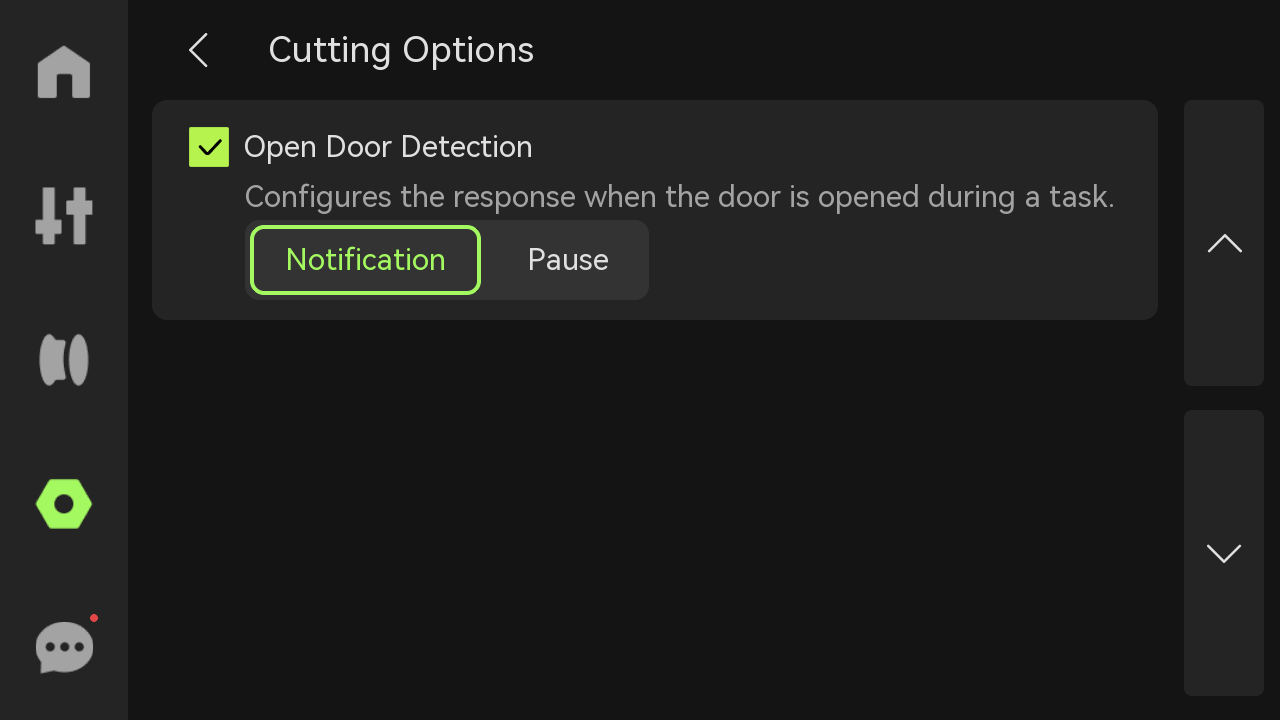
- Cutting Options:
Open Door Detection: If open door detection is enabled, if the door is opened during a cutting task, a notification will be issued or the current task will be paused.
- Video: Choose to turn the video function on or off.

-
Sound: If you turn on the option, the printer will emit a sound when it is turned on, when printing starts, and when printing ends.
-
Auto-Sleep: Select the length of time the printer will automatically sleep.
- Chamber Light Mode: You can choose manual mode or energy-saving mode according to actual needs.

- Status Indicator: Used to indicate the printer's health status and print task status.

- Language: Select the language in which the printer screen is displayed.

- Device and Serial Number: View the device name, device usage time, and serial number. Choose whether to join the user experience improvement program. Once enabled, the machine data (such as printing time, error information, etc.) can be uploaded to the official backend for subsequent statistics and improvements.
 |
 |
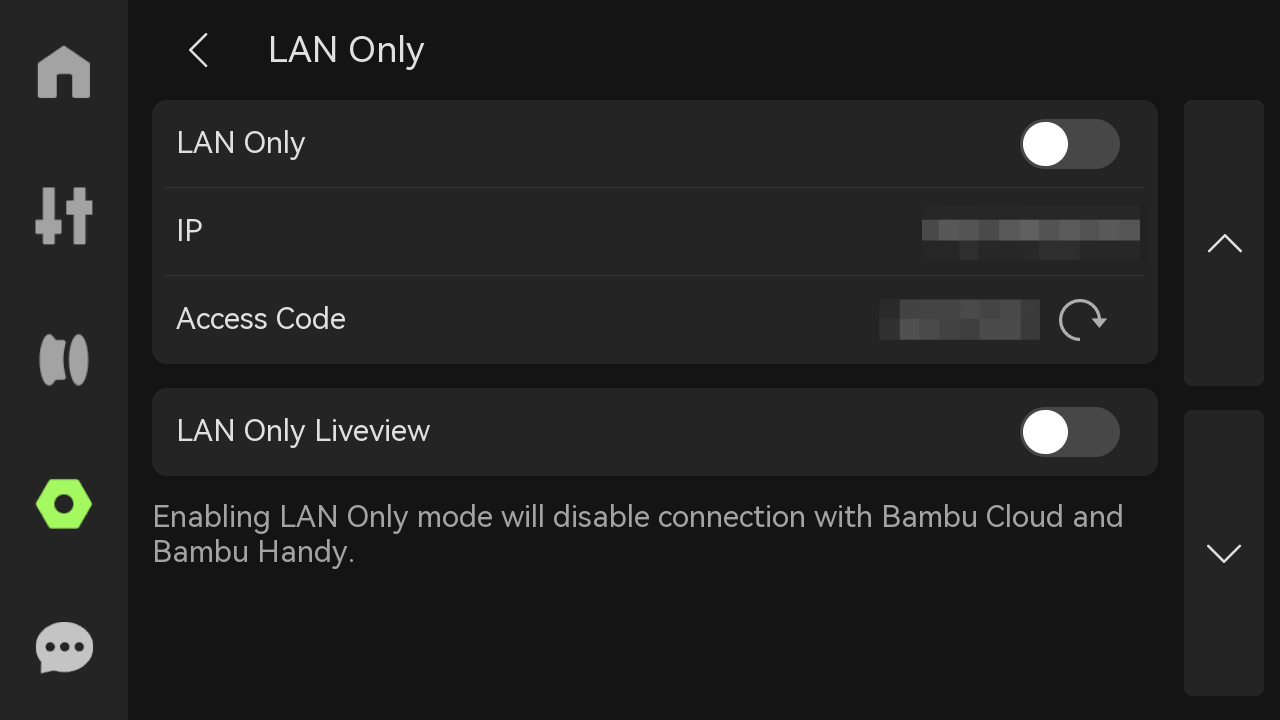
- LAN Only: When turned on, the printer can only be connected and accessed within the local network and cannot be accessed or controlled remotely over the Internet. If multiple devices are connected via the same LAN, live view or data sharing is possible.

- Export Log to external storage: Choose whether to export all logs, key photos (to determine micro radar and spaghetti problems), and G-code (to determine print quality problems) according to your needs.

- Restore to Factory Settings: Reset the printer to the factory settings. Once reset, the settings cannot be restored.

¶ HMS
If there is a problem with the printer, an error message will be displayed here.
¶ End Notes
We hope the detailed guide provided has been helpful and informative.
If this guide does not solve your problem, please submit a technical ticket, we will answer your questions and provide assistance.
If you have any suggestions or feedback on this Wiki, please leave a message in the comment area. Thank you for your support and attention!